- Table of Contents
-
- H3C Campus Fixed-Port Switches Web-Based Quick Start Configuration Guide-6W100
- 01-Compatible Product Models
- 02-Configuring Web Login with the Default IP
- 03-Web Login to a Device Without a Default IP
- 04-Interface Settings
- 05-PoE
- 06-VLAN
- 07-DHCP Server
- 08-DHCP Relay Agent
- 09-Static Routing
- 10-Policy-Based Routing
- 11-Ethernet Link Aggregation
- 12-Port Mirroring
- 13-Packet Filtering
- 14-Interface Rate Limit
- 15-Traffic Constrain
- 16-Spanning Tree
- 17-Direct Portal Authentication
- 18-Port Security
- 19-Port Isolation
- 20-ARP Attack Protection
- 21-Configuring a Static ARP Entry
- 22-IGMP Snooping
- 23-Enabling IPSG on an Interface
- 24-Software Upgrade
- 25-Adding Administrator Accounts
- 26-Ping and Tracert
- 27-Password Change
- 28-System Time
- 29-System Log
- 30-Configuration Backup, Export, Restoration to Factory Default
- 31-Device Reboot
- 32-Small-Sized Campus Network Configuration Guide
- Related Documents
-
| Title | Size | Download |
|---|---|---|
| 13-Packet Filtering | 233.81 KB |
Packet Filtering Quick Start Configuration Guide
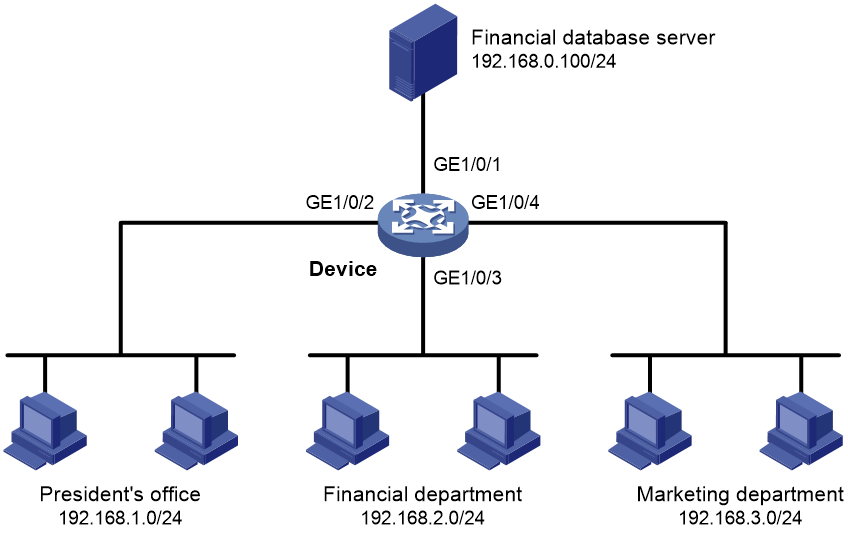
Network configuration
As shown in Figure 1, a company interconnects its departments through the device. Configure packet filtering to:
· Permit access from the President's office at any time to the financial database server.
· Permit access from the Financial department to the database server only during working hours (from 8:00 to 18:00) on working days.
· Deny access from any other department to the database server.
Procedures
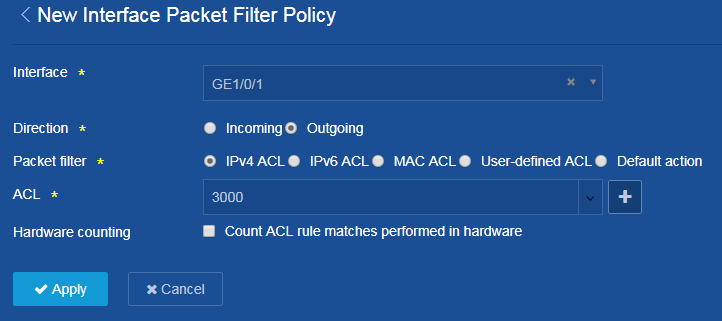
1. From the left navigation pane, select Security > Packet Filter > Packet Filter.
2. Click the Add icon ![]() at the
upper right of the page to add an interface packet
filter policy:
at the
upper right of the page to add an interface packet
filter policy:
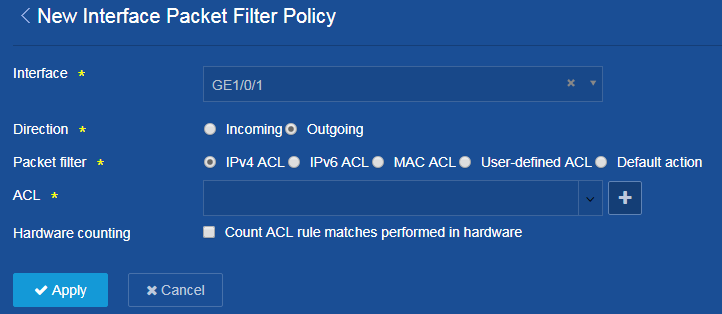
a. Select GE1/0/1 from the Interface list.
b. Select Outgoing for the Direction field.
c. Select IPv4 ACL for the Packet filter field.
d. Select an ACL from the ACL list, and click Apply.
Figure 2 Adding an interface packet filter
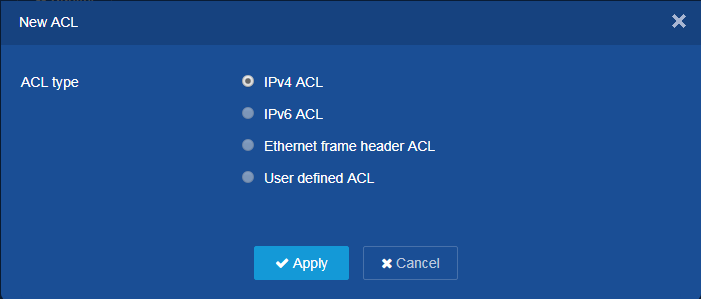
3. If no ACLs exist, click the Add icon ![]() next to the ACL field to add an ACL. On the New ACL page, select IPv4 ACL,
and click Apply.
next to the ACL field to add an ACL. On the New ACL page, select IPv4 ACL,
and click Apply.
Figure 3 Adding an ACL
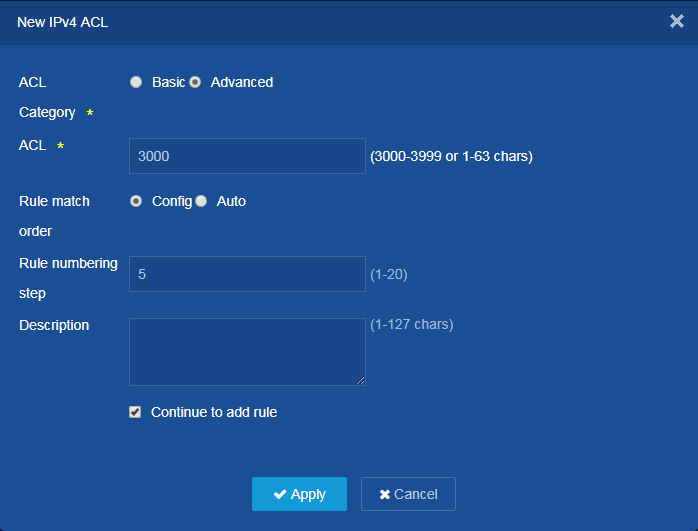
4. On the New IPv4 ACL page, configure the following parameters:
a. Select Advanced from the ACL Category list.
b. Enter an ACL number.
c. Configure other parameters as needed. In this example, use the default settings.
d. Click Apply to add a rule. The Continue to add rule option is selected by default.
Figure 4 Adding an IPv4 ACL
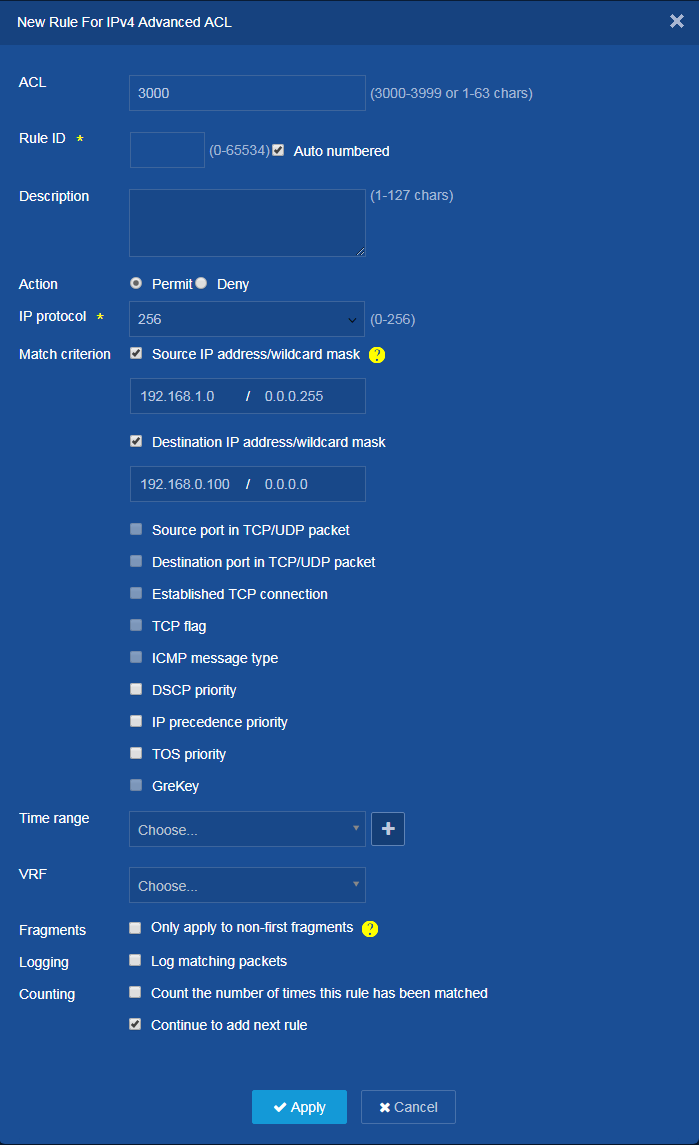
5. Add a rule for the President's office.
a. Select the Permit action.
b. Select 256 (IP) from the IP protocol list.
c. Set the source IP address/wildcard mask to 192.168.1.0/0.0.0.255.
d. Set the destination IP address/wildcard mask to 192.168.100.0/0.0.0.0.
e. Use default settings for other parameters.
f. Click Apply to add the rule and continue to add another rule.
Figure 5 Adding a rule for the President's office
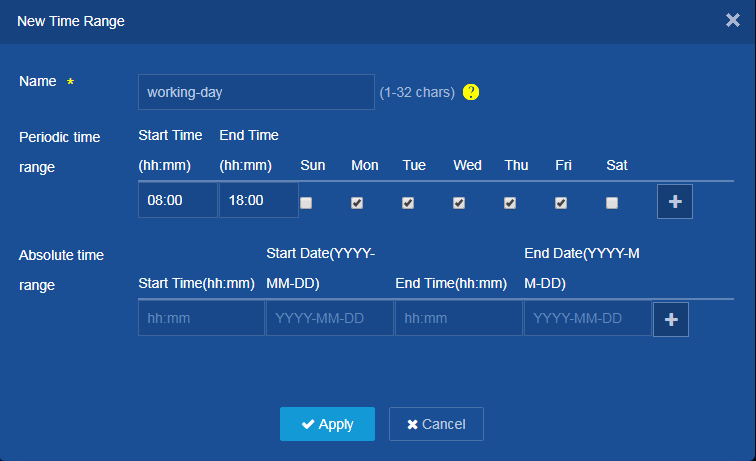
6. On the New Rule for IPv4 Advanced ACL page, click the Add icon ![]() next to the Time range field to add a
time range for the financial department.
next to the Time range field to add a
time range for the financial department.
a. Enter time range name working-day.
b. Add a periodic time range, and click the Add
icon ![]() to add the time range.
to add the time range.
c. Click Apply to add the time range and continue to add another rule.
Figure 6 Adding a time range
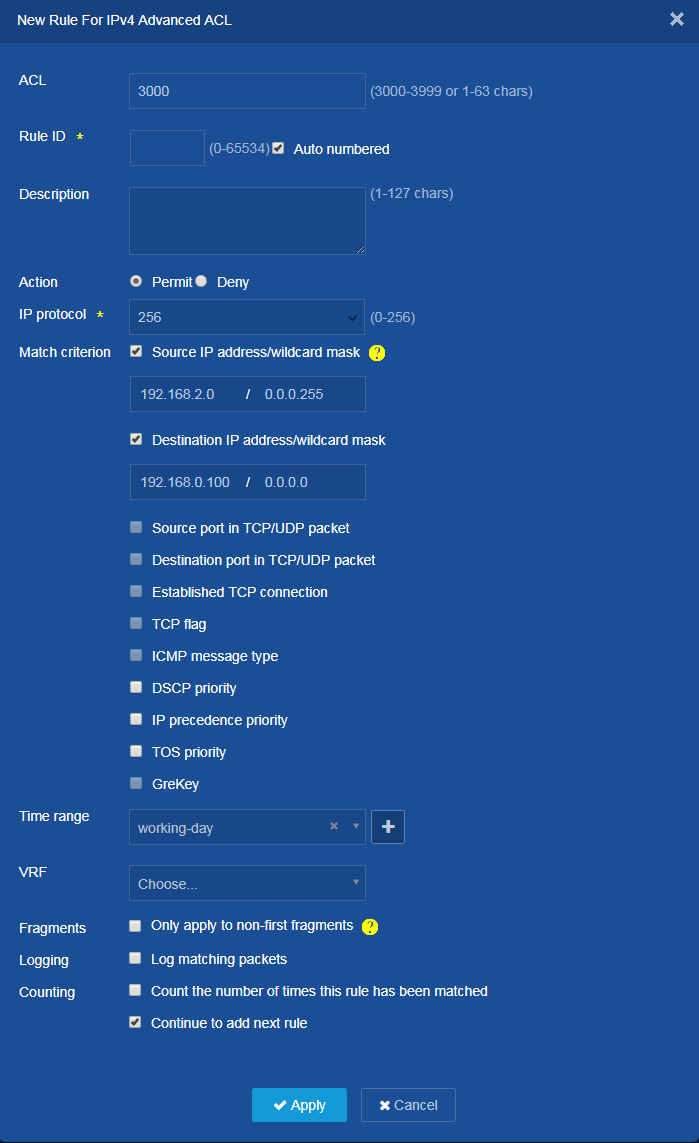
7. Add a rule for the financial department.
a. Select the Permit action.
b. Select 256 (IP) from the IP protocol list.
c. Set the source IP address/wildcard mask to 192.168.2.0/0.0.0.255.
d. Set the destination IP address/wildcard mask to 192.168.100.0/0.0.0.0.
e. Select time range working-day.
f. Use default settings for other parameters.
g. Click Apply to add the rule and continue to add another rule.
Figure 7 Adding a rule for the financial department
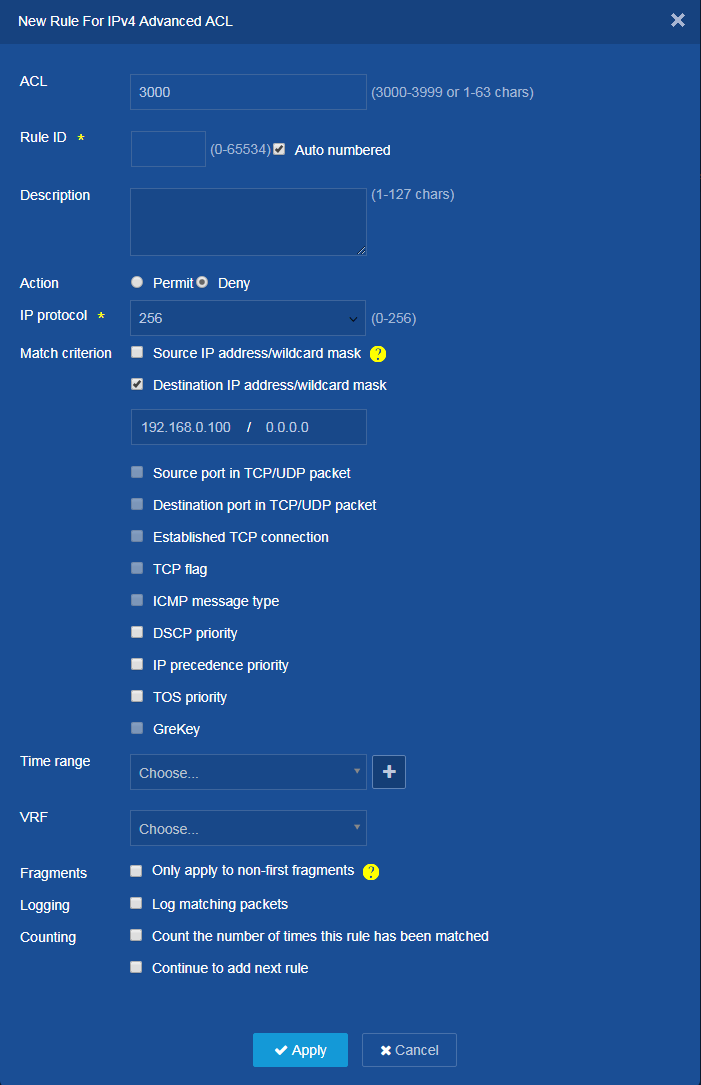
8. Add a rule for other departments.
a. Select the Deny action.
b. Select 256 (IP) from the IP protocol list.
c. Set the destination IP address/wildcard mask to 192.168.100.0/0.0.0.0.
d. Deselect the Continue to add rule option.
e. Use default settings for other parameters.
f. Click Apply to add the rule.
Figure 8 Adding a rule for other departments
9. Click Apply to add the interface packet filter.
Figure 9 Interface packet filter information
10. Save the configuration:
Click the Save icon ![]() at the upper left of the page.
at the upper left of the page.
Verify the configuration
1. On the Security > Packet Filter > Packet Filter page, verify that the interface packet filter has been added correctly.
Figure 10 Packet filter information
