- Table of Contents
-
- H3C Campus Fixed-Port Switches Web-Based Quick Start Configuration Guide-6W100
- 01-Compatible Product Models
- 02-Configuring Web Login with the Default IP
- 03-Web Login to a Device Without a Default IP
- 04-Interface Settings
- 05-PoE
- 06-VLAN
- 07-DHCP Server
- 08-DHCP Relay Agent
- 09-Static Routing
- 10-Policy-Based Routing
- 11-Ethernet Link Aggregation
- 12-Port Mirroring
- 13-Packet Filtering
- 14-Interface Rate Limit
- 15-Traffic Constrain
- 16-Spanning Tree
- 17-Direct Portal Authentication
- 18-Port Security
- 19-Port Isolation
- 20-ARP Attack Protection
- 21-Configuring a Static ARP Entry
- 22-IGMP Snooping
- 23-Enabling IPSG on an Interface
- 24-Software Upgrade
- 25-Adding Administrator Accounts
- 26-Ping and Tracert
- 27-Password Change
- 28-System Time
- 29-System Log
- 30-Configuration Backup, Export, Restoration to Factory Default
- 31-Device Reboot
- 32-Small-Sized Campus Network Configuration Guide
- Related Documents
-
| Title | Size | Download |
|---|---|---|
| 03-Web Login to a Device Without a Default IP | 836.51 KB |
Contents
Quick Start Configuration Guide for Accessing the Web Interface of a Device Without a Default IP
Quick Start Configuration Guide for Accessing the Web Interface of a Device Without a Default IP
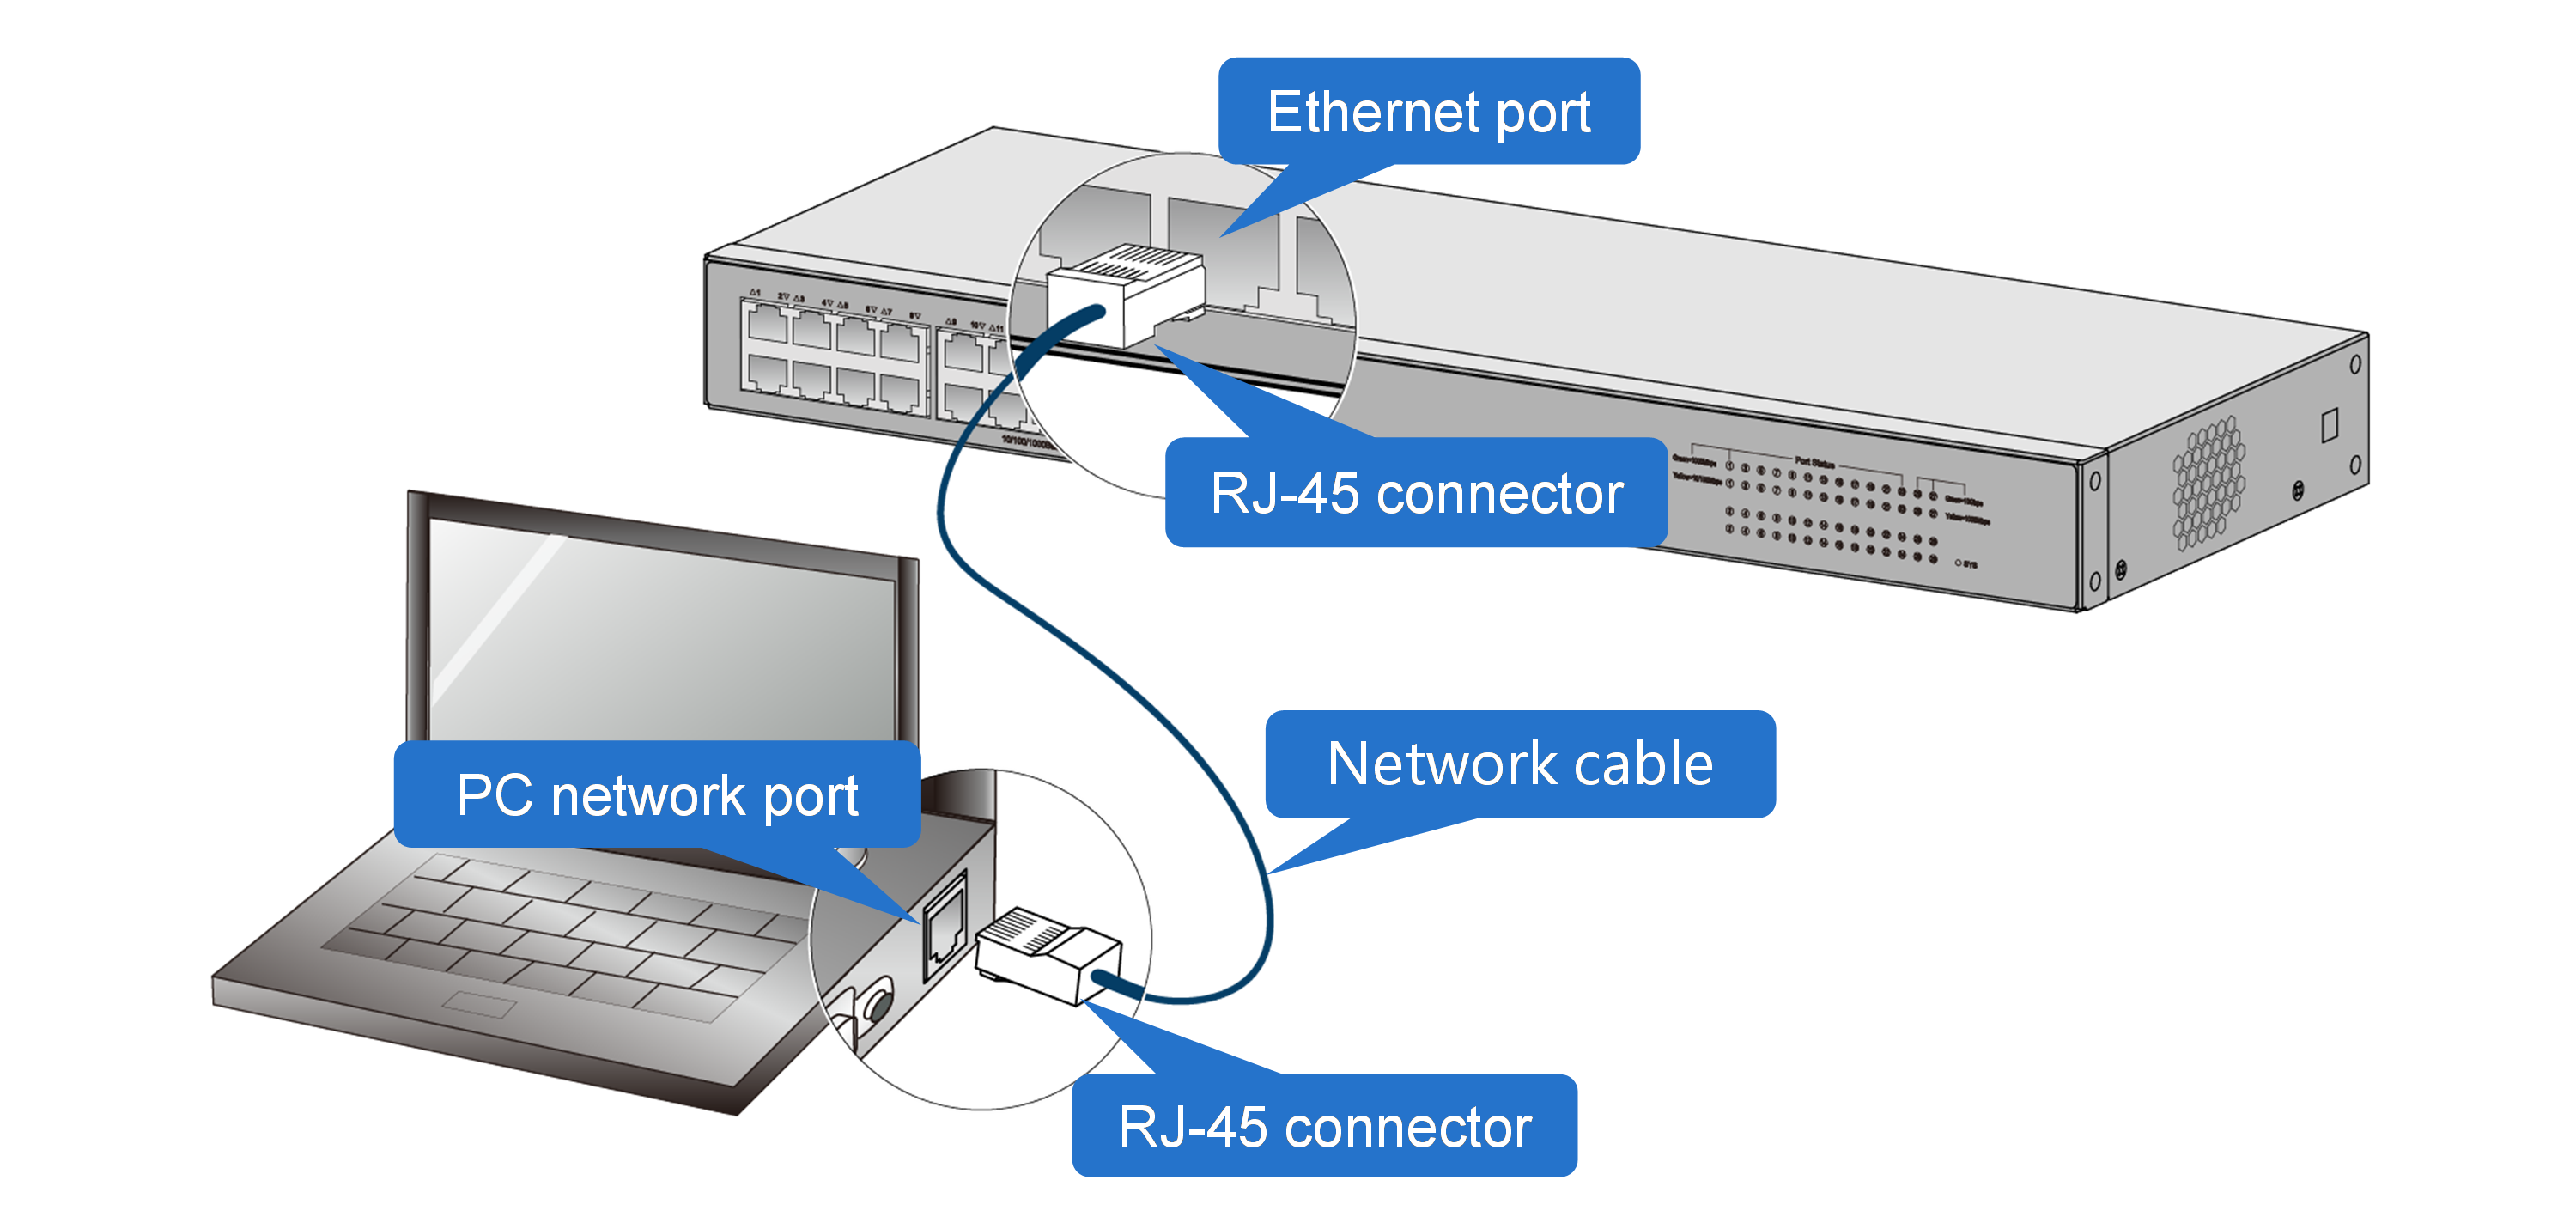
Network configuration
As shown in Figure 1, a PC connects to a device that does not have a default IP address. Configure Web login settings to access the Web interface of the device from the PC.
Prerequisites
Access the CLI of the device by connecting the PC to the console port of the device.
Procedures
Configuring basic settings for Web login
1. Enter system view
<Device> system-view
2. Create a local user named admin. Set the password to hello12345, specify the HTTP and HTTPS service types, and assign the network-admin user role to the device.
[Device] local-user admin
[Device-luser-manage-admin] password simple hello12345
[Device-luser-manage-admin] service-type http https
[Device-luser-manage-admin] authorization-attribute user-role network-admin
[Device-luser-manage-admin] quit
# Assign IP address 192.168.0.1 to the device.
[Device] interface vlan-interface 1
[Device-VLAN-interface1] ip address 192.168.0.1 255.255.255.0
[Device-VLAN-interface1] quit
# Enable HTTP and HTTPS.
[Device] ip http enable
[Device] ip https enable
# Save the settings.
[Device] save
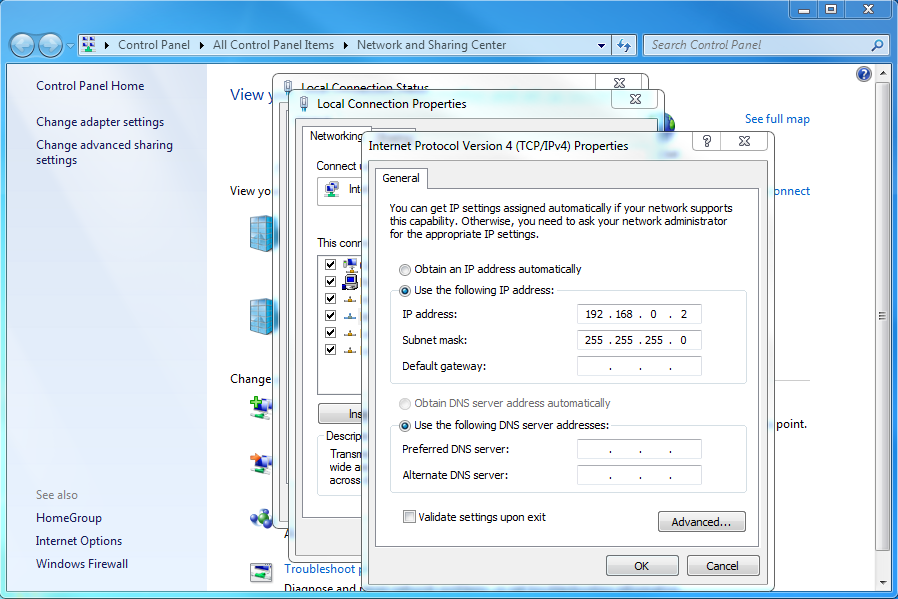
Configuring an IP address for the PC
1. Open Network and Sharing Center, and click Local Area Connection.
2. In the window that opens, click Properties. Then, double click Internet Protocol Version 4 (TCP/IPv4).
3. In the window that opens, configure the following settings:
a. Select Use the following IP address.
b. Configure an IP address. Make sure the IP address is in the same subnet as the management IP address of the device, for example, 192.168.0.2.
c. Configure the subnet mask, for example, 255.255.255.0.
4. Click OK.
Figure 2 Configuring an IP address for the PC
Logging in to the device
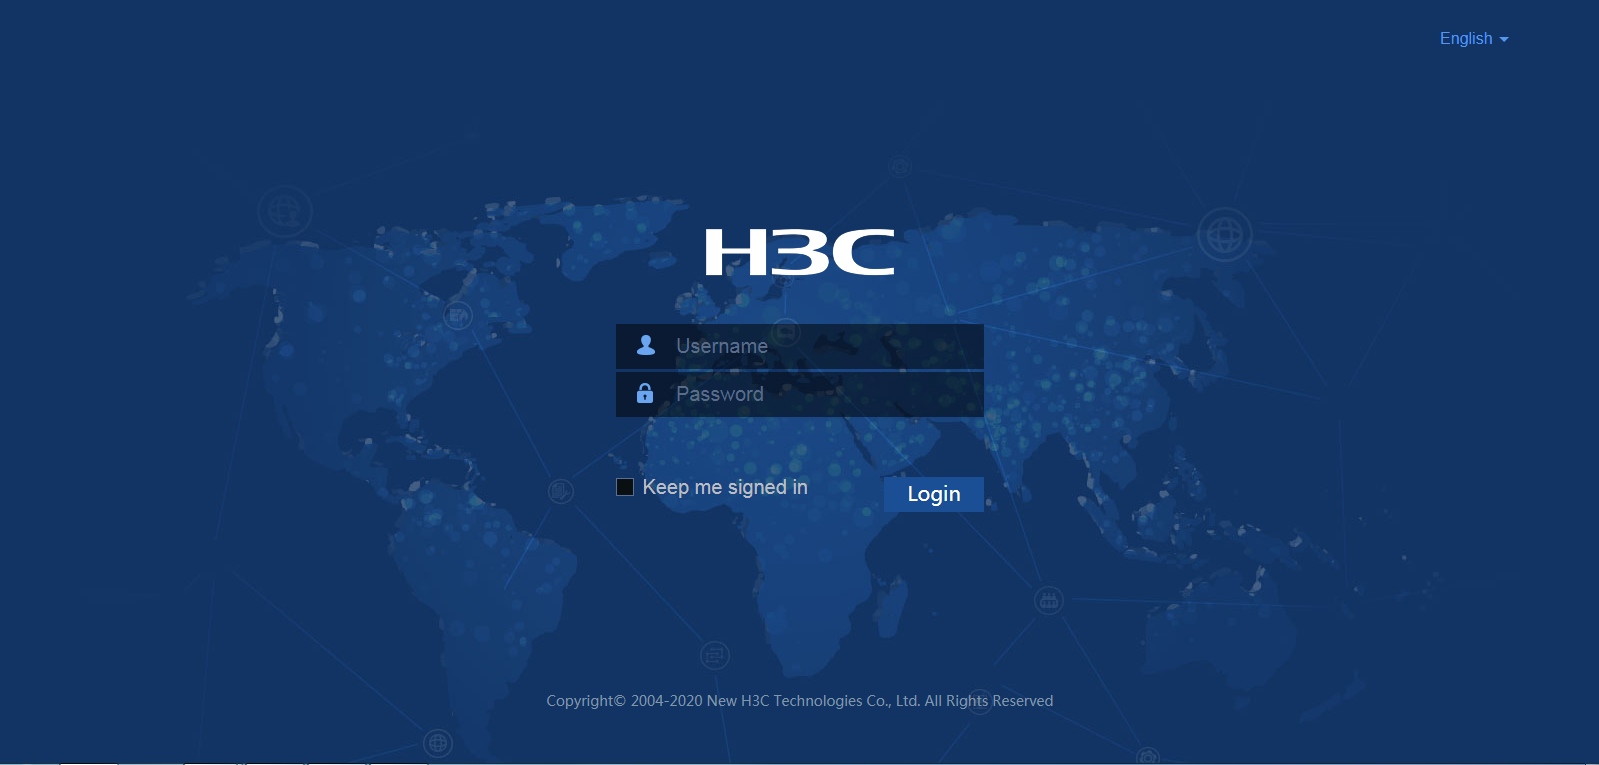
1. Open a browser, and enter the IP address of the device 192.168.0.1 in the address bar.
2. On the Web login page, enter the username admin and password hello12345.
3. Click Login.
Figure 3 Login page
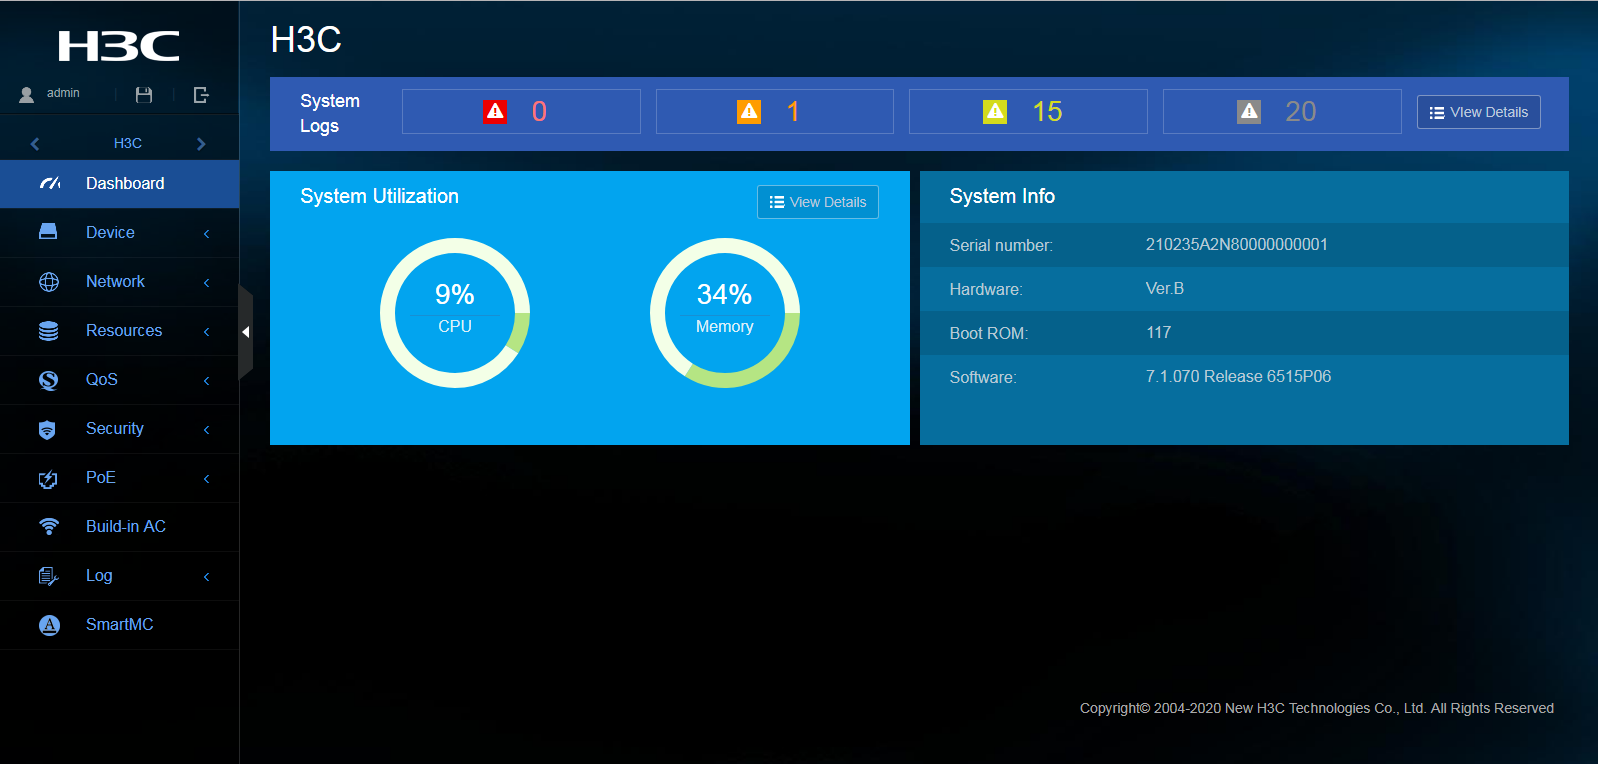
The Web interface opens if the login succeeds.
Figure 4 Web interface