- Table of Contents
-
- H3C Servers Storage Controller User Guide-6W107
- 00-Preface
- 01-Storage controller overview
- 02-Storage controller features
- 03-Configuring an embedded RSTe RAID controller
- 04-Configuring an NVMe VROC module
- 05-Configuring a P430 storage controller
- 06-Configuring a 1000 storage controller
- 07-Configuring a 9361, 9440, 9460, L460, P5408, or H5408 storage controller
- 08-Configuring an H460, P460, P240 or P4408 storage controller
- 09-Configuring a 9300 storage controller
- 10-Configuring a 9311 storage controller
- 11-Configuring an LSI 9400 or 9500 series storage controller
- 12-Configuring a RAID-MARVELL-SANTACRUZ-LP-2i storage controller
- 13-Appendix A Troubleshooting storage controllers
- 14-Appendix B RAID arrays and fault tolerance
- Related Documents
-
09-Configuring a 9300 storage controller
Configuring an HBA-LSI-9300-8i-A1-X storage controller
About the HBA-LSI-9300-8i-A1-X storage controller
The HBA-LSI-9300-8i-A1-X storage controller supports 12-Gbps data channels. For storage controller details, contact Technical Support.
RAID levels
The storage controller does not support configuring RAID arrays.
Configuring controller settings in UEFI mode
This section describes how to configure the storage controller settings in UEFI mode. For more information about how to enter the BIOS and set the boot mode to UEFI, see the BIOS user guide for the server.
Controller configuration tasks at a glance
To configure the storage controller settings in UEFI mode, perform the following tasks:
· Accessing the controller configuration screen
· (Optional.) View basic controller properties
· (Optional.) Changing controller properties
· (Optional.) Viewing drive properties
· (Optional.) Locating drives
Accessing the controller configuration screen
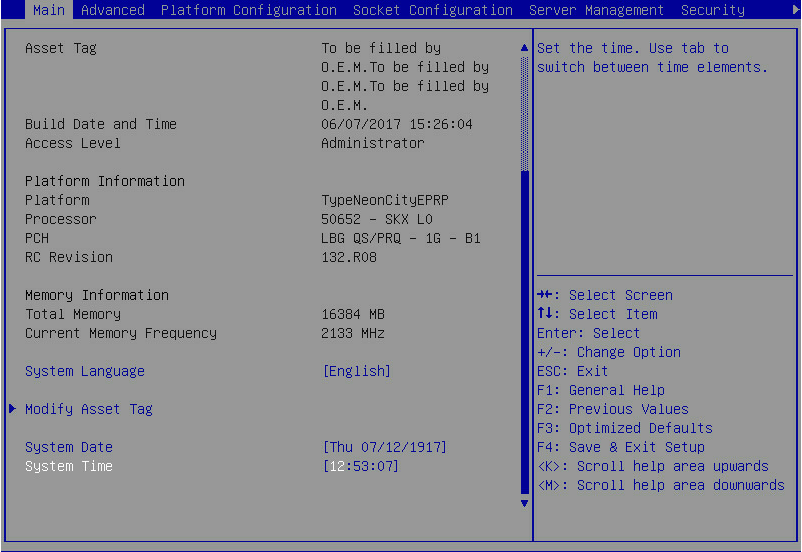
1. Access the BIOS. Press Delete, Esc, or F2 as prompted during server POST to open the BIOS setup screen as shown in Figure 1. For some servers, the Front Page screen opens, and you must select Device Management before proceeding to the next step.
For how to navigate screens and modify settings, see the operation instructions at the lower right corner.
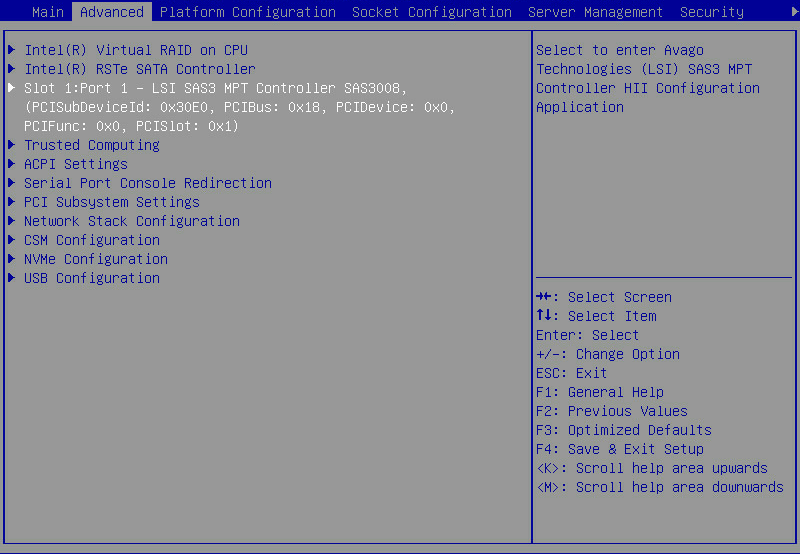
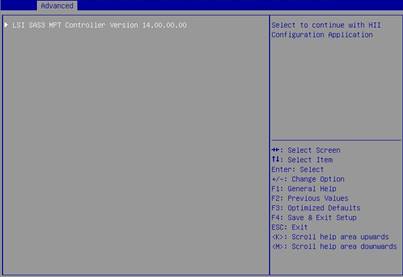
2. Access the LSI SAS3 MPT Controller SAS3008 submenu. Select Advanced > LSI SAS3 MPT Controller SAS3008, and press Enter.
Figure 2 Advanced screen
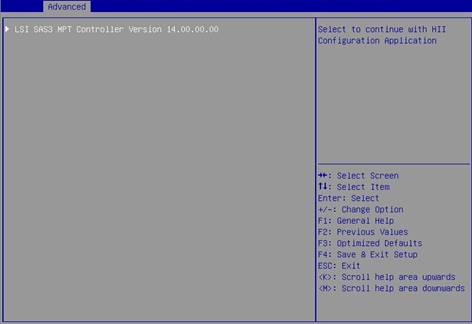
3. On the screen as shown in Figure 3, select LSI SAS3 MPT Controller and press Enter.
In this example, the LSI SAS3 MPT controller is LSI SAS3 MPT Controller Version 14.00.00.00.
Figure 3 Selecting the LSI SAS3 MPT controller
The controller configuration screen as shown in Figure 4 opens.
Figure 4 Controller configuration screen
View basic controller properties
1. Access the controller configuration screen.
For more information about how to access the controller configuration screen, see "Accessing the controller configuration screen."
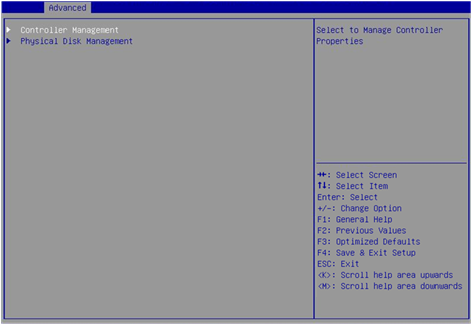
2. On the screen as shown in Figure 5, select Controller Management and press Enter.
Figure 5 Controller configuration screen

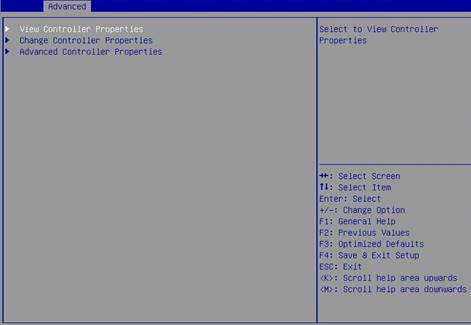
3. On the screen as shown in Figure 6, select View Controller Properties, and press Enter.
Figure 6 Selecting View Controller Properties
4. View the controller properties on the screen as shown in Figure 7.
Table 1 describes the properties of the controller.
Figure 7 Viewing controller properties
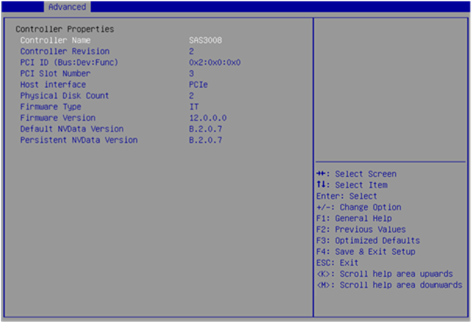
Table 1 Properties of the storage controller
|
Property |
Description |
|
Controller Revision |
Version of the storage controller. |
|
Host interface |
Host interface type. |
Changing controller properties
1. Access the controller configuration screen.
For more information about how to access the controller configuration screen, see "Accessing the controller configuration screen."
2. On the screen as shown in Figure 8, select Controller Management and press Enter.
Figure 8 Controller configuration screen

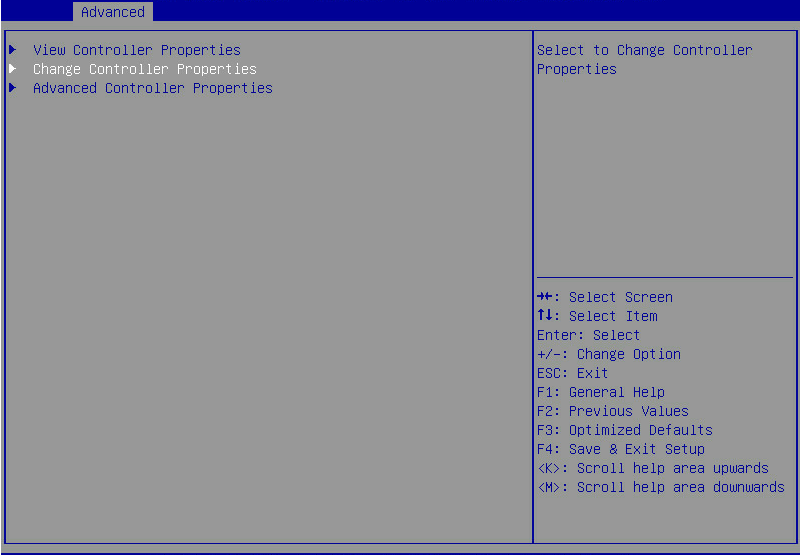
3. On the screen as shown in Figure 9, select Change Controller Properties, and press Enter.
Figure 9 Selecting Change Controller Properties
4. On the screen as shown in Figure 10, enable Legacy BIOS.
Figure 10 Enabling Legacy BIOS
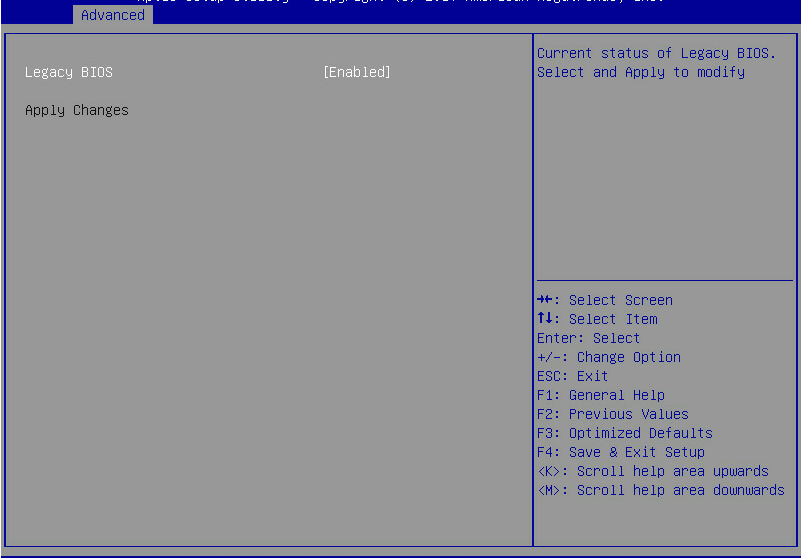
5. Select Apply Changes and press Enter.
Viewing drive properties
1. Access the controller configuration screen.
For more information about how to access the controller configuration screen, see "Accessing the controller configuration screen."
2. On the screen as shown in Figure 11, select Physical Disk Management and press Enter.
Figure 11 Controller configuration screen

3. On the screen as shown in Figure 12, select View Physical Disk Properties and press Enter.
Figure 12 Selecting View Physical Disk Properties

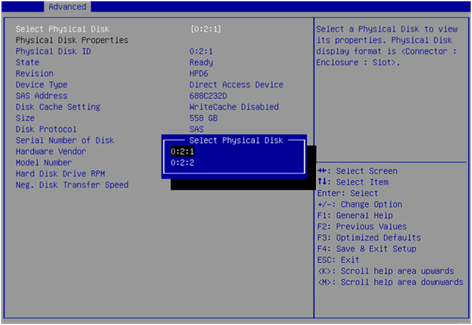
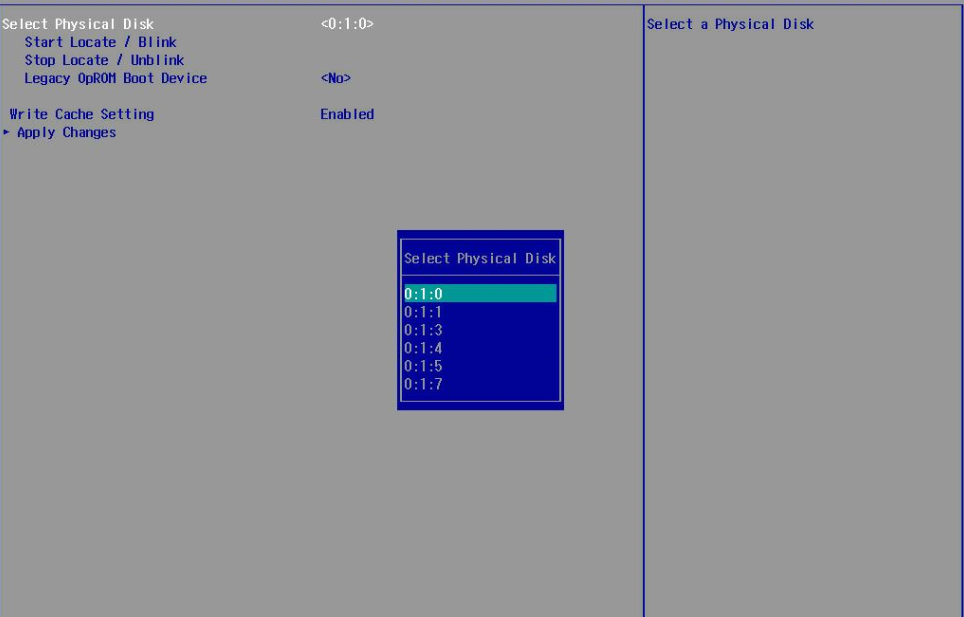
4. On the screen as shown in Figure 13, select Select Physical Disk. On the pop-up window that opens, select the physical drive you want to view and press Enter.
Figure 13 Selecting a physical drive
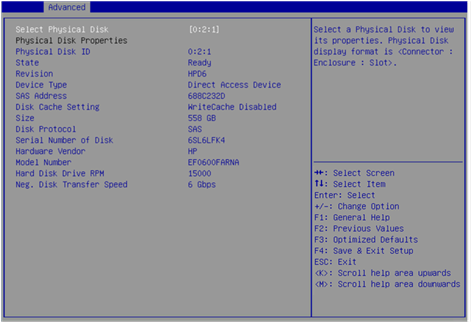
5. View properties of the physical drive on the screen as shown in Figure 14.
Figure 14 Viewing drive properties
Locating drives
1. Access the controller configuration screen.
For more information about how to access the controller configuration screen, see "Accessing the controller configuration screen."
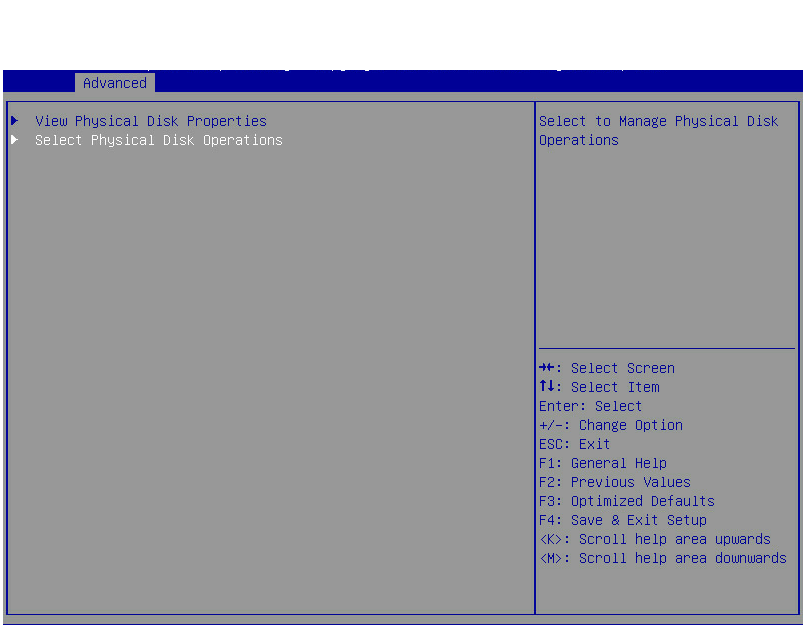
2. On the screen as shown in Figure 15, select Physical Disk Management and press Enter.
Figure 15 Controller configuration screen

3. On the screen as shown in Figure 16, select Select Physical Disk Operations, and press Enter.
Figure 16 Selecting physical disk operations
4. On the screen as shown in Figure 17, select Select Physical Disk. On the pop-up window that opens, select the physical drive you want to locate and press Enter.
Figure 17 Selecting a physical drive
5. Select Start Locate/Blink and press Enter.
6. On the server, identify the physical drive of which the Fault/UID LED is steady blue.
Configuring controller settings in legacy mode
This section describes how to configure the storage controller settings in legacy mode. For more information about how to enter the BIOS and set the boot mode to legacy, see the BIOS user guide for the server.
Controller configuration tasks at a glance
To configure the storage controller settings in legacy mode, perform the following tasks:
· Accessing the controller configuration screen
· (Optional.) Viewing drive properties
· (Optional.) Locating drives
· (Optional.) Verifying/Formatting drives
· (Optional.) Setting advanced controller properties
· (Optional.) Configuring boot options
Accessing the controller configuration screen
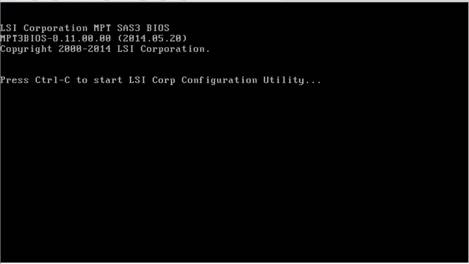
1. During server POST, press Ctrl+C on the screen as shown in Figure 18 to open the controller configuration screen.
Figure 18 Legacy BIOS setup screen
2. On the screen as shown in Figure 19, press Enter.
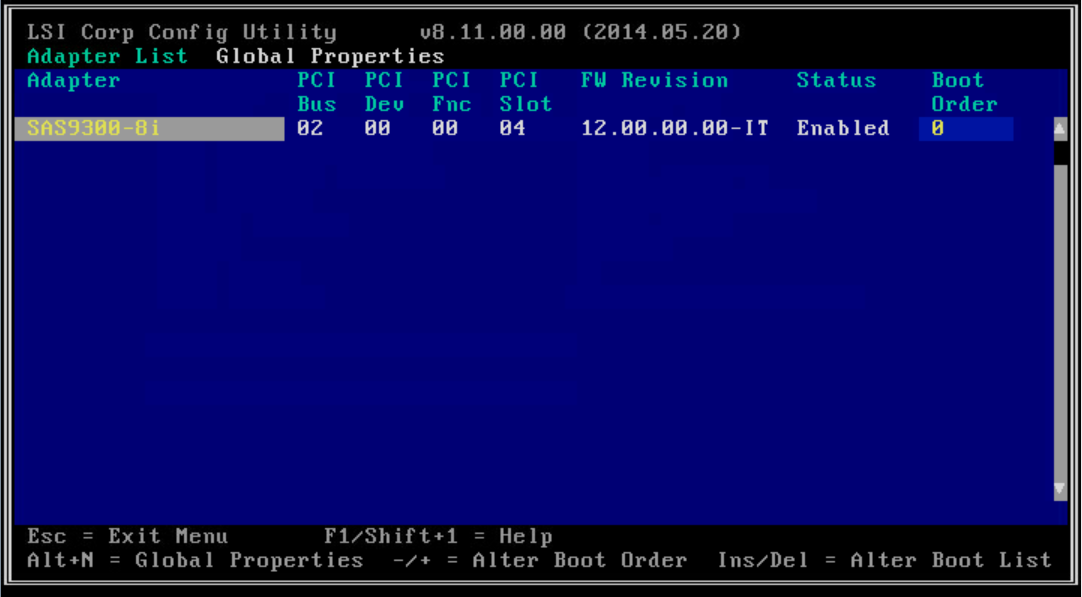
The controller configuration screen as shown in Figure 20 opens.
Figure 20 Controller configuration screen
Viewing drive properties
1. Access the controller configuration screen.
For more information about how to access the controller configuration screen, see "Accessing the controller configuration screen."
2. On the screen as shown in Figure 21, select SAS Topology and press Enter.
Figure 21 Controller configuration screen

3. On the screen as shown in Figure 22, select the physical drive you want to view and press Alt+D.
Figure 22 Selecting a physical drive

4. View properties of the drive on the screen as shown in Figure 23.

Locating drives
1. Access the controller configuration screen.
For more information about how to access the controller configuration screen, see "Accessing the controller configuration screen."
2. On the screen as shown in Figure 24, select SAS Topology and press Enter.
Figure 24 Controller configuration screen

3. On the screen as shown in Figure 25, select the physical drive you want to locate and press Enter to turn on the drive LED on the drive backplane.
Figure 25 Selecting a physical drive
Verifying/Formatting drives
1. Access the controller configuration screen.
For more information about how to access the controller configuration screen, see "Accessing the controller configuration screen."
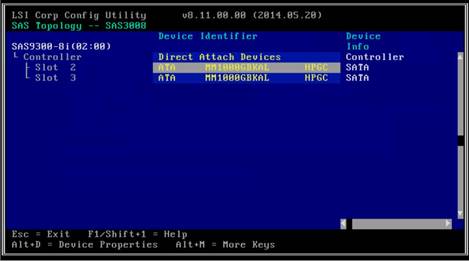
2. On the screen as shown in Figure 26, select SAS Topology and press Enter.
Figure 26 Controller configuration screen
3. On the screen as shown in Figure 27, select the physical drive you want to locate and press Alt+D.
Figure 27 Selecting a physical drive

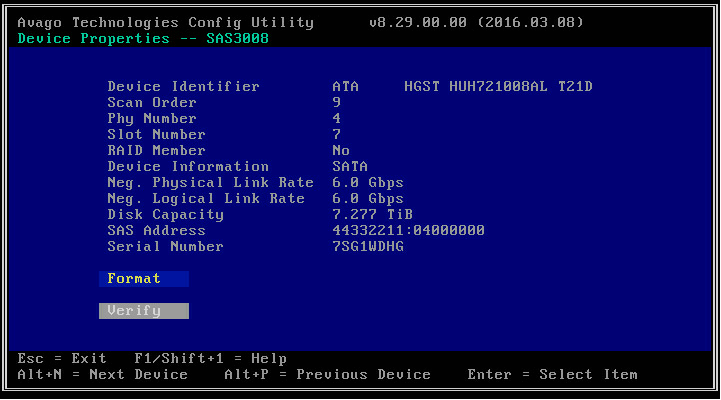
4. On the screen as shown in Figure 28, select Verify or Format as needed, and then press Enter.
Figure 28 Verifying or Formatting the physical drive
Setting advanced controller properties
1. Access the controller configuration screen.
For more information about how to access the controller configuration screen, see "Accessing the controller configuration screen."
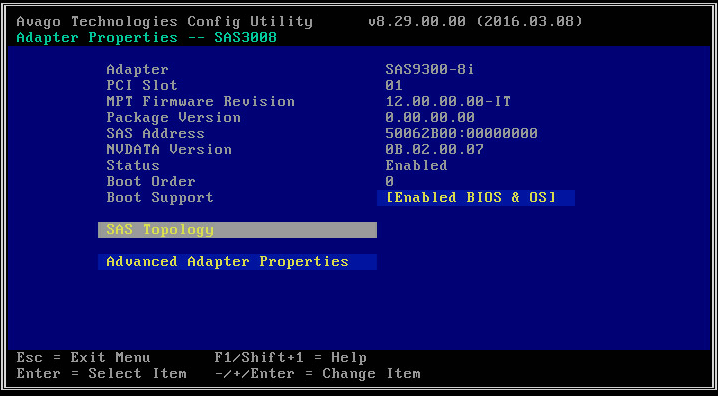
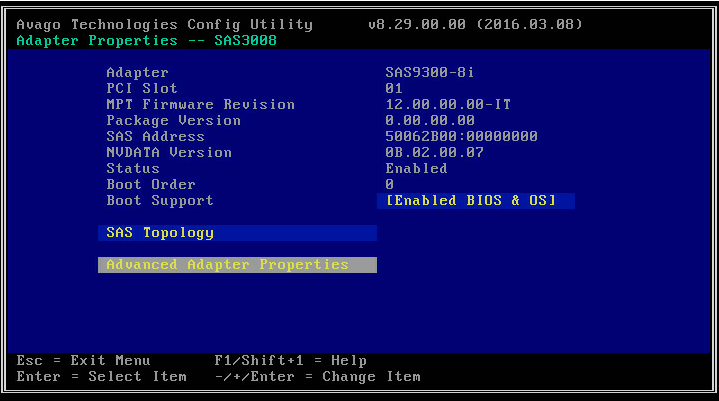
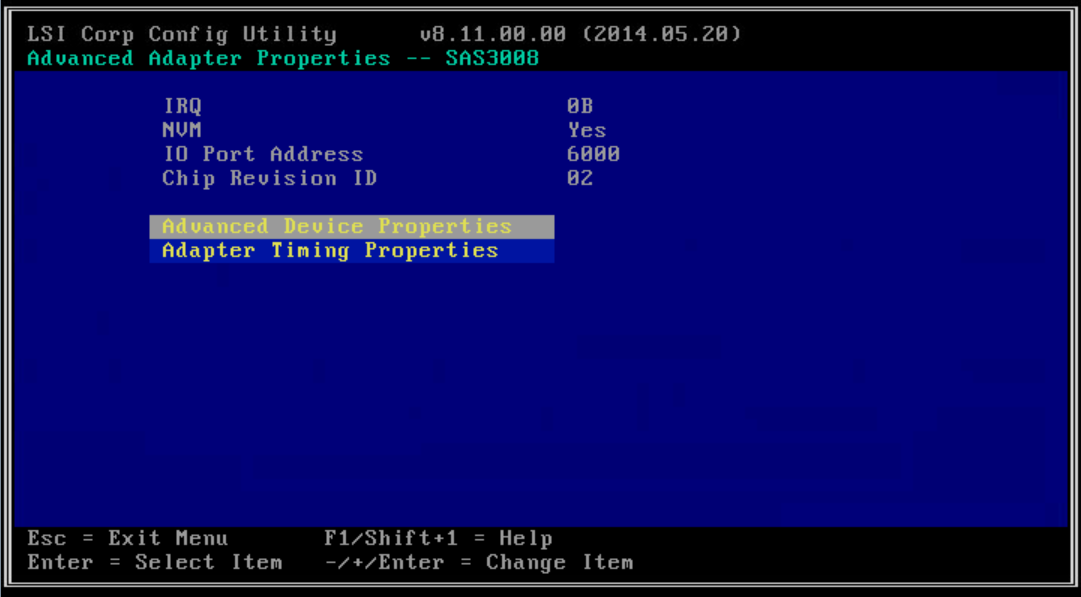
2. On the screen as shown in Figure 29, select Advanced Adapter Properties and press Enter.
Figure 29 Controller configuration screen
3. On the screen as shown in Figure 30, select Advanced Device Properties and press Alt+D.
Figure 30 Selecting Advanced Device Properties
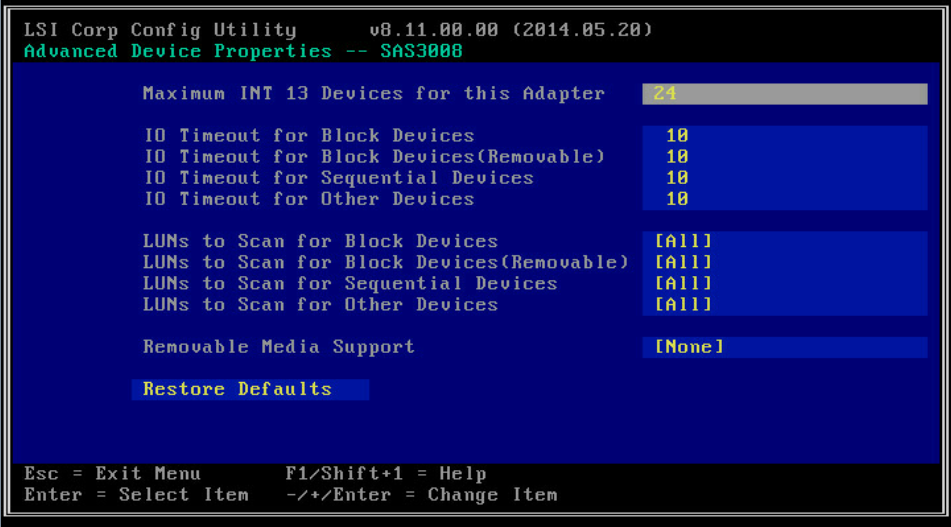
4. Change the advanced properties of the controller on the screen as shown in Figure 31.
Figure 31 Advanced controller properties screen
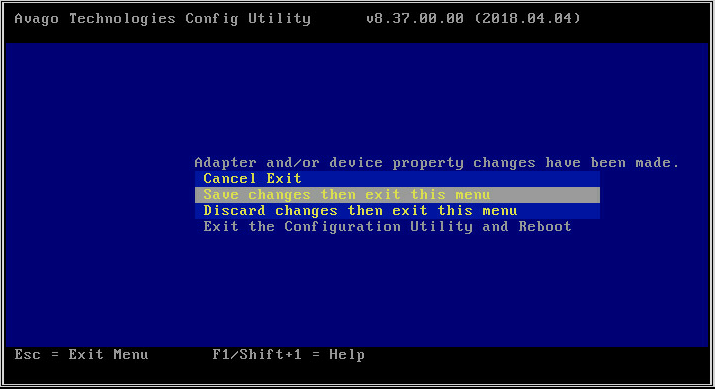
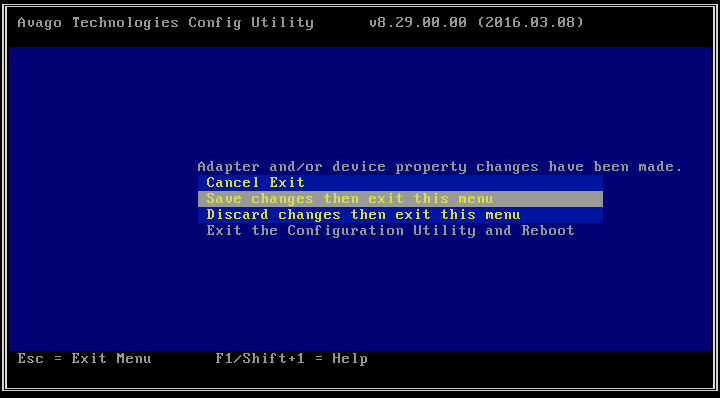
5. Keep pressing Esc till you enter the screen as shown in Figure 32. Select Save changes then exit this menu and press Enter to save the controller configuration.
Figure 32 Saving the controller configuration
Configuring boot options
1. On the screen as shown in Figure 33, select SAS Topology and press Enter.
2. On the screen as shown in Figure 34, select the target drive, and then press Alt+B to specify the drive as the boot device in legacy mode.
Figure 34 Specifying the boot device

3. To cancel a specified boot device, select the drive, and then press Alt+B.
4. Press Esc until the screen as shown in Figure 35 opens, select Save changes then exit this menu, and then press Enter.
The boot option configuration takes effect at the next restart.
Figure 35 Saving storage controller configuration