- Table of Contents
-
- H3C CR19000-8 Core Router Installation Guide-6W103
- 00-Preface
- 01-Chapter 1 Preparing for Installation
- 02-Chapter 2 Installing the Router
- 03-Chapter 3 Installing Power Supplies
- 04-Chapter 4 Installing Removable Components
- 05-Chapter 5 Connecting Cables
- 06-Chapter 6 Verifying the Installation
- 07-Chapter 7 Accessing the Router
- 08-Chapter 8 Replacement Procedures
- 09-Chapter 9 Troubleshooting
- 10-Appendix A Engineering Labels
- 11-Appendix B Cable Management
- 12-Appendix C Repackaging the Router
- Related Documents
-
| Title | Size | Download |
|---|---|---|
| 07-Chapter 7 Accessing the Router | 134.57 KB |
Using a console cable to connect the router to a configuration terminal
Using a mini USB console cable to connect the router to a configuration terminal
7 Accessing the router
The following options are available for connecting the switch to a configuration terminal:
· Use a serial console cable to connect the serial console port on the switch to a configuration terminal.
· Use a mini USB console cable to connect the mini USB console port on the switch to a configuration terminal.
By default, the mini USB console port is active when both the serial console port and the mini USB console port are connected to terminals.
Using a console cable to connect the router to a configuration terminal
|
|
IMPORTANT: When you connect a PC to a powered-on router, first connect the DB-9 connector of the console cable to the PC, and then connect the RJ-45 connector to the router. |
To connect a configuration terminal to the router by using a console cable:
1. Select a configuration terminal, which can be a character terminal with an RS-232 serial port, or a PC.
2. Plug the DB-9 female connector of the console cable into the serial port on the configuration terminal and the RJ-45 connector into the console port on the router.
Using a mini USB console cable to connect the router to a configuration terminal
|
|
CAUTION: The router supports only using a mini USB console cable to connect the USB console port. |
|
|
IMPORTANT: · To access and configure the router from the mini USB console port, first download and install the USB console driver from H3C official website. · If you connect the mini USB console cable before installing the USB console driver, pull out and insert the mini USB console cable for the driver to take effect. |
To connect a configuration terminal to the router by using a mini USB console cable:
1. Download the USB console driver from the following website:
http://www.h3c.com/en/home/USB_Console/.
2. Select a driver program according to the operating system you use:
¡ XR21V1410_XR21B1411_Windows_Ver1840_x86_Installer.EXE—32-bit operating system.
¡ XR21V1410_XR21B1411_Windows_Ver1840_x64_Installer.EXE—64-bit operating system.
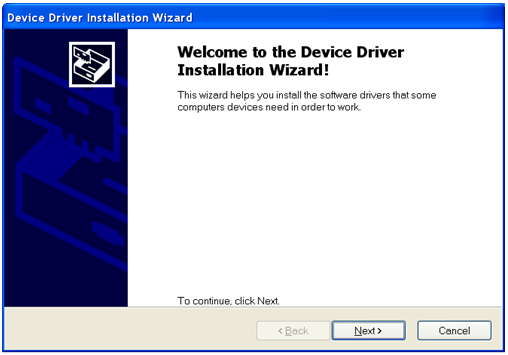
3. Click Next on the installation wizard.
Figure7-1 Device Driver Installation Wizard
4. Click Continue Anyway if the following dialog box opens.
Figure7-2 Software Installation

5. Click Finish.
Figure7-3 Completing the device driver installation wizard

6. Connect the USB connector to the USB port on the configuration terminal.
7. Connect the mini USB connector to the mini USB console port on the router.
Setting terminal parameters
To configure and manage the router through the console port, you must run a terminal emulator program, TeraTermPro or PuTTY, on your configuration terminal. You can use the emulator program to connect a network device, a Telnet site, or an SSH site. For more information about the terminal emulator programs, see the user guides for these programs.
Start the terminal emulator program and configure the parameters as follows:
· Bits per second—9600.
· Data bits—8.
· Stop bits—1.
· Parity—None.
· Flow control—None.
Starting the router
1. Power on the router.
2. Verify the following items:
¡ The LEDs on the front panel are normal. For the LED description, see H3C CR19000-8 Core Router Hardware Information and Specifications.
¡ The configuration terminal displays information normally.
BootWare Validating...
Press Ctrl+B to enter extended boot menu...
Starting to get the main application file--cfa0:/main.bin!............
............................................................................
............................................................................
...
The main application file is self-decompressing.............................
............................................................................
............................................................................
............................................................................
....................................................................Done!
System application is starting...
Mainboard 1 is master.
User interface con1 is available.
Press ENTER to get started. (Press Enter.)
<sysname> (The router is ready for configuration.)
Configuring basic settings
Configure basic settings for the router after the router starts up. For more information about how to configure the router, see H3C CR19000 Core Routers Configuration Guides and H3C CR19000 Core Routers Command References.
