- Table of Contents
-
- 03-Basic Network Configuration
- 01-Layer 2 Static Link Aggregation Configuration Example
- 02-Layer 2 Dynamic Link Aggregation Configuration Example
- 03-PPPoE Client Configuration Example
- 04-Static IPv6 Address Configuration Example
- 05-IPv6 Static Routing Configuration Example
- 06-Static IPv4 DNS Configuration Example
- 07-Static IPv6 DNS Configuration Example
- 08-Dynamic IPv4 DNS Configuration Example
- 09-Dynamic IPv6 DNS Configuration Example
- 10-IPv4 DNS Proxy Configuration Example
- 11-IPv6 DNS Proxy Configuration Example
- 12-Static NAT Configuration Example
- 13-Dynamic NAT Configuration Example
- 14-IPv4 ACL-Based Packet Filter Configuration Example
- 15-IPv6 ACL-Based Packet Filter Configuration Example
- 16-ARP Attack Protection Configuration Example
- 17-ARP Proxy Configuration Example
- 18-IGMP Snooping Configuration Example
- 19-MLD Snooping Configuration Example
- Related Documents
-
| Title | Size | Download |
|---|---|---|
| 16-ARP Attack Protection Configuration Example | 241.76 KB |
|
|
|
H3C Access Controllers |
|
Comware 7 ARP Attack Protection |
|
Configuration Example |
Copyright © 2024 New H3C Technologies Co., Ltd. All rights reserved.
No part of this manual may be reproduced or transmitted in any form or by any means without prior written consent of New H3C Technologies Co., Ltd.
Except for the trademarks of New H3C Technologies Co., Ltd., any trademarks that may be mentioned in this document are the property of their respective owners.
The information in this document is subject to change without notice.
Overview
The following information provides an example for configuring ARP attack protection.
Prerequisites
The following information applies to Comware 7-based access controllers. Procedures and information in the examples might be slightly different depending on the software or hardware version of the H3C access controllers.
The configuration examples were created and verified in a lab environment, and all the devices were started with the factory default configuration. When you are working on a live network, make sure you understand the potential impact of every command on your network.
The following information is provided based on the assumption that you have basic knowledge of ARP attack protection.
Example: Configuring ARP attack protection
Network configuration
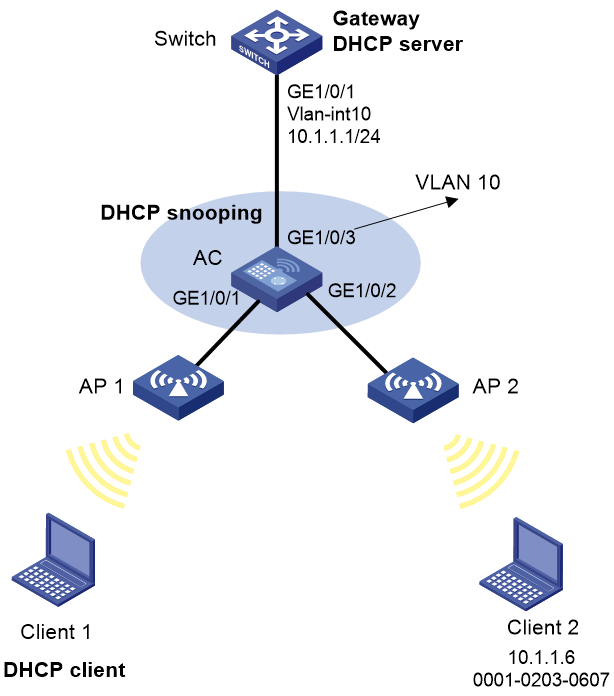
As shown in Figure 1, configure ARP attack protection for VLAN 10 on the AC so the AC can perform ARP packet validity check and user validity check on Client 1 and Client 2.
Prerequisites
Make sure the AC, the switch, and the clients can reach other. (Details not shown.)
Procedures
Configuring the DHCP server
Details not shown.
Configuring the AC
Configuring IP addresses
# Add all interfaces on the AC to VLAN 10. (Details not shown.)
Configuring DHCP snooping
1. Click the System View tab at the bottom of the page.
2. From the navigation pane, select Network Configuration > Network Services > DHCP/DNS.
3. Click the DHCP Snooping tab.
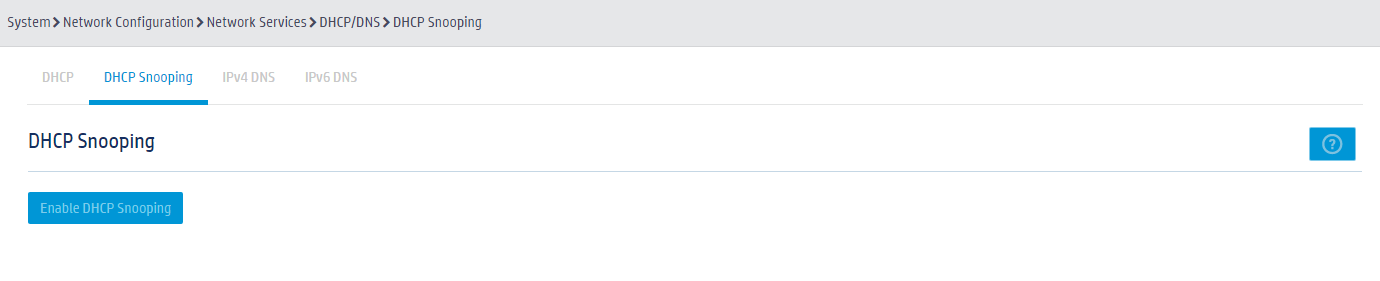
4. Click the Enable DHCP Snooping button.
Figure 2 Enabling DHCP snooping
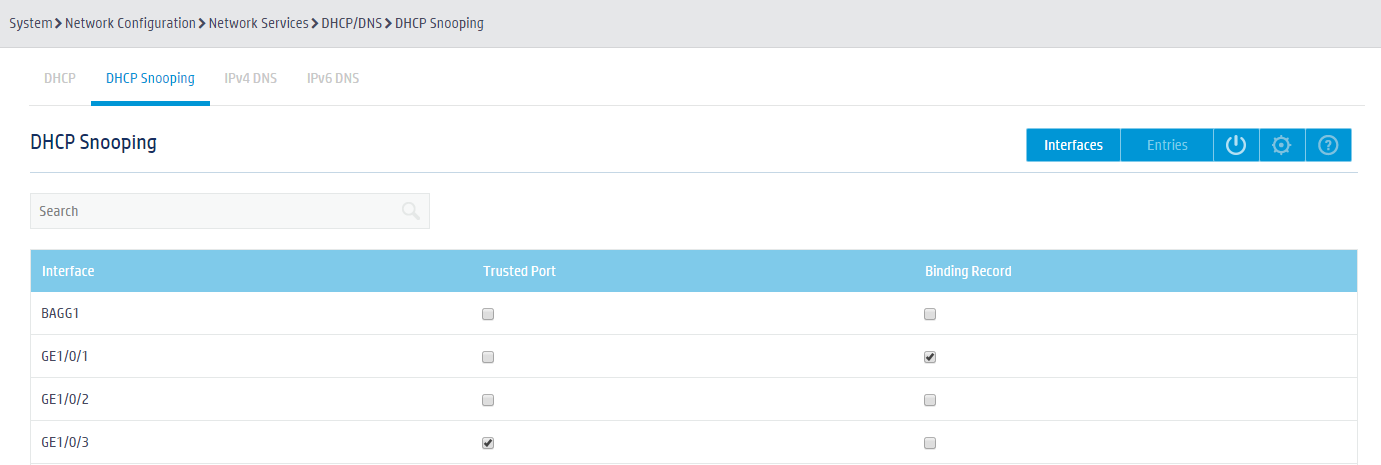
5. Enable the binding record feature on GigabitEthernet 1/0/1 and configure GigabitEthernet 1/0/3 as a trusted port.
Figure 3 Configuring DHCP snooping
6. Click Apply.
Configuring ARP attack protection
1. From the navigation pane, select Network Configuration > Network Services > ARP.
2. Click the Advanced settings
button ![]() to
configure advanced ARP settings.
to
configure advanced ARP settings.
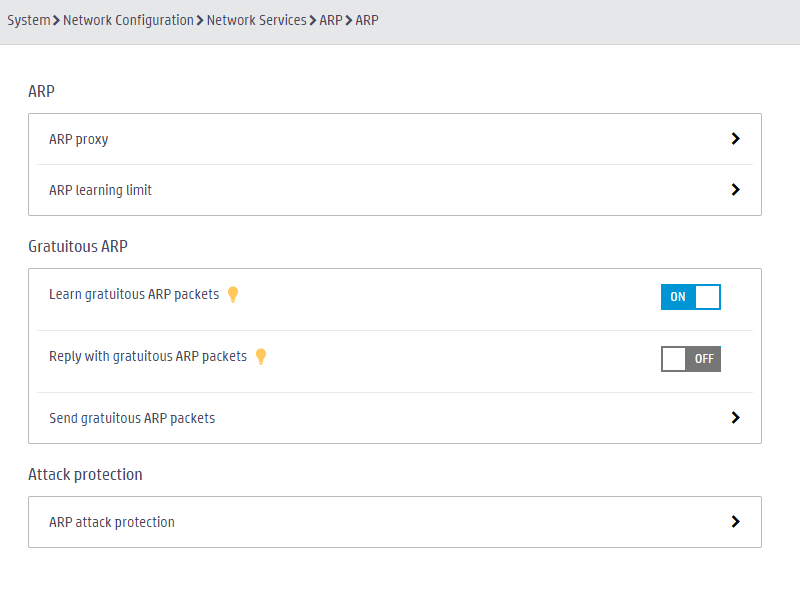
3. In the Attack protection area, click the
right angle bracket button ![]() in
the ARP attack protection row.
in
the ARP attack protection row.
Figure 4 Configuring advanced ARP settings
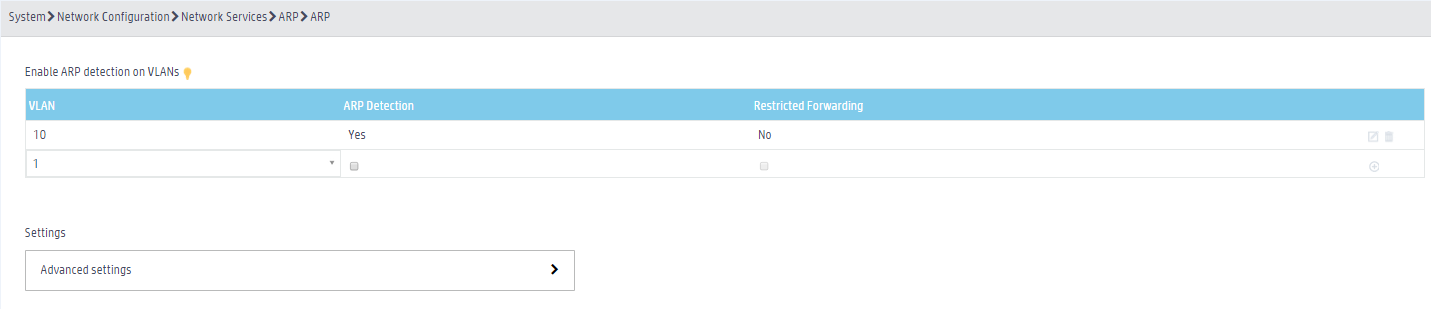
4. Enable ARP detection on VLAN 10.
Figure 5 Enabling ARP detection
5. In the Settings area, click the right chevron
button ![]() in
the Advanced settings row to configure advanced ARP attack protection.
in
the Advanced settings row to configure advanced ARP attack protection.
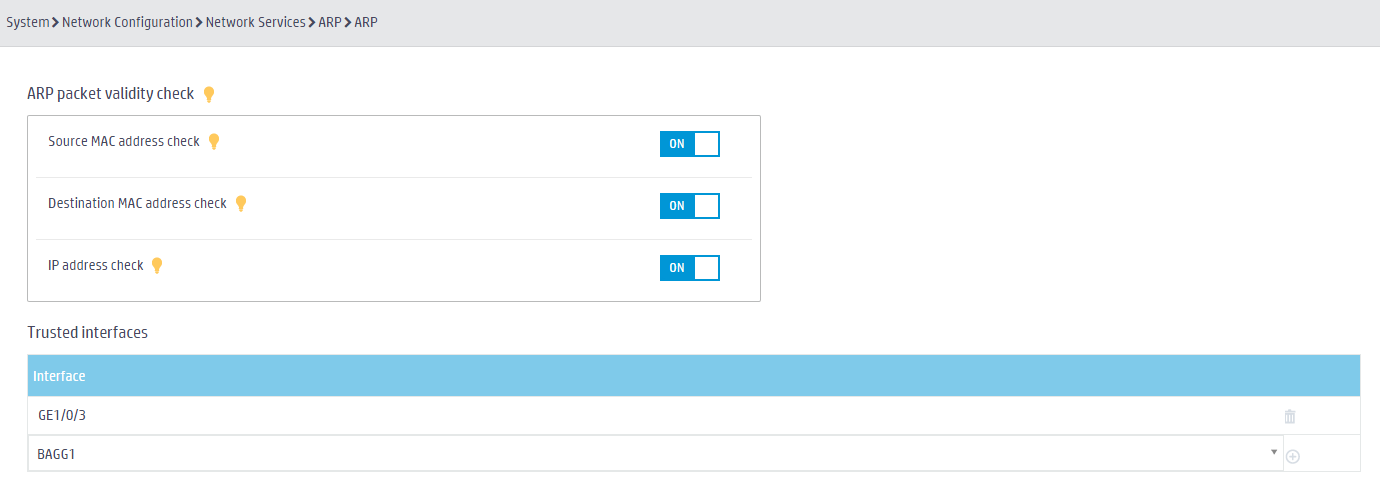
a. In the ARP packet validity check area, enable source MAC address check, destination MAC address check, and IP address check.
b. In the Trusted interfaces area, configure GigabitEthernet 1/0/3 as a trusted interface.
Figure 6 Configuring advanced ARP attack protection
Verifying the configuration
1. Click the System View tab at the bottom of the page.
2. From the navigation pane, select Network Configuration > Network Services > ARP.
3. Verify that the AC has the ARP entry for Client 1 but it does not have the ARP entry for Client 2.
Related documentation
H3C Access Controllers Web-Based Configuration Guide