- Table of Contents
-
- H3C Servers UniSystem Configuration Examples-6W102
- 01-UniSystem Bulk HDM&BIOS Import Configuration Examples
- 02-H3C UniSystem Cloning Installation Configuration Examples
- 03-UniSystem SMTP Configuration Examples
- 04-H3C UniSystem Cluster Creation Configuration Examples
- 05-H3C UniSystem SNMP Configuration Examples
- 06-H3C UniSystem RAID Configuration Examples
- 07-H3C UniSystem Rack Server Deployment Configuration Examples
- 08-UniSystem Bulk Component Update Configuration Examples
- 09-H3C UniSystem Server Inspection Configuration Example
- 10-H3C Unisystem REPO Acquisition and Use Configuration Examples
- 11-H3C UniSystem LDAP Management Configuration Example
- 12-H3C UniSystem Secure Erase Configuration Examples
- 13-H3C UniSystem Intelligent Version Management Configuration Examples
- 14-H3C UniSystem Bulk IP Settings Configuration Examples
- Related Documents
-
| Title | Size | Download |
|---|---|---|
| 13-H3C UniSystem Intelligent Version Management Configuration Examples | 806.59 KB |
H3C UniSystem
Intelligent Version Management Configuration Examples
Copyright © 2025 New H3C Technologies Co., Ltd. All rights reserved.
No part of this manual may be reproduced or transmitted in any form or by any means without prior written consent of New H3C Technologies Co., Ltd.
Except for the trademarks of New H3C Technologies Co., Ltd., any trademarks that may be mentioned in this document are the property of their respective owners.
The information in this document is subject to change without notice.
Introduction
|
|
NOTE: Starting from version 2.59, FIST software has been renamed as UniSystem. |
With LastestREPO update enabled, UniSystem will regularly retrieve information about the latest version of all component packages from the REPO online platform (http://supportrepo.h3c.com/repo.htm), based on the update interval and time set by the user. The system then filters out the suitable components for the managed servers and generates a new REPO package to replace the older version in the image pool. The LastestREPO feature, combined with the scheduled update feature of server template management, allows for automatic update of server components to the latest version.
Prerequisites
This document is not restricted to specific software or hardware versions. Procedures and information in the examples might be slightly different depending on the software or hardware version of the device.
The configuration examples were created and verified in a lab environment, and all the devices were started with the factory default configuration. When you are working on a live network, make sure you understand the potential impact of every command on your network.
The following information is provided based on the assumption that you have basic knowledge of intelligent version management.
Restrictions and guidelines
· If the server template configuration contains other settings besides HDM settings, make sure the servers to which the template is applied are powered off.
· Before applying a template to servers, make sure no operations are in progress on the servers. During the template application process, do not perform other operations contained in the settings.
· During the template application process on a server, do not perform the following operations:
¡ Power off or reboot the server.
¡ Update, reset, or restore the factory defaults for HDM on the server.
¡ Perform mount operations through KVM.
Example: Configuring intelligent version management
Network configuration
As shown in Figure 1, deploy UniSystem as both the UniSystem server and client on a PC. Connect the Ethernet port on the PC and the two servers to a switch in the same LAN, and configure IP addresses to ensure communication between UniSystem, the servers, and the REPO online platform. Perform automatic update of server HDM and BIOS firmware through the LastestREPO update feature of UniSystem combined with server templates. The network configuration is as shown in Table 1.
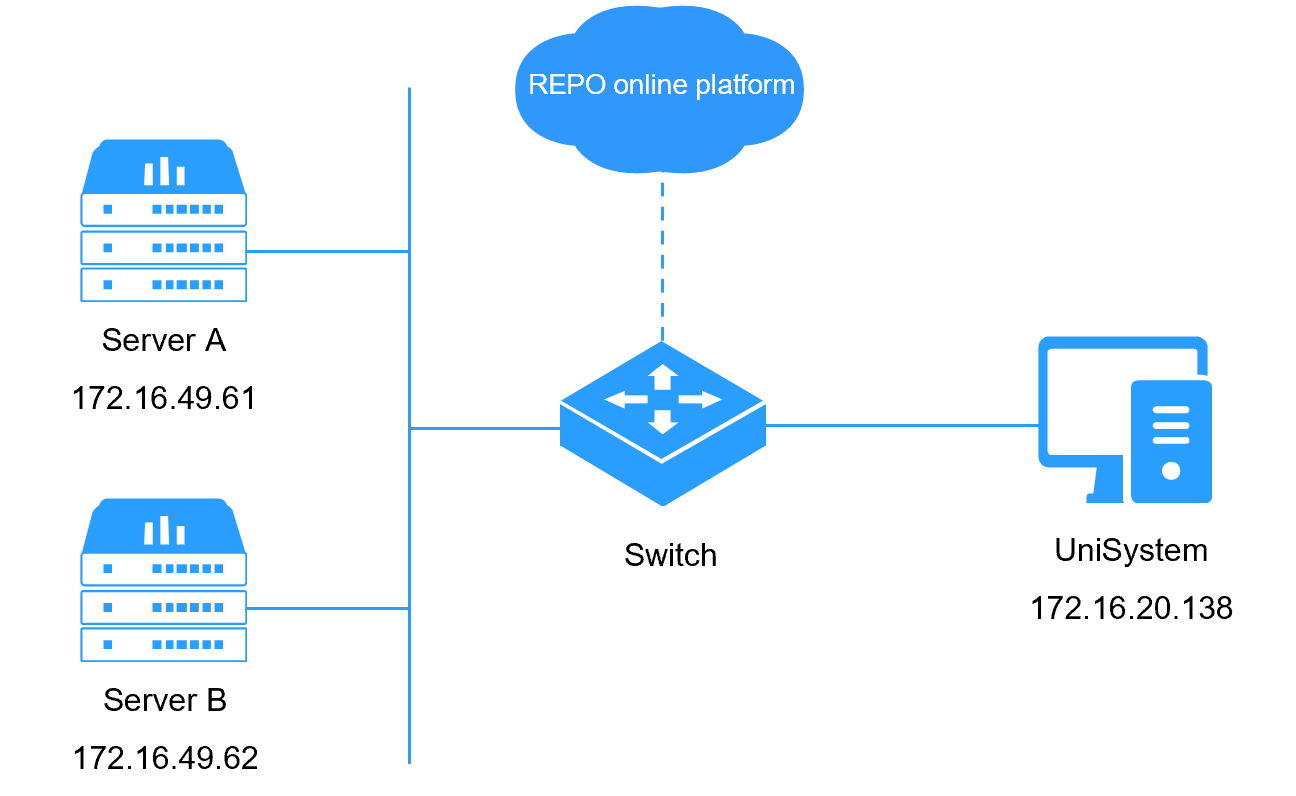
Table 1 Network configuration information
|
Device role |
Device configuration item |
Description |
|
UniSystem |
UniSystem IP |
172.16.20.138 |
|
Username of the default UniSystem administrator |
admin |
|
|
Password of the default UniSystem administrator |
Password@_ |
|
|
Server A |
Server model |
H3C UniServer R4900 G6 |
|
HDM IP |
172.16.49.61 |
|
|
Server B |
Server model |
H3C UniServer R4900 G6 |
|
HDM IP |
172.16.49.62 |
Analysis
1. Log in to UniSystem and add server A and server B to UniSystem.
2. Configure the DNS service or the proxy server for the UniSystem server to ensure communication between UniSystem and the REPO online platform.
3. Enable LastestREPO update and configure update frequency and time.
4. After LastestREPO update is completed, add a server template and select a REPO package for automatic update in the Firmware Update Configuration section.
5. Apply the server template and set scheduled deployment. Then, wait for the sever template to be applied as scheduled.
Software versions used
Table 2 lists the related firmware versions in this document.
|
Firmware type |
Original firmware version |
New firmware version |
|
UniSystem |
2.60 |
N/A |
|
HDM |
1.24 (server A) |
1.30 (server A) |
|
1.24 (server B) |
1.30 (server B) |
|
|
BIOS |
6.00.27 (server A) |
6.00.28 (server A) |
|
6.00.27 (server B) |
6.00.28 (server B) |
Procedures
Logging in to UniSystem
1. Open a browser on the UniSystem client and enter the address of the UniSystem server.
2. As shown in Figure 2, enter the default username admin and password Password@_ on the login page.
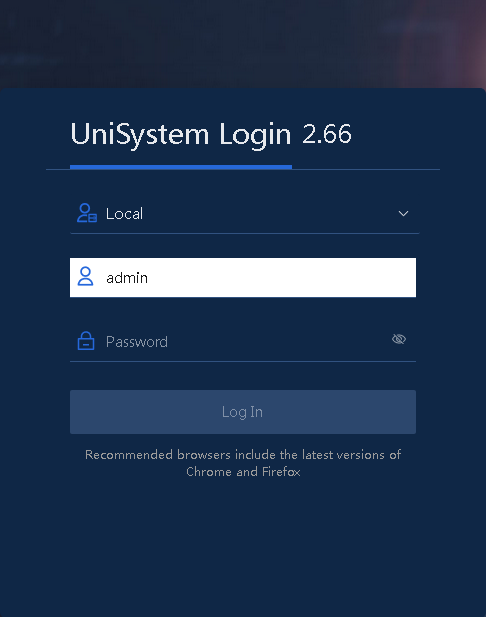
3. Click Log In to access the UniSystem dashboard.
Configuring network settings
For UniSystem to communicate with the REPO online platform correctly, configure the DNS service or the proxy server on the UniSystem server.
Configuring the DNS service
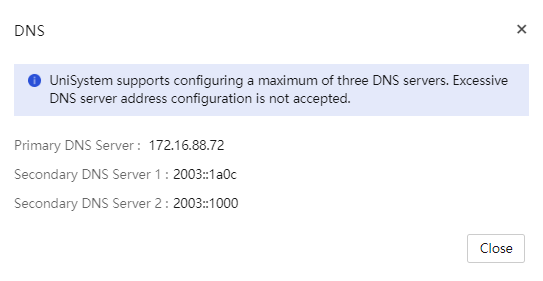
1. Select Menu > System > Network.
2. Click DNS. In the dialog box that opens, configure DNS server settings. First configure the primary DNS server.
Configuring a proxy server
1. Select Menu > System > Proxy Settings.
Figure 5 Configuring proxy settings

2. Select whether to enable proxy.
3. (Optional.) enter the username, password, and exceptions for the proxy server.
4. Select HTTP or HTTPS as needed, and then configure the proxy server address and port number.
5. Click Save.
Adding a server
|
|
NOTE: · To add devices, enter the HDM username and password of an administrator account as a best practice. · To avoid device adding failures, UniSystem supports only HDM usernames in the range of 1 to 16 characters. |
To add a server:
1. Select Menu > Devices > Server List.
2. Click Add and select Add Manually.
3. As shown in Figure 6, select HDM for Device Type, and then enter the HDM management IP address, username, and password for sever A.
¡ IP Address: Enter the HDM management IP address of a server when the device type is HDM.
¡ Username: Enter the HDM username, which can be the username of an administrator user or a non-administrator user.
¡ Password: Password corresponding to the HDM user.
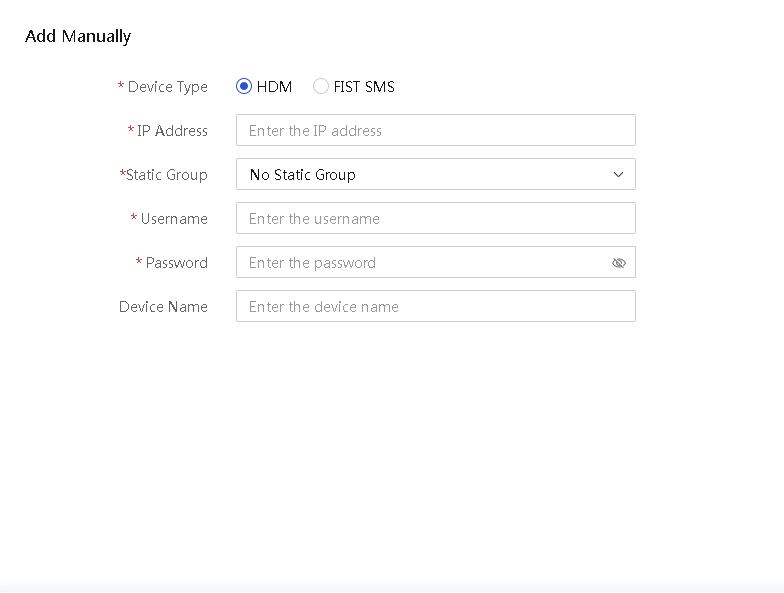
4. (Optional.) Select a static group. The newly added server can be added to the selected static group for easy management.
5. Click OK.
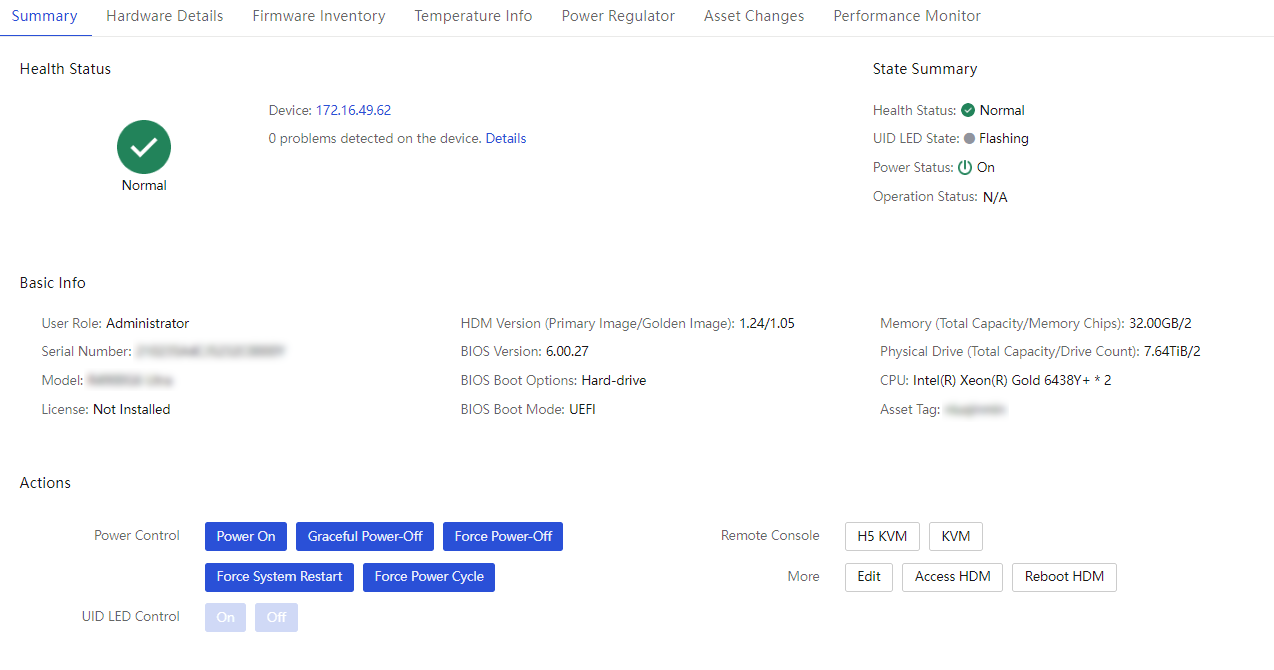
6. Repeat the previous steps to add server B to the server list, as shown in Figure 7.

7. To view firmware version of server A and server B, click the corresponding device name to enter the server details page.
Figure 8 Firmware version of server A
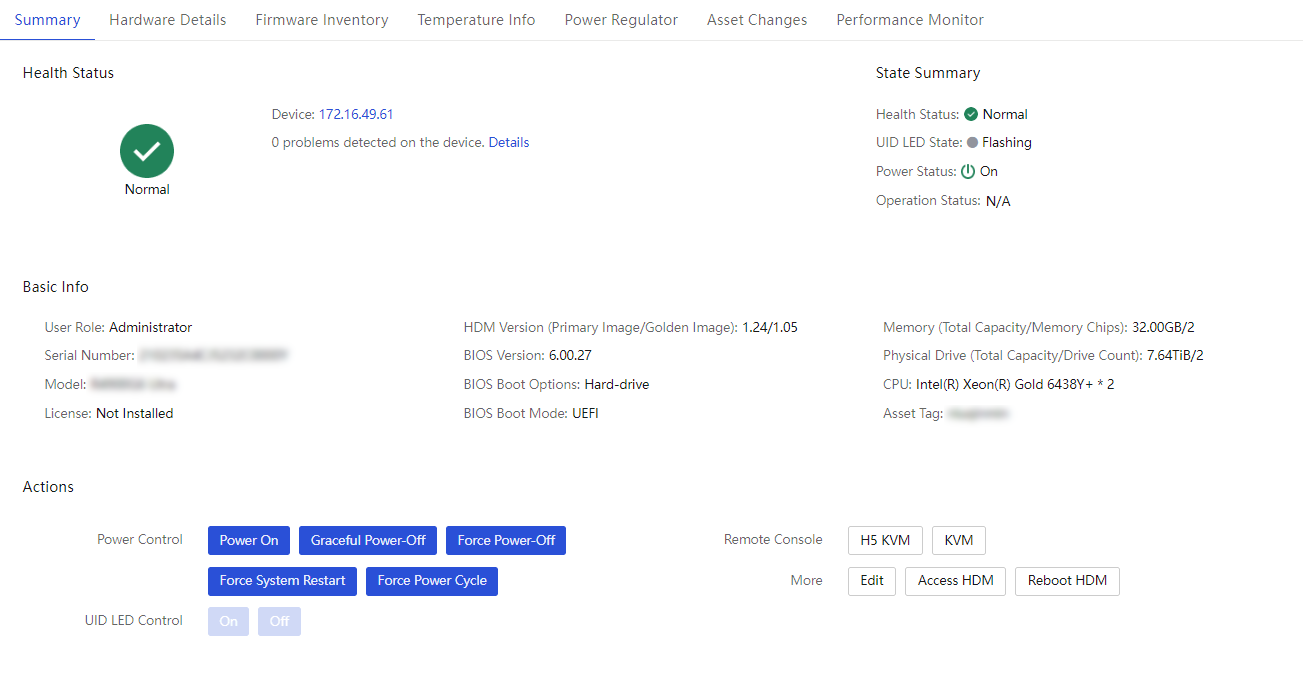
Figure 9 Firmware version of server B
Enabling LastestREPO update
After enabling update prompt, when UniSystem starts downloading and updating the latest version of the REPO package, the webpage displays a prompt for the user to check the download progress or update status. The prompt will disappear only when the user manually clicks the prompt or disables the update prompt feature.
To enable LastestREPO update:
1. Select Menu > Templates > Repositories.
2. Click the Update tab.
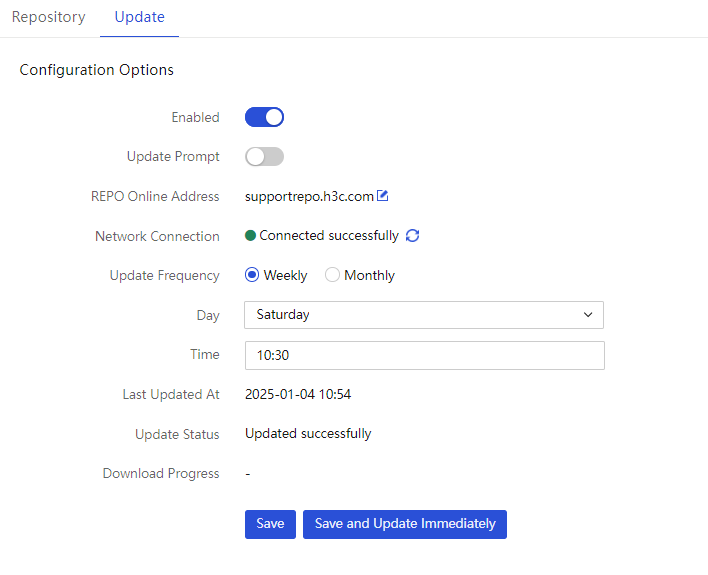
3. Enable LastestREPO update.
4. Enable update prompt.
5. Click ![]() and enter the domain name address of the REPO official website.
and enter the domain name address of the REPO official website.
6. Click ![]() to refresh the network connection status.
to refresh the network connection status.
7. If the network connection fails, troubleshoot issues based on recommended actions.
8. Specify the update frequency. In this example, the frequency is 00:00 on 15th of every month.
9. Click Save and Update Immediately. The system executes the update immediately.
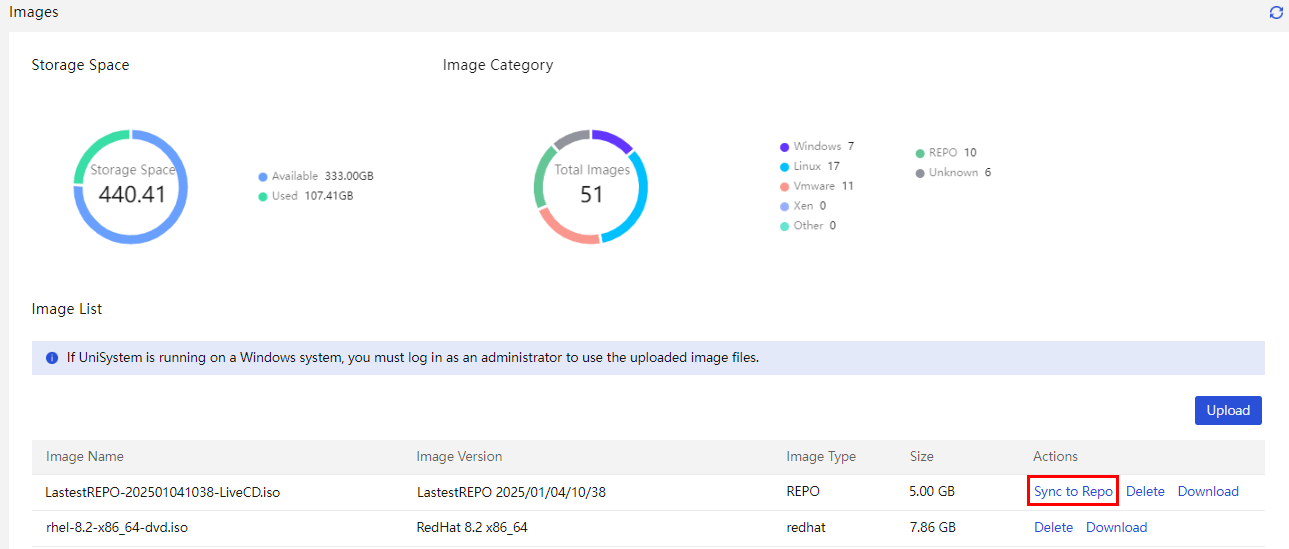
10. After the update, you can view the update REPO package on the Images page and click Sync to Repo in the Actions column for that file.
11. On the Repository tab, you can view the REPO package that has been synchronized.

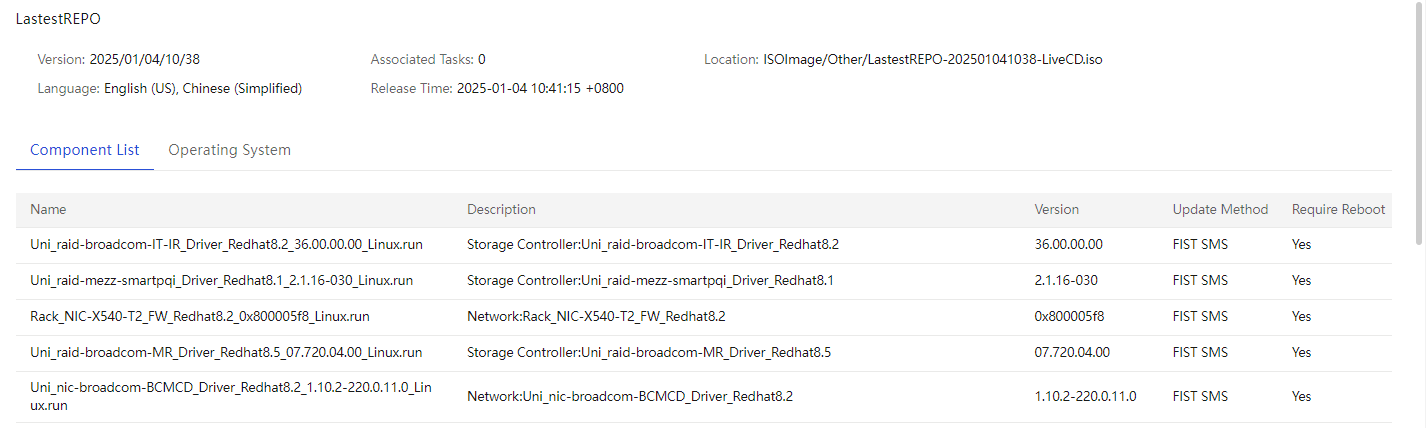
12. To view the component list in the REPO package, click the REPO package name. The HDM firmware and BIOS firmware are the targets for the update through the server template.
Adding a server template
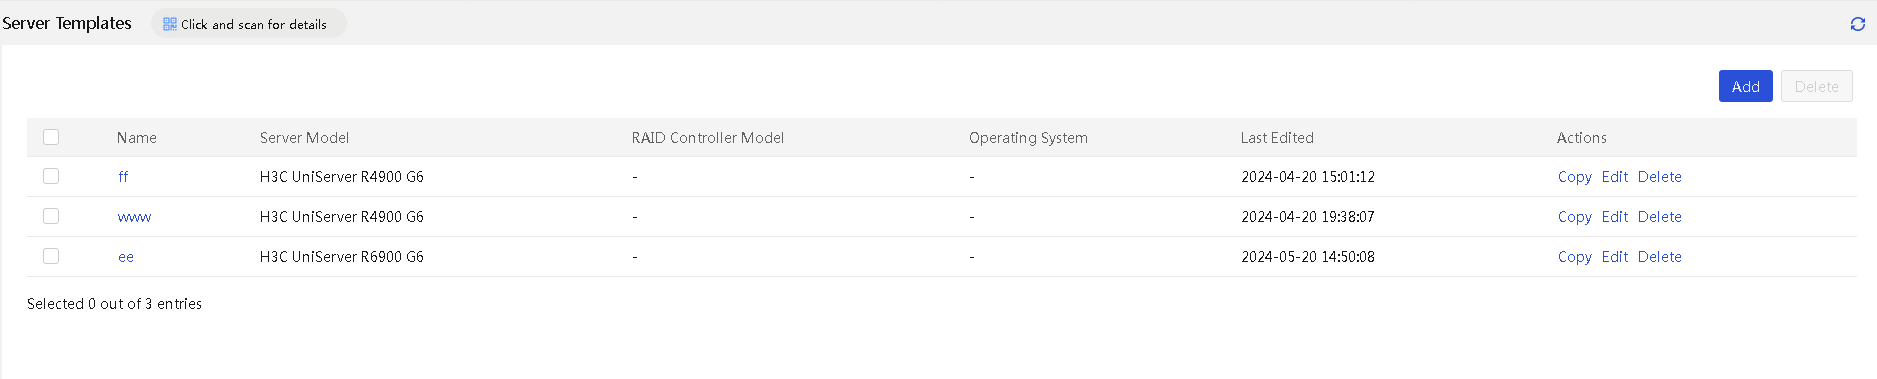
1. Select Menu > Templates > Server Templates.
Figure 14 Server Templates page
2. Click Add.
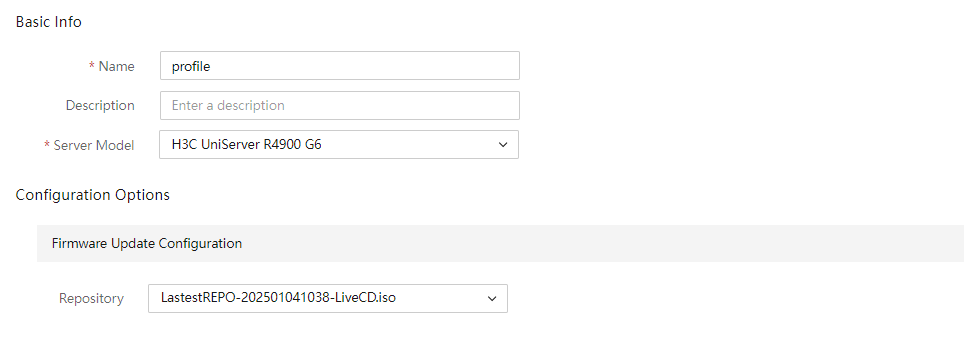
a. In the Basic Info area, enter the server template name and template description (optional), and select a compatible server model from the Server Model list. This example specifies the server template name as profile and select H3C UniServer R4900 G6.
b. Select a REPO package for automatic update in the Firmware Update Configuration section.
c. (Optional.) Configure HDM settings, BIOS settings, connection settings, RAID settings, and OS settings s needed. For more information, see H3C Servers UniSystem User Guide.
Figure 15 Adding a server template
3. Click OK.
Figure 16 Added the server template successfully

Applying a server template
1. Select Menu > Deployment > Servers > Apply Server Templates.
Figure 17 Applying server templates

2. Select the target servers, and click Apply Server Template. In the dialog box that opens, perform the following operations:
a. Select server template profile and verify the device name and HDM status.
b. In the Time Settings field, select Repeat Settings and set the execution frequency and time, and select whether to automatically shut down servers before application.
c. Select I have read the template application-related restrictions and guidelines.
Figure 18 Configuring application settings

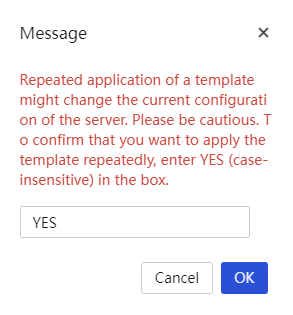
3. Click OK. In the dialog box that opens, enter Yes (case insensitive)
Figure 19 Confirming the operation
4. Click OK. The Application Tasks tab opens. You can view the task execution status.
Figure 20 Application Tasks tab

5. After applying a server template, you can go to the Template Application Status tab to view the application status.
6. After the application of a server template finishes, the application result will be displayed in the Application Status column.
Figure 21 Template application completed

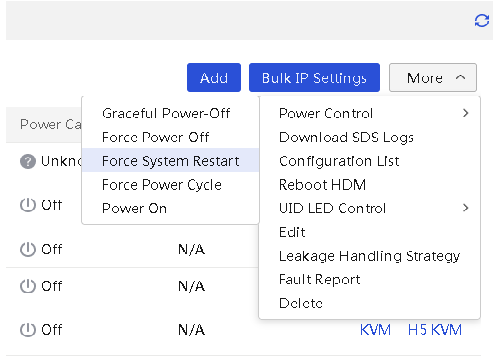
7. For the configuration to take effect on components after template application, restart the target servers as follows:
a. Select Menu > Devices > Server List.
b. Select the target servers, click More, and then select Power Control.
c. Select Force System Restart.
Figure 22 Bulk restarting servers
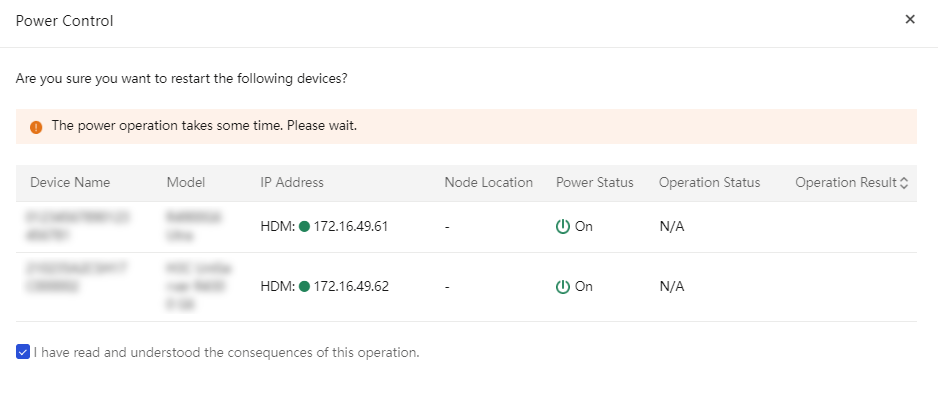
8. In the dialog box that opens, click OK.
Figure 23 Confirming the server restart
Verifying the configuration
1. Select Menu > Devices > Server List. The server list page opens.
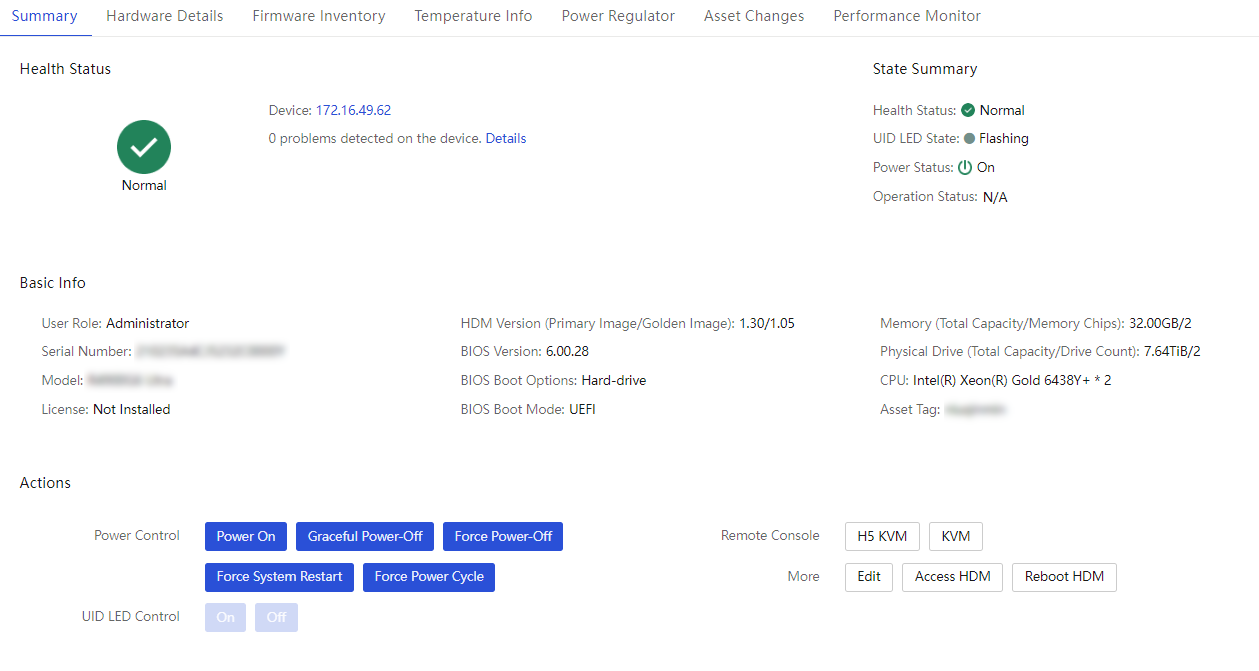
2. To view firmware version of server A and server B, click the corresponding device name to enter the server details page.
Figure 24 Firmware version of server A
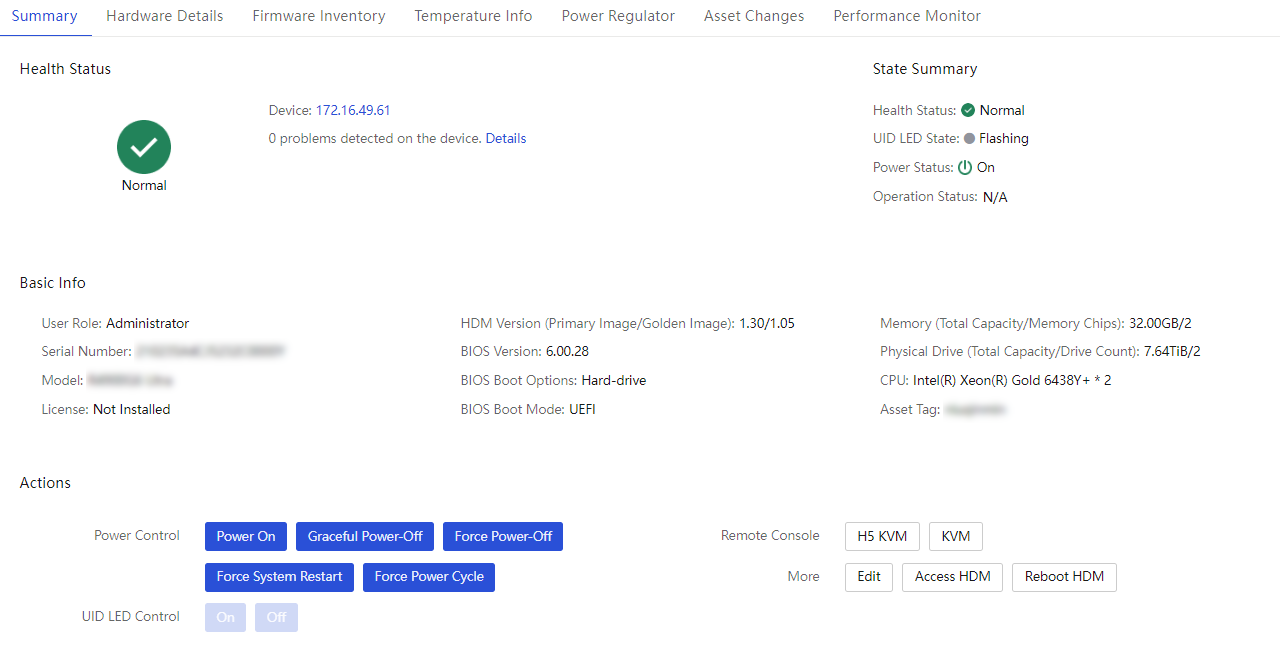
Figure 25 Firmware version of server B
Related documentation
H3C Servers UniSystem User Guide
