- Table of Contents
-
- H3C Servers UniSystem Configuration Examples-6W102
- 01-UniSystem Bulk HDM&BIOS Import Configuration Examples
- 02-H3C UniSystem Cloning Installation Configuration Examples
- 03-UniSystem SMTP Configuration Examples
- 04-H3C UniSystem Cluster Creation Configuration Examples
- 05-H3C UniSystem SNMP Configuration Examples
- 06-H3C UniSystem RAID Configuration Examples
- 07-H3C UniSystem Rack Server Deployment Configuration Examples
- 08-UniSystem Bulk Component Update Configuration Examples
- 09-H3C UniSystem Server Inspection Configuration Example
- 10-H3C Unisystem REPO Acquisition and Use Configuration Examples
- 11-H3C UniSystem LDAP Management Configuration Example
- 12-H3C UniSystem Secure Erase Configuration Examples
- 13-H3C UniSystem Intelligent Version Management Configuration Examples
- 14-H3C UniSystem Bulk IP Settings Configuration Examples
- Related Documents
-
| Title | Size | Download |
|---|---|---|
| 12-H3C UniSystem Secure Erase Configuration Examples | 974.22 KB |
H3C UniSystem
Secure Erase Configuration Examples
Copyright © 2025 New H3C Technologies Co., Ltd. All rights reserved.
No part of this manual may be reproduced or transmitted in any form or by any means without prior written consent of Hangzhou H3C Technologies Co., Ltd.
Except for the trademarks of New H3C Technologies Co., Ltd., any trademarks that may be mentioned in this document are the property of their respective owners.
The information in this document is subject to change without notice.
Introduction
|
|
NOTE: Starting from version 2.59, FIST software has been renamed as UniSystem. |
When a server stops running due to end of lifecycle (EOL) or other reasons, you can use the secure erase feature to erase the server's HDM, BIOS, and storage data to prevent user data leaks.
UniSystem supports performing batch security erase on servers in bulk. The system automatically erases data and displays the results without manual intervention.
Prerequisites
Procedures and information in the document might be slightly different depending on the software or hardware version of the device.
The configuration examples were created and verified in a lab environment, and all the devices were started with the factory default configuration. When you are working on a live network, make sure you understand the potential impact of every command on your network.
The following information is provided based on the assumption that you have basic knowledge of UniSystem secure erase.
Restrictions and guidelines
· Use the secure erase feature with caution. Make sure the data to be erased is unnecessary and can be safely deleted before using this function. Otherwise, back up your data in advance to prevent the loss of important information.
· Before beginning the data erase, make sure all external storage devices connected to the server, including but not limited to portable drives, have been removed to avoid accidental data deletion.
· During the data erasing process, the server will automatically reboot into iFIST to perform the erase. After completion, the server will reboot again.
· Before beginning data erase, make sure the target server's iFIST software version is not lower than iFIST-1.58 and the HDM software version is not lower than HDM2-1.57 to guarantee successful data deletion.
Example: Configuring secure erase
Network configuration
As shown in Figure 1, deploy UniSystem as both the UniSystem server and client on a PC. Connect the Ethernet port of the PC and the three servers to a switch in the same LAN, and configure IP addresses to ensure communication between UniSystem and the servers. Implement the secure erase feature in UniSystem to erase the BIOS data on two servers. See Table 1 for specific networking information.
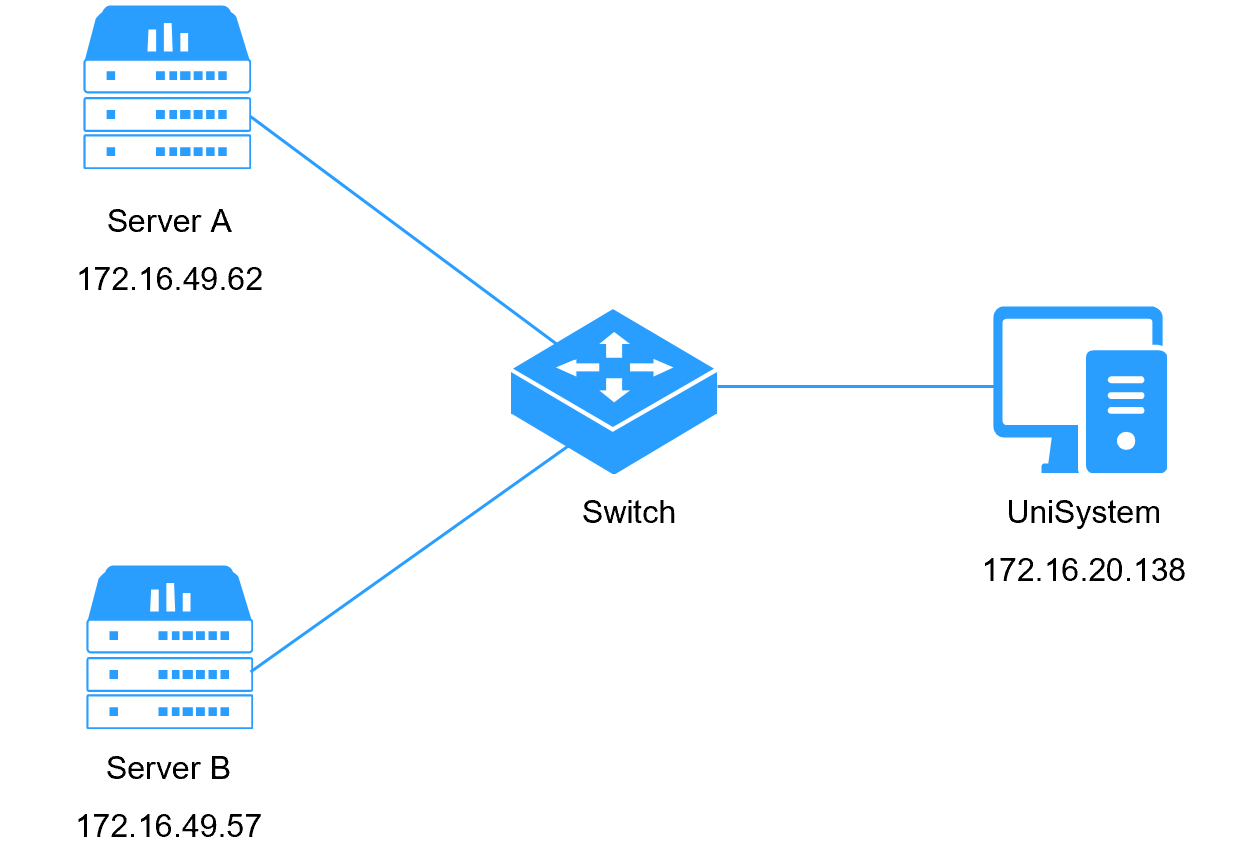
Table 1 Network configuration information
|
Device Role |
Device information |
Description |
|
UniSystem |
UniSystem IP address |
172.16.20.138 |
|
Default UniSystem administrator |
admin |
|
|
Default UniSystem administrator password |
Password@_ |
|
|
Server A |
Server model |
H3C UniServer R4900 G6 |
|
HDM IP address |
172.16.49.62 |
|
|
Server B |
Server model |
H3C UniServer R4950 G6 |
|
HDM IP address |
172.16.49.57 |
Analysis
· Log in to UniSystem and add a server to UniSystem.
· Use the security erase feature to erase the server's BIOS data.
Software versions used
This configuration example was created and verified on UniSystem-2.60 with HDM2-1.57 and iFIST-1.58 on both servers.
Procedures
Logging in to UniSystem
1. Open the browser on the UniSystem client and enter the UniSystem server address.
2. As shown in Figure 2, enter the default username admin and password Password@_ on the login interface.
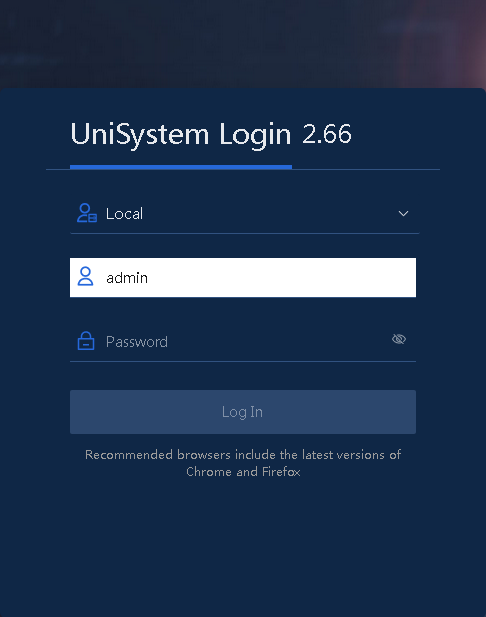
3. Log in to UniSystem and enter the home page as shown in Figure 3.

Adding a server
1. In the navigation pane, select Menu > Devices > Server List.
2. Click Add, as shown in Figure 4. Select Add Manually to enter the manual addition page.
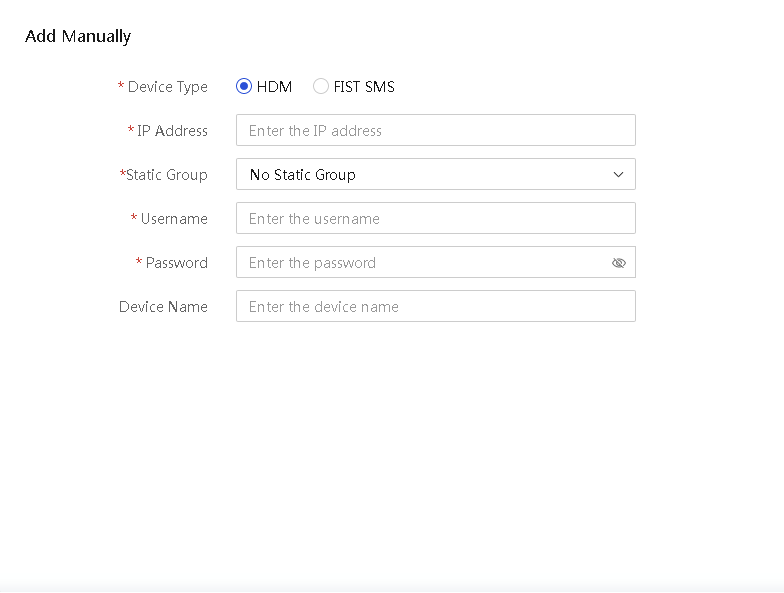
3. Select HDM as the device type, and then enter the HDM management IP address, username, and password for server A. For the secure erase function to be available, use the username and password of an account with the administrator permissions.
4. Click OK.
5. Repeat the previous steps to add server B to the server list, as shown in Figure 5.

6. Click H5 KVM in the Actions column for server A and server B to access the BIOS Setup Utility of the corresponding server.
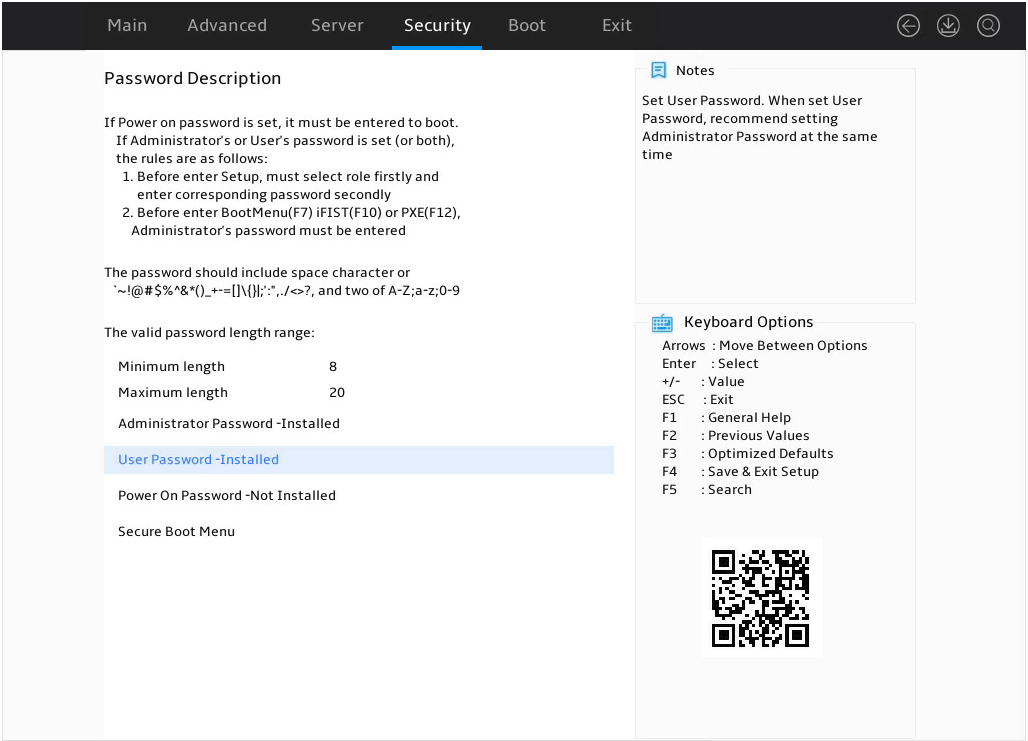
7. Enter server A's BIOS Setup Utility as shown in Figure 6, access the Security screen, and verify that passwords have been set for both administrator and user accounts.
Figure 6 BIOS Setup Utility (server A)
8. Enter server B's BIOS Setup Utility as shown in Figure 7, access the Security screen, and verify that passwords have been set for both administrator and user accounts.
Figure 7 BIOS Setup Utility (server B)

Erasing server data
1. Access the Menu > Deployment > Security Erase screen, as shown in Figure 8.
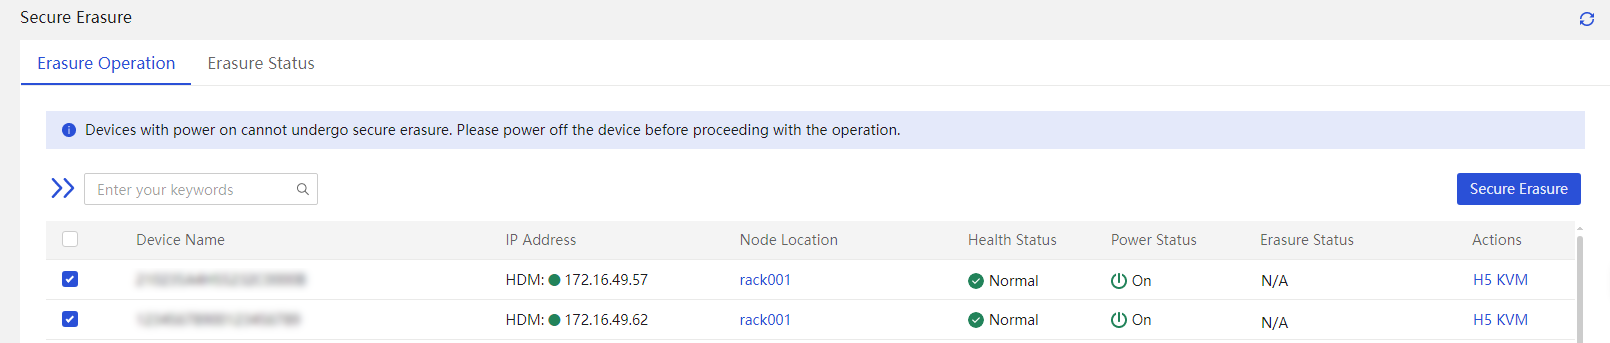
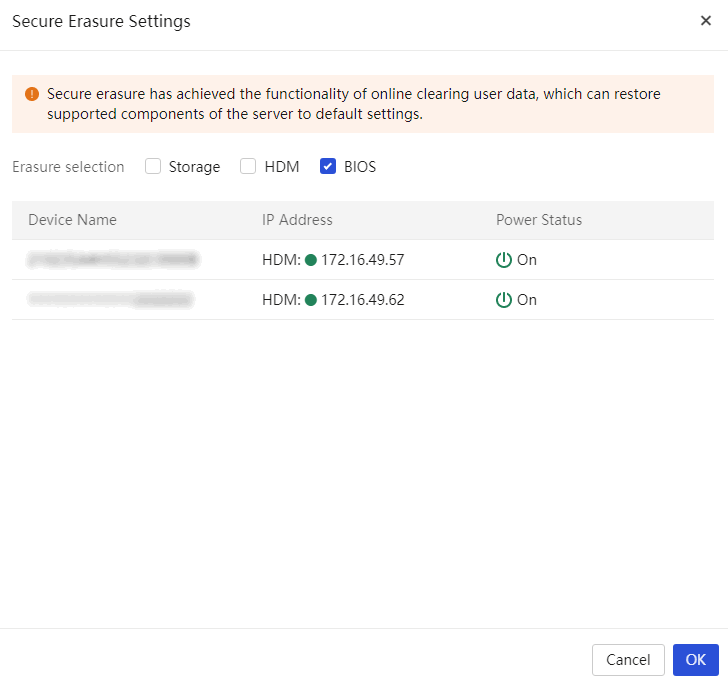
2. Select servers A and B, click Security Erase, and in the dialog box shown in Figure 9, select the erase options, including HDM, BIOS, and Storage.
|
|
NOTE: After you erase the HDM data, the HDM management IP address will revert to the default, preventing users from performing other operations on the server through UniSystem. This section erases the BIOS data as an example. |
Figure 9 Selecting the erase options
3. Click OK. Enter the password of the current UniSystem login user in the dialog box shown in Figure 10.
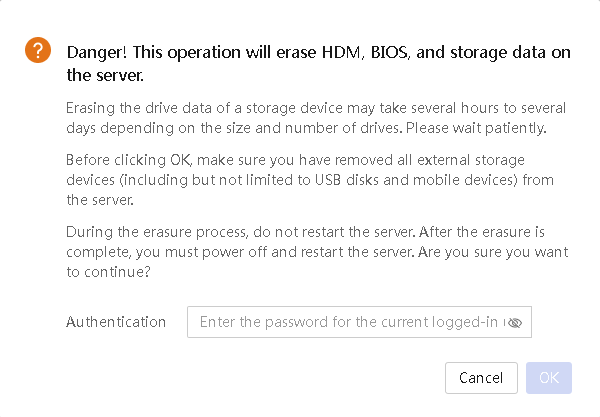
4. Click OK. UniSystem will validate the password. Upon successful validation, UniSystem will begin to erase data.
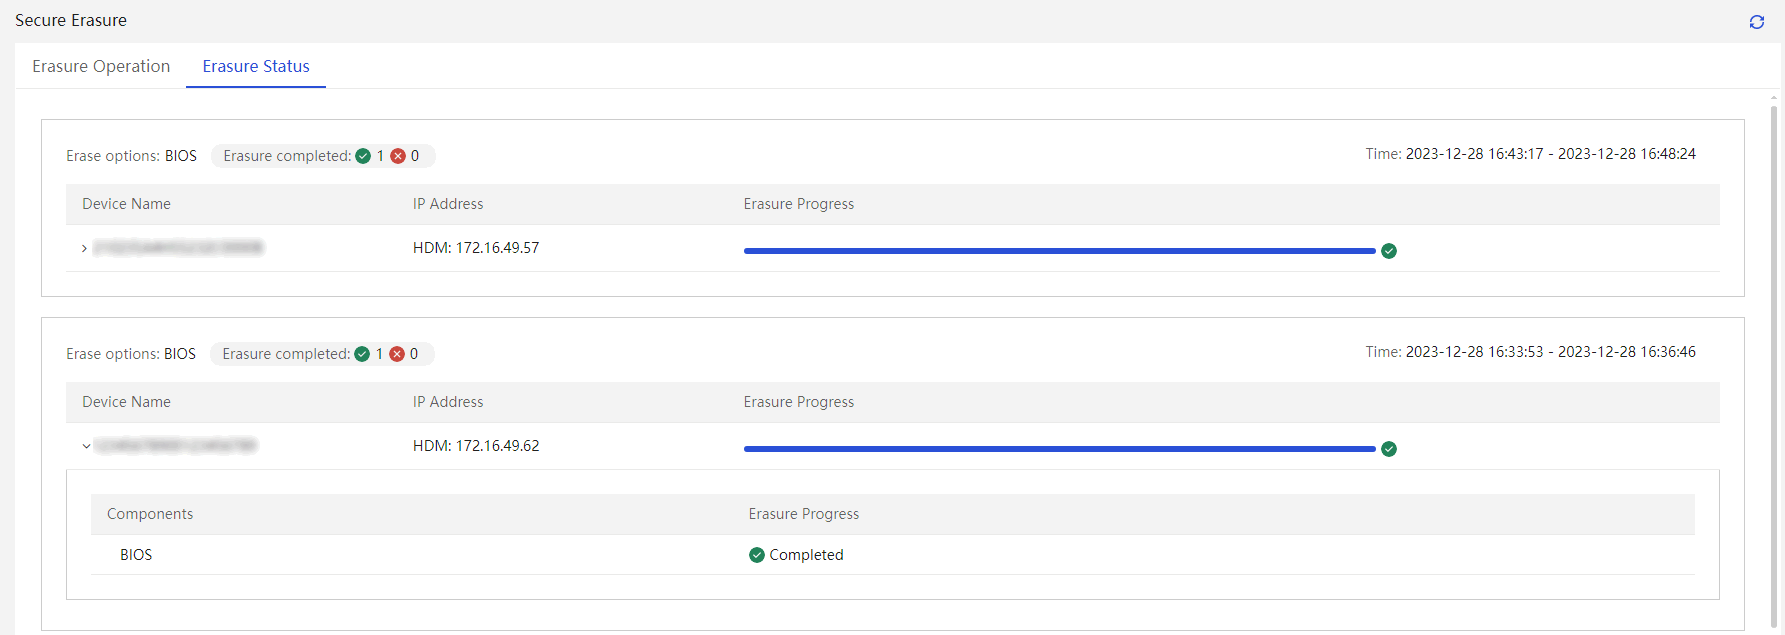
After UniSystem starts data erase, the page will automatically go to the Erase State tab, displaying the current server erase operation's state and progress.
5. The security erase result is shown in Figure 11, and the implementation method is indicated in Table 2.
|
Item |
Impact |
Effective method |
|
HDM |
Restore the HDM to factory settings, clear SDS logs, and clear the data on the Flash card. |
After a successful erase, the HDM will automatically restart. |
|
BIOS |
· Restore the default BIOS configuration. · The Administrator and User passwords on the BIOS side are erased. Users with erased passwords can enter the BIOS Setup directly without entering a password on the server's next restart. · The power-on password on the BIOS side is erased. |
Restart the server |
|
Non-Volatile Memory (NVDIMM) |
Data not in memory mode will be erased, and then the NVDIMM will switch to full memory mode. |
After a successful erase, the server will automatically restart. |
|
Storage controller |
· All logical drives under RSTe and VROC will be deleted. · All logical drives under the following LSI storage controller will be deleted. If the LSI storage controller is in RAID mode before deletion, the JBOD property of RAID mode will change to ON after deletion. ¡ HBA-LSI-9311-8i ¡ HBA-LSI-9500-16i ¡ HBA-LSI-9500-8i ¡ HBA-LSI-9540-8i · All logical drives under the following PMC storage controllers will be deleted: ¡ HBA-H460-B1 ¡ RAID-P4408-Mf-8i-2GB ¡ RAID-P2404-Mf-4i ¡ RAID-P460-B2 ¡ RAID-P460-B4 · The logical drives under the following MARVELL storage controllers will be deleted: ¡ RAID-MARVELL-SANTACRUZ-2i |
After a successful erase, the server will automatically restart. |
|
Drive |
Erase all data on the drives. |
After a successful erase, the server will automatically restart. |
|
SD card |
Erase all data in the SD cards. |
After a successful erase, the server will automatically restart. |
Verifying the configuration
1. Return to the server list page shown in Figure 12, click H5 KVM in the Actions column to access the BIOS Setup Utility of servers A and B respectively.

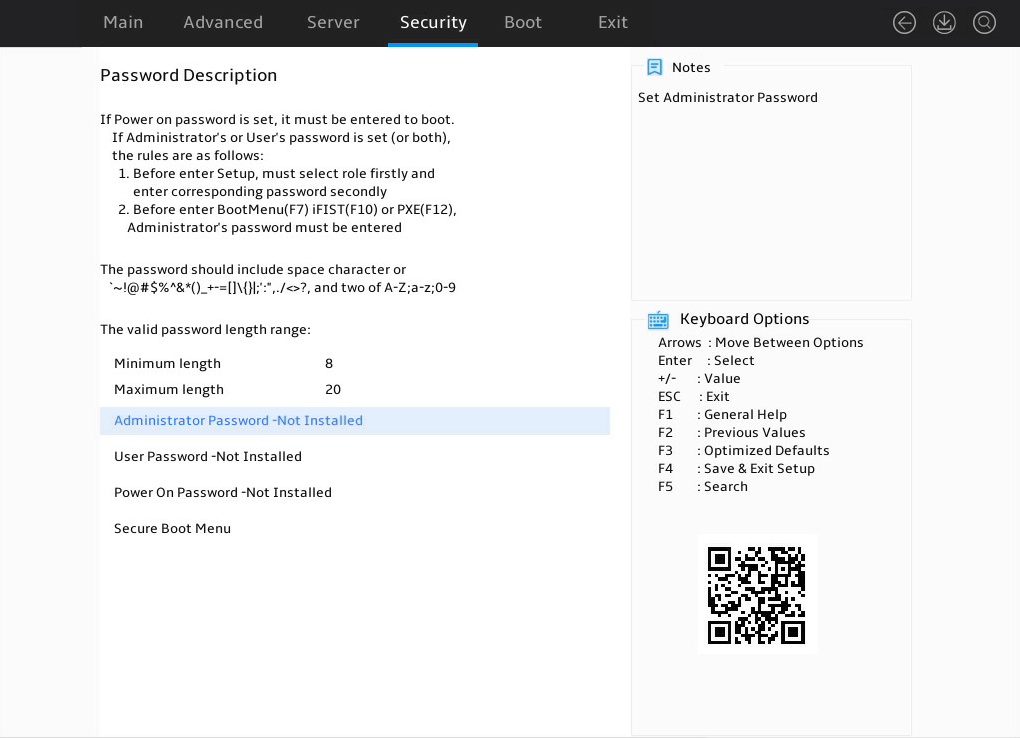
2. Enter server A's BIOS Setup Utility as shown in Figure 13, access the Security screen, and verify that the passwords for both administrator and user accounts have been erased.
Figure 13 BIOS Setup Utility (server A)
3. Enter server B's BIOS Setup Utility as shown in Figure 14, access the Security screen, and verify that the passwords for both administrator and user accounts have been erased.
Figure 14 BIOS Setup Utility (server B)

Related documentation
· H3C UniSystem Server User Guide
· H3C Server Eagle Stream Platform BIOS User Guide
· H3C Server AMD Genoa & Bergamo Processor BIOS User Guide
