- Table of Contents
-
- H3C Servers UniSystem Configuration Examples-6W102
- 01-UniSystem Bulk HDM&BIOS Import Configuration Examples
- 02-H3C UniSystem Cloning Installation Configuration Examples
- 03-UniSystem SMTP Configuration Examples
- 04-H3C UniSystem Cluster Creation Configuration Examples
- 05-H3C UniSystem SNMP Configuration Examples
- 06-H3C UniSystem RAID Configuration Examples
- 07-H3C UniSystem Rack Server Deployment Configuration Examples
- 08-UniSystem Bulk Component Update Configuration Examples
- 09-H3C UniSystem Server Inspection Configuration Example
- 10-H3C Unisystem REPO Acquisition and Use Configuration Examples
- 11-H3C UniSystem LDAP Management Configuration Example
- 12-H3C UniSystem Secure Erase Configuration Examples
- 13-H3C UniSystem Intelligent Version Management Configuration Examples
- 14-H3C UniSystem Bulk IP Settings Configuration Examples
- Related Documents
-
| Title | Size | Download |
|---|---|---|
| 11-H3C UniSystem LDAP Management Configuration Example | 242.94 KB |
H3C UniSystem
LDAP Management Configuration Example
Copyright © 2025 New H3C Technologies Co., Ltd. All rights reserved.
No part of this manual may be reproduced or transmitted in any form or by any means without prior written consent of Hangzhou H3C Technologies Co., Ltd.
Except for the trademarks of New H3C Technologies Co., Ltd., any trademarks that may be mentioned in this document are the property of their respective owners.
The information in this document is subject to change without notice.
Introduction
|
|
NOTE: Starting from version 2.59, FIST software has been renamed as UniSystem. |
UniSystem supports access of LDAP users, supporting login with user domain, group domain, and the username and password of users belonging to the user domain.
Prerequisites
Procedures and information in the document might be slightly different depending on the software or hardware version of the device.
The configuration examples were created and verified in a lab environment, and all the devices were started with the factory default configuration. When you are working on a live network, make sure you understand the potential impact of every command on your network.
The following information is provided based on the assumption that you have basic knowledge of UniSystem LDAP management.
Example: Configuring UniSystem LDAP management
Network configuration
As shown in Figure 1, deploy UniSystem as both the UniSystem server and client on a PC. Connect the Ethernet port of the PC and the three servers to a switch in the same LAN, and configure IP addresses to ensure communication between UniSystem and the servers. Configure LDAP users to log in to UniSystem to manage the servers.
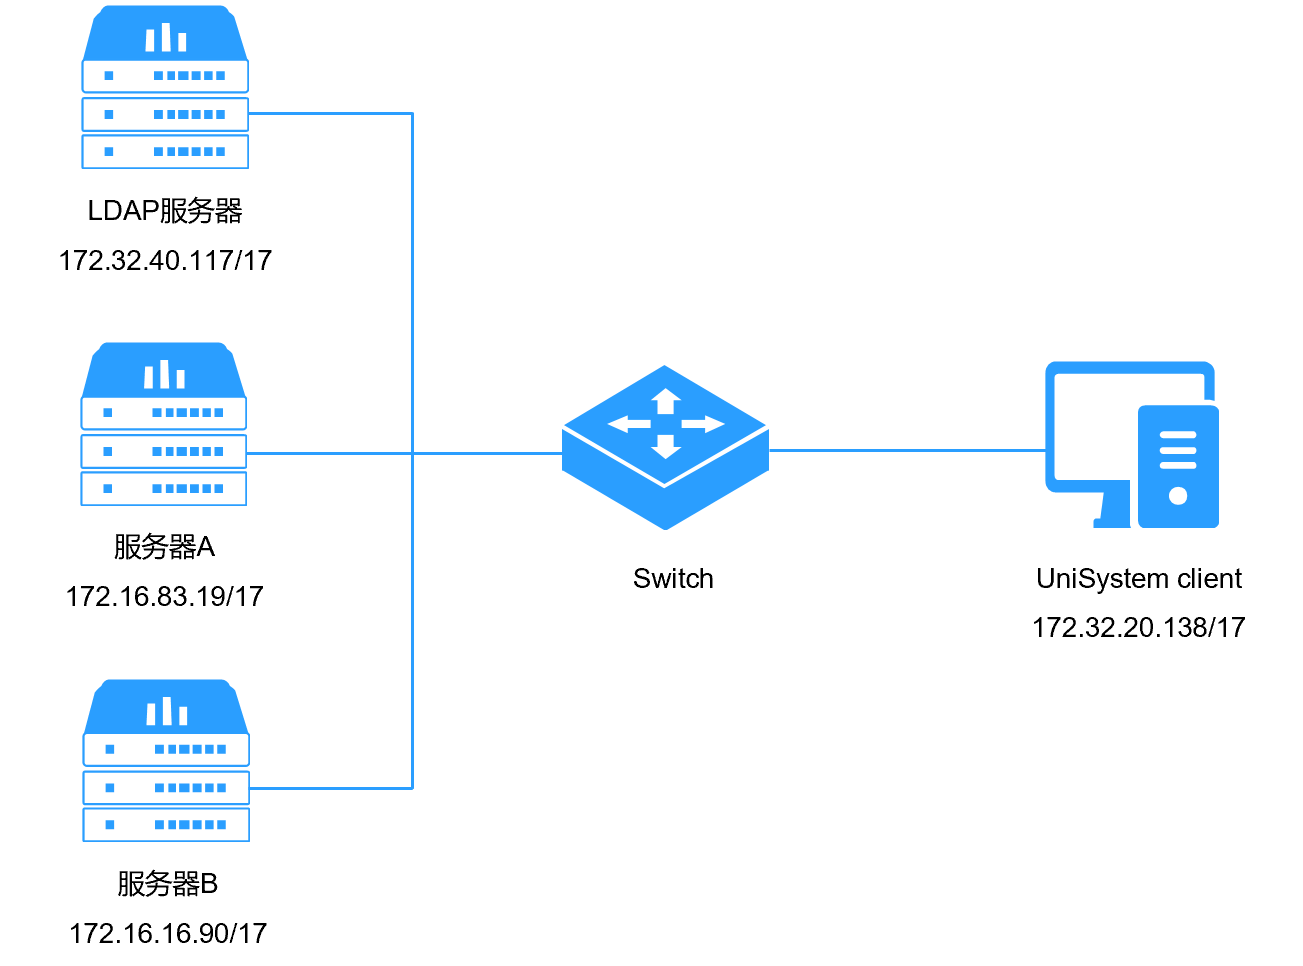
Table 1 Network configuration information
|
Device role |
Device information |
Description |
|
UniSystem |
UniSystem IP address |
172.32.20.138 |
|
Username of the default UniSystem administrator |
admin |
|
|
Password of the default UniSystem administrator |
Password@_ |
|
|
Server A |
Server model |
H3C UniServer R4900 G6 |
|
HDM IP address |
172.16.83.19 |
|
|
Server B |
Server model |
H3C UniServer R5300 G3 |
|
HDM IP address |
172.16.16.90 |
|
|
LDAP server |
IP address |
172.32.40.117 |
Analysis
1. Add servers to UniSystem.
2. Add and configure the LDAP server.
3. Add an LDAP user group.
4. Use LDAP user accounts to log in to UniSystem.
Software versions used
This configuration example was created and verified on UniSystem-2.56P03.
Procedures
Logging in to UniSystem
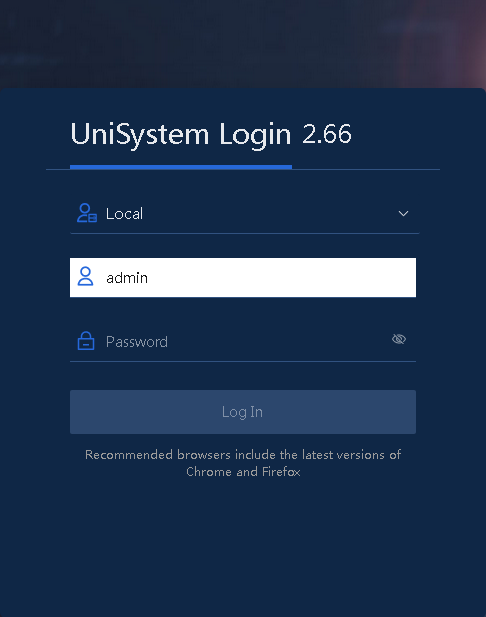
1. Open a browser on the UniSystem client and enter the address of the UniSystem server.
2. As shown in Figure 2, enter the default username admin and password Password@_ on the login interface.
3. Click Log In to access the UniSystem homepage.
Adding the LDAP server
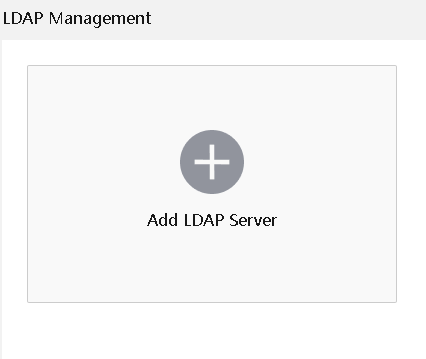
1. In the navigation pane, select Menu > System > LDAP Management, and then click Add LDAP Server.
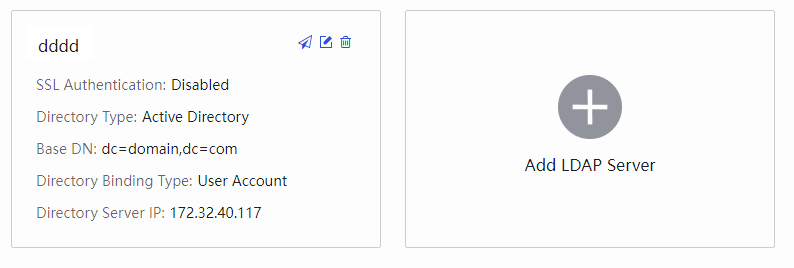
2. Enter LDAP server information in the dialog box that opens.
Figure 4 LDAP server information

Parameters:
¡ SSL Authentication: Select whether to enable encrypted connection. For security purposes, enable SSL authentication as a best practice.
¡ Directory Name: Specify the name of the LDAP server in UniSystem. You cannot set the directory name to local (case insensitive).
¡ Directory Server IP: IPv4 address of the LDAP server.
¡ Directory Type: Directory type of the LDAP server. Currently, only Active Directory is supported.
¡ Base DN: LDAP server domain name, the unique identifier of this server. For example, if the domain name is domain.com, enter dc=domain,dc=com as the base DN. The string is case-insensitive.
¡ Directory Binding Type: The supported directory binding types include the following:
- Service Account: If this type is selected, UniSystem will record the entered username and password. Manual input of the username and password is no longer required when you test the connectivity, modify LDAP server information, or configure LDAP user groups later.
- User Account: If this type is selected, the username and password entered are used only for this configuration. When you test the connectivity, modify LDAP server information, or configure LDAP user groups later, you must manually enter the username and password again.
¡ Port: Communication port for LDAP service. If SSL authentication is enabled, the default port is 636. If SSL authentication is not enabled, the default port is 389. At the adding of a global catalog server, if SSL authentication is enabled, the default port is 3269. If SSL authentication is disabled, the default supported port is non-secure port 3268.
¡ Username: Username created on the LDAP server. Login through a system earlier than Windows 2000 is not supported.
¡ Password: Password corresponding to the username.
3. Click OK.
Figure 5 Adding the LDAP server
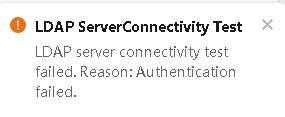
Testing the connectivity
1. On the LDAP management page, click the ![]() icon, and then enter the username and password created on the LDAP
server.
icon, and then enter the username and password created on the LDAP
server.
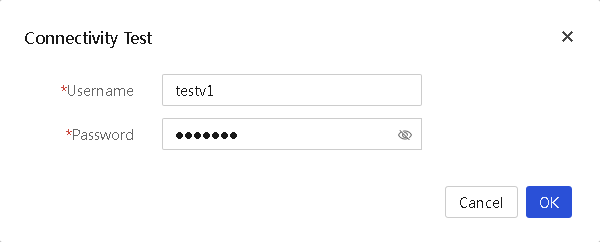
2. Click OK to perform the test. The bottom right corner will display a prompt indicating a successful connection to the LDAP server, as shown in Figure 7.
Managing LDAP user groups
1. In the navigation pane, select Menu > System > User List, and click the LDAP User Groups tab.
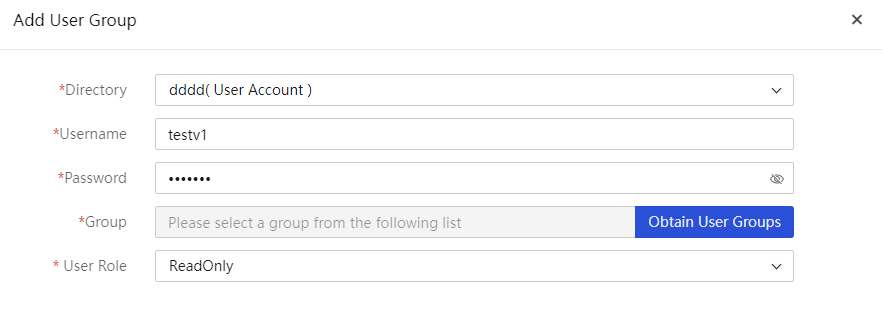
2. Select LDAP1 (user account) as the directory, and enter the username and password created on the LDAP server. Select a group and set the user group permissions.
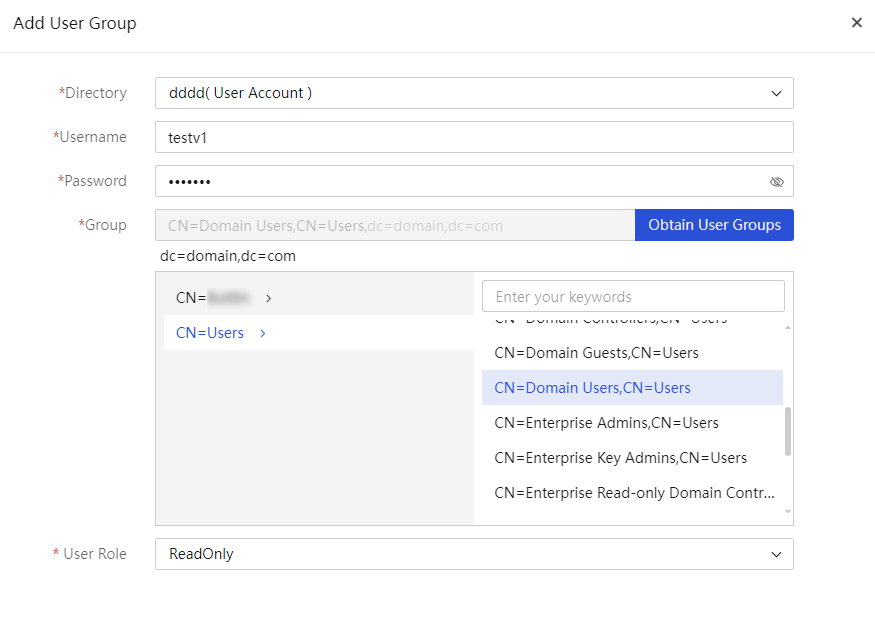
Parameters:
¡ Directory: Select the directory name corresponding to the LDAP server.
¡ Group: Select the directory path for the user group under the LDAP server. The selected path cannot contain backslashes (\), commas (,), or equal signs (=).
¡ Role: Specify the permissions for all users in the user group to operate UniSystem.
¡ Username: Username created on the LDAP server.
¡ Password: Password corresponding to the username.
3. Click OK.

Verifying the configuration
1. Log out and then re-log in to UniSystem, select LDAP1 on the UniSystem login page, and enter the LDAP username and password.
Figure 11 Using LDAP to log in to UniSystem

2. Click Log In to login to UniSystem. In the left navigation pane, select Menu > System > Online Users, and view the username and role of the current user. Verify that the username and role are consistent with the LDAP user created, as shown in Figure 12.

Related documentation
H3C Servers UniSystem User Guide
