- Table of Contents
-
- H3C Servers UniSystem Configuration Examples-6W102
- 01-UniSystem Bulk HDM&BIOS Import Configuration Examples
- 02-H3C UniSystem Cloning Installation Configuration Examples
- 03-UniSystem SMTP Configuration Examples
- 04-H3C UniSystem Cluster Creation Configuration Examples
- 05-H3C UniSystem SNMP Configuration Examples
- 06-H3C UniSystem RAID Configuration Examples
- 07-H3C UniSystem Rack Server Deployment Configuration Examples
- 08-UniSystem Bulk Component Update Configuration Examples
- 09-H3C UniSystem Server Inspection Configuration Example
- 10-H3C Unisystem REPO Acquisition and Use Configuration Examples
- 11-H3C UniSystem LDAP Management Configuration Example
- 12-H3C UniSystem Secure Erase Configuration Examples
- 13-H3C UniSystem Intelligent Version Management Configuration Examples
- 14-H3C UniSystem Bulk IP Settings Configuration Examples
- Related Documents
-
| Title | Size | Download |
|---|---|---|
| 03-UniSystem SMTP Configuration Examples | 713.48 KB |
H3C UniSystem
SMTP Configuration Examples
Copyright © 2025 New H3C Technologies Co., Ltd. All rights reserved.
No part of this manual may be reproduced or transmitted in any form or by any means without prior written consent of New H3C Technologies Co., Ltd.
Except for the trademarks of New H3C Technologies Co., Ltd., any trademarks that may be mentioned in this document are the property of their respective owners.
The information in this document is subject to change without notice.
Introduction
|
|
NOTE: Starting from version 2.59, FIST software has been renamed as UniSystem. |
The following information describes how to use software UniSystem to configure Simple Mail Transfer Protocol (SMTP) to send event log information of a server to designated users through "email alerts", helping users monitor the running status and health status of the server.
Prerequisites
Procedures and information in the examples might be slightly different depending on the software or hardware version of the products.
The configuration was created and verified in a lab environment, and all the servers and software were started with the factory default configuration. If the device has been configured, ensure that the existing configuration does not conflict with the configuration in the following example.
The following information is provided based on the assumption that you have basic knowledge of the UniSystem and SMTP alarm forwarding features.
Configuration example
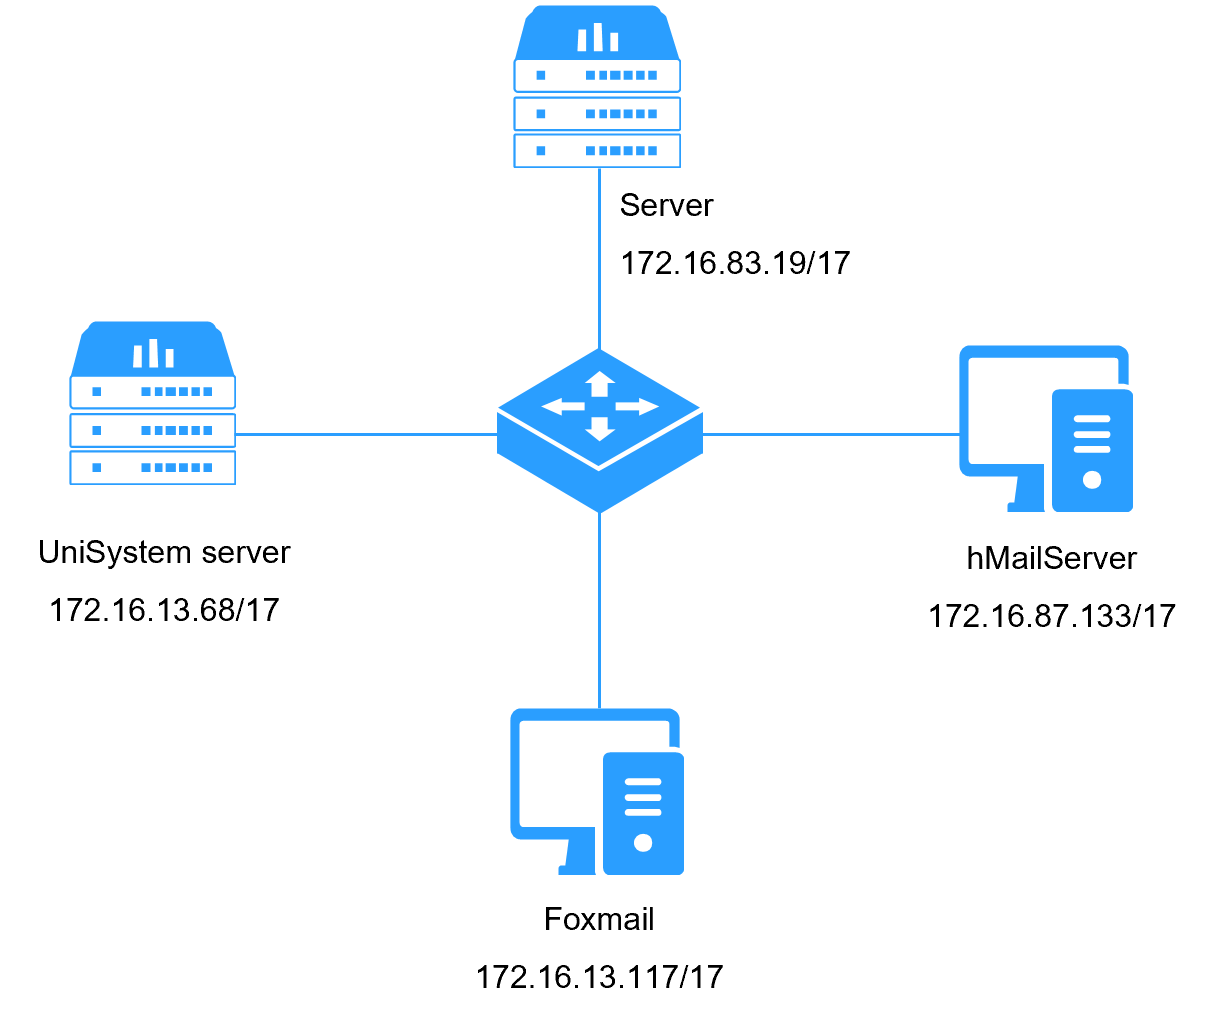
Network requirement
As shown in Figure 1, the PC running the UniSystem server is connected to the server through a switch. The PC running UniSystem can normally access UniSystem and the HDM of the server. The three PCs running UniSystem, hMailServer, and Foxmail are connected through a switch and the networks are reachable. Now allow UniSystem to forward the alarm information collected from the server to a Foxmail mailbox by email to monitor the health status of the server.
· UniSystem management IP addresses: 172.16.13.68/17
· HDM management IP addresses: 172.16.83.19/17
· IP address of the PC running Foxmail (mail client): 172.16.13.117/17
· IP address of the PC running hMailServer (mail server): 172.16.87.113/17
Analysis
1. Set up the SMTP server, which includes installing and configuring the hMailServer. Create a mailbox in a local area network.
2. Download and run Foxmail and log in to the mailbox.
3. Configure SMTP through UniSystem so that the mailbox can receive alarm emails from the UniSystem device and UniSystem can forward the server's event logs to the Foxmail mailbox.
Software versions used
This example was created and verified on the following software versions:
· UniSystem: 2.33
· HDM: 2.54
· hMailServer: 5.6.7-Build 2425
· Foxmail: 7.2
Restrictions and guidelines
· When the listening feature of UniSystem is enabled, UniSystem can receive the event logs generated by the server.
· If you have set the alarm level in the HDM, the UniSystem SMTP filters the alarms based on the set alarm level (the level of alarms forwarded by UniSystem is higher than or equal to the level set in the HDM).
Procedures
Configuring hMailServer
1. Download and install the hMailServer (address: https://www.hmailserver.com/download). After the download is completed, double-click the installer. In the installation process, you need to set a password to connect to the hMailServer.
2. After the hMailServer is installed, configure the hMailServer. As shown in Figure 2, run and open the hMailServer.
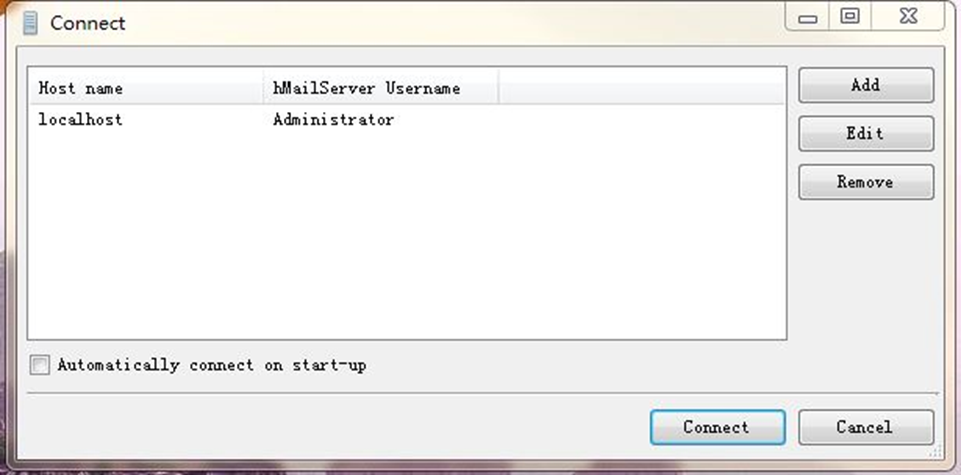
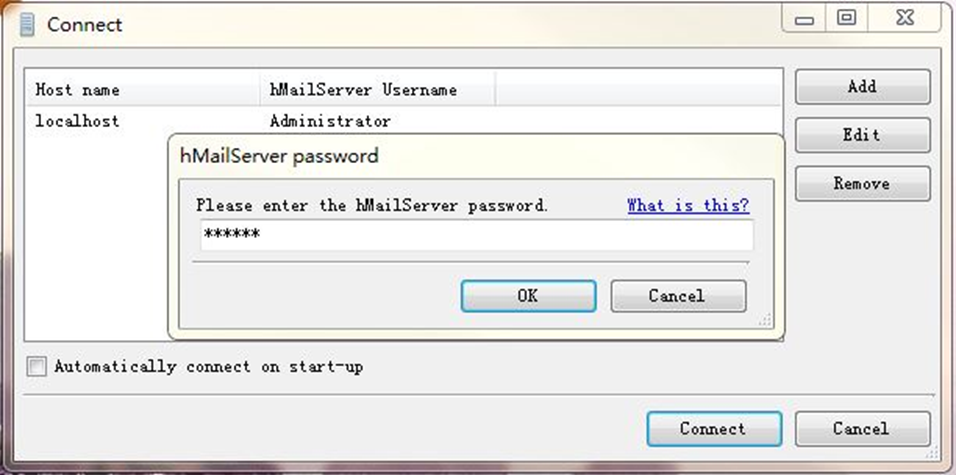
3. Click Connect. In the dialog box that opens, enter the hMailServer password that you set during hMailServer installation, as shown in Figure 3.
Figure 3 Logging in to hMailServer
4. Click OK to enter hMailServer, as shown in Figure 4.
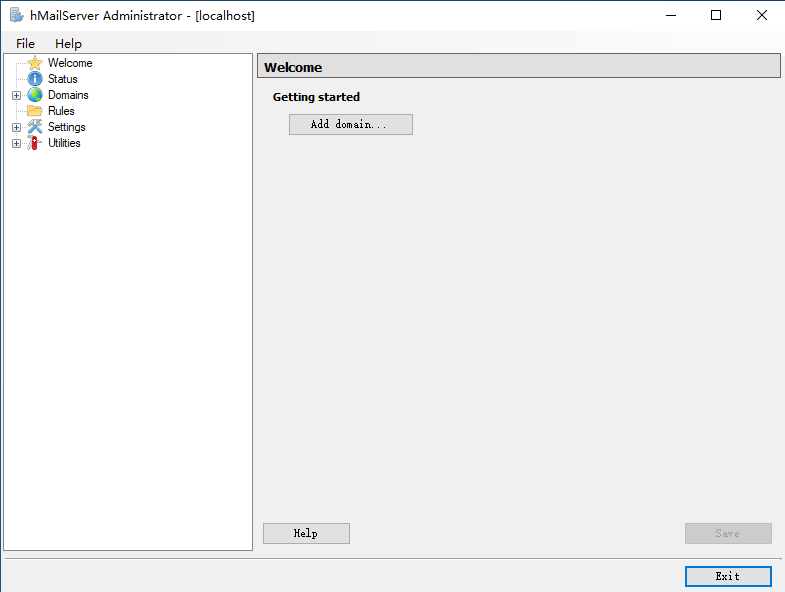
5. Create a domain: Click Add domain... to navigate to the following page. Enter test.com (modifiable). Click Save to add a domain, as shown in Figure 5.
Figure 5 Adding a domain on hMailServer

6. After a domain is added, click Domains > test.com > Accounts to navigate to the mailbox creation page, as shown in Figure 6.
Figure 6 Navigating to the page for creating a mailbox
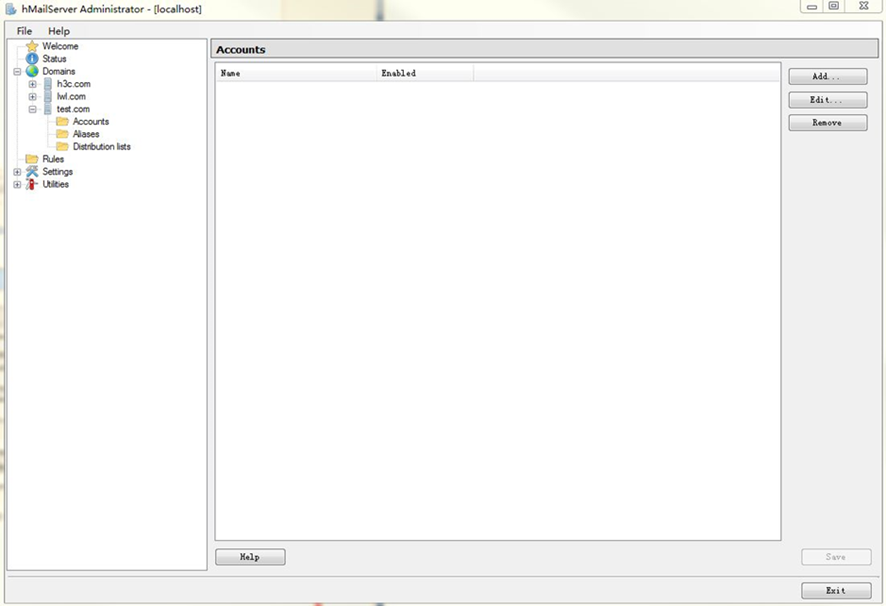
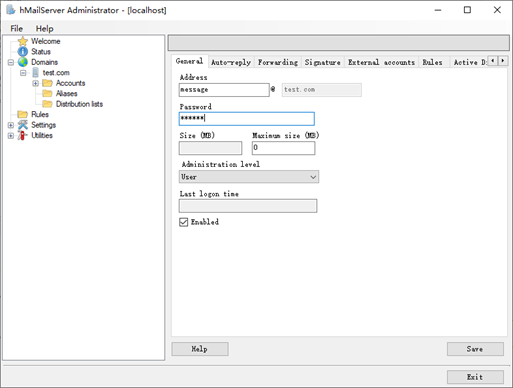
7. Click Add... to navigate to the mailbox creation page. On the General tab, configure the parameters below, as shown in Figure 7. Click Save to create the mailbox [email protected].
¡ Address: Mailbox address, taking message as an example.
¡ Password: Mailbox password. Enter a custom password.
¡ Maximum size (MB): Use the default value 0.
¡ Administration level: Select User.
¡ Enabled: Select this option.
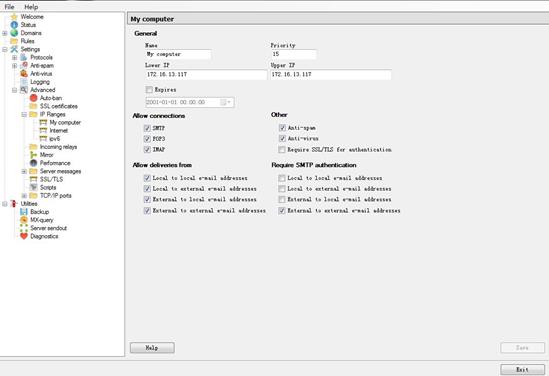
8. Click Setting > Advanced > IP Ranges > My computer and set the network parameters, as shown in Figure 8. Then click Save.
¡ Name: Use the default value My computer.
¡ Priority: Use the default value 15.
¡ Set the IP ranges for My computer. The SMTP server runs locally, so here enter the IP address 172.16.13.117 of the local PC.
Figure 8 Setting the IP address range of My computer
9. Click Setting > Advanced > IP Ranges > Internet to set the network of the Internet, as shown in Figure 9. Then click Save.
¡ Name: Use the default value Internet.
¡ Priority: Use the default value 10.
¡ Set the IP ranges of the network that the SMTP server can access to its maximum to ensure that the IP address of the local PC can communicate with the server side of the SMTP server normally. That is, set Lower IP to 0.0.0.0 and Upper IP to 255.255.255.255.
Figure 9 Setting the IP address range of Internet

Configuring a mailbox for receiving alarms
Downloading Foxmail
Download Foxmail (or other mailbox software) and install it according to the default configuration.
Creating a Foxmail account
1. Double-click Foxmail, and click Create a New Account.
2. In the dialog box for creating a new account, click Other Mailboxes. A dialog box for entering mailbox account and password opens.
3. In the dialog box for entering mailbox account and password, click Manually Set in the lower left corner to set the mailbox parameters.
Logging in to the mailbox
Enter the mailbox information created by the hMailServer, and then click Create to log in to the mailbox.
· Server type: POP3
· Email account: [email protected] (email account created by the hMailServer)
· Password: password of the mailbox created by hMailServer
· POP server: 172.16.13.117 (IP address of the environment where the hMailServer runs, which is the local IP address), port number: 110 (default port).
· SMTP server: 172.16.13.117 (IP address of the environment where the hMailServer runs, which is the local IP address), port number: 25 (default port).
Configuring UniSystem SMTP
Logging in to UniSystem
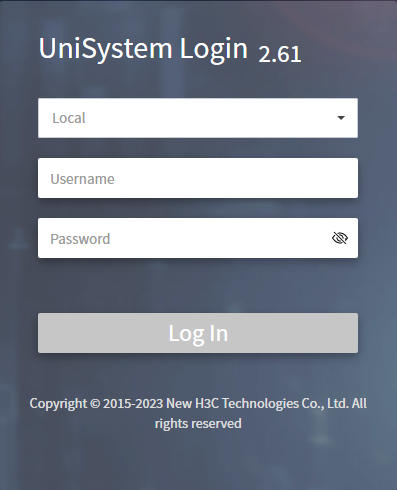
Open a browser on a client PC, and then enter the UniSystem management IP address 172.16.20.237 to navigate to the UniSystem login page, as shown in Figure 10. On the UniSystem login page, enter the default username admin and the default password Password@_, and click Log In.
Figure 10 Logging in to UniSystem
Setting alarm forwarding
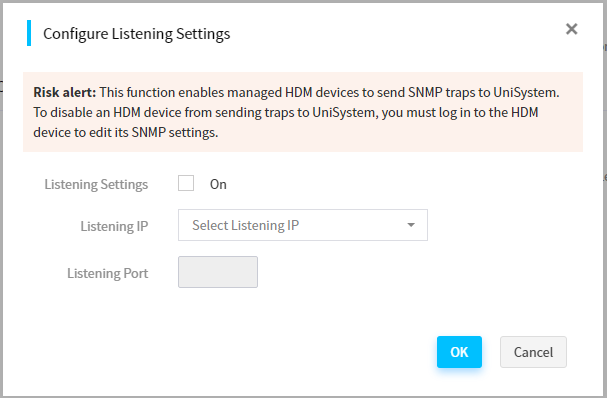
1. Click Menu > Monitoring > Alarm Forwarding, and click Configure under Listening Settings to configure the listening feature, as shown in Figure 11.

2. As shown in Figure 12, in the Configure Listening Settings dialog box, set the relevant information.
¡ Listening Settings: Enable the option.
¡ Listening IP: IP address of UniSystem.
¡ Listening Port: 80 (an unoccupied port in the environment where UniSystem runs, ranging from 1 to 65535). If an occupied port is used, UniSystem will report an error.
Figure 12 Enabling the listening function
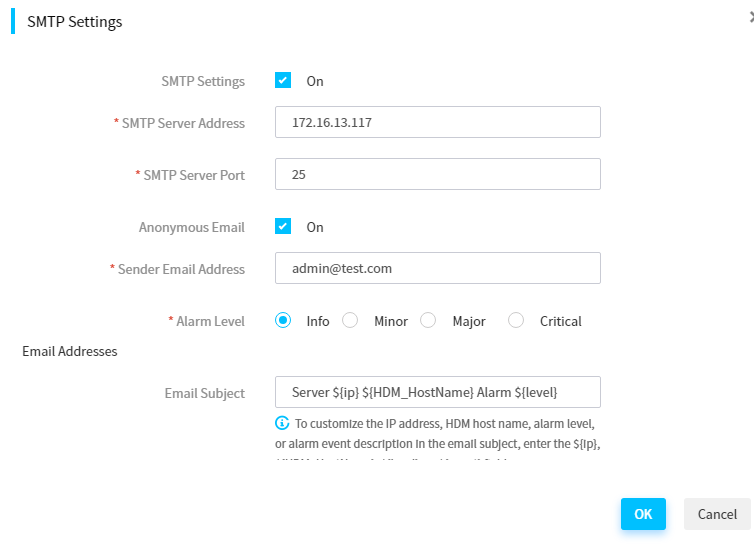
3. Click Menu > Monitoring > Alarm Forwarding, and click Configure under SMTP Settings to configure the listening feature. Set the relevant information in the dialog box for SMTP Settings, as shown in Figure 14.
¡ SMTP Settings: Enable the option.
¡ SMTP Server Address: 172.16.13.117 (IP address of the environment where the hMailServer runs, which is the local IP address).
¡ SMTP Server Port: 25 (default port).
¡ Anonymous Email: Enable the option. If you don't enable this option, you need to enter the username, password, and encryption protocol of the sender (the username and password are the mailbox and password of the sender), as shown in Figure 13.
Figure 13 Disabling anonymous email

¡ Alarm Level: Select Info.
¡ Enter the mailbox you created: [email protected].
Figure 14 Configuring SMTP through UniSystem
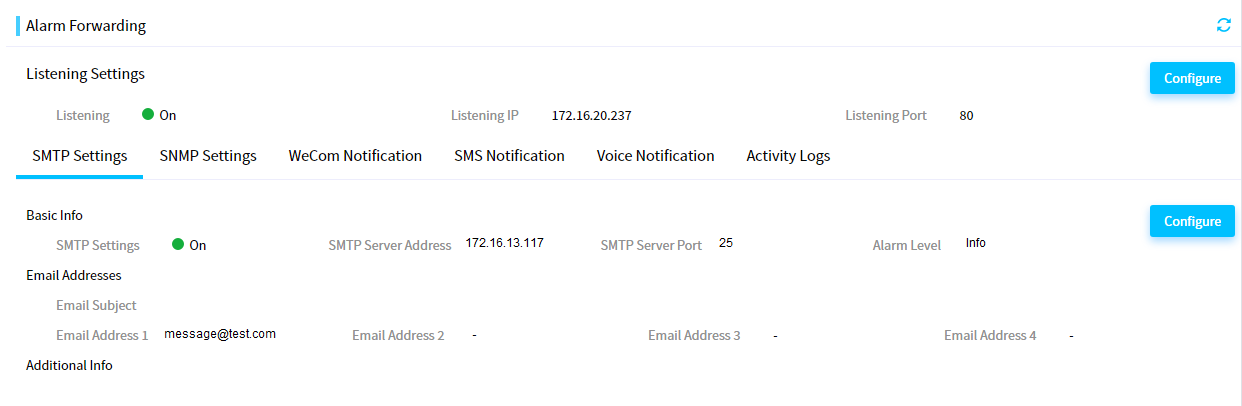
4. After you configure SMTP, the page shown in Figure 15 is displayed.
Figure 15 Page after configuration is completed
Verifying the configuration
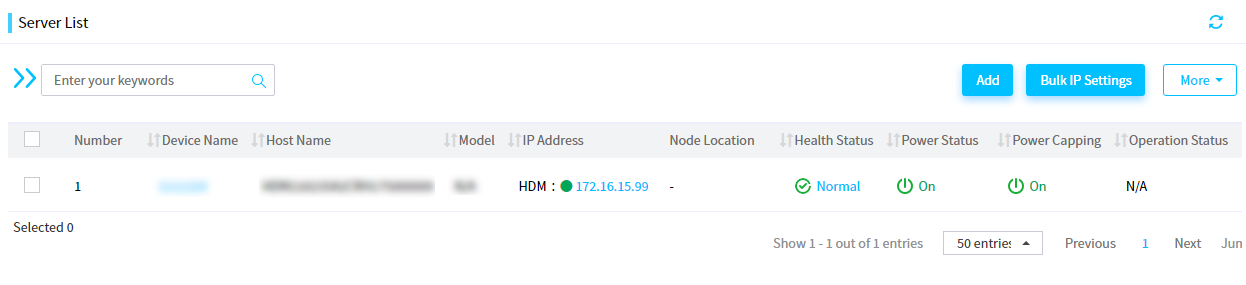
1. Log in to UniSystem. Click Devices > Servers > Server List. Click Device Name to navigate to the server details page, as shown in Figure 16.
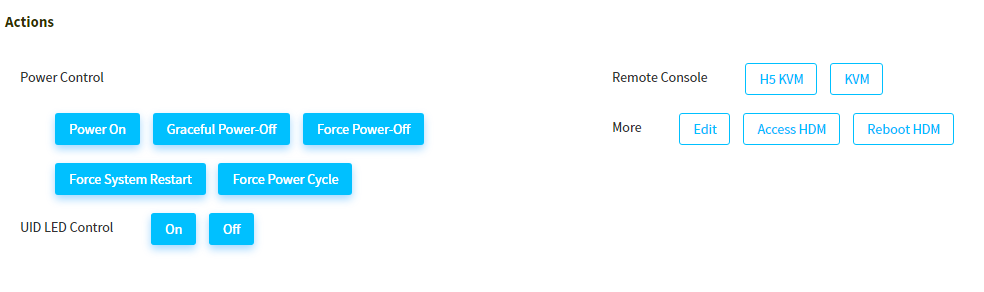
2. On the server details page, click Force System Restart to restart the device, as shown in Figure 17.
Figure 17 Restarting the device
3. After the device is restarted, it generates event logs. Log in to the HDM page and view the event logs.
4. When you check the mailbox [email protected], you will find an alarm email sent from UniSystem.
Related documentation
H3C Servers UniSystem User Guide
