- Table of Contents
-
- 03-Layer 2 Configuration Guide
- 00-Preface
- 01-Ethernet Interface Configuration
- 02-Loopback and Null Interface Configuration
- 03-VLAN Configuration
- 04-MAC Address Table Configuration
- 05-Ethernet Link Aggregation Configuration
- 06-Spanning Tree Configuration
- 07-Layer 2 Forwarding Configuration
- 08-PPPoE Configuration
- 09-FPGA Fast Forwarding Configuration
- 10-QinQ Termination Configuration
- Related Documents
-
| Title | Size | Download |
|---|---|---|
| 01-Ethernet Interface Configuration | 123.56 KB |
Configuring Ethernet interfaces
Configuring basic settings of an Ethernet interface or subinterface
Shutting down an Ethernet interface or subinterface
Configuring flow control on an Ethernet interface
Configuring loopback testing on an Ethernet interface
Configuring the link mode of an Ethernet interface
Configuring jumbo frame support
Setting a statistics polling interval
Configuring a Layer 2 Ethernet interface
Enabling loop detection on an Ethernet interface
Configuring a Layer 3 Ethernet interface or subinterface
Setting the MTU for an Ethernet interface or subinterface
Configuring an Ethernet interface to operate in promiscuous mode
Setting the MAC address of an Ethernet interface or subinterface
Displaying and maintaining an Ethernet interface
Configuring Ethernet interfaces
All configuration tasks in this chapter are independent and optional. You can perform these configuration tasks in any order.
Overview
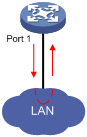
Ethernet is the most widespread wired LAN technology due to its flexibility, simplicity, and easy implementation. The AC side of your device supports Layer 2 Ethernet interfaces, which are physical Ethernet interfaces operating at the data link layer (Layer 2) to forward traffic within a subnet between hosts. Your device supports the following types of Ethernet interfaces:
· Layer 2 Ethernet interfaces—Physical Ethernet interfaces operating at the data link layer (Layer 2) to forward traffic within a subnet between hosts.
· Layer 3 Ethernet interfaces—Physical Ethernet interfaces operating at the network layer (Layer 3) to forward traffic between different subnets. You can assign an IP address to a Layer 3 Ethernet interface.
· Layer 3 Ethernet subinterfaces—Logical interfaces operating at the network layer. You can assign an IP address to a Layer 3 Ethernet subinterface. By creating subinterfaces on a Layer 3 Ethernet interface, you enable the interface to carry packets for multiple VLANs.
Making general configurations
Configuring a combo interface
The device supports only the single combo interfaces.
Support for the combo interfaces depends on the device model. For more information, see About the H3C Access Controllers Configuration Guides.
A combo interface is a logical interface that comprises one optical (fiber) port and one electrical (copper) port. The two ports share one forwarding interface and cannot work simultaneously. When you enable one port, the other is automatically disabled.
The fiber and copper combo ports share one interface view, in which you can activate the fiber or copper combo port, and configure other port attributes such as the interface rate and duplex mode.
Configuring basic settings of an Ethernet interface or subinterface
Configuring an Ethernet interface
You can configure an Ethernet interface to operate in one of these duplex modes:
· Full-duplex mode (full)—Interfaces that operate in this mode can send and receive packets simultaneously.
· Half-duplex mode (half)—Interfaces that operate in this mode cannot send and receive packets simultaneously.
· Auto-negotiation mode (auto)—Interfaces that operate in this mode negotiate a duplex mode with their peers.
You can set the speed of an Ethernet interface or enable it to automatically negotiate a speed with its peer.
To configure an Ethernet interface:
|
Step |
Command |
Remarks |
|
1. Enter system view. |
system-view |
N/A |
|
2. Enter Ethernet interface view. |
interface interface-type interface-number |
N/A |
|
3. Set the interface description. |
description text |
Optional. By default, the description of an interface is in the format of interface-name Interface. For example, Ethernet1/1 Interface. |
|
4. Set the duplex mode of the interface. |
duplex { auto | full | half } |
Optional. By default, the duplex mode is full for 10-GE interfaces, and is auto for other Ethernet interfaces. Fiber ports do not support the half keyword. Support for the keywords of the command depends on the interface card model. For more information, see About the H3C Access Controllers Command References. |
|
5. Set the port speed. |
speed { 10 | 100 | 1000 | 10000 | auto } |
Optional. Support for the command and keywords depends on the device model. For more information, see About the H3C Access Controllers Command References. |
|
6. Restore the default settings for the interface. |
default |
Optional. |
Configuring an Ethernet subinterface
|
Step |
Command |
Remarks |
|
1. Enter system view. |
system-view |
N/A |
|
2. Create an Ethernet subinterface. |
interface interface-type interface-number.subnumber |
This command also leads you to Ethernet subinterface view. |
|
3. Set the interface description. |
description text |
Optional. By default, the description of an Ethernet subinterface is in the format of interface-name Interface. For example, Ethernet1/1.1 Interface. Support for this command depends on the device model. For more information, see About the H3C Access Controllers Command References. |
|
4. Restore the default settings for the subinterface. |
default |
Optional. Support for this command depends on the device model. For more information, see About the H3C Access Controllers Command References. |
You can configure IP- or IPX-related settings on an Ethernet subinterface. For more information, see Layer 3 Configuration Guide.
For the local and remote Ethernet subinterfaces to transmit traffic correctly, assign them to the same VLAN.
Shutting down an Ethernet interface or subinterface
|
|
CAUTION: Use this command with caution. After you manually shut down an Ethernet interface, the Ethernet interface cannot forward packets even if it is physically connected. |
Support for this feature depends on the device model. For more information, see About the H3C Access Controllers Configuration Guides.
You might need to shut down and then bring up an Ethernet interface to activate some configuration changes, for example, the speed or duplex mode changes.
To shut down an Ethernet interface:
|
Step |
Command |
Remarks |
|
1. Enter system view. |
system-view |
N/A |
|
2. Enter Ethernet interface view or port group view. |
· Enter Ethernet interface view: · Enter port group view: · Enter Ethernet subinterface view: |
To shut down an Ethernet interface, enter Ethernet interface view. To shut down all Ethernet interfaces in a port group, enter port group view. To shut down an Ethernet subinterface, enter Ethernet subinterface view. |
|
3. Shut down the Ethernet interface. |
shutdown |
By default, Ethernet interfaces are up. |
Configuring flow control on an Ethernet interface
Support for this feature depends on the device model. For more information, see About the H3C Access Controllers Configuration Guides.
To avoid packet drops on a link, you can enable flow control at both ends of the link. When traffic congestion occurs at the receiving end, the receiving end sends a flow control (Pause) frame to ask the sending end to suspend sending packets.
To enable flow control on an Ethernet interface:
|
Step |
Command |
Remarks |
|
1. Enter system view. |
system-view |
N/A |
|
2. Enter Ethernet interface view. |
interface interface-type interface-number |
N/A |
|
3. Enable flow control. |
flow-control |
By default, flow control is disabled on an Ethernet interface. |
Configuring loopback testing on an Ethernet interface
Management Ethernet interfaces do not support this feature.
If an Ethernet interface does not work normally, you can enable loopback testing on it to identify the problem. An Ethernet interface in a loopback test does not forward data traffic.
Loopback testing has the following types:
· Internal loopback testing—Tests all on-chip functions related to Ethernet interfaces.
· External loopback testing—Tests hardware of Ethernet interfaces. To perform external loopback testing on an Ethernet interface, connect a loopback plug to the Ethernet interface. The device sends test packets out of the interface, which are expected to loop over the plug and back to the interface. If the interface fails to receive any test packets, the hardware of the interface is faulty.
Configuration restrictions and guidelines
· On an interface that is physically down, you can only perform internal loopback testing. On an interface administratively shut down, you cannot perform internal or external loopback testing.
· The speed, duplex, and shutdown commands are not available during loopback testing.
· During loopback testing, the Ethernet interface operates in full duplex mode. When you disable loopback testing, the port returns to its duplex setting.
Configuration procedure
To enable loopback testing on an Ethernet interface:
|
Step |
Command |
Remarks |
|
1. Enter system view. |
system-view |
N/A |
|
2. Enter Ethernet interface view. |
interface interface-type interface-number |
N/A |
|
3. Enable loopback testing. |
loopback { external | internal } |
By default, loopback testing is disabled. |
Configuring the link mode of an Ethernet interface
Support for this feature depends on your device model. For more information, see About the H3C Access Controllers Configuration Guides.
Depending on the hardware structure of interface cards, for a device, some interfaces can operate only as Layer 2 Ethernet interfaces (in bridge mode), some can operate only as Layer 3 Ethernet interfaces (in route mode), but others can operate either as Layer 2 or Layer 3 Ethernet interfaces (you can set the link mode to bridge or route).
You can configure the link mode in system view or in Ethernet interface view, which produces the same result. The link mode configuration in system view applies to multiple interfaces, and the link mode configuration in interface view applies only to the current interface.
Configuration restrictions and guidelines
· After you change the link mode of an Ethernet interface, all settings of the Ethernet interface are restored to their defaults under the new link mode.
· The link mode configuration for an Ethernet interface in system view and in interface view supersedes each other.
Configuration procedure
To change the link mode of the specified Ethernet interfaces in system view:
|
Step |
Command |
Remarks |
|
1. Enter system view. |
system-view |
N/A |
|
2. Change the link mode of the specified Ethernet interfaces. |
port link-mode { bridge | route } interface-list |
The default settings are as follows: · For WAC360 or WAC361 access controllers, interfaces GigabitEthernet 1/0/1 through GigabitEthernet 1/0/4 operate in bridge mode, and interface GigabitEthernet 1/0/5 operates in route mode. · For WX2540E access controllers, interfaces GigabitEthernet 1/0/1 through GigabitEthernet 1/0/4 operate in bridge mode, and interfaces GigabitEthernet 1/0/5 through GigabitEthernet 1/0/6 operate in route mode. |
To change the link mode of an Ethernet interface:
|
Step |
Command |
Remarks |
|
1. Enter system view. |
system-view |
N/A |
|
2. Enter Ethernet interface view. |
interface interface-type interface-number |
N/A |
|
3. Change the link mode of the Ethernet interface. |
port link-mode { bridge | route } |
The default settings are as follows: · For WAC360 or WAC361 access controllers, interfaces GigabitEthernet 1/0/1 through GigabitEthernet 1/0/4 operate in bridge mode, and interface GigabitEthernet 1/0/5 operates in route mode. · For WX2540E access controllers, interfaces GigabitEthernet 1/0/1 through GigabitEthernet 1/0/4 operate in bridge mode, and interfaces GigabitEthernet 1/0/5 through GigabitEthernet 1/0/6 operate in route mode. |
Configuring jumbo frame support
An Ethernet interface might receive some frames larger than the standard Ethernet frame size (called "jumbo frames") during high-throughput data exchanges such as file transfers. Usually, an Ethernet interface discards jumbo frames. With jumbo frame support enabled, the interface can process frames larger than the standard Ethernet frame size yet within the specified range.
In interface configuration mode (Ethernet interface view or port group view), you can set the length of jumbo frames that are allowed to pass through Ethernet interfaces, as follows:
· If you execute the command in Ethernet interface view, the configuration takes effect only on the interface.
· If you execute the command in port group view, the configuration takes effect on all ports in the port group.
To configure jumbo frame support in interface view or port group view:
|
Step |
Command |
Remarks |
|
1. Enter system view. |
system-view |
N/A |
|
2. Configure jumbo frame support. |
· (Method 1) In port group view: a. port-group manual port-group-name b. jumboframe enable [ value ] · (Method 2) In Ethernet interface view: a. interface interface-type interface-number b. jumboframe enable [ value ] |
If you set the value argument multiple times, the most recent configuration takes effect. |
Setting a statistics polling interval
You can configure an interface statistics polling interval. To display the interface statistics collected in the last polling interval, use the display interface command.
In Ethernet interface view, you can configure an interface statistics polling interval.
To set the statistics polling interval on an Ethernet interface:
|
Step |
Command |
Remarks |
|
1. Enter system view. |
system-view |
N/A |
|
2. Enter interface view. |
interface interface-type interface-number |
N/A |
|
3. Set the statistics polling interval. |
flow-interval interval |
The default setting is 300 seconds. |
Configuring a Layer 2 Ethernet interface
Configuring a port group
Some interfaces on your device might use the same set of settings. To configure these interfaces in bulk rather than one by one, you can assign them to a port group.
You create port groups manually. All settings made for a port group apply to all the member ports of the group. For example, you can configure a traffic suppression threshold (see "Configuring storm suppression") for multiple interfaces in bulk by assigning these interfaces to a port group.
Even though the settings are made on the port group, they are saved on each interface basis rather than on a port group basis. You can only view the settings in the view of each interface by using the display current-configuration or display this command.
To configure a manual port group:
|
Step |
Command |
Remarks |
|
1. Enter system view. |
system-view |
N/A |
|
2. Create a manual port group and enter manual port group view. |
port-group manual port-group-name |
N/A |
|
3. Assign Ethernet interfaces to the manual port group. |
group-member interface-list |
If you use the group-member interface-type interface-start-number to interface-type interface-end-number command to add multiple ports in batch to the specified port group, make sure all these ports are of the same type and on the same interface card, and the interface-end-number argument must be greater than the interface-start-number argument. |
Configuring storm suppression
You can use the storm suppression function to limit the size of a particular type of traffic (broadcast, multicast, or unknown unicast traffic) that can be received on a per-interface basis in Ethernet interface view.
In interface or port group view, you set the maximum size of broadcast, multicast, or unknown unicast traffic allowed to be received on an interface or each interface in a port group. When the broadcast, multicast, or unknown unicast traffic received on the interface exceeds this threshold, the system discards packets until the traffic drops below this threshold.
For an Ethernet interface that belongs to a port group, if you set a traffic suppression threshold for the interface in both Ethernet interface view and port group view, the most recent threshold takes effect.
To set storm suppression thresholds on one or multiple Ethernet interfaces:
|
Step |
Command |
Remarks |
|
1. Enter system view. |
system-view |
N/A |
|
2. Enter Ethernet interface view or port group view. |
· Enter Ethernet interface view: · Enter port group view: |
To configure storm suppression on an Ethernet interface, enter Ethernet interface view. To configure storm suppression on a group of Ethernet interfaces, enter port group view. |
|
3. Set the broadcast suppression threshold ratio. |
broadcast-suppression { ratio | pps max-pps } |
Optional. By default, broadcast traffic is allowed to pass through an interface. The value range for the pps keyword depends on your device model. For more information, see About the H3C Access Controllers Command References. |
|
4. Set the multicast suppression threshold ratio. |
multicast-suppression { ratio | pps max-pps } |
Optional. By default, multicast traffic is allowed to pass through an interface. The value range for the pps keyword depends on your device model. For more information, see About the H3C Access Controllers Command References. |
|
5. Set the unknown unicast suppression threshold ratio. |
unicast-suppression { ratio | pps max-pps } |
Optional. By default, unknown unicast traffic is allowed to pass through an interface. The value range for the pps keyword depends on your device model. For more information, see About the H3C Access Controllers Command References. |
Enabling loop detection on an Ethernet interface
Support for this feature depends on the device model. For more information, see About the H3C Access Controllers Configuration Guides.
If a device receives a packet that it sent, a loop has occurred to the device. Loops might cause broadcast storms, which degrade network performance. You can use this feature to detect whether a loop has occurred.
You can enable loop detection to detect loops on an interface and configure the protective action to take on the receiving interface when a loop is detected, for example, to shut down the interface. The device takes the actions in Table 1 to alleviate the impact of the loop condition.
Table 1 Actions to take upon detection of a loop condition
|
Port type |
Actions |
|
Access port |
· Place the receiving interface in controlled mode. The interface discards all incoming packets, but still forwards outgoing packets. · Generate traps. · Delete all MAC address entries of the interface. |
|
Hybrid or trunk port |
· Generate traps. · If loop detection control is enabled, place the receiving interface in controlled mode. The interface discards all incoming packets, but still forwards outgoing packets. · Delete all MAC address entries of the interface. |
Configuration restrictions and guidelines
· To use loop detection on an Ethernet interface, you must enable the function both globally and on the interface.
· To disable loop detection on all interfaces, run the undo loopback-detection enable command in system view.
· To enable a hybrid or trunk port to take the administratively specified protective action, you must use the loopback-detection control enable command on the port.
· When you change the link type of an Ethernet interface by using the port link-type command, the switch removes the protective action configured on the interface. For more information about the port link-type command, see Layer 2 Command Reference.
Configuration procedure
To configure loop detection:
|
Step |
Command |
Remarks |
|
1. Enter system view. |
system-view |
N/A |
|
2. Enable global loop detection. |
loopback-detection enable |
By default, global loop detection is disabled. |
|
3. Set the loop detection interval. |
loopback-detection interval-time time |
Optional. The default setting is 30 seconds. |
|
4. Enter Ethernet interface view or port group view. |
· Enter Ethernet interface view: · Enter port group view: |
To configure loop detection on one interface, enter Ethernet interface view. To configure loop detection on a group of Ethernet interfaces, enter port group view. |
|
5. Enable loop detection on the interface. |
loopback-detection enable |
By default, loop detection is disabled. |
|
6. Enable loop detection control on a trunk port or a hybrid port. |
loopback-detection control enable |
Optional. By default, loop detection control is disabled. |
Configuring a Layer 3 Ethernet interface or subinterface
Support for Layer 3 Ethernet interface or subinterface configuration depends on the device model. For more information, see About the H3C Access Controllers Configuration Guides.
Setting the MTU for an Ethernet interface or subinterface
The value of Maximum Transmission Unit (MTU) affects the fragmentation and re-assembly of IP packets.
To set the MTU for an Ethernet interface or subinterface:
|
Step |
Command |
Remarks |
|
1. Enter system view. |
system-view |
N/A |
|
2. Enter Ethernet interface or subinterface view. |
interface interface-type { interface-number | interface-number.subnumber } |
N/A |
|
3. Set the MTU. |
mtu size |
The default setting is 1500. |
Due to the QoS queue length limit (for example, the default length of an FIFO queue is 75), too small an MTU will result in too many fragments, which will be discarded from the QoS queue. You can increase MTU or QoS queue length properly. In Ethernet interface view, you can use the qos fifo queue-length command to change the QoS queue length. For more information, see ACL and QoS Configuration Guide.
Configuring an Ethernet interface to operate in promiscuous mode
An Ethernet interface usually receives only packets with matched destination MAC addresses. After you configure an Ethernet interface to operate in promiscuous mode, however, the interface no longer checks the MAC addresses in received packets. Rather, it receives all Ethernet packets with correct format. You might need to configure a network listening port to operate in promiscuous mode.
To configure an Ethernet interface to operate in promiscuous mode:
|
Step |
Command |
Remarks |
|
1. Enter system view. |
system-view |
N/A |
|
2. Enter Ethernet interface view. |
interface interface-type interface-number |
N/A |
|
3. Configure the Ethernet interface to operate in promiscuous mode. |
promiscuous |
By default, an Ethernet interface does not operate in promiscuous mode. |
Setting the MAC address of an Ethernet interface or subinterface
When a Layer 3 Ethernet subinterface is created, it uses the MAC address of its main interface by default. As a result, all Layer 3 Ethernet subinterfaces of a Layer 3 Ethernet interface share the same MAC address. To set a different MAC address for a Layer 3 Ethernet subinterface, use the mac-address command.
As a best practice, do not set a MAC address in the VRRP-reserved MAC address range for a Layer 3 Ethernet subinterface.
To set the MAC address of an Ethernet interface or subinterface:
|
Step |
Command |
Remarks |
|
1. Enter system view. |
system-view |
N/A |
|
2. Enter Ethernet interface or subinterface view. |
interface interface-type { interface-number | interface-number.subnumber } |
N/A |
|
3. Set the MAC address of the Ethernet interface or subinterface. |
mac-address mac-address |
By default, a Layer 3 Ethernet interface uses the MAC address displayed on the RFID of the device. The default MAC address of a Layer 3 Ethernet subinterface is the same as the MAC address of its main interface. |
Displaying and maintaining an Ethernet interface
|
Task |
Command |
Remarks |
|
Display Ethernet interface information. |
display interface [ interface-type ] [ brief [ down ] ] [ | { begin | exclude | include } regular-expression ] display interface interface-type [ { interface-number | interface-number.subnumber } ] [ brief ] [ | { begin | exclude | include } regular-expression ] |
Available in any view. |
|
Display information about a manual port group or all manual port groups. |
display port-group manual [ all | name port-group-name ] [ | { begin | exclude | include } regular-expression ] |
Available in any view. |
|
Display information about the loopback function. |
display loopback-detection [ | { begin | exclude | include } regular-expression ] |
Available in any view. |
|
Clear the interface statistics. |
reset counters interface [ interface-type [ interface-number ] |
Available in user view. |