- Table of Contents
-
- H3C Unified Platform Configuration Examples-E71xx-5W101
- 01-Unified Platform Operator Permission Management Configuration Examples
- 02-Unified Platform Dashboard Configuration Examples
- 03-Unified Platform Trap Filter Rule Configuration Examples
- 04-Unified Platform Trap-to-Alarm Rule Configuration Examples
- 05-Unified Platform Alarm Forwarding via SMS Configuration Examples
- 06-Unified Platform Alarm Aggregation Configuration Examples
- 07-Unified Platform Component License Registration and Expansion Configuration Examples
- 08-Unified Platform Alarm Forwarding via Mail Configuration Examples
- 09-Unified Platform Two-Factor Authentication Configuration Examples
- 10-Unified Platform Alarm Rendering Configuration Examples
- 11-Unified Platform Syslog Configuration Examples
- Related Documents
-
| Title | Size | Download |
|---|---|---|
| 04-Unified Platform Trap-to-Alarm Rule Configuration Examples | 849.48 KB |
Unified Platform Trap-to-Alarm Rule
Configuration Examples
Document version: 5W100-20250425
Product version: E7101
Copyright © 2025 New H3C Technologies Co., Ltd. All rights reserved.
No part of this manual may be reproduced or transmitted in any form or by any means without prior written consent of New H3C Technologies Co., Ltd.
Except for the trademarks of New H3C Technologies Co., Ltd., any trademarks that may be mentioned in this document are the property of their respective owners.
The information in this document is subject to change without notice.
Introduction
On this page, you can use predefined trap-to-alarm rules or self-define trap-to-alarm rules to escalate traps to alarms based on keywords, trap sources, trap types, and time spans. The system automatically escalates a trap to an alarm if it matches a trap-to-alarm rule. The trap-to-alarm rule list displays all user-defined trap-to-alarm rules, including rule name, description, status, and other information.
The following information describes how to customize traps and escalate custom traps to alarms.
Prerequisites
Unified Platform has incorporated the devices and the system can receive traps from them.
Example: Configuring trap-to-alarm rules
Network configuration
A data center of a large enterprise contains hundreds of network devices. The O&M team must monitor these devices in real time to quickly respond to issues, ensuring stable and secure network operation. These devices send warning messages to the monitoring system via SNMP traps. However, due to the large number of devices and complex network environment, standard trap alarms often lack sufficient information for quick problem resolution. Additionally, some traps might be triggered by momentary network jitter and do not require immediate action.
Configure trap-to-alarm rules to meet the following requirements:
· Enhanced warning message accuracy: Automatically associate and gather related device information and logs after receiving traps to improve problem localization efficiency.
· Alarm deduplication: Distinguish between critical alarms and temporary anomalies to prevent operational fatigue due to alarm overload.
· Customized alarm strategies: Allow setting different alarm strategies based on various devices and their importance.
Analysis
1. Add a trap definition.
2. Configure the restored trap settings.
3. Add trap-to-alarm rules.
Software versions used
This configuration example was created and verified on Unified Platform E71xx.
Procedures
Adding a trap definition
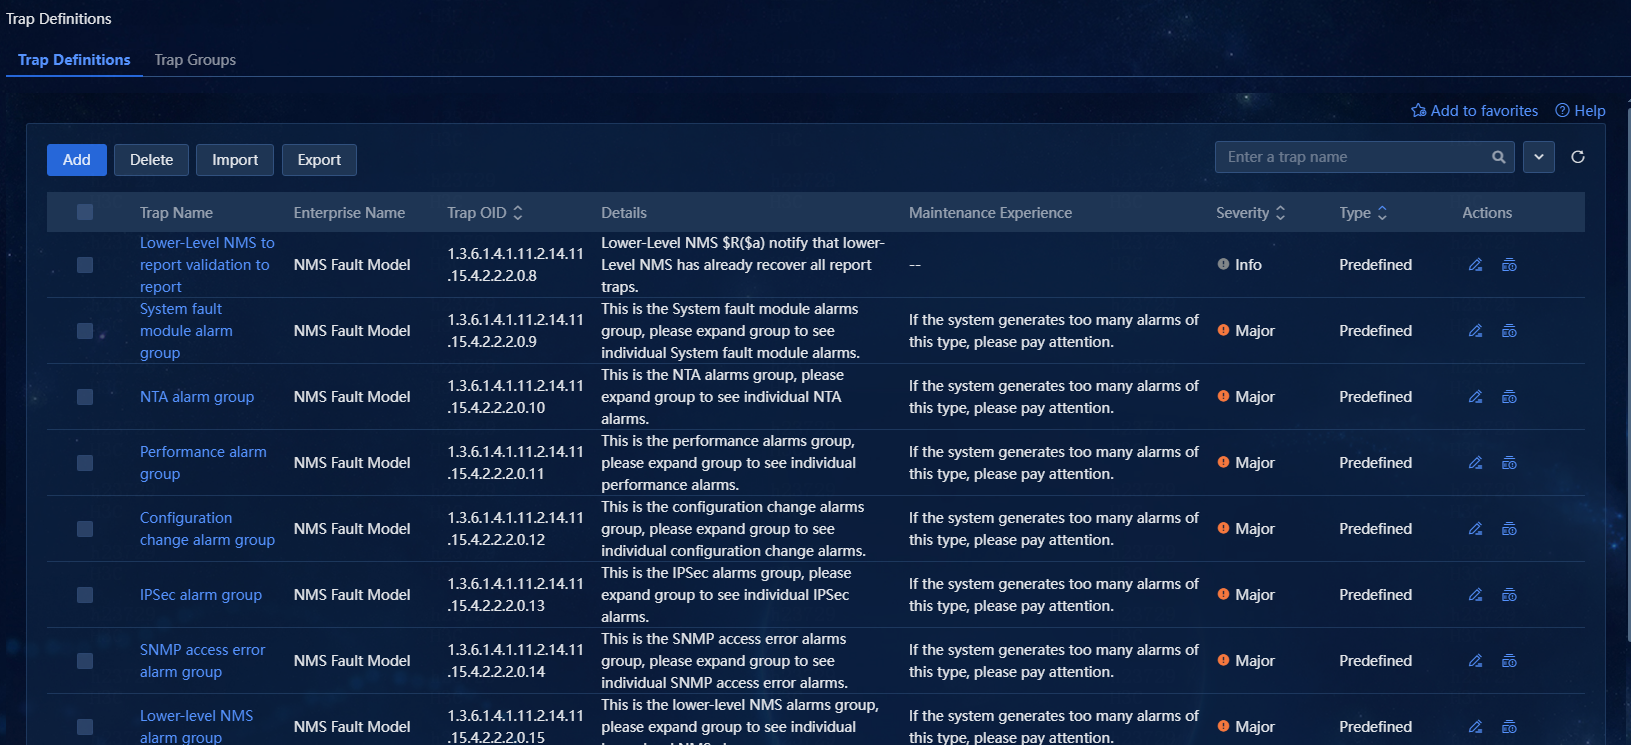
1. Navigate to the Alarm > Alarm config > Trap Definitions page. The trap definition page displays various traps defined in the system, as shown in Figure 1.
2. Click Add to access the Add Trap Definition page.
Figure 2 Adding a trap definition
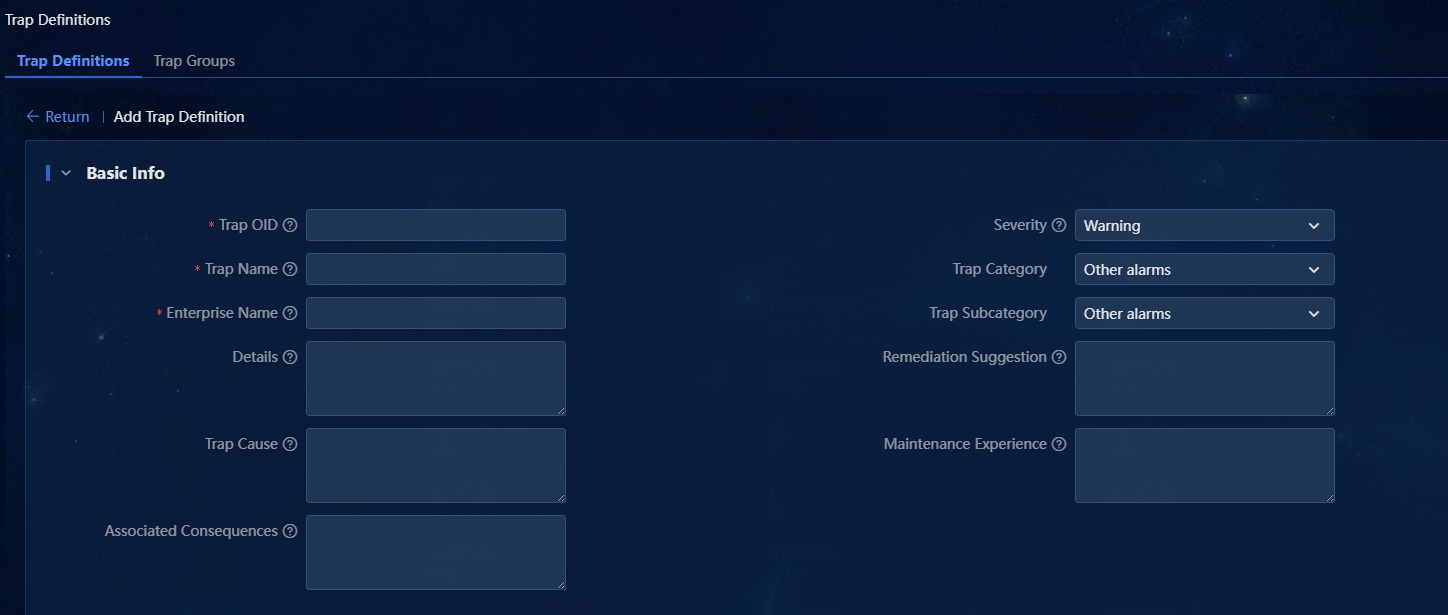
3. Configure basic information:
¡ Trap OID: A trap OID contains three parts: enterprise ID, generic ID, and specific ID, which are obtained from the device's MIB file. Among them:
- The number after the last dot (.) is the specific ID. When the generic ID is 6, the specific ID field and the enterprise ID field together form a trap ID.
- The number after the second last dot (.) is the generic ID, representing the generic trap type in the range of 0 to 6.
- The remaining digits are the enterprise ID, representing the type of the trap source (the device generating the trap) to identify different enterprises.
In this example, add trap OID 1.4.1.5.6.8, where the specific ID is 8, generic ID is 6, and enterprise ID is 1.2.1.5.
¡ Trap Name: Enter a trap name as needed or as defined in the MIB file. It is a string of 1 to 64 characters. In this example, enter 2-mytrap.
¡ Enterprise Name: If the system already has the corresponding enterprise ID, the input enterprise must be the same as that in the system. In this example, enter haha.
¡ Severity: Specify the severity of the triggered trap. Options are Critical, Major, Minor, Warning, and Info. In this example, select Major.
¡ Trap Category: Category of the trap based on the major trap features. In this example, select Threshold Alarms.
¡ Trap Subcategory: Category of the trap based on the minor trap features. In this example, select Network Device Threshold Alarms.
¡ Details: Describe the function of this trap. You can use a predefined macro. The system replaces variables with the actual values when receiving the trap, as shown in Figure 3.
Figure 3 Predefined macro samples
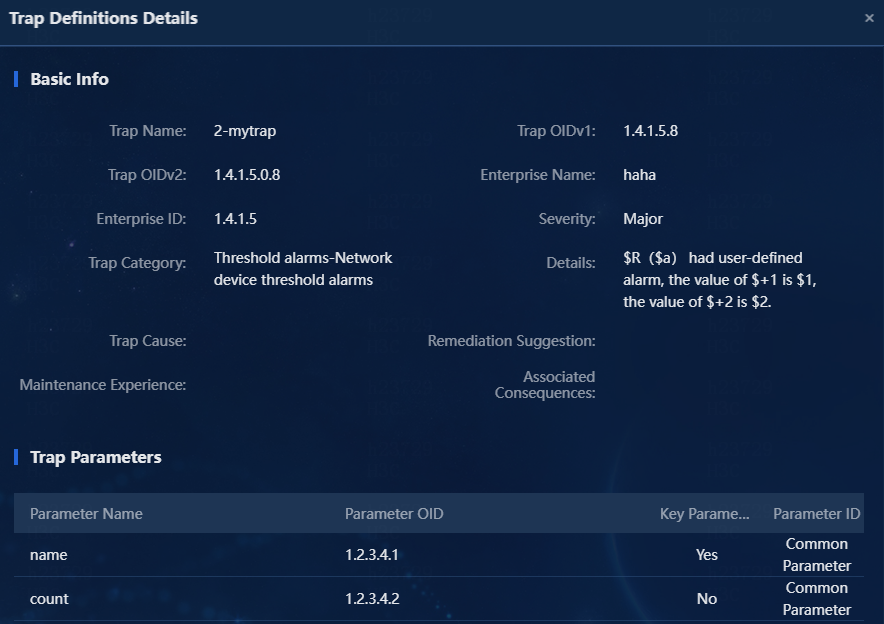
Variables
- $R: It represents the trap source name.
- $a: It represents the trap source IP address.
- $+1: It represents the variable name of the first trap parameter name.
- $1: It represents the value of the first trap parameter name.
- $+2: It represents the variable name of the second trap parameter count.
- $2: It represents the value of the second trap parameter count.
4. Set the trap cause, remediation suggestion, maintenance experience, and associated consequences as needed. In this example, do not configure these fields. The maintenance experience describes the possible causes of the trap based on personal past maintenance experience.
5. In the Trap Parameters area, click Add to add trap parameters, as shown in Figure 4.
Figure 4 Adding trap parameters
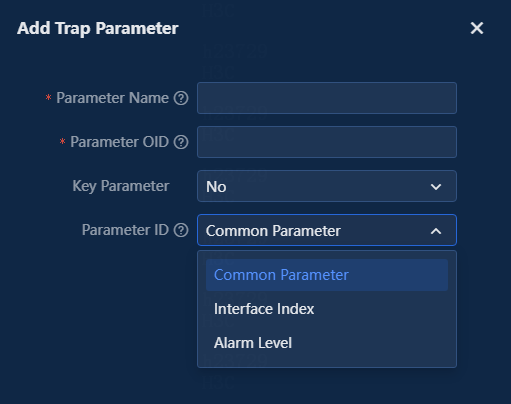
Parameters
¡ Key Parameter: Determines repeated traps or recovery traps when the system receives traps from the same source.
¡ Parameter ID_Interface Index: Clearly specify the parameter that represents the interface index in the trap definition when the trap is classified as an interface alarm. When adding this parameter in the Add Trap Parameter window, set the Parameter ID option to Interface Index.
¡ Parameter ID_Alarm Level: Specify the alarm level when sending the trap. Alarm levels include 1: Critical, 2: Major, 3: Minor, 4: Warning, 5: Info. When any other value is set, the displayed trap severity level is the set level.
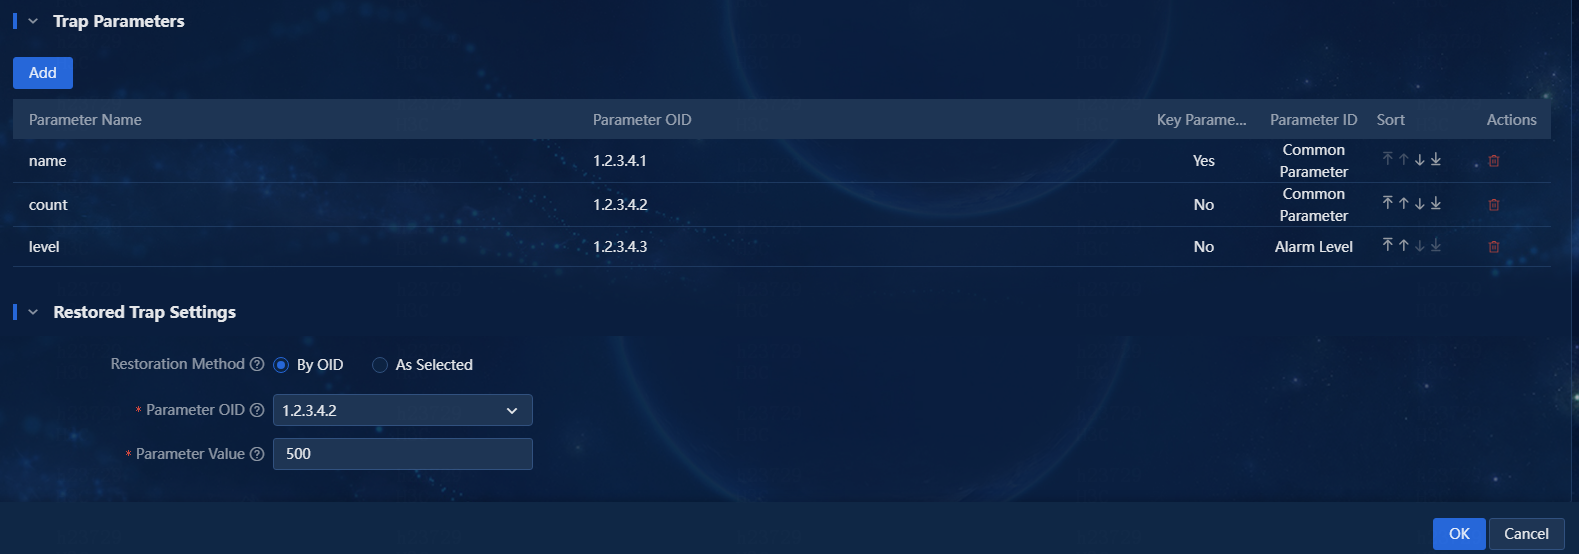
Add or delete parameters as needed, as shown in Figure 5.

6. Configure the restored trap settings as needed. In the current software version, the following restoration methods are supported:
¡ By OID—This method can restore traps with the same OID. In the By OID method, the parameter OID can only be a non-key parameter OID. Only custom traps support this restoration method.
¡ As Selected—This method can restore the selected traps that meet the following conditions:
- The key parameter OID of the traps must be the same as that of the current trap definition.
- The number of the key parameters in the traps must be the same as that in the current trap definition.
In this example, configure the restoration method By OID as shown in Figure 6.
Figure 6 Restored trap settings
7. Click OK.
Adding trap-to-alarm rules
1. Navigate to the Alarm > Alarm config > Trap-to-Alarm page.

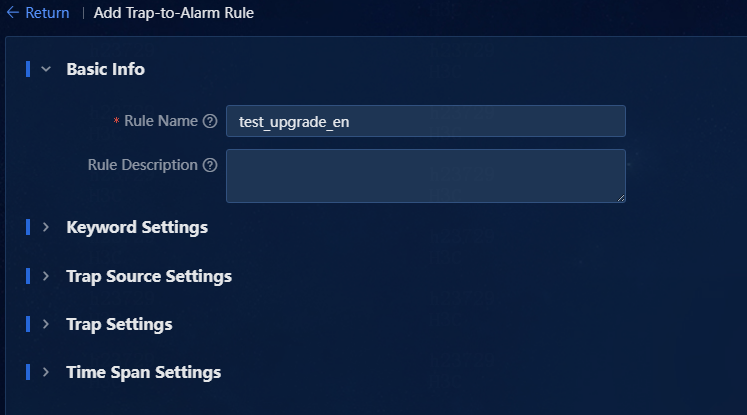
2. Click Add to access the Add Trap-to-Alarm Rule page. In this example, escalate a manually defined trap to an alarm. Set the basic information, as shown in Figure 8.
¡ Rule Name: Enter the name of the trap-to-alarm rule, a string of up to 32 characters.
¡ Rule Description: Enter the description of the trap-to-alarm rule, a string of up to 128 characters.
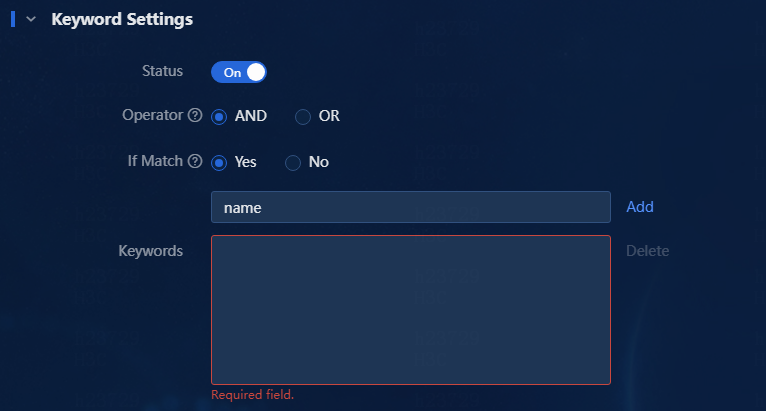
3. Select whether to enable the keyword settings. Keywords refer to those in the trap description. You can specify multiple keywords in the trap description at a time. The relationship between multiple keywords can be AND or OR. In this example, enable the keyword settings and configure the keywords.
a. For the Operator field, select AND.
b. For the If Match field, select Yes.
c. Enter the name keyword in the If Match field, as shown in Figure 9.
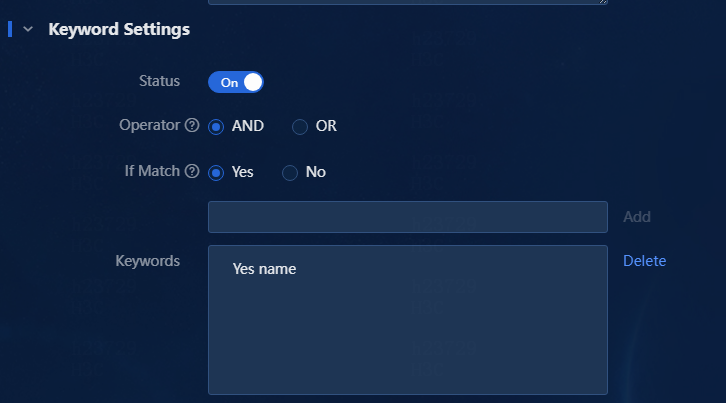
d. Click Add. Then, you can view the added keyword in the Keywords field, as shown in Figure 10.
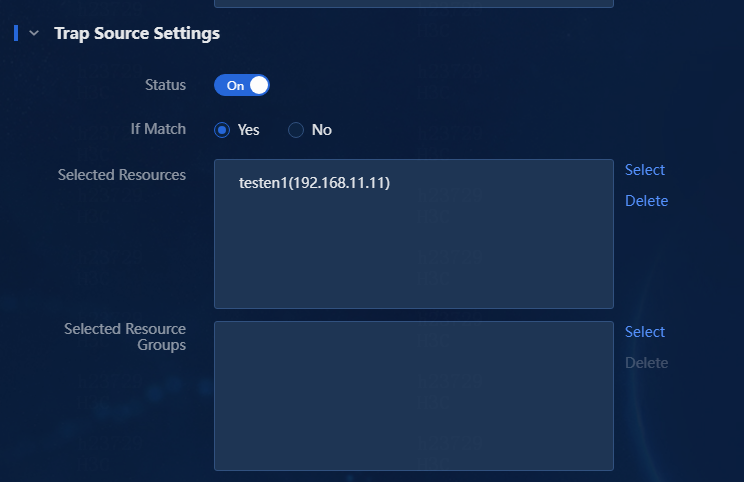
4. Select whether to enable the trap source settings. When this feature is enabled, you can configure the trap source list (resource list or resource group list) and match type (Yes or No). In this way, you can specify the trap sources to be included or excluded. The logical relationship between resources and resource groups is OR. In this example, enable the trap source settings and configure the trap sources.
a. For the If Match field, select Yes.
b. Click the Select link next to the Selected Resources field. The Select Resources window opens, as shown in Figure 11.

c. Select the resources to be added from the resource list.
d. Click the ![]() icon
to add the selected resources to the selected resource list.
icon
to add the selected resources to the selected resource list.
e. Click OK. Then, you can view the selected resources in the Selected Resources list, as shown in Figure 12.
Figure 12 Trap source settings
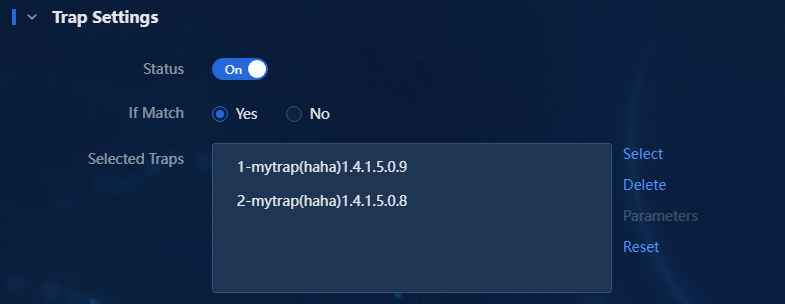
5. Select whether to enable trap settings. With this feature enabled, you can configure a list of traps, select the match type (Yes or No), and configure parameters for the selected traps. In this example, enable the trap settings and configure the traps. The Parameters link next to the Selected Traps field allows you to configure VB parameters. Only traps matching the parameters will be escalated. If no parameters are configured, all traps will be escalated by default.
a. For the If Match field, select Yes.
b. Click the Select link next to the Selected Traps field. The Select Traps window opens, as shown in Figure 13. You can filter traps by fields such as enterprise name and trap name.
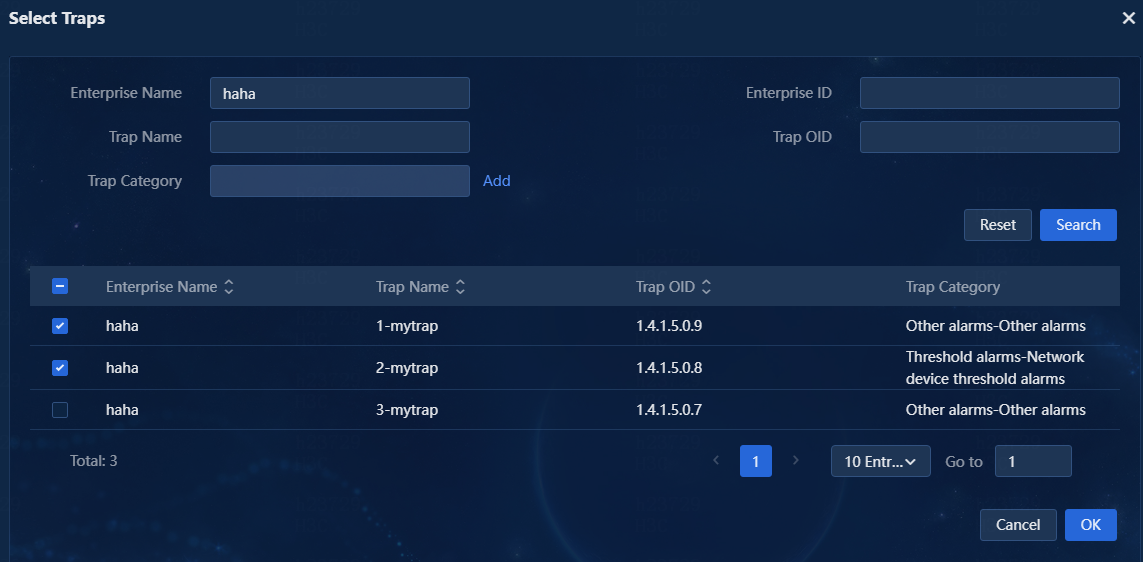
c. Select the traps to be escalated to alarms from the trap list.
d. Click OK. Then, you can view the selected traps in the Selected Traps list, as shown in Figure 14.
If the trap list is too long to accurately find traps to be escalated to alarms, you can enter an enterprise name, trap name, and other information in the search area at the top of the page for exact search.
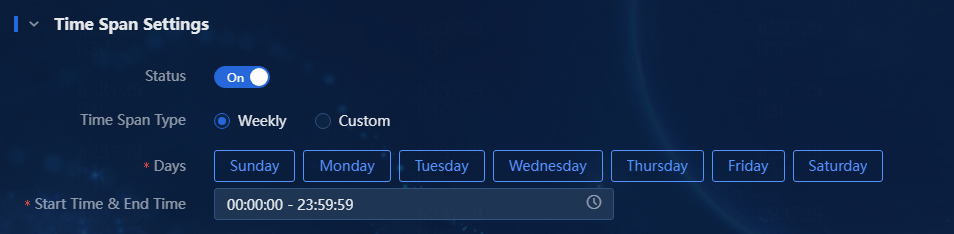
6. Select whether to enable time span settings. With this feature enabled, you can configure a periodic time span or an absolute time span as shown in Figure 15.
7. Click OK. The trap-to-alarm rule is successfully added, as shown in Figure 16. When the device receives a trap that is from source 192.168.11.11 and with the trap name 2-mytrap and matches the keyword settings and time span settings, the trap will be escalated to an alarm to promptly notify the administrator of the change in the device operating state.
Figure 16 Adding a trap-to-alarm rule

|
|
NOTE: · After a trap is escalated to an alarm, the new alarm uses the configured alarm level if the alarm level parameter is configured. If the alarm level parameter is not configured or is configured incorrectly, the new alarm uses the alarm level of the trap. · Match options, including keyword, trap source, trap, and time span, together form a single match rule. In a match rule, you can configure all or some of these match options. Multiple match rules will be applied in sequence. The logical relationship among the four types of match options is AND. |
Verifying the configuration
1. Navigate to the Alarm > Trap List page.
The system received a trap from the device at 192.168.11.11.
Figure 17 Trap list

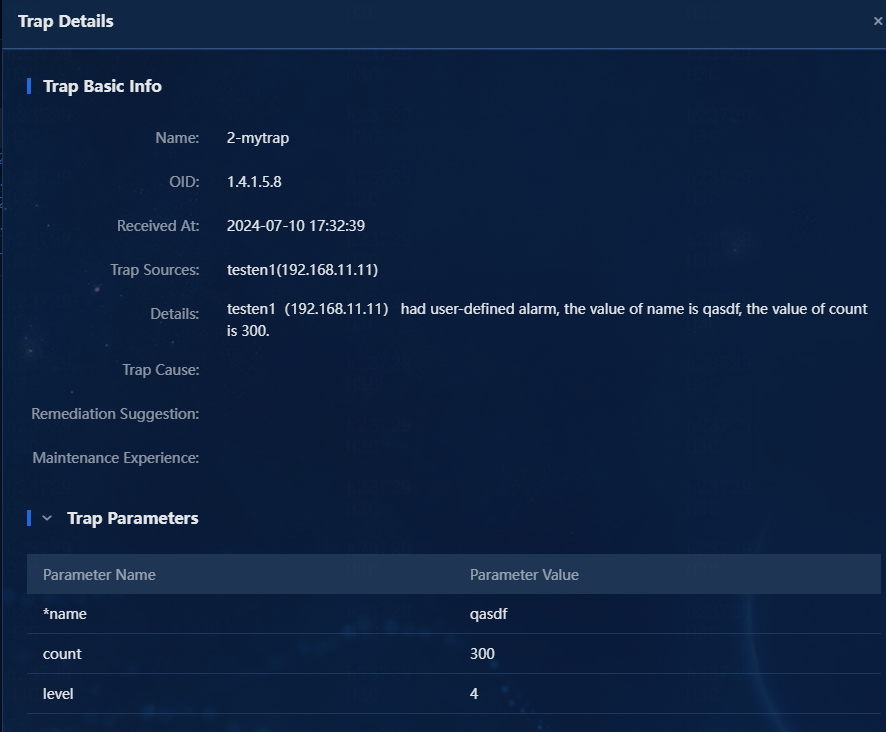
2. Click the details link for the trap to view its details.
Figure 18 Trap details
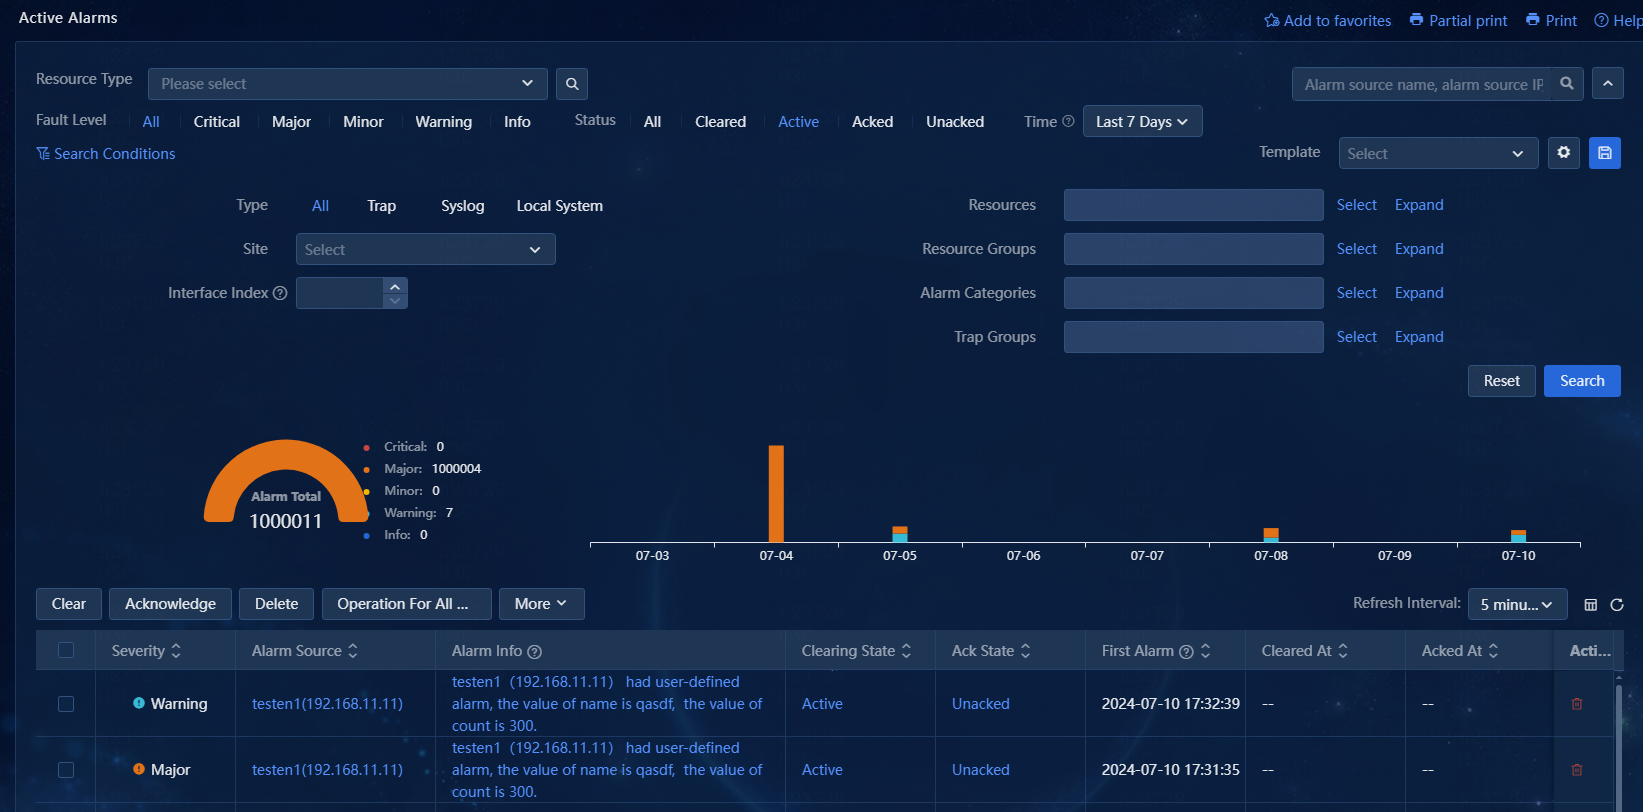
3. Navigate to the Alarm > Active Alarms page. View active alarms and alarms that cleared today. By default, active alarms are displayed. The trap from the device at 192.168.11.11 has been escalated to an alarm. The severity level of the alarm is the same as that of the trap, which is Major in this example.
4. Click the ![]() icon
next to the search bar to expand the advanced search area. After you set the level,
state, resource, resource group, and alarm category, the matching alarms are
displayed on the list. You can clear, acknowledge, delete, and export alarms in
the list.
icon
next to the search bar to expand the advanced search area. After you set the level,
state, resource, resource group, and alarm category, the matching alarms are
displayed on the list. You can clear, acknowledge, delete, and export alarms in
the list.
Figure 19 Active alarms
5. Navigate to the Alarm > History Alarms page. View the alarms cleared before today.
Figure 20 History alarms
