- Table of Contents
-
- H3C S9500 Operation Manual-Release1648[v1.24]-08 System Volume
- 00-1Cover
- 01-Command Line Interface Configuration
- 02-Login and User Interface Configuration
- 03-FTP and TFTP Configuration
- 04-HA Configuration
- 05-NQA Configuration
- 06-NetStream Configuration
- 07-NTP Configuration
- 08-RMON Configuration
- 09-SNMP Configuration
- 10-Packet Statistics Accounting Configuration
- 11-Device Management Configuration
- 12-Configuration File Management Configuration
- 13-File System Management Configuration
- 14-Cluster Management Configuration
- 15-System Maintenance and Debugging Configuration
- 16-Information Center Configuration
- 17-PoE Configuration
- 18-Clock Module Configuration
- 19-ACSEI Server Configuration
- 20-OAP Module Configuration
- Related Documents
-
| Title | Size | Download |
|---|---|---|
| 16-Information Center Configuration | 147.29 KB |
1.1 Introduction to Information Center
1.2 Information Center Configuration
1.2.1 Information Center Configuration Overview
1.2.2 Sending Information to the Loghost
1.2.3 Sending Information to Console terminal
1.2.4 Sending Information to Telnet Terminal or Dumb Terminal
1.2.5 Sending Information to the Log Buffer
1.2.6 Sending Information to the Trap Buffer
1.2.7 Sending Information to SNMP Network Management
1.2.8 Sending Information to a Log File
1.3 Displaying and Maintaining Information Center
1.4 Information Center Configuration Examples
1.4.1 Configuration Example of Sending Log to the Unix Loghost
1.4.2 Configuration Example of Sending Log to the Linux Loghost
1.4.3 Configuration Example of Sending Log to the Console Terminal
Chapter 1 Information Center
When configuring information center, go to these sections for information you are interested in:
l Introduction to Information Center
l Information Center Configuration
l Displaying and Maintaining Information Center
l Information Center Configuration Examples
1.1 Introduction to Information Center
The information center is an indispensable part of the switch. It serves as an information center of the system software modules. The logging system is responsible for most of the information outputs, and it also makes detailed classification to filter the information efficiently. Coupled with the debugging program, the information center provides powerful support for the network administrators and the R&D personnel to monitor the operating status of networks and diagnose network failures.
The log information format is:
% <priority> timestamp sysname module/level/digest:content
The closing set of angel brackets < >, the space, the forward slash /, and the colon are all required in the above format, and % is optional.
The format of the log information output to the log host is:
% <189>Jun 7 05:22:03 2006 H3C IFNET/6/UPDOWN:Line protocol on interface Ethernet0/0/0, changed state to UP
The description of the components of log information is as follows:
1) %
In practical output, some of the information is started with the % character, which means a logging is necessary.
2) Priority
The priority is computed according to following formula: facility*8+severity-1. The default value for the facility is 23. The range of severity is 1~8, and the severity will be introduced in separate section.
Priority is only effective when information is sent to log host. There is no character between priority and timestamp.
3) Timestamp
If the logging information is send to the log host, the default format of timestamp is date
The date format of timestamp is " Mmm dd hh:mm:ss yyyy".
" Mmm " is month field, such as: Jan, Feb, Mar, Apr, May, Jun, Jul, Aug, Sep, Oct, Nov, Dec.
"dd" is day field, if the day is little than 10th, one blank should be added, such as " 7".
"hh:mm:ss" is time field, "hh" is from 00 to 23, "mm" and "ss" are from 00 to 59.
"yyyy" is year field.
4) Sysname
The sysname is the host name, the default value is "H3C".
User can change the host name through sysname command.
Notice: There is a blank between sysname and module name.
5) Module name
The module name is the name of module which create this logging information, the following sheet list some examples:
Table 1-1 The module name field
|
Module name |
Description |
|
8021X |
802.1X module |
|
ACL |
Access control list module |
|
ADBM |
MAC address management module |
|
ARP |
Address resolution protocol module |
|
BGP |
Border gateway protocol module |
|
CFM |
Configuration file management module |
|
CMD |
Command module |
|
default |
Default settings for all the modules |
|
DEV |
Device management module |
|
DHCP |
Dynamic host configuration protocol module |
|
DIAGCLI |
Diagnosis module |
|
DNS |
Domain name server module |
|
DRVMPLS |
Multiprotocol label switching drive module |
|
DRVL2 |
Layer 2 drive module |
|
DRVL3 |
Layer 3 drive module |
|
DRVL3MC |
Layer 3 multicast module |
|
MPLS |
Multiprotocol Label Switching module |
|
DRVPOS |
POS drive module |
|
DRVQACL |
QACL drive module |
|
DRVVPLS |
Virtual private LAN service drive module |
|
ETH |
Ethernet module |
|
FTPS |
FTP server module |
|
HA |
High availability module |
|
HABP |
Huawei authentication bypass protocol module |
|
HGMPS |
Huawei group management protocol service module |
|
HWCM |
Huawei configuration management MIB module |
|
IFNET |
Interface management module |
|
IGSP |
IGMP snooping module |
|
IP |
Internet protocol module |
|
ISIS |
Intermediate system-to-intermediate system intra-domain routing protocol module |
|
L2INF |
L2 interface management module |
|
L2V |
L2 VPN module |
|
LACL |
LAN switch ACL module |
|
LDP |
label distribution protocol module |
|
LINKAGG |
LINKAGG module |
|
LQOS |
LAN switch QoS module |
|
LS |
Local server module |
|
LSPAGENT |
Label switched path agent module |
|
LSPM |
Label switch path management module |
|
MIX |
Dual system management module |
|
MMC |
MMC module |
|
MODEM |
Modem module |
|
MPLSFW |
MPLS forward module |
|
MPM |
Multicast port management module |
|
MSDP |
Multicast source discovery protocol module |
|
MSTP |
Multiple spanning tree protocol module |
|
NAT |
Network address translation module |
|
NTP |
Network time protocol module |
|
OSPF |
Open shortest path first module |
|
PHY |
Physical sublayer & physical layer module |
|
POS_SNMP |
POS simple network management protocol module |
|
PPP |
Point to point protocol module |
|
PSSINIT |
PSSINIT module |
|
RDS |
RADIUS module |
|
RM |
Routing management module |
|
RMON |
Remote monitor module |
|
RPR |
Resilient packet ring module |
|
RSA |
RSA (Revest, Shamir and Adleman) encryption module |
|
RTPRO |
Routing protocol module |
|
SHELL |
User interface module |
|
SNMP |
Simple network management protocol module |
|
SOCKET |
Socket module |
|
SSH |
Secure shell module |
|
SYSM |
System manage veneer module |
|
SYSMIB |
System MIB module |
|
TAC |
Terminal access controller module |
|
TELNET |
Telnet module |
|
USERLOG |
User calling logging module |
|
VFS |
Virtual file system module |
|
VLAN |
Virtual local area network module |
|
VOS |
Virtual operate system module |
|
VRRP |
VRRP (virtual router redundancy protocol) module |
|
VTY |
VTY (virtual type terminal) module |
Notice: There is a slash ('/') between module name and severity.
6) Severity
System information is classified into three types: log information, debugging information, and trap information. Depending on the severity & emergency degree, each kind of information can be further divided into eight levels. Information filtering by severity works this way: information with the severity value greater than the configured threshold will not be output during the filtering. The smaller the severity value, the higher the severity. “emergencies” indicates a severity of 1, and “debugging” indicates a severity of 8. If the severity threshold is set to “debugging”, all information can be output. The table below describes the eight severity level.
Table 1-2 Severity defined by the information center
|
Severity |
Value |
Description |
|
emergencies |
1 |
|
|
alerts |
2 |
Information requiring immediate reaction |
|
critical |
3 |
Critical information |
|
errors |
4 |
Error information |
|
warnings |
5 |
Warning information |
|
notifications |
6 |
Normal but important information |
|
informational |
7 |
Notification that should be recorded |
|
debugging |
8 |
Information generated during debugging |
Note: There is a slash between severity and digest.
7) Digest
The digest is abbreviation, it represent the abstract of contents.
Notice: There is a colon between digest and content. The digest can be up to 32 characters long.
1.2 Information Center Configuration
1.2.1 Information Center Configuration Overview
Switch supports 7 output directions of information.
The system assigns a channel in each output direction by default. See the table below.
Table 1-3 Numbers and names of the channels for log output
|
Output direction |
Channel number |
Default channel name |
|
Console |
0 |
console |
|
Monitor |
1 |
monitor |
|
Information center loghost |
2 |
loghost |
|
Trap buffer |
3 |
trapbuf |
|
Logging buffer |
4 |
logbuf |
|
snmp |
5 |
snmpagent |
|
Log file |
6 |
logfile |
& Note:
The settings in the 7 directions are independent from each other. The settings will take effect only after enabling the information center.
The information center of the switch has the following features:
l Support to output log in 7 directions, i.e., Console, monitor to Telnet terminal, logbuffer, loghost, trapbuffer, and SNMP log file.
l The log is divided into 8 levels according to the significance and it can be filtered based on the levels.
l The information can be classified in terms of the source modules and the information can be filtered in accordance with the modules.
l The output language can be selected between Chinese and English.
1) Sending information to the loghost
Table 1-4 Send information to the loghost
|
Device |
Configuration |
Default value |
Configuration description |
|
Switch |
Enable information center |
By default, the information center is enabled. |
Other configurations are valid only if the information center is enabled. |
|
Set the information output direction to the loghost |
— |
The configuration about the loghost on the switch and that on loghost must be the same; otherwise the information cannot be sent to the loghost correctly |
|
|
Set information source |
— |
You can define which modules and information to be sent out and the time-stamp format of information, and so on. You must turn on the switch of the corresponding module before defining output debugging information |
|
|
Loghost |
Refer to configuration cases for related log host configuration |
— |
— |
2) Sending information to the console terminal
Table 1-5 Send information to the console terminal.
|
Device |
Configuration |
Default value |
Configuration description |
|
Switch |
Enable information center |
By default, information center is enabled. |
Other configurations are valid only if the information center is enabled |
|
Set the information output direction to the Console |
— |
— |
|
|
Set information source |
— |
You can define which modules and information to be sent out and the time-stamp format of information, and so on. You must turn on the switch of the corresponding module before defining output debugging information |
|
|
Enable terminal display function |
— |
You can view debugging information after enabling terminal display function |
3) Sending information to the monitor terminal
Table 1-6 Send information to the monitor terminal
|
Device |
Configuration |
Default value |
Configuration description |
|
Switch |
Enable information center |
By default, information center is enabled |
Other configurations are valid only if the information center is enabled |
|
Set the information output direction to the monitor |
— |
— |
|
|
Set information source |
— |
You can define which modules and information to be sent out and the time-stamp format of information, and so on. You must turn on the switch of the corresponding module before defining output debugging information |
|
|
Enable the terminal display function and this function for the corresponding information |
— |
For Telnet terminal and dumb terminal, to view the information, you must enable the current terminal display function using the terminal monitor command |
4) Sending information to the log buffer
Table 1-7 Send information to the log buffer
|
Device |
Configuration |
Default value |
Configuration description |
|
Switch |
Enable information center |
By default, information center is enabled |
Other configurations are valid only if the information center is enabled |
|
Set the information output direction to the logbuffer |
— |
You can configure the size of the log buffer at the same time. |
|
|
Set information source |
— |
You can define which modules and information to be sent out and the time-stamp format of information, and so on. You must turn on the switch of the corresponding module before defining output debugging information |
5) Sending information to the trap buffer
Table 1-8 Send information to the trap buffer
|
Device |
Configuration |
Default value |
Configuration description |
|
Switch |
Enable information center |
By default, information center is enabled |
Other configurations are valid only if the information center is enabled |
|
Set the information output direction to the trapbuffer |
— |
You can configure the size of the trap buffer at the same time |
|
|
Set information source |
— |
You can define which modules and information to be sent out and the time-stamp format of information, and so on. You must turn on the switch of the corresponding module before defining output debugging information |
6) Sending information to SNMP
Table 1-9 Send information to SNMP
|
Device |
Configuration |
Default value |
Configuration description |
|
Switch |
Enable information center |
By default, information center is enabled |
Other configurations are valid only if the information center is enabled |
|
Set the information output direction to SNMP |
— |
— |
|
|
Set information source |
— |
You can define which modules and information to be sent out and the time-stamp format of information, and so on. You must turn on the switch of the corresponding module before defining output debugging information |
|
|
Configure SNMP features |
— |
Refer to SNMP Configuration in the System Volume. |
|
|
Network management workstation |
The same as the SNMP configuration of the switch |
— |
— |
7) Sending information to a log file
Table 1-10 Send information to a log file
|
Device |
Configuration |
Default value |
Configuration description |
|
Switch |
Enable the information center |
By default, the information center is enabled. |
Other configurations do not take effect unless the information center is enabled. |
|
Set the Switch to send information to a log file |
By default, the Switch outputs information to a log file, the allowed size of each log file is 2 Mbytes, the system allows you to save a maximum of 5 log files, and log files are saved under cf:/logfile. |
You can configure the allowed size of each log file (1 to 5 Mbytes), allowed number of saved log files, and directory under which to save a log file |
|
|
Configure an information source |
— |
You can define the modules and information that can be sent out. If you configure the Switch to output debugging information, you must enable debugging for the corresponding modules. |
1.2.2 Sending Information to the Loghost
To send configuration information to the loghost, follow the steps below:
1) Enabling information center
Perform the following configuration to enable/disable information center:
|
To do… |
Use the command… |
Remarks |
|
Enable information center |
info-center enable |
Available in system view |
|
Disable information center |
undo info-center enable |
Available in system view |
& Note:
Information center is enabled by default. After information center is enabled, system performances are affected when the system processes much information because of information classification and outputting.
2) Outputting information to the loghost
Perform the following configuration to output information to the loghost:
|
To do… |
Use the command… |
Remarks |
|
Output information to the loghost |
info-center loghost { source interface-type interface-number | host-ip-addr [ channel { channel-number | channel-name } | facility local-number | language { chinese | english } ]* } |
Available in system view |
|
Cancel the configuration of outputting information to loghost |
undo info-center loghost host-ip-addr |
Available in system view |
Note that the IP address of log host must be correct.
& Note:
Ensure to enter the correct IP address using the info-center loghost command to configure loghost IP address. If you enter a loopback address, the system prompts of invalid address appears.
3) Configuring information source on the switch
By this configuration, you can define the information that sent to console terminal is generated by which modules, information type, information level, and so on.
Perform the following configuration to define information source:
|
To do… |
Use the command… |
Remarks |
|
Define information source |
info-center source { modu-name | default } channel { channel-number | channel-name } [ debug { level severity | state state }* | log { level severity | state state }* | trap { level severity | state state }* ]* |
Available in system view |
|
Cancel the configuration of information source |
undo info-center source { modu-name | default | all } channel { channel-number | channel-name } |
Available in system view |
modu-name specifies the module name; default represents all the modules; all represents all the information filter configuration in channel channel-number except default; level refers to the severity levels; severity specifies the severity level of information. The information with the level below it will not be output. channel-number specifies the channel number and channel-name specifies the channel name.
When defining the information sent to the loghost, channel-number or channel-name must be set to the channel that corresponds to loghost direction.
Every channel has been set with a default record, whose module name is default and the module number is 0xffff0000. However, for different channels, the default record may have different default settings of log, trap and debugging. When there is no specific configuration record for a module in the channel, use the default one.
& Note:
If you want to view the debugging information of some modules on the switch, you must select debugging as the information type when configuring information source, meantime using the debugging command to turn on the debugging switch of those modules.
4) Configuring the loghost
The configuration on the loghost must be the same with that on the switch. For related configuration, see the configuration examples in the later part.
1.2.3 Sending Information to Console terminal
To send configuration information to console terminal, follow the steps below:
1) Enabling information center
|
To do… |
Use the command… |
Remarks |
|
Enable information center |
info-center enable |
Available in system view |
|
Disable information center |
undo info-center enable |
Available in system view |
& Note:
Information center is enabled by default. After information center is enabled, system performances are affected when the system processes much information because of information classification and outputting.
2) Configuring to output information to console terminal
|
To do… |
Use the command… |
Remarks |
|
Output information to Console |
info-center console channel { channel-number | channel-name } |
Available in system view |
|
Cancel the configuration of outputting information to Console |
undo info-center console channel |
Available in system view |
3) Configuring information source on the switch
By this configuration, you can define the information that sent to console terminal is generated by which modules, information type, information level, and so on.
|
To do… |
Use the command… |
Remarks |
|
Define information source |
info-center source { modu-name | default } channel { channel-number | channel-name } [ debug { level severity | state state }* | log { level severity | state state }* | trap { level severity | state state }* ]* |
Available in system view |
|
Cancel the configuration of information source |
undo info-center source { modu-name | default | all } channel { channel-number | channel-name } |
Available in system view |
When defining the information sent to the console terminal, channel-number or channel-name must be set to the channel that corresponds to Console direction.
Every channel has been set with a default record, whose module name is default and the module number is 0xffff0000. However, for different channels, the default record may have different default settings of log, trap and debugging. When there is no specific configuration record for a module in the channel, use the default one.
& Note:
If you want to view the debugging information of some modules on the switch, you must select debugging as the information type when configuring information source, meantime using the debugging command to turn on the debugging switch of those modules.
You can use the following commands to configure log information, debugging information and the time-stamp output format of trap information.
This configuration will affect the timestamp of the displayed information.
& Note:
The timestamp format of loghost information is not affected.
Perform the following configuration to configure the output format of time-stamp:
|
To do… |
Use the command… |
Remarks |
|
Configure the output format of the time-stamp |
info-center timestamp { log | trap | debugging } { boot | date | none } |
Available in system view |
|
Disable the output of time-stamp |
undo info-center timestamp { log | trap | debugging } |
Available in system view |
4) Enabling terminal display function
To view the output information at the console terminal, you must first enable the corresponding log, debugging and trap information functions at the switch.
For example, if you have set the log information as the information sent to the console terminal, now you need to use the terminal logging command to enable the terminal display function of log information on the switch, then you can view the information at the console terminal.
Perform the following configuration to enable terminal display function:
|
To do… |
Use the command… |
Remarks |
|
Enable terminal display function of debugging information |
terminal debugging |
Available in user view |
|
Disable terminal display function of debugging information |
undo terminal debugging |
Available in user view |
|
Enable terminal display function of log information |
terminal logging |
Available in user view |
|
Disable terminal display function of log information |
undo terminal logging |
Available in user view |
|
Enable terminal display function of trap information |
terminal trapping |
Available in user view |
|
Disable terminal display function of trap information |
undo terminal trapping |
Available in user view |
By default, the terminal display function of debugging information is disabled.
1.2.4 Sending Information to Telnet Terminal or Dumb Terminal
To send configuration information to Telnet terminal or dumb terminal, follow the steps below:
1) Enabling information center
|
To do… |
Use the command… |
Remarks |
|
Enable information center |
info-center enable |
Available in system view |
|
Disable information center |
undo info-center enable |
Available in system view |
& Note:
Information center is enabled by default. After information center is enabled, system performances are affected when the system processes much information because of information classification and outputting.
2) Configuring to output information to Telnet terminal or dumb terminal
|
To do… |
Use the command… |
Remarks |
|
Output information to Telnet terminal or dumb terminal |
info-center monitor channel { channel-number | channel-name } |
Available in system view |
|
Cancel the configuration of outputting information to Telnet terminal or dumb terminal |
undo info-center monitor channel |
Available in system view |
3) Configuring information source on the switch
By this configuration, you can define the information that sent to Telnet terminal or dumb terminal is generated by which modules, information type, information level, and so on.
|
To do… |
Use the command… |
Remarks |
|
Define information source |
info-center source { modu-name | default } channel { channel-number | channel-name } [ debug { level severity | state state }* | log { level severity | state state }* | trap { level severity | state state }* ]* |
Available in system view |
|
Cancel the configuration of information source |
undo info-center source { modu-name | default | all } channel { channel-number | channel-name } |
Available in system view |
When defining the information sent to Telnet terminal or dumb terminal, channel-number or channel-name must be set to the channel that corresponds to monitor direction.
Every channel has been set with a default record, whose module name is default and the module number is 0xffff0000. However, for different channels, the default record may have different default settings of log, trap and debugging. When there is no specific configuration record for a module in the channel, use the default one.
& Note:
When there are more than one Telnet users or monitor users at the same time, some configuration parameters should be shared among the users, such as module-based filtering settings and information level threshold. When a user modifies these settings, it will be reflected on other clients.
& Note:
If you want to view the debugging information of some modules on the switch, you must select debugging as the information type when configuring information source, meantime using the debugging command to turn on the debugging switch of those modules.
You can use the following commands to configure log information, debugging information and the time-stamp output format of trap information.
This configuration will affect the timestamp of the displayed information.
Perform the following configuration to configure the output format of time-stamp:
|
To do… |
Use the command… |
Remarks |
|
Configure the output format of the time-stamp |
info-center timestamp { log | trap | debugging } { boot | date | none } |
Available in system view |
|
Disable the output of time-stamp |
undo info-center timestamp { log | trap | debugging } |
Available in system view |
4) Enabling terminal display function
To view the output information at the Telnet terminal or dumb terminal, you must first enable the terminal display function, and then the corresponding terminal display function of log information on the switch.
For example, if you have specified the log information as the information sent to the Telnet terminal or dumb terminal, now you need to use the terminal monitor command to enable the terminal display function and the terminal logging command to enable the terminal display function of log information on the switch, then you can view the information at the Telnet terminal or dumb terminal.
Perform the following configuration to enable terminal display function:
|
To do… |
Use the command… |
Remarks |
|
Enable terminal display function of log, debugging and trap information |
terminal monitor |
Available in user view |
|
Disable terminal display function of the above information |
undo terminal monitor |
Available in user view |
|
Enable terminal display function of debugging information |
terminal debugging |
Available in user view |
|
Disable terminal display function of debugging information |
undo terminal debugging |
Available in user view |
|
Enable terminal display function of log information |
terminal logging |
Available in user view |
|
Disable terminal display function of log information |
undo terminal logging |
Available in user view |
|
Enable terminal display function of trap information |
terminal trapping |
Available in user view |
|
Disable terminal display function of trap information |
undo terminal trapping |
Available in user view |
1.2.5 Sending Information to the Log Buffer
To send configuration information to the log buffer, follow the steps below:
1) Enabling information center
|
To do… |
Use the command… |
Remarks |
|
Enable information center |
info-center enable |
Available in system view |
|
Disable information center |
undo info-center enable |
Available in system view |
& Note:
Information center is enabled by default. After information center is enabled, system performances are affected when the system processes much information because of information classification and outputting.
2) Configuring to output information to the log buffer
|
To do… |
Use the command… |
Remarks |
|
Output information to log buffer |
info-center logbuffer [ channel { channel-number | channel-name } | size buffersize ]* |
Available in system view |
|
Cancel the configuration of outputting information to log buffer |
undo info-center logbuffer [ channel | size ] |
Available in system view |
By default, the switch outputs information to the log buffer in the CPU. The size of the log buffer is 512, that is, the log buffer can hold up to 512 messages.
3) Configuring information source on the switch
By this configuration, you can define the information that sent to log buffer is generated by which modules, information type, information level, and so on.
|
To do… |
Use the command… |
Remarks |
|
Define information source |
info-center source { modu-name | default } channel { channel-number | channel-name } [ debug { level severity | state state }* | log { level severity | state state }* | trap { level severity | state state }* ]* |
Available in system view |
|
Cancel the configuration of information source |
undo info-center source { modu-name | default | all } channel { channel-number | channel-name } |
Available in system view |
modu-name specifies the module name; default represents all the modules; all represents all the information filter configuration in channel channel-number except default; level refers to the severity levels; severity specifies the severity level of information. The information with the level below it will not be output. channel-number specifies the channel number and channel-name specifies the channel name.
When defining the information sent to log buffer, channel-number or channel-name must be set to the channel that corresponds to logbuffer direction.
Every channel has been set with a default record, whose module name is default and the module number is 0xffff0000. However, for different channels, the default record may have different default settings of log, trap and debugging. When there is no specific configuration record for a module in the channel, use the default one.
& Note:
If you want to view the debugging information of some modules on the switch, you must select debugging as the information type when configuring information source, meantime using the debugging command to turn on the debugging switch of those modules.
You can use the following commands to configure log information, debugging information and the time-stamp output format of trap information.
Perform the following configuration to configure the output format of time-stamp:
|
To do… |
Use the command… |
Remarks |
|
Configure the output format of the time-stamp |
info-center timestamp { log | trap | debugging } { boot | date | none } |
Available in system view |
|
Disable the output of time-stamp |
undo info-center timestamp { log | trap | debugging } |
Available in system view |
1.2.6 Sending Information to the Trap Buffer
To send configuration information to the trap buffer, follow the steps below:
1) Enabling the information center
|
To do… |
Use the command… |
Remarks |
|
Enable information center |
info-center enable |
Available in system view |
|
Disable information center |
undo info-center enable |
Available in system view |
& Note:
Information center is enabled by default. After information center is enabled, system performances are affected when the system processes much information because of information classification and outputting.
2) Configuring to output information to the trap buffer
|
To do… |
Use the command… |
Remarks |
|
Output information to trap buffer |
info-center trapbuffer [ size buffersize | channel { channel-number | channel-name } ]* |
Available in system view |
|
Cancel the configuration of outputting information to trap buffer |
undo info-center trapbuffer [ channel | size ] |
Available in system view |
By default, the switch outputs information to the trap buffer in the CPU. The size of the trap buffer is 256, that is, the trap buffer can hold up to 256 messages.
3) Configuring information source on the switch
By this configuration, you can define the information that sent to trap buffer is generated by which modules, information type, information level, and so on.
|
To do… |
Use the command… |
Remarks |
|
Define information source |
info-center source { modu-name | default } channel { channel-number | channel-name } [ debug { level severity | state state }* | log { level severity | state state }* | trap { level severity | state state }* ]* |
Available in system view |
|
Cancel the configuration of information source |
undo info-center source { modu-name | default | all } channel { channel-number | channel-name } |
Available in system view |
When defining the information sent to trap buffer, channel-number or channel-name must be set to the channel that corresponds to trapbuffer direction.
Every channel has been set with a default record, whose module name is default and the module number is 0xffff0000. However, for different channels, the default record may have different default settings of log, trap and debugging. When there is no specific configuration record for a module in the channel, use the default one.
& Note:
If you want to view the debugging information of some modules on the switch, you must select debugging as the information type when configuring information source, meantime using the debugging command to turn on the debugging switch of those modules.
You can use the following commands to configure log information, debugging information and the time-stamp output format of trap information.
This configuration will affect the timestamp of the displayed information.
Perform the following configuration to configure the output format of time-stamp:
|
To do… |
Use the command… |
Remarks |
|
Configure the output format of the time-stamp |
info-center timestamp { log | trap | debugging } { boot | date | none } |
Available in system view |
|
Disable the output of time-stamp |
undo info-center timestamp { log | trap | debugging } |
Available in system view |
1.2.7 Sending Information to SNMP Network Management
To send configuration information to SNMP NM, follow the steps below:
1) Enabling information center
|
To do… |
Use the command… |
Remarks |
|
Enable information center |
info-center enable |
Available in system view |
|
Disable information center |
undo info-center enable |
Available in system view |
& Note:
Information center is enabled by default. After information center is enabled, system performances are affected when the system processes much information because of information classification and outputting.
2) Outputting information to SNMP NM
|
To do… |
Use the command… |
Remarks |
|
Output information to SNMP NM |
info-center snmp channel { channel-number | channel-name } |
Available in system view |
|
Cancel the configuration of outputting information to SNMP NM |
undo info-center snmp channel |
Available in system view |
3) Configuring information source on the switch
By this configuration, you can define the information that sent to SNMP NM is generated by which modules, information type, information level, and so on.
|
To do… |
Use the command… |
Remarks |
|
Define information source |
info-center source { modu-name | default } channel { channel-number | channel-name } [ debug { level severity | state state }* | log { level severity | state state }* | trap { level severity | state state }* ]* |
Available in system view |
|
Cancel the configuration of information source |
undo info-center source { modu-name | default | all } channel { channel-number | channel-name } |
Available in system view |
modu-name specifies the module name; default represents all the modules; all represents all the information filter configuration in channel channel-number except default level refers to the severity levels; severity specifies the severity level of information. The information with the level below it will not be output. channel-number specifies the channel number and channel-name specifies the channel name.
When defining the information sent to SNMP NM, channel-number or channel-name must be set to the channel that corresponds to SNMP direction.
Every channel has been set with a default record, whose module name is default and the module number is 0xffff0000. However, for different channels, the default record may have different default settings of log, trap and debugging. When there is no specific configuration record for a module in the channel, use the default one.
& Note:
If you want to view the debugging information of some modules on the switch, you must select debugging as the information type when configuring information source, meantime using the debugging command to turn on the debugging switch of those modules.
You can use the following commands to configure log information, debugging information and the time-stamp output format of trap information.
This configuration will affect the timestamp of the displayed information.
Perform the following configuration to configure the output format of time-stamp:
|
To do… |
Use the command… |
Remarks |
|
Configure the output format of the time-stamp |
info-center timestamp { log | trap | debugging } { boot | date | none } |
Available in system view |
|
Disable the output of time-stamp |
undo info-center timestamp { log | trap | debugging } |
Available in system view |
4) Configuring SNMP and network management workstation on the switch
You have to configure SNMP on the switch and the remote workstation to ensure that the information is correctly sent to SNMP NM. Then you can get correct information from network management workstation. For SNMP configuration on switch refer to SNMP Configuration in the System Volume.
1.2.8 Sending Information to a Log File
To configure the Switch to send information to a log file, follow the procedure below:
1) Enabling the information center
|
To do… |
Use the command… |
Remarks |
|
Enable the information center |
info-center enable |
Available in system view |
|
Disable the information center |
undo info-center enable |
Available in system view |
& Note:
By default, the information center is enabled. If the information center is enabled, system performance will be affected at a certain degree when a large amount of information is processed.
2) Setting the Switch to output information to a log file
|
To do… |
Use the command… |
Remarks |
|
Set the Switch to send information to a log file |
info-center logfile [ channel { channel-number | channel-name } | size logfile-size | directory directory | number logfile-num ]* info-center logfile [ flush ] |
Available in system view |
|
Disable the Switch from sending information to a log file |
undo info-center logfile [ channel | size | directory | number ] |
Available in system view |
By default, the Switch outputs information to a log file, the allowed size of each log file is 2 Mbytes, the system allows you to save a maximum of 5 log files, and log files are saved under cf:/logfile.
3) Configuring an information source on the Switch
You can define the modules that generate the information to be sent to log files, information type, and information level.
|
To do… |
Use the command… |
Remarks |
|
Define an information source |
info-center source { modu-name | default } channel { channel-number | channel-name } [ debug { level severity | state state }* | log { level severity | state state }* | trap { level severity | state state }* ]* |
Available in system view |
|
Remove the configuration of the information source |
undo info-center source { modu-name | default | all } channel { channel-number | channel-name } |
Available in system view |
modu-name indicates a module name. default indicates all modules. all means removing all non-default information filtering configurations in the channelnum channel. level indicates the level of information severity. severity indicates an information level. The information at a lower level will not be output. channel-number indicates a channel number. channel-name indicates an information channel name.
When defining the information sent to a log file, you must set channel-number or channel-name to a channel in the logfile direction.
A default record is set for each information channel. It has a module name of default and a module number of 0xffff0000. The default record (containing log, trap, and debugging information) may vary with the information channels. If a module has no definite configuration record in this channel, the system uses the default record.
& Note:
To query debugging information of some modules on the Switch, you need to set the information type to debugging, and enable debugging for corresponding modules by executing the debugging command.
1.3 Displaying and Maintaining Information Center
|
To do… |
Use the command… |
Remarks |
|
Display the content of information channel |
display channel [ channel-number | channel-name ] |
Available in any view |
|
Display configuration of system log and memory buffer |
display info-center |
Available in any view |
|
Display the attribute of logbuffer and the information recorded in logbuffer |
display logbuffer [ summary ] [ size sizenum | [ reverse ] | level { levelnum | emergencies | alerts | critical | errors | warnings | notifications | informational | debugging } ] * [ | { begin | include | exclude } text ] |
Available in any view |
|
Display the summary information recorded in logbuffer |
display logbuffer summary [ level severity ] |
Available in any view |
|
Display the attribute of trapbuffer and the information recorded in trapbuffer |
display trapbuffer [ summary ] [ level [ levelnum | emergencies | alerts | critical | debugging | errors | informational | notifications | warnings ] ] [ size sizenum] |
Available in any view |
|
Clear information in memory buffer |
reset logbuffer |
Available in user view |
|
Clear information in trap buffer |
reset trapbuffer |
Available in user view |
1.4 Information Center Configuration Examples
1.4.1 Configuration Example of Sending Log to the Unix Loghost
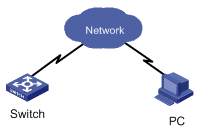
I. Network requirements
The network requirements are as follows:
l Sending the log information of the switch to UNIX loghost
l The IP address of the loghost is 202.38.1.10
l The information with the severity level above “informational” will be sent to the loghost
l The output language is English
l The modules that allowed to output information are ARP and IP
II. Network diagram
III. Configuration steps
1) Configuration on the switch
# Enable information center
[H3C] info-center enable
# Set the host with the IP address of 202.38.1.10 as the loghost; set the severity level threshold value as “informational”, set the output language to English; set that the modules which are allowed to output information are ARP and IP.
[H3C] info-center loghost 202.38.1.10 language english
[H3C] info-center source arp channel loghost log level informational
[H3C] info-center source ip channel loghost log level informational
2) Configuration on the loghost
This configuration is performed on the loghost. The following example is performed on SunOS 4.0 and the operation on Unix operation system produced by other manufactures is generally the same to the operation on SunOS 4.0.
Step 1: Perform the following command as the super user (root).
# mkdir /var/log/H3C
# touch /var/log/H3C/information
Step 2: Edit file /etc/syslog.conf as the super user (root), add the following selector/actor pairs.
# H3C configuration messages
local4.info /var/log/H3C/information
& Note:
Note the following points when editing /etc/syslog.conf:
l The note must occupy a line and start with the character #.
l There must be a tab other than a space as the separator in selector/actor pairs.
l No redundant space after file name.
l The device name and the acceptant log information level specified in /etc/syslog.conf must be consistent with information center loghost and information center loghost a.b.c.d facility configured on the switch. Otherwise, the log information probably cannot be output to the loghost correctly.
Step 3: After the establishment of information (log file) and the revision of /etc/syslog.conf, you should send a HUP signal to syslogd (system daemon), through the following command, to make syslogd reread its configuration file /etc/syslog.conf.
# ps -ae | grep syslogd
147
# kill -HUP 147
After the above operation, the switch system can record information in related log files.
& Note:
Through combined configuration of the device name (facility), information severity threshold (severity), module name (filter) and “syslog.conf” file, you can classify information precisely for filtering.
1.4.2 Configuration Example of Sending Log to the Linux Loghost
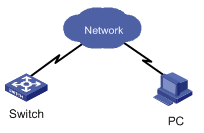
I. Network requirements
The Network requirements are as follows:
l Sending the log information of the switch to LINUX loghost
l The IP address of the loghost is 202.38.1.10
l The information with the severity level above informational will be sent to the loghost
l The output language is English
l All modules are allowed to output information
II. Network diagram
III. Configuration procedure
1) Configuration on the switch
# Enable information center
[H3C] info-center enable
# Set the host with the IP address of 202.38.1.10 as the loghost; set the severity level threshold value as “informational”, set the output language to English; set all the modules are allowed output information.
[H3C] info-center loghost 202.38.1.10 language english
[H3C] info-center source default channel loghost log level informational
2) Configuration on the loghost
This configuration is performed on the loghost.
Step 1: Perform the following command as the super user (root).
# mkdir /var/log/H3C
# touch /var/log/H3C/information
Step 2: Edit file /etc/syslog.conf as the super user (root), add the following selector/actor pairs.
# H3C configuration messages
local7.info /var/log/H3C/information
& Note:
Note the following points when editing /etc/syslog.conf:
l The note must occupy a line and start with the character #.
l There must be a tab other than a space as the separator in selector/actor pairs.
l No redundant space after file name.
l The device name and the acceptant log information level specified in /etc/syslog.conf must be consistent with information center loghost and information center loghost a.b.c.d facility configured on the switch. Otherwise, the log information probably cannot be output to the loghost correctly.
Step 3: After the establishment of information (log file) and the revision of /etc/syslog.conf, you should view the number of syslogd (system daemon) through the following command, kill syslogd daemon and reuse -r option to start syslogd in daemon.
# ps -ae | grep syslogd
147
# kill -9 147
# syslogd -r &
& Note:
For LINUX loghost, you must ensure that syslogd daemon is started by -r option.
After the above operation, the switch system can record information in related log files.
& Note:
Through combined configuration of the device name (facility), information severity threshold (severity), module name (filter) and file “syslog.conf”, you can classify information precisely for filtering.
1.4.3 Configuration Example of Sending Log to the Console Terminal
I. Network requirements
The network requirements are as follows:
l Sending the log information of the switch to console terminal
l The information with the severity level above informational will be sent to the console terminal
l The output language is English
The modules that allowed to output information are ARP and IP
II. Network diagram
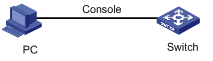
III. Configuration procedure
Configuration on the switch:
# Enable information center.
[H3C] info-center enable
# Configure console terminal log output; allow modules ARP and IP to output information; the severity level is restricted within the range of emergencies to informational.
[H3C] info-center console channel console
[H3C] info-center source arp channel console log level informational
[H3C] info-center source ip channel console log level informational
# Enable terminal display function.
<H3C> terminal logging
