- Table of Contents
-
- 10-Network Management and Monitoring Configuration Guide
- 00-Preface
- 01-System maintenance and debugging configuration
- 02-NQA configuration
- 03-iNQA configuration
- 04-Packet trace configuration
- 05-NTP configuration
- 06-PTP configuration
- 07-SNMP configuration
- 08-RMON configuration
- 09-Event MIB configuration
- 10-NETCONF configuration
- 11-Ansible configuration
- 12-Puppet configuration
- 13-Chef configuration
- 14-CWMP configuration
- 15-EAA configuration
- 16-Process monitoring and maintenance configuration
- 17-Sampler configuration
- 18-Mirroring configuration
- 19-NetStream configuration
- 20-IPv6 NetStream configuration
- 21-NetAnalysis configuration
- 22-sFlow configuration
- 23-Information center configuration
- 24-GOLD configuration
- 25-Packet capture configuration
- 26-Performance management configuration
- 27-TCP connection trace configuration
- Related Documents
-
| Title | Size | Download |
|---|---|---|
| 11-Ansible configuration | 103.17 KB |
Contents
Using Ansible for automated configuration management
Device setup examples for management with Ansible
Example: Setting up the device for management with Ansible
Using Ansible for automated configuration management
About Ansible
Ansible is an automation tool used for remote deployment on a large scale of devices that can be accessed through SSH. Deployed with Ansible, the system can perform large-scale and automated system O&M operations such as cluster configuration and application deployment. The flexible Ansible usage and replicable deployment parameters significantly reduce duplicated effort of O&M personnel and improve the O&M efficiency.
Ansible is programmed in Python and uses SSH to connect to network devices for centralized configuration and management.
Ansible network architecture
As shown in Figure 1, an Ansible system consists of the following elements:
· Manager—A host installed with Ansible. For more information about installing Ansible, see the Ansible official website.
The manager supports remote configuration such as creating VLANs. Not all services modules are configurable through Ansible. To identify the service modules that you can configure by using Ansible, access the Comware 7 Python library.
· Managed device—A managed device acts as an SSH server and does not require any agent software to be installed. Once an SSH connection is established between the manager and the device, the device automatically executes the commands deployed by the manager.
H3C devices can act as managed devices.
Figure 1 Ansible network architecture
Basic Ansible concepts
Figure 2 Basic Ansible concepts

Figure 2 shows the basic Ansible concepts:
· Playbook—An automated script written in YAML format. A playbook contains all configuration to be deployed to the devices and is executed in the order of the content. It avoids repeated and large-scale input on the manager, which is crucial for Ansible automation.
· Play—A play contains all operations targeted at a group of hosts. A playbook can contain multiple plays.
· Task—A basic unit that describes the operation and configuration to be executed on the target hosts. Each operation corresponds to a task. For example, creating VLAN 10 and specifying an IP address for VLAN-interface 10 correspond to two separate tasks. A play can contain multiple tasks.
· Module—A module can be a Python or Bash script. Ansible can perform specific operations on the target hosts and return the results only after tasks call modules. Modules can be called in the playbook or directly called by command lines on the manager. As a best practice to avoid repeated execution of commands, use the playbook to call modules.
· Hosts inventory—An important configuration file that informs Ansible of hosts to be managed and categorizes them. Target hosts of the operations written in the playbook must be defined in the hosts inventory.
How Ansible works
1. Install Ansible on the manager and write the operations to be executed by the devices in the playbook.
2. The manager (SSH client) initiates SSH connections to the devices (SSH servers).
3. The manager executes the playbook to deploy commands to the target devices.
4. The devices automatically execute the received commands.
Prerequisites for Ansible
Before you use Ansible to configure the device, complete the following tasks:
· Configure NTP or PTP or manually configure the system time on the Ansible server and the device to synchronize their system time. For more information about time synchronization, see device management configuration in Fundamentals Configuration guide and NTP and PTP configuration in Network Management and Monitoring Configuration Guide.
· Configure the device as an SSH server. For more information about SSH configuration, see Security Configuration Guide.
Device setup examples for management with Ansible
Example: Setting up the device for management with Ansible
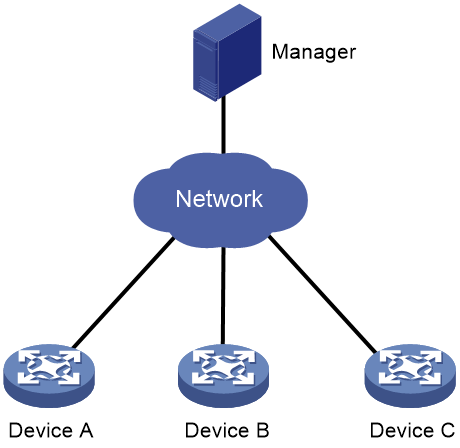
Network configuration
As shown in Figure 3, enable SSH server on the device and use the Ansible manager to manage the device over SSH.

Prerequisites
1. Assign IP addresses to the device and manager. Make sure they have connectivity to each other.
2. Configure NTP or PTP or manually configure the system time on both the device and manager so they use the same system time.
Configuring the device as an SSH server
# Create local key pairs. For more information, see SSH configuration in Security Configuration Guide.
# Create a local user named abc and set the password for the user.
<Device> system-view
[Device]local-user abc
[Device-luser-manage-abc] password simple 123456TESTplat&!
# Assign the network-admin user role to the user and authorize the user to use SSH, HTTP, and HTTPS services.
[Device-luser-manage-abc] authorization-attribute user-role network-admin
[Device-luser-manage-abc] service-type ssh http https
[Device-luser-manage-abc] quit
# Enable NETCONF over SSH.
[Device] netconf ssh server enable
# Enable scheme authentication for SSH login and assign the network-admin user role to the login users.
[Device] line vty 0 63
[Device-line-vty0-63] authentication-mode scheme
[Device-line-vty0-63] user-role network-admin
[Device-line-vty0-63] quit
# Enable the SSH server.
[Device] ssh server enable
# Authorize SSH user abc to use all service types, including SCP, SFTP, Stelnet, and NETCONF. Set the authentication method to password.
[Device] ssh user abc service-type all authentication-type password
# Enable the SFTP server or SCP server.
· If the device supports SFTP, enable the SFTP server.
[Device] sftp server enable
· If the device does not support SFTP, enable the SCP server.
[Device] scp server enable
Configuring the Ansible manager
In this example, the Ubuntu operating system is installed on the manager. To use a manager installed with another Linux system or Unix-like system, see the Ansible documentation official website at https://docs.ansible.com.
To configure the Ansible manager:
1. Configure the default hosts inventory:
The default hosts inventory file path is /etc/ansible/hosts. The manager must write the host information of the device (such as the IP address or domain name) in this file, for example:
192.168.1.1 Device
For more information about the hosts inventory writing rules and editing the file path, see the Ansible documentation official website at https://docs.ansible.com.
2. Use the PiP tool to install Ansible.
# Check the Python version.
$ python --version
# If Python is not installed, install it first.
$ sudo apt-get update
$ sudo apt-get install python3
# Check the PiP version.
$ pip --version
# If PiP is not installed, install it first.
$ sudo apt-get update
$ sudo apt-get install python-pip
# Install Ansible.
$ sudo pip install markupsafe
$ sudo pip install ansible
# After installation, check the Ansible version.
$ ansible -- version
3. Install the Python library.
|
|
NOTE: When Ansible executes scripts, the called modules must be implemented via Python. Install the Python library to obtain the code that enables the modules called by the playbook to operate correctly. |
# Download the up-to-date Comware Python library source code from GitHub.
$ sudo git clone https://github.com/HPENetworking/pyhpecw7
# Install the Comware Python library.
$ cd pyhpecw7-master
$ sudo chmod 777 setup.py
$ sudo python setup.py install
|
|
NOTE: If a message displays a missing component, use the $ sudo apt-get install xxx command to install the component. xxx represents the name of a component. |
# Download the Ansible module.
$ sudo git clone https://github.com/HPENetworking/ansible-hpe-cw7
# Use the find command to search for the namespaces.py file from the root directory. If the file is found and the file path contains pyhpecw7, open the file and use the following content to replace the existing content of the file:
HPDATA="http://www.h3c.com/netconf/data:1.0"
HPDATA_C='{'+HPDATA+'}'
NETCONFBASE="urn:ietf:params:xml:ns:netconf:base:1.0"
NETCONFBASE_C='{'+NETCONFBASE+'}'
HPCONFIG="http://www.h3c.com/netconf/data:1.0"
HPCONFIG_C='{'+HPCONFIG+'}'
HPACTION="http://www.h3c.com/netconf/data:1.0"
HPACTION_C='{'+HPACTION+'}'
4. Configure the SSH service.
# Install an SSH server.
$ sudo apt-get install ssh
# Edit the sshd configuration file. Change the value for the PermitRootLogin field to Yes.
$ sudo vi sshd_config
# Restart the SSH service.
$ sudo service ssh restart
5. Define the hosts inventory variables.
# In the ansible-hpe-cw7-master/hosts file, change the username and password that the manager use to log in to the device through SSH. The manager uses the new username and password to log in to all hosts.
[all:vars]
username=abc
password=123456TESTplat&!
# In the ansible-hpe-cw7-master/hosts file, change the [switches] field to Device. All host names of [switches] belong to the same group. Ansible can execute the same task on all hosts in the group.
[switches]
Device
6. Write the playbook.
# Create the vlans.yml file and write the following code in the file:
---
- name: VLAN automation with Ansible on Devices
hosts: switches
gather_facts: no
connection: local
tasks:
- name: ensure VLAN 10 exists
comware_vlan: vlanid=10 name=VLAN10 descr=LOCAL_SEGMENT username={{ username }} password={{ password }} hostname={{ inventory_hostname }}
- name: ensure VLAN 20 exists
comware_vlan: vlanid=20 state=present username={{ username }} password={{ password }} hostname={{ inventory_hostname }}
7. Execute the script.
# Grant the permission to execute the vlans.yml file.
$ sudo chmod 777 vlans.yml
# Use the ansible-playbook command to execute the vlans.yml file.
$ sudo ansible-playbook -i hosts vlans.yml
PLAY [VLAN automation with Ansible on Devices] *********************************
TASK [ensure VLAN 10 exists] ***************************************************
changed: [Device]
TASK [ensure VLAN 20 exists] ***************************************************
ok: [Device]
PLAY RECAP *********************************************************************
Device : ok=2 changed=1 unreachable=0 failed=0
The output shows that the script created VLAN 10 and detected that VLAN 20 already existed.
