- Table of Contents
-
- H3C Servers UniSystem Configuration Examples-6W100
- 01-UniSystem Bulk HDM&BIOS Import Configuration Examples
- 02-H3C UniSystem Cloning Installation Configuration Examples
- 03-UniSystem SMTP Configuration Examples
- 04-H3C UniSystem Cluster Creation Configuration Examples
- 05-H3C UniSystem SNMP Configuration Examples
- 06-H3C UniSystem RAID Configuration Examples
- 07-H3C UniSystem Rack Server Deployment Configuration Examples
- 08-UniSystem Bulk Component Update Configuration Examples
- Related Documents
-
| Title | Size | Download |
|---|---|---|
| 02-H3C UniSystem Cloning Installation Configuration Examples | 2.65 MB |
H3C UniSystem
Cloning Installation Configuration Examples
Copyright © 2023 New H3C Technologies Co., Ltd. All rights reserved.
No part of this manual may be reproduced or transmitted in any form or by any means without prior written consent of New H3C Technologies Co., Ltd.
Except for the trademarks of New H3C Technologies Co., Ltd., any trademarks that may be mentioned in this document are the property of their respective owners.
The information in this document is subject to change without notice.
Introduction
The following information describes a typical configuration example of using the UniSystem cloning installation feature to clone an operating system to two other servers. The UniSystem cloning installation feature allows cloning and exporting the operating system on the source server, as well as cloning the software and partition information of the operating system to the target server to realize rapid deployment of the server.
|
|
NOTE: Starting from version 2.59, FIST software has been renamed as UniSystem. |
Prerequisites
Procedures and information in the examples might be slightly different depending on the software or hardware version of the products.
The configuration was created and verified in a lab environment, and all the servers and software were started with the factory default configuration. When you are working on a live network, make sure you understand the potential impact of every command on your network.
The following information is provided based on the assumption that you have basic knowledge of the UniSystem cloning installation feature.
Restrictions and guidelines
This feature is only available when the UniSystem server is located in the AE module or virtual machine (VM).
When you clone an OS, follow these restrictions and guidelines:
· Linux
¡ When the server is in UEFI mode, only the OS installed in UEFI mode can be cloned and exported. In legacy mode, only the OS installed in legacy mode can be cloned and exported.
¡ You can export data of system disk partitions (including /, /usr, /usr/local, /var, and /home), rather than the data in the /run, /proc, /media, and /sys directories and other partitions (including swap and data partitions).
¡ After the cloned image is applied, the partition information will be consistent with that of the OS before cloning. The file systems such as ext2, ext3, ext4, VFAT, XFS, and LVM (LVM Thin Provisioning only supports the basic liner mode) are supported and the btrfs file system is not supported.
· VMware ESXi
¡ Before cloning, if you modify the network configuration on the OS, you need to restart the OS (do not restart or shut down it forcibly) so that the configuration will be saved in the configuration file of the OS. Otherwise, the network configuration will not be exported.
¡ Data files of the VMware ESXi system cannot be exported. As a best practice, separate the system disk from the data disk.
¡ After applying the cloned image, if you want to create a data partition on a logical drive, create it manually. The cloned image cannot retain the data partition of the VMware ESXi system.
Rack server configuration
Network requirement
As shown in Figure 1, deploy a UniSystem VM on a PC as the UniSystem server, and use another PC as the UniSystem client. Connect the Ethernet port of the PC, one R2700 G3 server, and two R4900 G5 servers to a switch on the same LAN, and configure IP addresses so that the UniSystem client, UniSystem server, and server devices can communicate normally. Clone the OS of the R2700 G3 server to the R4900 G5 server through UniSystem. For the detailed networking information, see Table 1.
Figure 1 Network diagram for UniSystem cloning installation

|
Devices role |
Device information |
Remarks |
|
UniSystem server |
UniSystem IP address |
192.168.1.72/16 |
|
Default UniSystem administrator account |
admin |
|
|
Default UniSystem administrator password |
Password@_ |
|
|
UniSystem client |
OS IP address |
192.168.11.36/16 |
|
Source server |
Server model |
H3C UniServer R2700 G3 |
|
HDM management IP addresses |
192.168.0.236/16 |
|
|
Storage controller model |
RAID-LSI-9361-8i(2G)-1-X |
|
|
OS version |
Red Hat Enterprise Linux 8.2 |
|
|
OS username |
root |
|
|
OS password |
Password@_ |
|
|
Logical drive where the OS is installed |
· Level: RAID0 · Name: raid0 · Capacity: 744.687 GiB |
|
|
Target server 1 |
Server model |
H3C UniServer R4900 G5 |
|
HDM IP address |
192.168.50.137/16 |
|
|
Storage controller model |
RAID-LSI-9361-8i(2G)-1-X |
|
|
Target drive |
· Level: RAID0 · Name: raid0 · Capacity: 1.8 TB |
|
|
Target server 2 |
Server model |
H3C UniServer R4900 G5 |
|
HDM IP address |
192.168.0.27/16 |
|
|
Storage controller model |
RAID-LSI-9361-8i(2G)-1-X |
|
|
Target drive |
· Level: RAID0 · Name: raid0 · Capacity: 745.21 GiB |
|
|
NOTE: · The storage controller models on the source server and target server must be the same. · The capacity of the target drive of the target server must be greater than or equal to the capacity of the logical drive where the OS of the source server is installed. · The iFIST software is required on the target server, and iFIST needs to have a system IP address that can communicate with UniSystem. The iFIST system IP address can only be obtained through DHCP, and UniSystem and iFIST need to be deployed on the same LAN. |
||
Analysis
1. To manage servers through UniSystem, you need to add the source server and target server to the server list of UniSystem.
2. Clone and export the OS image on the source server R2700 G3.
3. Create a server template that matches the target server, and select the OS image file exported from the source server when configuring the OS.
4. To successfully apply a server template, you need to shut down the target server first.
5. Apply the server template on the target server.
Software versions used
This configuration example was created and verified on UniSystem-2.35 and iFIST-1.35.
|
|
NOTE: When performing cloning installation through UniSystem, as a best practice, use UniSystem-2.00.22 and iFIST-1.01.22 or later versions. |
Restrictions and guidelines
When cloning the OS, the source server must meet the following requirements.
· The HDM status is normal and the server is powered on.
· The logical or physical drives are in normal state. When using an LSI storage controller, only RAID mode is supported (the working mode does not need to be configured for some LSI storage controllers).
· There exists only one OS.
Procedures
Adding the server
1. Log in to UniSystem. Click Menu > Devices > Server List.
2. Click Add. As shown in Figure 2, in the dialog box that opens, select the method of adding the server. Select Add Manually this time.
Figure 2 Selecting the method of adding the server

Figure 3 Manually adding the server

4. Repeat steps 2 and 3. Enter the server HDM IP address, username, password, and device name, and add two R4900 G5 servers one by one.
Exporting the cloned image
1. As shown in Figure 4, click Menu > Templates > Clone Images.
Figure 4 Page for cloning images

2. Select the source server R2700 G3 from which you want to export the OS image, and click Export in the Actions column for a device. As shown in Figure 5, in the dialog box that opens, enter the name of the cloning task and the name of the OS image, select Storage Controller and Target Drive where the OS resides, and click OK.
Figure 5 Exporting image for OS cloning

3. In the dialog box shown in Figure 6, enter YES and click OK to issue the cloning and exporting command.

4. In the Status column, check the cloning progress, as shown in Figure 7. When the progress is 100%, it indicates that the cloning process is completed.
|
|
TIP: Do not power off or restart the server during the cloning process. The process takes several minutes, depending on the current state of the server and the size of the OS image file. Please wait patiently. |

5. Click Manage Images to navigate to the page as shown in Figure 8. Check the type and size of the exported image file.

Creating a server template
1. Click Menu > Templates > Server Templates to navigate to the page shown in Figure 9.

2. Click Add to navigate to the page shown in Figure 10.
Figure 10 Adding a server template

3. Configure the server template information. In the Basic Info column, enter the server template name and server template description (optional), and select the server model in the drop-down box.
4. Configure the OS image and parameters. As shown in Figure 11, in the OS Settings column, select Cloned Image for Operating System under Image Settings, and select rhel82 cloned and exported from the source server. Use the default parameters this time.
5. Configure the target drive and specify the location where the OS is to be installed. Select Logical Drive for the target drive and enter the original logical drive name raid0 in the target server.

6. Click OK and the template of the R4900 G5 server is created.
Applying a server template
Powering off servers
1. Click Menu > Devices > Server List.
2. To apply a server template, servers must be powered off. To power off servers, click the target servers, click More, select Power Control, and then select Graceful Power-Off, as shown in Figure 12.

3. In the dialog box that opens as shown in Figure 13, select I have read and understood the consequences of this operation, and then click OK.
Figure 13 Gracefully powering off servers

Applying a server template
1. Click Menu > Deployment > Apply Server Templates to navigate to the page as shown in Figure 14.
Figure 14 Applying a server template

2. Select the R4900 G5 servers whose device names are R4900 G5_1 and R4900 G5_2 as target servers and click Apply Server Template.
3. In the dialog box that opens as shown in Figure 15, select the server template R4900_clone_rhel82, and verify that the device name and HDM status are normal.
Figure 15 Dialog box for applying the server template

4. Select I have read the template application-related restrictions and guidelines.
5. Click OK to apply the server template.
6. Check the status and progress of applying the current server template, and click Logs in the Actions column to view the server template application logs.
7. After the template is applied, the Apply Templates tab will display Succeeded, as shown in Figure 16.
Figure 16 Application configuration completed

Verifying configuration
1. As shown in Figure 16, click H5 KVM in the Actions column for two R4900 G5 servers.
2. After the server starts and the OS login interface shown in Figure 17 opens, use the username root and password Password@_ of the source server OS to log in to the cloned OS.

3. Log in to the OS and check whether the system configuration installed through the cloned image is consistent with that of the source server.
¡ Check the system disk partition, as shown in Figure 18 and Figure 19.
Figure 18 System partition of the source server

Figure 19 System partition of the target server

¡ Check the storage controller driver version. Both are 07.715.02.00, as shown in Figure 20 and Figure 21.
Figure 20 Storage controller driver version of the source server

Figure 21 Storage controller driver version of the target server

4. The OS of the target server is the same as that of the source server, indicating that the OS is cloned and installed successfully.
Blade server configuration
Network requirement:
As shown in Figure 22, use an AE module in the B16000 chassis as the UniSystem server, and use a PC as the UniSystem client. Connect the Ethernet port of the PC and the service ports and management ports of the OM modules of B16000 chassis A and B to the switches on the same LAN respectively, and configure IP addresses so that the UniSystem client, UniSystem server, and server devices can communicate normally. Clone and install the OS of a B5800 G3 server to a B5700 G3 server and a B7800 G3 server through UniSystem. For the detailed networking information, see Table 2.
Figure 22 Network diagram for UniSystem cloning installation

|
Devices roles |
Device information |
Remarks |
|
UniSystem client |
OS IP address |
172.16.12.55/17 |
|
B16000 chassis 1 |
OM IP address |
172.17.0.239/17 |
|
AE module (UniSystem server) |
UniSystem IP address |
172.16.13.224/17 |
|
UniSystem administrator account |
admin |
|
|
UniSystem administrator password |
Password@_ |
|
|
Source server |
HDM IP address |
172.16.88.65/17 |
|
Storage controller model |
RAID-P2404-Mf-4i-2GB |
|
|
OS Version |
Red Hat Enterprise Linux 8.2 |
|
|
OS username |
root |
|
|
OS password |
rhel82@123 |
|
|
Logical drive where the OS is installed |
· Level: RAID0 · Name: raid0 · Capacity: 279.42 GiB |
|
|
B16000 chassis 2 |
OM IP address |
172.17.0.39/17 |
|
Target server B5700 G3 |
HDM IP address |
172.16.12.158/17 |
|
Storage controller model |
RAID-P2404-Mf-4i-2GB |
|
|
Target drive |
· Level: RAID0 · Name: raid0 · Capacity: 1.09 TB |
|
|
Target server B7800 G3 |
HDM IP address |
172.16.18.53/17 |
|
Storage controller model |
RAID-P2404-Mf-4i-2GB |
|
|
Target drive |
· Level: RAID0 · Name: raid0 · Capacity: 558.9 GiB |
|
|
NOTE: · The storage controller models on the source server and target server must be the same. · The capacity of the target drive of the target server must be greater than or equal to the capacity of the logical drive where the OS of the source server is installed. · The iFIST software is required on the target server, and iFIST needs to have a system IP address that can communicate with UniSystem. The IP address of the iFIST system can only be obtained through DHCP, and UniSystem needs to be deployed on the same LAN. |
||
Analysis
1. To manage servers through UniSystem, you need to add the source server and target server to the server list of UniSystem.
2. Clone and export the OS image on the source server B5800 G3.
3. Create a server template that matches the target server. Select the OS image file exported from the source server when configuring the OS.
4. To successfully apply a server template, you need to shut down the server first.
5. Apply the server template on the target server.
Software versions used
This configuration example was created and verified on UniSystem-2.34 and iFIST-1.34.
|
|
NOTE: When performing cloning installation through UniSystem, as a best practice, use UniSystem-2.00.22 and iFIST-1.01.22 or later versions. |
Restrictions and guidelines
When cloning the OS, the source server must meet the following requirements.
· The HDM status is normal and the server is powered on.
· The logical or physical drives are in normal state. When using an LSI storage controller, only RAID mode is supported (the working mode does not need to be configured for some LSI storage controllers).
· There exists only one OS.
Procedures
Adding chassis
1. Log in to UniSystem. Click Menu > Devices > Chassis List.
2. Click Add Enclosure. As shown in Figure 23, in the dialog box that opens, enter the OM IP address, username, and password of chassis 2 and then click OK.
Figure 23 Selecting the method of adding the server

3. After the chassis is successfully added, the chassis list is displayed as shown in Figure 24. The chassis 172.17.0.239 where the AE module resides will be automatically added to the chassis list.

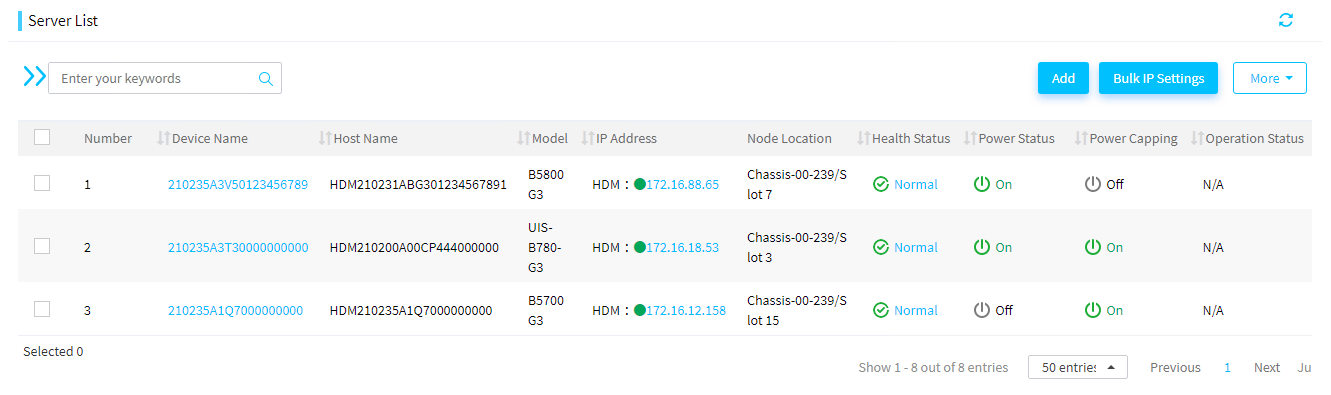
4. After the chassis is added, blade servers within the chassis are automatically added to the server list. The server list is shown in Figure 25.
Exporting the cloned image
1. As shown in Figure 26, click Menu > Templates > Clone Images.
Figure 26 Page for cloning images

2. Select the source server B5800 G3 from which you want to export the OS image, and click Export in the Actions column for a device. As shown in Figure 27, in the dialog box that opens, enter the name of the cloning task and the name of the OS image, select Storage Controller and Target Drive where the OS resides, and click OK.
Figure 27 Exporting the image for OS cloning

3. In the dialog box shown in Figure 28, enter Yes and click OK to issue the cloning and exporting command.

4. In the Status column, check the cloning progress, as shown in Figure 29. When the progress is 100%, it indicates that the cloning process is completed.
|
|
TIP: · Do not power off or restart the server during the cloning process. The process takes several minutes, depending on the current state of the server and the size of the OS image file. Please wait patiently. · If the available capacity of the AE module is less than or equal to 10 GB, the cloned image file cannot be exported. Please delete unwanted image files first. You can navigate to the Menu > Templates > Image Management page to view the available capacity of the AE module. |

5. Click Manage Images to navigate to the page as shown in Figure 30. Check the type and size of the exported image file.

Creating a server template
1. Click Menu > Templates > Server Templates to navigate to the page shown in Figure 31.

2. Click Add to navigate to the page shown in Figure 32.
Figure 32 Adding a server template

3. Configure the server template information. In the Basic Info column, enter the server template name and server template description (optional), and select the server model in the drop-down box.
4. Configure the OS image and parameters. As shown in Figure 33, in the OS Settings column, select Cloned Image for Operating System under Image Settings, and select rhel82_P2404 cloned and exported from the source server. Use the default parameters for the network type of the OS this time.
5. Configure the target drive and specify the location where the OS is to be installed. Select Logical Drive for the target drive and enter the original logical drive name raid0 in the target server.
Figure 33 Configuring system settings

6. Click OK and the template of the B5700 G3 server is created.
7. Click Inherit Create for a server template, enter the template name 7800_Clone_rhel82, select the compatible model H3C UniServer B7800 G3, and click OK. After you configure the template of the B7800 G3 server, the page shown in Figure 34 is displayed.
Figure 34 Server template list

Applying a server template
Powering off servers
1. Click Menu > Devices > Server List.
2. To apply a server template, servers must be powered off. To power off servers, click the target servers, click More, select Power Control, and then select Graceful Power-Off, as shown in Figure 35.

3. In the dialog box that opens as shown in Figure 36, select I have read and understood the consequences of this operation, and then click OK to power off the server.
Figure 36 Gracefully powering off servers

Applying a server template
1. Click Menu > Deployment > Apply Server Templates to navigate to the page as shown in Figure 37.
Figure 37 Applying a server template

2. Select the B5700 G3 server as the target server and click Apply Server Template.
3. In the dialog box that opens as shown in Figure 38, select the server template 5700_clone_rhel82, and verify that the device name and HDM status are normal.
Figure 38 Dialog box of server configure template

4. Select I have read the template application-related restrictions and guidelines.
5. Click OK to apply the server template.
6. Return to the Apply Templates page. Select B7800 G3. Click Apply Server Template and repeat steps 3 through 5. Select 7800_clone_rhel82 for the B7800 G3 server as the server template.
7. Check the status and progress of applying the current server template, and click Logs in the Actions column to view the server template application logs.
8. After the template is applied, the Apply Templates tab will display Succeeded, as shown in Figure 39.
Figure 39 Application configuration completed

Verifying the configuration
1. As shown in Figure 39, click H5 KVM in the Actions column for two target servers B5700 G3 and B7800 G3.
2. After the server starts and the OS login interface shown in Figure 40 opens, use the username root and password rhel82@123 of the source server OS to log in to the cloned OS.
Figure 40 OS login page

3. Log in to the OS and check whether the system configuration installed through the cloned image is consistent with that of the source server.
¡ Check the system disk partition, as shown in Figure 41 and Figure 42.
Figure 41 System partition of the source server

Figure 42 System partition of the target server

¡ Check the software settings, such as viewing the FIST SMS running status, firewall status and other software versions, as shown in Figure 43 and Figure 44.
Figure 43 System software settings of the source server

Figure 44 System software settings of the target server

4. The OS of the target server is the same as that of the source server, indicating that the OS is cloned and installed successfully.
Related documentation
· H3C Servers UniSystem User Guide
· H3C Servers UniSystem Installation Guide
