- Table of Contents
-
- H3C iMC Database Installation Guide-5W103
- 01-MySQL 8.0.xx Installation and Configuration Guide (for Linux)
- 02-MySQL 8.0.xx Installation and Configuration Guide (for Windows)
- 03-Oracle 11g Installation and Configuration Guide
- 04-Oracle 11g R2 Installation and Configuration Guide
- 05-Oracle 12c Installation and Configuration Guide
- 06-Oracle 12c R2 Installation and Configuration Guide
- 07-Oracle 18c Installation and Configuration Guide
- 08-SQL Server 2016 Installation and Configuration Guide
- 09-SQL Server 2017 Installation and Configuration Guide
- 10-SQL Server 2019 Installation and Configuration Guide
- 11-SQL Server 2022 Installation and Configuration Guide
- 12-MariaDB 10.x.x Installation Guide (Linux)
- 13-MariaDB 10.x.x Installation Guide (Windows)
- Related Documents
-
| Title | Size | Download |
|---|---|---|
| 02-MySQL 8.0.xx Installation and Configuration Guide (for Windows) | 4.18 MB |
|
|
|
H3C Intelligent Management Center |
|
MySQL 8.0.xx Installation and Configuration |
|
Guide (for Windows)
|
Software version: IMC PLAT 7.3 (E0708)
Document version: 5W102-20241206
Copyright © 2025 New H3C Technologies Co., Ltd. All rights reserved.
No part of this manual may be reproduced or transmitted in any form or by any means without prior written consent of New H3C Technologies Co., Ltd.
Except for the trademarks of New H3C Technologies Co., Ltd., any trademarks that may be mentioned in this document are the property of their respective owners.
The information in this document is subject to change without notice.
Preface
This preface includes the following topics about the documentation:
· Audience.
· Conventions.
Audience
This documentation is intended for:
· Network planners.
· Field technical support and servicing engineers.
· Network administrators working with the H3C Intelligent Management Center (IMC).
Conventions
The following information describes the conventions used in the documentation.
GUI conventions
|
Convention |
Description |
|
Boldface |
Window names, button names, field names, and menu items are in Boldface. For example, the New User window opens; click OK. |
|
> |
Multi-level menus are separated by angle brackets. For example, File > Create > Folder. |
Symbols
|
Convention |
Description |
|
|
An alert that calls attention to important information that if not understood or followed can result in personal injury. |
|
|
An alert that calls attention to important information that if not understood or followed can result in data loss, data corruption, or damage to hardware or software. |
|
|
An alert that calls attention to essential information. |
|
NOTE: |
An alert that contains additional or supplementary information. |
|
|
An alert that provides helpful information. |
Documentation feedback
You can e-mail your comments about product documentation to [email protected].
We appreciate your comments.
Contents
Adding an environment variable value
Enabling batch data import from files
Overview
This document describes how to install and configure the MySQL 8.0 database in Windows Server 2019. The installation procedures for MySQL databases of other versions might vary. For more information, see their respective installation and configuration guides.
|
|
IMPORTANT: Before you install IMC, you must install and start the MySQL server. If IMC is deployed in distributed mode, the master and subordinate IMC servers must use the same MySQL server as the database server. |
Prerequisites
Before the installation, copy the installation program to the Windows server. This document uses the mysql-installer-community-8.0.17.0.msi installation program.
Make sure Microsoft Visual C++ 2015 and Microsoft .Net Framework 4.5.2 have been installed before you install the MySQL server or client on the Windows server system.
Installation
If IMC will use a local database, install the MySQL server on the same server where IMC will be installed.
If IMC will use a remote database server, install the MySQL server on the database server and install the MySQL client on the same server as IMC. The MySQL client must be installed before you install IMC. During IMC installation, you must select other server and specify the server address to test the database connection.
Installing the MySQL server
1. Double-click the MySQL installation program to start the setup wizard.
The License Agreement dialog box opens.

2. Select I accept the license terms, and then click Next.
The Choosing a Setup Type dialog box opens.
Figure 2 Choosing a setup type

3. Select Server only.
4. Click Next.
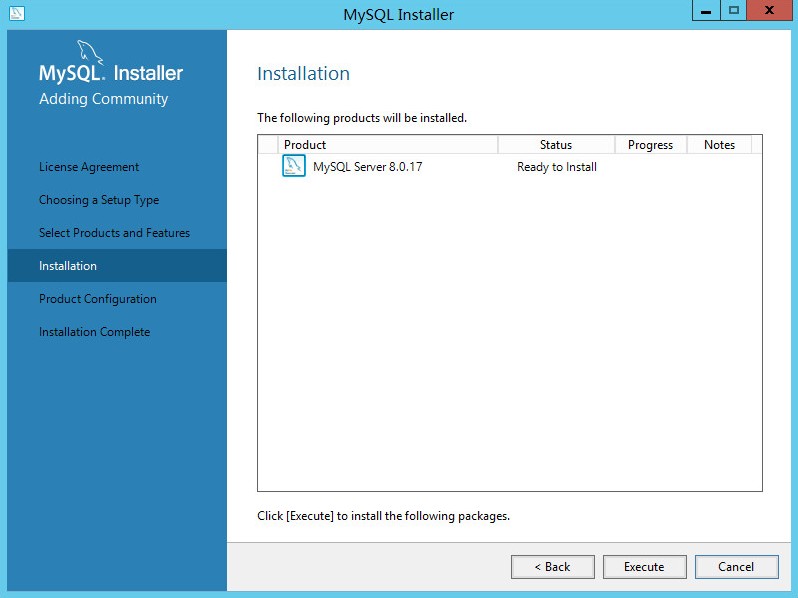
The Installation dialog box opens.

5. Click Execute.
To view detailed information about the installation progress, click Show Details in the Installation dialog box.
Figure 4 Viewing detailed information about the installation progress
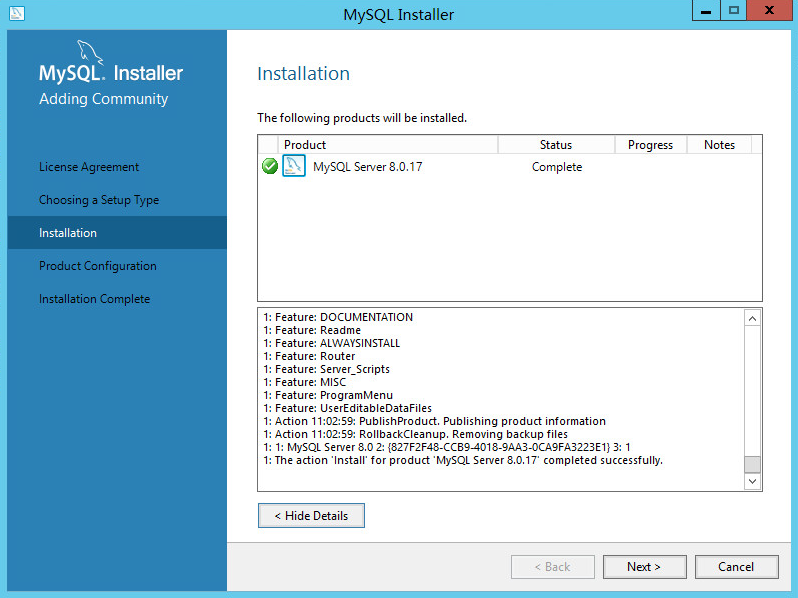
6. Click Next after the installation is complete.
The Product Configuration dialog box opens.
Figure 5 Product Configuration
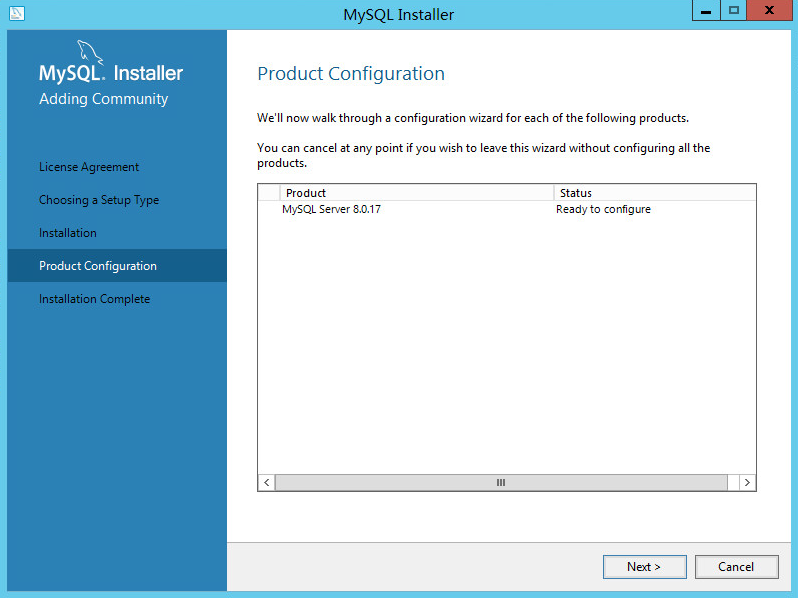
7. Click Next.
8. Click Next.
The Type and Networking dialog box opens.
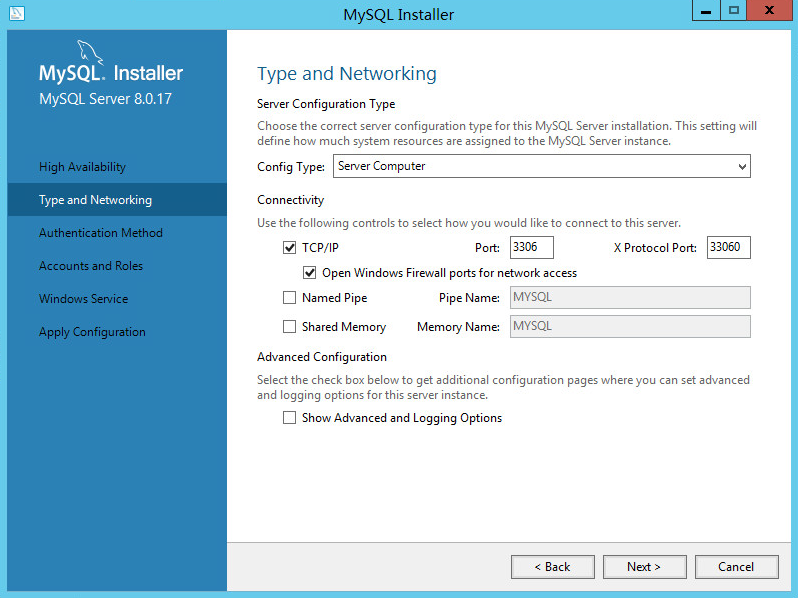
9. Configure the following parameters for the MySQL server:
¡ From the Config Type list, select Server Computer or Dedicated Computer. The list provides a description for each configuration type.
¡ Select TCP/IP, and then enter the port number to be used by the MySQL server. Make sure the port number is not used by other applications. This example uses the default port of 3306.
¡ Select Open Firewall port for network access to prevent the firewall from blocking the MySQL database connection.
10. Click Next.
The Authentication Method dialog box opens.
Figure 7 Authentication Method
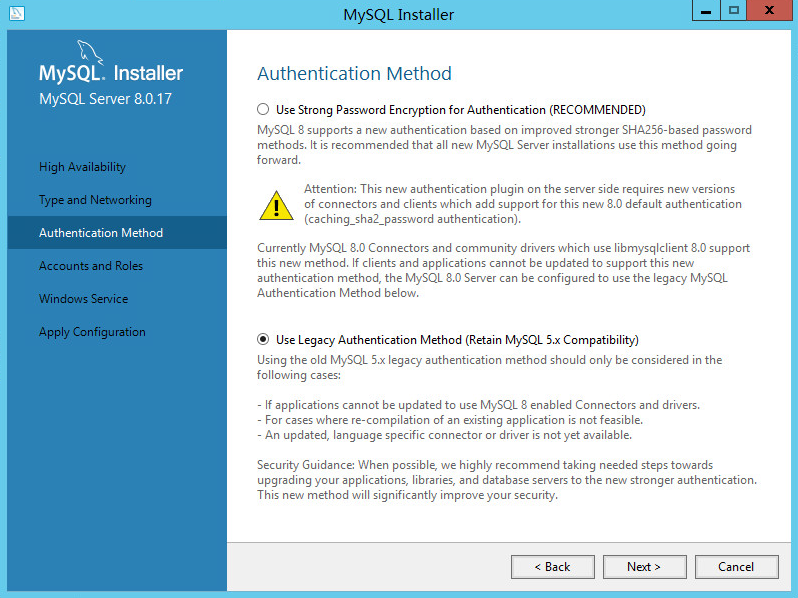
11. Select Use Legacy Authentication Method (Retain MySQL 5.x Compatibility).
12. Click Next.
13. Set a password for the root user account. The password must contain a minimum of four characters.
Figure 8 Setting a password for the root user
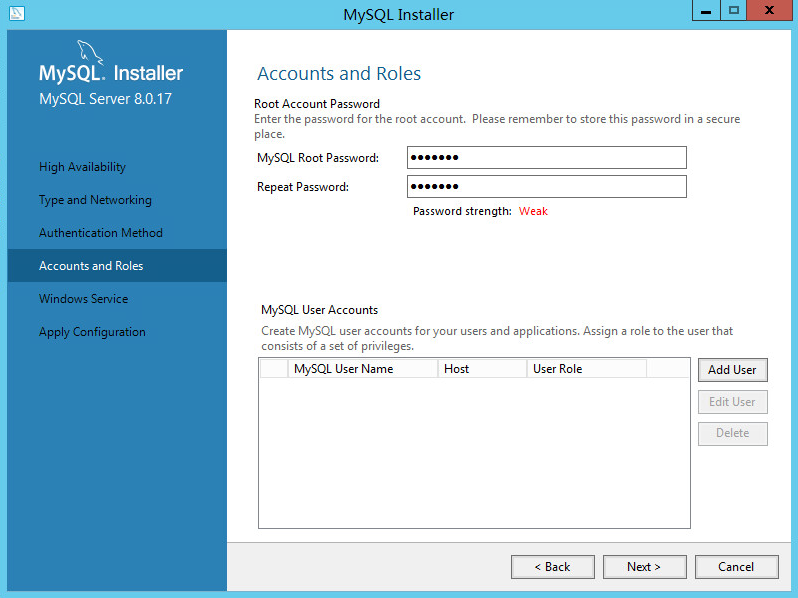
Make sure the password of the root user does not include spaces, tabs (\t), or any characters in Table 1. Otherwise, the password cannot be recognized during IMC installation.
|
Character name |
Symbol |
|
Ampersand |
& |
|
Apostrophe |
' |
|
At sign |
@ |
|
Back quote |
` |
|
Backslash |
\ |
|
Caret |
^ |
|
Dollar sign |
$ |
|
Exclamation point |
! |
|
Left angle bracket |
< |
|
Left parenthesis |
( |
|
Quotation marks |
" |
|
Right angle bracket |
> |
|
Right parenthesis |
) |
|
Semicolon |
; |
|
Slash |
/ |
|
Vertical bar |
| |
14. Click Next.
The Windows Service dialog box opens.
Figure 9 Windows Service
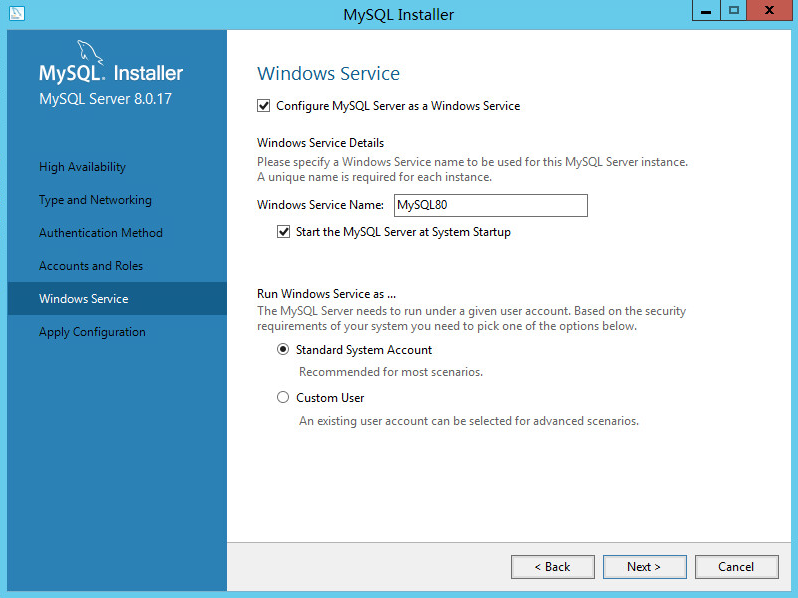
15. Configure the following parameters:
¡ Select Configure MySQL Server as a Windows Service.
¡ Enter a Windows service name in the Windows Service Name field. This example uses the default value.
¡ Select Start the MySQL Server at System Startup.
¡ Select Standard System Account in the Run Windows Service as area.
16. Click Next.
The Apply Configuration dialog box opens.
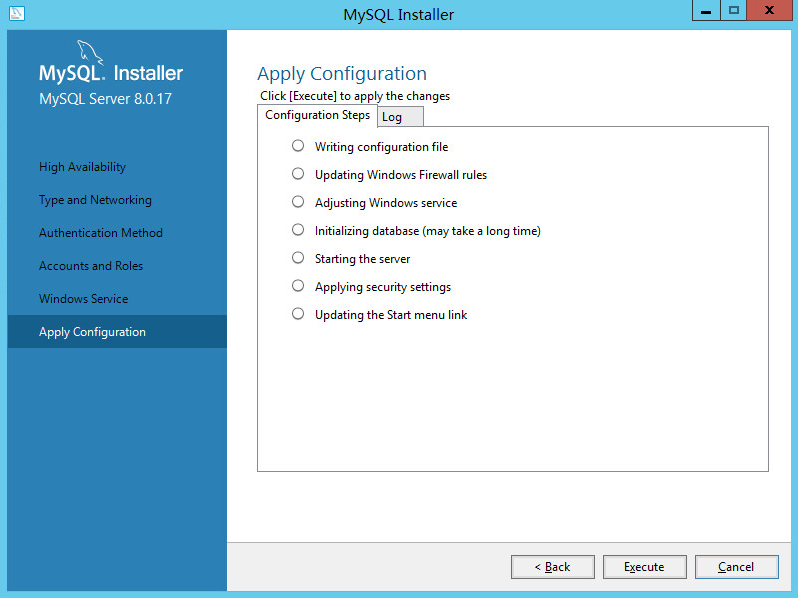
17. Click Execute.
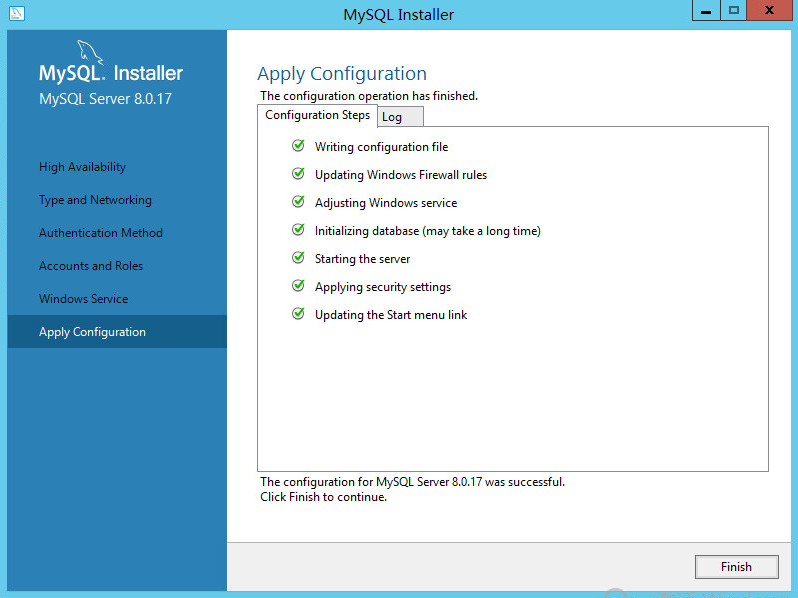
After the configuration is complete, the configuration success message opens.
Figure 11 Configuration success
The Product Configuration page opens.
Figure 12 Product Configuration

19. Click Next.
The Installation Complete dialog box opens.
Figure 13 Installation Complete
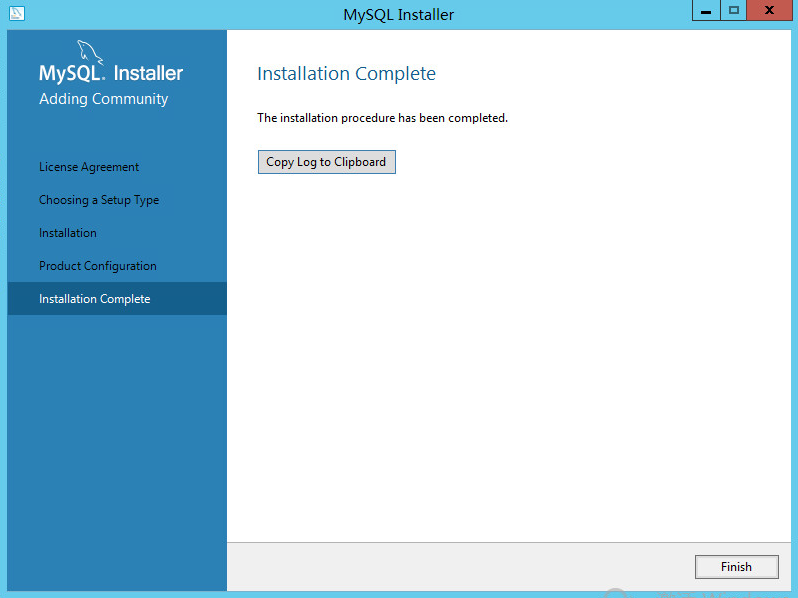
20. Click Finish.
Installing the MySQL client
If the database and IMC will be planned on different servers, install the MySQL client on each IMC server after installing the MySQL server on the database server.
The MySQL client must be installed on the IMC server before you install IMC. When configuring the remote database, select other server for the database location.
|
|
IMPORTANT: Make sure Microsoft Visual C++ 2013 and Microsoft .Net Framework 4.5.2 have been installed before you install the MySQL client on the Windows server system. |
1. Double-click the MySQL installation program to start the setup wizard.
The License Agreement dialog box opens.
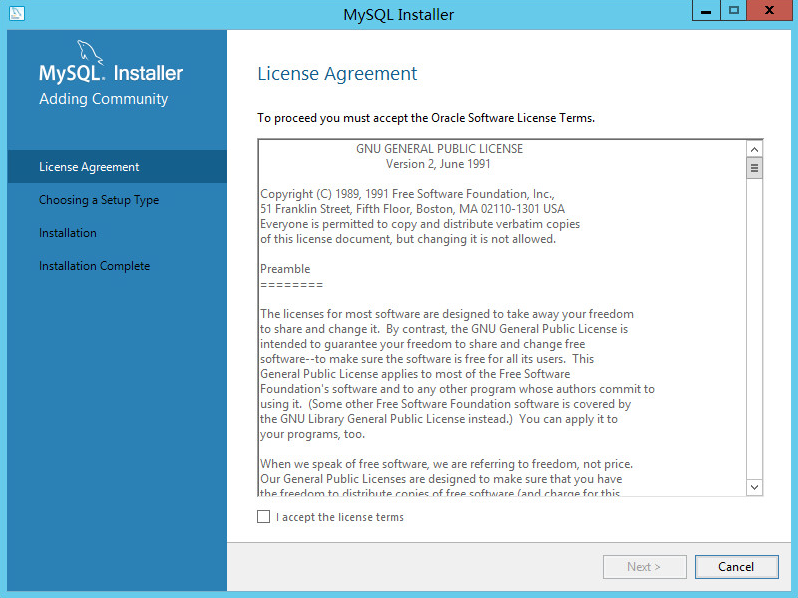
2. Select I accept the license terms, and then click Next.
The Choosing a Setup Type dialog box opens.
Figure 15 Choosing a Setup Type
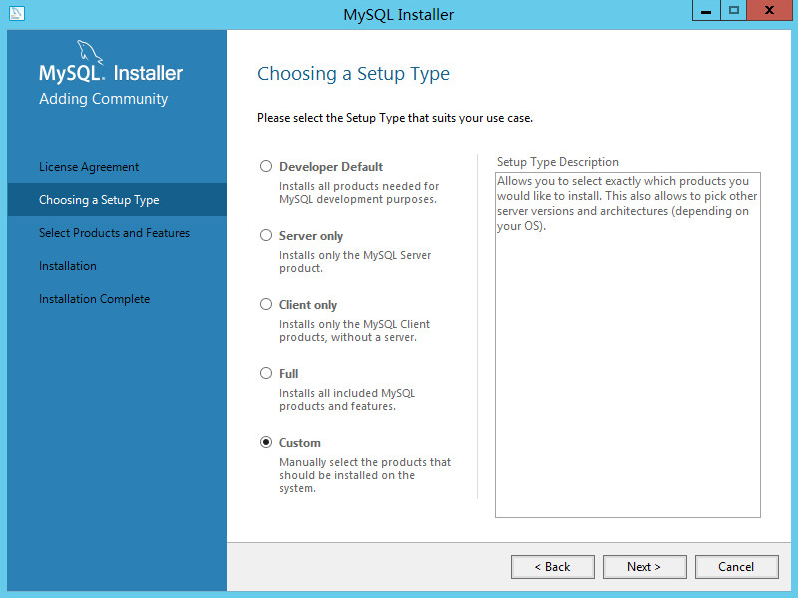
3. Select Custom, and then click Next.
The Select Products and Features dialog box opens.
Figure 16 Select Products and Features
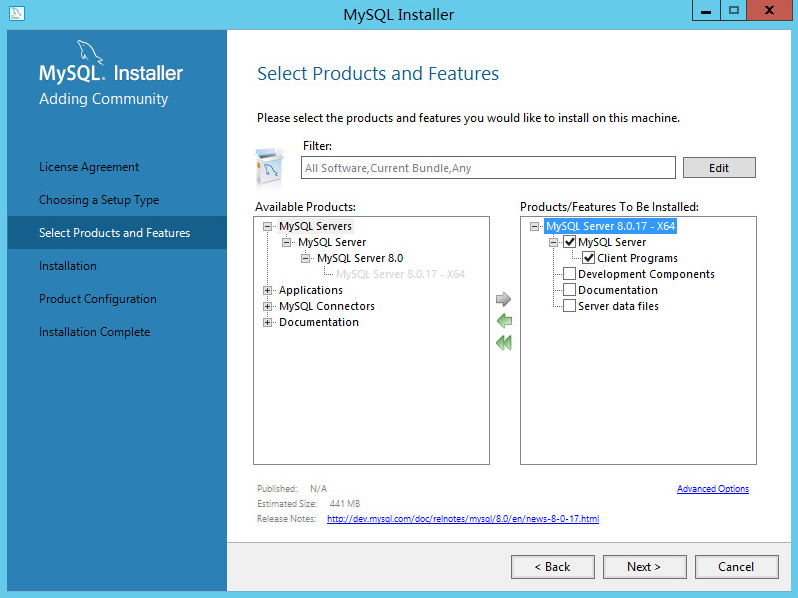
4. Select Client Programs, and then click Next.
The Installation dialog box opens.
5. Click Execute to install the MySQL client on the server.
Figure 18 Installation operation

6. Click Next after the installation is complete.
The Product Configuration dialog box opens.
Figure 19 Product Configuration
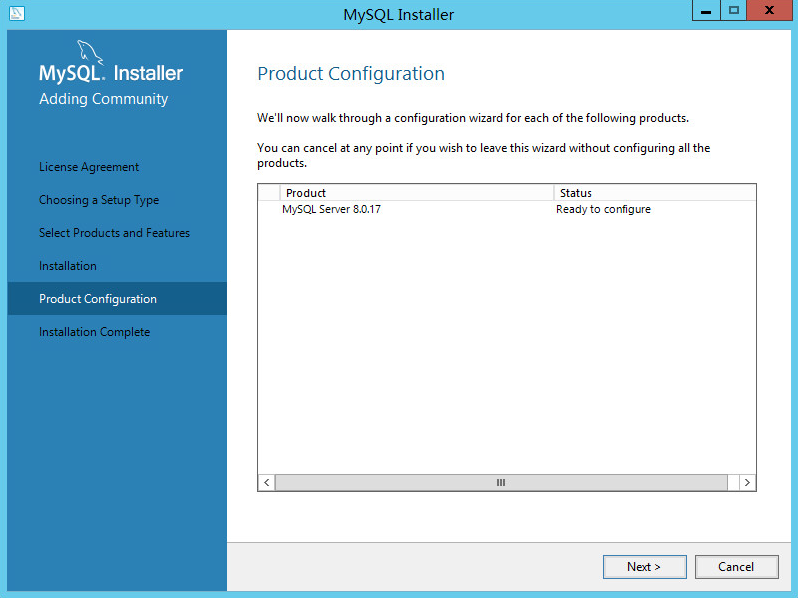
7. Click Cancel.
The Cancel dialog box opens.
Figure 20 Cancel adding products
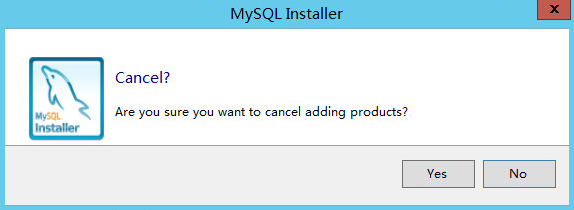
8. Click Yes.
Testing the connectivity
After the MySQL client is installed, add the MySQL client installation path as a PATH environment variable value. For more information, see "Adding an environment variable value."
After adding the installation path as an environment variable value, make sure the MySQL server on the remote database server has been started.
To test the connectivity between the MySQL client and the server:
1. Select Start > Run.
2. In the Run dialog box, enter cmd, and then click OK.
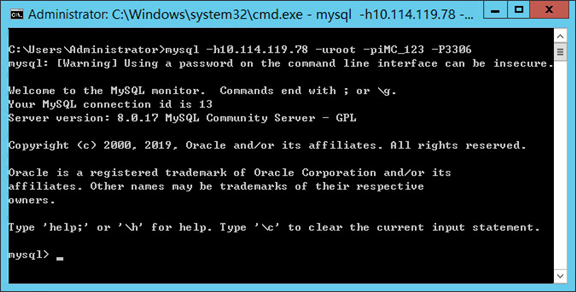
3. In the CLI window, enter the following command:
mysql -h10.114.119.78 -uroot -piMC123 -P3306
In this command, 10.114.119.78 is the IP address of the database server, root is the remote MySQL user name (see "Creating a remote root user account" for information about creating a remote MySQL user account), iMC123 is the password of the user root, and 3306 is the default port number of the MySQL database.
If you can enter the MySQL CLI mode, the client can connect to the MySQL server.
Figure 21 Testing the connectivity between the MySQL client and server
Startup and stop
1. Select Start > Windows Administrative Tools > Services.
The Services window opens.
Figure 22 Starting or stopping the MySQL service
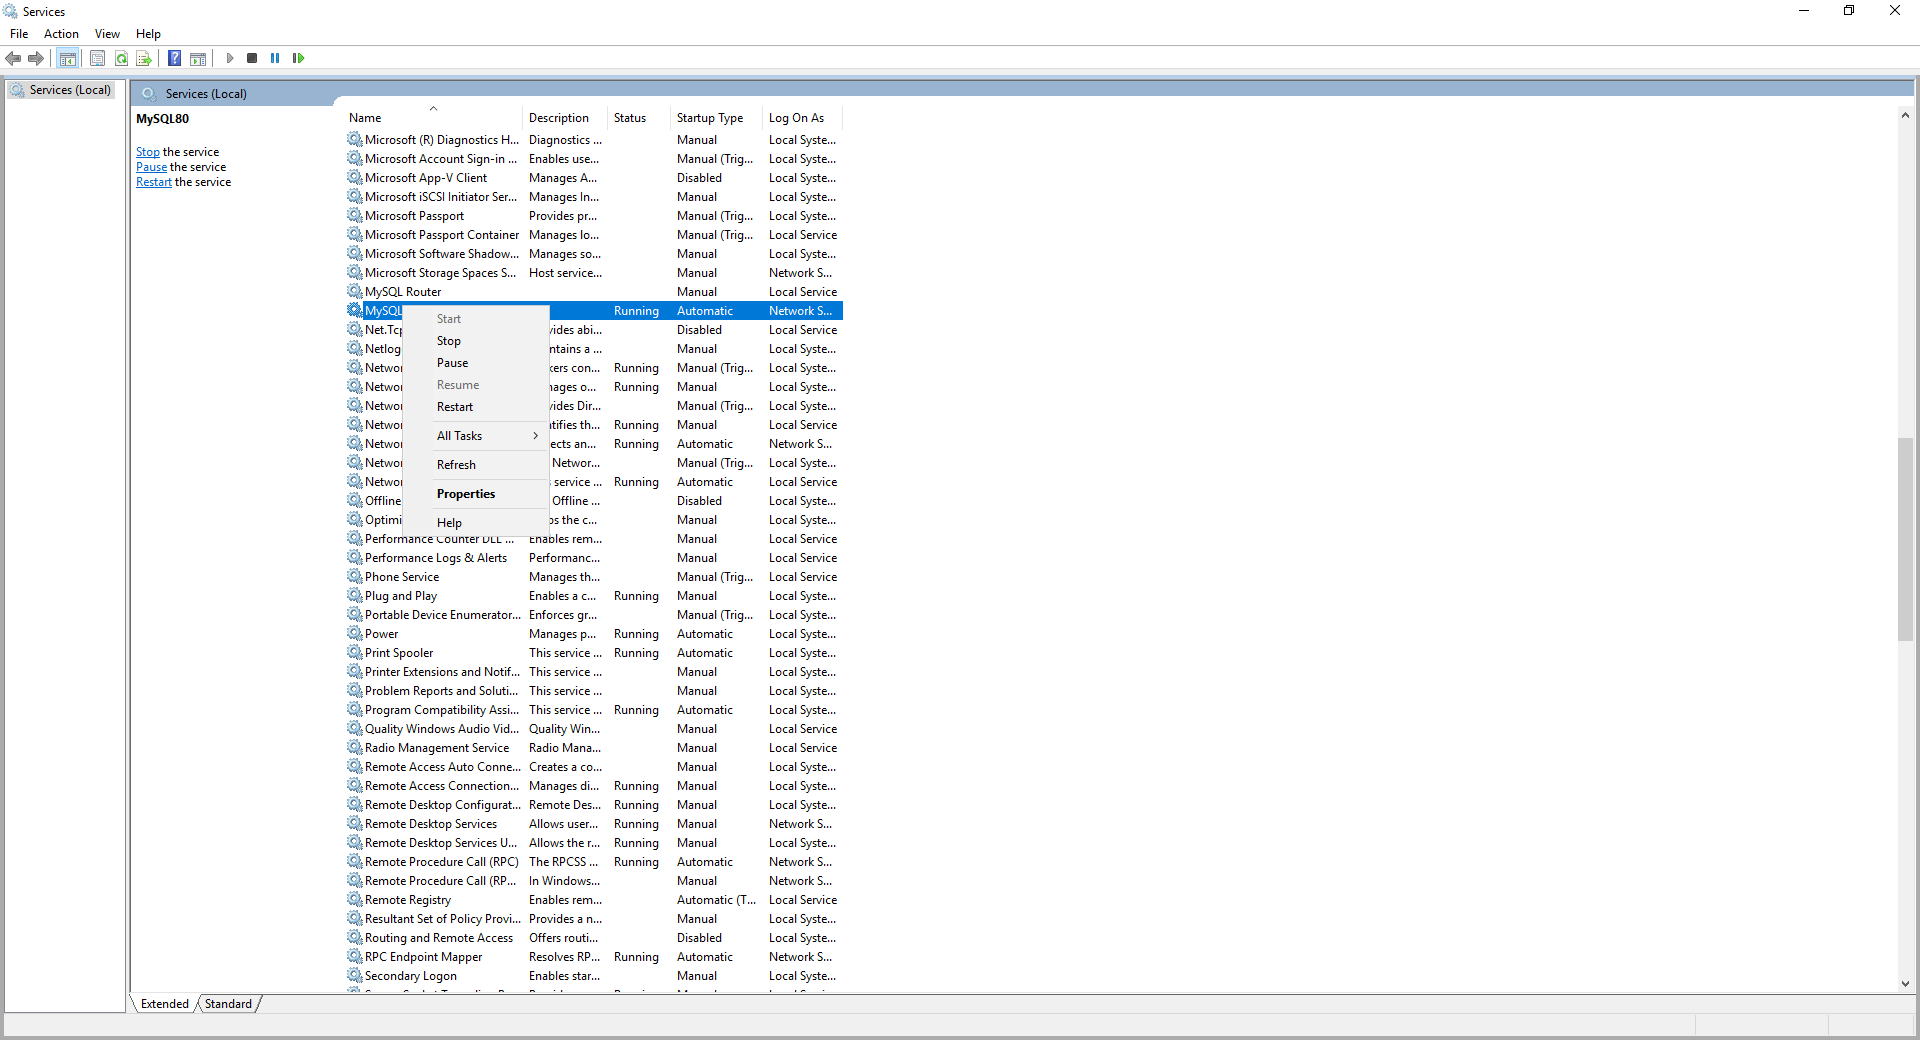
2. Right-click the Windows service name. The default name is MySQL80.
A shortcut menu opens.
3. Click Start or Stop to start or stop the service, as required.
The Start option is available only when the MySQL80 service is not running. The Stop option is available only when the MySQL80 service is running.
Configuring the MySQL server
Adding an environment variable value
To execute the MySQL server management commands (for example, mysqld, mysqlshow, and mysqladmin) in the CLI window, add the MySQL server or client installation path as a PATH environment variable value. This procedure uses the MySQL server installation path as an example.
1. Select Start > Control Panel > System and Security > System.
The View basic information about your computer page opens.
Figure 23 Viewing basic information about your computer
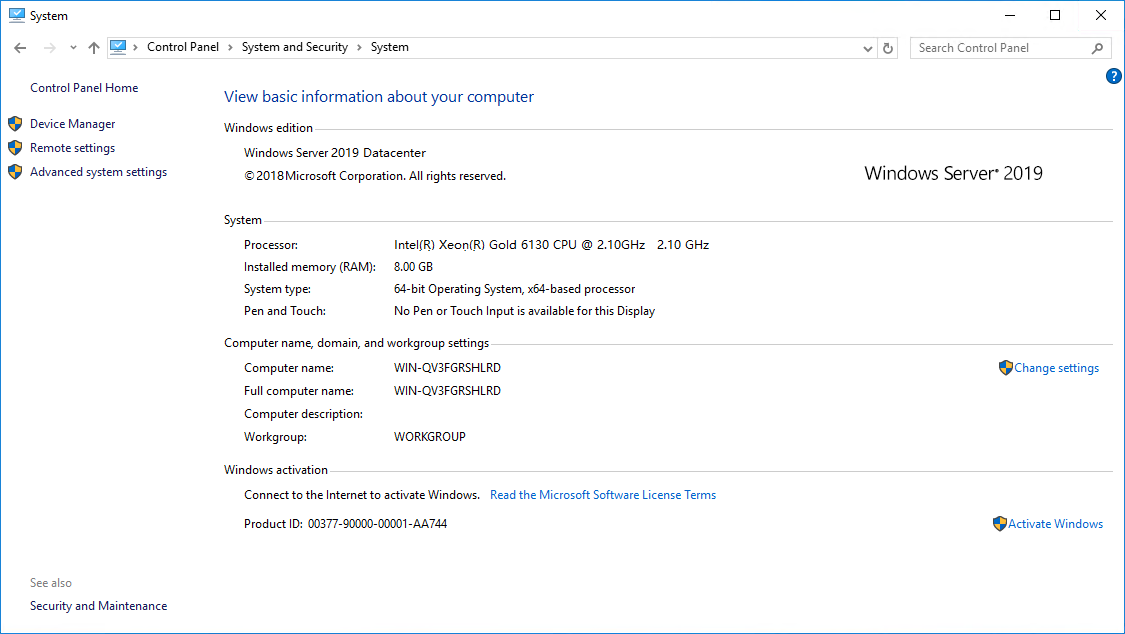
2. Click Advanced system settings.
The System Properties dialog box opens.
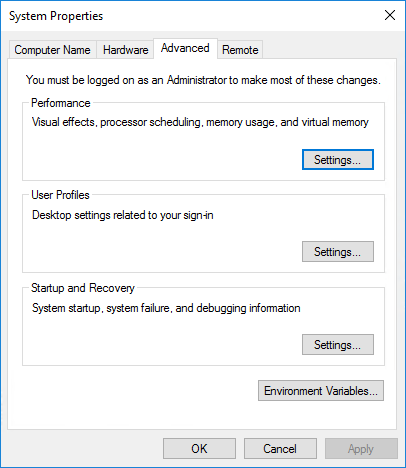
3. Click the Advanced tab, and then click Environment Variables.
The Environment Variables dialog box opens.
Figure 25 Environment Variables
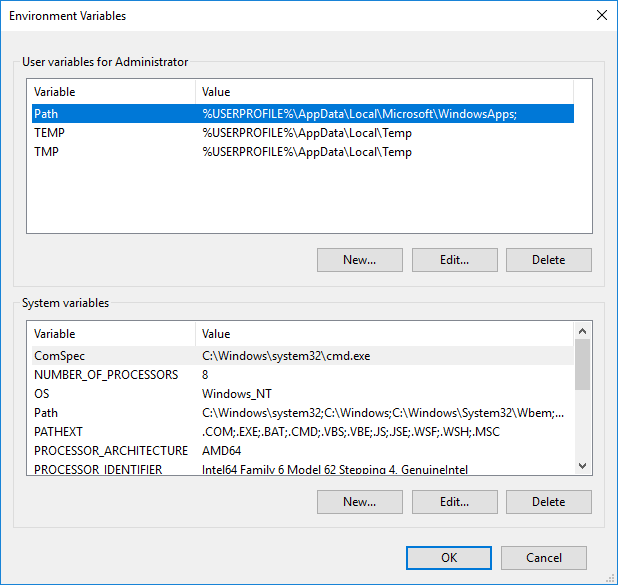
4. In the System variables area, select Path, and then click Edit.
The Edit System Variable dialog box opens.
Figure 26 Edit System Variable
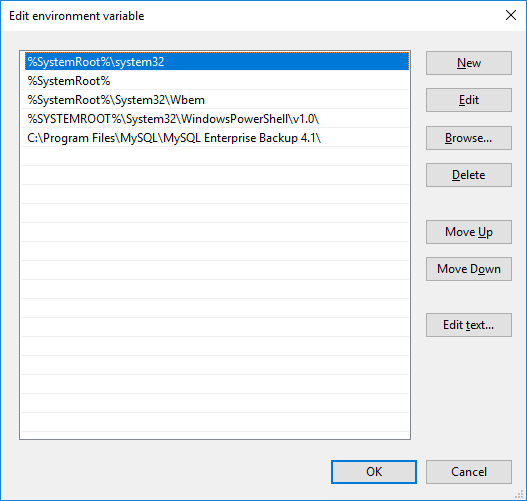
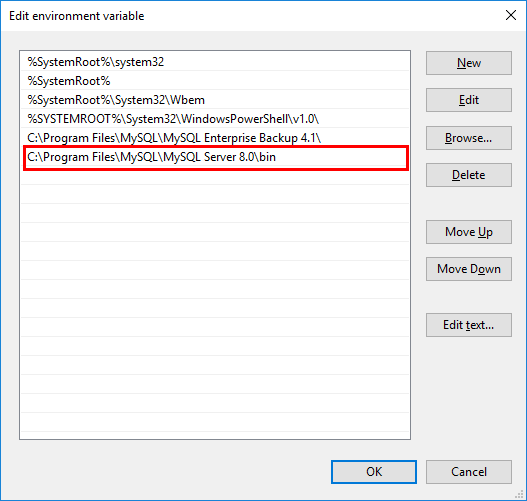
5. Click New and add the storage path for the programs in the MySQL installation directory. The default path is C:\Program Files\MySQL\MySQL Server 8.0\bin. Use a semicolon (;) to separate the path from the preceding variable values.
Figure 27 Adding an environment variable
6. Click OK in the Edit System Variable, Environment Variables, and System Properties dialog boxes to save the configuration.
7. Restart the operating system to make the new environment variable value take effect.
Configuring MySQL parameters
The default configuration file my.ini in the data path for the MySQL server determines the functions and performance of the MySQL server. The default data path for the my.ini file is C:\ProgramData\MySQL\MySQL Server 8.0.
You must modify any parameters in the my.ini file that do not meet the IMC requirements.
To modify the parameters:
1. Stop the MySQL service.
For information about stopping the MySQL service, see "Startup and stop."
2. Enter the data path for storing the MySQL data files.
If the data path is the default path, ProgramData is a hidden file folder. For information about viewing the hidden file folder, see "Why can't I find the ProgramData file folder on the system disk?"
3. Double-click the my.ini file.
The file opens in Notepad by default.
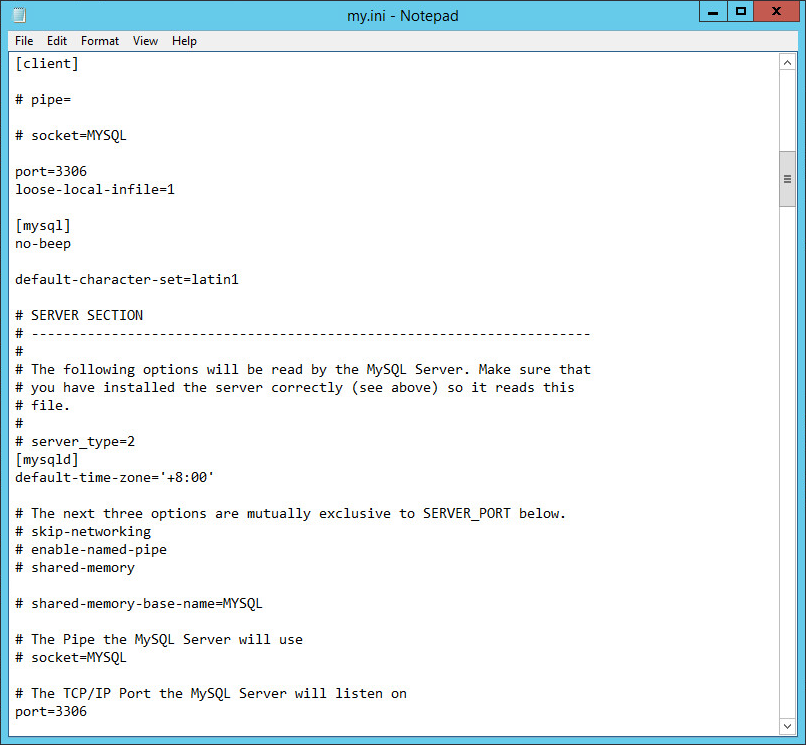
4. Change the parameter values under [client], [mysql] and [mysqld]. Table 2 describes the parameters in the my.ini file.
|
|
IMPORTANT: For regions that use different daylight hours between summer and winter, set the default time zone according to the actual time zone. For specific time zone settings, access the website https://dev.mysql.com/doc/refman/8.0/en/time-zone-support.html. |
a. Under [client] , Add the parameter loose-local-infile=1.
b. Under [mysql], change the value of the default-character-set parameter to match your operating system language. This example uses latin1. If you change the character after IMC has been deployed, you must reinstall IMC and add the parameter local_infile=1.
c. Under [mysqld], make the following changes:
- Add the parameter lower_case_table_names=1.
- Change the value of the character-set-server parameter to latin1.
- Change the value of the innodb_buffer_pool_size parameter to 512M.
- Change the value of the innodb_strict_mode parameter to 0.
- Change the value of the max_allowed_packet parameter to 200M.
- Change the value of the max_connections parameter to 600.
- Add the parameter default-time-zone = '+8:00'.
- Add the parameter local_infile=1.
|
Parameters |
Description |
|
lower_case_table_names |
Indicate whether a table name is case sensitive. · 0—Yes · 1—No |
|
default-character-set and character-set-server |
Character sets required by the MySQL database. The character set for English is latin1. |
|
innodb_buffer_pool_size |
Size of the InnoDB buffer pool. |
|
innodb_strict_mode |
Mode that affects the handling of syntax errors for CREATE TABLE, ALTER TABLE and CREATE INDEX statements: · 0—InnoDB ignores conflicting clauses and creates the table or index, with only a warning in the message log. · 1—InnoDB returns errors rather than warnings for certain conditions. |
|
max_allowed_packet |
Maximum allowed size for a packet. |
|
max_connections |
Maximum number of connections allowed by the MySQL server. You can modify this number based on the number of deployed IMC components. For the maximum number allowed for each component or subcomponent, see IMC Getting Started Guide. |
|
default-time-zone |
Sets the default server time zone. Named time zones can be used only if the time zone information tables in the MySQL database have been created and populated, for example, Europe/Helsinki. |
|
local_infile |
Whether to allow using the load data local infile command for data import and export. · 0—Disallowed · 1—Allowed |
|
transaction_isolation |
Transaction isolation level. Check whether the transaction_isolation parameter exists under [mysqld] when installing EIA: · If that parameter does not exist, add transaction_isolation=READ-COMMITTED under [mysqld]. · If that parameter exists, change the value to READ-COMMITTED. |
5. Select File > Save As, specify the ANSI coding format, click Save to save the my.ini file, and then restart the MySQL server.
Enabling batch data import from files
Perform this task on the MySQL server and client.
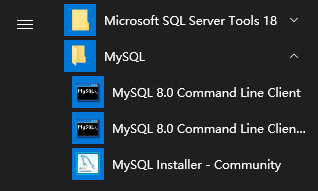
1. Select Start > MySQL > MySQL 8.0 Command Line Client.
The MySQL 8.0 command line client opens.
Figure 29 Opening the MySQL 8.0 command line client
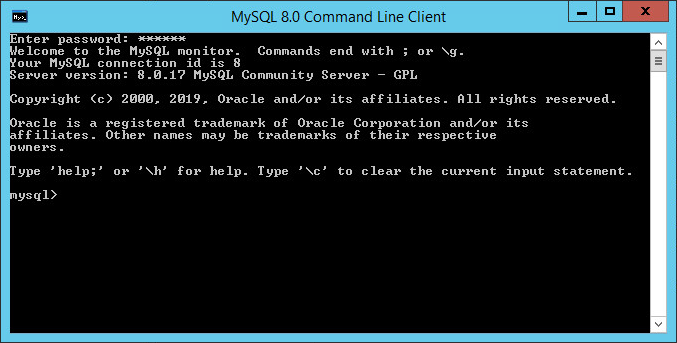
2. Enter the root password and then press Enter.
The MySQL command line window opens.
Figure 30 Entering the MySQL command line window

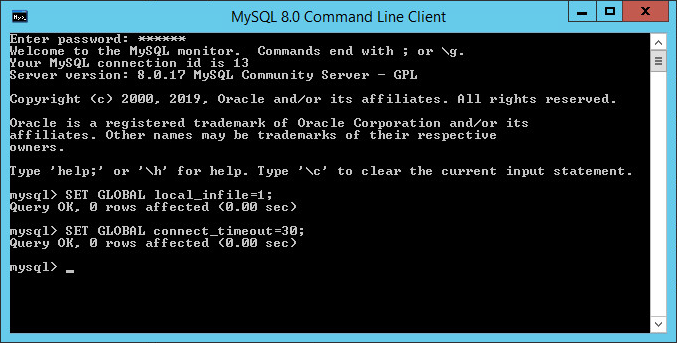
3. Execute the following scripts to enable batch data import from files.
SET GLOBAL local_infile=1;
SET GLOBAL connect_timeout=30;
Figure 31 Enabling batch data import from files
Deleting anonymous users
1. Select Start > MySQL > MySQL 8.0 Command Line Client.
2. Enter the root password and then press Enter.
The MySQL command line window opens.
Figure 32 Entering the MySQL command line window

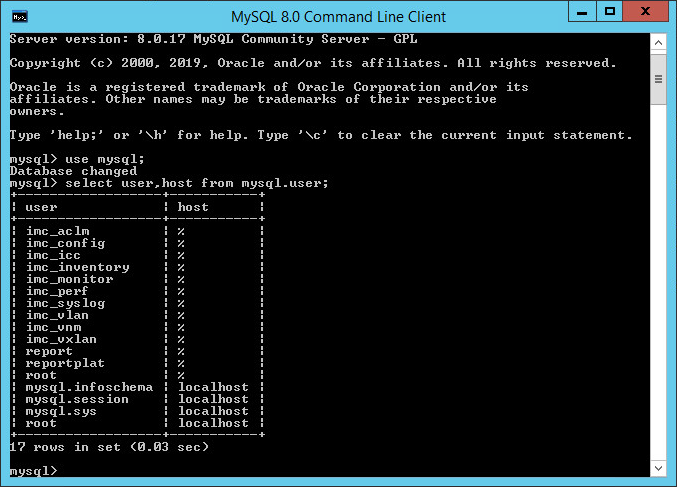
3. Execute the following scripts to view user information.
use mysql;
select user,host from mysql.user;
Figure 33 Viewing user information
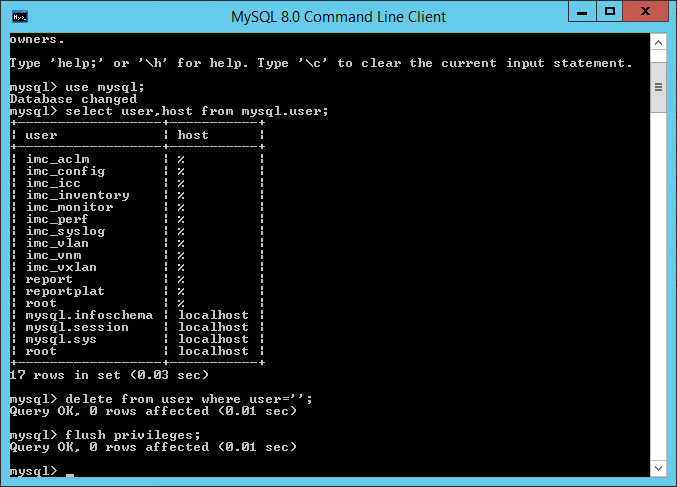
4. Delete anonymous users.
delete from user where user='';
5. Refresh privileges.
flush privileges;
Figure 34 Deleting anonymous users.
Creating a remote root user account
By default, the MySQL server has only one local root user account. If you want to use IMC with a remote database, install MySQL client and configure a remote root user account on the database server.
1. Select Start > MySQL > MySQL 8.0 Command Line Client - Unicode.
2. Enter the root user account password.
Figure 35 MySQL CLI
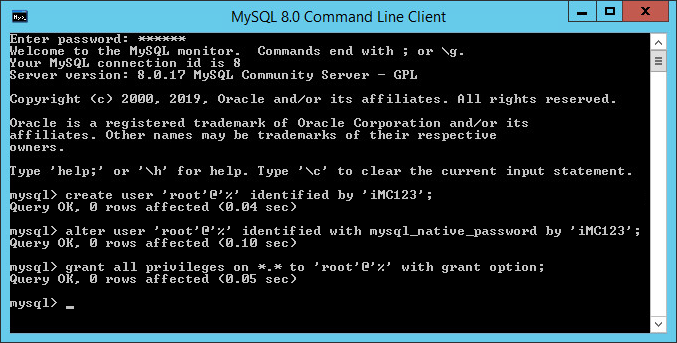
3. Change the password of the root user.
create user 'root'@'%' identified by 'iMC123'; //iMC123 is the password of remote user root. Please set the password as needed.
alter user 'root'@'%' identified with mysql_native_password by 'iMC123';
4. Create a remote root user account.
grant all privileges on *.* to root@'%' with grant option;
5. Refresh privileges.
flush privileges;
Figure 36 Executing the statement
Uninstallation
The uninstall methods for the MySQL server and client are similar.
To uninstall the MySQL server:
1. Double-click the MySQL installation program.
The MySQL Installer page opens.
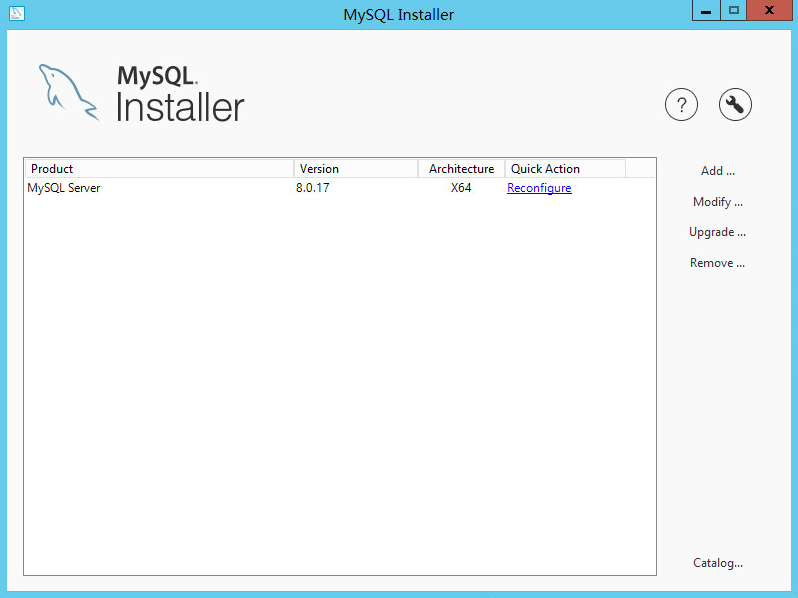
2. Click Remove.
The Remove Products dialog box opens.

3. Select MySQL Server 8.0.17, and then click Execute.
A confirmation dialog box opens.
Figure 39 Confirming removal of the selected product
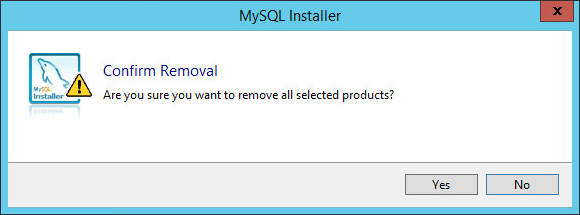
4. Click Yes.
Figure 40 Viewing the product removal progress
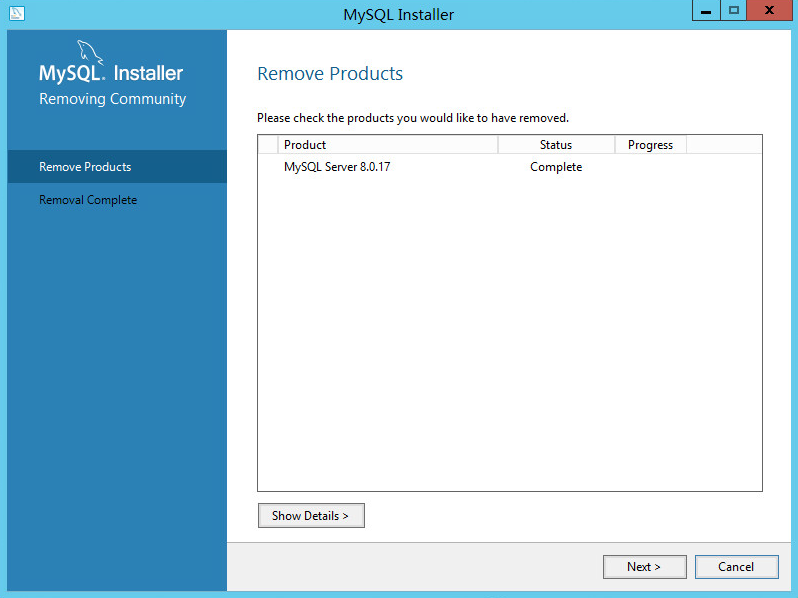
5. Click Next.
The Removal Complete dialog box opens.
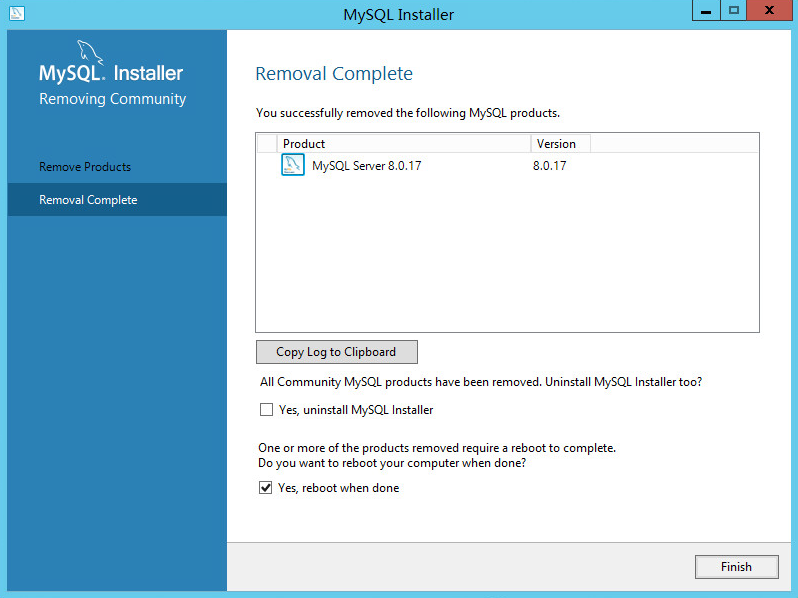
6. Select Yes, uninstall the MySQL Installer and Yes, reboot when done, and then click Finish.
A confirmation dialog box opens.
Figure 42 Confirmation dialog box
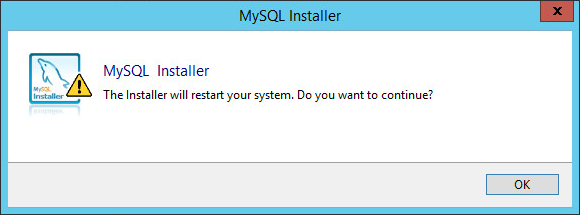
7. Click Yes.
FAQ
Why can't I find the ProgramData file folder on the system disk?
ProgramData is a hidden folder on the system disk.
To view the folder:
1. Open any folder in Windows Server 2019.
2. On the View tab, click Options.
Figure 43 Opening the View window

3. In the Folder Options window that opens, Click the View tab. In the Advanced settings area, select Files and Folders > Hidden files and folders > Show hidden files, folders, and drives.
Figure 44 Displaying the hidden file folder

4. Click OK.
Why do garbled characters appear in the database table?
If you use an English operating system, set the values of the default-character-set and character-set-server parameters to latin1. For more information, see "Configuring MySQL parameters."
If your operating system language is different, see the related MySQL documentation for the correct character set.
How do I update the database password for the IMC server?
1. Select Start > Run.
2. In the Run dialog box, enter cmd, and then click OK.
3. In the CLI window, enter the following command:
E:\Program Files\iMC\deploy\instInfoMgr.bat" –modify dbAdminPwd=yourpassword
For example, change the password to iMC123456, as shown in Figure 45.
Figure 45 Changing the database password on the iMC server

4. Click the Environment tab on the Intelligent Deployment Monitoring Agent window, and then click Refresh in the Database Space Usage area.