- Table of Contents
- Related Documents
-
| Title | Size | Download |
|---|---|---|
| 01-H3C iFIST RAID and OS Installation Configuration Examples | 1.33 MB |
H3C iFIST
RAID and OS Installation Configuration Examples
Copyright © 2023 New H3C Technologies Co., Ltd. All rights reserved.
No part of this manual may be reproduced or transmitted in any form or by any means without prior written consent of New H3C Technologies Co., Ltd.
Except for the trademarks of New H3C Technologies Co., Ltd., any trademarks that may be mentioned in this document are the property of their respective owners.
The information in this document is subject to change without notice.
Example: Configuring RAID arrays and installing an OS through iFIST
Using the OS installation wizard
Introduction
This document provides examples for configuring RAID arrays and installing operating systems through iFIST. iFIST integrates the RAID configuration, driver installation, and other tasks into the OS installation wizard that guides you through the installation process step-by-step from a unified interface. The OS installation wizard simplifies the installation process. After the installation configuration is complete, iFIST automatically installs the operating system on the server.
Prerequisites
Procedures and information in the examples might be slightly different depending on the software or hardware version of the products.
The configuration was created and verified in a lab environment, and all the servers and software were started with the factory default configuration.
This document assumes that you have basic knowledge of the iFIST OS installation wizard feature.
Example: Configuring RAID arrays and installing an OS through iFIST
Network configuration
As shown in Figure 1, the HDM management IP address of the target server interconnects with the IP address of the PC client. This document uses the H3C UniServer R4900 G5 server (hereinafter referred to as R4900 G5) as an example. The requirement is to access the server's HDM through the PC client, and then access iFIST through the HDM's KVM to configure RAID arrays and install the OS and drivers for the target server.
· HDM management IP addresses: 172.16.18.231/17
· Client PC IP addresses: 172.16.20.20/24

Software versions used
This configuration example was created and verified on HDM 2.55, BIOS 5.20, iFIST 1.34, and REPO 2.00.16.
Key steps
Mount the OS and REPO image files and access iFIST through the HDM's KVM remote console to configure RAID arrays and install the operating system and drivers for a server.
Restrictions and guidelines
When you use the iFIST OS installation wizard, follow these restrictions and guidelines:
· Before installing the OS, make sure the server has only one bootable image file mounted. If the server has multiple bootable image files mounted, the server might fail to locate the correct boot files and OS installation will fail.
· Do not remove the image source during OS installation. An image file can only be edited in basic settings.
· Do not intervene manually during operating system installation.
· The server might automatically restart during the installation of an operating system.
· You can only operate an LSI controller in RAID mode.
· To install an operating system on a server in UEFI boot mode, make sure only the specified system drive contains a UEFI partition. Operating system installation will fail if a UEFI partition exists on a non-system drive.
Procedures
Mounting image files
Logging in to HDM
1. Open a browser on a client PC, and then enter the HDM management IP address 172.16.18.231 to access the HDM login page, as shown in Figure 2. On the HDM login page, enter the default username admin and the default password Password@_, and then click Log In.

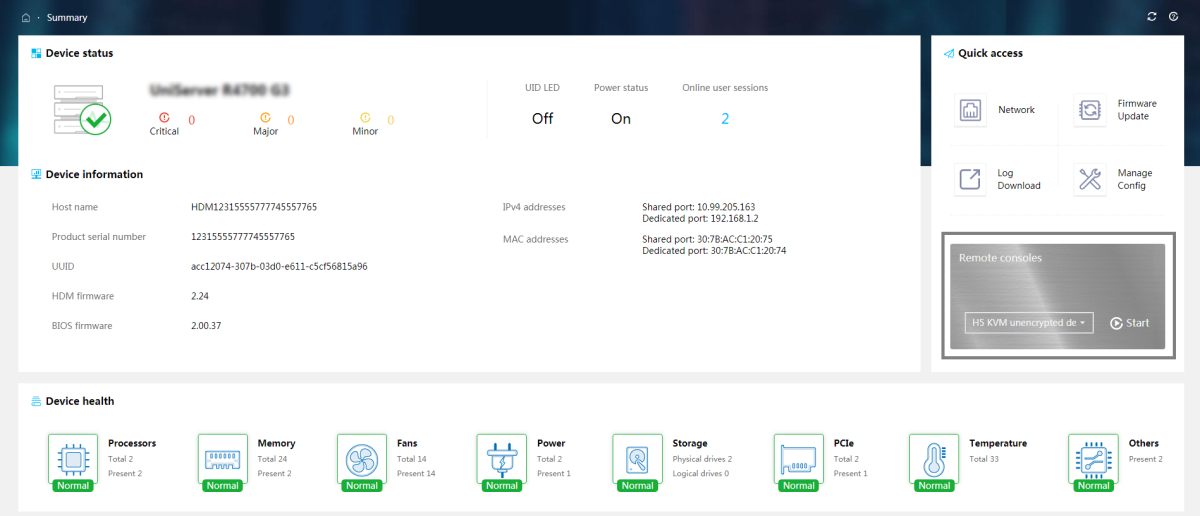
2. After login, you are placed on the HDM home page, as shown in Figure 3.
Starting the KVM remote console
1. Click Start in the Quick access column (as shown in Figure 3) to start the KVM remote console and enter the page shown in Figure 4. For more information on KVM remote console, see H3C Servers HDM User Guide.
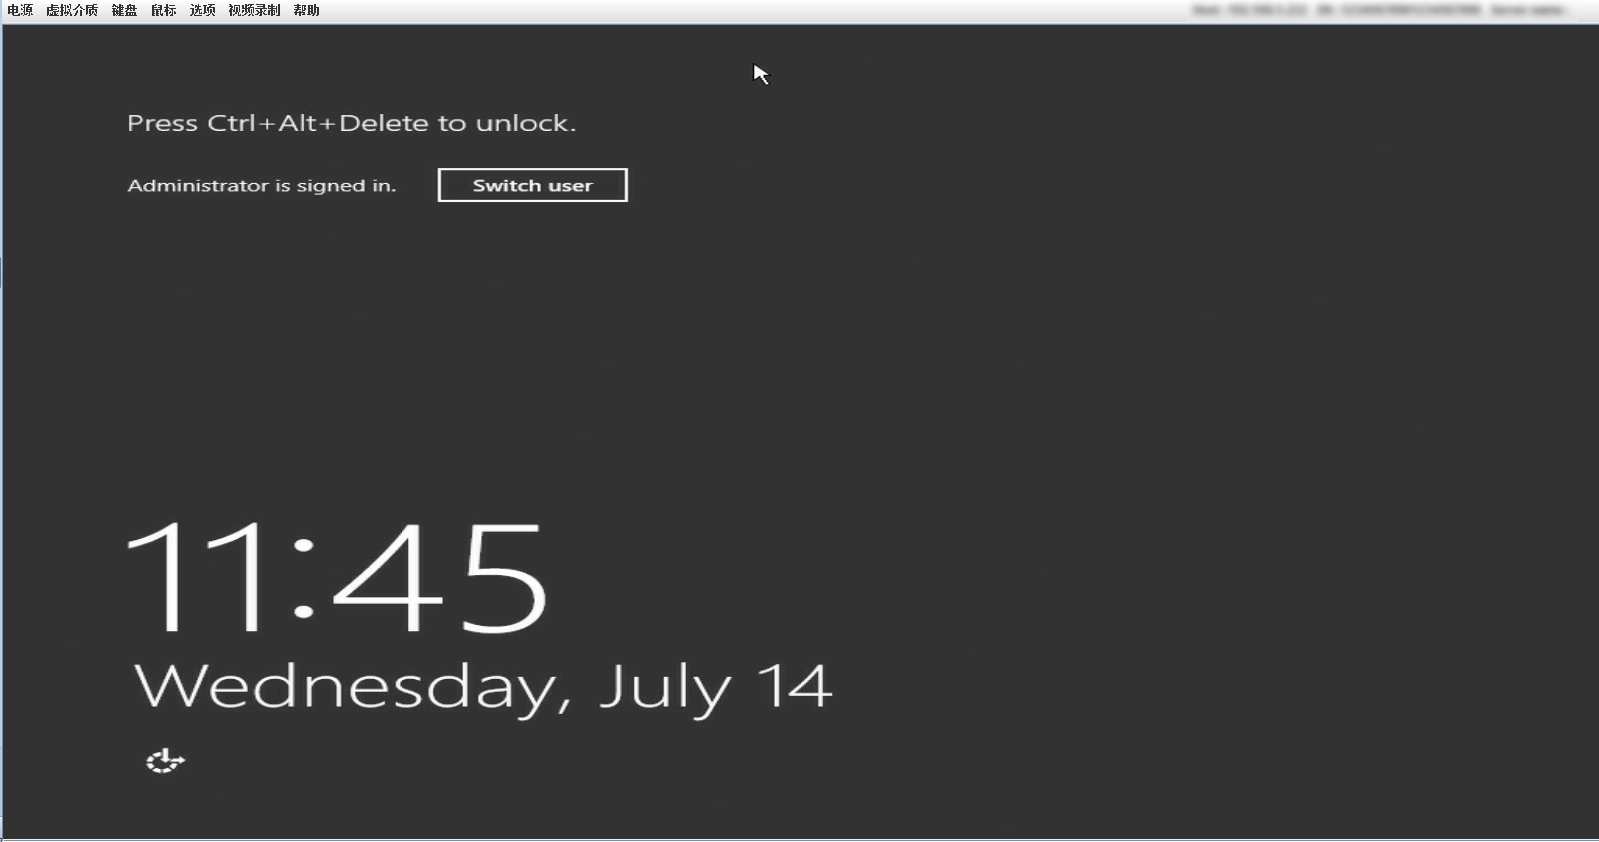
Figure 4 KVM remote console
Mount the images.
1. Select Media > Virtual Media Wizard from the KVM menu bar. On the Virtual Media window that opens, mount the OS image file.
2. iFIST will install the built-in drivers while installing an OS. For more information on the iFIST built-in driver list, see H3C Servers iFIST User Guide. You can also install drivers by mounting driver packages. This section uses how to mount REPO-2.00.16 as an example. For more information on REPO, see H3C Servers REPO User Guide.
Logging in to iFIST
1. Click Power > Restart in the KVM menu bar to restart the server. After entering the POST screen (Figure 5), press F10 to access iFIST.

2. The iFIST home page shown in Figure 6 opens.

Using the OS installation wizard
Configuring basic settings
1. On the iFIST home page, click OS Installation Wizard. The OS installation wizard displays the Configure basic settings page, which displays storage controllers installed on the server, as shown in Figure 7. Select the storage controller to be configured. This section uses the configuration of RAID-LSI-9361-8i(2G)-1-X as an example.
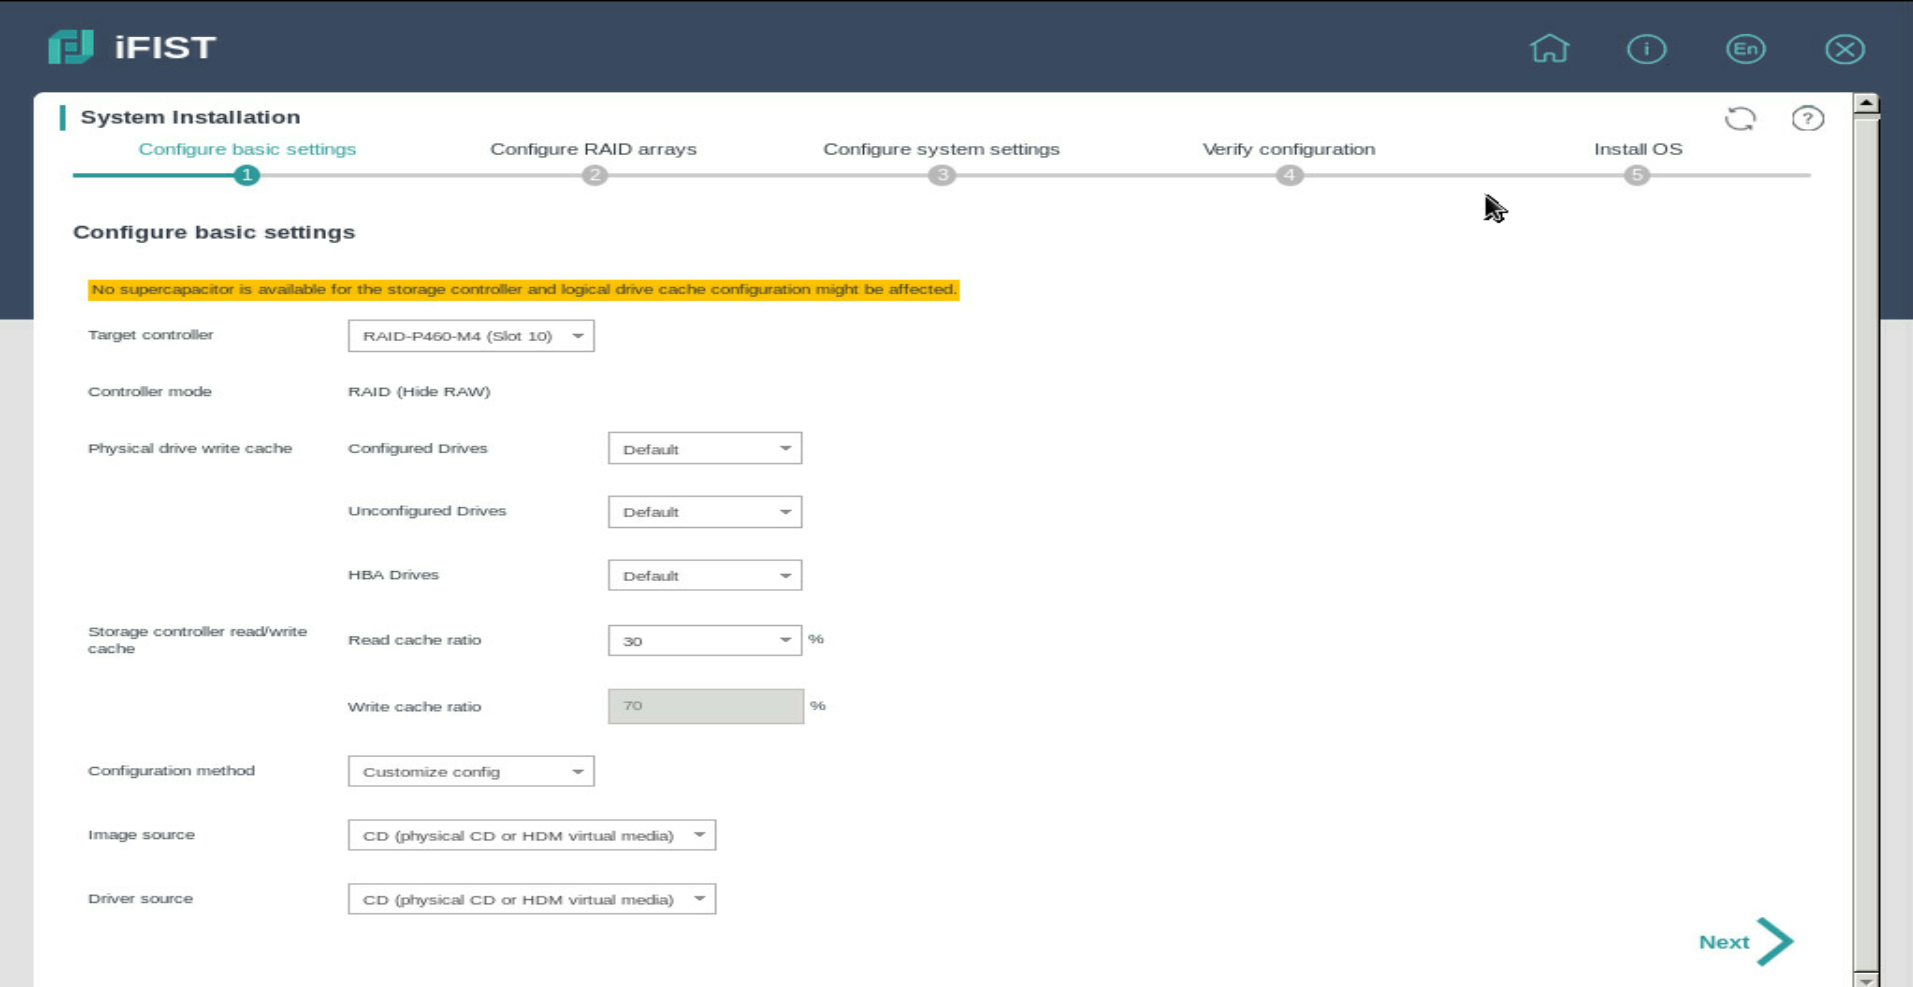
2. Configure the following collection parameters on the screen as shown in Figure 7. After the configuration is complete, click Next to enter the RAID configuration page.
¡ Configuration mode: Select the configuration mode. In this example, select Custom configuration.
¡ Image source: Select the type of media where the image file resides. In this example, select CD (physical CD or HDM virtual media).
¡ Driver source: Select the type of media where the driver file resides. In this example, select CD (physical CD or HDM virtual media).
Configuring RAID arrays
1. On the Manage physical drives tab, identify whether the physical drive on which you want to install the operating system is in Unconfigured Good state. If not, select the physical drive and click Set State to set its state to Unconfigured Good, as shown in Figure 8.
Figure 8 Physical drive management page
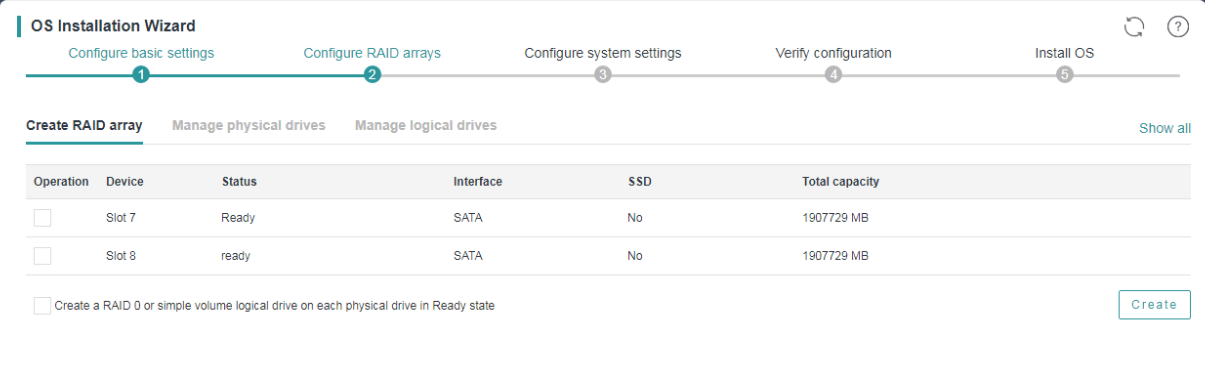
2. On the Configure RAID arrays page, select the physical drives in Unconfigured Good state. In this example, physical drives in Slot 1 and Slot 3 are selected. Then, click Create at the lower right of the page. On the dialog box that opens, configure RAID parameters, as shown in Figure 9. For information on RAID parameters, see H3C Servers iFIST User Guide.
¡ Name: Name of the RAID array. For example, raid1. To name the RAID arrays for LSI storage controllers, follow the rule: Only letters (either case), digits, and underscores with no more than 15 characters.
¡ RAID level: RAID level. For example, RAID1. The RAID level varies with the models of storage controllers. For specific differences, see the actual interface. For information on RAID levels, see H3C Servers Storage Controller User Guide.
¡ Capacity: This field is automatically populated with the maximum capacity of the RAID array.
¡ Write cache: Select a write cache policy. For example, Write back. When the write-back policy is selected, if the RAID controller has a functional BBU present and BBU is in normal state, data is written first to the controller cache before being written to the physical drive. If the RAID controller does not have a functional BBU present or BBU is faulty, write-through is resumed and data is written directly to the physical drive.
¡ Read cache: Select a read cache policy. For example, Read ahead always. If the read-ahead policy is selected, when retrieving data from the logical drive, the system also retrieves subsequent data and saves the subsequent data to the cache. Then, the subsequent data can be retrieved from the cache directly when requested. The read-ahead policy reduces the hard drive seek time and improves data retrieval efficiency. To use this policy, make sure the RAID controller supports power fail safeguard. This policy entails data security risks because data loss might occur in case of super capacitor exceptions.
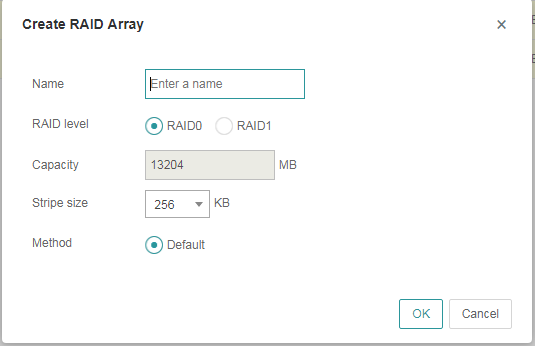
3. After the configuration is completed, click OK. Then, iFIST jumps to the Manage logical drives tab, as shown in Figure 10.
Figure 10 Managing logical drives

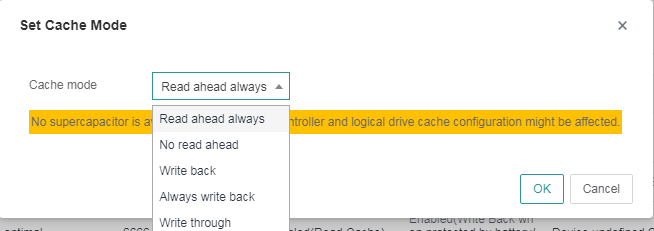
4. (Optional) Select a logical drive, and click Set Cache Mode. On the dialog box (Figure 11) that opens, configure the cache mode of the logical drive. This section uses Read ahead always cache mode as an example.
Figure 11 Setting the cache mode for the logical drive
Configuring system settings
1. After the REPO driver image file is mounted, the system automatically filters the matching drivers and displays them on the system configuration page. All drivers except FIST SMS are selected by default, as shown in Figure 12. You can select the drivers to be installed as needed.

2. Configure the following parameters in the System parameters column, as shown in Figure 13.
¡ Image file: Image file of the operating system to be installed. For example, Windows Server 2016 SERVERSTANDARD.
¡ Hostname (optional): Specify the host name of the server. For example, windows2016.
¡ Password (required): Specify the password used to log in to the operating system. For example, Password@_.
¡ Confirm password: Enter the password again. For example, Password@_.
¡ Key (optional): Specify the key to activate the Windows operating system. This parameter is available when you install a Windows OS.
Figure 13 Configuring system parameters

3. Configure the following parameters in the System drive settings column. iFIST supports installing an operating system to a logical drive or a physical drive. This section describes how to install an operating system to a logical drive.
¡ Target drive: Select a target drive. In this example, select the logical drive raid1 created in "Configuring RAID arrays."
¡ Primary partition capacity: Specify the capacity of the primary partition. In this example, 200000 MB.
Checking the configuration
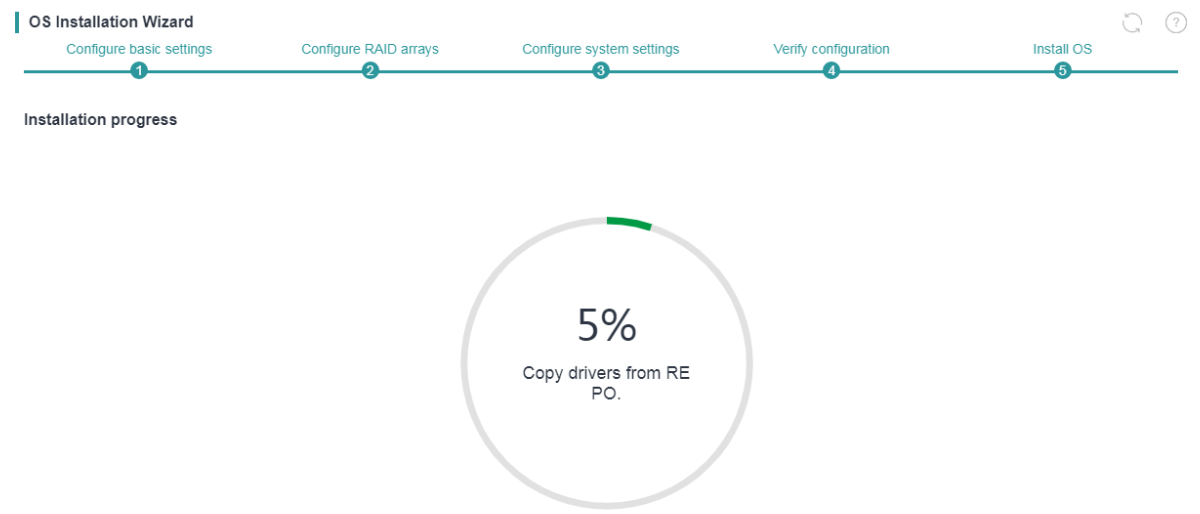
1. Click Next and then you are placed on the Verify configuration page shown in Figure 14. On this page, verify the configuration information, and click Next.
Figure 14 Checking the configuration

2. The Install OS page displays the installation progress, as shown in Figure 15.
Figure 15 Installing the operating system
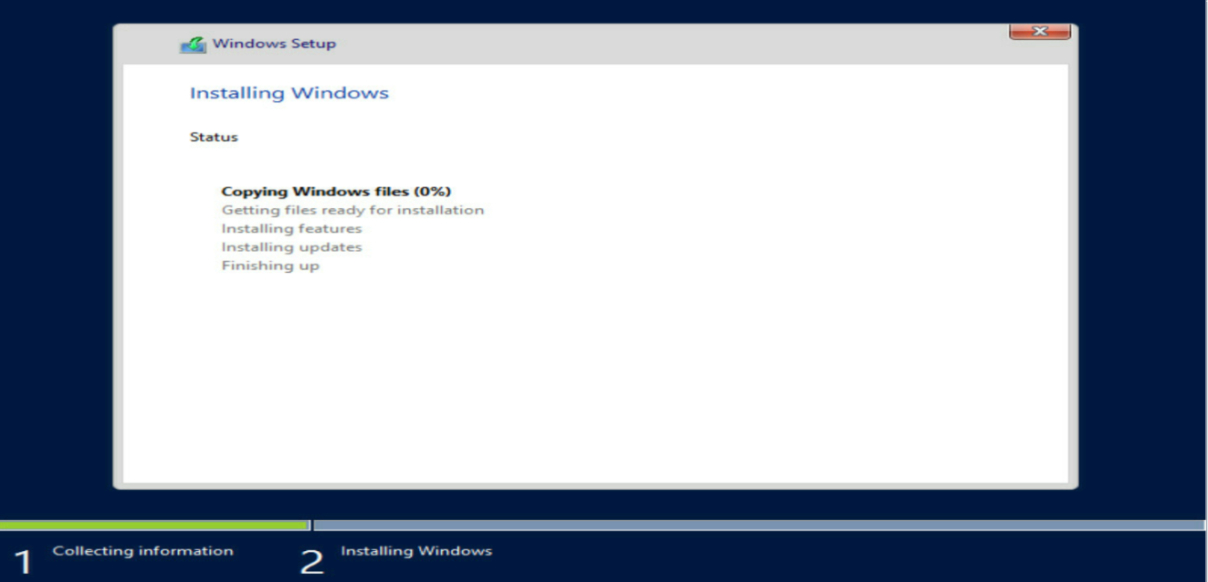
3. After the installation progress reaches 100%, the system will restart and display the page shown in Figure 16. The server might automatically restart multiple times during OS installation. Do not intervene manually.
Figure 16 Configuring the operating system
Verifying the configuration
1. After the OS configuration is complete, the system automatically enters the OS home page shown in Figure 17.
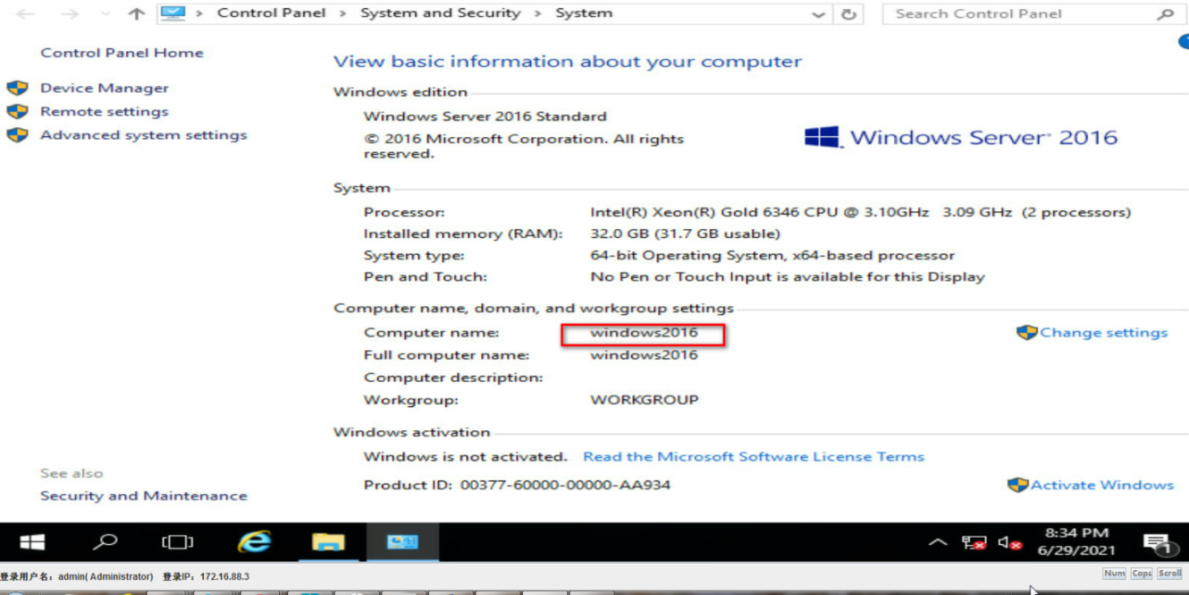
2. Click File Explorer at the lower left of the page, and right-click This PC to view the attributes of the menu and enter the page shown in Figure 18. You can see that the Computer name on this page is windows2016, which is the same as the host name configured in "Configuring system settings."
Figure 18 Viewing the computer name
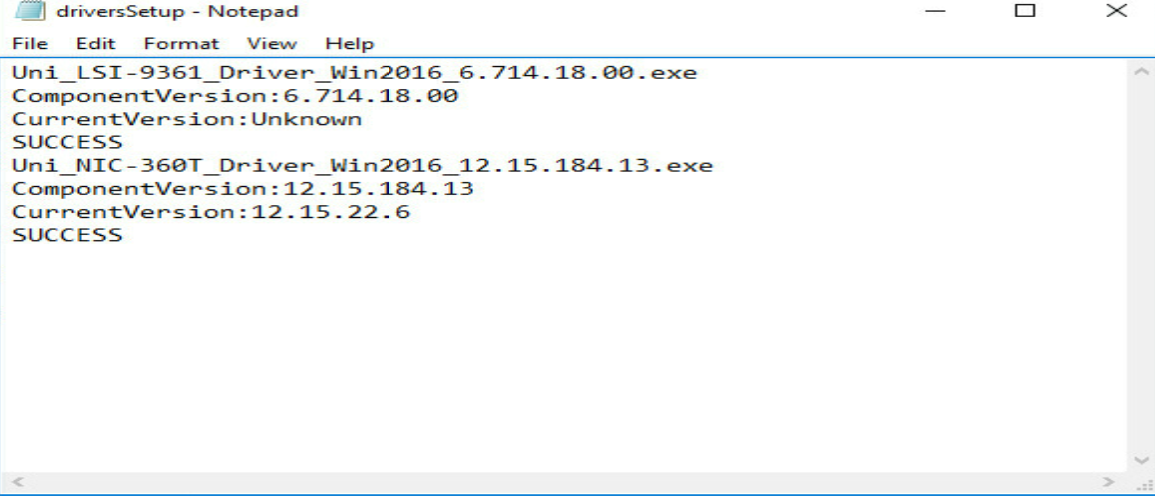
3. Access the log directory in the local drive C, and open the document named driversSetup. You can see that the driver installation information is the same as that selected in "Configuring system settings", as shown in Figure 19.
Figure 19 Viewing driver installation records
Related documentation
· H3C Servers iFIST User Guide
· H3C Servers HDM User Guide
· H3C Servers REPO User Guide
· H3C Servers Storage Controller User Guide
