- Table of Contents
- Related Documents
-
| Title | Size | Download |
|---|---|---|
| 02-H3C Cloud-Managed APs Configuration Example | 677.72 KB |
|
H3C Cloud-Managed APs |
|
Configuration Example |
Copyright © 2022 New H3C Technologies Co., Ltd. All rights reserved.
No part of this manual may be reproduced or transmitted in any form or by any means without prior written consent of New H3C Technologies Co., Ltd.
Except for the trademarks of New H3C Technologies Co., Ltd., any trademarks that may be mentioned in this document are the property of their respective owners.
The information in this document is subject to change without notice.
Contents
3 Example: Configuring cloud-managed AP management from the Cloudnet platform
Accessing the Cloudnet platform
Configuring a wireless service
1 Introduction
The following information provides an example for managing cloud-managed APs from the Cloudnet platform.
2 Prerequisites
The following information applies to cloud-managed APs. Procedures and information in the examples might be slightly different depending on the software or hardware version of the cloud-managed APs.
The configuration examples were created and verified in a lab environment, and all the devices were started with the factory default configuration. When you are working on a live network, make sure you understand the potential impact of every command on your network.
The following information is provided based on the assumption that you have basic knowledge of cloud-managed APs and the Cloudnet platform.
|
|
NOTE: · Both cloud-managed APs and fit APs can come online from the Cloudnet platform. You can manage cloud-managed APs from the platform and switch the operating mode or upgrade the version of fit APs from the platform. · For information about operating mode switching, see H3C Wi-Fi 6 Access Points Operating Mode Switching Guide. |
3 Example: Configuring cloud-managed AP management from the Cloudnet platform
Network configuration
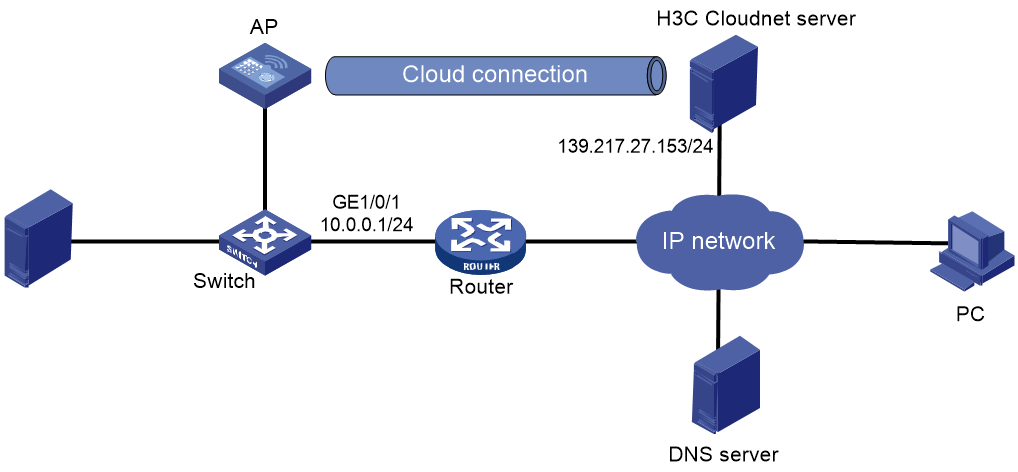
As shown in Figure3-1, the cloud-managed AP connects to the network through a switch. Configure the cloud-managed AP to obtain an IP address through DHCP. Configure cloud-managed AP management from the Cloudnet platform so that users can view and manage the AP from the PC.
Restrictions and guidelines
Make sure the AP can use the IP address assigned by the DHCP to access the public network.
Make sure the DNS server can translate the address of the Cloudnet server correctly.
The domain name of the Cloudnet server is oasiscloudnet.h3c.com.
Procedures
The procedures are similar for configuring APs from the Cloudnet Web interface and configuring APs from the Cloudnet app. This section uses the Cloudnet Web interface as an example.
For more information about configuring cloud-managed APs from the Cloudnet platform, see H3C Cloud-Managed APs Configuration Examples.
Accessing the Cloudnet platform
You can access the Cloudnet platform to add sites and APs connected to the public network to view and manage APs remotely.
To access the Cloudnet platform:
· Access the Cloudnet Web interface.
Open a browser from the PC, and enter oasiscloud.h3c.com in the address bar. On the login page that opens, enter the username and password.
· Access the Cloudnet app.
Connect your cellphone to the network and open Cloudnet App Int. On the login page, enter the username and password.
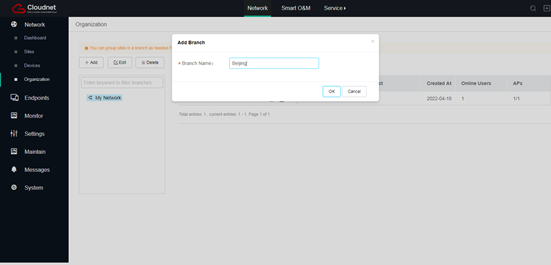
Adding a branch
1. On the top navigation bar, click Network.
2. From the left navigation pane, select Network > Organization.
3. On the page that opens, select the root branch, and then click Add.
4. Enter a branch name.
Figure3-2 Adding a branch
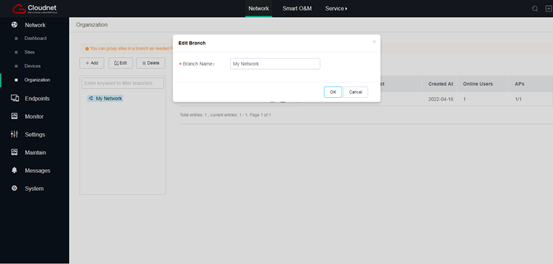
Renaming a branch
1. From the left navigation pane, select Network > Organization.
2. On the page that opens, select the target branch and then click Edit.
3. Rename the branch.
Figure3-3 Renaming a branch
Deleting a branch
1. From the left navigation pane, select Network > Organization.
2. Select the target branch and then click Delete.
You cannot delete the root branch.
To delete a branch that has sites or sub branches, first delete the sites or sub branches.
Adding a site
1. Perform either of the following tasks:
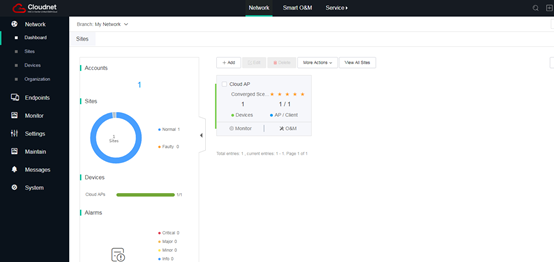
¡ From the left navigation pane, select Network > Dashboard. Select the target branch from the upper left corner of the work pane, and then click Add.
¡ From the left navigation pane, select Network > Organization. From the organization pane, select the target branch, and then click Add above the site list.
Figure3-4 and Figure3-5 use the Network > Dashboard page as examples.
Figure3-4 Adding a site to a branch for the first time
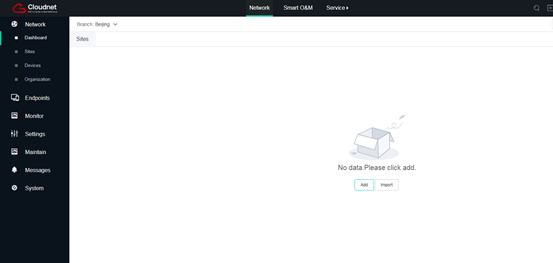
Figure3-5 Adding a site to a branch that contains sites
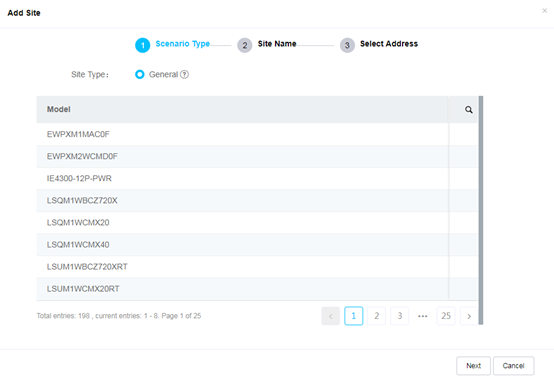
2. Select General as the site type, and then click Next. To identify if a device model is supported in the scenario, click the search icon, and specify the device model.
Figure3-6 Specifying a scenario
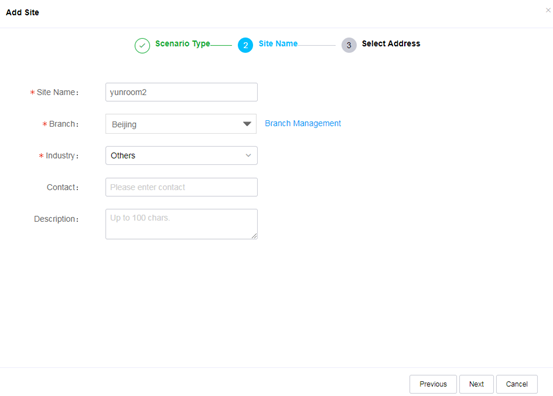
3. Enter the site name, select a branch and an industry, specify the contact number and description as needed, and then click Next.
Figure3-7 Specifying the site information
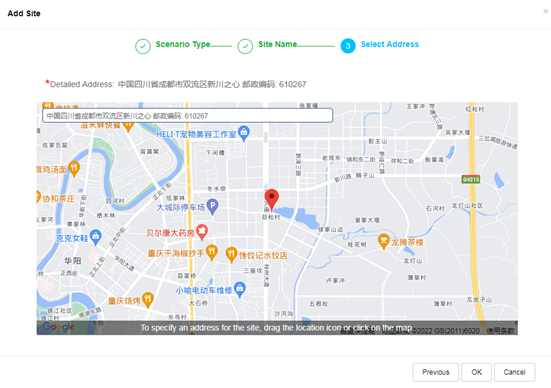
4. Select the address, and then click OK.
Figure3-8 Selecting the address
Adding a device
You can add a device to a site immediately after creating the site, or perform the following steps to add a device to an existing site:
1. From the left navigation pane, select Network > Devices.
2. Select the target branch and site from the upper left corner of the page, and then click Add.
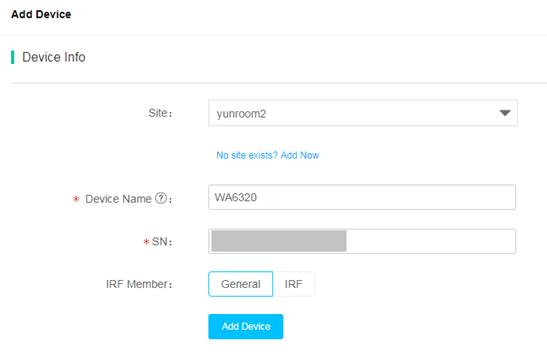
3. Specify the device name, SN, and device type, and then click Add.
Figure3-9 Adding a device
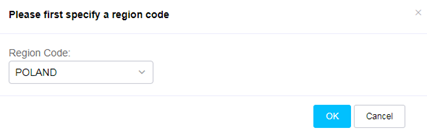
If it is the first time you add a device, you must select a region code.
Figure3-10 Selecting a region code
It might take a few minutes for the device to come online. Refresh the page later to verify that the device has come online.
Figure3-11 Verifying device status

Configuring a wireless service
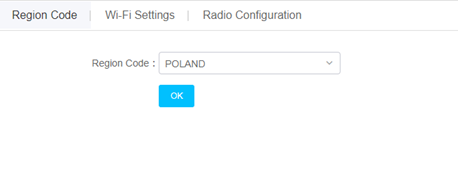
1. From the left navigation pane, select Settings > Cloud APs > WLAN Settings, and then select the target branch and site.
2. On the Region Code tab, select a region code, and then click OK.
Figure3-12 Specifying a region code
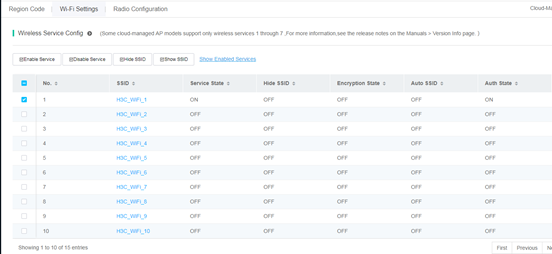
3. Click the Wi-Fi Settings tab, and then click
the down chevron ![]() to
expand the Wireless Service Config menu. You can click Show All Services or Show Enabled
Services as needed to show all or enabled services.
to
expand the Wireless Service Config menu. You can click Show All Services or Show Enabled
Services as needed to show all or enabled services.
4. To enable or disable wireless services in bulk, select the target services, and then click Enable Service or Disable Service.
5. To enable or disable SSID hidden for wireless services in bulk, select the target services, and then click Hide SSID or Show SSID.
Figure3-13 Configuring wireless services in bulk
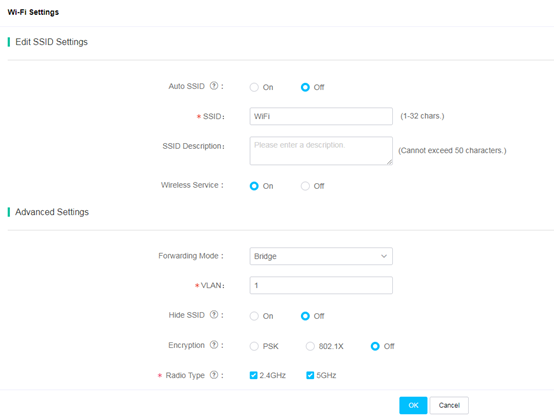
6. To edit a wireless service, click the SSID of the service and then configure auto SSID, the SSID name, wireless service state, forwarding mode, encryption, and authentication as needed.
|
|
NOTE: With auto SSID enabled, you must click Auto SSID Setting Sync after changing the AP name or importing APs to deploy the SSID settings to devices. |
Figure3-14 Editing SSID settings
Verifying the configuration
1. On the top navigation bar, click Network.
2. From the left navigation pane, select Monitor > Cloud APs > AP List.
3. Select the target branch and site from the upper left corner of the work pane.
4. View AP statistics in the site, including AP online state, MAC addresses, and IP addresses.
5. Click the name of an AP, and view the client association trend and online client statistics.
6. If auto SSID is enabled, verify that the SSID name is as required. With auto SSID enabled, the system combines the configured SSID and the device name to form an SSID name for easy identification. For example, if the configured SSID is WIFI and the device name is WA6320, the SSID name will be WIFI_WA6320.
4 Related documentation
· H3C Cloudnet Platform Deployment Guide
· H3C Cloud-Managed APs Configuration Examples
