- Table of Contents
- Related Documents
-
| Title | Size | Download |
|---|---|---|
| 01-Text | 3.05 MB |
Deploying VSR1000 Virtual Services Router on Microsoft Azure
Deploying VSR1000 Virtual Services Router on AWS
Creating a bucket and uploading a VHD image file
Deploying VSR1000 Virtual Services Router on Microsoft Azure
Prerequisites
Make sure the current network environment is operating correctly so that you can access Microsoft Azure and perform the required operations.
Restrictions and guidelines
A VHD image file is required to deploy VSR1000 Virtual Services Router on Microsoft Azure. Prepare the required image file in advance..
Procedure
Creating a private image file
Creating a storage account
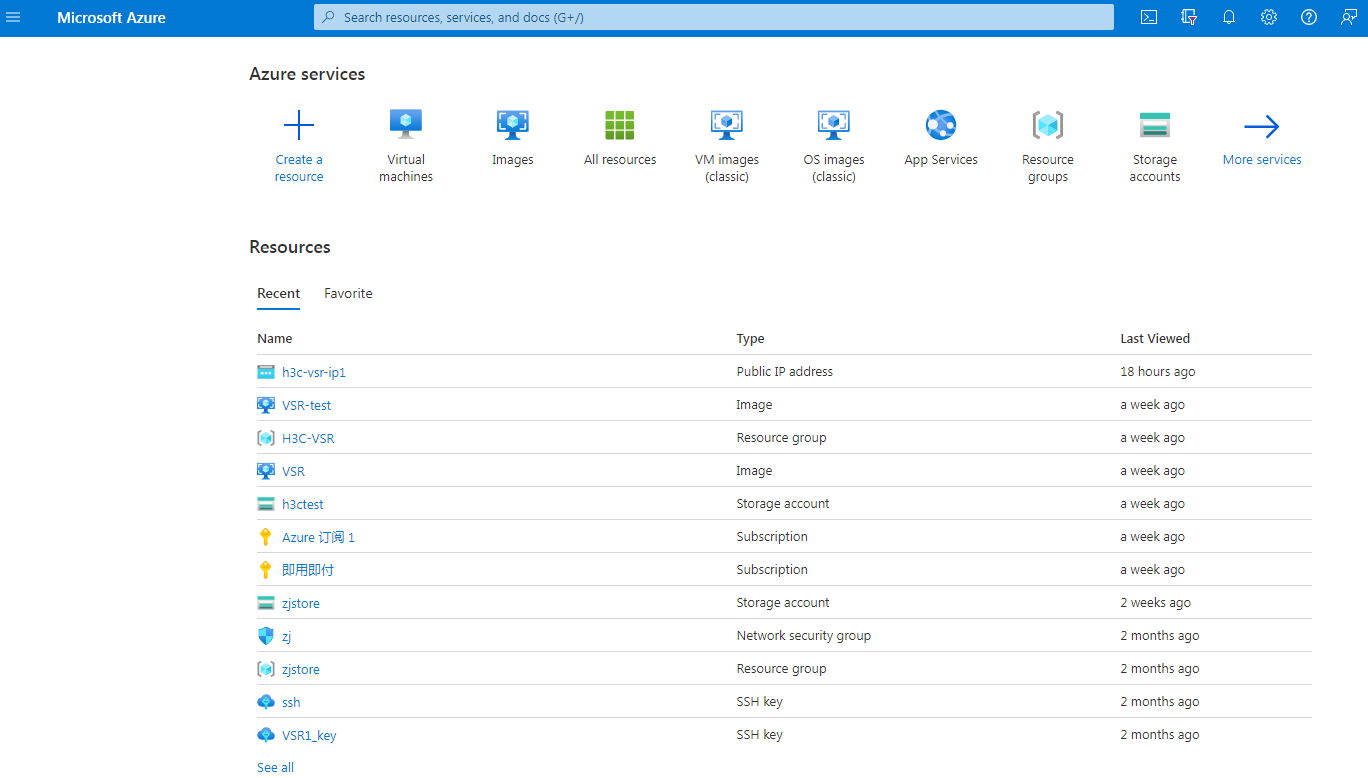
1. Access the Microsoft Azure homepage.
Figure 1 Microsoft Azure homepage
2. From the left portal menu, select Storage accounts.
Figure 2 Storage accounts page

3. Click + Create. The Create a storage account page opens and you are placed on the Basics tab. Configure the parameters as described in Table 1, and then click Next: Advanced >.
Figure 3 Create a storage account–Basics tab
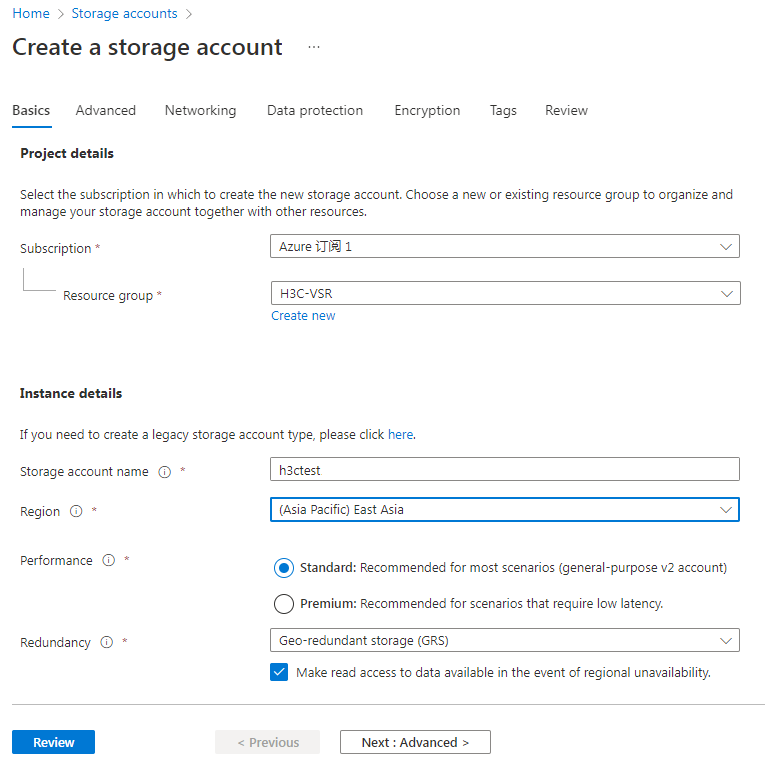
Table 1 Create a storage account–Basic tab parameters
|
Parameter |
Description |
|
Subscription |
Select a subscription. All resources in the same Microsoft Azure subscription are billed together. To create a subscription, navigate to the Cost Management + Billing > Subscriptions > New Subscription page and create a new subscription as shown in Figure 4. |
|
Resource group |
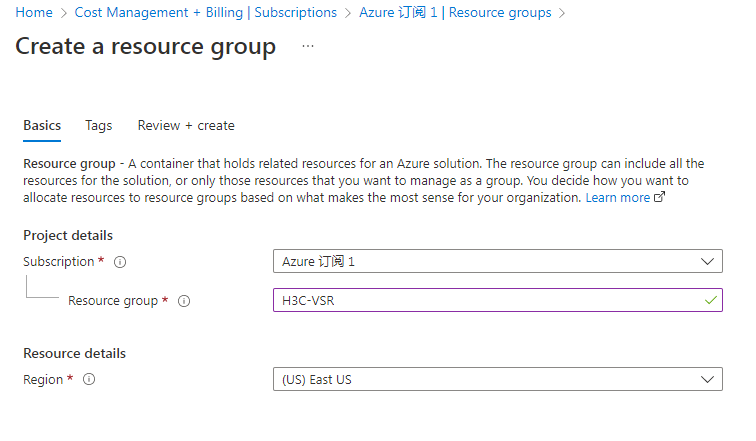
Select a resource group. A resource group is a collection of resources that share the same lifecycle, permissions, and policies. To create a resource group, select one of the created subscriptions on the Subscriptions page and then select Resource Groups from the left menu. On the resource group page that opens, click Create to create a new resource group, as shown in Figure 5. |
|
Storage account name |
Enter a name for the storage account. It is a string of 2 to 24 characters that can contain only lowercase letters and digits. |
|
Region |
Select the region where the storage account is used. If that region does not exist, select the nearest region. |
|
Performance |
Select Standard or Premium performance as needed. For scenarios requiring low latency, select Premium. |
|
Redundancy |
Select the described redundancy configuration. Options include: · Locally-redundant storage (LRS)—Lowest-cost option with basic protection against server rack and drive failures, recommended for non-critical solutions. · Geo-redundant storage (GRS)—Option with failover capabilities in a secondary region, recommended for backup scenarios. · Zone-redundant storage (ZRS)—Option with protection against data center-level failures, recommended for high availability scenarios. · Geo-zone-redundant storage (GZRS)—Optimal data center solution, recommended for critical data scenarios. |
Figure 4 Creating a subscription
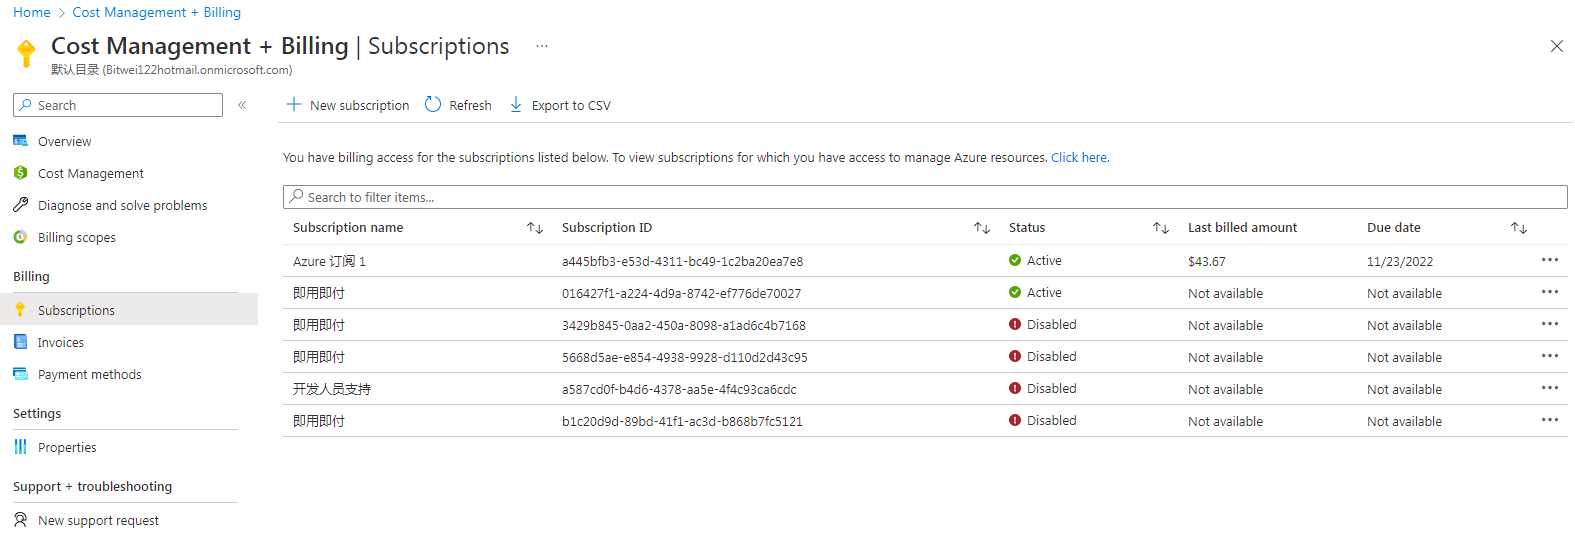
Figure 5 Creating a resource group
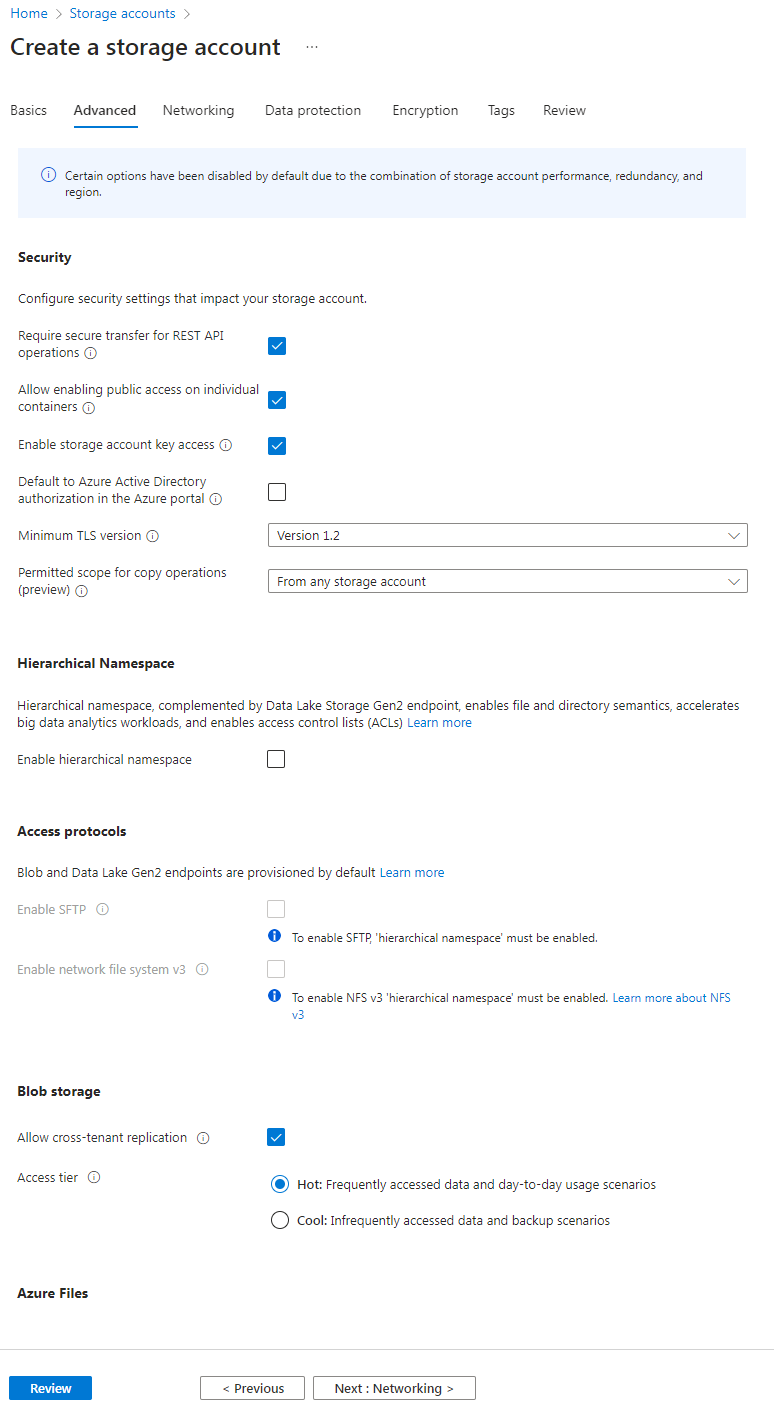
4. On the Advanced tab, configure the parameters and then click Next: Networking >.
This example uses the default settings for the parameters.
Figure 6 Create a storage account–Advanced tab
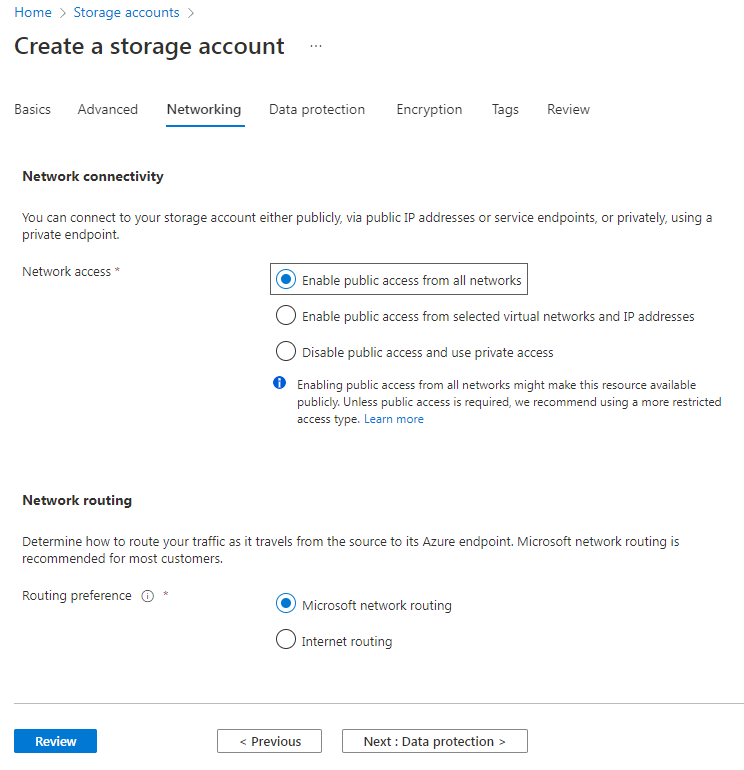
5. On the Networking tab, configure the parameters and then click Next: Data protection >.
This example uses the default settings for the parameters.
Figure 7 Create a storage account–Networking tab
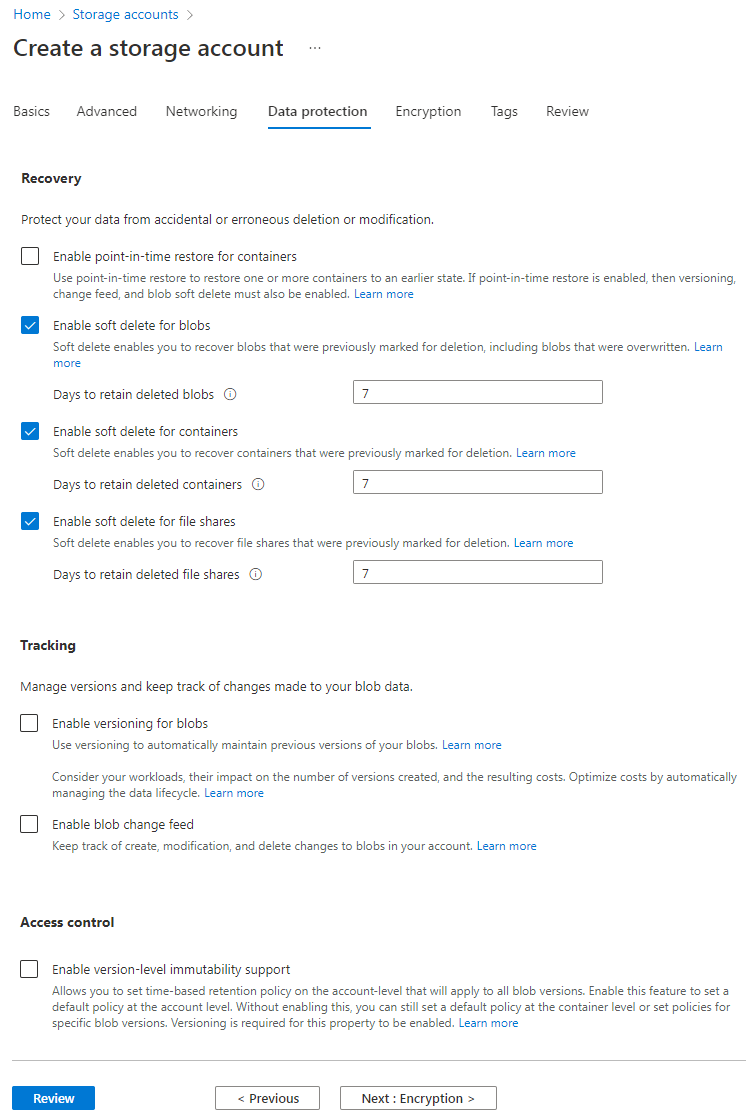
6. On the Data protection tab, configure the parameters and then click Next: Encryption >.
This example uses the default settings for the parameters.
Figure 8 Create a storage account–Data protection tab
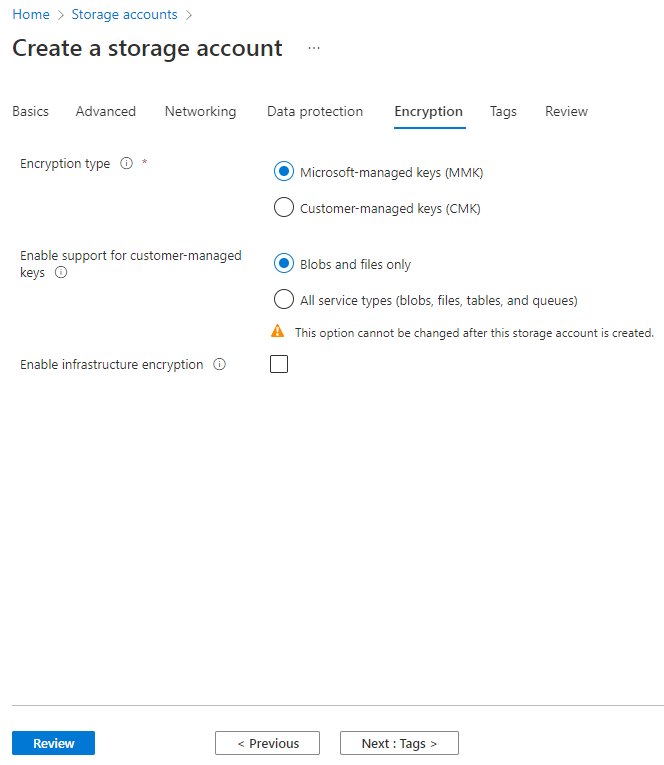
7. On the Encryption tab, configure the parameters and then click Next: Tags >.
This example uses the default settings for the parameters.
Figure 9 Create a storage account–Encryption tab
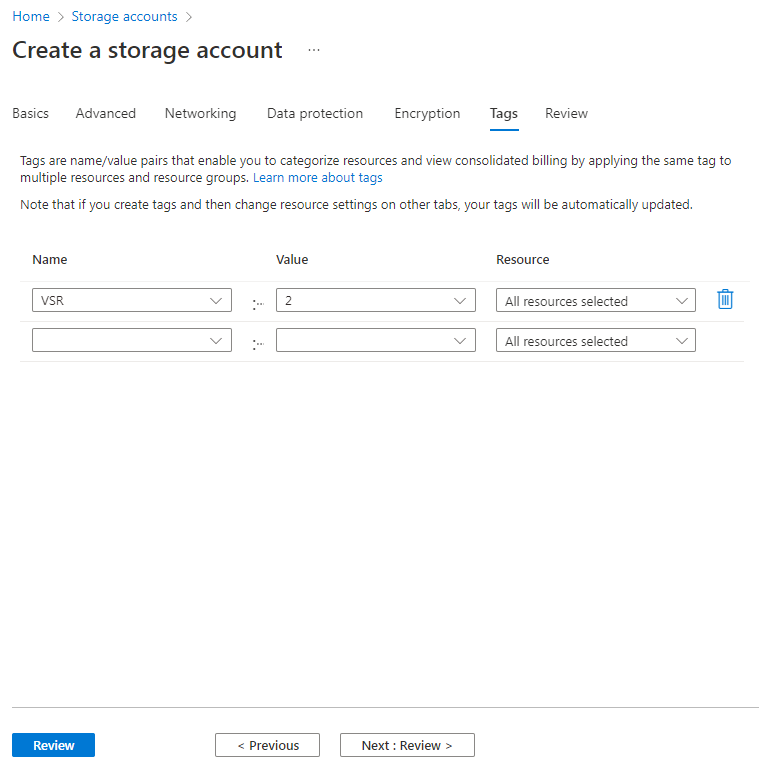
8. On the tags tab, specify the tag name and value and then click Next: Review >.
As shown in Figure 10, tags are name/value pairs that enable you to categorize resources and view consolidated billing by applying the same tag to multiple resource and resource groups.
Figure 10 Create a storage account–Tags tab
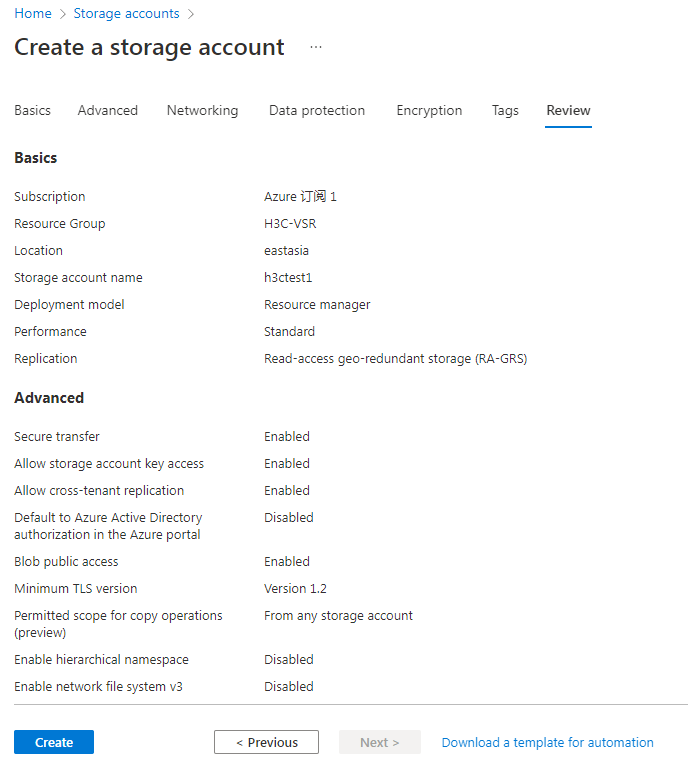
9. On the Review tab, review the configured parameters and then click Create.
Figure 11 Create a storage account-Review tab
After the storage account is created, you can view it from the Storage accounts page.
Figure 12 Storage account created

Creating a container and uploading the image file to the container
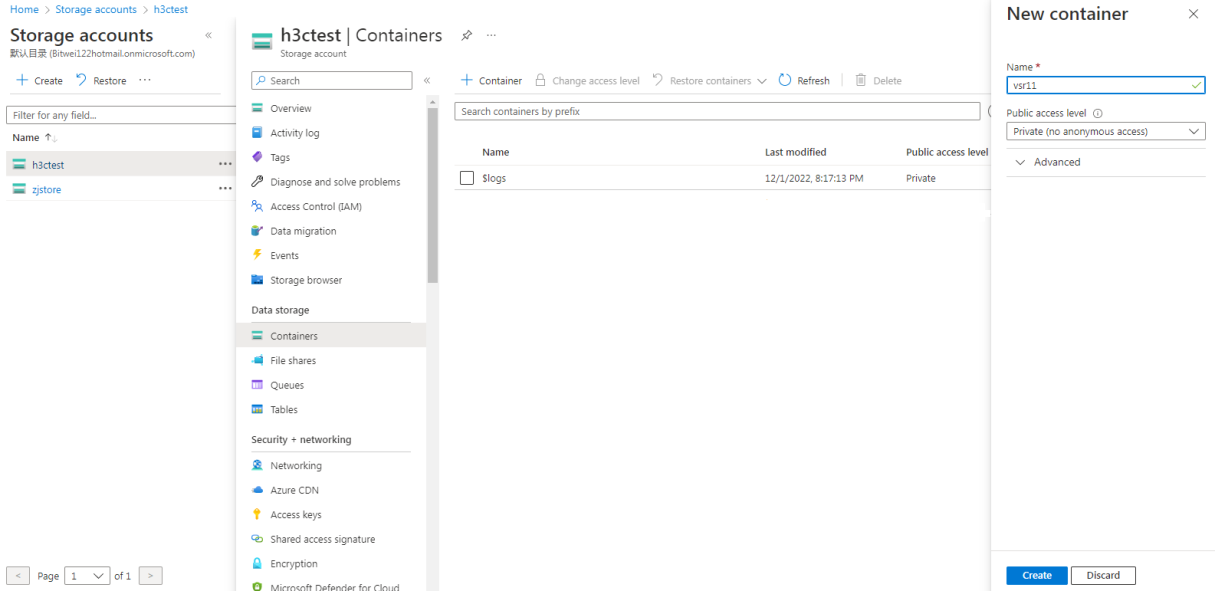
1. Select the newly created storage account on the Storage accounts page.
2. Select Containers from the left menu of the storage account.
3. Click+ Container. The container creation page opens.
4. Enter a name for the container and then click Create.
The container name is a string of 3 to 63 characters that can only contain lowercase letters, numbers, and hyphens, and must start with a letter or digit.
Figure 13 Containers page
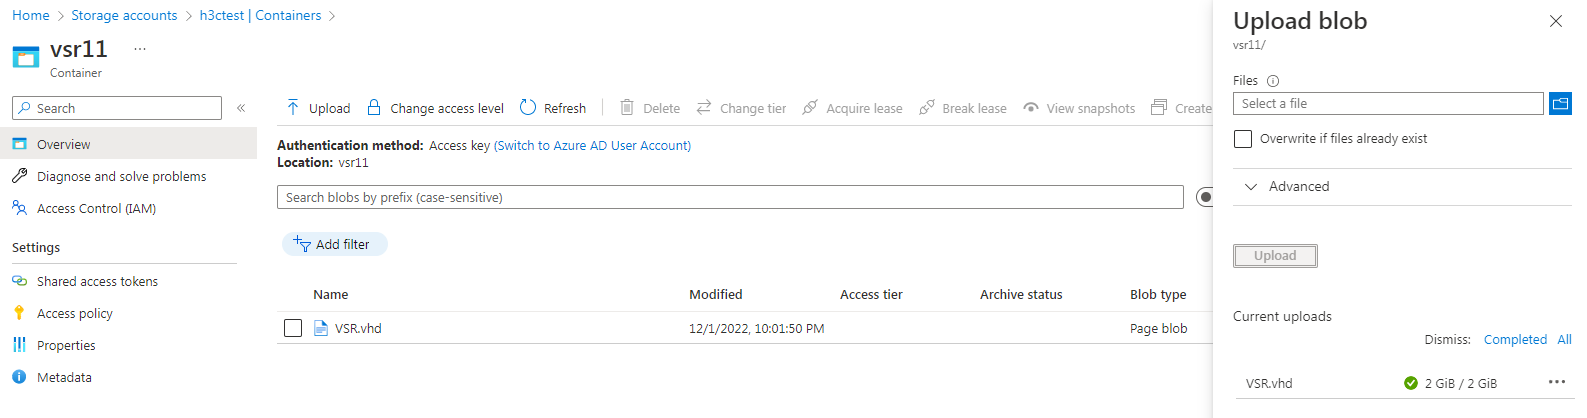
5. Select the newly created container on the Containers page.
6. Click Upload on the page for the container.
7. On the Upload blob page that opens, select the local image file and then click Upload.
After the file is uploaded, you can view it on the container page.
Figure 14 Upload blob page
Creating a private image file
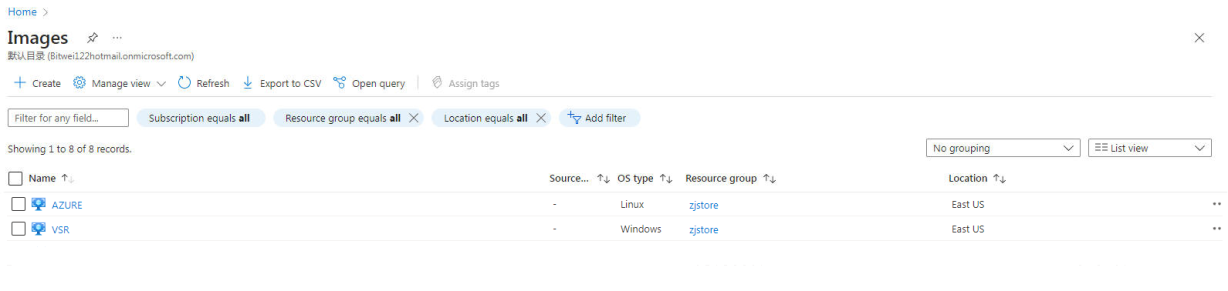
1. From the left portal menu on the Azure home page, select All services > Others > Images. Alternatively, enter "image" in the search box on the home page and select Images from the list.
Figure 15 Images page
2. Click + Create. The Create an image page opens
3. On the Basics tab, configure the parameters as shown in Figure 16 and Table 2, and then click Next: Tags >.
Figure 16 Create an image–Basics tab
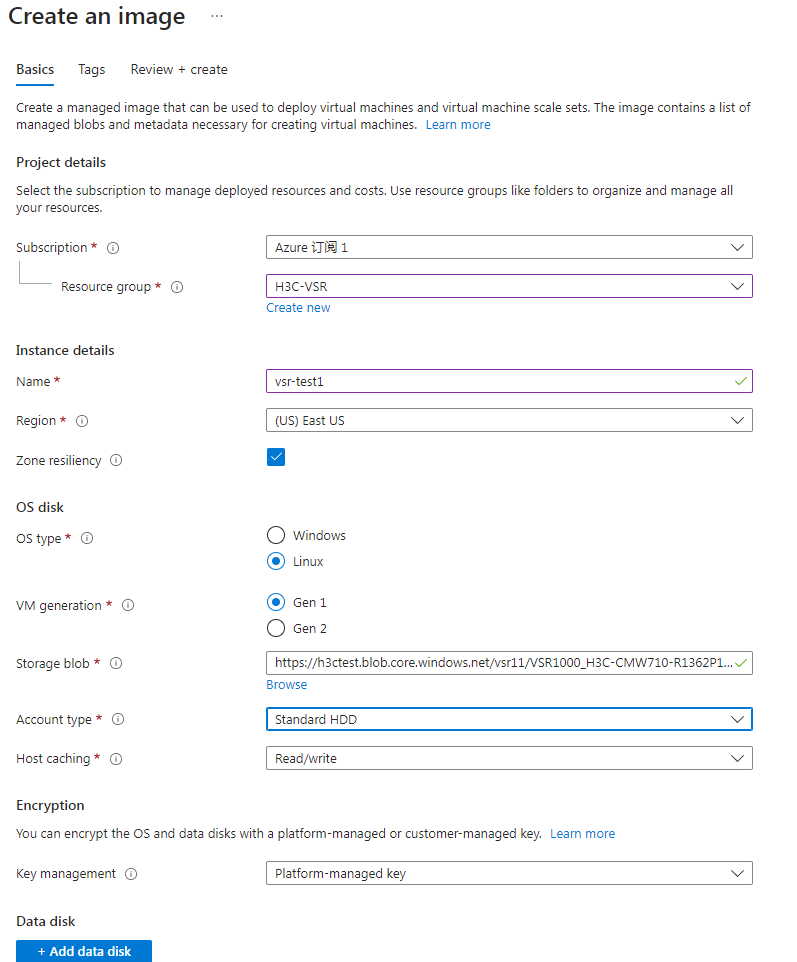
Table 2 Create an image–Basics tab parameters
|
Parameter |
Description |
|
|
Project details |
Subscription |
Select the subscription to create an image. |
|
Resource group |
Select the resource group to create an image. |
|
|
Instance details |
Name |
Specify a name for the instance. The name can contain only letters, digits, underscores, periods, and hyphens, and must start with a letter or digit and end with a letter, digit, or underscore |
|
Region |
Select the region where the subscription is. |
|
|
Zone resiliency |
If you select this option, you can use the image in any available zone. This option is selected by default. |
|
|
OS disk |
OS type |
Select Linux. |
|
VM generation |
Select Gen 1 or Gen 2 as needed. Gen 1 is selected in this example. |
|
|
Storage blob |
Click Browse and select the blob file uploaded in the "Creating a container and uploading the image file to the container" procedure. |
|
|
Account type |
Select the desired account type based on the usage scenario and performance requirements for the virtual machine. Options are Standard HDD, Premium HDD, Standard SSD, and Premium SSD. Standard HDD is selected in this example. |
|
|
Host caching |
Read/write is selected by default. This example uses the default configuration. |
|
|
Encryption |
Key management |
Select Customer-managed key or Platform-managed key as needed. Platform-managed key is selected in this example. |
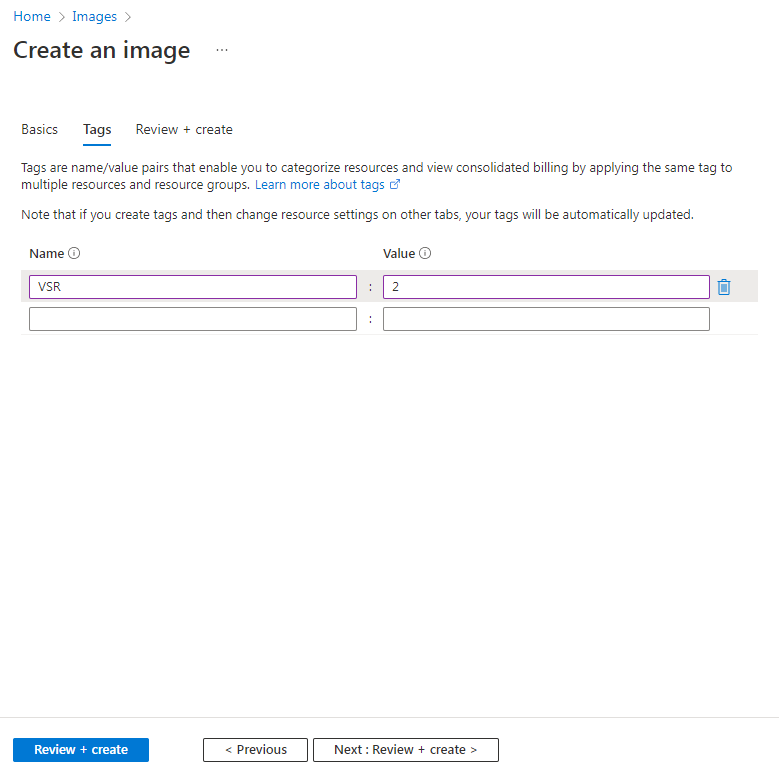
4. On the tags tab, specify the tag name and value and then click Next: Review + create >.
As shown in Figure 17, tags are name/value pairs that enable you to categorize resources and view consolidated billing by applying the same tag to multiple resource and resource groups.
Figure 17 Create an image-Tags tab
5. Review the configured parameters and then click Create.
Figure 18 Create an image-Review + create tab

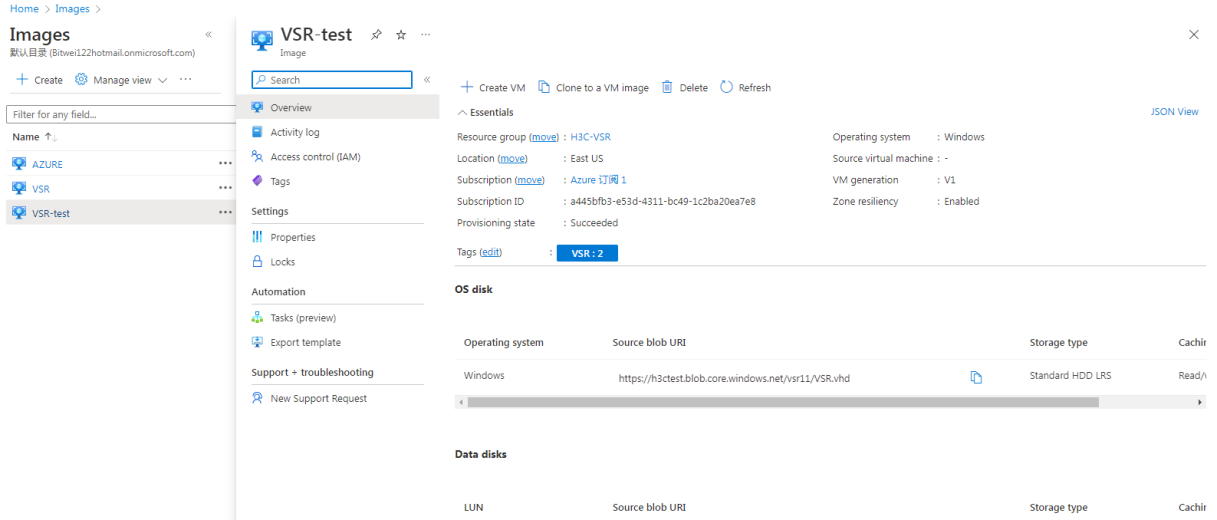
After the image is created successfully, you can view it on the Images page.
Figure 19 Image created successfully
Creating a virtual machine
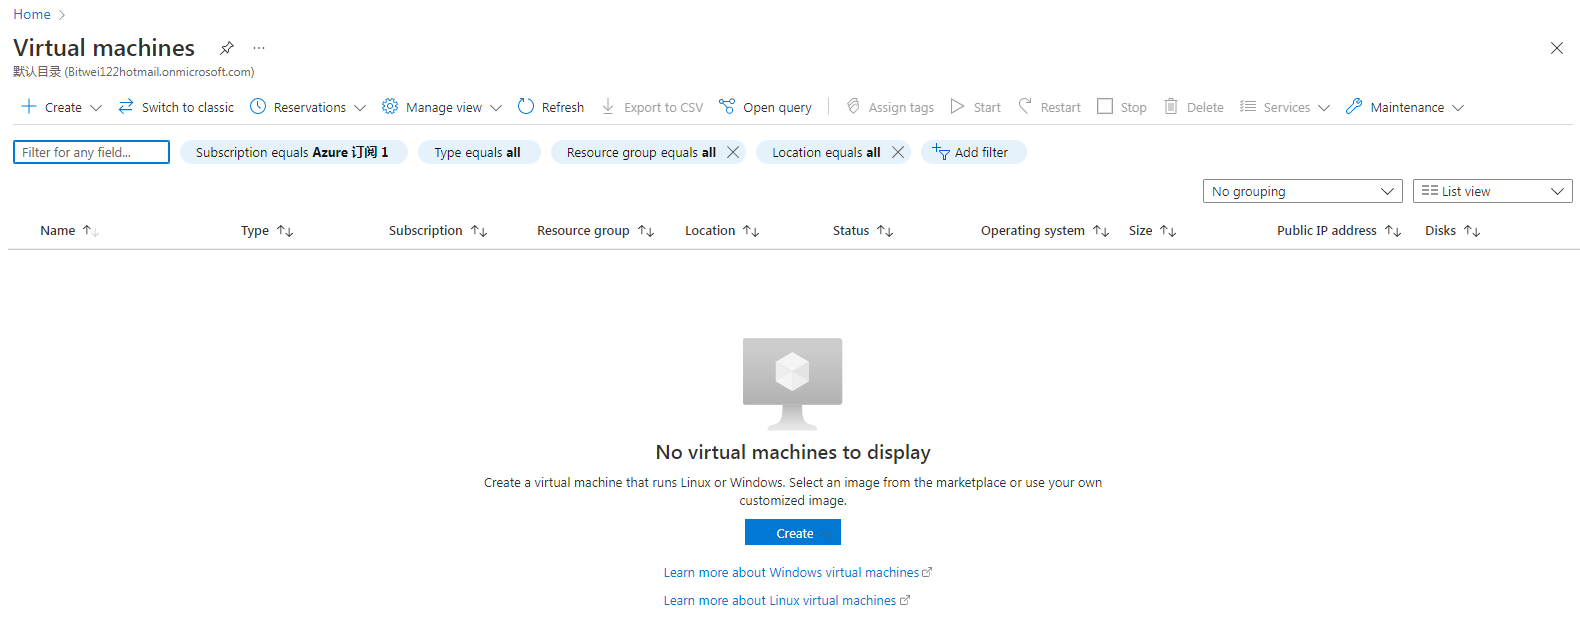
1. Select Virtual machines from the left portal menu on the home page.
Figure 20 Virtual machines page
2. Click + Create and select Azure virtual machine from the list. The Create a virtual machine page opens.
3. On the Basics tab, configure the parameters as shown in Figure 21 and Table 3, and then click Next: Disks.
Figure 21 Create a virtual machine-Basics
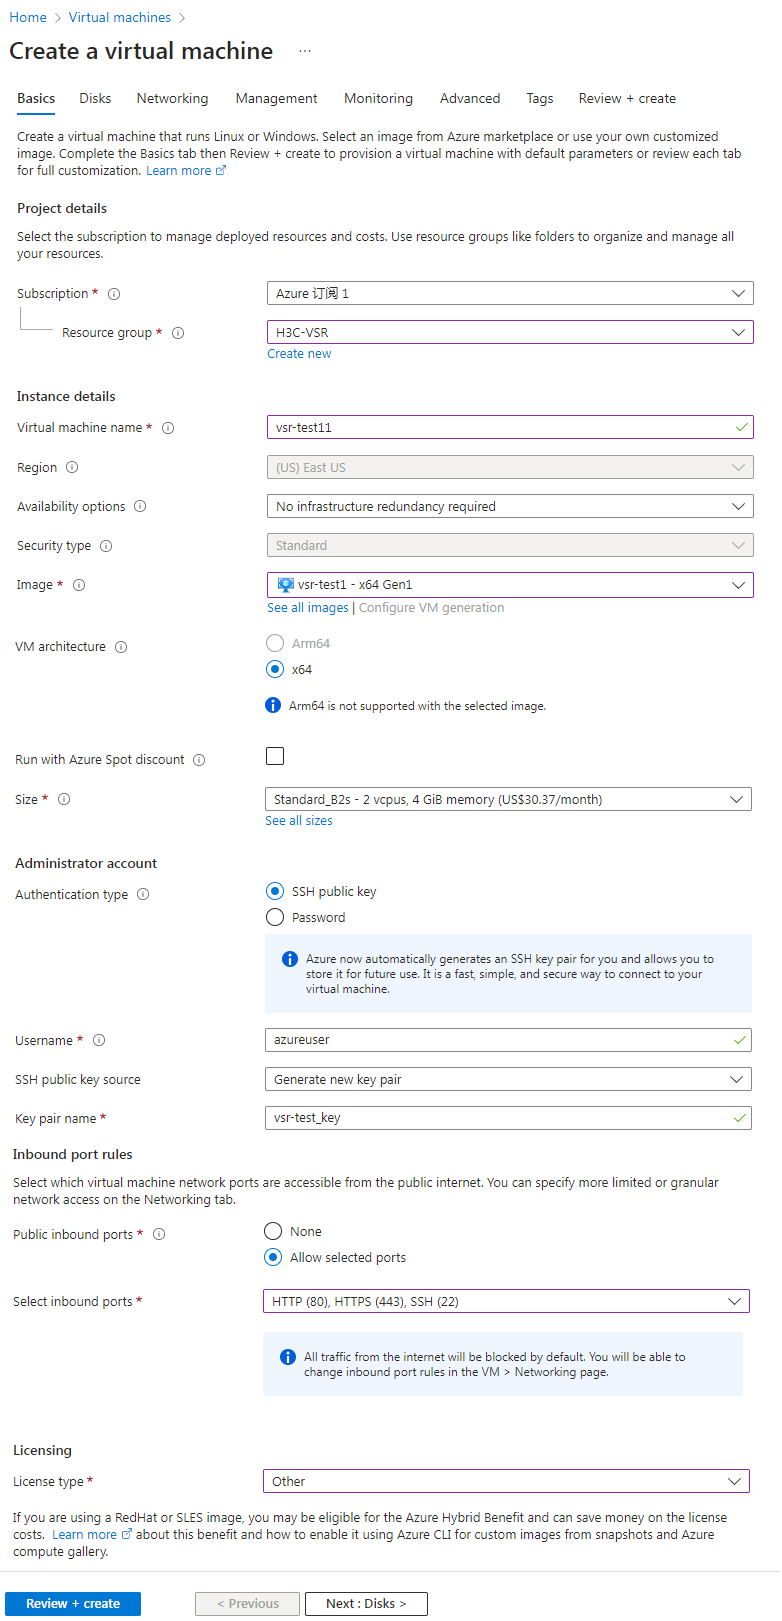
Table 3 Create a virtual machine-Basics tab parameters
|
Parameter |
Description |
|
|
Project details |
Subscription |
Select the subscription to create a virtual machine. |
|
Resource group |
Select the resource group to create a virtual machine. |
|
|
Instance details |
Virtual machine name |
Specify a name for the virtual machine. The name is a string of 1 to 64 characters that cannot contain special characters \/[]:|<>+=;,?*@& or spaces, and cannot start with an underscore (_) or end with a comma (,) or hyphen (-). |
|
Region |
The system fills this parameter with the region where the subscription is. |
|
|
Availability options |
Options are Availability zones, Virtual machine scale sets, Availability sets, No infrastructure redundancy required. The No infrastructure redundancy required option is selected in this example. |
|
|
Security type |
The system fills this parameter based on the availability option. |
|
|
Image |
Click Browse and select the private image created in the "Creating a private image file" procedure. |
|
|
VM architecture |
Select the x64 or Arm64 VM architecture as needed. x64 is selected in this example. |
|
|
Run with Azure Spot discount |
By default, this option is unselected. This example uses the default configuration. |
|
|
Size |
Select the size for the virtual machine. The virtual machine processing power, memory, and storage capacity depends on its size. Microsoft Azure charges hourly based on the size and operating system of the VM. |
|
|
Administrator account |
Username |
The username is a string of 1 to 20 characters that cannot contain special characters \/""[]:|<>+=;,?*@& or end with a period (.). |
|
Password |
The password is a string of 12 to 123 characters that must contain three of the four character types: lowercase letter, uppercase letter, digit, and special character. |
|
|
Confirm password |
Enter the password again for confirmation. |
|
|
Inbound port rules |
Public inbound ports |
Select Allow selected ports. This option allows access to the virtual machine network ports from the public Internet. |
|
Select inbound ports |
Select HHTP (80), HTTPS (443), SSH (22), RDP (3389). |
|
|
Licensing |
License type |
Select a license type. This example selects Other. You can also select Red Hat Enterprise Linux or SUSE Enterprise Linux. |
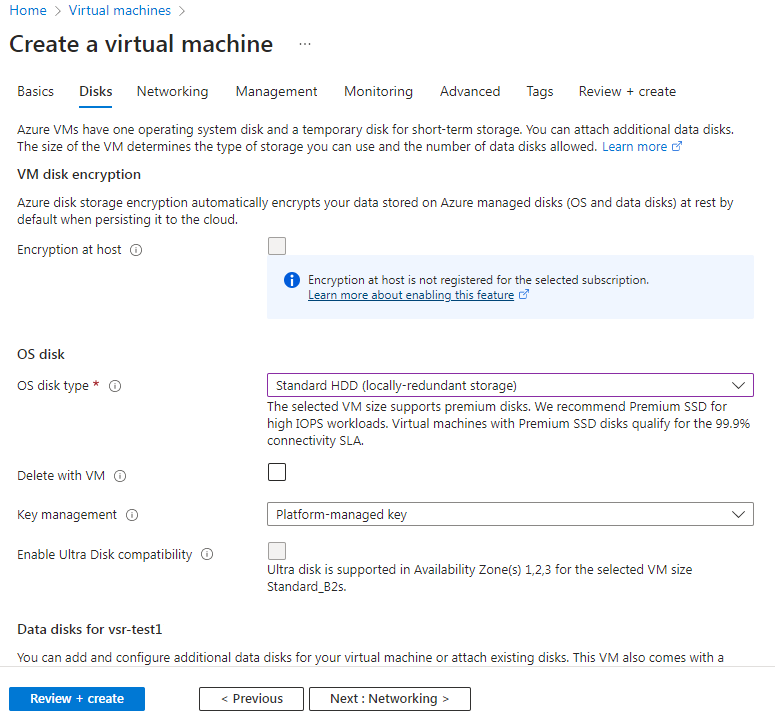
4. On the Disks tab, configure the parameters and then click Next: Networking.
This example selects the Standard SSD (locally-redundant storage) OS disk type and use the default settings for the other parameters.
Figure 22 Create a virtual machine-Disks tab
5. On the Networking tab, configure the parameters as shown in Table 4, and then click Next: Management >.
Figure 23 Create a virtual machine-Networking tab
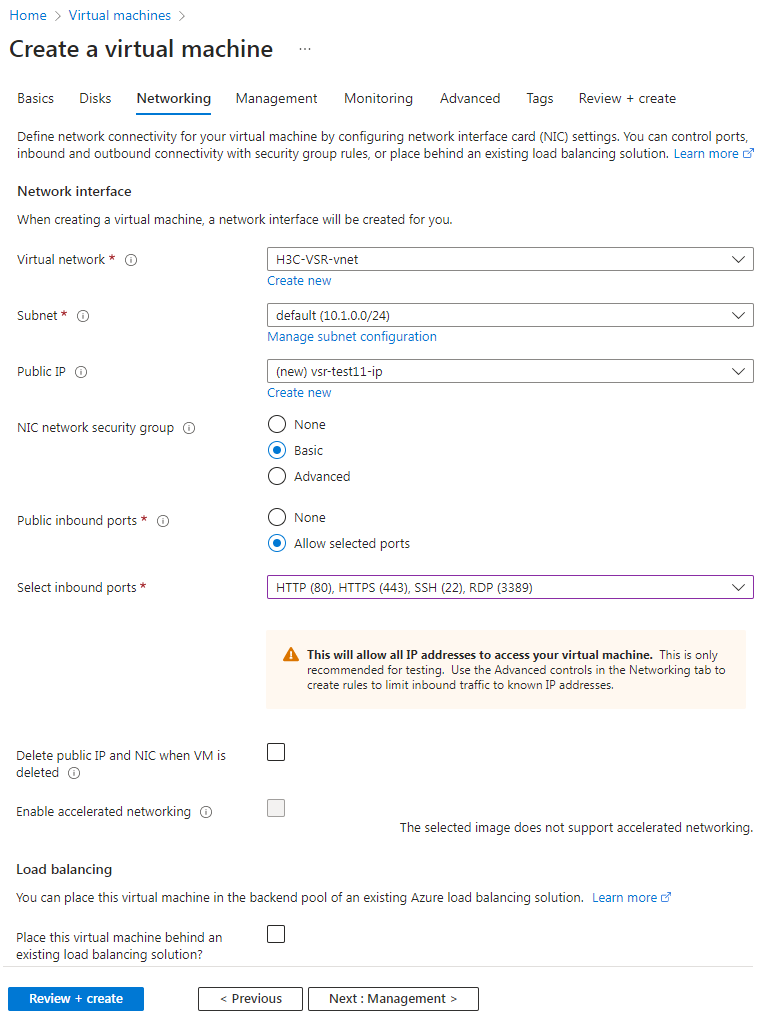
Table 4 Networking tab parameters
|
Parameter |
Description |
|
Virtual network |
Select a virtual network for the virtual machine. Virtual machines on the same virtual network can access each other. To create and use a new virtual network, click Create New and configure the virtual network name, address space, as well as subnet name and address range on the Create Virtual Network page, as shown in Figure 24. This example uses the default configuration. |
|
Subnet |
Select an IP address range on the virtual network. Virtual machines connected to the same subnet on the virtual network can communicate with each other. You can configure this parameter to isolate virtual machines from each other or isolate the virtual machine from the Internet. This example uses the default configuration. |
|
Public IP |
Select a public IP for the virtual machine. The public IP is used for access to the virtual machine from outside the virtual network. To create and use a new public IP, click Create new to configure the parameters including the name, SKU, and routing preference on the Create public IP address page, as shown in Figure 25. This example uses the default configuration. |
|
NIC network security group |
Basic is selected by default. This example uses the default configuration. |
|
Public inbound ports |
Select Allow selected ports. This option allows access to the virtual machine network ports from the public Internet. |
|
Select inbound ports |
Select HHTP (80), HTTPS (443), SSH (22), RDP (3389). |
|
Delete public IP and NIC when VM is deleted |
This option is not selected by default. This example uses the default configuration. |
|
Enable accelerated networking |
This option is configured by the system based on the selected image file. |
|
Load balancing |
This option is not selected by default. This example uses the default configuration. |
Figure 24 Creating a virtual network
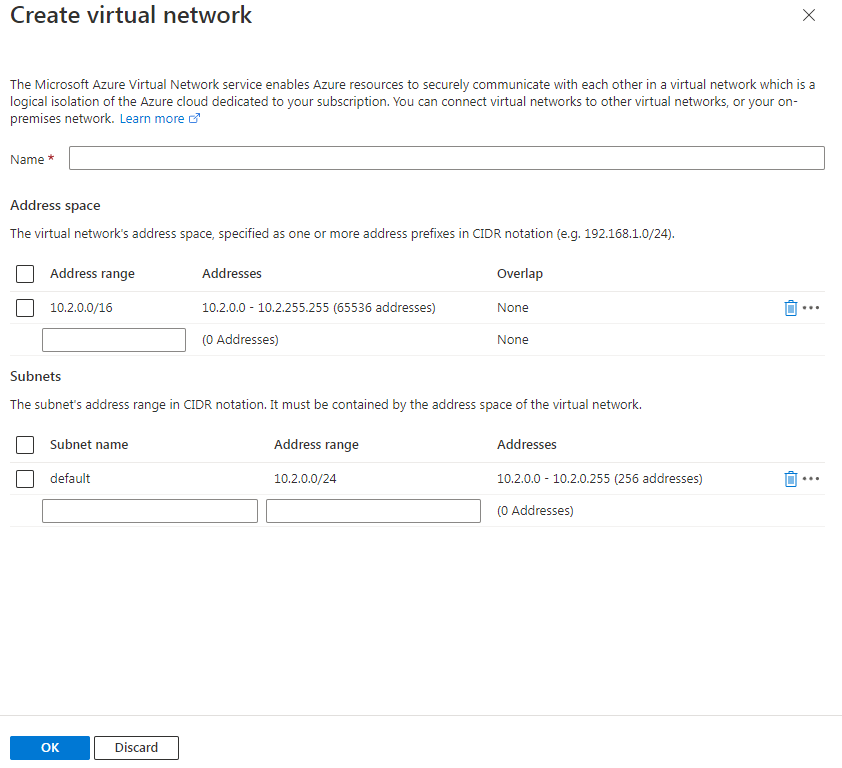
Figure 25 Creating a public IP address

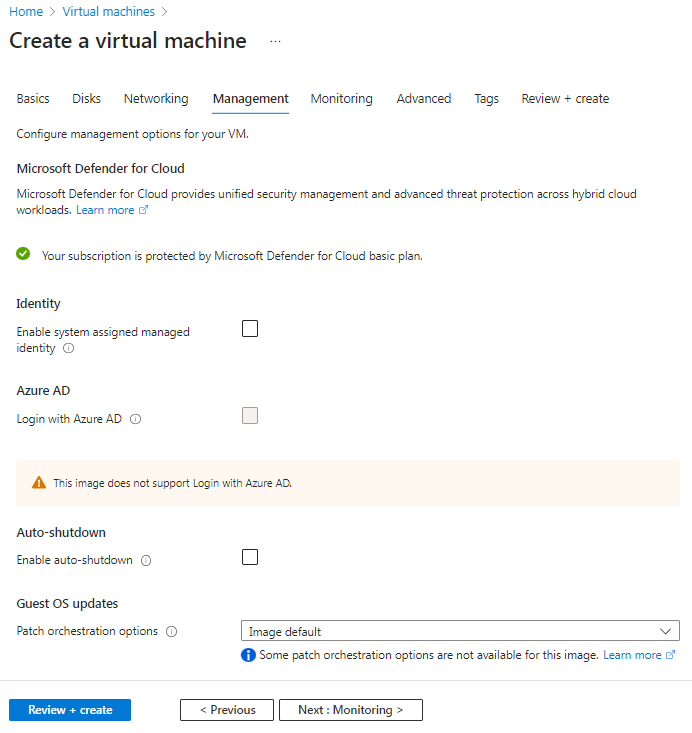
6. On the Management tab, configure the parameters and then click Next: Monitoring >.
This example uses the default configuration for the parameters.
Figure 26 Create a virtual machine-Management tab
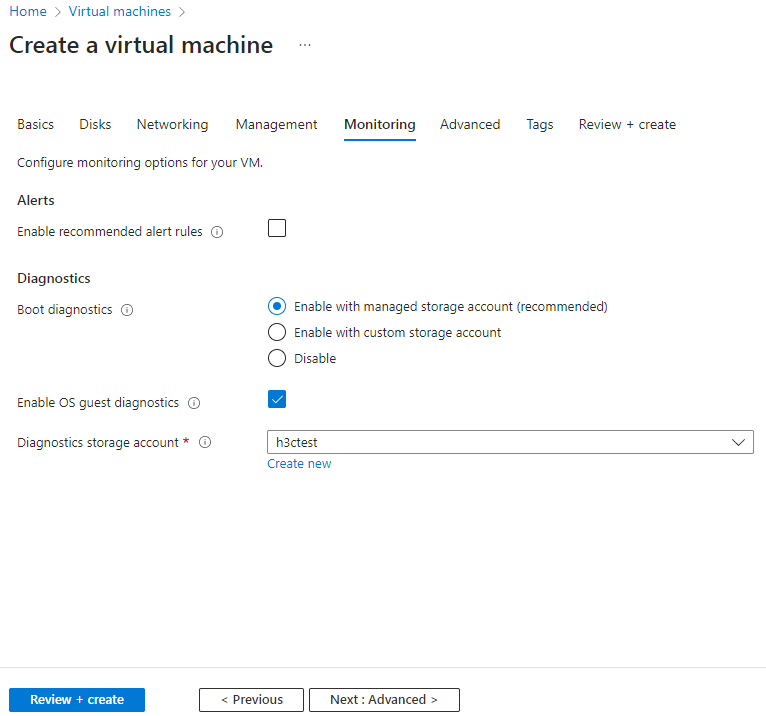
7. On the Monitoring tab, configure the parameters and then click Next: Advanced >.
This example uses the default configuration for the parameters.
Figure 27 Create a virtual machine-Monitoring tab
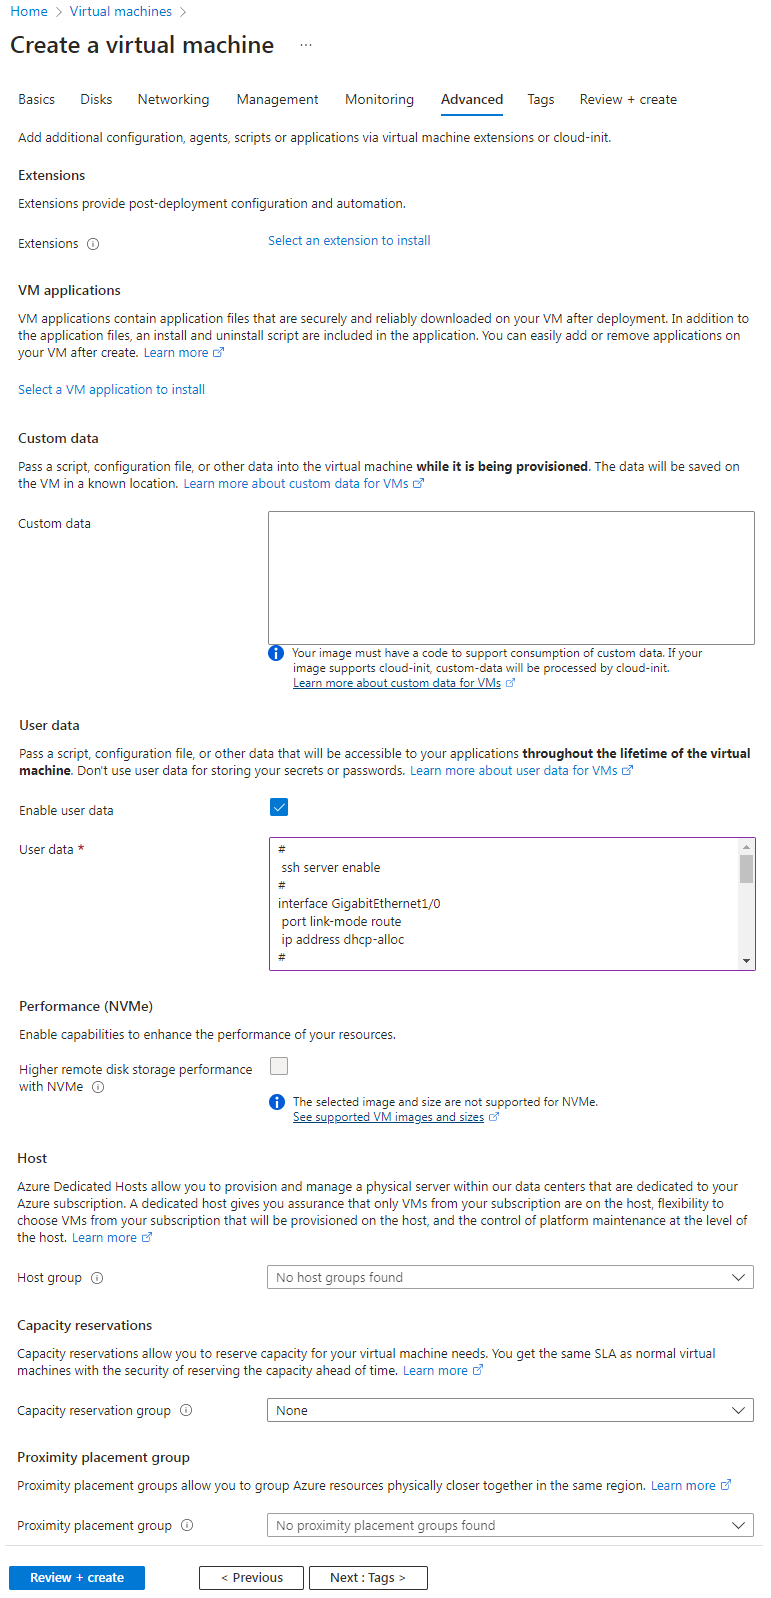
8. On the Advanced tab, select Enable user data, enter the script as follows, use the default settings for other parameters, and then click Next: Tags >.
Customize the username and password used for connecting to the virtual machine through SSH for the local-user and password simple parameters, respectively.
#
ssh server enable
#
interface GigabitEthernet1/0
port link-mode route
ip address dhcp-alloc
#
line aux 0
authentication-mode none
user-role network-admin
user-role network-operator
#
line vty 0 63
authentication-mode scheme
user-role level-15
user-role network-operator
idle-timeout 0 0
#
local-user admin class manage
password simple admin
service-type ftp
service-type ssh
authorization-attribute user-role level-15
authorization-attribute user-role network-operator
#
Figure 28 Create a virtual machine-Advanced tab
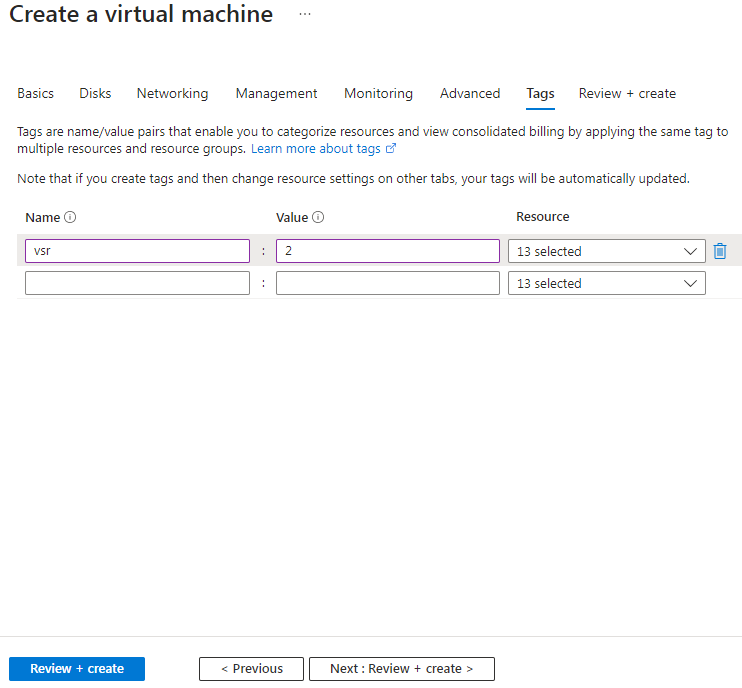
9. On the Tags tab, specify the tag name and value and then click Next: Review + create >.
Tags are name/value pairs that enable you to categorize resources and view consolidated billing by applying the same tag to multiple resource and resource groups.
Figure 29 Create a virtual machine-Tags tab
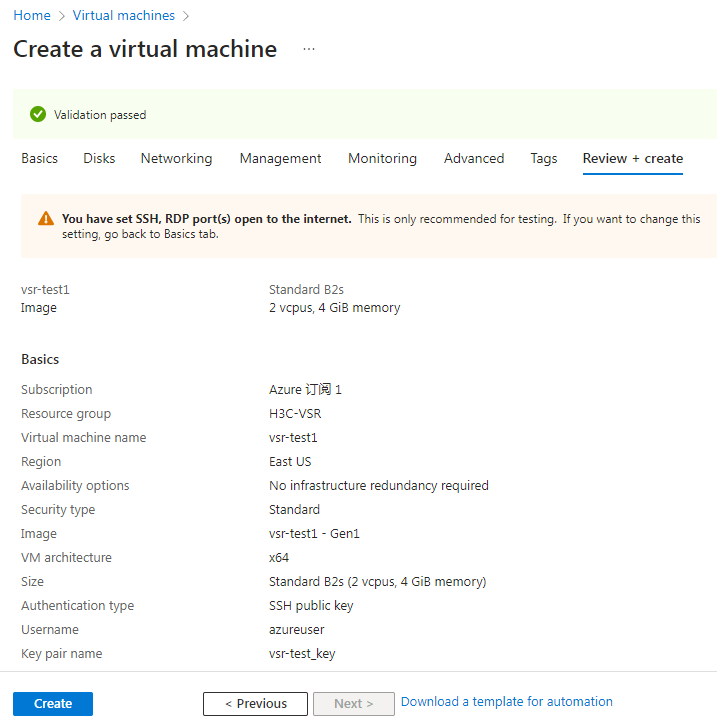
10. On the Review + create tab, review the configured parameters and then click Create.
Figure 30 Create a virtual machine-Review + create tab
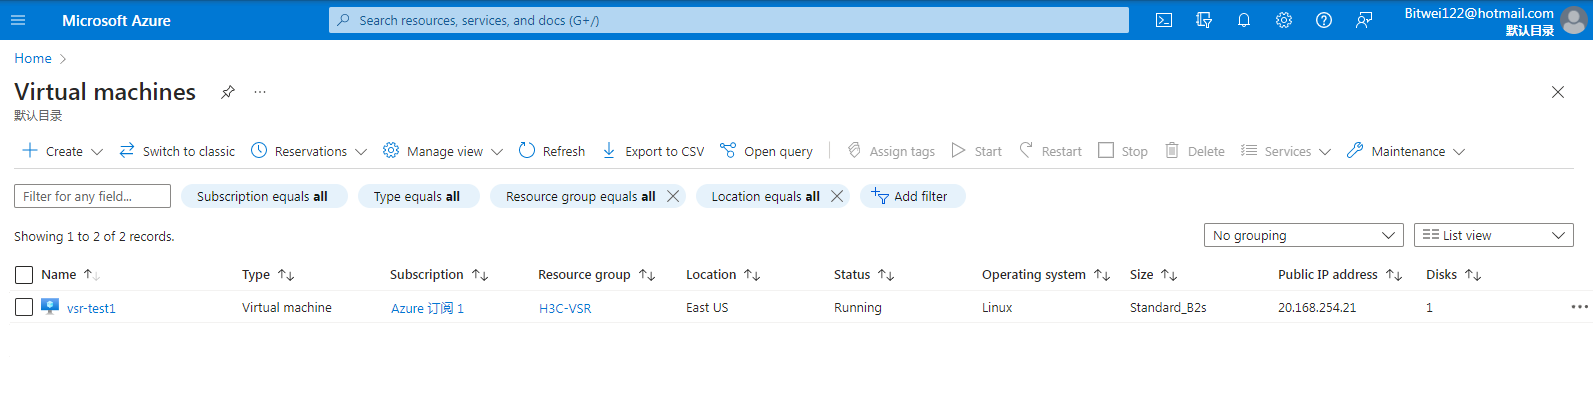
After the virtual machine is created, you can view it from the Virtual machines page.
Figure 31 Virtual machine created successfully
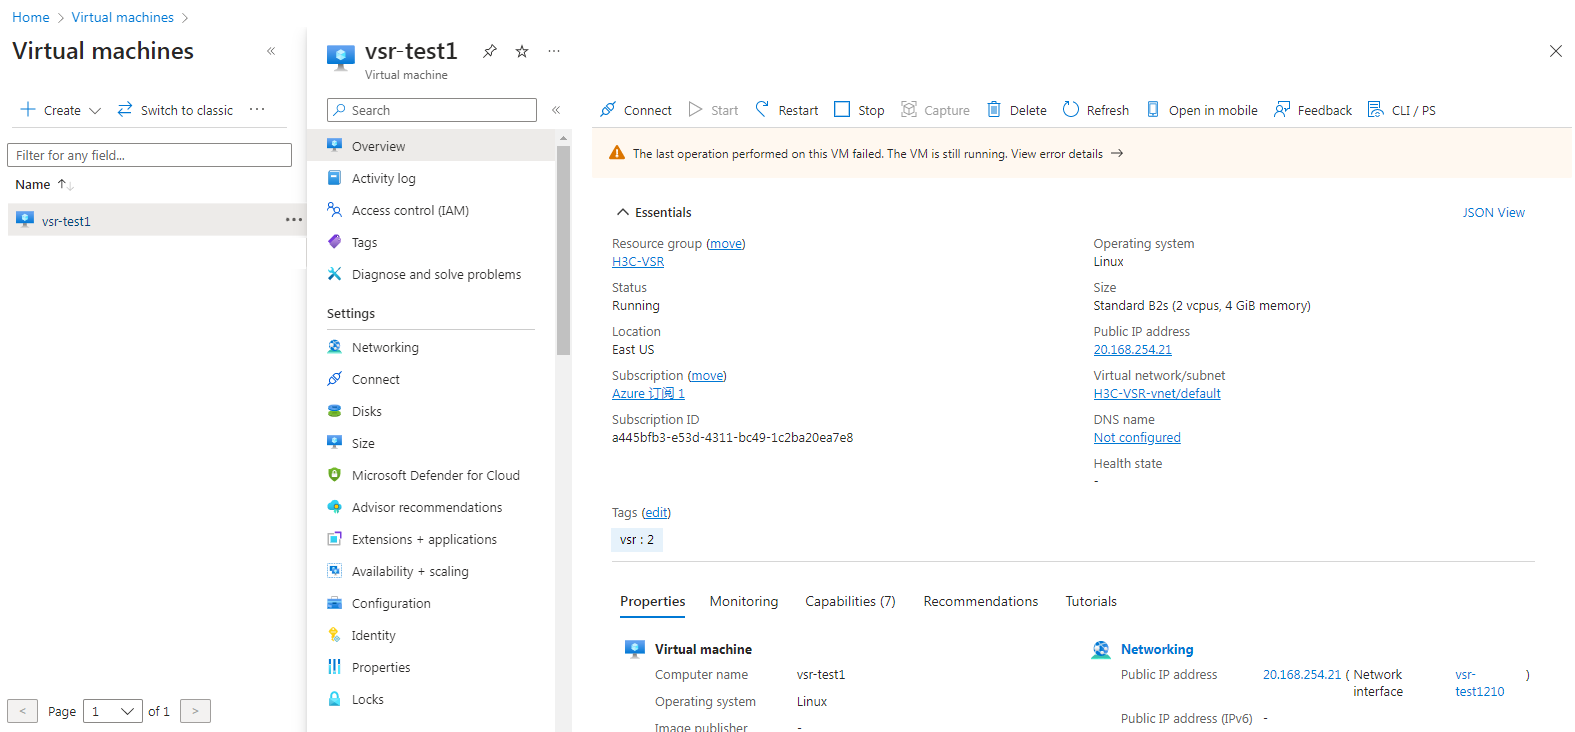
11. Click the newly created virtual machine name to access the Essentials page for the virtual machine.
Figure 32 Essentials page of the created virtual machine
12. Select Connect > SSH from the left menu and view the restrictions and guidelines for the connection.
Figure 33 SSH connection page for the virtual machine

13. Open a remote connection tool on the local host. Enter the assigned public IP address and the username and password configured in the User data area on the Advanced tab during virtual machine creation to connect to the virtual machine.
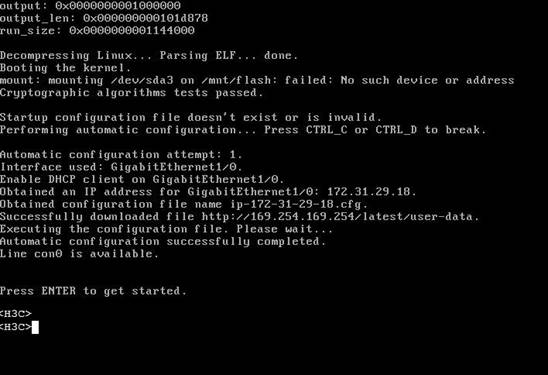
Figure 34 Connected to the virtual machine page successfully
Deploying VSR1000 Virtual Services Router on AWS
Prerequisites
Make sure the current network environment is operating correctly so that you can access Amazon Web Services (AWS) and perform the required operations.
Restrictions and guidelines
A VHD image file is required to deploy VSR1000 Virtual Services Router on AWS. Prepare the required image file in advance.
Procedure
Creating a bucket and uploading a VHD image file
1. Log in to AWS Management Console with your account name and password.
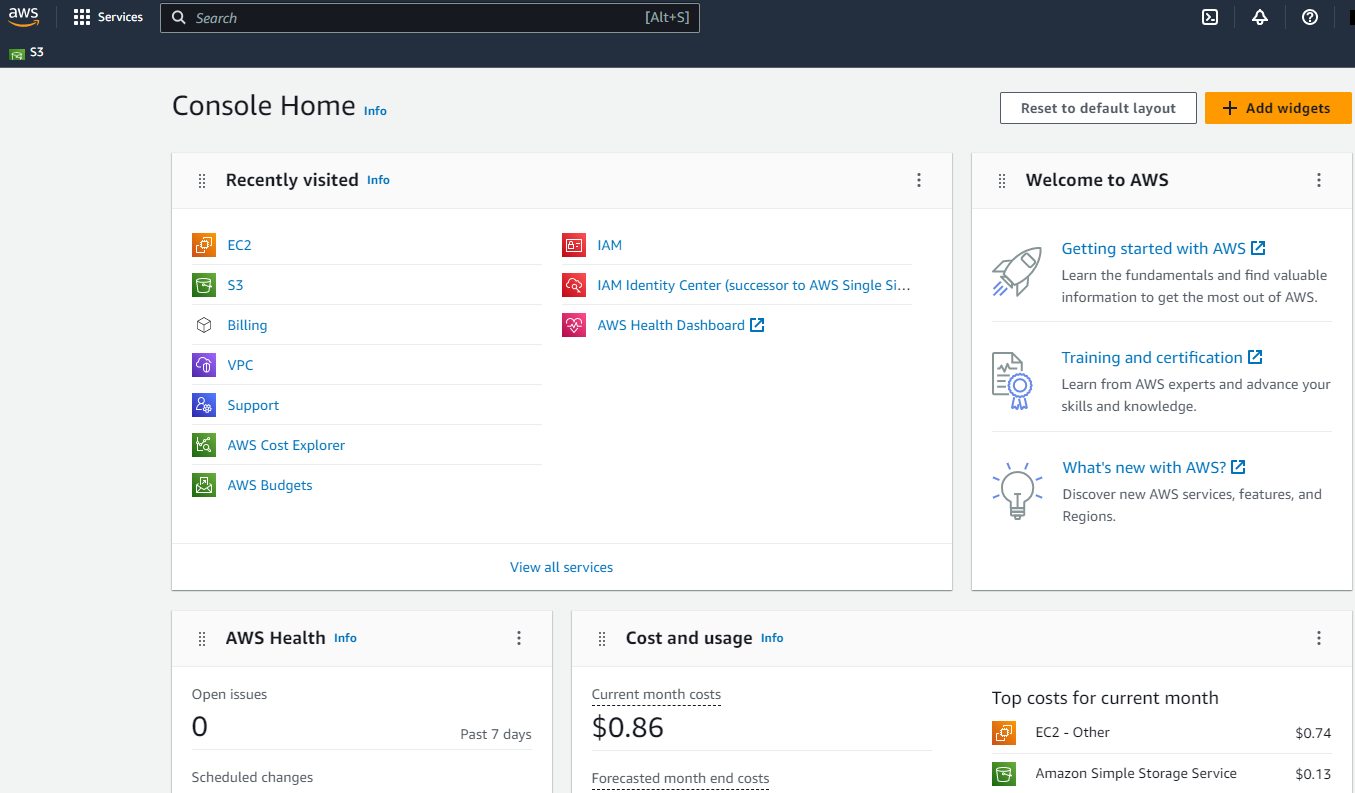
2. Select Services on the top left of the homepage and then select S3 from the dropdown list.
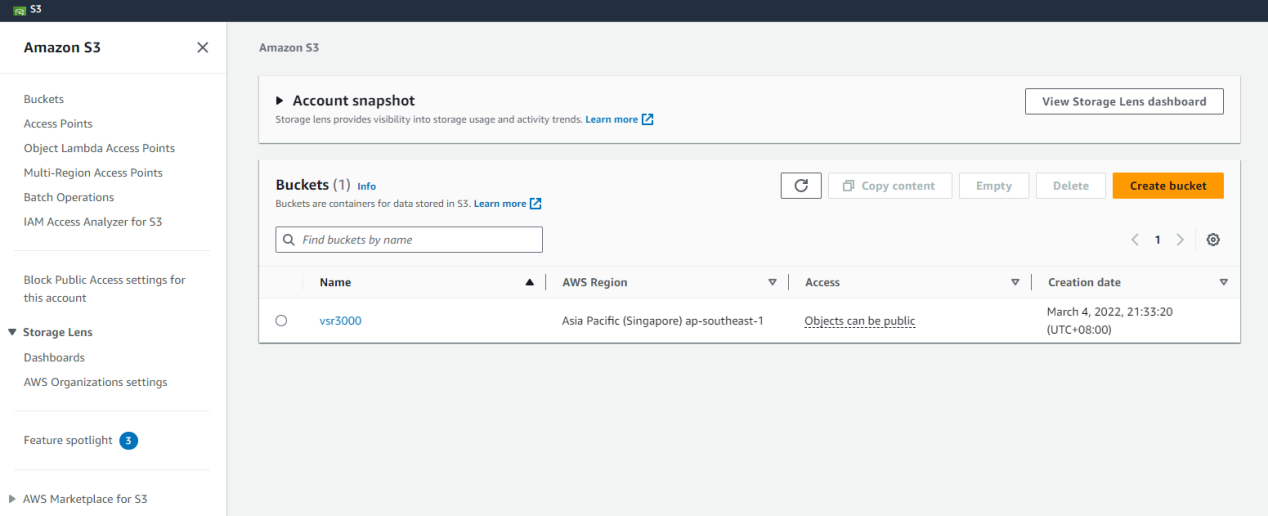
3. Click Bucket from the left navigation pane. On the page that opens, click Create bucket to create a bucket. Configure the parameters as described in Table 5.
Figure 37 Creating a bucket (1)
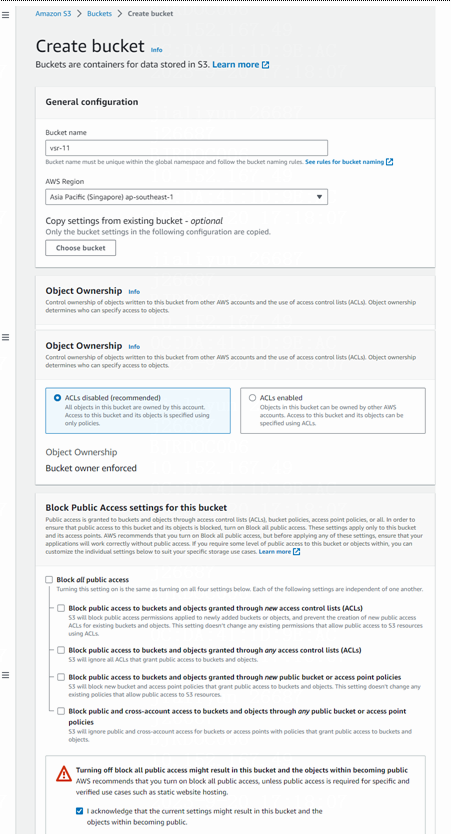
Figure 38 Creating a bucket (2)
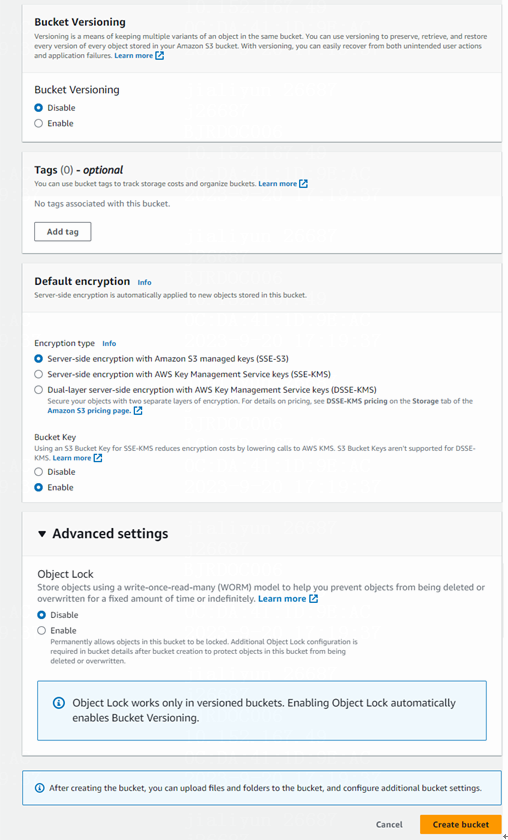
Table 5 Storage bucket configuration parameters
|
Parameter |
Description |
|
Bucket name |
Enter a bucket name unique in the global namespace. Once created, the name cannot be changed. The bucket naming rules are as follows: · The name is a string of 3 to 63 characters. · The name can contain only lowercase letters, numbers, dots (.), and hyphens (-), and must start and end with a number or letter. |
|
AWS Region |
Specify an AWS region where the bucket will be placed. |
|
Object Ownership |
Select whether to enable ACLs to control the ownership of objects in the bucket. This example disables ACLs. |
|
Block Public Access settings for this bucket |
Configure whether to block public access to the bucket. This example unselects Block all public access and selects I acknowledge that the current settings might result in this bucket and the objects within becoming public. |
|
Bucket Versioning |
Select whether to enable bucket versioning. This feature keeps multiple versions of an object in the bucket for retrieval and restoration. By default, this feature is disabled. |
|
Default encryption |
Customize the default encryption settings. · Encryption type—By default, the Server-side encryption with Amazon S3 managed keys (SSE-S3) option is selected. If more control over the encryption keys is required, select the Server-side encryption with AWS Key Management Service keys (SSE-KMS) or Dual-layer server-side encryption with AWS Key Management Service keys (DSSE-KMS) option. · Bucket Key—Enabling S3 bucket key reduces encryption costs by reducing calls to AWS KMS. |
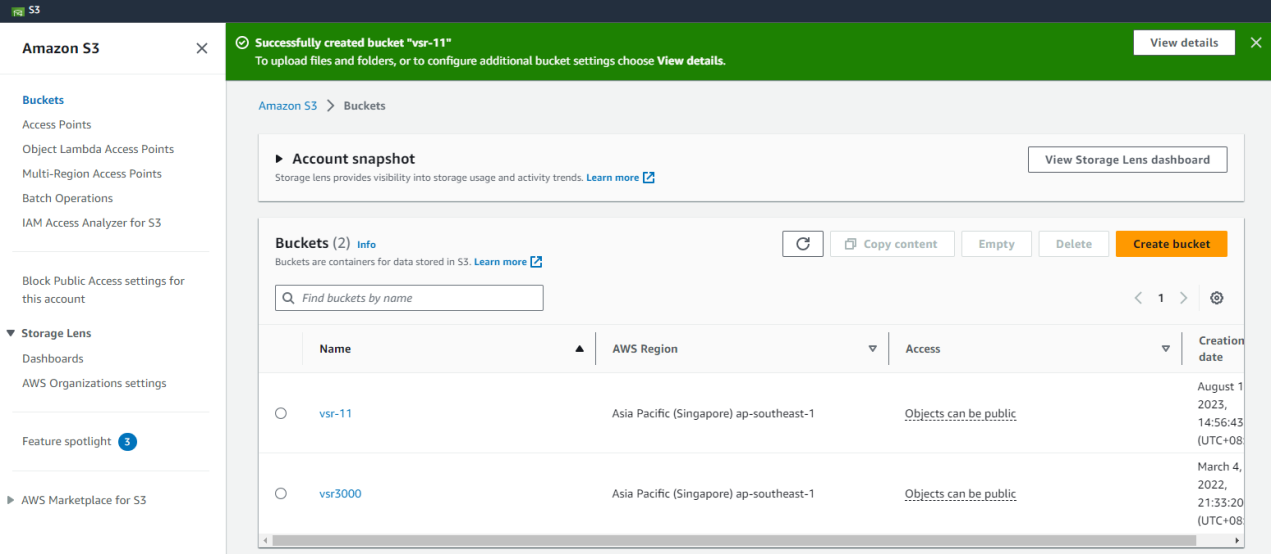
4. After the configuration is complete, click Create bucket. View the created bucket on the Amazon S3 page.
Figure 39 Bucket created successfully
Creating an AMI image
Installing the AWS CLI tool
1. To create an AMI image, install the AWS CLI tool in an environment that supports public network access. This example installs the AWS CLI tool on a Linux system. For more information, see the official AWS document at https://docs.aws.amazon.com/cli/latest/userguide/getting-started-install.html
2. After installing the AWS CLI tool, configure the following settings for interaction with AWS:
¡ AWS Access Key ID and AWS Secret Access Key—Represents the access key ID and the secret access key, respectively.
You must perform the following operations to create a key on AWS:
- Select Services on the top left of the homepage and then select All services > IAM from the dropdown list.
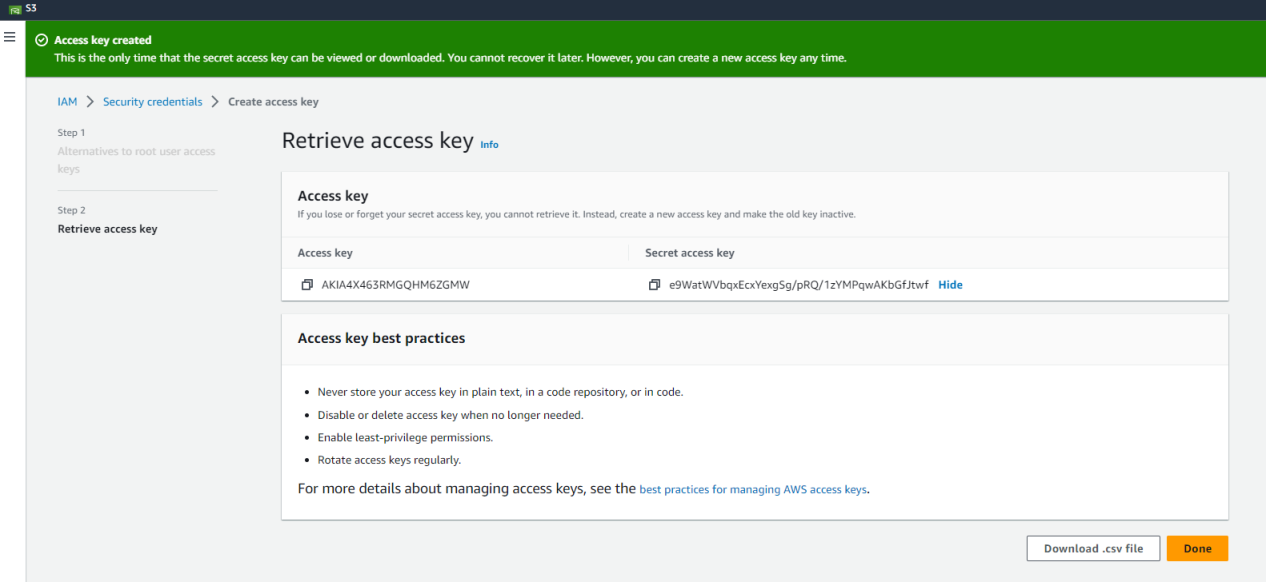
- Click Dashboard and then click Manage access keys to enter the My security credentials page.
- In the Access keys area, click Create access key.
Follow these restrictions and guidelines when you create keys:
- You can have or create up to two access keys. If you already have two keys, you must deactivate and delete one to create a new key.
- The secret access key is not accessible after creation. You can click Show to view the secret access key during creation, or click Download .csv file below to save your private access key.
¡ Default region name—AWS region where the bucket is located.
¡ Default output format—Default format for output.
Figure 40 Interaction with AWS by using the AWS CLI tool
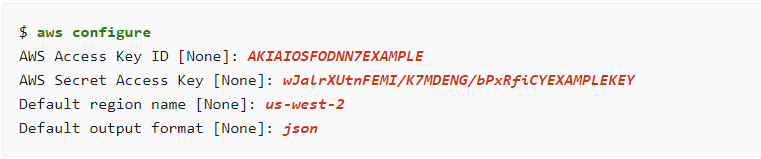
Figure 41 Access key configuration page
Creating an IAM role
An IAM role is an IAM identity with specific permissions created in an account. With this role, you can grant access to users, applications, or services that do not have permissions to access AWS resources. For more information about creating IAM roles, see the official document at https://docs.aws.amazon.com/vm-import/latest/userguide/required-permissions.html.
Creating a snapshot
1. Compile script file vim containers.json in the AWS CLI tool. The script content is as follows:
{
"Description": "My vsr1000-1",
"Format": "VHD",
"UserBucket": {
"S3Bucket": "vsr-11",
"S3Key": "0308/0308-1.vhd"
}
}
|
Parameter |
Description |
|
Description |
Description for the script. |
|
Format |
Format of the image file. |
|
S3Bucket |
Name of the bucket for storing the VHD image file. |
|
S3Key |
Path in the Amazon S3 bucket for storing the VHD image file. |
2. In the AWS CLI tool, execute the aws ec2 import-snapshot --description "vsr3000-1" --disk-container script_storage_path command to run the containers.json script. The script storage path in this example is file://containers.json.
Figure 42 Executing the containers.json script

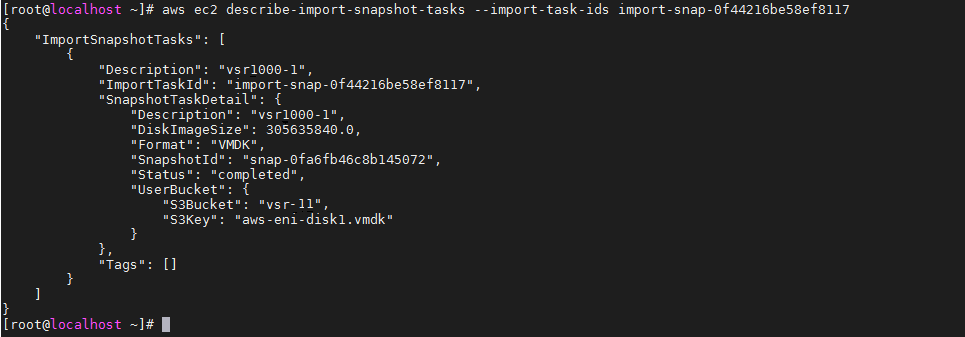
3. When the script is running, execute the aws ec2 describe-import-snapshot-tasks --import-task-ids ImportTaskId_value command to check the progress of the snapshot creation. ImportTaskId_value indicates the value for the ImportTaskId parameter in Figure 42. The value in this example is import-snap-0f44216be58ef8117. If the value for the Status parameter is completed, the snapshot creation is finished.
Figure 43 Snapshot creation completed
Creating an AMI image
1. Select Services on the top left of the homepage, and then select All Services > EC2 from the dropdown list.
2. Click Elastic Block Store > Snapshots from the left navigation pane.
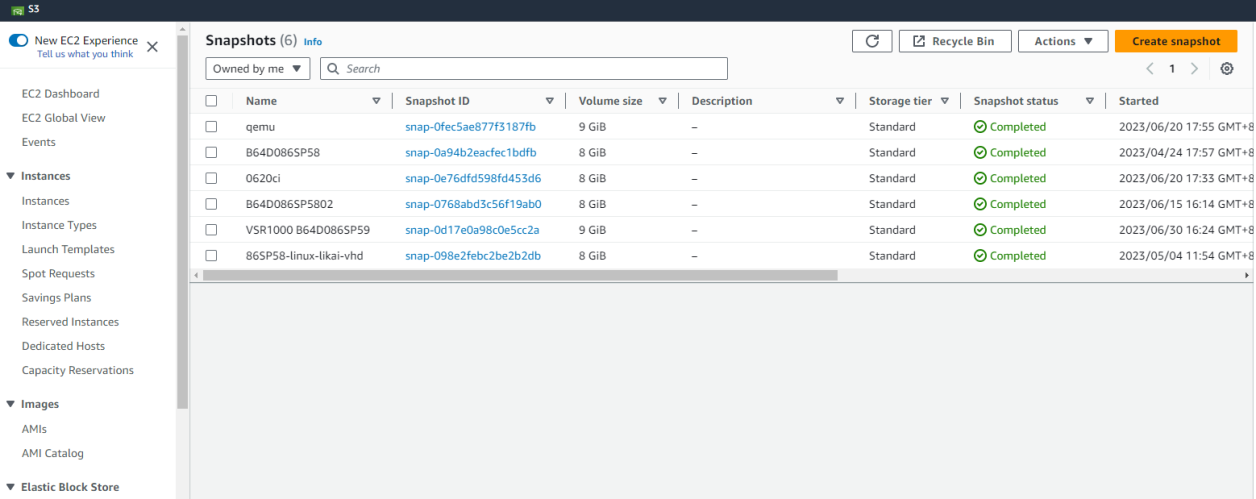
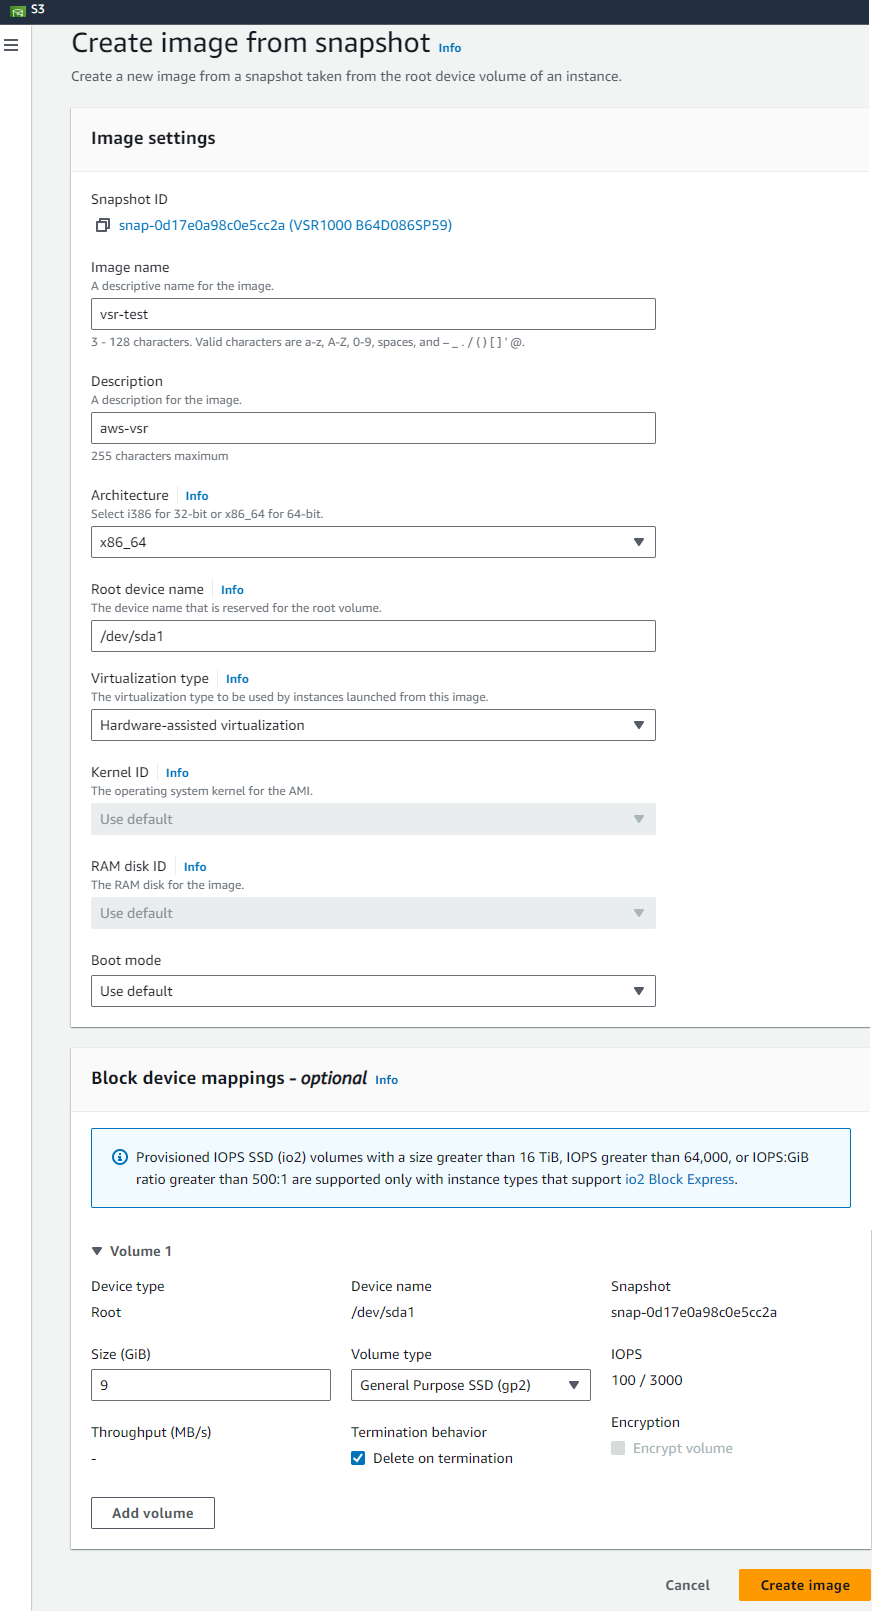
3. Select the created snapshot in the snapshot list, click Actions in the upper right corner of the page, and then select Create image from snapshot from the dropdown list. On the page that opens, configure parameters such as image name and description as needed, use the default settings for other parameters, and then click Create image.
Figure 46 Image configuration page
4. After the image is created, click Images > AMIs from the left navigation pane of the EC2 page to view the created image.
Figure 47 Viewing the created image

Creating an instance
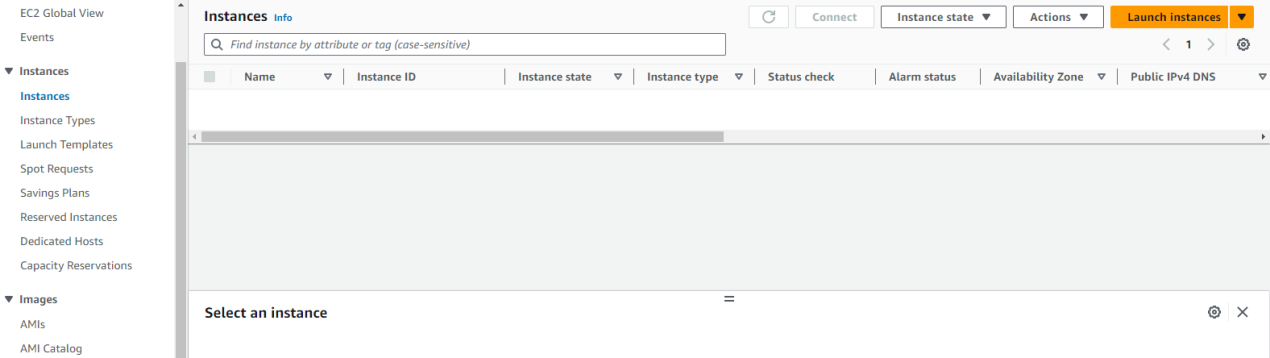
1. Click Instances > Instances from the left navigation pane of the EC2 page.
Figure 48 Instance configuration page
2. Click Launch instances, configure the parameters as described in Table 7 on the page that opens, and then click Launch instance.
Figure 49 Launching an instance (1)
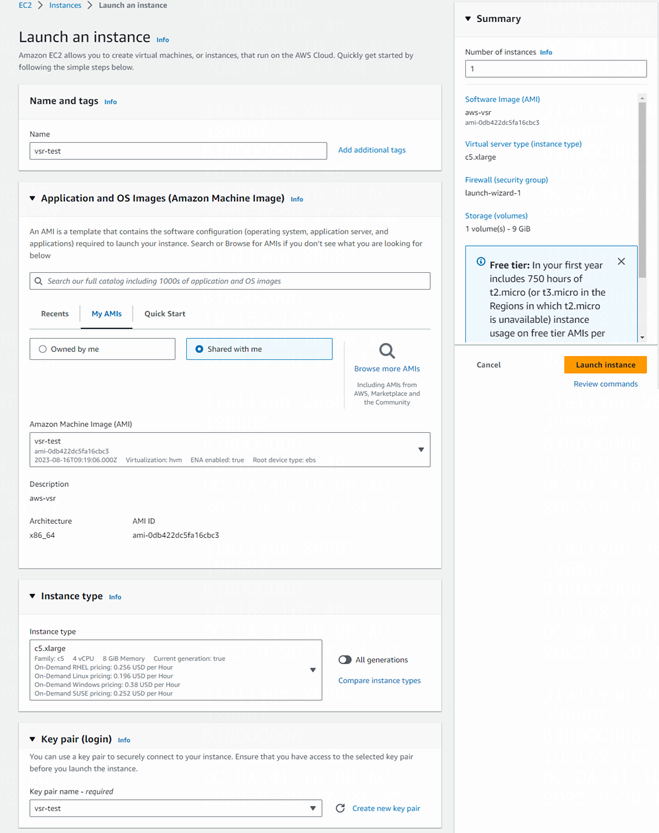
Figure 50 Launching an instance (2)

|
Parameter |
Description |
|
Name and tags |
Enter a descriptive name for the instance. |
|
Application and OS Images |
Select the created AMI image on the My AMIs tab. |
|
Instance type |
Select the hardware configuration for the instance. As a best practice, select C5, C5a, C5ad, C5d, C5n, D3, I3en, I4i, Inf1, M5, M5a, M5ad, M5d, M5dn, M5n, M5zn, R5, R5a, R5ad, R5b, R5d, R5dn, R5n, T3, or T3a as needed. |
|
Key pairs |
Configure a key pair for secure remote connection to the instance in scenarios such as file transfer. If no key pair exists, click Create new key pair to create one. |
|
Network settings |
For fields such as Network and Subnet, use the default settings or click Edit next to Network Settings to edit the default settings. For the Firewall (security groups) field, you can use the existing security group launch-wizard-1 or create a new security group. |
|
Advanced details |
· Enter the following script configured in advance in the User data field: · Use the default settings for other parameters. |

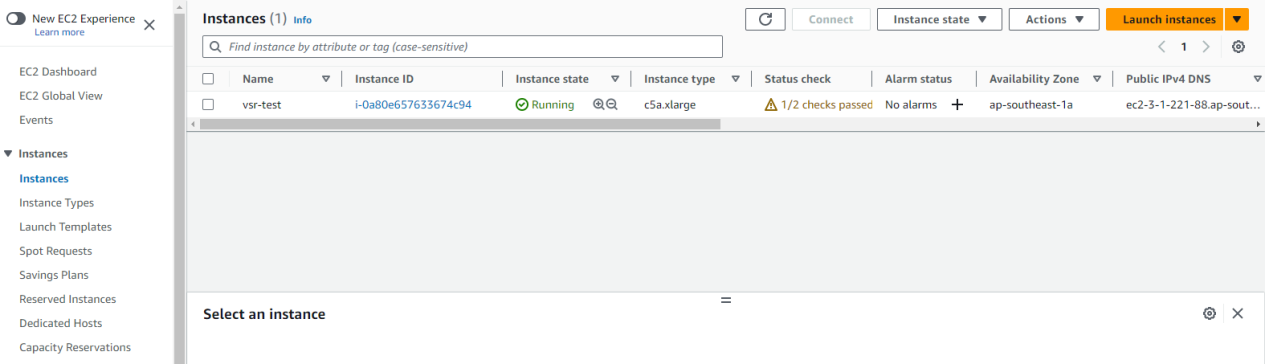
3. After the instance is successfully created, view the created instance on the instance page.
Figure 52 Instance created successfully
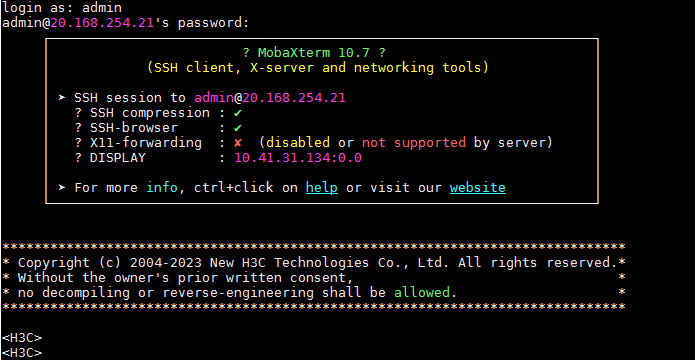
4. Click the instance ID of the instance to enter the instance summary page, click Connect on the right to enter the Connect to instance page. Click the EC2 serial console tab, and then click Connect below to connect to the instance.
Figure 53 Connect to instance page
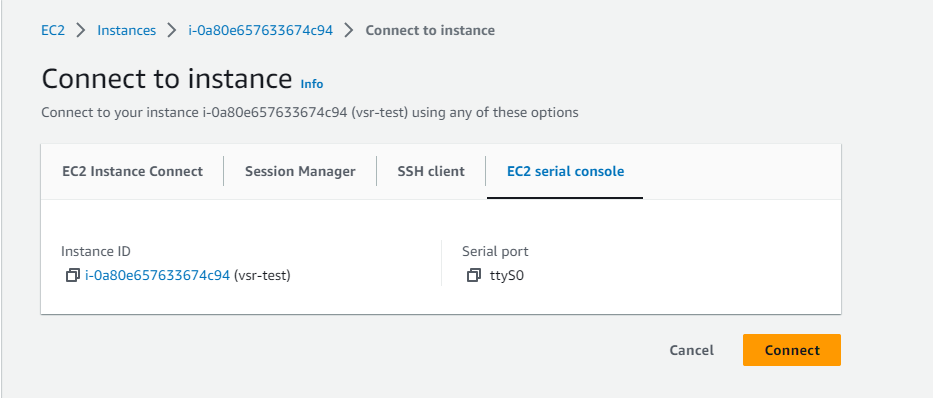
Figure 54 Successful instance connection
5. If you need to use a remote tool to connect to the instance, configure the script as shown below on the serial console. Customize the username and password used for connecting to the instance remotely for the local-user and password simple parameters, respectively.
#
interface GigabitEthernet1/0
port link-mode route
ip address dhcp-alloc
#
line vty 0 63
authentication-mode scheme
user-role level-15
user-role network-operator
idle-timeout 0 0
#
performance-management
#
ssh server enable
#
local-user admin class manage
password simple admin
service-type ftp
service-type ssh
authorization-attribute user-role level-15
authorization-attribute user-role network-operator
#
