- Table of Contents
- Related Documents
-
| Title | Size | Download |
|---|---|---|
| 01-Text | 2.01 MB |
Contents
Collecting system information for installation
Post-installation configuration
Setting the number of file descriptors and user processes
Installing IMC-required packages
Installation preparation
H3C Intelligent Management Center (IMC) supports Red Hat Enterprise Linux (RHEL) operating systems, including RHEL 8.1, RHEL 8.2, and RHEL 8.3.
IMC on RHEL 8.x requires configuration during and after installation of the operating system. This document uses RHEL 8.1 as an example to illustrate the required configuration.
Hardware requirements
IMC runs on Linux and stores and manages data with Oracle databases. You must install the operating system, databases, and IMC software correctly.
Table 1 shows the hardware requirements and minimum configuration of IMC. The node count, collection units, and online operators columns represent the management scale, and the remaining columns represent the minimum system requirements. For the collection units column, a value range of 0 K to 5 K means performance monitoring is not enabled or a small scale of performance monitoring is enabled. To deploy service components, see the associated release notes for information about the hardware configuration requirements.
|
|
IMPORTANT: In this document, IMC is installed in the root directory. To install IMC to another partition, make sure the partition meets the hardware requirements in Table 1. As a best practice, reserve a minimum of 50 GB for the root partition. |
Table 1 Linux environment 64-bit
|
Node count |
Collection units) |
Online operators |
CPU (main frequency ≥ 2.5 GHz) |
Memory |
Java heap size |
Disk space for software installation (imcInstallDir) |
Disk space for data storage (imcDataDir) |
|
0 to 200 |
0 to 5 K |
20 |
CPU with dual core |
12 GB |
4 GB |
3 GB |
100 GB |
|
5 K to 50 K |
10 |
200 GB |
|||||
|
200 to 1 K |
0 to 10 K |
30 |
CPU with 4 cores |
16 GB |
6 GB |
3 GB |
100 GB |
|
10 K to 100 K |
10 |
200 GB |
|||||
|
1 K to 2 K |
0 to 20 K |
30 |
CPU with 6 cores |
24 GB |
8 GB |
4 GB |
100 GB |
|
20 K to 200 K |
10 |
200 GB |
|||||
|
2 K to 5 K |
0 to 30 K |
40 |
CPU with 8 cores |
32 GB |
12 GB |
5 GB |
120 GB |
|
30 K to 300 K |
20 |
250 GB |
|||||
|
5 K to 10 K |
0 to 40 K |
50 |
CPU with 16 cores |
64 GB |
16 GB |
7 GB |
150 GB |
|
40 K to 400 K |
20 |
300 GB |
|||||
|
10 K to 15 K |
0 to 40 K |
50 |
CPU with 24 cores |
80 GB |
24 GB |
10 GB |
200 GB |
|
40 K to 400 K |
20 |
600 GB |
To improve server IO performance, follow these guidelines:
· If the number of collection units reaches 100 K to 200 K, install two or more disks and configure a disk RAID module of more than 256-MB memory.
· If the number of collection units reaches 200 K to 300 K, install two or more disks and configure a disk RAID module of more than 512-MB memory.
· If the number of collection units reaches 300 K to 400 K, install more than four disks and configure a disk RAID module of more than 1-GB memory.
· As a best practice, configure RAID5 (that requires three or more hard drives), more than four hard drives, and use RAID0+1.
Preparing the installation CD
Installation requires the Red Hat Enterprise Linux Server 8.1 installation software suite and software serial number. Set the server to start up from the CD-ROM.
Collecting system information for installation
Collect system information to be used for installation, including the host name, IP address, and network connection information on the target server. You can obtain the IP address and network connection information from the network administrator.
Installing RHEL 8.1
|
IMPORTANT: This procedure only shows pages on which you must make special configurations. The pages that use default settings are not shown. |
1. Start the server from the Linux installation program.
The initial window opens.
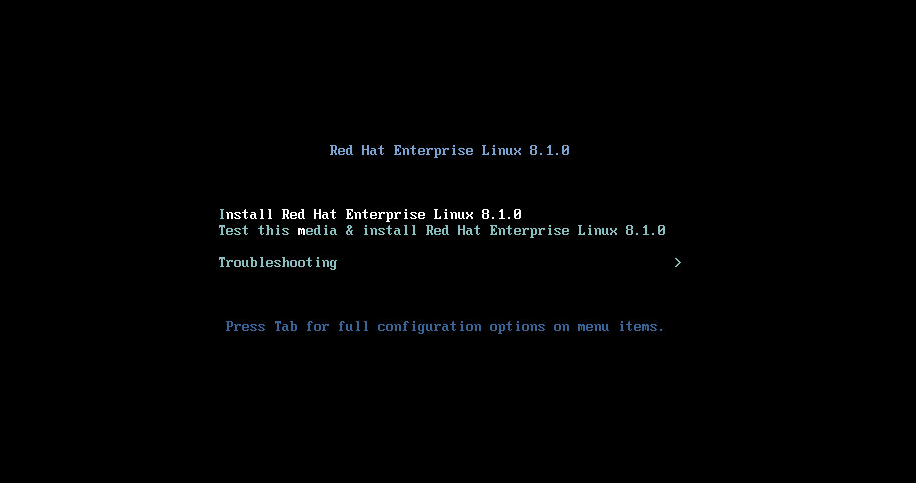
2. Select Install Red Hat Enterprise Linux 8.1.0, and then press Enter, as shown in Figure 1.
Figure 1 Starting Linux installation
3. Select English (United States) as the installation language, and then click Continue, as shown in Figure 2.
Figure 2 Selecting the installation language

4. View the installation summary, as shown in Figure 3.
Figure 3 Viewing the installation summary

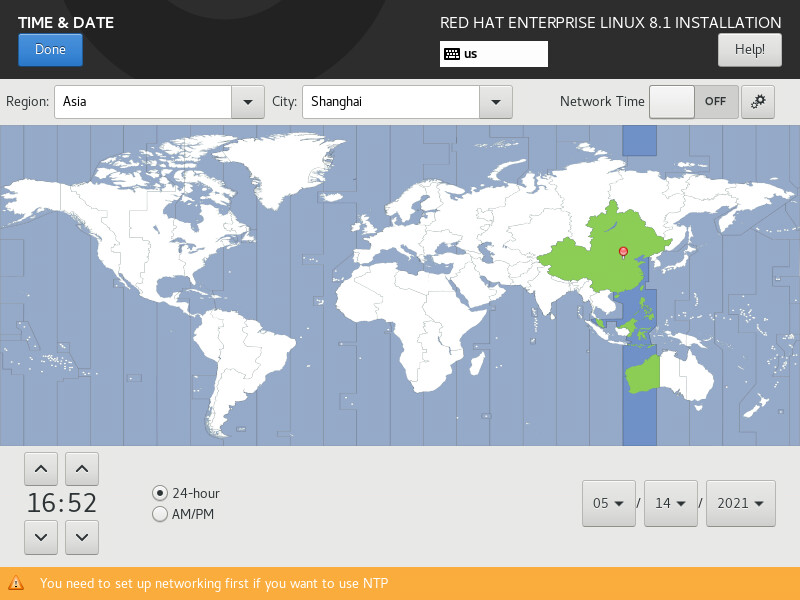
5. Click Time & Date to modify the time zone setting. This example uses the default Asia/Shanghai time zone, as shown in Figure 4.
Figure 4 Setting the date and time
6. On the installation summary page, click SOFTWARE SELECTION.
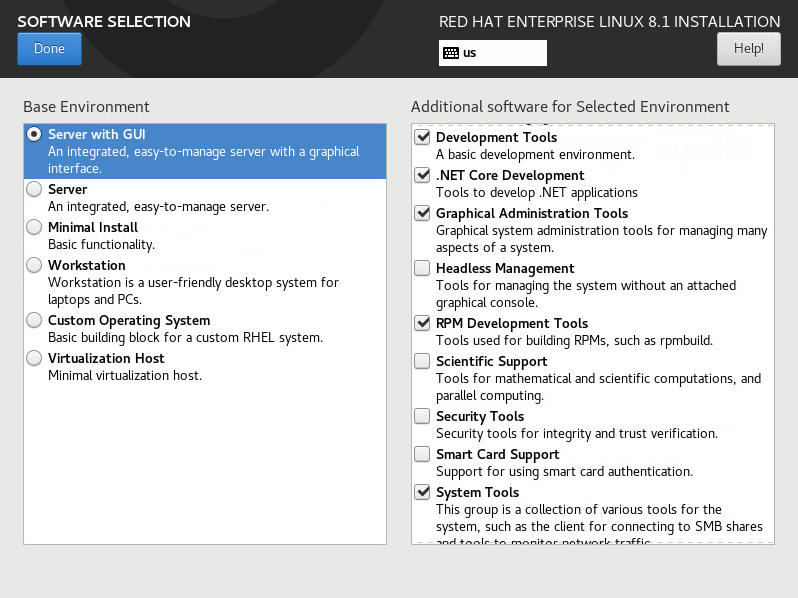
7. Select Server with GUI and the following options, as shown in Figure 5 and Figure 6:
¡ Network Servers
¡ Performance Tools
¡ Remote Management for Linux
¡ Development Tools
¡ .NET Core Development
¡ Graphical Administration Tools
¡ RPM Development Tools
¡ System Tools
Figure 5 Customizing software settings (1)
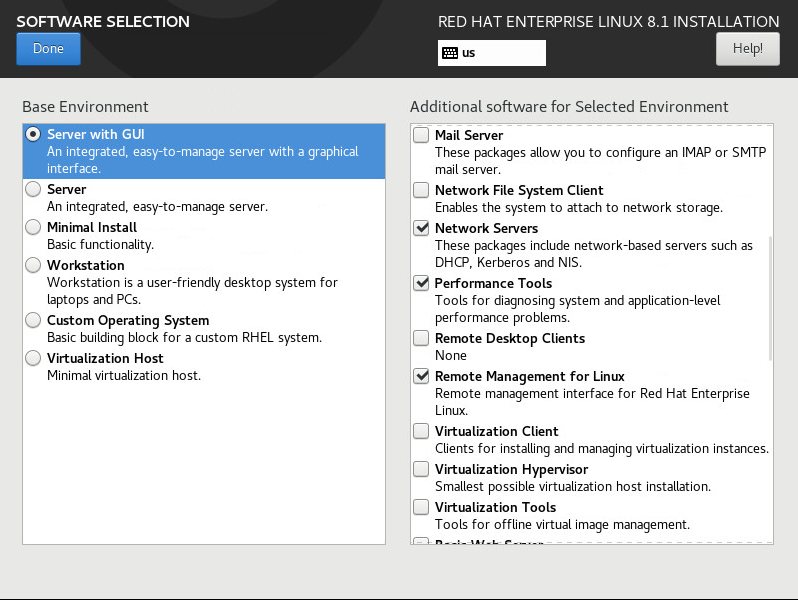
Figure 6 Customizing software settings (2)
8. Select other options as needed, and then click Done.
9. On the installation summary page, click Network & Host Name. Then, select a NIC and click Configure.
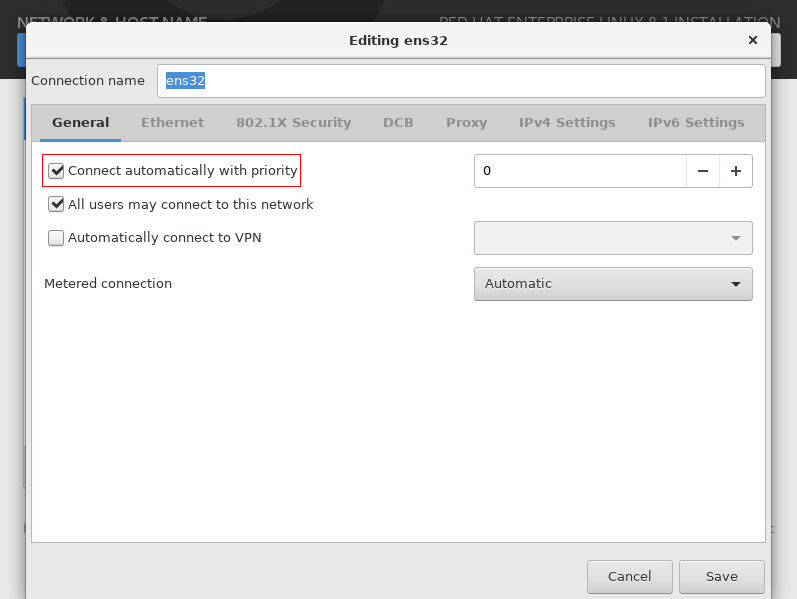
10. On the window that opens, click the General tab, and select Connect automatically with priority (a larger value indicates higher priority, and the default setting is 0), as shown in Figure 7.
Figure 7 Configuring the general network connection settings
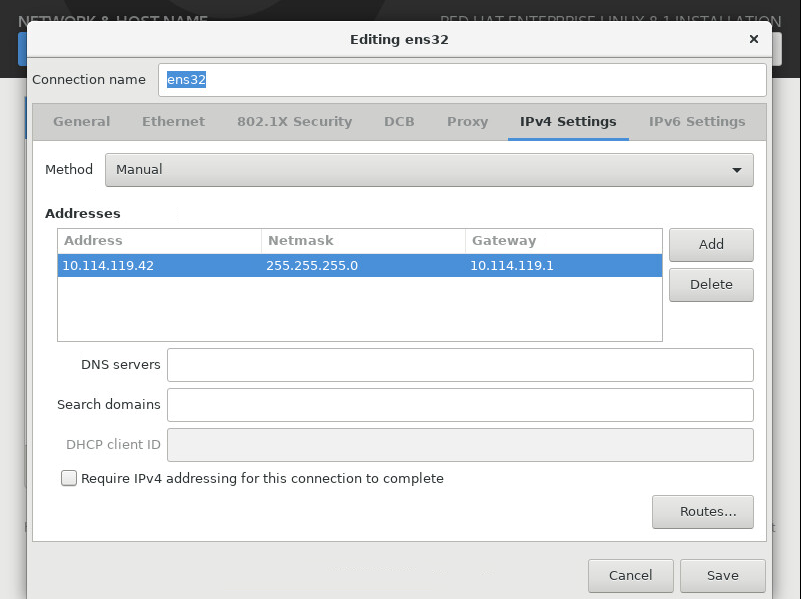
11. Click the IPv4 Settings tab, select Manual for Method, click Add to configure the IP address, and then click Save, as shown in Figure 8.
Figure 8 Configuring the network connection settings
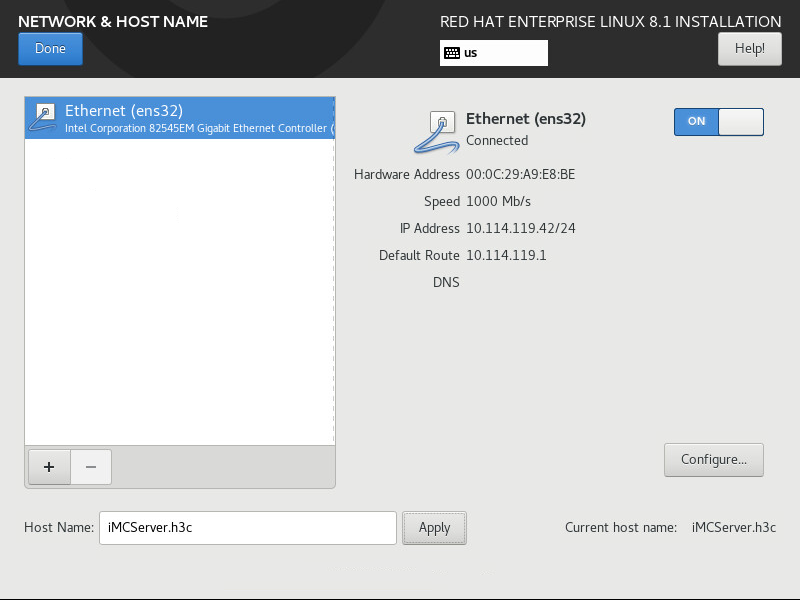
12. On the NETWORK & HOST NAME page, turn on the NIC ens32, enter a hostname on the lower part of the page, and then click Done, as shown in Figure 9. This example uses iMCServer.h3c as the hostname.
Figure 9 Configuring the hostname
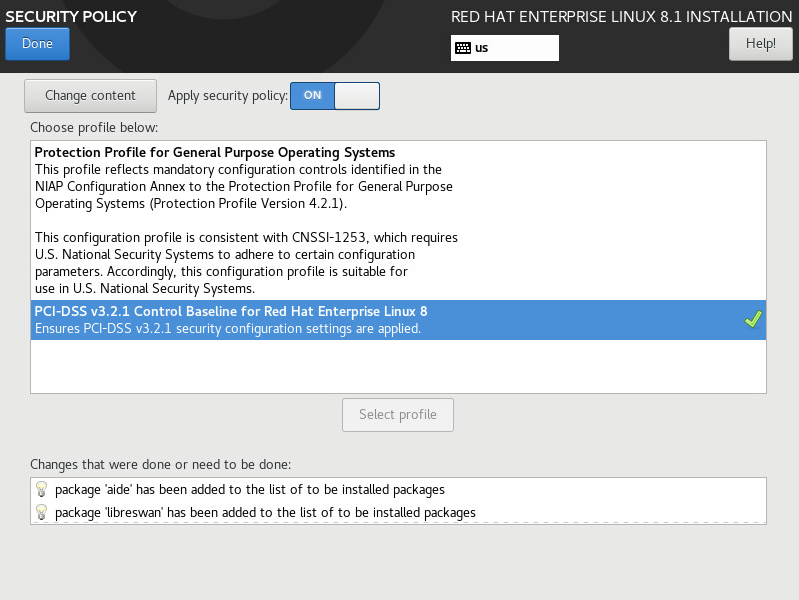
13. (Optional.) On the installation summary page, click Security Policy. Choose a security policy profile and then click Select profile, as shown in Figure 10. After the profile is loaded, click Done.
This step is optional. You can use the default security policy settings without performing this step. In the profile list, Payment Card Industry Data Security Standard (PCI-DSS) is used to protect user credit card data. For more information, see Let's talk about PCI-DSS on the official website.
Figure 10 Configure the security policy
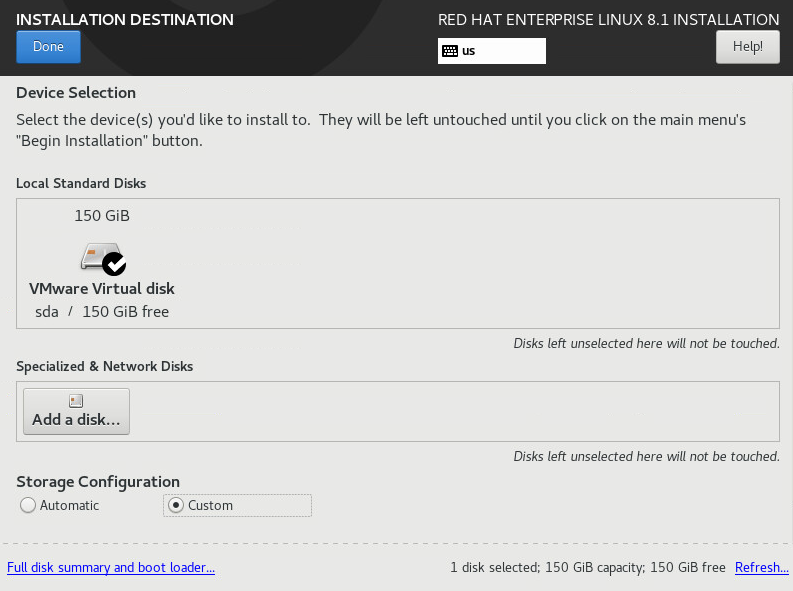
14. On the installation summary page, click Installation Destination. Select Custom for Storage Configuration, as shown in Figure 11.
Figure 11 Installation destination
15. Click Done. On the MANUAL PARTITIONING page that opens, click Click here to create them automatically, as shown in Figure 12.
Figure 12 Manual partitioning (I)
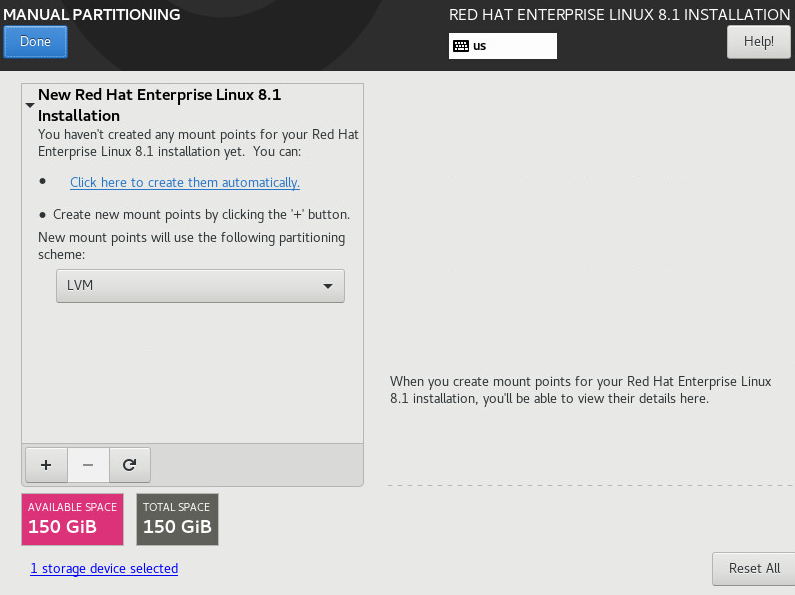
|
|
IMPORTANT: In this document, IMC is installed in the root directory. To install IMC to another partition, make sure the partition meets the hardware requirements in Table 1. As a best practice, reserve a minimum of 50 GB for the root partition. |
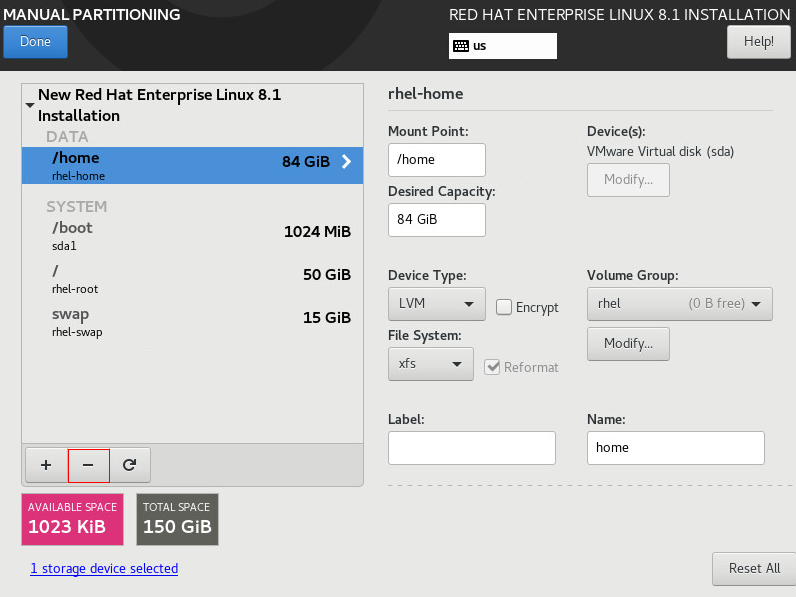
16. Select the /home partition, and then click – to delete the partition, as shown in Figure 13.
Figure 13 Manual partitioning (II)
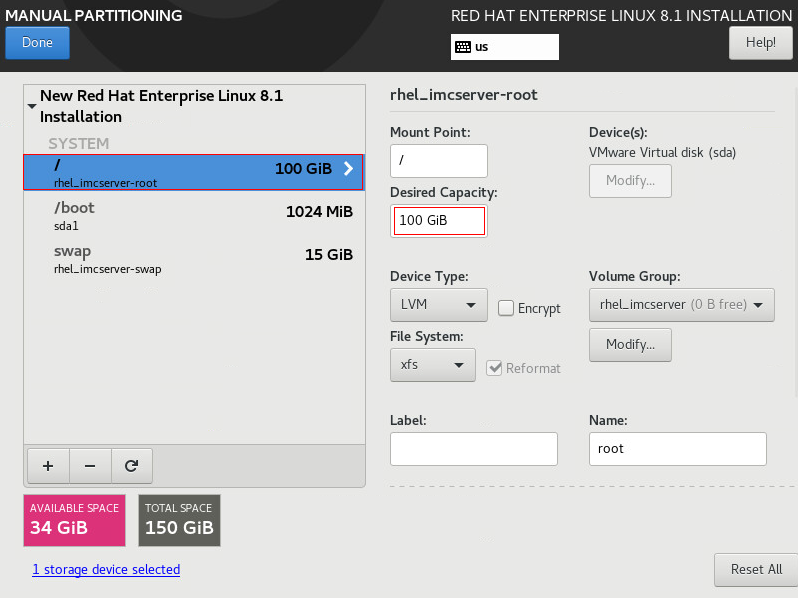
17. Select the / partition, set the desired capacity as needed, and manually add the root partition to all capacity, as shown in Figure 14.
This example sets 100 GiB as the desired capacity (minimum requirement in smallest node scenarios).
To install IMC to another partition, make sure the partition meets the hardware configuration requirements.
Figure 14 Manual partitioning (III)
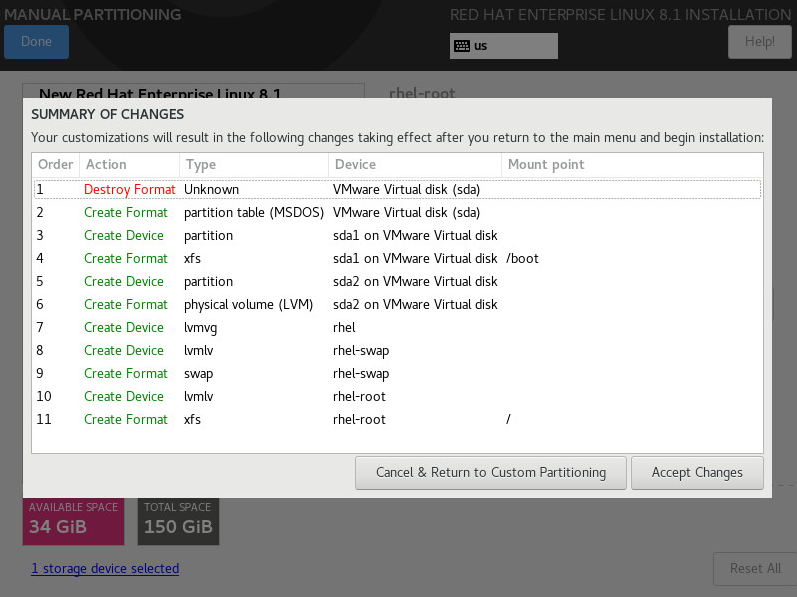
18. Click Done. On the SUMMARY OF CHANGES page that opens, click Accept Changes, as shown in Figure 15.
Figure 15 Manual partitioning (IV)
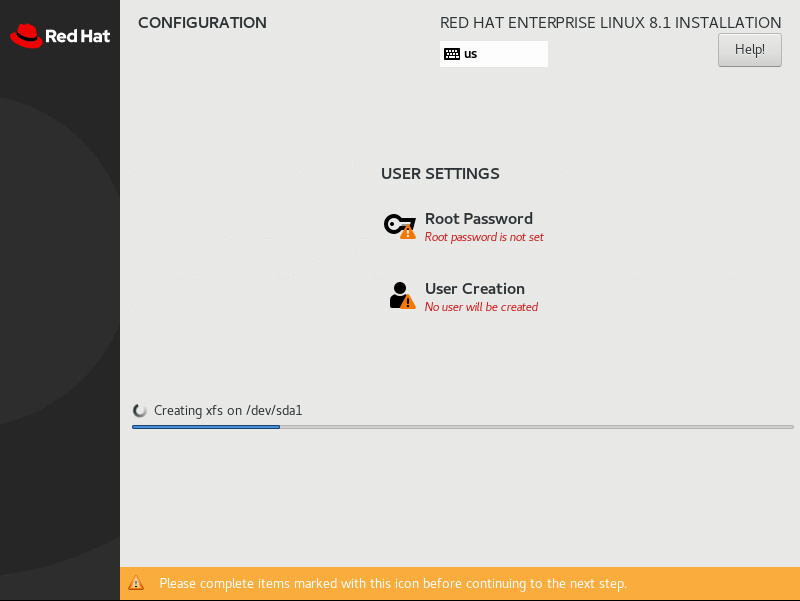
19. On the installation summary page, click Begin Installation. The page displays the installation progress, as shown in Figure 16.
Figure 16 Viewing the installation progress
20. Configure the root password and create a new user as needed. (Details not shown.)
21. When the installation is complete, restart the server.
Post-installation configuration
After installing the Linux system, log in to the operating system as a root user and complete the following configuration to correctly install and run IMC.
Disabling the firewall
1. Disable the firewall.
systemctl stop firewalld.service
systemctl disable firewalld.service
2. Check the firewall state.
systemctl status firewalld.service
If the value for Loaded is disabled and the value for Active is inactive (dead) as shown in Figure 17, the firewall is disabled permanently.
Figure 17 Firewall is disabled

Disabling SELinux
To disable SELinux, edit the SELinux configuration file as follows:
1. Open the SELinux configuration file.
vim /etc/selinux/config
2. Change the value of SELINUX to disabled in the configuration file.
SELINUX=disabled
3. Save and close the file.
4. Restart Linux to validate the configuration.
5. View SELinux status.
getenforce
If Disabled is displayed as shown in Figure 18, SELinux is disabled.

Setting the number of file descriptors and user processes
To set the number of file descriptors and user processes, edit the system.conf file as follows:
1. View the number of file descriptors.
ulimit –n
2. View the number of user processes.
ulimit –u
3. If the number of file descriptors or user processes is less than 65535, open the system.conf file.
vim /etc/systemd/system.conf
4. Add the following parameter settings at the end of the file. If the parameters already exist, make sure the parameter values are greater than 65535.
DefaultLimitNOFILE=65535
DefaultLimitNPROC=65535
The DefaultLimitNOFILE parameter specifies the number of file descriptors. The DefaultLimitNPROC parameter specifies the number of user processes.
5. Save and close the file.
6. Restart Linux to validate the configuration.
7. Perform steps 1 and 2 to verify that your configuration has taken effect.
Installing IMC-required packages
To ensure correct operation of IMC, install required 32-bit software packages on RHEL 8.1 with the root user privileges.
rpm -Uvh --force --nodeps glibc-2.28-72.el8.i686.rpm
rpm -Uvh --force –-nodeps libaio-0.3.112-1.el8.i686.rpm
rpm -Uvh --force –-nodeps libgcc-8.3.1-4.5.el8.i686.rpm
rpm -Uvh --force --nodeps libstdc++-8.3.1-4.5.el8.i686.rpm
rpm -Uvh --force --nodeps nss-softokn-freebl-3.44.0-8.el8.i686.rpm
rpm -Uvh --force --nodeps compat-libstdc++-33-3.2.3-72.el7.i686.rpm
rpm -Uvh --force –-nodeps libnsl-2.28-72.el8.i686.rpm
|
|
NOTE: · The software packages of RHEL 8.x are located in the BaseOS\Packages and AppStream\Packages directories of the installation CD. · The software package versions might vary by RHEL version. · To view all installed software packages, use the rpm -qa command. To make sure whether a specific software package has been installed, use the rpm -q command. · RHEL 8.x does not provide the compat-libstdc++-33 installation package. As a best practice for correct IMC operation, download it from the website. |
