- Table of Contents
- Related Documents
-
01-Text
H3C VSR1000 Virtual Service Router Deployment Guide on Microsoft Azure Prerequisites
Ensure access to Microsoft Azure before deploying VSR1000 on Microsoft Azure.
Restrictions and guidelines
1. Install Hyper-V Manager on Windows 10 in advance. For information about installing Hyper-V Manager, visit the website at https://learn.microsoft.com/en-us/virtualization/hyper-v-on-windows/quick-start/quick-create-virtual-machine.
Make sure the following requirements are met:
¡ Use Windows 10 Enterprise, Pro, or Education. Windows 10 Home does not support Hyper-V Manager installation.
¡ The host uses a 64-bit CPU that supports Second Level Address Translation (SLAT).
¡ The CPU supports VM Monitor Mode Extension.
¡ The host has a minimum of 4 GB memory.
2. A VHD image file is required to deploy VSR1000 on Microsoft Azure. Prepare an ISO image file in advance and create a VHD image file from the ISO image file locally.
3. To access VSR1000 deployed on Microsoft Azure, use the username and password created when creating the VHD image file.
Procedure
Creating a VHD image file
Creating a virtual machine with Hyper-V Manager
1. Open Hyper-V Manager.
Figure 1 Hyper-V Manager home page

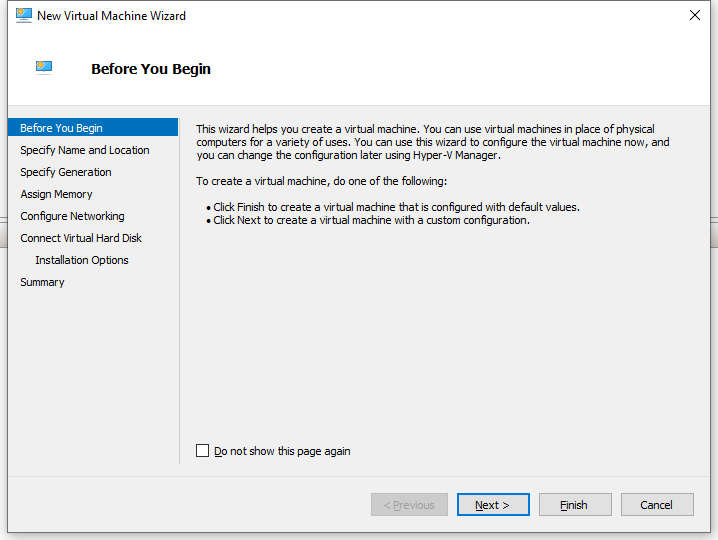
2. Select New > Virtual Machine in the upper right corner to open the New Virtual Machine Wizard. View the content on the Before You Begin page and then click Next.
Figure 2 New Virtual Machine Wizard–Before You Begin page
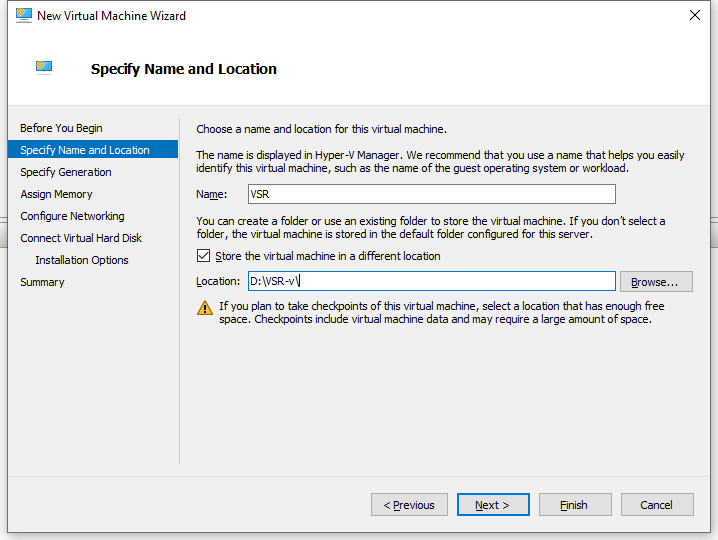
3. On the Specify Name and Location page, specify a name for the virtual machine and choose the location where the virtual machine will be stored, and then click Next.
Figure 3 New Virtual Machine Wizard–Specify Name and Location page
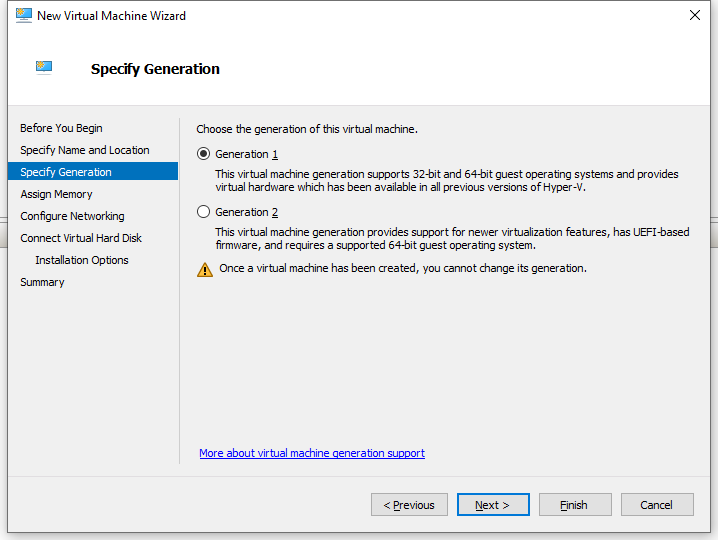
4. On the Specify Generation page, select Generation 1 for the virtual machine, and then click Next.
The UEFI firmware-based image file of VSR1000 is not supported on Microsoft Azure.
Figure 4 New Virtual Machine Wizard–Specify Generation page
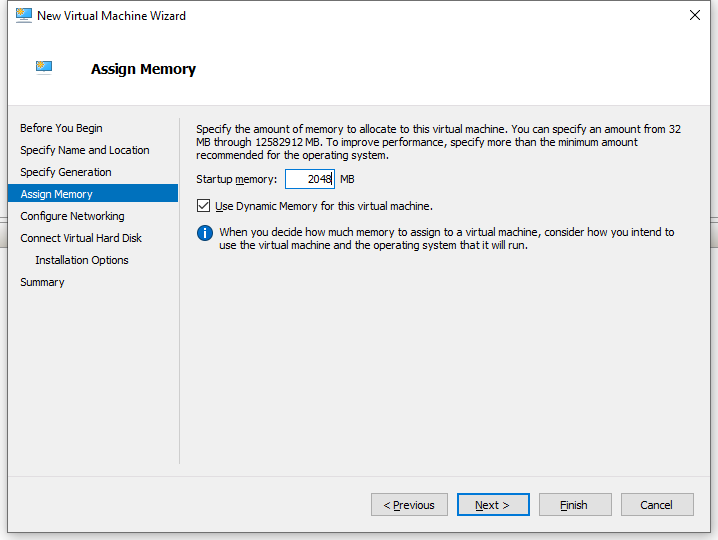
5. On the Assign Memory page, specify a minimum of 2048 MB startup memory to allocate to the virtual machine, and then click Next.
Figure 5 New Virtual Machine Wizard–Assign Memory page
6. On the Configure Networking page, select vswitch0 or Default Switch for connection, and then click Next. vswitch0 is selected in this example.
Figure 6 New Virtual Machine Wizard–Configure Networking page

7. On the Connect Virtual Hard Disk page, select Attach a virtual hard disk later, and then click Next.
Figure 7 New Virtual Machine Wizard–Connect Virtual Hard Disk page

8. On the Summary page, review the configured parameters and then click Finish to close the New Virtual Machine Wizard and create the virtual machine.
Figure 8 New Virtual Machine Wizard–Summary page
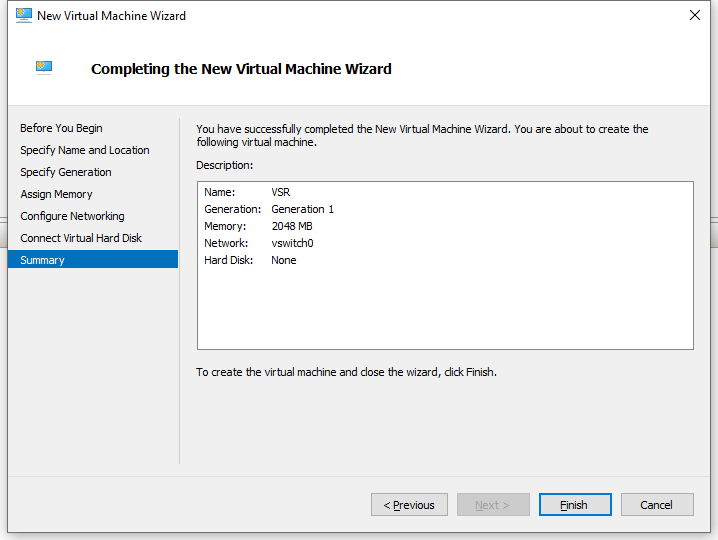
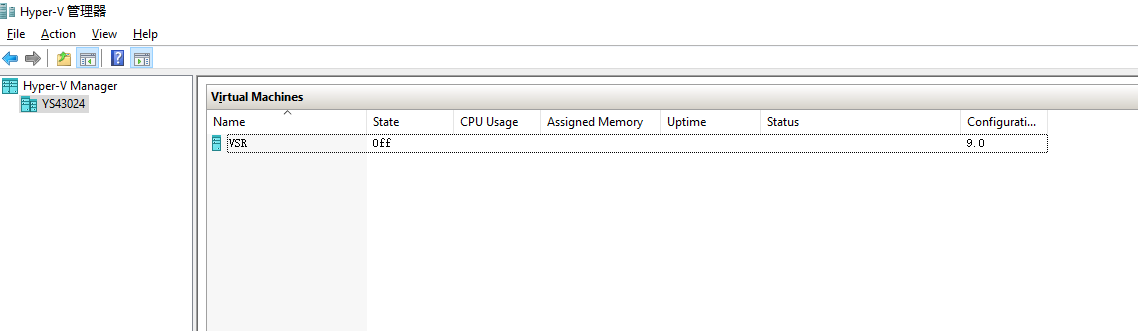
Figure 9 Virtual machine created
Attaching a fixed size type of hard disk to the virtual machine
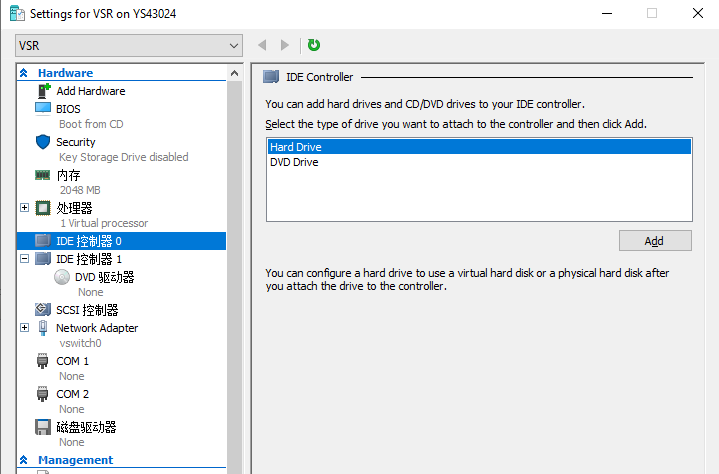
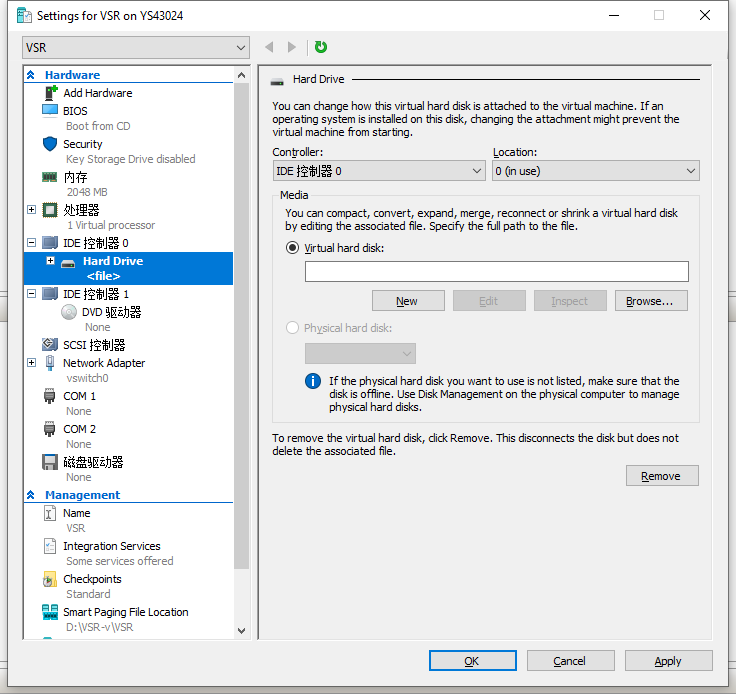
1. Right click the newly created virtual machine and then select Settings. On the virtual machine settings page, select IDE Controller 0 or IED Controller 1. IED Controller 0 is selected in this example.
Figure 10 IDE Controller page
2. On the IDE Controller page that opens, select Hard Drive and then click Add. The Hard Drive page opens.
Figure 11 Hard Drive page
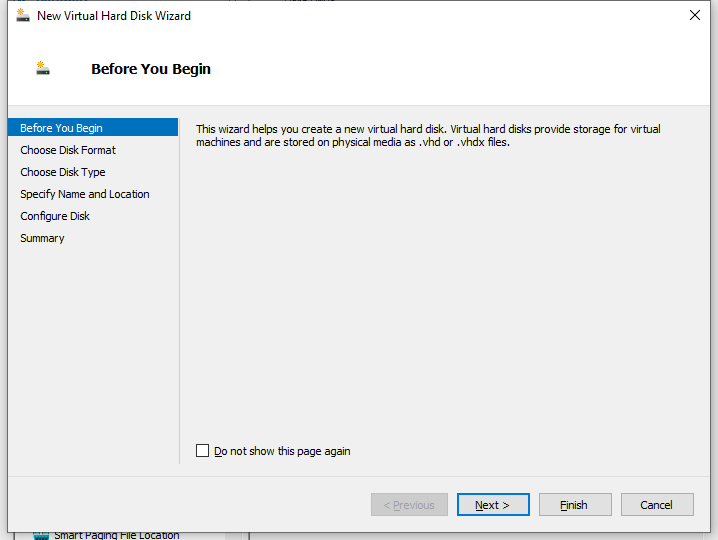
3. Click New. The New Virtual Hard Disk Wizard opens and you are placed on the Before You Begin page. Click Next.
Figure 12 New Virtual Hard Disk Wizard–Before You Begin page
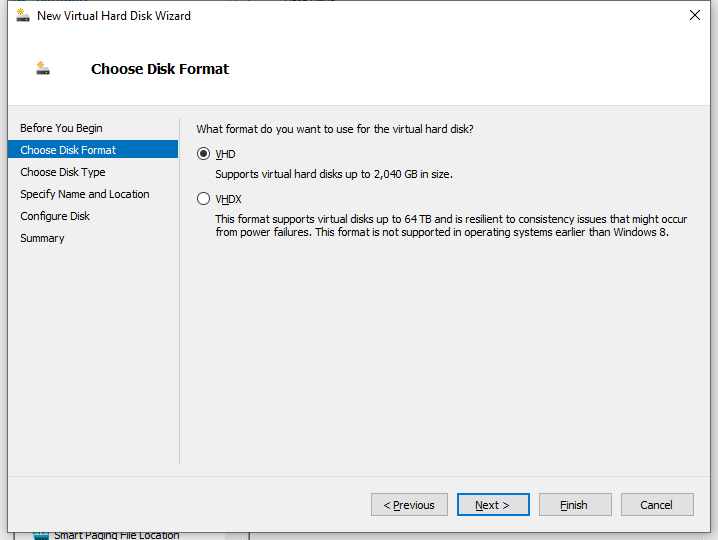
4. On the Choose Disk Format page that opens, select the VHD format for the virtual hard disk, and then click Next.
Figure 13 New Virtual Hard Disk Wizard–Choose Disk Format page
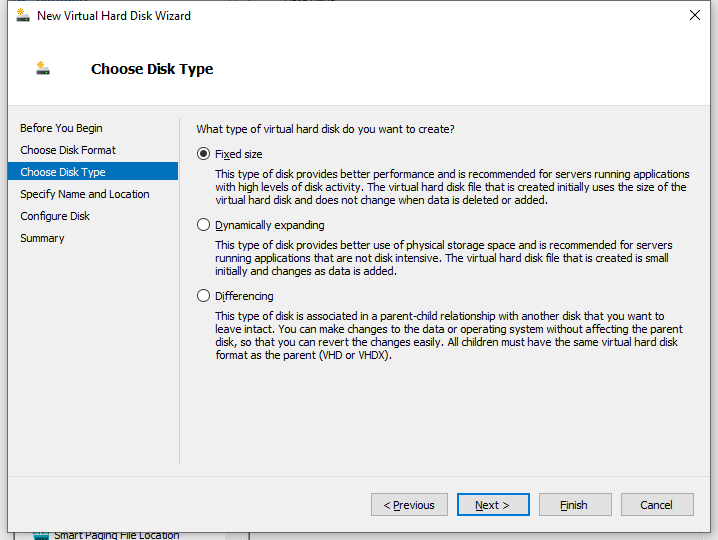
5. On the Choose Disk Type page that opens, select the Fixed size type for the virtual hard disk.
Figure 14 New Virtual Hard Disk Wizard–Choose Disk Type page
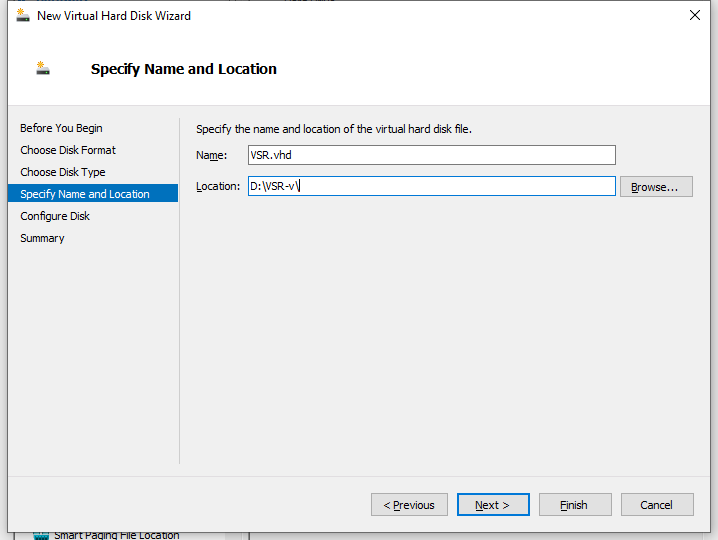
6. On the Specify Name and Location page, enter a name for the virtual hard disk file and choose a location for storing the virtual hard disk file, and then click Next.
Figure 15 New Virtual Hard Disk Wizard–Specify Name and Location page
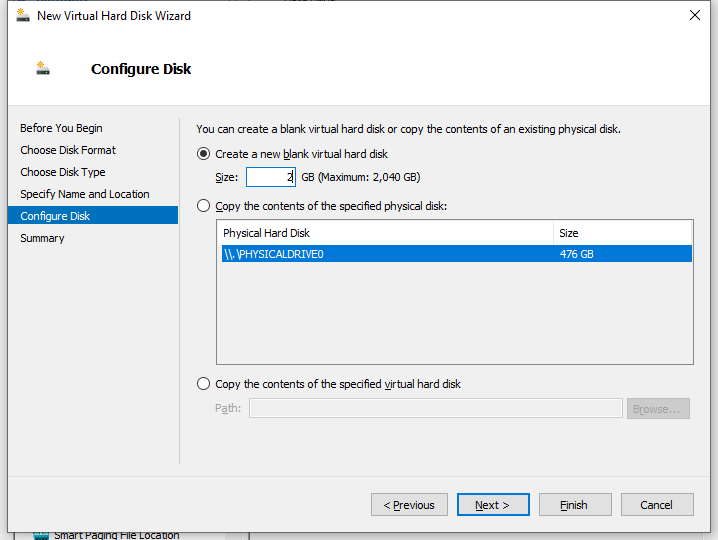
7. On the Configure Disk page, select Create a new blank virtual hard disk and specify the size of the disk, for example, 2 GB. Then, click Next.
Figure 16 New Virtual Hard Disk Wizard–Configure Disk page
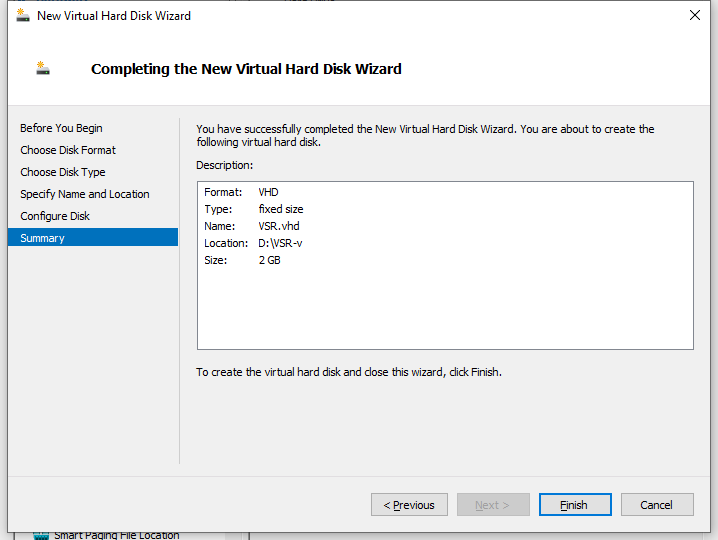
8. On the Summary page, view the configured parameters and then click Finish to create the virtual hard disk and close the wizard.
Figure 17 New Virtual Hard Disk Wizard–Summary page
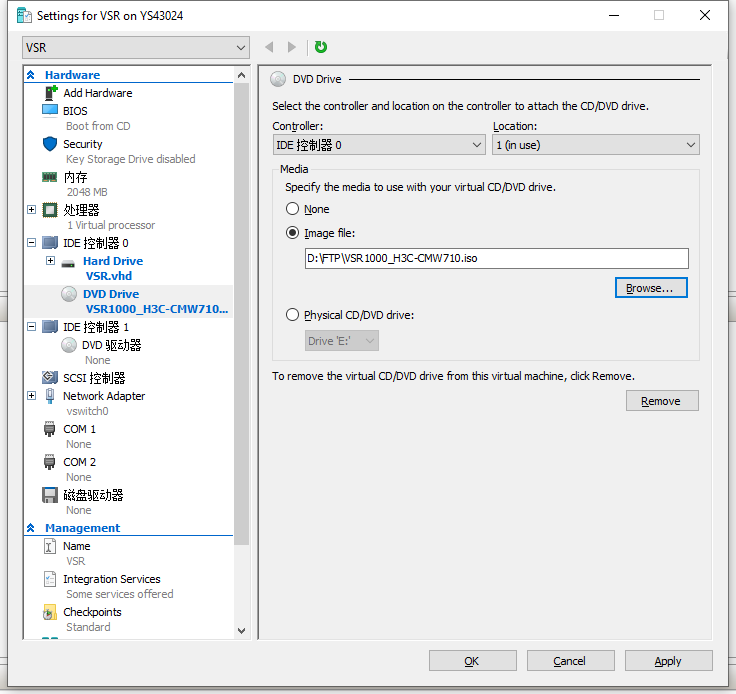
9. On the virtual machine settings page that opens, select IDE Controller 0 > DVD Drive, and then click Add. On the DVD Drive page that opens, select Image file, click Browse to select the VSR1000 ISO image file stored locally, and then click OK.
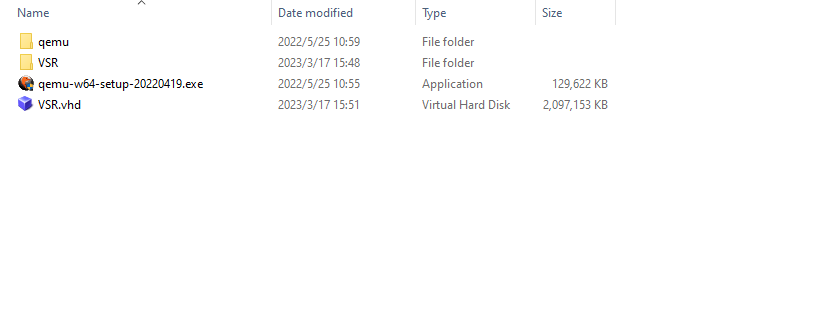
After the VHD image file is created, you can view it at the virtual hard disk file location.
Figure 19 VHD image file created successfully
Preconfiguring the VHD image file
1. Right-click the newly created virtual machine and select Connect. On the virtual machine page, follow the prompts to connect to the virtual machine and enter 1. Then follow the prompts to install the virtual machine.
2. After the virtual machine is installed, preconfigure the VHD image file as follows:
# Set the authentication method and user role for access to the virtual machine from the VTY user line.
[H3C]line vty 0 63
[H3C-line-vty0-63]authentication-mode scheme
[H3C-line-vty0-63]user-role network-admin
[H3C-line-vty0-63]user-role network-operator
[H3C-line-vty0-63]idle-timeout 0 0
# Set the username and password for logging in to the virtual machine. In this example, the username is set to admin and password is set to h3ctestvsr.
[H3C]local-user admin class manage
[H3C-luser-manage-admin]password simple admin
# Set the service type and authorization attributes for logging in to the virtual machine.
[H3C-luser-manage-admin]service-type ssh
[H3C-luser-manage-admin]authorization-attribute user-role network-admin
[H3C-luser-manage-admin]authorization-attribute user-role network-operator
# Enable Stelnet server.
[H3C]ssh server enable
# Configure the interfaces to obtain an IP address through DHCP.
[H3C-GigabitEthernet1/0/1]ip address dhcp-alloc
# Configure the authentication method and user role for logging in to the virtual machine from the AUX user line.
[H3C]line aux 0
[H3C-line-aux0]authentication-mode none
[H3C-line-aux0]user-role network-admin
[H3C-line-aux0]user-role network-operator
[H3C-line-aux0]idle-timeout 0 0
Figure 20 Virtual machine installed successfully

Creating a private image file
Creating a storage account
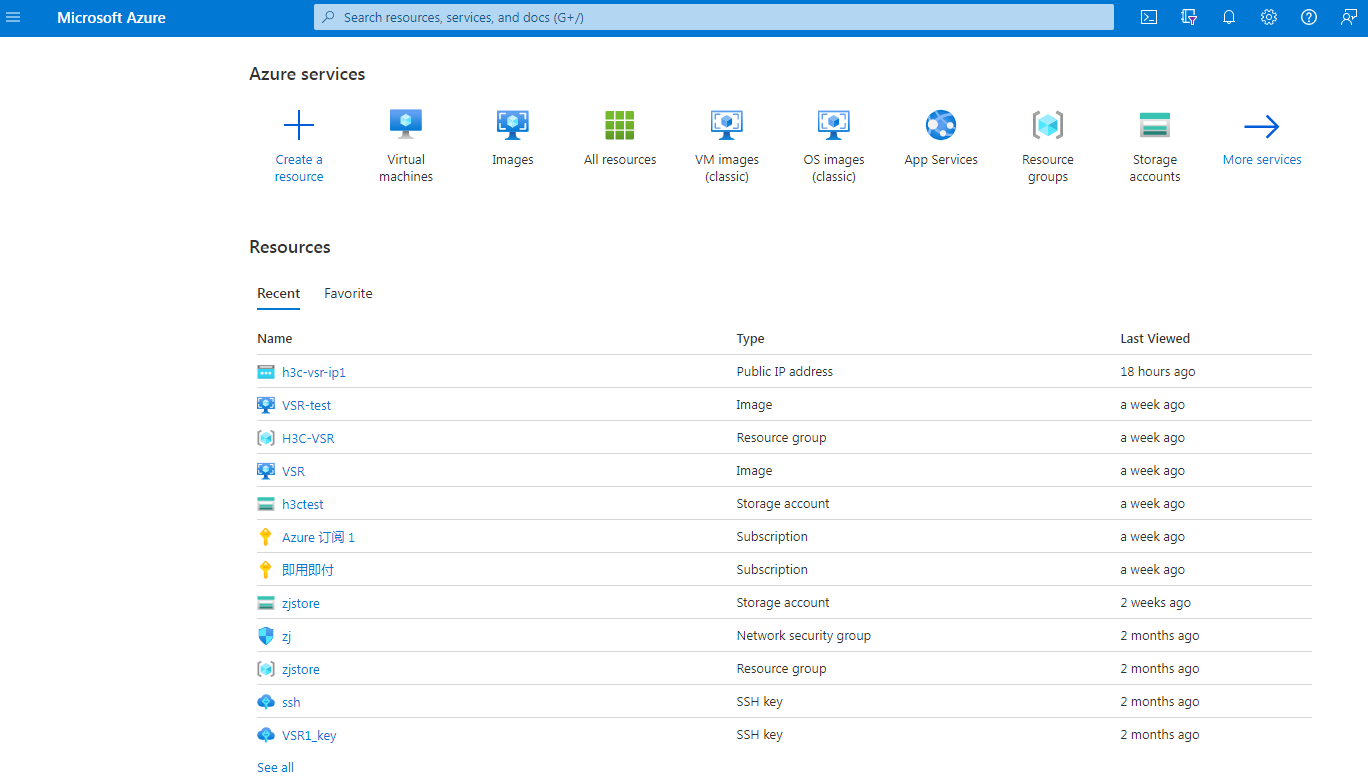
1. Access the Microsoft Azure home page.
Figure 21 Microsoft Azure home page
2. From the left portal menu, select Storage accounts.
Figure 22 Storage accounts page

3. Click + Create. The Create a storage account page opens and you are placed on the Basics tab. Configure the parameters as described in Table 1, and then click Next: Advanced >.
Figure 23 Create a storage account–Basics tab
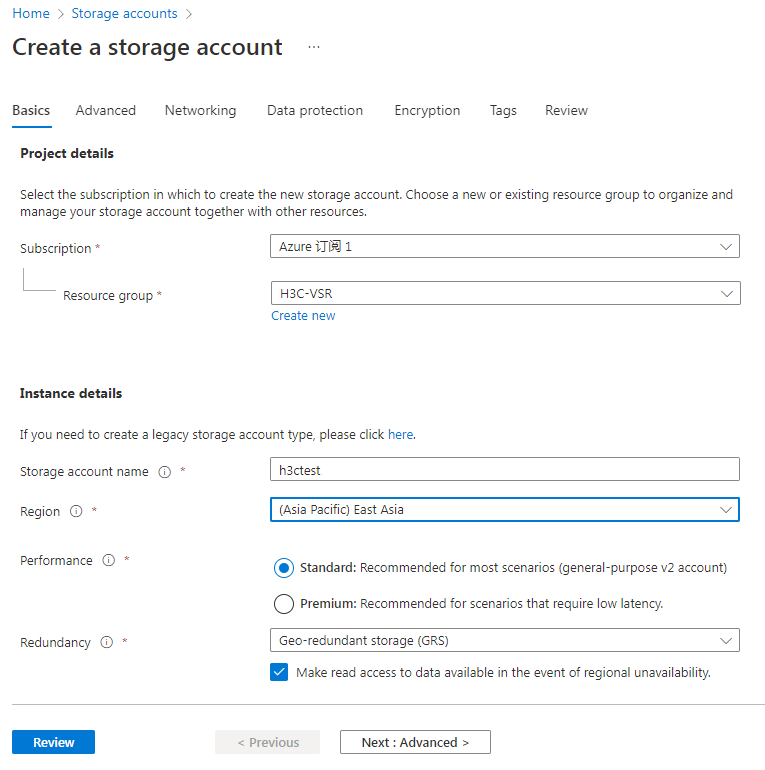
Table 1 Create a storage account–Basic tab parameters
|
Parameter |
Description |
|
Subscription |
Select a subscription. All resources in the same Microsoft Azure subscription are billed together. To create a subscription, navigate to the Cost Management + Billing > Subscriptions > New Subscription page and create a new subscription as shown in Figure 24. |
|
Resource group |
Select a resource group. A resource group is a collection of resources that share the same lifecycle, permissions, and policies. To create a resource group, select one of the created subscriptions on the Subscriptions page and then select Resource Groups from the left menu. On the resource group page that opens, click Create to create a new resource group, as shown in Figure 25. |
|
Storage account name |
Enter a name for the storage account. It is a string of 2 to 24 characters that can contain only lowercase letters and digits. |
|
Region |
Select the region where the storage account is used. If that region does not exist, select the nearest region. |
|
Performance |
Select Standard or Premium performance as needed. For scenarios requiring low latency, select Premium. |
|
Redundancy |
Select the described redundancy configuration. Options are Locally-redundant storage (LRS), Zone-redundant storage (ZRS), Geo-redundant storage (GRS), and Geo-zone-redundant storage (GZRS). |
Figure 24 Creating a subscription
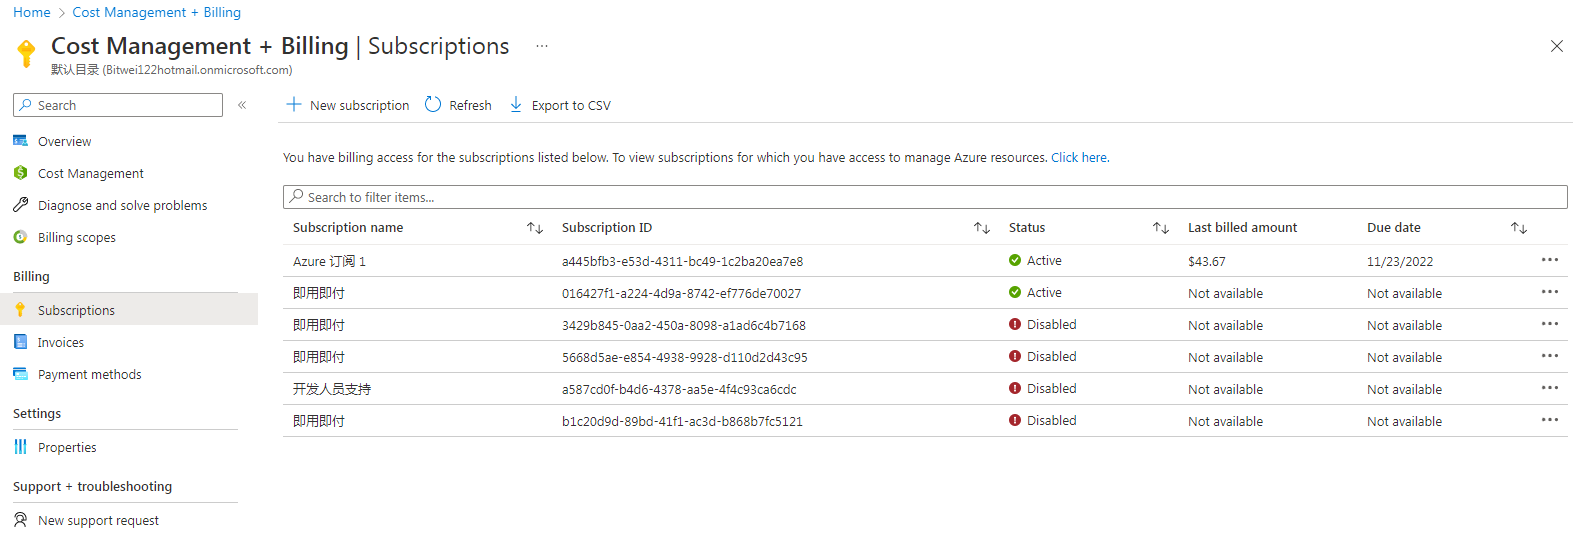
Figure 25 Creating a resource group

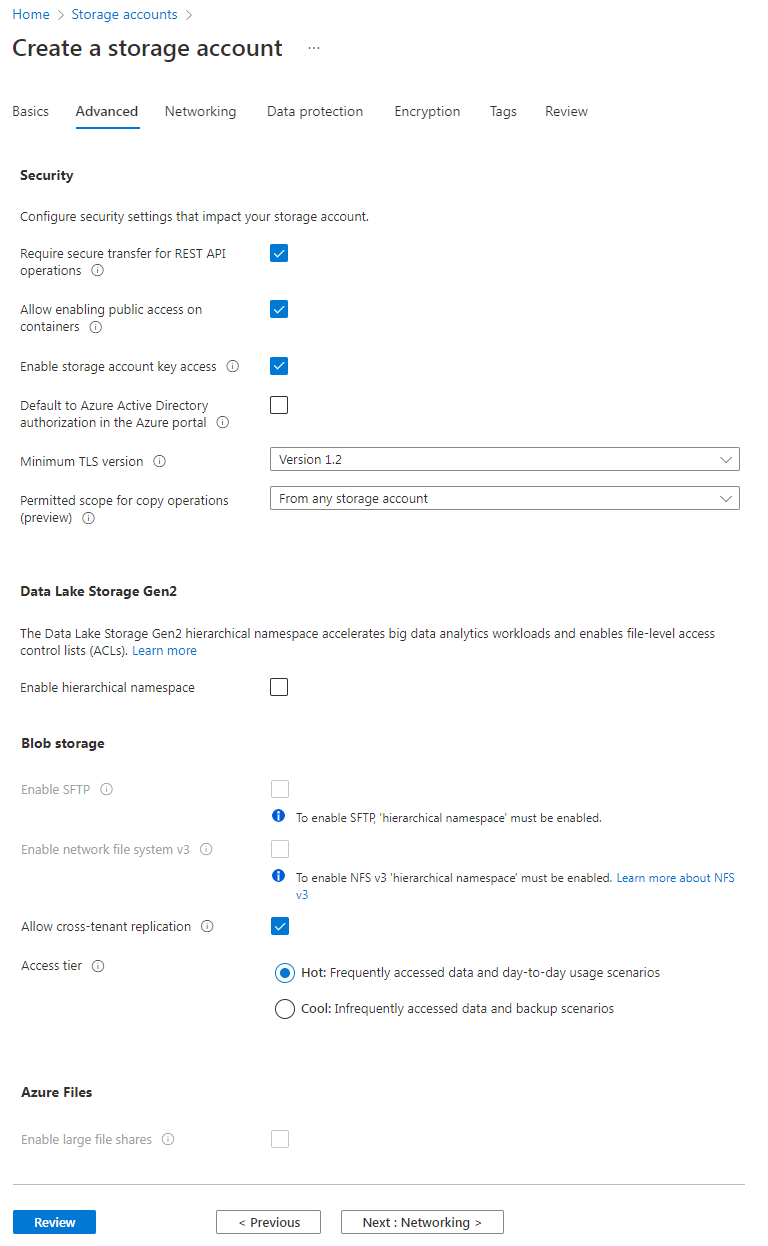
4. On the Advanced tab, configure the parameters and then click Next: Networking >.
This example uses the default settings for the parameters.
Figure 26 Create a storage account–Advanced tab
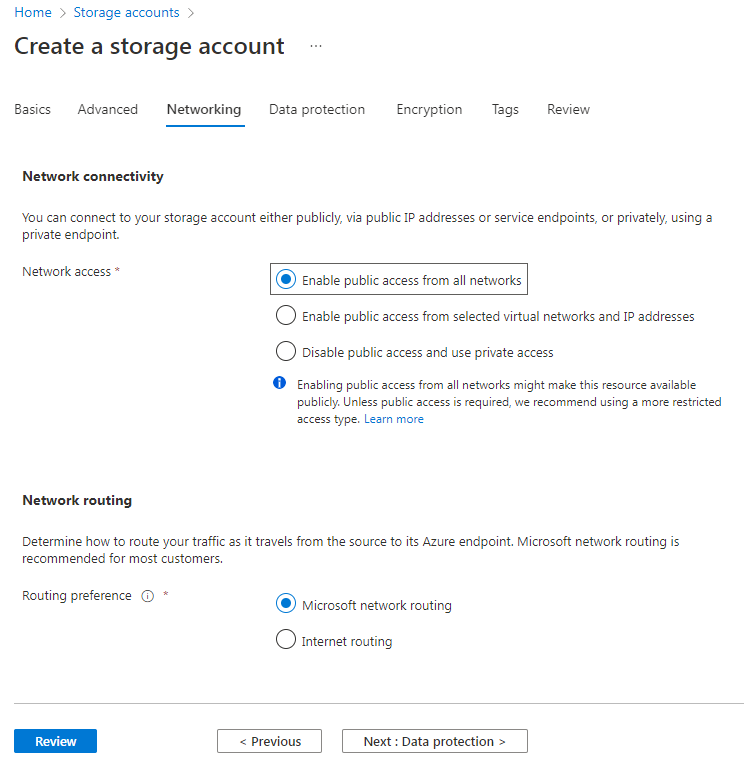
5. On the Networking tab, configure the parameters and then click Next: Data protection >.
This example uses the default settings for the parameters.
Figure 27 Create a storage account–Networking tab
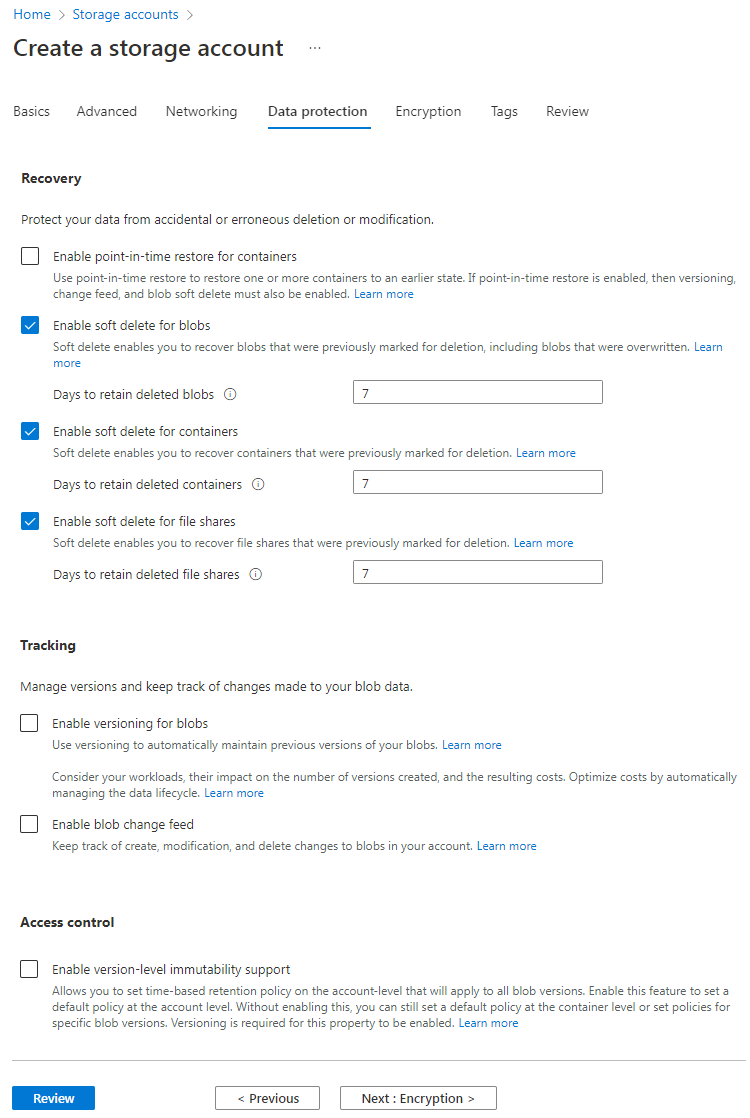
6. On the Data protection tab, configure the parameters and then click Next: Encryption >.
This example uses the default settings for the parameters.
Figure 28 Create a storage account–Data protection tab
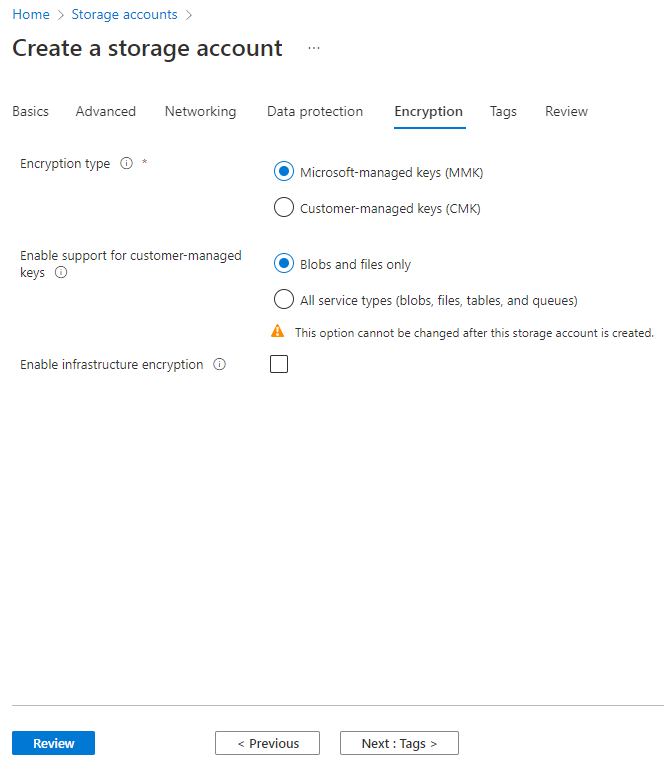
7. On the Encryption tab, configure the parameters and then click Next: Tags >.
This example uses the default settings for the parameters.
Figure 29 Create a storage account–Encryption tab
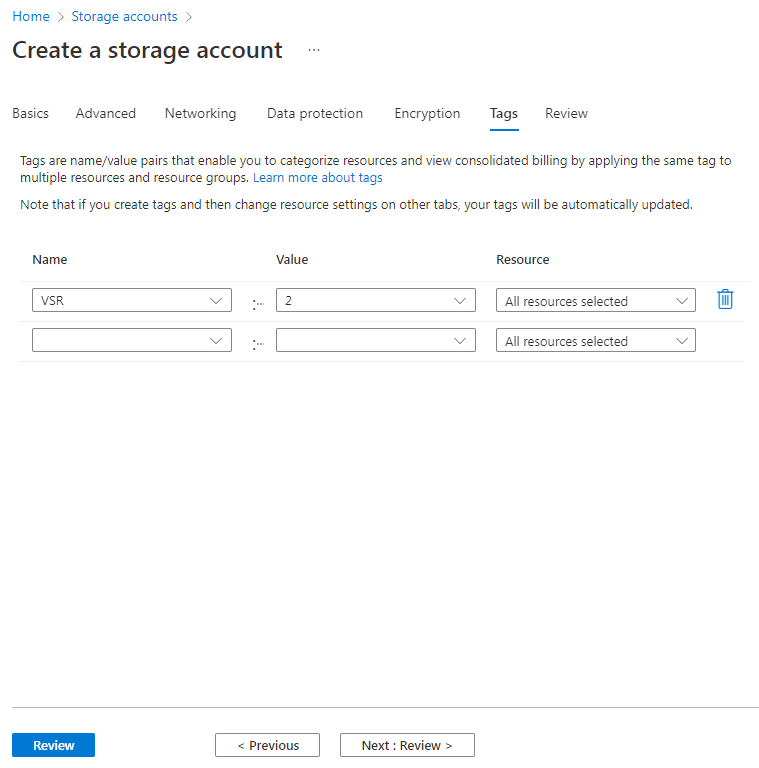
8. On the tags tab, specify the tag name and value and then click Next: Review >.
As shown in Figure 30, tags are name/value pairs that enable you to categorize resources and view consolidated billing by applying the same tag to multiple resource and resource groups.
Figure 30 Create a storage account–Tags tab
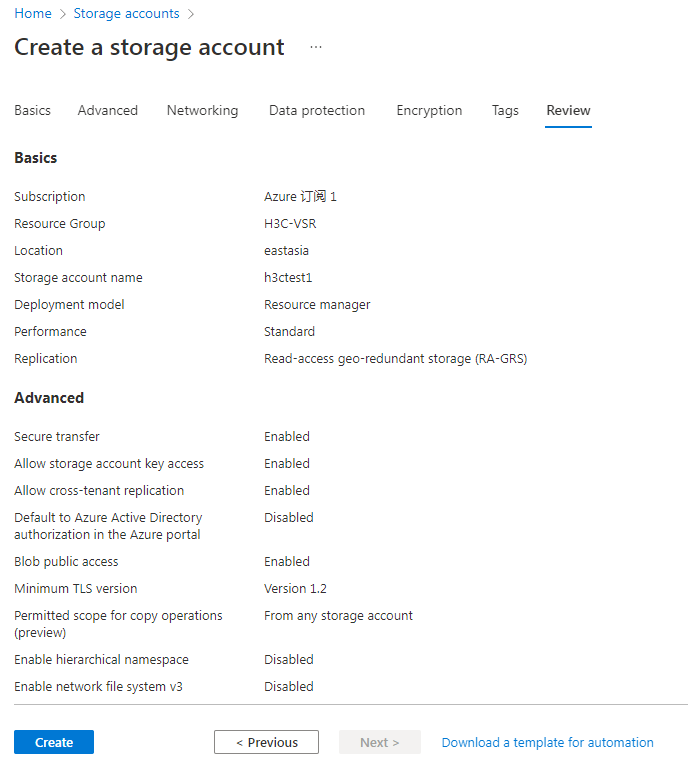
9. On the Review tab, review the configured parameters and then click Create.
Figure 31 Create a storage account-Review tab
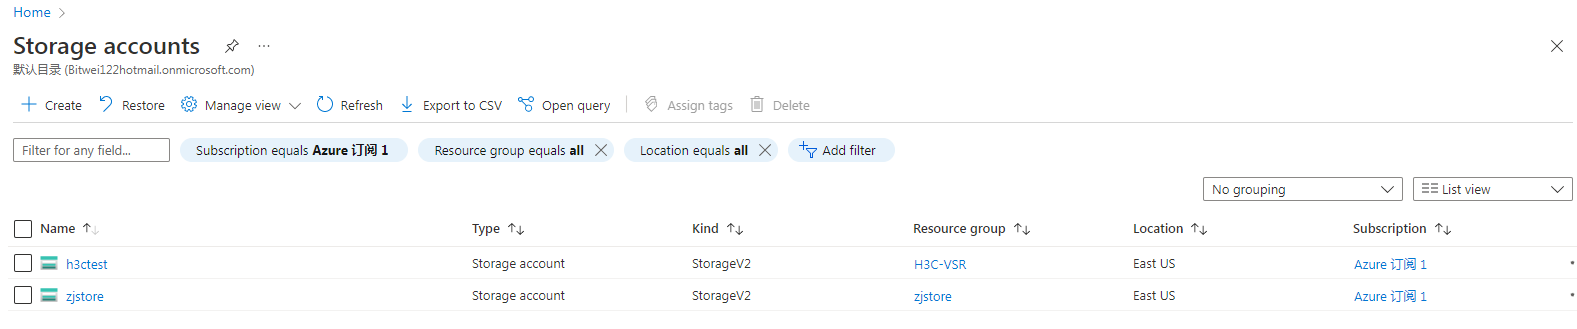
After the storage account is created, you can view it from the Storage accounts page.
Figure 32 Storage account created
Creating a container and uploading the image file to the container
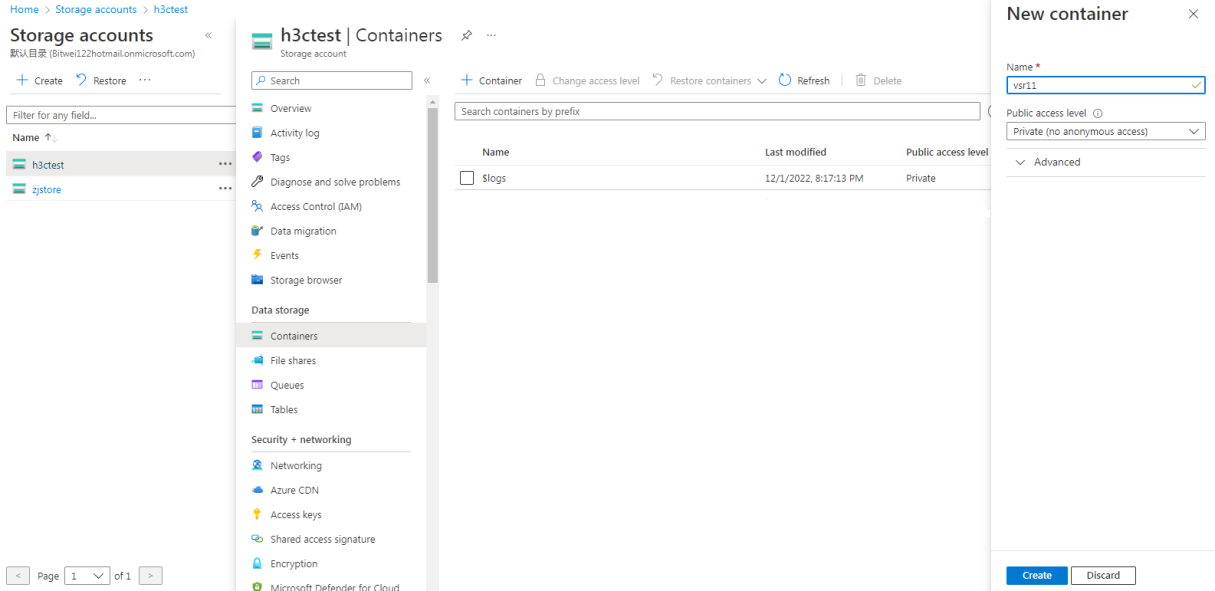
1. Select the newly created storage account on the Storage accounts page.
2. Select Containers from the left menu of the storage account.
3. Click+ Container. The container creation page opens.
4. Enter a name for the container and then click Create.
The container name is a string of 3 to 63 characters that can only contain lowercase letters, numbers, and hyphens, and must start with a letter or digit.
Figure 33 Containers page
5. Select the newly created container on the Containers page.
6. Click Upload on the page for the container.
7. On the Upload blob page that opens, select the local image file and then click Upload.
After the file is uploaded, you can view it on the container page.
Figure 34 Upload blob page

Creating a private image file
1. From the left portal menu on the Azure home page, select All services > Others > Images. Alternatively, enter "image" in the search box on the home page and select Images from the list.
2. Click + Create. The Create an image page opens
3. On the Basics tab, configure the parameters as shown in Figure 35 andTable 2,and then click Next: Tags >.
Figure 35 Create an image–Basics tab
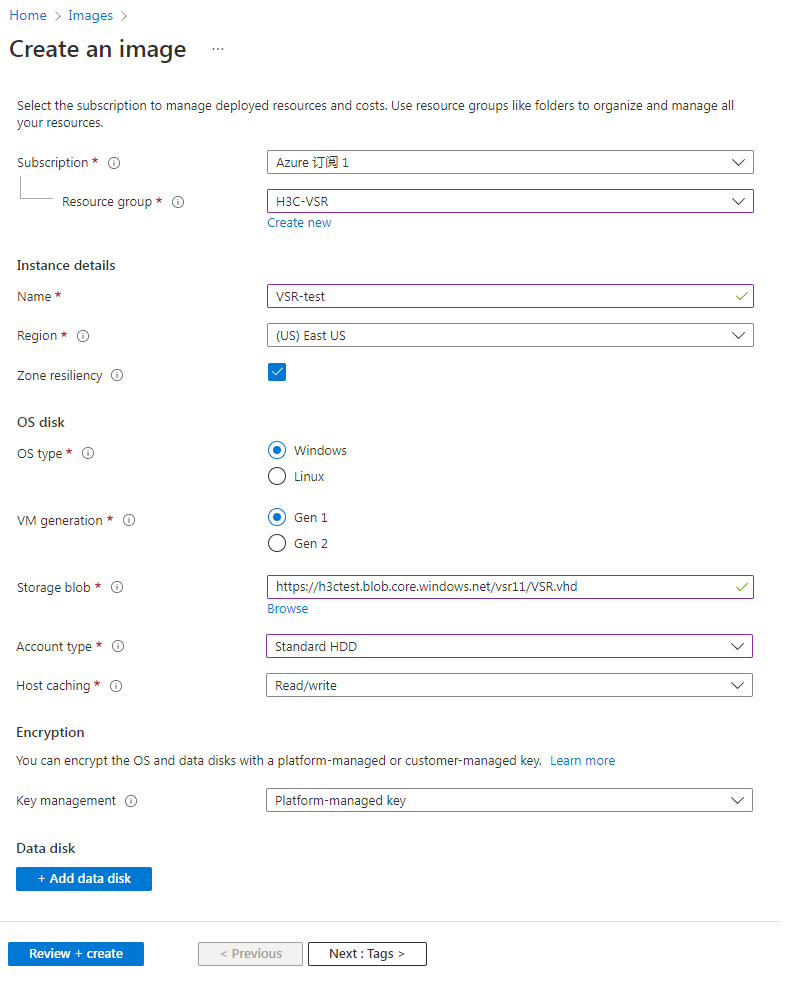
Table 2 Create an image–Basics tab parameters
|
Parameter |
Description |
|
|
Project details |
Subscription |
Select the subscription to create an image. |
|
Resource group |
Select the resource group to create an image. |
|
|
Instance details |
Name |
Specify a name for the instance. The name can contain only letters, digits, underscores, periods, and hyphens, and must start with a letter or digit and end with a letter, digit, or underscore |
|
Region |
Select the region where the subscription is. |
|
|
Zone resiliency |
If you select this option, you can use the image in any available zone. This option is selected by default. |
|
|
OS disk |
OS type |
Select Windows or Linux as needed. Windows is selected in this example. |
|
VM generation |
Select Gen 1 or Gen 2 as needed. Gen 1 is selected in this example. |
|
|
Storage blob |
Click Browse and select the blob file uploaded in the "Creating a container and uploading the image file to the container" procedure. |
|
|
Account type |
Select the desired account type based on the usage scenario and performance requirements for the virtual machine. Options are Standard HDD, Premium HDD, Standard SSD, and Premium SSD. Standard HDD is selected in this example. |
|
|
Host caching |
Read/write is selected by default. This example uses the default configuration. |
|
|
Encryption |
Key management |
Select Customer-managed key or Platform-managed key as needed. Platform-managed key is selected in this example. |
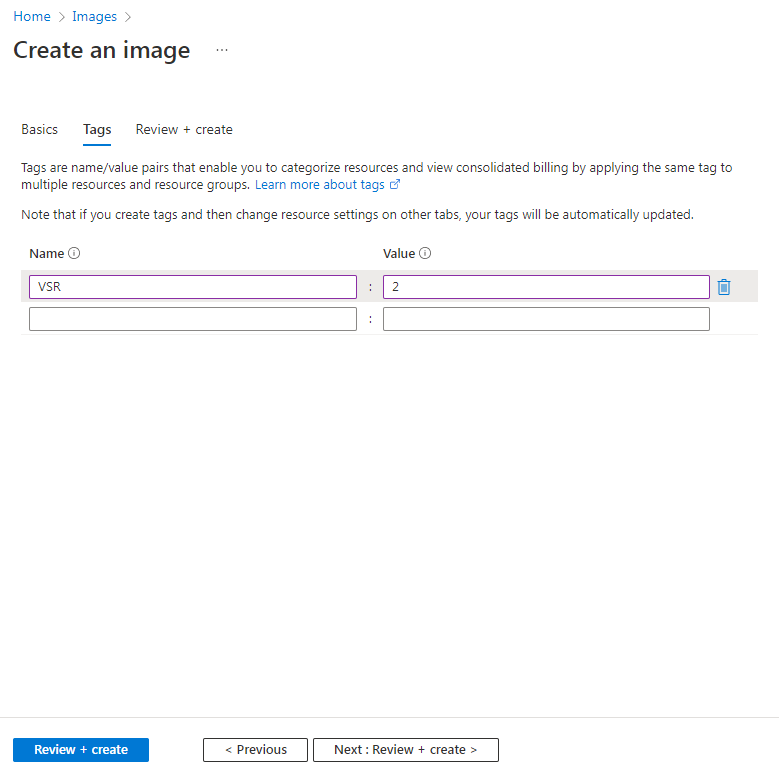
4. On the tags tab, specify the tag name and value and then click Next: Review + create >.
As shown in Figure 36, tags are name/value pairs that enable you to categorize resources and view consolidated billing by applying the same tag to multiple resource and resource groups.
Figure 36 Create an image-Tags tab
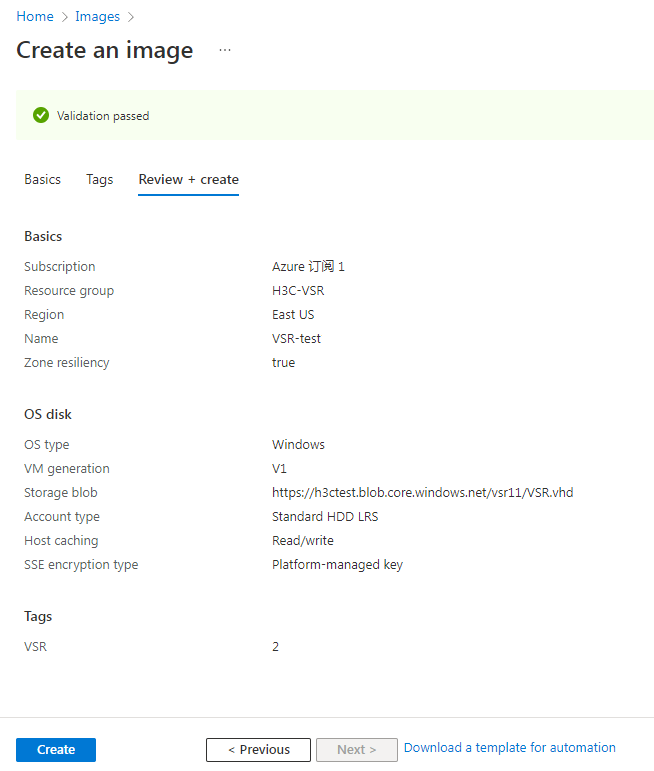
5. Review the configured parameters and then click Create.
Figure 37 Create an image-Review + create tab
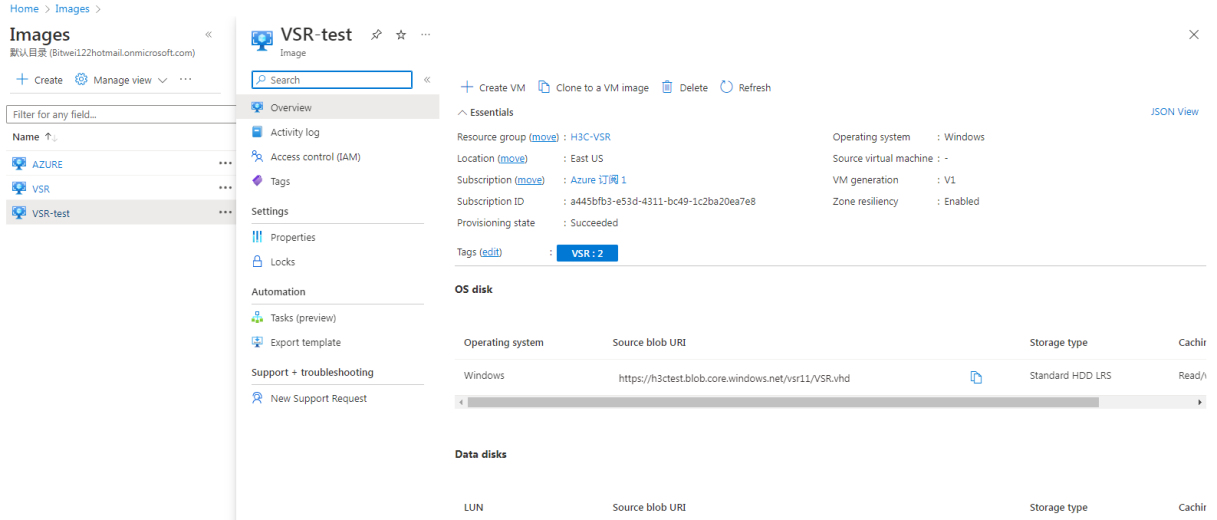
After the image is created successfully, you can view it on the Images page.
Figure 38 Image created successfully
Creating a virtual machine
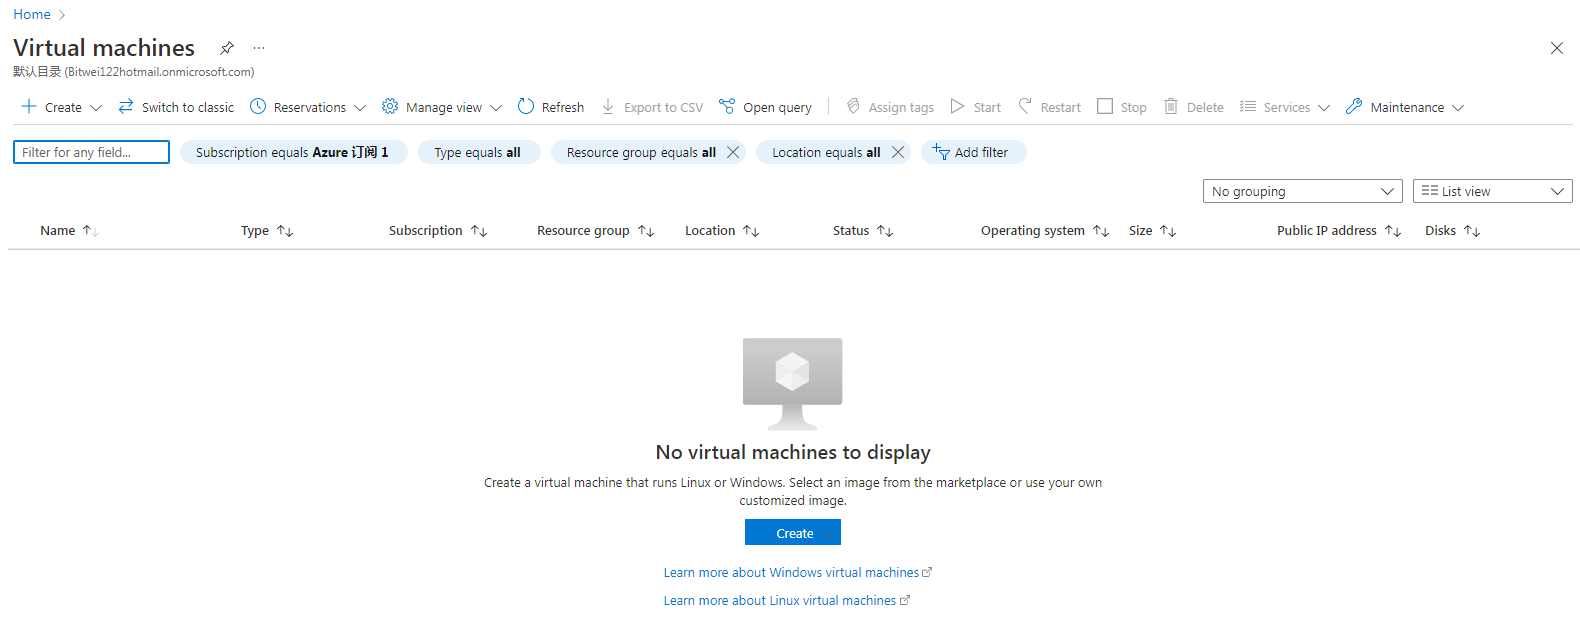
1. Select Virtual machines from the left portal menu on the home page.
Figure 39 Virtual machines page
2. Click + Create and select Azure virtual machine from the list. The Create a virtual machine page opens.
3. On the Basics tab, configure the parameters as shown in Figure 40 and Table 3, and then click Next: Disks.
Figure 40 Create a virtual machine-Basics
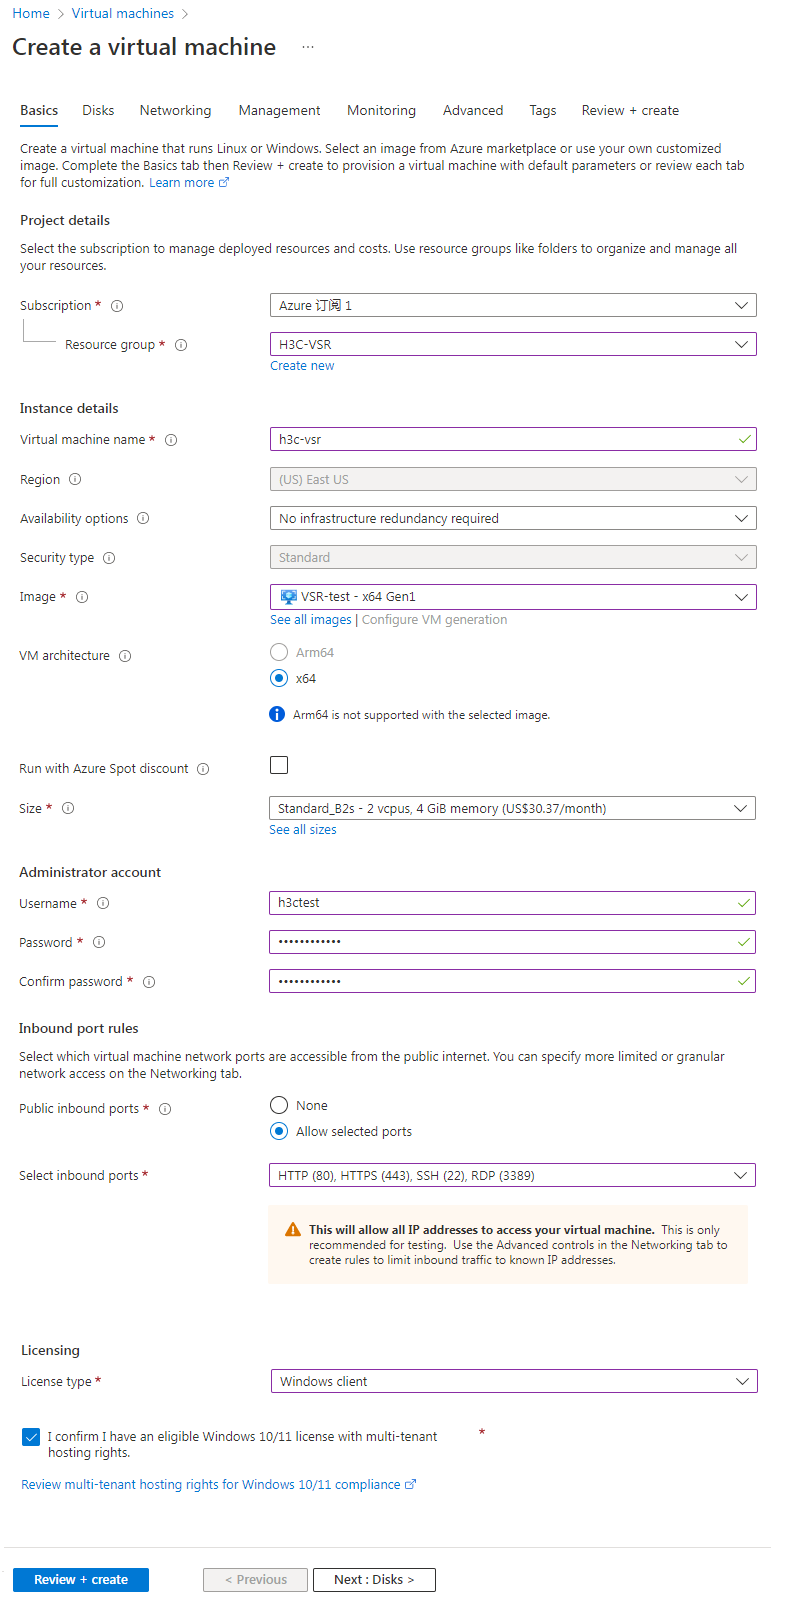
Table 3 Create a virtual machine-Basics tab parameters
|
Parameter |
Description |
|
|
Project details |
Subscription |
Select the subscription to create a virtual machine. |
|
Resource group |
Select the resource group to create a virtual machine. |
|
|
Instance details |
Virtual machine name |
Specify a name for the virtual machine. The name is a string of 1 to 64 characters that cannot contain special characters \/[]:|<>+=;,?*@& or spaces, and cannot start with an underscore (_) or end with a comma (,) or hyphen (-). |
|
Region |
The system fills this parameter with the region where the subscription is. |
|
|
Availability options |
Options are Availability zones, Virtual machine scale sets, Availability sets, No infrastructure redundancy required. The No infrastructure redundancy required option is selected in this example. |
|
|
Security type |
The system fills this parameter based on the availability option. |
|
|
Image |
Click Browse and select the private image created in the "Creating a private image file" procedure. |
|
|
VM architecture |
Select the x64 or Arm64 VM architecture as needed. x64 is selected in this example. |
|
|
Run with Azure Spot discount |
By default, this option is unselected. This example uses the default configuration. |
|
|
Size |
Select the size for the virtual machine. The virtual machine processing power, memory, and storage capacity depends on its size. Microsoft Azure charges hourly based on the size and operating system of the VM. |
|
|
Administrator account |
Username |
The username is a string of 1 to 20 characters that cannot contain special characters \/""[]:|<>+=;,?*@& or end with a period (.). |
|
Password |
The password is a string of 12 to 123 characters that must contain three of the four character types: lowercase letter, uppercase letter, digit, and special character. |
|
|
Confirm password |
Enter the password again for confirmation. |
|
|
Inbound port rules |
Public inbound ports |
Select Allow selected ports. This option allows access to the virtual machine network ports from the public Internet. |
|
Select inbound ports |
Select HHTP (80), HTTPS (443), SSH (22), RDP (3389). |
|
|
Licensing |
License type |
Select Windows client or Windows server as needed. This example selects Windows client and I confirm I have an eligible Windows 10/11 license with multi-tenant hosting rights. |
4. On the Disks tab, configure the parameters and then click Next: Networking.
This example selects the Standard SSD (locally-redundant storage) OS disk type and use the default settings for the other parameters.
Figure 41 Create a virtual machine-Disks tab

5. On the Networking tab, configure the parameters and then click Next: Management >.
Figure 42 Create a virtual machine-Networking tab

Table 4 Networking tab parameters
|
Parameter |
Description |
|
Virtual network |
Select a virtual network for the virtual machine. Virtual machines on the same virtual network can access each other. To create and use a new virtual network, click Create New and configure the virtual network name, address space, as well as subnet name and address range on the Create Virtual Network page, as shown in Figure 43. This example uses the default configuration. |
|
Subnet |
Select an IP address range on the virtual network. Virtual machines connected to the same subnet on the virtual network can communicate with each other. You can configure this parameter to isolate virtual machines from each other or isolate the virtual machine from the Internet. This example uses the default configuration. |
|
Public IP |
Select a public IP for the virtual machine. The public IP is used for access to the virtual machine from outside the virtual network. To create and use a new public IP, click Create new to configure the parameters including the name, SKU, and routing preference on the Create public IP address page, as shown in Figure 44. This example uses the default configuration. |
|
NIC network security group |
Basic is selected by default. This example uses the default configuration. |
|
Public inbound ports |
Select Allow selected ports. This option allows access to the virtual machine network ports from the public Internet. |
|
Select inbound ports |
Select HHTP (80), HTTPS (443), SSH (22), RDP (3389). |
|
Delete public IP and NIC when VM is deleted |
This option is not selected by default. This example uses the default configuration. |
|
Enable accelerated networking |
This option is configured by the system based on the selected image file. |
|
Load balancing |
This option is not selected by default. This example uses the default configuration. |
Figure 43 Creating a virtual network
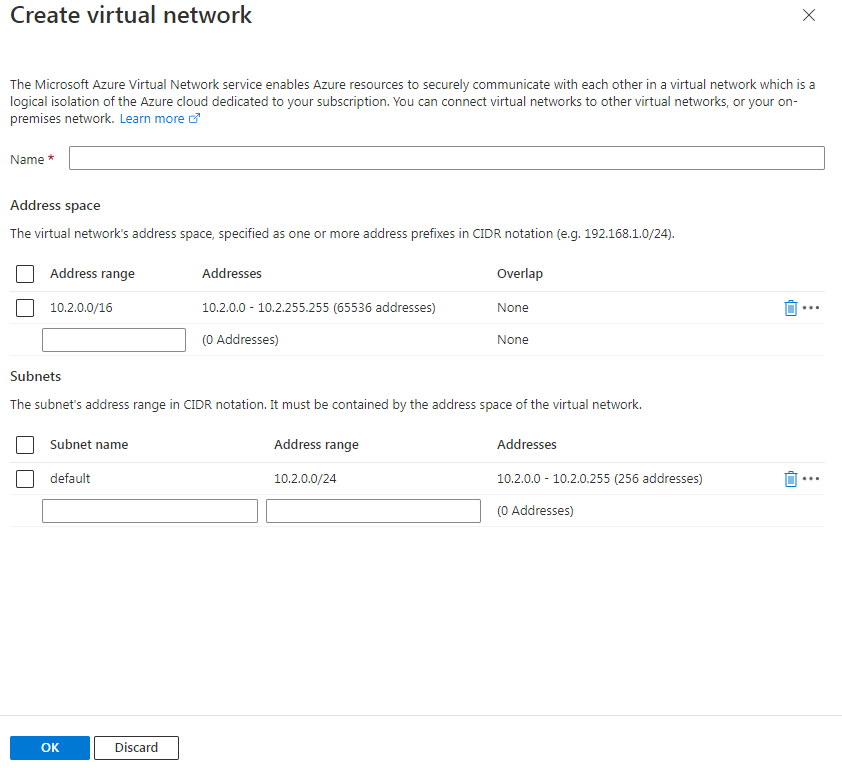
Figure 44 Creating a public IP address

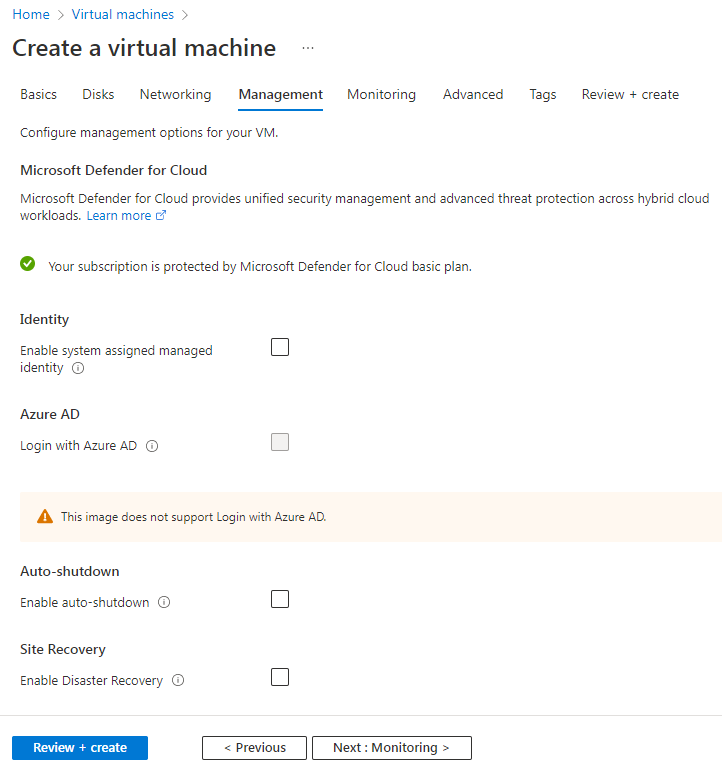
6. On the Management tab, configure the parameters and then click Next: Monitoring >.
This example uses the default configuration for the parameters.
Figure 45 Create a virtual machine-Management tab
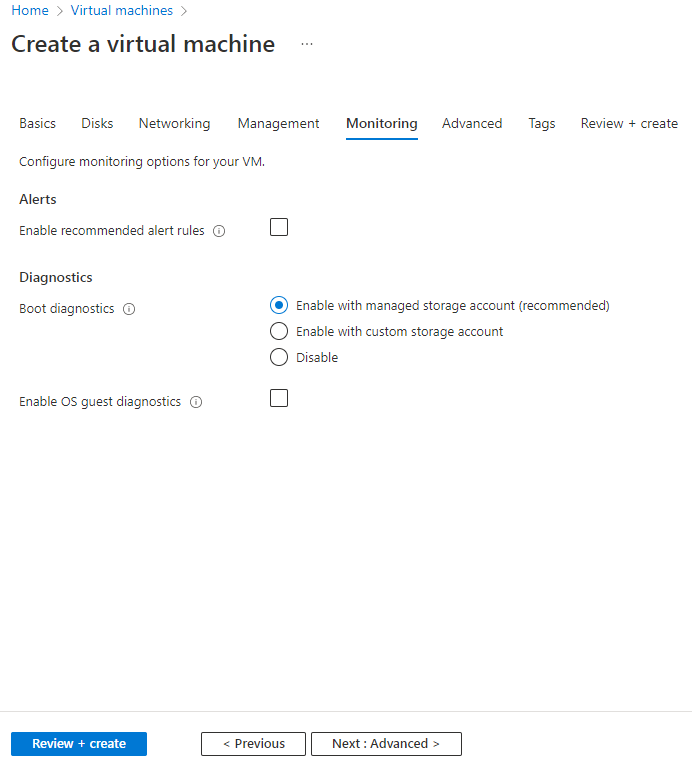
7. On the Monitoring tab, configure the parameters and then click Next: Advanced >.
This example uses the default configuration for the parameters.
Figure 46 Create a virtual machine-Monitoring tab
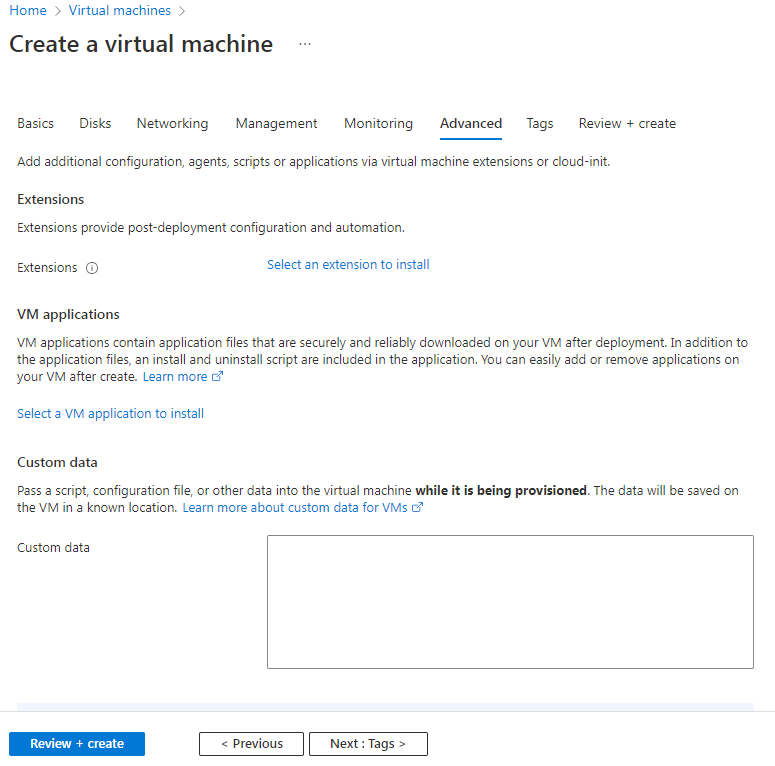
8. On the Advanced tab, configure the parameters and then click Next: Tags >.
This example uses the default configuration for the parameters.
Figure 47 Create a virtual machine-Advanced tab
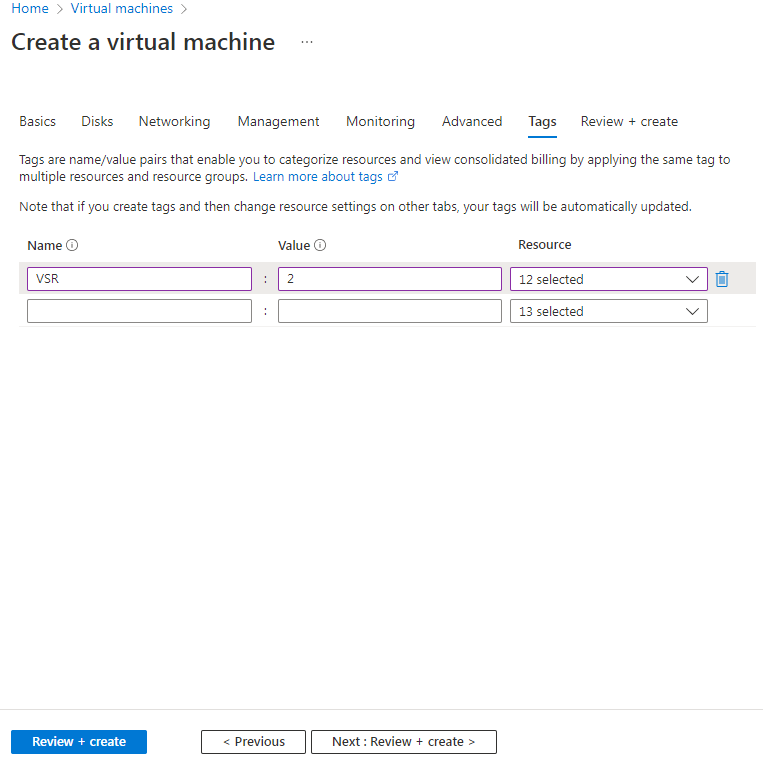
9. On the Tags tab, specify the tag name and value and then click Next: Review + create >.
Tags are name/value pairs that enable you to categorize resources and view consolidated billing by applying the same tag to multiple resource and resource groups.
Figure 48 Create a virtual machine-Tags tab
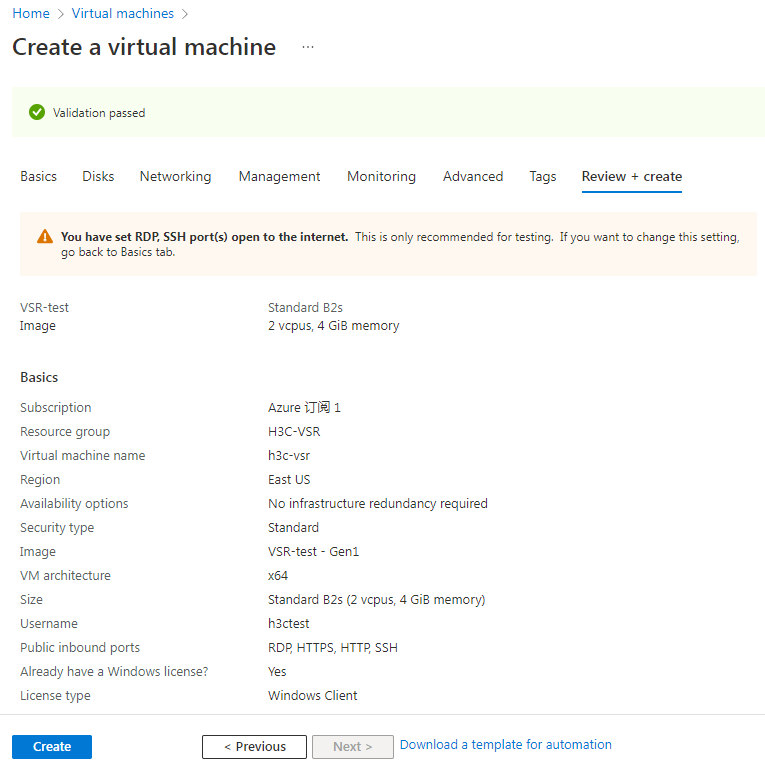
10. On the Review + create tab, review the configured parameters and then click Create.
Figure 49 Create a virtual machine-Review + create tab
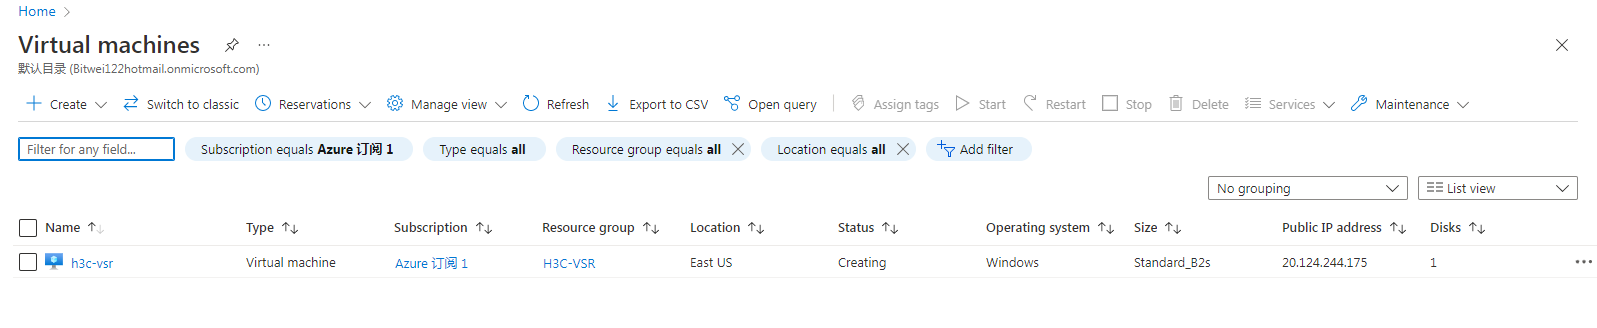
After the virtual machine is created, you can view it from the Virtual machines page.
Figure 50 Virtual machine created successfully
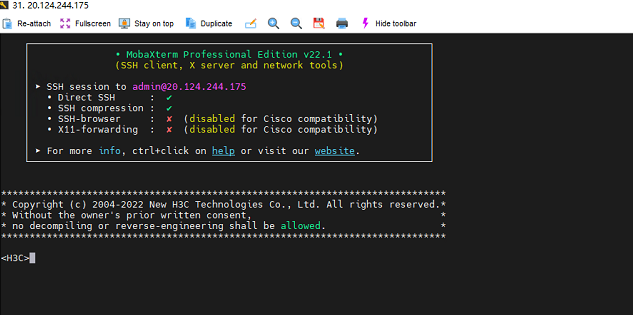
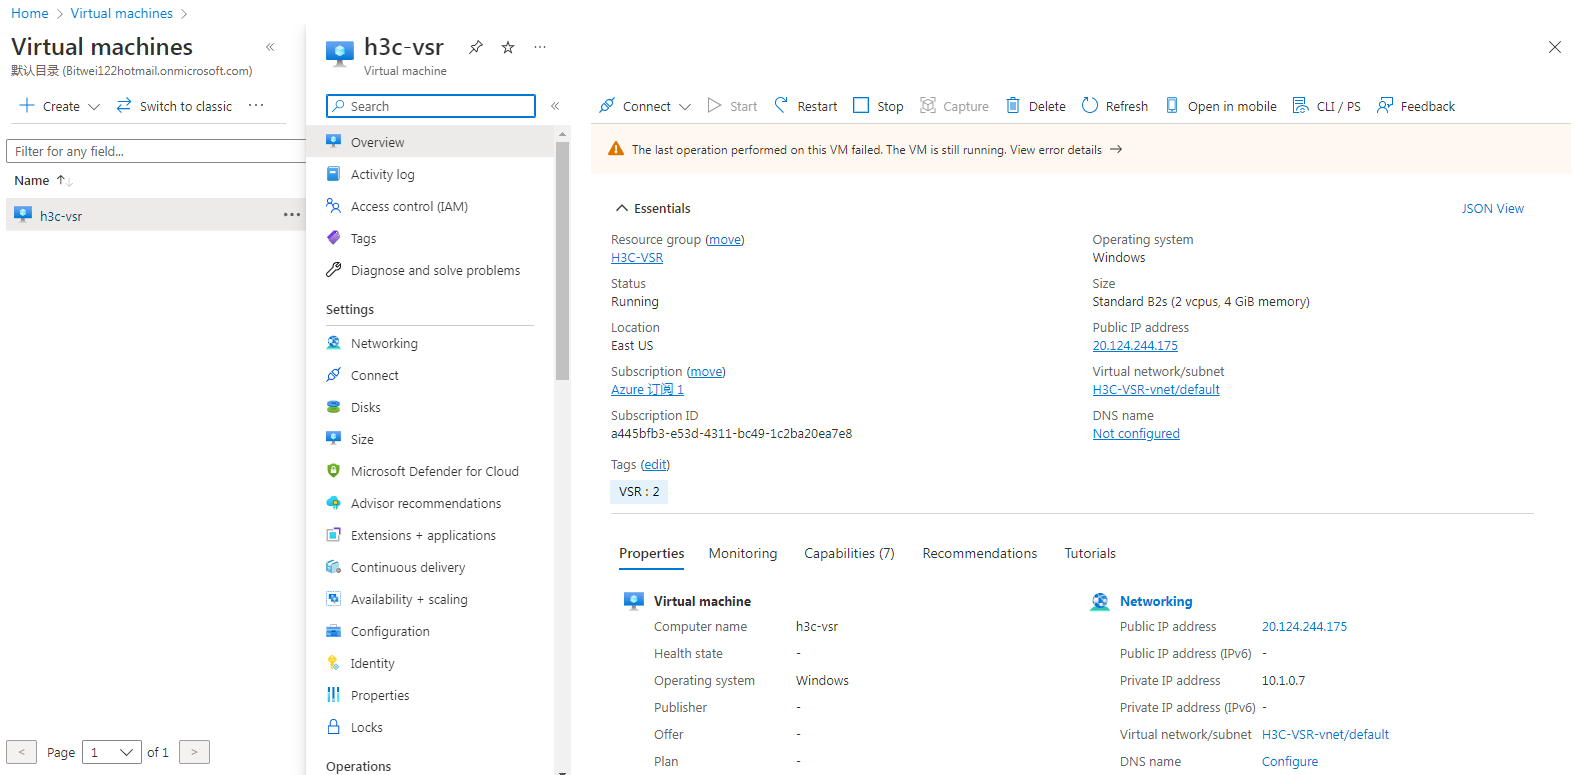
11. Click the newly created virtual machine name to access the Essentials page for the virtual machine.
Figure 51 Essentials page of the created virtual machine
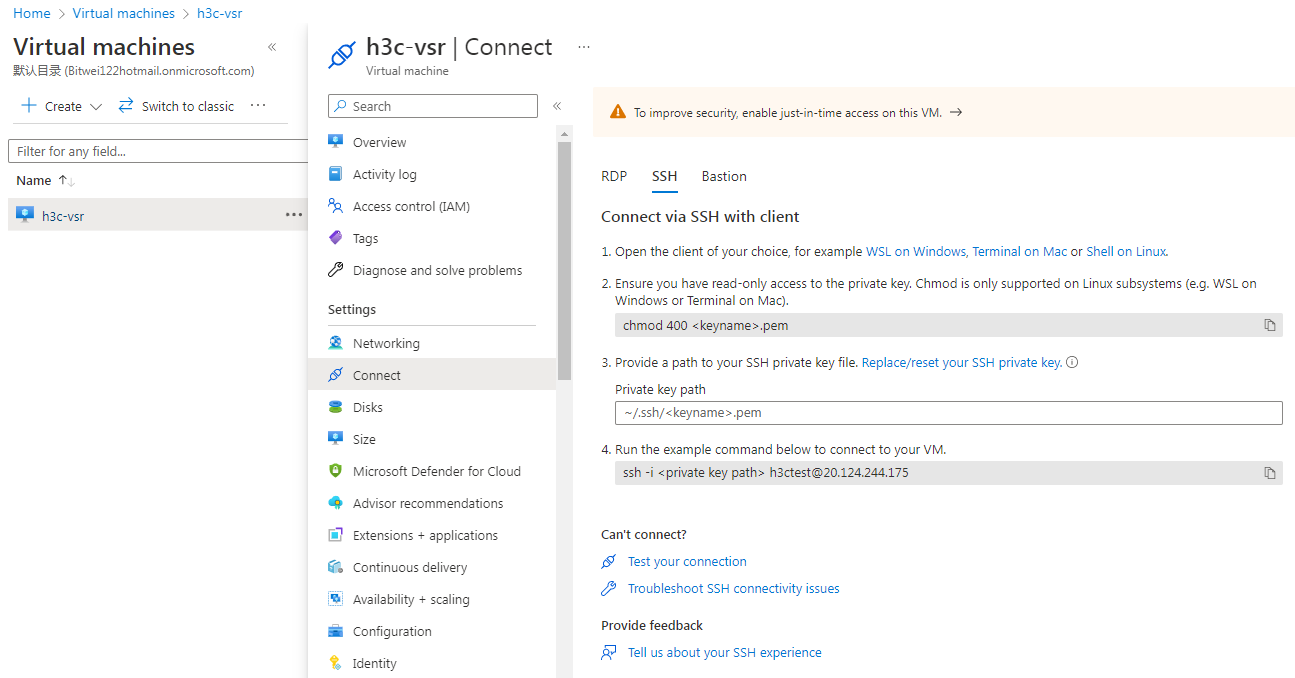
12. Select Connect > SSH from the left menu and view the restrictions and guidelines for the connection.
Figure 52 SSH connection page for the virtual machine
13. Open MobaXterm_Portable or Secure CRT Portable on the local host. Enter the public IP address and username and password for creating the VHD image file to connect to the virtual machine.
Figure 53 Connected to the virtual machine page successfully