- Table of Contents
- Related Documents
-
| Title | Size | Download |
|---|---|---|
| 01-Text | 2.88 MB |
Contents
Hardware and software requirements
Connecting the server to an access device
Installing H3C SecCenter SMP on a server
Preparing for SMP installation
Installing H3C SecCenter SMP on the H3C CAS Virtualization Platform
Installing H3C SecCenter SMP on VMware virtualization platform
Logging in to the Web interface of SMP
About H3C SecCenter SMP
H3C SecCenter Security Management Platform (SMP) provides unified management and control for security devices in the network. This platform monitors asset status in real time and provides a full range of statistics reports for various security events to facilitate users to monitor the cyber security situation in time.
Preparing for installation
Hardware and software requirements
SMP can be installed on a VM or a physical server. To ensure a successful installation, make sure the VM or physical server where SMP will be installed meets the hardware and software requirements in this section.
Server or VM hardware and software requirements
|
Item |
Requirements |
|
CPU |
8 cores 2.1 GHz or above |
|
Memory size |
32 GB |
|
Drive |
1 TB or above SSD not supported |
|
OS version |
64-bit CentOS 7 |
Table 2 Server or VM hardware and software requirements (for a single SMP to manage 10 to 50 security devices)
|
Item |
Requirements |
|
CPU |
8 cores 2.1 GHz or above |
|
Memory size |
64 GB |
|
Drive |
2 TB or above SSD not supported |
|
OS version |
64-bit CentOS 7 |
Table 3 Server or VM hardware and software requirements (for a single SMP to manage 50 to 100 security devices)
|
Item |
Requirements |
|
CPU |
8 cores 2.1 GHz or above |
|
Memory size |
128 GB |
|
Drive |
4 TB or above SSD not supported |
|
OS version |
64-bit CentOS 7 |
SMP image package
You can obtain an SMP image package from the H3C official website. Image packages used for SMP installation are named in the format of SecCenterSMP_version-number.iso. The size of an SMP image package is about 2 GB. The package includes H3Linux operating system and SMP key feature image files.
Installation restrictions and guidelines
To ensure successful installation, follow these restrictions and guidelines:
· If SMP is deployed on a VM, only one virtual disk is required.
· The server used to deploy SMP or the server where the SMP VM is deployed must be an x86 server.
· SMP cannot be deployed on a server if the server is configured with software RAID. To set up RAID, the server must have an independent RAID controller.
· If you deploy SMP on a server with an independent RAID controller, create a RAID with all hard disks used to deploy SMP before you deploy SMP. The RAID level is not limited. To ensure successful system boot after SMP deployment, make sure the server contains only one RAID.
· If the server has multiple hard disks that meet the capacity requirements for SMP installation, SMP is automatically installed on the hard disk or RAID with the largest capacity.
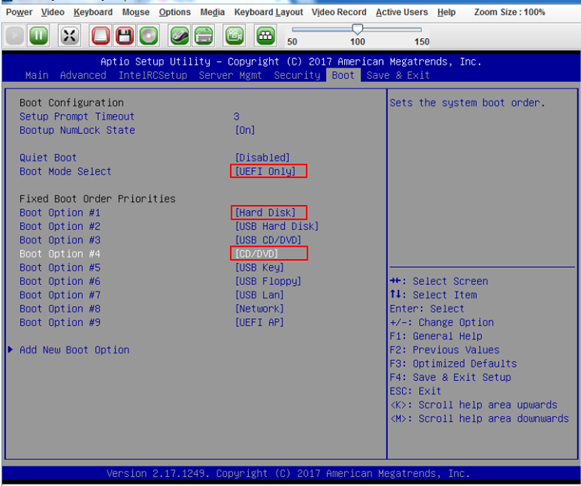
· Set the BIOS boot mode to UEFI mode on the server. Configure the hard disk to have higher priority than the virtual CD-ROM when the system is booting.
Figure 1 Setting the BIOS boot mode to UEFI mode and configuring boot order priorities
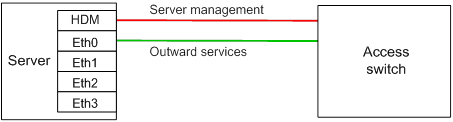
Connecting the server to an access device
As shown in Figure 2, use Ethernet cables to connect the HDM and Eth 0 ports of the server or the server deployed with a virtualization platform to the access switch. The HDM port provides an address for server management, and port Eth 0 is used by SMP to provide outward services. A user can log in to SMP by using the IP address of Eth 0.
Installing H3C SecCenter SMP
This document describes how to install H3C SecCenter SMP on an H3C server or on a VM created on the H3C CAS virtualization platform or the VMware virtualization platform. For information about installing H3C SecCenter SMP on third-party devices, see the manuals for installing an OS on the devices.
Installing H3C SecCenter SMP on a server
Preparing for SMP installation
· On the server, configure an IP address for the management port, add an account, and configure BIOS and RAID as needed. For more information, see the manuals for the server.
· Make sure the configuration terminal (PC) and the server can reach each other.
Installing SMP
Restrictions and guidelines
To ensure successful guest operating system installation and SMP deployment, follow these restrictions and guidelines:
· Make sure port Eth 0 on the server and the access switch have network connectivity during the installation.
· As a best practice, format the hard disk if the hard disk has been used.
Procedure
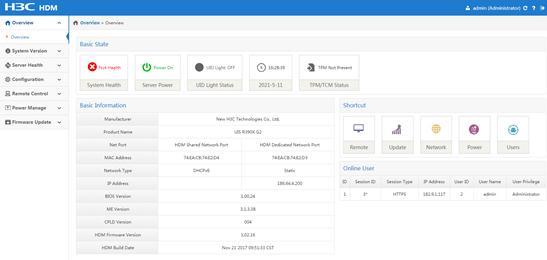
1. On the PC that acts as the configuration terminal, open a Web browser, and enter the HDM interface IP address of the server in the address bar. On the Web interface of the server, click Remote Control > Remote Console. Then, click KVM to enter the JViewer page.
Figure 3 JViewer page
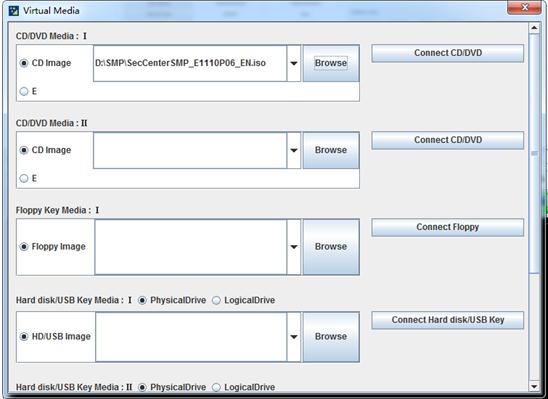
2. Click Virtual Media from the menu bar. In the window that opens, click Browse and select the SMP image package for installation. The package file name is in the format of SecCenterSMP_version-number.iso. Then, click Connect CD/DVD.
Figure 4 Importing the image package
3. Click Power from the menu bar, and select Force Power Cycle to reboot the server.
Figure 5 Rebooting the server

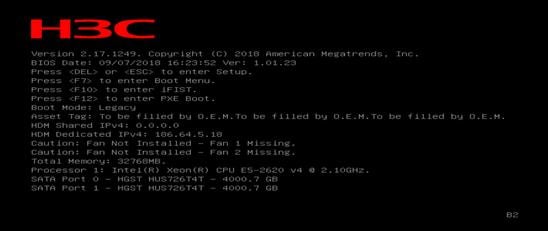
4. When the following information appears, press F7 immediately to enter the Boot Menu. The key used to enter the Boot Menu varies by server model.
Figure 6 Rebooting page
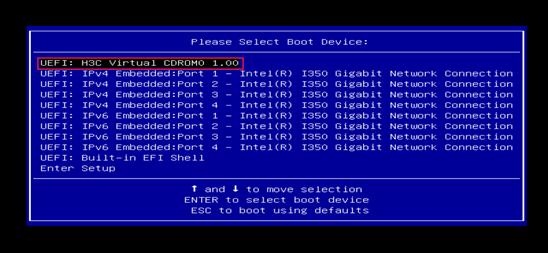
5. When the following page appears, select the first virtual CDROM as the boot device, and then press Enter:
Figure 7 Selecting the boot device
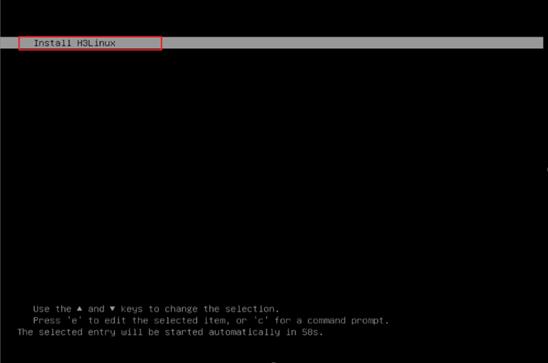
6. Select Install H3Linux and press Enter.
Figure 8 Installation page
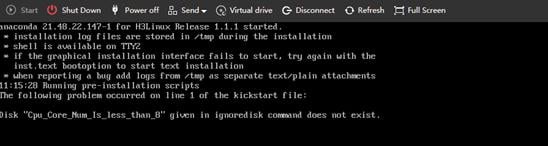
The installation process exits if the hardware resources are insufficient. In this case, check the hardware resources and add hardware resources to make sure the resources meet the installation requirements. Then, reinstall SMP.
The following resource issues might exist:
¡ Cpu_Core_Num_Is_less_than_8—Indicates that the number of CPU cores is less than eight.
¡ Memory_Is_less_than_32G—Indicates that the memory size is less than 32 GB.
¡ Cannot_Find_Available_Disk—Indicates that no disk meets the installation requirements. To install SMP on a disk, the disk size must be larger than 1 TB.
Figure 9 Error message for insufficient CPU cores
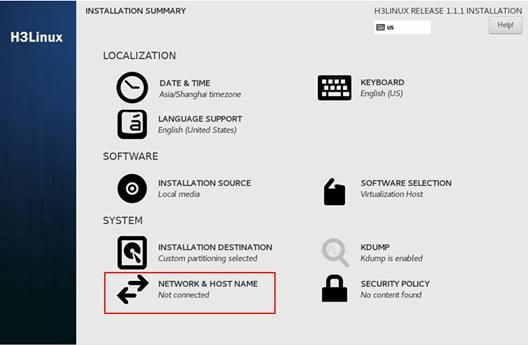
7. On the INSTALLATION SUMMARY page, configure the keyboard, select software, and configure the network and host name. Click Done at each step to return to the INSTALLATION SUMMARY page. Configure these parameters strictly as described in the following steps:
|
|
IMPORTANT: As a best practice to ensure successful installation, do not configure other parameters except the parameters in the following steps. |
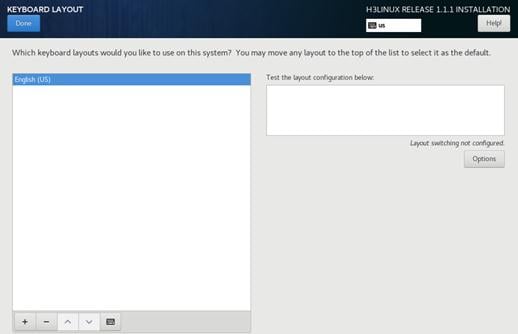
a. Configure the keyboard and select a language, as shown in Figure 10 and Figure 11.
Figure 10 Configuring the keyboard
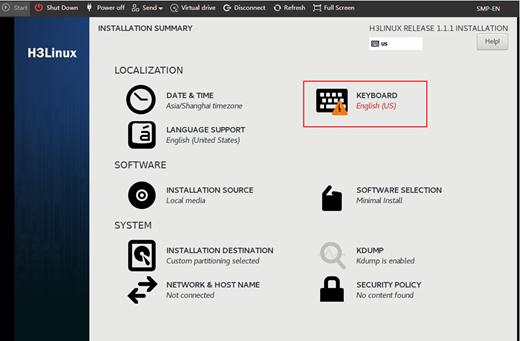
Figure 11 Selecting a language
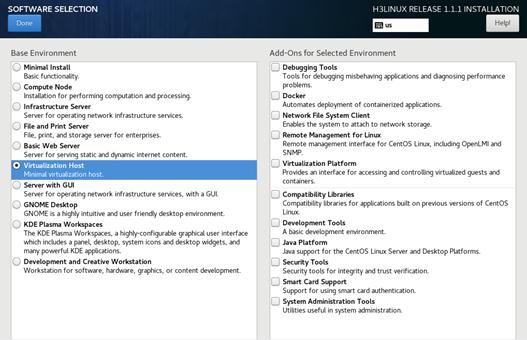
b. Click Done. Then, select Virtualization Host for software selection.
Figure 12 Configuring software
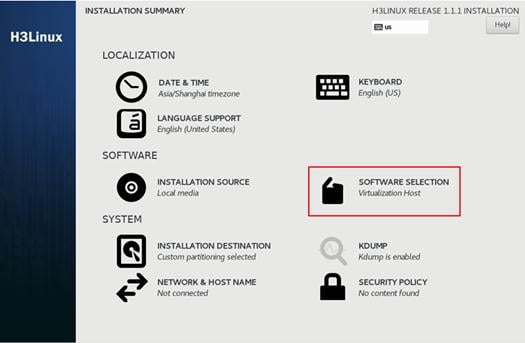
Figure 13 Software selection
c. Click Done. Then, configure the network and host name.
# Click NETWORK & HOST NAME.
Figure 14 Configuring the network and host name
# Select the NIC to be used and configure the host name. To submit the host name, click Apply next to the host name. Then, click Configure at the lower right corner of the page to configure network settings.
Figure 15 Configuring the host name

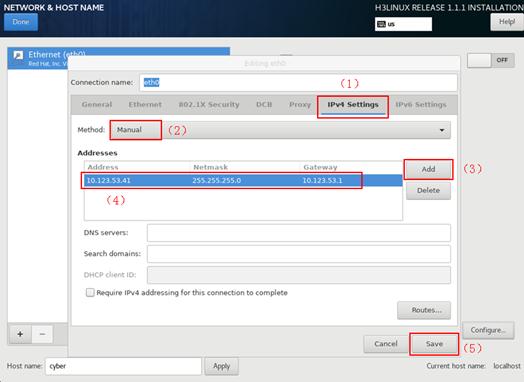
# Configure an IPv4 address for the NIC and save the configuration. Only IPv4 addresses are supported in the current software version. To ensure successful installation or successful login after installation, configure an unused IPv4 address and make sure the IPv4 address is valid.
To configure an IPv4 address for the NIC:
- Click the IPv4 Settings tab.
- Select manual from the method list.
- Click Add in the Addresses area.
- Enter an IPv4 address, mask, and gateway.
- Configure other parameters as needed.
- Click Save.
Figure 16 Configuring the network
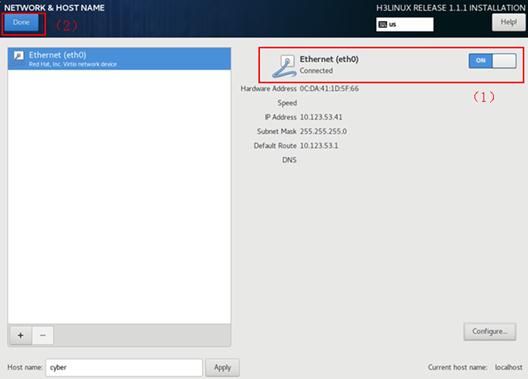
# Turn on the Ethernet network, and then click Done.
Figure 17 Turning on the Ethernet network
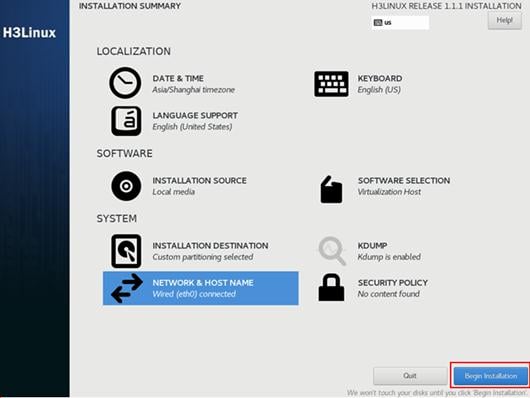
d. Click Begin Installation. During the installation, the server automatically reboots.
|
|
CAUTION: During the installation, do not create users. A violation causes installation abnormity or SSH start failure. Do not power off the server during the installation. |
Figure 18 Begin Installation page
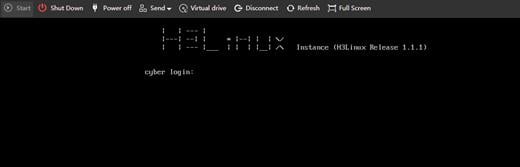
Installation completes after the following page appears. You can use the Chrome browser to access SMP.
Figure 19 Installation completion
The installation takes about 20 minutes. If the page in Figure 20 retains for more than 20 minutes, the webpage and the server CLI might be disconnected. To resolve this issue, double-click the webpage or click Refresh to refresh the page.
8. After SMP is installed completely, open the Chrome browser. Enter https://SMP-IP-address to open the login page of SMP.

If you cannot access SMP after SMP is installed, perform the following tasks to resolve the issue:
a. Verify the following items:
- Verify that the NIC and IP address settings are correct.
- Verify that the NIC is enabled as described in the installation procedure and the NIC is in up state.
- Verify that the server can access the network correctly and the configuration terminal (PC) and the server are reachable.
b. Reinstall SMP.
Installing H3C SecCenter SMP on the H3C CAS Virtualization Platform
This section uses the H3C CAS Virtualization Platform as an example to describe how to install H3C SecCenter SMP on a VM.
Adding a VM
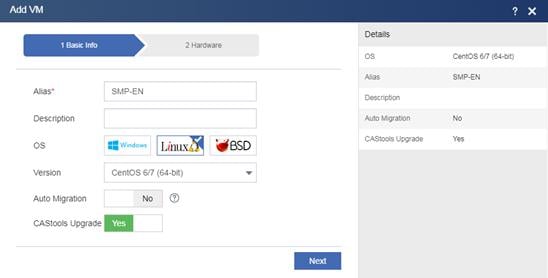
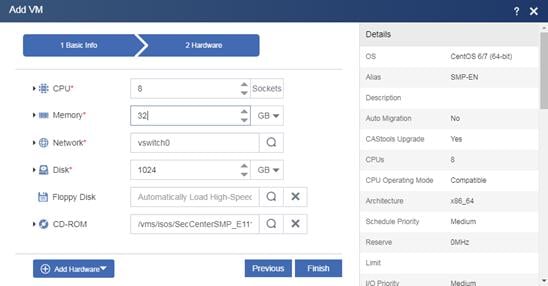
1. Connect to the H3C CAS Virtualization Platform and add a VM. Configure an alias for the VM, select Linux as the OS, and select 64-bit CentOS 7 as the version. Then, click the 2 Hardware tab to configure hardware information.
Figure 22 Configuring basic information
2. Configure hardware information. The minimum hardware requirements are 8 CPU cores, 32 GB memory, and 1024 GB disk space. You can expand the memory and disk space as needed. The disk stores log messages. A log message occupies 0.3 KB storage space in average.
Figure 23 Configuring hardware information

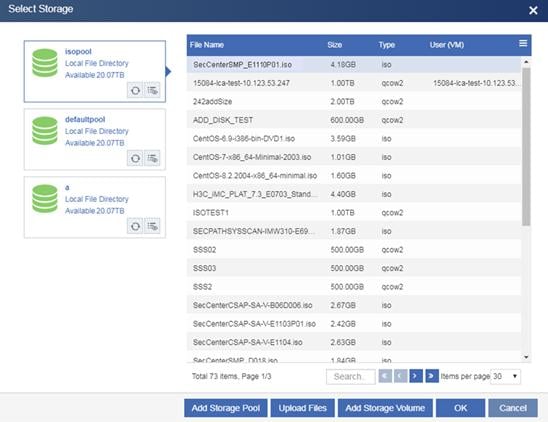
3. Click isopool and select the SMP image package. The package file name is in the format of SecCenterSMP_version-number.iso. If the SMP image package has been uploaded, you can select it directly from the file list and click OK. If the SMP image package has not been uploaded, first click Upload Files at the bottom of the page and go to the next step to upload the image package.
Figure 24 Selecting the SMP image package
4. Select an SMP image package and click Start to upload the package file to the cloud storage pool.
5. In the CD-ROM field, select the image package, and then click OK.
Figure 25 Selecting the image package from the CD-ROM list
6. Click Finish.
Installing SMP
1. Start the newly created VM, and click Console to configure SMP deployment settings.
Figure 26 Starting the VM
2. Install SMP on the VM in the same way SMP is installed on a server. For more information, see substeps b to d of step 7 in "Installing SMP."
Installing H3C SecCenter SMP on VMware virtualization platform
This section shows how to deploy H3C SecCenter SMP on VMware vSphere.
Preparing for installing SMP
Make sure the server where VMware vSphere is deployed has a minimum of 8 CPU cores, 32 GB memory, and 1 TB storage space.
Adding a VM
1. Log in to the VMware vSphere Client, enter the IP address, username, and password of the VMware vSphere Client, and then click Login.
Figure 27 VMware vSphere Client login interface

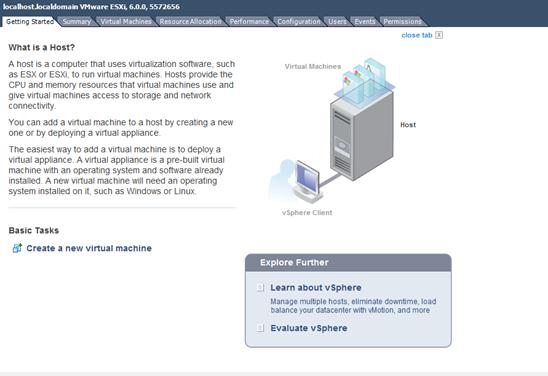
2. On the Getting Started tab, click Create a new virtual machine.
Figure 28 Getting Started tab
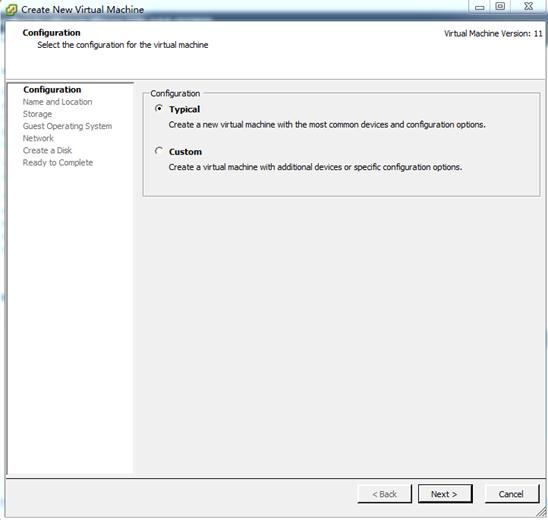
3. Select Typical, and then click Next. By default, Typical is selected.
Figure 29 Selecting the Typical configuration
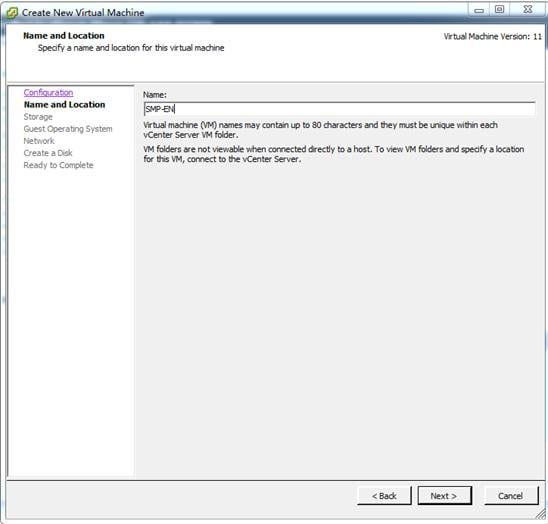
4. Enter a name for the VM. For example, enter name SMP-EN. Then, click Next.
Figure 30 Configuring a name for the VM
5. Configure storage, and then click Next. In this example, the default setting is used.
Figure 31 Configuring storage

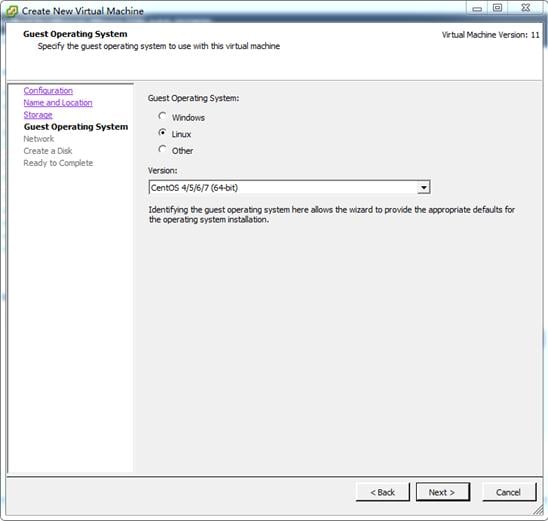
6. Select a guest operating system and a version, and then click Next.
Figure 32 Configuring the operating system
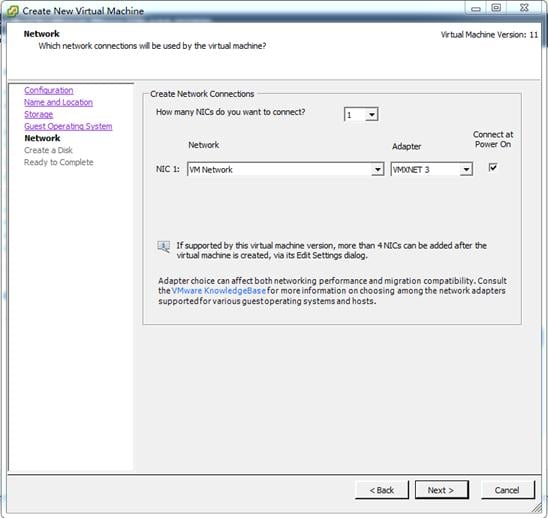
7. Configure the network, and then click Next. In this example, the default setting is used.
Figure 33 Configuring the network
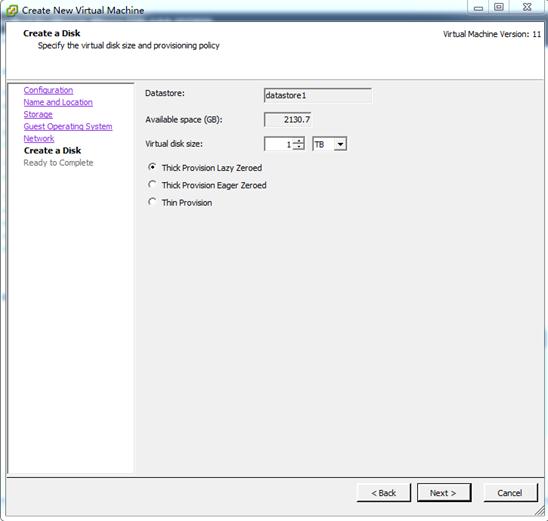
8. Configure disk settings, and then click Next. The virtual disk size cannot be smaller than 1 TB. Use the default settings for other parameters.
Figure 34 Configuring disk settings
9. Select Edit the virtual machine settings before completion, and then click Continue.
Figure 35 Select Edit the virtual machine settings before completion

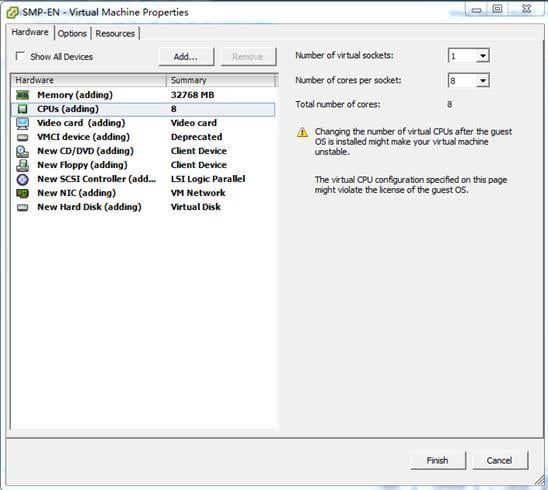
10. Set the memory size to 32 GB and the number of CPU cores to 8, and use the default settings for other parameters. Then, click Finish.
Figure 36 Setting the memory size
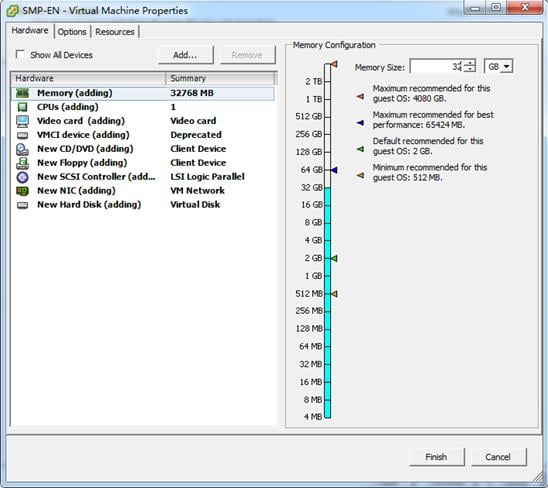
Figure 37 Setting the number of CPU cores
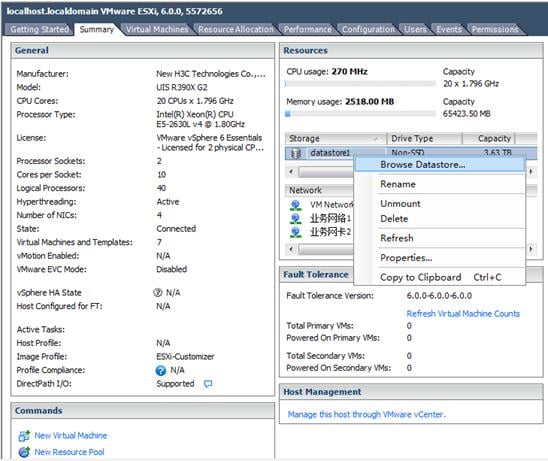
11. Select the newly added VM, and click the Summary tab. Then, right-click the database1 storage and click Browse Datastore.
Figure 38 Browsing Datastore
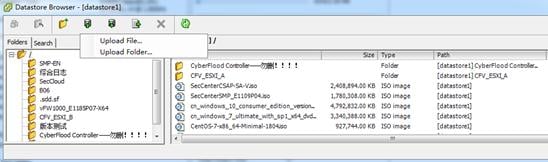
12. Upload SMP image package SecCenterSMP_version-number.iso.
Figure 39 Upload an SMP image package
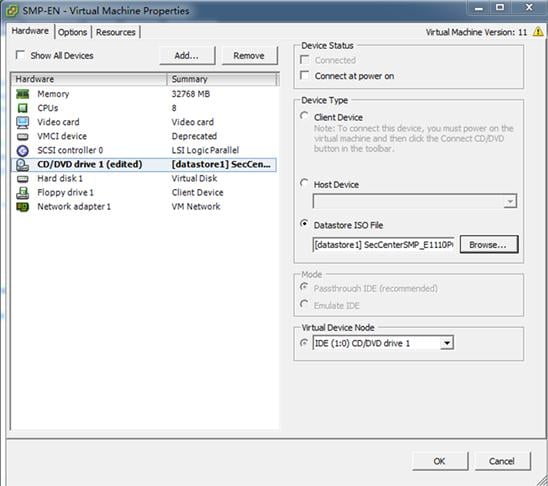
13. After the image package is uploaded, select VM SMP-EN, click Edit Settings, and then click the CD/DVD drive. Then, click Browse in the Datastore ISO File field and select the uploaded SMP image package. In the Device Status area, select Connect at power on and click OK.
Figure 40 Selecting a datastore ISO file
Installing SMP
1. Select the newly created VM. On the Getting Started tab, click Power on VM to start the VM.
2. Click the Console tab to configure SMP deployment settings. Install SMP on the VM in the same way SMP is installed on a server. For more information, see substeps b to d of step 7 in "Installing SMP."
Logging in to the Web interface of SMP
Registering and activating licenses
After SMP is installed, you must install the H3C SecCenter SMP Base Platform Software License to obtain the rights to access the Web interface of SMP.
License registration and activation tasks at a glance
To register and activate a license:
1. Purchase a software license certificate from an H3C official channel. A software license certificate contains a license key.
2. Obtain the device information file (also referred to as DID file).
3. Visit the H3C license management platform at http://www.h3c.com/en/Support/Online_Help/License_Service/ to apply for an activation file.
4. Install the activation file to SMP to activate the license.
Obtaining the device information file
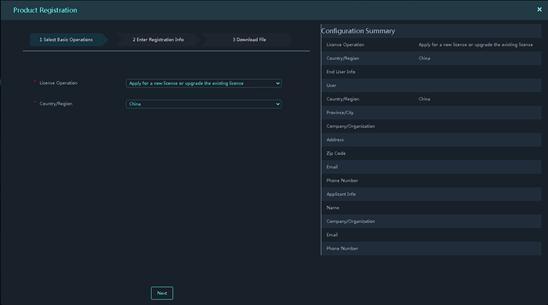
1. Open the login page of SMP, and click Product Registration in the lower right corner.
2. Select Apply for a new license or upgrade the existing license from the License Operation list, and select your country or region from the Country/Region list, and then click Next.
Figure 41 Product registration
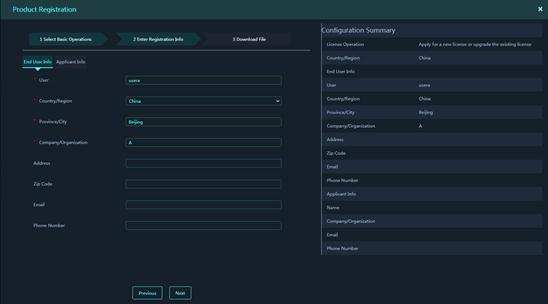
3. Configure information about the user that will use SMP. Then, click Next.
Figure 42 Configuring user information
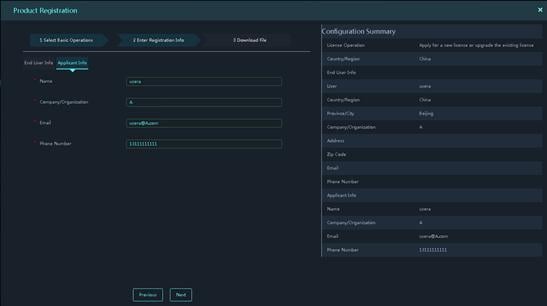
4. Configure the applicant information, and then click Next.
Figure 43 Configuring the applicant information
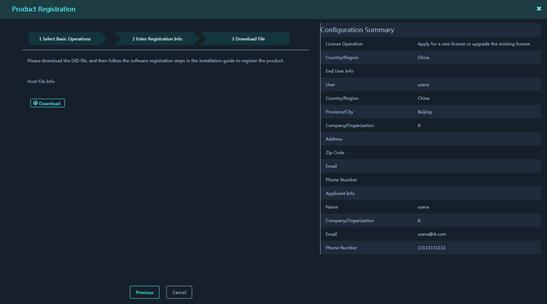
5. Click Download to download the device information file.
Figure 44 Downloading the device information file
Applying for an activation file
For more information, see H3C SecCenter CSAP Series License User Guide.
Activating the license
To install the activation file on SMP to activate the license:
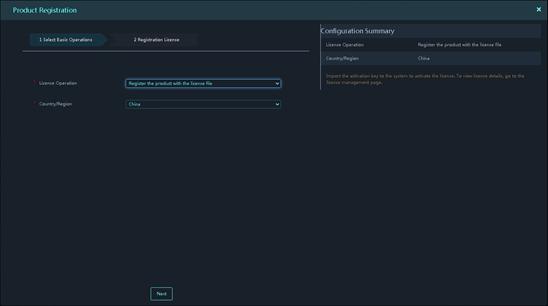
1. On the PC that acts as the configuration terminal, open the Chrome browser. Enter https://SMP-IP-address in the address bar and press Enter to open the login page of SMP. Then, click Product Registration.
2. On the Select Basic Operations tab, select Register the product with the license file from the License Operation list, and then click Next.
Figure 45 Selecting a license operation
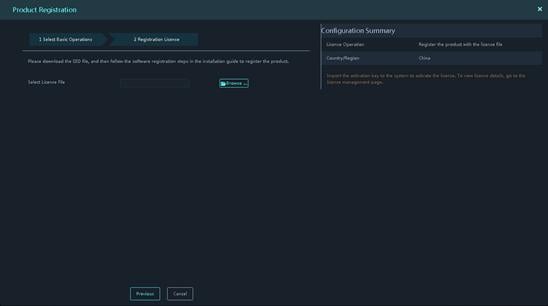
3. Upload the activation file.
Figure 46 Uploading the activation file
Log in to the Web interface for the first time
You can use a predefined user account to log in to the Web interface of SMP. As a best practice, use the super administrator account to log in to the Web interface for the first time. Figure 47 shows the predefined user accounts for Web login. As a best practice, change the default passwords of the accounts as soon as possible after you log in to the Web interface.
Figure 47 Predefined account information for Web login
|
Role |
Username/Password |
Privileges |
|
System administrator |
sysAdmin/sysAdmin |
View and configure system settings. |
|
Super administrator |
admin/admin@admin |
Have all privileges. The information security administrator can use the super administrator account to perform routine information security management and maintenance. |
|
Business administrator |
buzAdmin/buzAdmin |
View reports of various security services. |
|
Audit administrator |
auditAdmin/auditAdmin |
View operation records of other users and audit the operations. |
To log in to the Web interface of SMP:
1. On the PC that acts as the configuration terminal, open the Chrome browser, enter https://SMP-IP-address in the address bar, and then press Enter.
2. On the page that opens, enter a username and password and click Login.
