- Table of Contents
- Related Documents
-
| Title | Size | Download |
|---|---|---|
| 01-text | 306.68 KB |
Contents
Approve password requests from the Cloudnet platform
View password request approval records
Edit, clone, or delete a dashboard
PPSK authentication
About PPSK authentication
Private pre-shared key (PPSK) authentication uses a unique password for each client and generates binding entries between client MAC addresses and PPSK passwords at client association. Compared with PSK authentication that applies one password to all clients, PPSK authentication provides enhanced security.In PPSK authentication, the IT administrator manages all binding entries.
Configure PPSK authentication
Enable PPSK globally
1. On the top navigation bar, select Services > PPSK.
2. From the left navigation pane, select Settings.
3. Enable PPSK in the Global Settings section.
PPSK uses a pre-configured password for authentication. If PPSK is disabled, the method is not available.
4. To view wireless services provided by a device, click View Wireless Services.
Enable SSID-based PPSK
For PPSK authentication to take effect, you must enable it both globally and for specific SSIDs.
To enable PPSK for specific SSIDs:
1. On the top navigation bar, select Services > PPSK.
2. From the left navigation pane, select Settings.
3. In the SSID-Based PPSK Authentication section, select the target SSIDs and then click On.
On the same device, you can enable PPSK for a maximum of 10 SSIDs.
Specify passwords for users
PPSK authentication allows a user to perform authentication by using a specified password. This section describes how to specify passwords for users.
Restrictions and guidelines
You can specify passwords for users at user creation or from the Services > PPSK > Passwords page. This section specifies a password at user creation.
You can specify a maximum of 10 passwords for each user. If you specify a password for a nonexistent user from the Services > PPSK > Passwords page, the system creates the user.
Procedure
1. On the top navigation bar, select Services > PPSK.
2. From the left navigation pane, select Users.
3. Click Add User, Bulk Add, Add Superuser, or Import, and then configure parameters as needed.
This section adds a single user.
Figure 1 Adding a single user
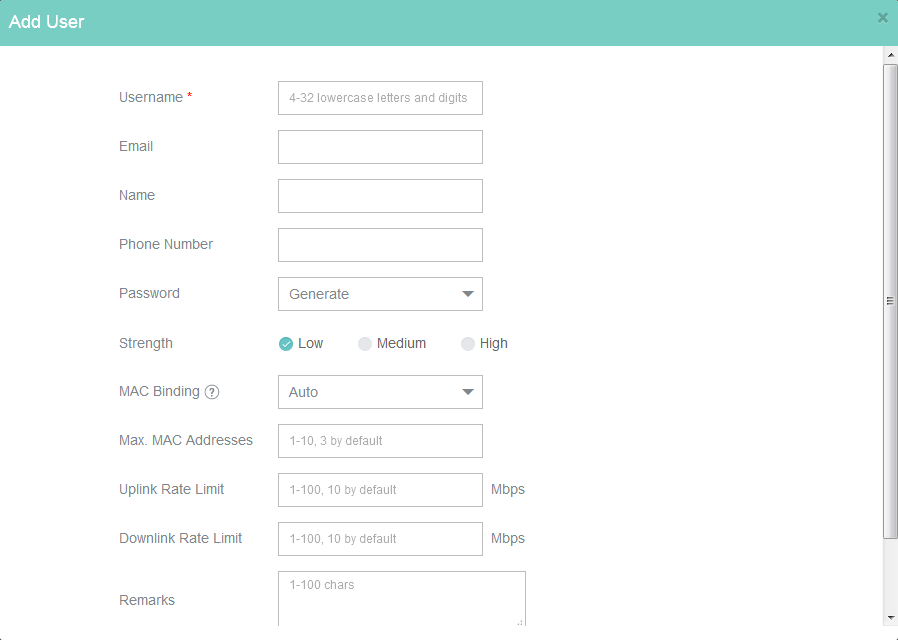
4. Specify the username, email address, name, and phone number as needed.
5. Specify the password generation method.
¡ Generate—Allows the system to generate a password based on the specified password strength.
¡ Input—Allows you to specify a password manually.
6. Specify the MAC address binding method.
¡ Auto—In this mode, the system can bind 1 to 10 MAC addresses to a password. By default, the number is 3.
¡ Manual—In this mode, you can bind only one MAC address to a password.
7. Specify the limited uplink rate, limited downlink rate, and a user description as needed.
8. Click OK.
Approve password requests
Approve password requests from the Cloudnet platform
1. On the top navigation bar, select Services > PPSK.
2. From the left navigation pane, select Password Requests.
The list that opens displays password requests that have not been processed.
3. Perform the following tasks to approve or reject password requests:
¡ To approve or reject a single request, click Approve or Reject for the request in the Actions column.
¡ To approve or reject multiple requests in bulk, select the target requests and then click Bulk Approve or Bulk Reject.
View password request approval records
1. On the top navigation bar, select Services > PPSK.
2. From the left navigation pane, select Approval Records.
The page that opens displays the password request approval records.
The password approval records cannot be deleted.
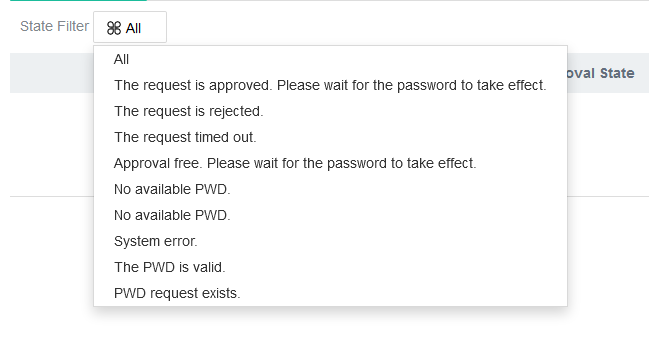
3. To filter the records by approval state, select a state from the State Filter list. Available options include the following:
¡ All.
¡ The request is approved. Please wait for the password to take effect.
¡ The request is rejected.
¡ The request timed out.
¡ Approval free. Please wait for the password to take effect.
¡ No available PWD for the current account.
¡ No available PWD in the site.
¡ System error.
¡ The password is invalid.
¡ PWD request exists.
Figure 2 Filtering password request approval records by approval state
Configure advanced settings
Print the password list
1. On the top navigation bar, select Services > PPSK.
2. From the left navigation pane, select Passwords.
3. Click Print.
4. Select a printer, specify the layout, color, paper size, quality, and zoom settings, and then click Print.
Custom dashboard
About custom dashboard
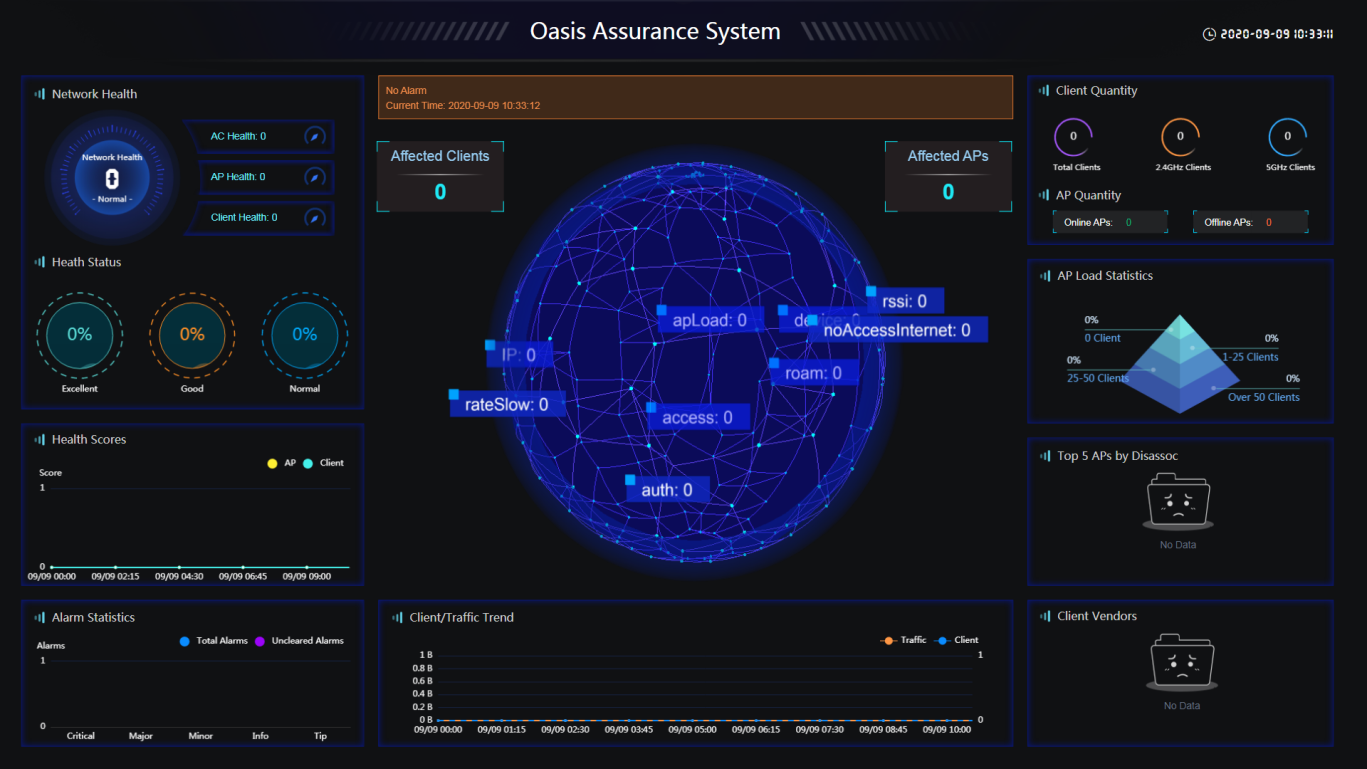
Custom dashboard service enables you to add network statistical graphs to the monitoring screen to view the most recent network information such as network health, issue distribution, AP quantity, AP load statistics, client access trend, client/traffic trend, and alarm content.
Each account can create up to 10 dashboards, and the parent account can view the dashboards created by subaccounts.
Figure 3 Dashboard
Create a dashboard
1. On the top navigation bar, select Services > Custom Dashboard.
You are placed on the My Dashboards page.
2. Click Create Dashboard.
3. Select the assurance template or the empty template, and then click Create Dashboard.
4. Specify a name for your dashboard and then click OK.
The dashboard customization page opens. The page contains the tile area, services area, dashboard area, and dashboard/tile settings area from left to right, and a tool bar at the top.
5. Add tiles to the dashboard. You can put custom contents on your dashboard by using tiles of different types, such as services, text, picture, time, and assistant.
6. Manage tiles in the Tile area.
¡ To adjust the display order of a tile, select the tile, and then select an action. The tile on top is displayed the first on your dashboard.
¡ To
hide or display a tile, click the ![]() icon to the left of the tile.
icon to the left of the tile.
¡ To view the data source of a tile, click the tile.
¡ To
remove a tile from your dashboard, select the tile, and then click the ![]() icon.
icon.
7. Manage the layout in the Dashboard area.
¡ To resize a tile, click on the tile, move your mouse pointer over one of the handles and then drag your mouse.
¡ To adjust the position of a tile, select the tile, and then press the arrow keys on your keyboard.
¡ To adjust the display order or remove a tile from your dashboard, right-click on the tile, and then select an action.
¡ To create a vertical or horizontal guide, click on a ruler.
¡ To move a guide to the desired position, drag the guide.
¡ To delete a guide, double-click the guide.
¡ To
show or hide a guide, click the ![]() icon at the intersection of the rulers in the upper-left corner.
icon at the intersection of the rulers in the upper-left corner.
8. To configure dashboard settings, click on a blank area on your dashboard. The Dashboard Settings area is displayed to the right of the page. The settings apply to all tiles on your dashboard.
¡ On the Style tab, you can configure the dashboard theme, title style, tile title, background picture, and dashboard cover. Only .jpg, .png, and .jpeg files are supported and the file size cannot exceed 2 MB.
¡ To configure data source settings such as time span and refresh interval, click the Data tab. To restore the default settings for all tiles on your dashboard, click Restore Default Settings.
9. To configure settings for a tile, click a tile in the Tile or Dashboard area. The Tile Settings area is displayed to the right of the page.
¡ On the Style tab, you can adjust the tile title name, title alignment, font size, tile position, and title display style, depending on the tile you select.
¡ On the Data tab, you can select devices, set a time span, and set a refresh interval, depending on the tile you select.
10. To preview your dashboard, click Save & Preview in the upper right corner after arranging the tiles on the dashboard.
To view the dashboard in full screen mode, press a shortcut key on your keyboard, for example, F11, depending on the operating system or browser you use.
Edit, clone, or delete a dashboard
1. On the top navigation bar, select Services > Custom Dashboard.
You are placed on the My Dashboards page.
2. Hover over the target dashboard to view, clone, or delete the dashboard, add remarks for the dashboard, or edit the dashboard name.
