- Table of Contents
-
- 13-Network Management and Monitoring Configuration Guide
- 00-Preface
- 01-System Maintenance and Debugging Configuration
- 02-NQA Configuration
- 03-NTP Configuration
- 04-IPC Configuration
- 05-SNMP Configuration
- 06-RMON Configuration
- 07-CWMP Configuration
- 08-Sampler Configuration
- 09-Mirroring Configuration
- 10-Protocol Packet Statistics Configuration
- 11-sFlow Configuration
- 12-Information Center Configuration
- 13-Packet Capture Configuration
- Related Documents
-
| Title | Size | Download |
|---|---|---|
| 13-Packet Capture Configuration | 71.45 KB |
Configuring the packet capture function
Displaying and maintaining packet capture
Packet capture configuration example
The packet capture feature facilitates network problem identification. Packets captured are stored in the packet capture buffer on the device. You can display the packets at the CLI, or export them to a .pcap file and analyze them by using packet analysis software such as Ethereal or Wireshark.
Configuring the packet capture function
When you configure this function, follow these guidelines:
· To capture IPv6 packets based on IPv6 ACLs, execute the acl ipv6 enable command first. For more information about this command, see ACL and QoS Command Reference.
· To release system resources after finishing packet capture, use the undo packet capture command to disable this function.
To configure the packet capture function:
|
Step |
Command |
Remarks |
|
1. Set packet capture parameters. |
packet capture { acl { acl-number | ipv6 acl6-number } | buffer-size size | length capture-length | mode { circular | linear } }* |
Optional. |
|
2. Enable packet capture. |
· (Method 1) Start packet capture immediately: · (Method 2) Configure a packet capture
schedule: |
Use either method. You can set packet capture parameters at the same time when you use method 1. By default, packet capture is disabled, and no packet capture schedule is configured. If you use method 1, the existing packet capture schedule is invalid. |
|
3. Stop packet capture. |
packet capture stop |
Optional. Stop packet capture before you display, save, or clear the buffered contents. The device automatically stops packet capture when: · The packet capture function operates in linear mode, and the packet capture buffer is full. · The number of packets captured exceeds the upper limit. · The duration of the packet capture process exceeds the upper limit. |
|
4. Save the contents in the packet capture buffer. |
packet capture buffer save [ filename ] |
Optional. Save the file with a filename in .pcap format. |
Displaying and maintaining packet capture
|
Task |
Command |
Remarks |
|
Display the current packet capture status. |
display packet capture status |
Available in any view. |
|
Display the buffered contents. |
display packet capture buffer [ start-index [ end-index ] ] [ length display-length ] |
Available in any view. |
|
Clear the buffered contents. |
reset packet capture buffer |
Available in user view. |
Packet capture configuration example
Network requirements
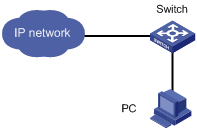
As shown in Figure 1, the switch captures the packets from 192.168.1.0/24, and saves the result in a .pcap file so that the PC can download the file for packet analysis.
Configuration procedure
1. Enable the packet capture function on the switch:
# Create an ACL rule for IPv4 basic ACL 2000 to permit packets with a source address in 192.168.1.0/24.
<Switch> system-view
[Switch] acl number 2000
[Switch-acl-basic-2000] rule permit source 192.168.1.0 0.0.0.255
[Switch-acl-basic-2000] quit
[Switch] quit
# Configure the switch to capture packets based on ACL 2000, and start packet capture immediately.
<Switch> packet capture start acl 2000
# Display the packet capture status.
<Switch> display packet capture status
Current status : In process
Mode : Linear
Buffer size : 2097152 (bytes)
Buffer used : 1880 (bytes)
Max capture length : 68 (bytes)
ACL information : Basic or advanced IPv4 ACL 2000
Schedule datetime: Unspecified
Upper limit of duration : Unspecified (seconds)
Duration : 13 (seconds)
Upper limit of packets : Unspecified
Packets count : 10
The output shows that packet capture is ongoing.
2. Save the packet capture result:
# Stop packet capture.
<Switch> packet capture stop
# Save the contents in the packet capture buffer to file test.pcap.
<Switch> packet capture buffer save test.pcap
# Display the contents and file information in the current directory.
<Switch> dir
Directory of flash:/
0 -rw- 1860 Sep 21 2012 12:52:58 test.pcap
1 drw- - Apr 26 2012 12:00:38 seclog
2 -rw- 10479398 Apr 26 2012 12:26:39 logfile.log
The output shows that the buffered contents are successfully saved.
# Stop packet capture, and release system resources after packet capture is completed.
<Switch> undo packet capture
The PC can access the switch through FTP or TFTP, save file test.pcap, and analyze the packets through packet analysis software such as Wireshark.