- Table of Contents
- Related Documents
-
| Title | Size | Download |
|---|---|---|
| 01-Text | 1.70 MB |
Installing the operating system
Preparing the installation disk
Collecting the installation information of the system
Installing the MariaDB database
Upload the iMC installation package and check the installation environment.
Introduction
Intelligent Management Center (iMC) can be installed on the NingOS V3 operating system with the MariaDB 10.x.x database. This document guides you to quickly configure the NingOS operating system and install and configure the MariaDB database.
This document uses the NingOS V3 (1.0.2403) operating system as an example to describe the installation and configuration procedures of the NingOS operating system and MariaDB database. If you are using a different version, the procedures might differ slightly.
|
|
NOTE: iMC E0710 and later versions can be installed on the NingOS operating system. |
Installing the operating system
Preparing for installation
Hardware requirements
For the minimum hardware requirements of iMC PLAT, see Table 1. To install other service components, see the corresponding release notes to obtain the final hardware requirements.
|
|
CAUTION: · This document installs iMC to the root directory as an example. To install iMC on a different partition, make sure the partition meets the hardware requirements as shown in Table 1. · If the database is deployed on the same server as iMC, the iMC server memory equals the memory used by iMC, the memory used by the database, and the memory used by the operating system. · If the database is deployed on a different server than iMC, the iMC server memory equals the memory used by iMC and the memory used by the operating system. The database server memory equals the memory used by the database and the memory used by the operating system. · Prepare the operating system memory based on different operation requirements. Without specific requirements, allocate at least 4G of memory to the operating system. |
|
Management scale |
Minimum hardware requirements |
|||||||
|
Node quantity |
Collectors (when the number of collectors is 0 to 5k, no or few performance monitors are enabled) |
Online operators |
CPU (frequency≥ 2.5GHz) |
Memory used by iMC |
Memory used by database |
Java heap size |
Disk space for software installation (imcInstallDir) |
Disk size for running iMC (imcDataDir) |
|
0 to 200 |
0 to 5K |
20 |
4-core CPU |
12GB |
6GB |
4GB |
3GB |
100GB |
|
5K to 50K |
10 |
200GB |
||||||
|
200 to 1K |
0 to 10K |
30 |
6-core CPU |
16GB |
8GB |
6GB |
3GB |
100GB |
|
10K to 100K |
10 |
200GB |
||||||
|
1K to 2K |
0 to 20K |
30 |
8-core CPU |
24GB |
12GB |
8GB |
4GB |
100GB |
|
20K to 200K |
10 |
200GB |
||||||
|
2K to 5K |
0 to 30K |
40 |
12-core CPU |
32GB |
16GB |
12GB |
5GB |
120GB |
|
30K to 300K |
20 |
250GB |
||||||
|
5K to 10K |
0 to 40K |
50 |
16-core CPU |
64GB |
32GB |
16GB |
7GB |
150GB |
|
40K to 400K |
20 |
300GB |
||||||
|
10K to 15K |
0 to 40K |
50 |
24-core CPU |
80GB |
40GB |
24GB |
10GB |
200GB |
|
40K to 400K |
20 |
600GB |
||||||
|
|
CAUTION: To enhance the I/O performance of the server, follow these guidelines: · If the number of collectors is 100K to 200K, configure more than two disks and a RAID controller with at least 256MB cache. · If the number of collectors is 200K to 300K, configure more than two disks and a RAID controller with at least 512MB cache. · If the number of collectors is 300K to 400K, configure at least four disks and a RAID controller with at least 1GB cache. As a best practice, configure RAID level 5, which requires three or more disks. If more than four disks are used, use RAID level 0+1 as a best practice. |
Preparing the installation disk
Prepare the complete installation software for NingOS V3.
Collecting the installation information of the system
During the installation process, the system will prompt you to enter information including the host name, IP address, and network information of the installation host. You can obtain the IP address and network information of the installation host from the network administrator of the host.
Procedure
Boot the host from the NingOS installation CD. Then, the initial installation window of NingOS opens, as shown in Figure 1.
Figure 1 Initial installation window
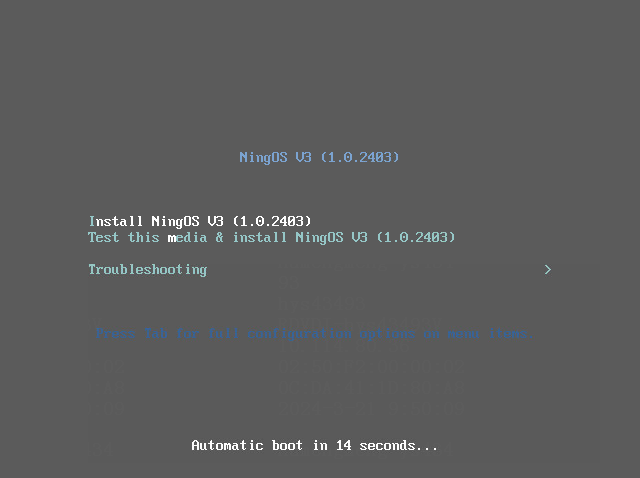
Select the Install NingOS V3 option by using the up and down keys on the keyboard, and then press Enter to access the main graphical installation window.
This section only describe pages that require special attention. For pages not mentioned, use the default settings.
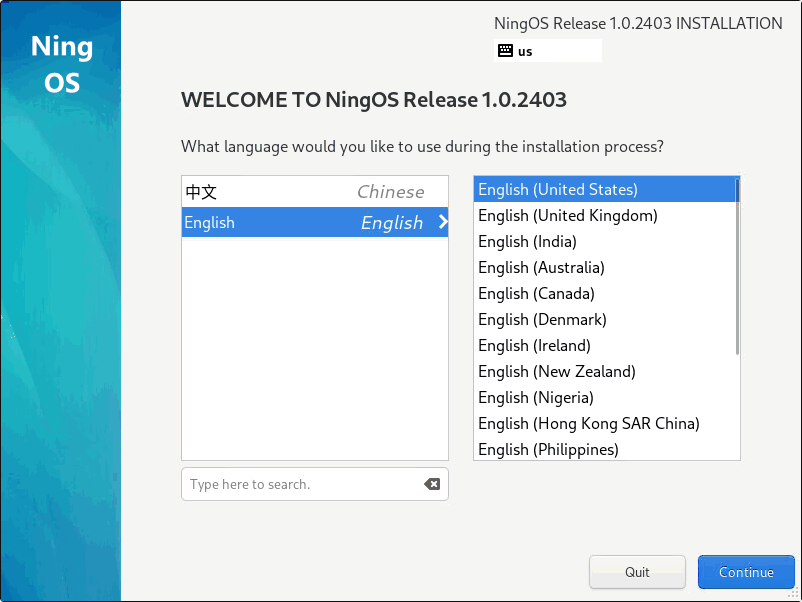
1. Access the page for selecting the language used by the installation wizard, and select English (United States) as shown in Figure 2. Then, click Continue.
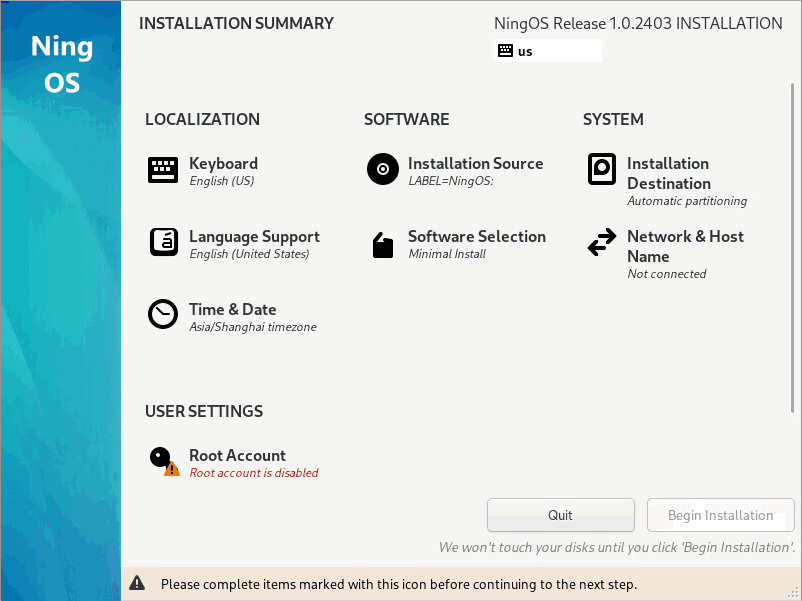
2. Access the INSTALLATION SUMMARY page, as shown in Figure 3. Set the required parameters, and use the default settings for the other parameters.
3. Select the Software Selection option to access the SOFTWARE SELECTION page, select the Server option in the Base Environment area, and select the following additional software products to be installed:
¡ Network Servers
¡ Remote Management for Linux
¡ xfce-desktop
¡ Development Tools
¡ System Tools
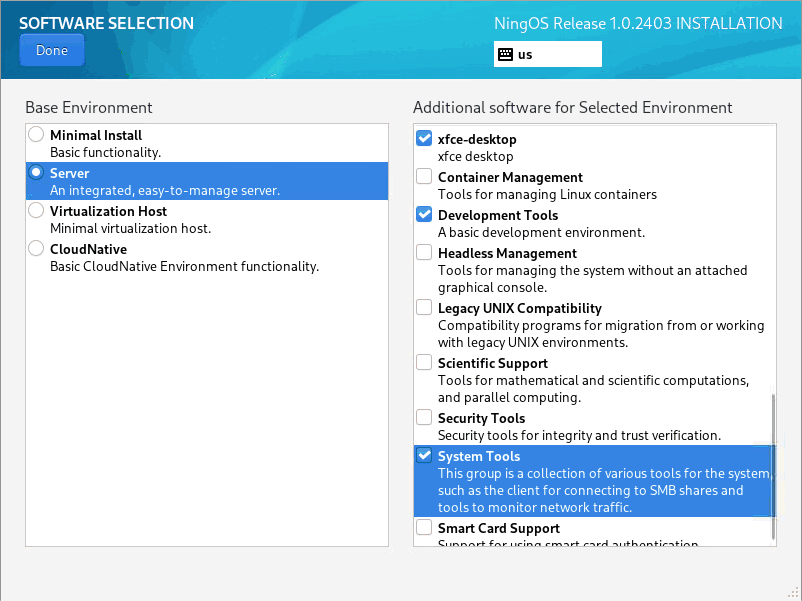
As shown in Figure 4 and Figure 5, you can also select additional software products to be installed as needed. Click Done to return to the INSTALLATION SUMMARY page.
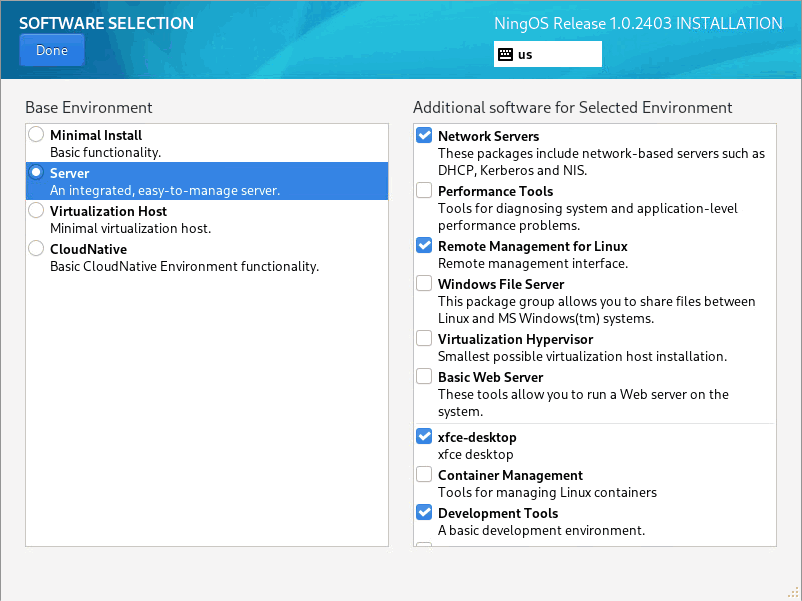
Figure 5 Software selection (continued)
4. Select the Installation Destination option to access the INSTALLATION DESTINATION page. In the Storage Configuration area, select the Custom option, as shown in Figure 6. Click Done to access the MANUAL PARTITIONING page, as shown in Figure 7. Then, click the Click here to create them automatically link.
Figure 6 Selecting the installation destination
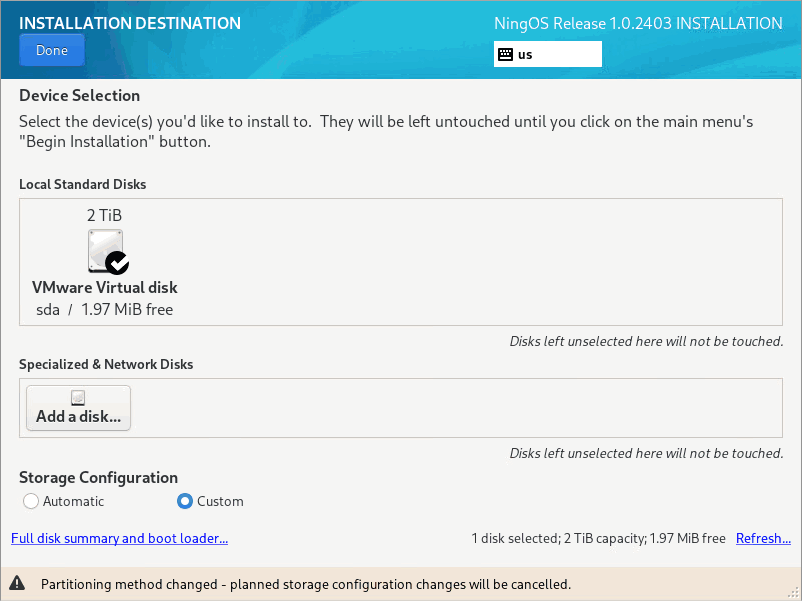
Figure 7 Manual partitioning 1
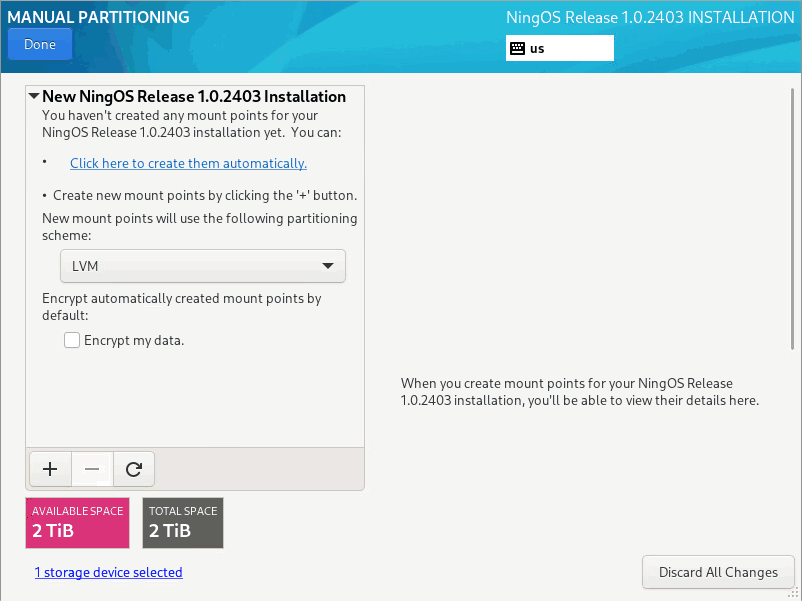
This section describes how to manually partition the disk when installing iMC to the root directory.
|
|
CAUTION: To install iMC on another partition, make sure the partition meets the hardware requirements. For more information about hardware requirements, see Hardware requirements. As a best practice, reserve at least 100GB for the root partition. |
a. As shown in Figure 8, select the /home partition and click — to delete the /home partition.
Figure 8 Manual partitioning 2

b. Select the /var/log partition and click — to delete the /var/log partition, as shown in Figure 9.
Figure 9 Manual partitioning 3
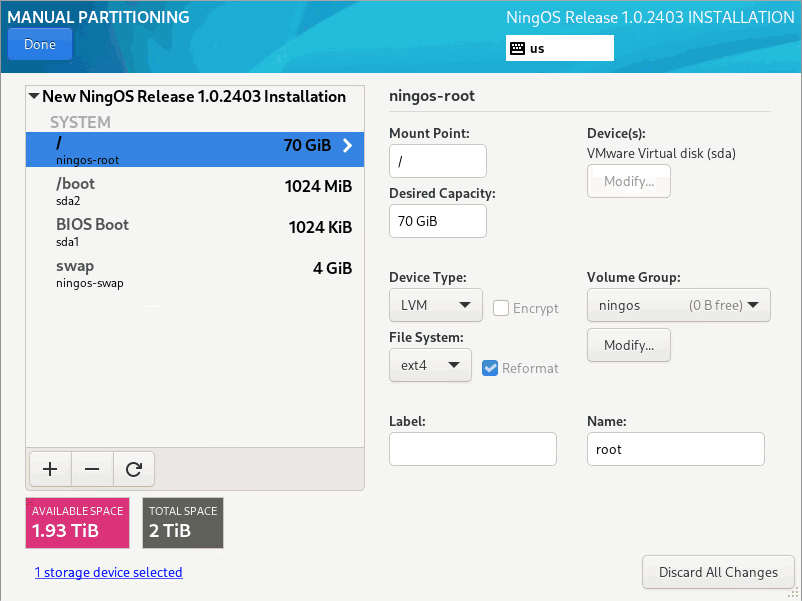
c. Select the / partition, and set the desired capacity. As a best practice, add all remaining available space to the root partition. Click Done. Then, the SUMMARY OF CHANGES window opens, as shown in Figure 10. Click Accept Changes to return to the INSTALLATION SUMMARY page.

5. Select the Network & Host Name option to access the NETWORK & HOST NAME page. Select a NIC, and click Configure. Click the IPv4 Settings tab, and select the Manual option from the Method list. Click Add, and configure an IPv4 address as shown in Figure 11.

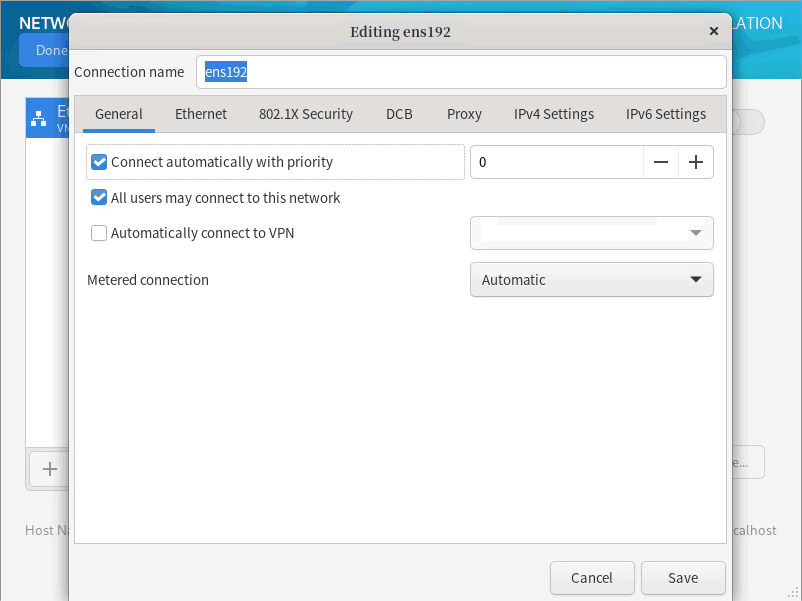
6. Click the General tab, and select the Connect automatically with priority option as shown in Figure 12. Then, click Save to save the configuration.
Figure 12 Editing the network and host name
7. On this page, configure the host name as needed in the bottom left corner. In this example, configure the host name as iMCServer, and then click Apply as shown in Figure 13. Then, click Done to return to the INSTALLATION SUMMARY page.
Figure 13 Setting the host name

8. Select the Root Account option to access the ROOT ACCOUNT page. Select the Enable root account option, and set the root user password as shown in Figure 14. Then, click Done to return to the INSTALLATION SUMMARY page.
Figure 14 Setting the root account

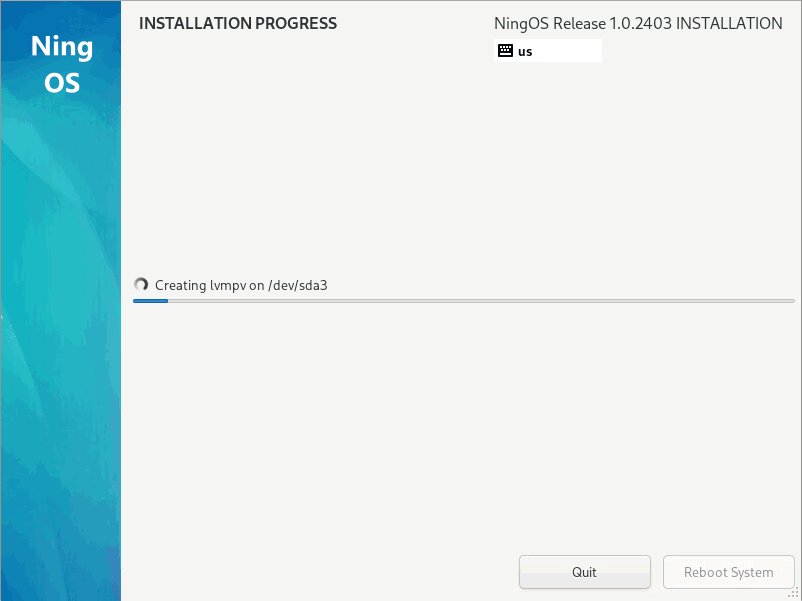
9. On the INSTALLATION SUMMARY page, click Begin Installation as shown in Figure 15 to access the INSTALLATION PROGRESS page, as shown in Figure 16.
Figure 15 Beginning installation
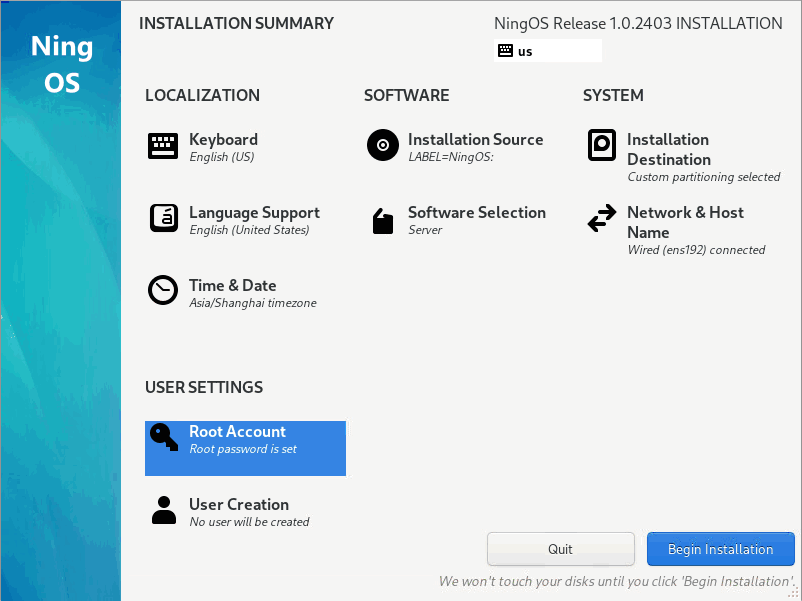
Figure 16 Installation progress
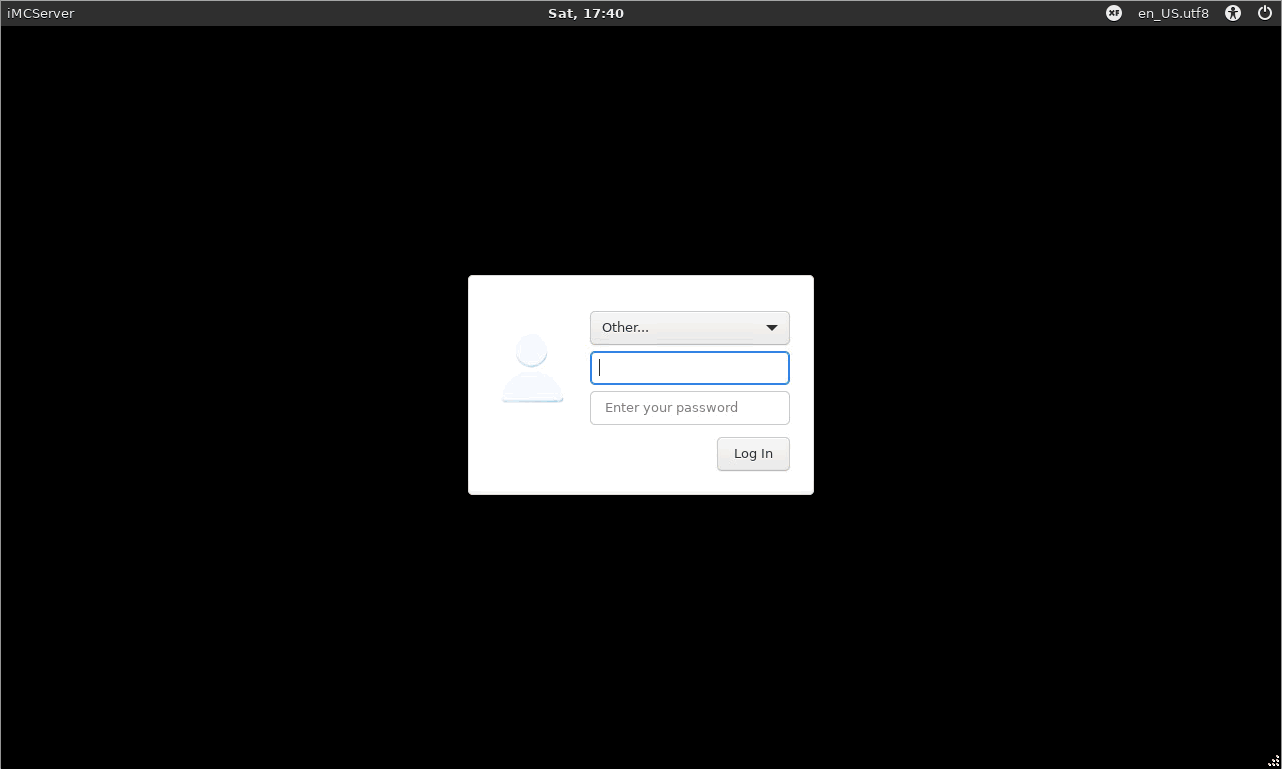
10. After the installation is complete, enter the root password to log in to the system, as shown in Figure 18.
Figure 17 Entering the root password
Installing the MariaDB database
To ensure the correct installation and operation of iMC, log in to the operating system as the root user after installing the Linux system, and perform the following tasks. This example uses the init_environment_for_NingOS_v1.0.zip toolkit as an example. If you are using a different version, the configuration procedure is similar.
|
|
TIP: · Before you start configuration, make sure the ISO package of NingOS V3 has been loaded in the CD-ROM drive. For how to identify whether the NingOS V3 ISO package has been loaded in the CD-ROM drive, see "What should I do when the "ERROR: no media found on /dev/cdrom. please ensure the CDROM is available" error is displayed?." · You can obtain the toolkit on the download page for this deployment guide. For more information, see "How can I obtain the required toolkit on the whole book download page?." |
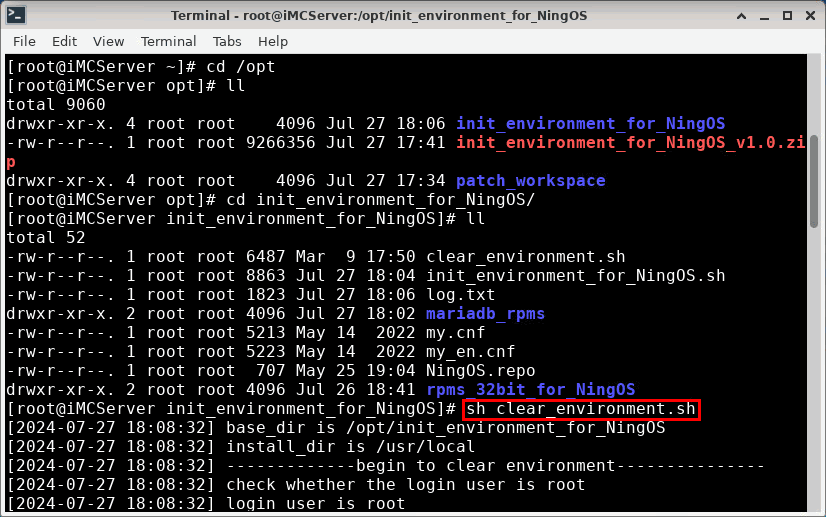
1. Upload the init_environment_for_NingOS_v1.0.zip toolkit to the /opt/ directory on the server, and execute the unzip init_environment_for_NingOS_v1.0.zip command to decompress the toolkit, as shown in Figure 19.
[root@iMCServer ~]# cd /opt
[root@iMCServer opt]# ll
[root@iMCServer opt]# unzip init_environment_for_NingOS_v1.0.zip
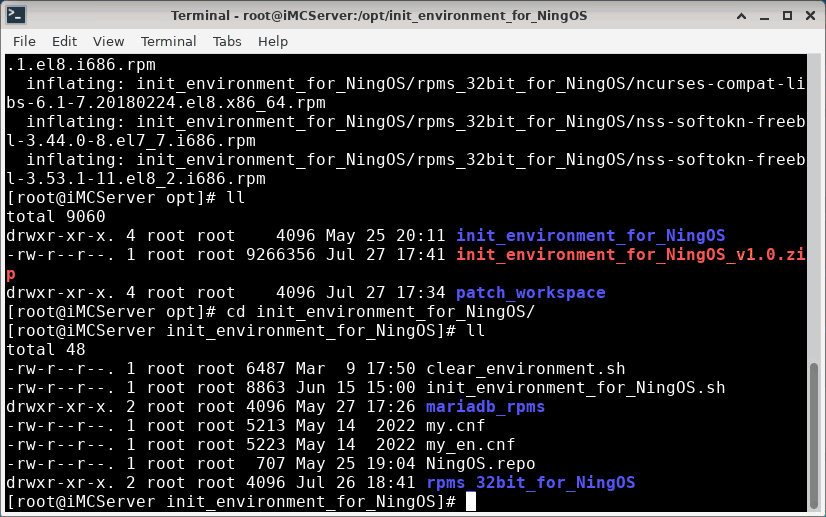
[root@iMCServer opt]# cd init_environment_for_NingOS/
[root@iMCServer init_environment_for_NingOS]# ll
Figure 19 Uploading and decompressing the toolkit
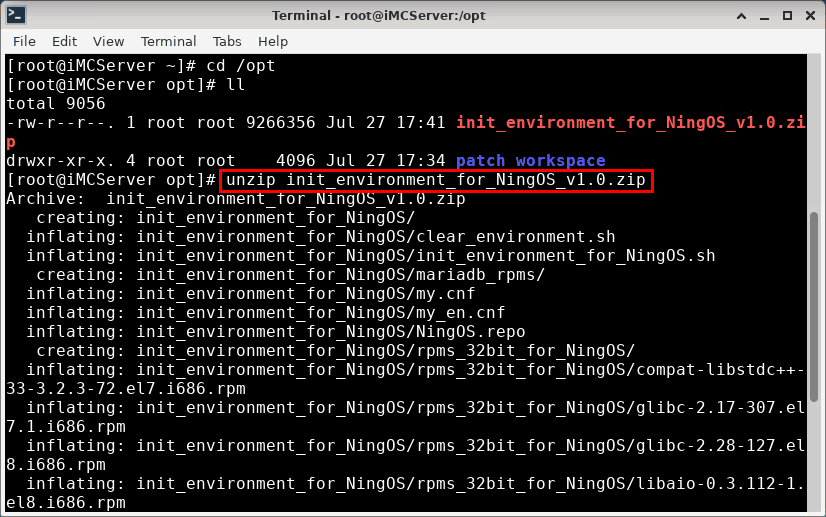
Figure 20 Viewing the contents of the toolkit
2. (Optional.) To install a version of the MariaDB database rather than that shipped with the NingOS operating system, follow the steps in "How can I install a version of the MariaDB database rather than that shipped with the NingOS operating system?."
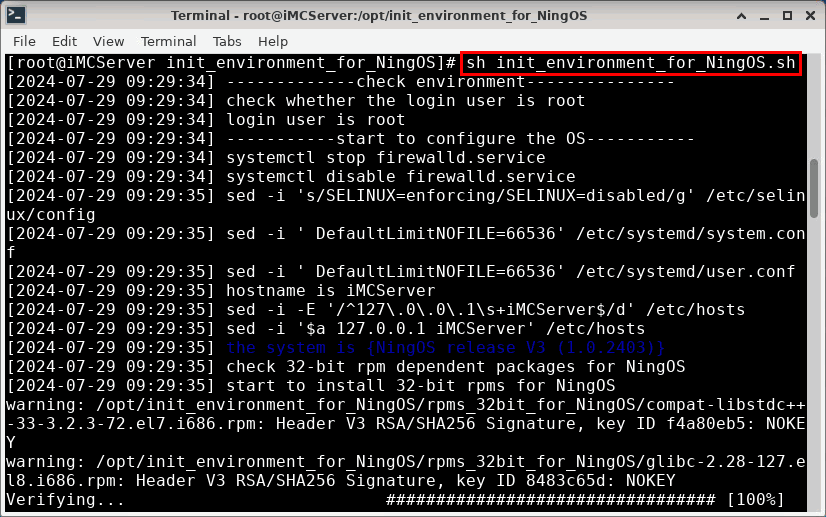
3. Execute the sh init_environment_for_NingOS.sh script to configure the operating system and install and configure the database, as shown in Figure 21.
[root@iMCServer init_environment_for_NingOS]# sh init_environment_for_NingOS.sh
Figure 21 Executing the init_environment_for_NingOS.sh script
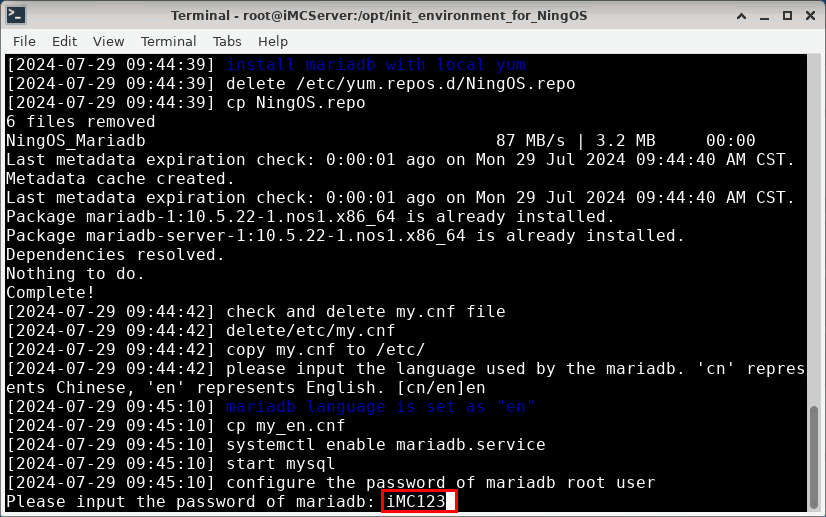
4. Set the language for the database as prompted: cn for Chinese and en for English. In this example, select en to install the database in English, as shown in Figure 22.
Figure 22 Selecting the database language

5. Configure the login password for the database root user as prompted. In this example, configure the login password for the database root user as iMC123, as shown in Figure 23.
|
|
TIP: Make sure the password does not contain the characters `’”!()&|\$;<>/^, spaces, or tabs. If you cannot do that, the iMC installation check will fail. |
Figure 23 Setting the database login password
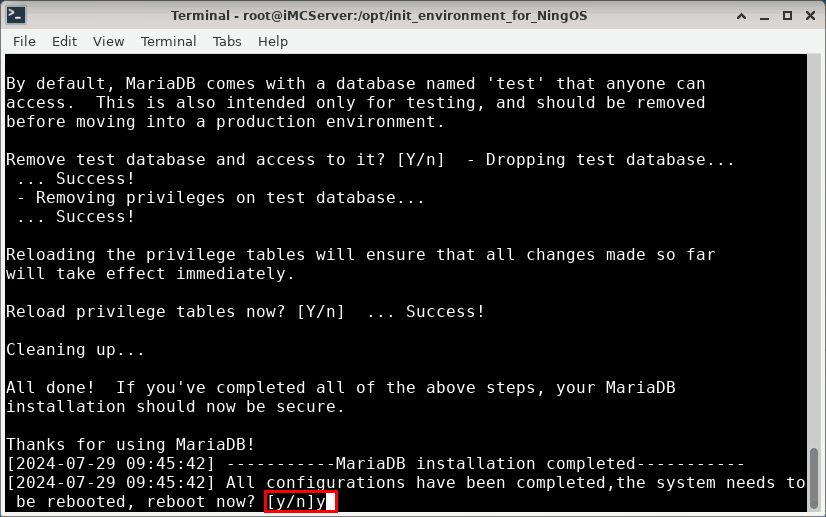
6. Up to this point, all configurations for the operating system and database have been completed. Restart the operating system as prompted. Then, you can directly install iMC.
Figure 24 Restarting the operating system as prompted
Installing iMC
Preparing for installation
Upload the iMC installation package and check the installation environment.
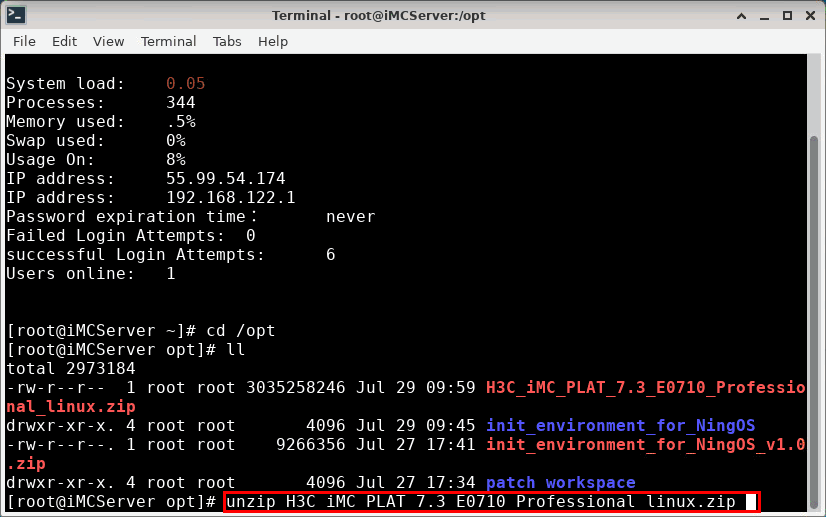
1. Upload the iMC installation package compatible with the operating system to the /opt directory in the operating system. In this example, use the H3C_iMC_PLAT_7.3_E0710_Professional_linux.zip installation package.
2. Decompress the installation package and view the files in the iMC folder, as shown in Figure 25 and Figure 26.
[root@iMCServer opt]# ll
[root@iMCServer opt]# unzip H3C_iMC_PLAT_7.3_E0710_Professional_linux.zip
Figure 25 Decompressing the iMC installation package
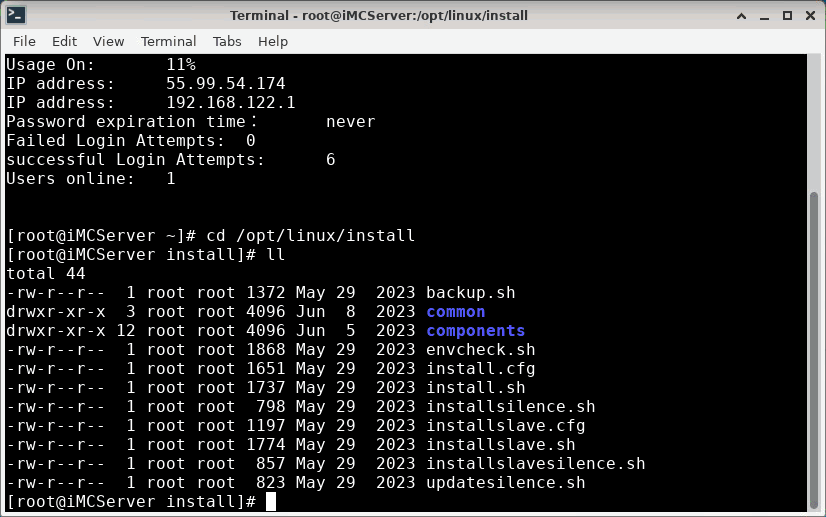
[root@iMCServer ~]# cd /opt/linux/install
[root@iMCServer opt]# ll
Figure 26 Viewing the files in the installation package
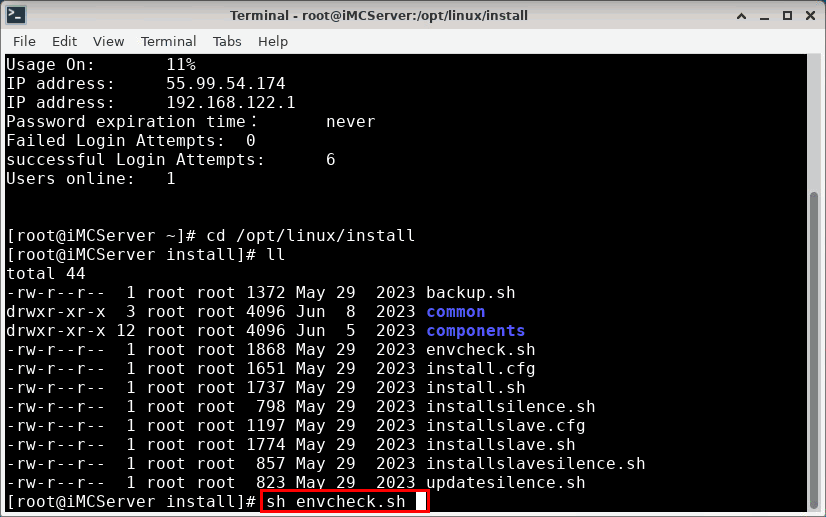
3. Execute the environment check script as shown in Figure 27.
[root@iMCServer install]# sh envcheck.sh
Figure 27 Executing the environment check installation script
|
|
TIP: If the environment check tool shows anomalies, see "How can I resolve the issue that the inspection tool is displayed abnormally?" for how to resolve this issue. |
4. Enter the database password on the installation environment check page that opens. In this example, set the password to iMC123, as shown in Figure 28 and Figure 29.
Figure 28 Executing the installation environment check
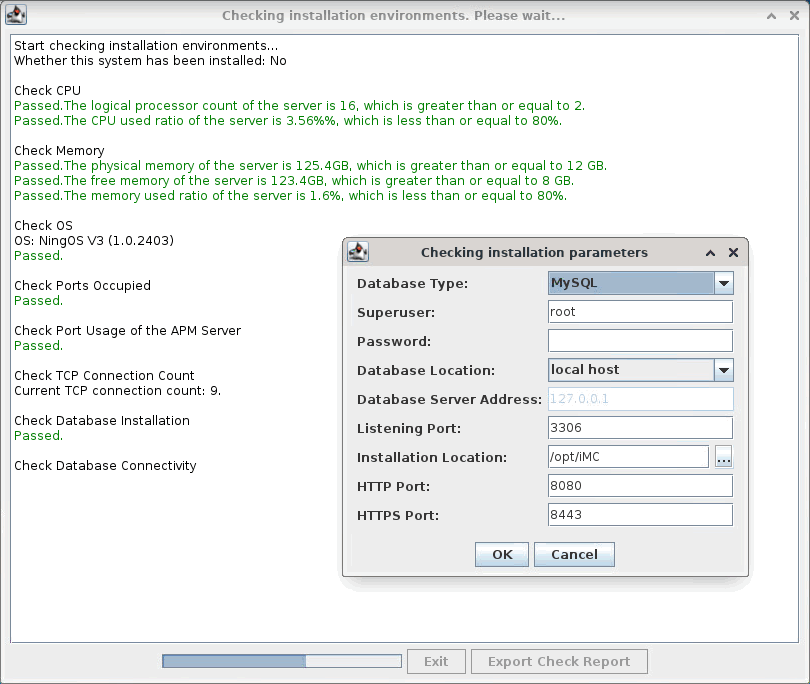
Figure 29 Passing the installation environment check
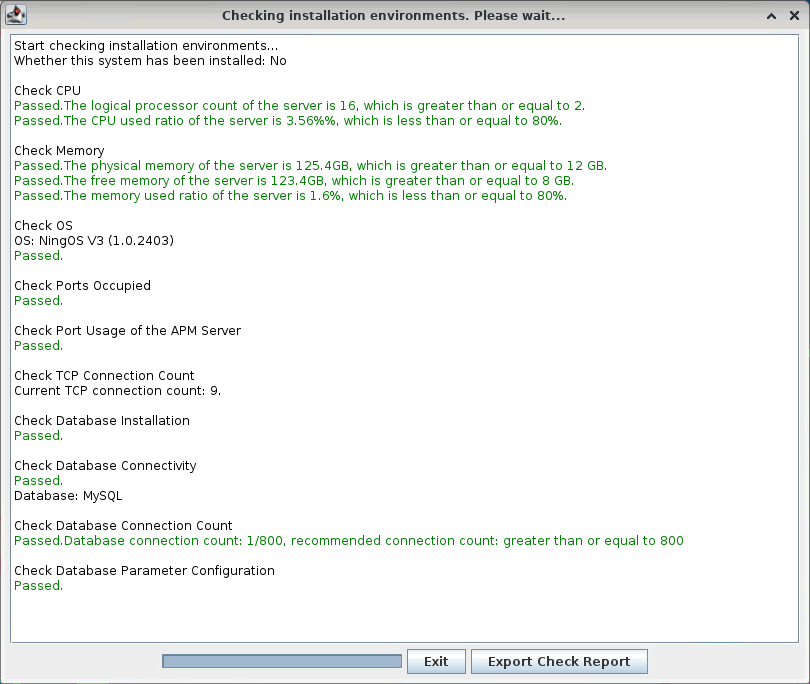
5. Once all environment check items are passed, you can install iMC.
Installation procedure
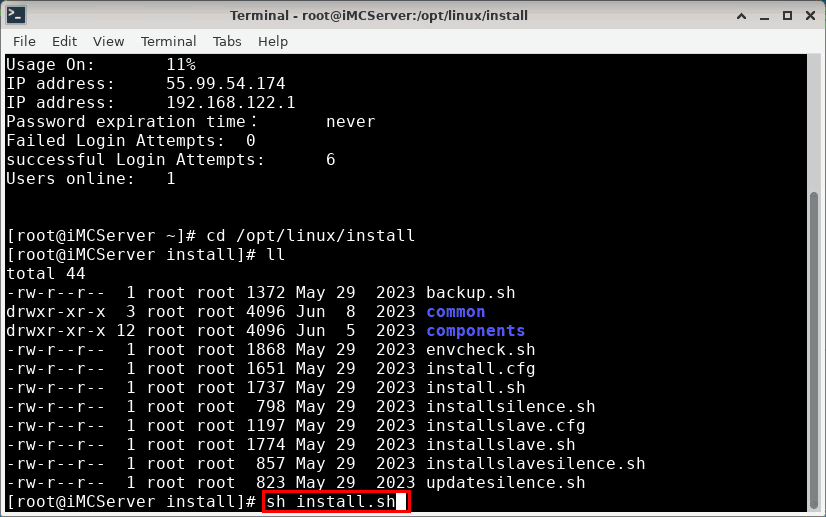
1. Execute the sh install.sh command to run the installation script as shown in Figure 30 to start iMC installation.
[root@iMCServer install]# sh install.sh
Figure 30 Executing the installation script
2. Access the selection page for iMC installation, as shown in Figure 31.
Figure 31 Selection page for installation

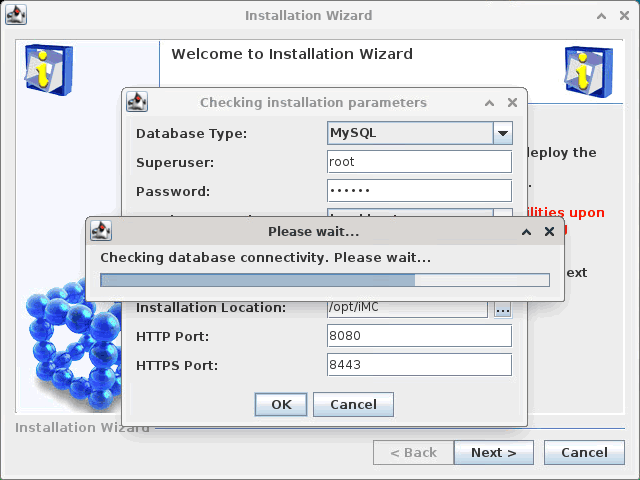
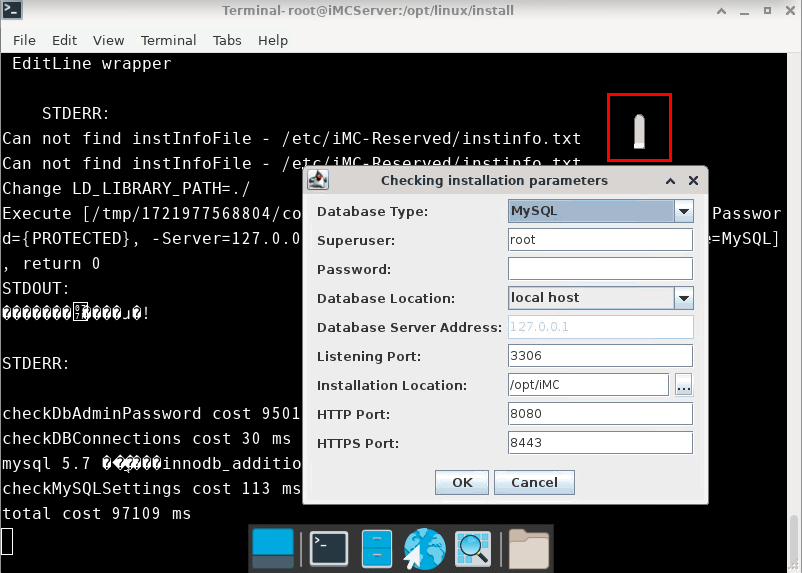
3. Click OK to start the installation environment check. Enter the password on the Checking installation parameters page that opens. The default password for the root user is iMC123. Use the default settings for the other parameters, as shown in Figure 32.
Figure 32 Checking installation parameters
|
|
TIP: You can customize the HTTP and HTTPS web service ports. Make sure the iMC web service ports are accessible on the iMC server. |
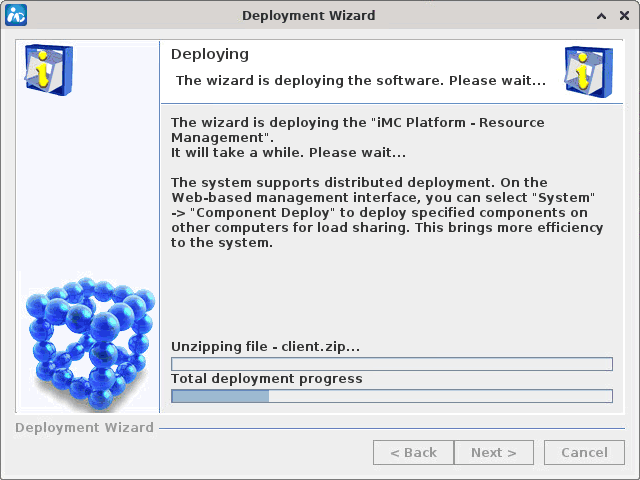
4. After the database check is passed, iMC installation and deployment will proceed automatically as shown in Figure 33.
Figure 33 iMC deployment wizard
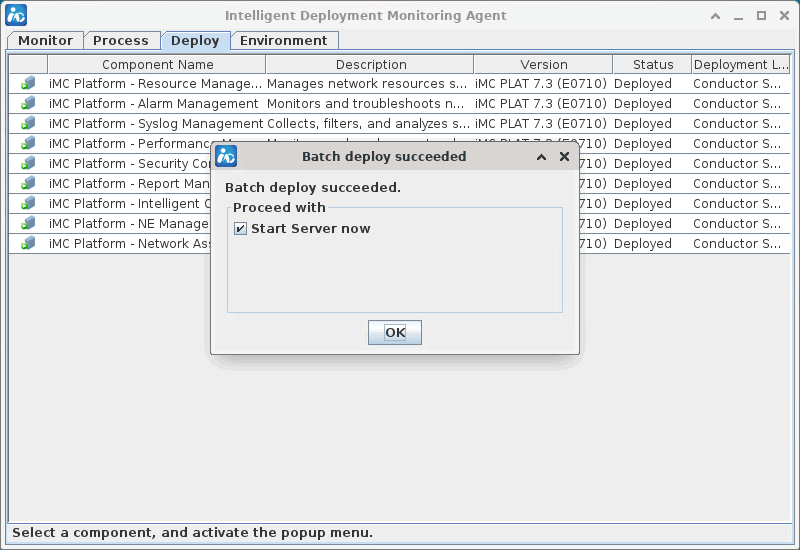
5. After deployment, the dialog box as shown in Figure 34 opens. Select the Start Server now option (selected by default), and click OK to start the service.
Figure 34 Bulk deployment succeeded
6. After the service starts, you can view the status of each process on the Process tab, as shown in Figure 35.
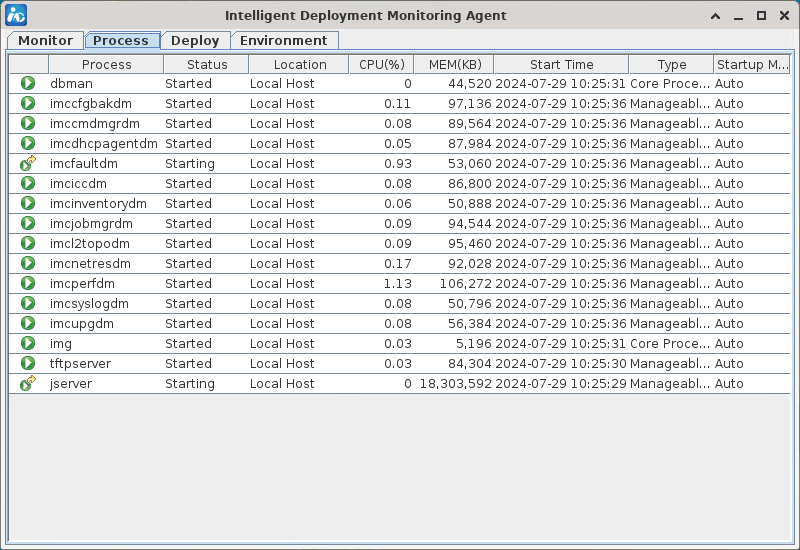
iMC installation in the NingOS operating system with MariaDB database environment is now complete.
FAQ
How can I install a version of the MariaDB database rather than that shipped with the NingOS operating system?
1. Contact Technical Support to obtain the installation package for the target MariaDB version. This document uses mariadb10.5.22.x86_for_NingOS.zip as an example.
2. Upload mariadb10.5.22.x86_for_NingOS.zip to the init_environment_for_NingOS/mariadb_rpms/ directory in the toolkit (init_environment_for_NingOS_v1.0.zip in this example), as shown in Figure 36.
[root@iMCServer ~]# cd /opt/init_environment_for_NingOS/mariadb_rpms/
[root@iMCServer init_environment_for_NingOS]# ll
[root@iMCServer init_environment_for_NingOS]# unzip mariadb10.5.22.x86_for_NingOS.zip
Figure 36 Uploading and decompressing the database installation package

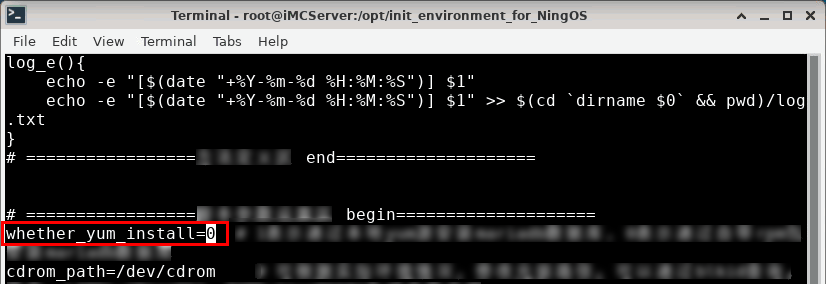
3. In the init_environment_for_NingOS.sh file, change the value for the whether_yum_install parameter to 0 to use the script to install the MariaDB database installation package uploaded by the user. A value of 1 means to install MariaDB from the local YUM repository, while 0 means to install it from the shipped RPM package. After editing the parameter, save the file and exit, as shown in Figure 37.
[root@iMCServer ~]# cd /opt/init_environment_for_NingOS/
[root@iMCServer init_environment_for_NingOS]# ll
[root@iMCServer init_environment_for_NingOS]# vi init_environment_for_NingOS.sh
Figure 37 Editing the init_environment_for_NingOS.sh file
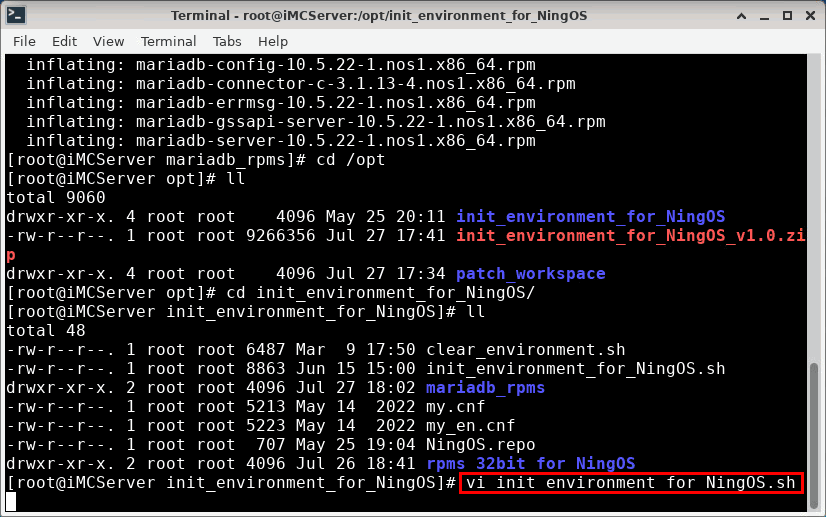
Figure 38 Setting the whether_yum_install parameter to 0
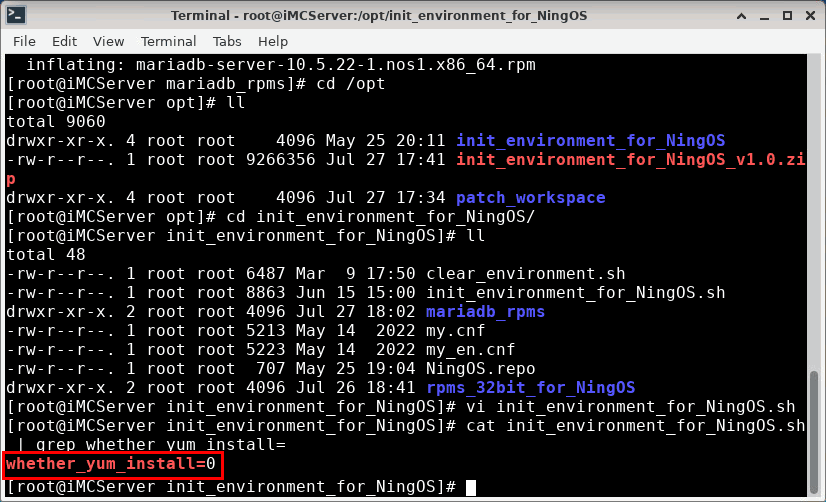
4. Execute the following command to identify whether the change for the whether_yum_install parameter value takes effect, as shown in Figure 39.
[root@iMCServer init_environment_for_NingOS]# cat init_environment_for_NingOS.sh | grep whether_yum_install=
Figure 39 Identifying whether the parameter value change takes effect
5. After completing the preceding operations, continue with step 3 to install the database until the installation is complete.
How can I uninstall the installed MariaDB database?
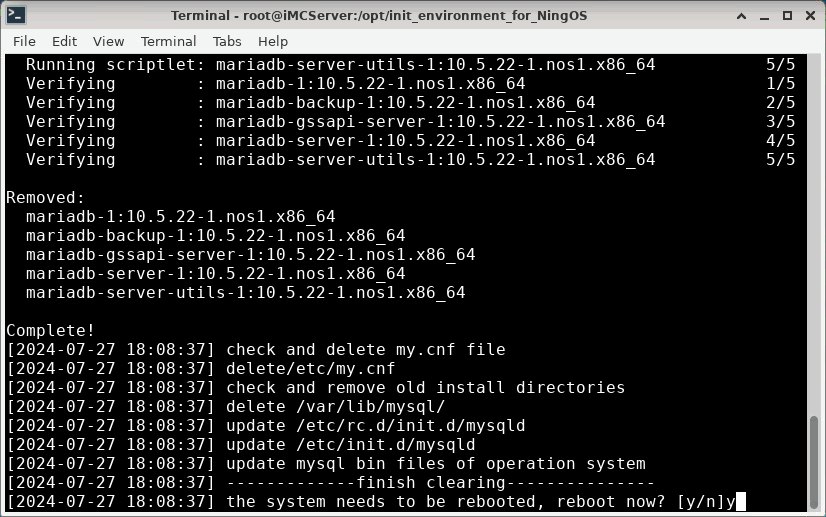
1. When a configuration error occurs or the MariaDB database operates abnormally, execute the clear_environment.sh script in the init_environment_for_NingOS directory to uninstall the MariaDB database, as shown in Figure 40.
[root@iMCServer ~]# cd /opt/init_environment_for_NingOS/
[root@iMCServer init_environment_for_NingOS]# ll
[root@iMCServer init_environment_for_NingOS]# sh clear_environment.sh
Figure 40 Uninstalling the installed MariaDB database
2. After uninstallation, restart the operating system as prompted, as shown in Figure 41.
Figure 41 Restarting the operating system as prompted after uninstallation
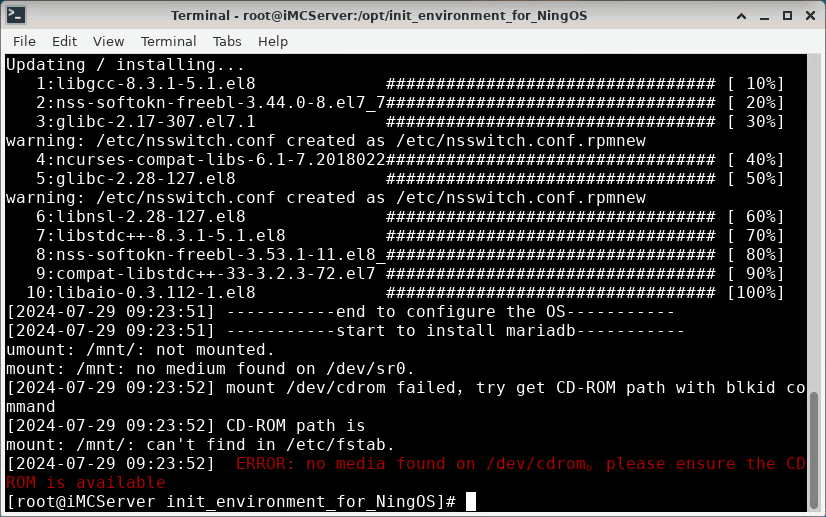
What should I do when the "ERROR: no media found on /dev/cdrom. please ensure the CDROM is available" error is displayed?
Figure 42 ERROR: no media found on /dev/cdrom. please ensure the CDROM is available
Identify whether the ISO image for the NingOS operating system is mounted correctly. The method varies by platform as follows:
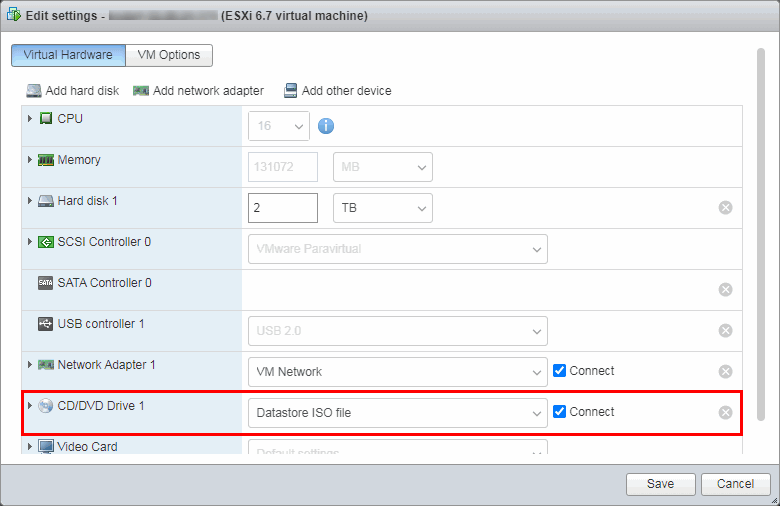
· On the VMware platform: Identify whether the ISO file for data storage is connected in the Edit settings window, as shown in Figure 43.
Figure 43 Identifying whether the ISO file for data storage is connected
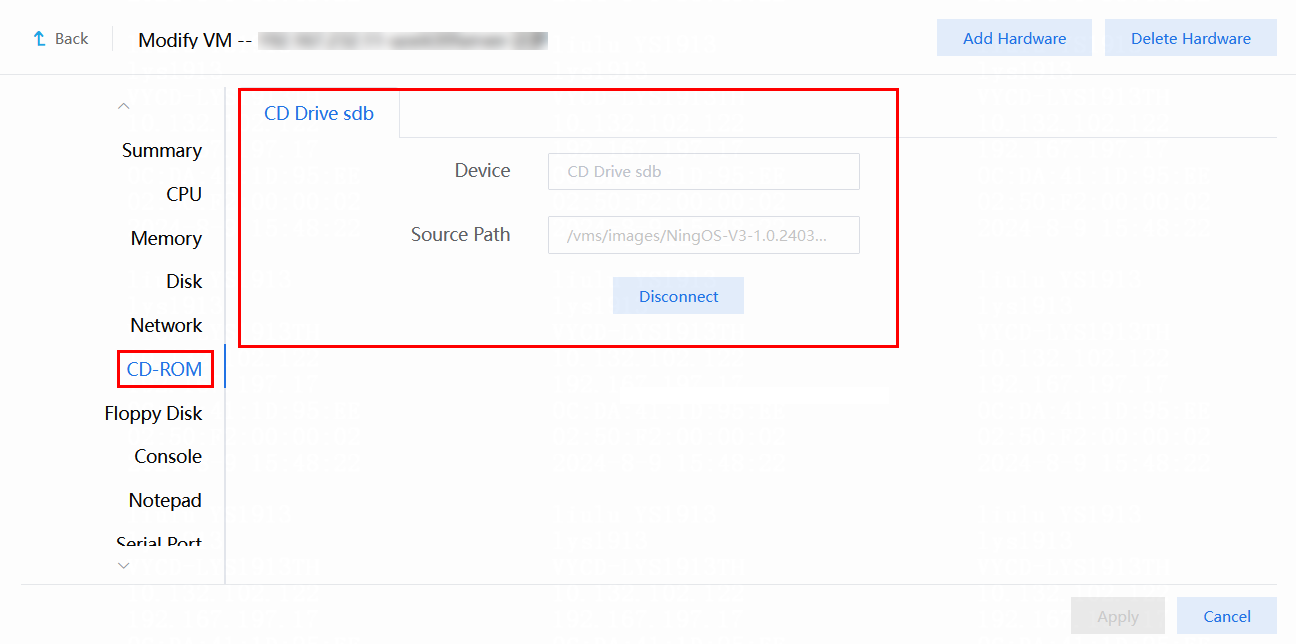
· On the CAS platform: On the CD-ROM tab of the page for modifying VM configuration, identify whether the CD drive is connected, as shown in Figure 44.
Figure 44 Identifying whether the CD drive is connected
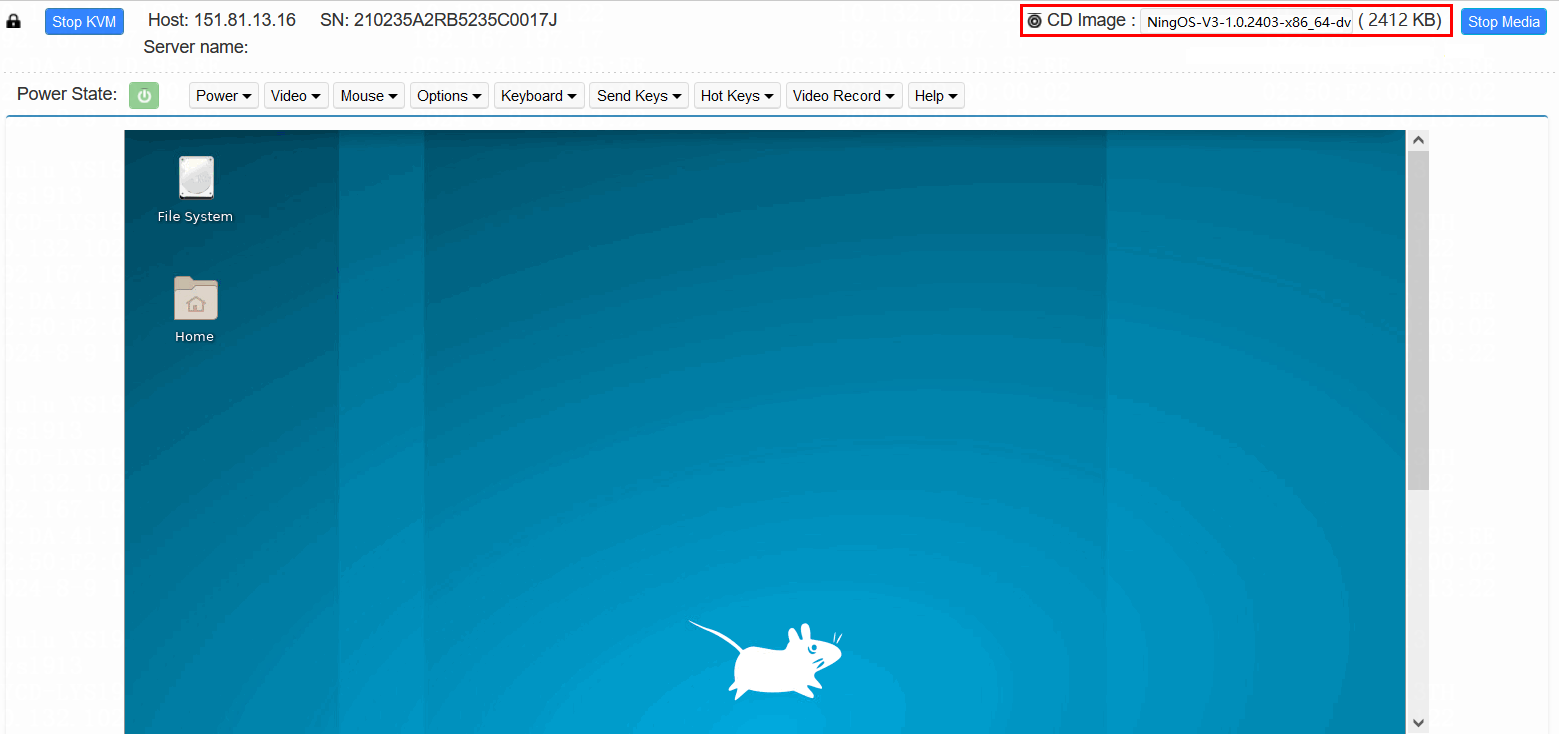
· On a physical server: Log in to the management interface address of the server and identify whether the CD image is connected, as shown in Figure 45.
Figure 45 Identifying whether the CD image is connected
How can I resolve abnormal display issues on the iMC installation interface?
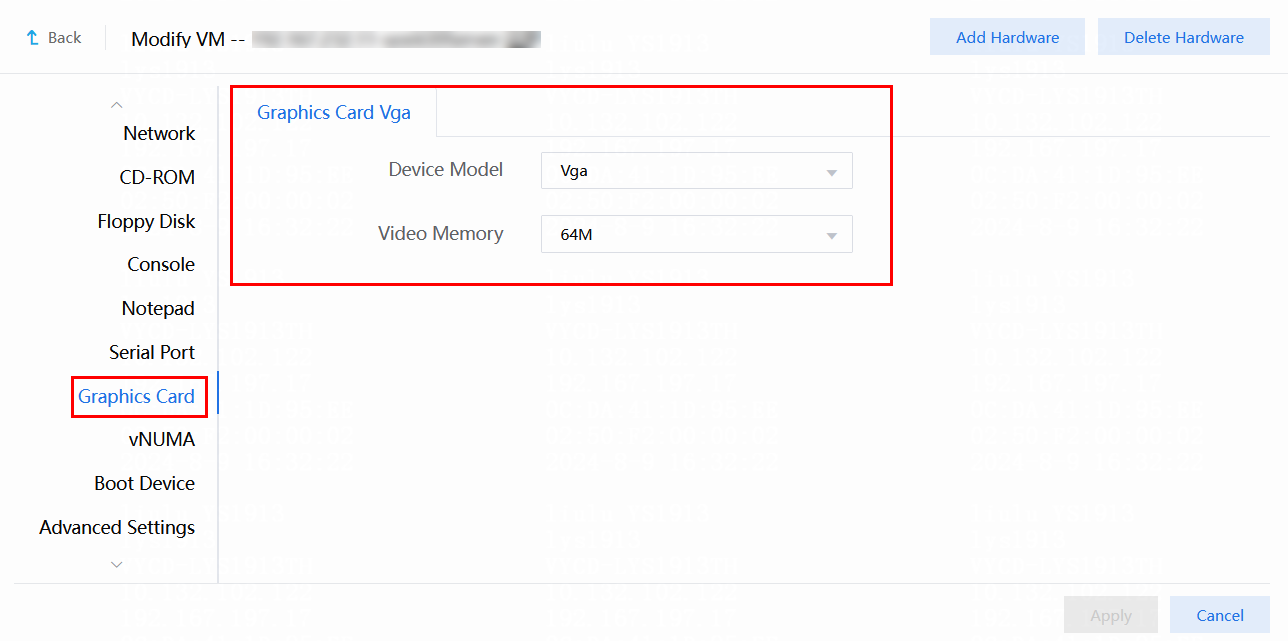
If the VM environment monitoring agent interface is displayed abnormally, select graphics card VGA for the VM as prompted, as shown in Figure 46 and Figure 47.
After successfully applying the graphics card, restart the operating system and install iMC again.
Figure 46 The monitoring agent interface is abnormal
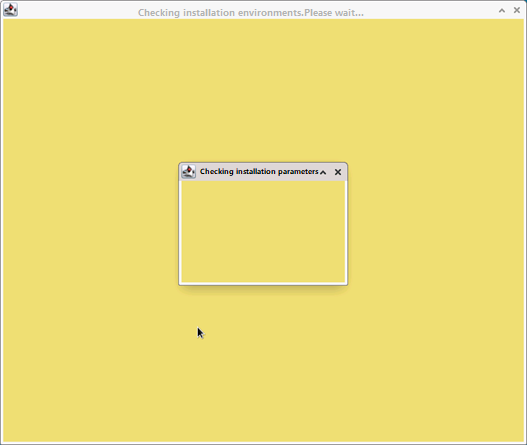
Figure 47 Viewing the graphics card configuration
If the issue persists after you replace the graphics card, use the MobaXterm tool to remotely connect to the environment and run the installation script again.
How can I resolve the issue that the inspection tool is displayed abnormally?
The initial execution result of the inspection tool is displayed abnormally, as shown in Figure 48. To resolve this issue, execute the environment check again. Then, the execution result will be displayed normally.
Figure 48 Inspection tool displayed abnormally
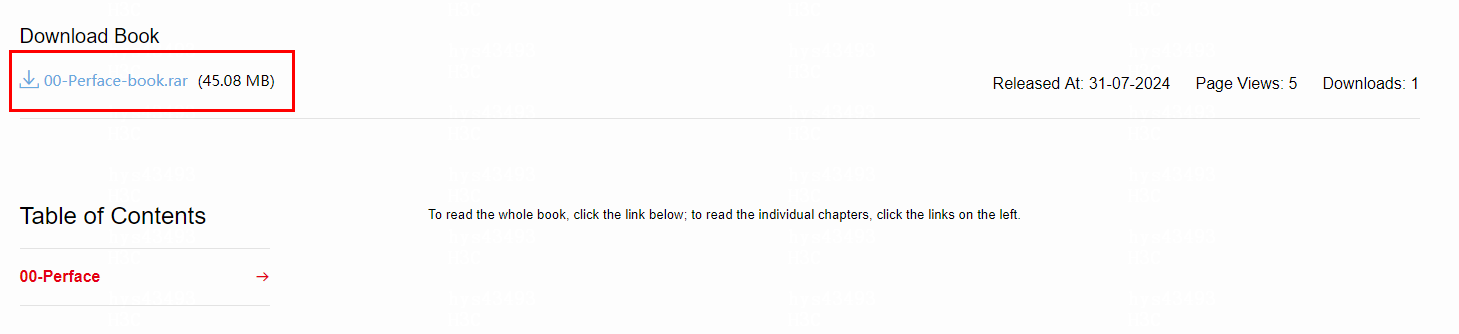
How can I obtain the required toolkit on the whole book download page?
1. Log in to https://www.h3c.com/en/ and then select Support > Technical Documents.
2. Select Network Operations & Management, and then click Intelligent Management Center 7 under Intelligent Management Center to access the H3C intelligent management center document library.
3. Hover over the target document name. Then,
the ![]() icon will appear after the document name. Click the
icon will appear after the document name. Click the ![]() icon to
download and obtain the required toolkit, as shown in Figure 49.
icon to
download and obtain the required toolkit, as shown in Figure 49.
|
|
TIP: This section mainly explains how to obtain the toolkit on the whole book download page. See the actual download results for the specific toolkit required. The content below is provided as an example only. |
Figure 49 Download page for the whole book