| Title | Size | Downloads |
|---|---|---|
WA6500A-CMW710-R2592P02.zip  |
52.89 MB | |
| WA6500A-CMW710-R2592P02 Release Notes (Software Feature Changes).pdf |
100.87 KB | |
| WA6120H6500A-CMW710-R2592P02 Release Notes.pdf | 699.96 KB |
|
WA6500A-CMW710-R2592P02 Release Notes |
|
|
Copyright © 2023 New H3C Technologies Co., Ltd. All rights reserved. No part of this manual may be reproduced or transmitted in any form or by any means without prior written consent of New H3C Technologies Co., Ltd. The information in this document is subject to change without notice. |
Contents
Hardware and software compatibility matrix
Upgrading restrictions and guidelines
Software feature and command updates
Resolved problems in WA6500A-CMW710-R2592P02
Resolved problems in WA6500A-CMW710-R2591P02
Resolved problems in WA6500A-CMW710-R2591P01
Resolved problems in WA6500A-CMW710-E2590P81
Resolved problems in WA6500A-CMW710-E2588P01
Resolved problems in WA6500A-CMW710-E2587P03
Upgrading through the associated AC
Upgrading devices of specific models
Upgrading from the Web interface
Upgrading from the Web interface
Saving the running configuration and verifying the storage space
Downloading the image file to the AP
Specifying the startup image file
Rebooting the AP to complete the upgrade
Upgrading from the BootWare menu
Upgrading from the BootWare menu
Using Xmodem to upgrade the BootWare through the console port
Appendix C Converting the AP mode
Converting the AP mode from the BootWare menu
Converting the AP mode from the Cloudnet
Converting the AP mode from the CLI
This document describes the features, restrictions and guidelines, open problems, and workarounds of WA6500A APs. Before you use this version in a live network, back up the configuration and test the version to avoid software upgrade affecting your live network.
Use this document in conjunction with the documents listed in “Related documentation”.
Version information
Version number
Comware Software, Version 7.1.064, Release 2592P02
Note: This version number can be displayed by using the command display version in any view. Please see Note1.
Version history
Version number | Last version | Release date | Release type | Remarks |
WA6500A-CMW710-R2592P02 | WA6500A-CMW710-R2591P02 | 2023-03-23 | Release version | None |
WA6500A-CMW710-R2591P02 | WA6500A-CMW710-R2591P02 | 2023-02-27 | Release version | None |
WA6500A-CMW710-R2591P01 | WA6500A-CMW710-E2590P81 | 2023-01-17 | ESS version | None |
WA6500A-CMW710-E2590P81 | WA6500A-CMW710-E2588P01 | 2022-12-15 | ESS version | None |
WA6500A-CMW710-E2588P01 | WA6500A-CMW710-E2587P03 | 2022-10-30 | ESS version | None |
WA6500A-CMW710-E2587P03 | First release | 2022-09-24 | Official version | Released a version that supports all the two AP modes (fit and cloud) for the first time |
Note: As from ESS 2587P03, the WA6500A AP supports all the two AP modes: fit and cloud.
Hardware and software compatibility matrix
CAUTION: To avoid an upgrade failure, use Table 2 to verify the hardware and software compatibility before performing an upgrade. |
Table 2 Hardware and software compatibility matrix
Item | Specifications |
Product family | WA6526/WA6526E/WA6520/WA6520H/WA6126/WA6120/WA6120H/ WA6120X/WA6520H-JP/ WA6126-JP |
Memory | WA6526/WA6526E/WA6126/ WA6126-JP: 1024M WA6520/WA6520H/WA6120/WA6120H/WA6120X/WA6520H-JP: 512M |
Flash | WA6526/WA6526E/WA6126/ WA6126-JP: 256M NAND WA6520/WA6520H/WA6120/WA6120H/WA6120X/WA6520H-JP: 128M NAND |
Boot ROM version | Basic:7.13 Extern:7.15 (Note: Perform the command display version command in any view to view the version information. Please see Note2.) |
Software images and their MD5 checksums | WA6500A-CMW710-R2592P02.ipe MD5: dcf550d27812169cbb483bb2ba463a13 |
iMC | iMC WSM 7.3 (E0609) |
iNode | iNode PC 7.3(E0585) |
To display the software and Boot ROM version of the WA6500A, perform the following:
H3C Comware Software, Version 7.1.064, Release 2592P02 -------Note1
Copyright (c) 2004-2023 New H3C Technologies Co., Ltd. All rights reserved.
H3C WA6526 uptime is 0 weeks, 0 days, 1 hour, 14 minutes
Last reboot reason : User soft reboot
Boot image: flash:/wa6500a-boot.bin
Boot image version: 7.1.064, Release 2592P02 -------Note1
Compiled Mar 15 2023 15:00:00
System image: flash:/wa6500a-system.bin
System image version: 7.1.064, Release 2592P02 -------Note1
Compiled Mar 15 2023 15:00:00
with 1 ARM 1.0GHz Processor
512M bytes DDR3
128M bytes NandFlash Memory
Hardware Version is Ver.A
Basic Bootrom Version is 7.13 -------Note2
Extend Bootrom Version is 7.15 -------Note2
[Subslot 0]H3C WA6526 Hardware Version is Ver.A
[SLOT 1]GE1/0/1 (Hardware)Ver.A, (Driver)1.0
[SLOT 1]GE1/0/2 (Hardware)Ver.A, (Driver)1.0
[SLOT 1]SGE1/0/1 (Hardware)Ver.A, (Driver)1.0
[SLOT 1]RADIO1/0/1 (Hardware)Ver.A, (Driver)1.0
[SLOT 1]RADIO1/0/2 (Hardware)Ver.A, (Driver)1.0
Upgrading restrictions and guidelines
Hardware feature updates
Software feature and command updates
MIB updates
None.
Operation changes
Restrictions and cautions
Restrictions
1.Some Intel NICs do not support 802.11ax. For more information, access the Intel official website at https://www.intel.cn/content/www/cn/zh/support/articles/000054799/network-and-io/wireless-networking.html.
2.The following features are not supported: WEP128, dynamic WEP and spectrum analysis supply. The following features are not supported by Cloud: IoT, USB disk identification supply.
3.An AP cannot come online because of insufficient IP addresses in the DHCP address pool caused by DHCP client ID change. Clear the old DHCP entry for the DHCP client ID on the DHCP server.
4.After QuickNet is moved to the cloud, VLANs not bound to any wireless service will be deleted automatically. Please re-configure the VLANs from Cloudnet.
5.To ensure data security after QuickNet is moved to the cloud, the wireless service password is not synchronized to Cloudnet automatically. Please re-configure the password from Cloudnet.
6.After QuickNet is deployed, the management Wi-Fi will be hidden automatically. A user Wi-Fi can be used to access the local Web interface.
7.You cannot access the local Web interface of an AP in cloud mode through the IE browser .
8.Added rollback limits to the WA6500A series to avoid degrading to a version earlier than WA6500A-CMW710-E2588P21
Open problems and workarounds
202301101305
Symptom: Use NSS forwarding mode.
Condition: In DP forwarding mode, the client information detected by WIPS scanning is empty.
Workaround: This symptom might occur if you configure WIPS from Cloudnet or the local Web interface.
202211301791
Symptom: Enable fast forwarding.
Condition: The AP forwarding performance is low.
Workaround: None.
202302131897
Symptom: Do not delete service template after the radio goes silent under this condition.
Condition: An AP cannot send beacon frames and cannot provide services if some bound BSSs are deleted when the AP is in silence mode.
Workaround: This symptom occurs when the following conditions are met:
The AP operates at a non radar channel.
The AP is bound to multiple BSSs, and is configured with the 160MHz bandwidth.
Some bound BSSs are deleted when the AP is in silence mode.
202301310540
Symptom: None.
Condition: The memory space of a WA6522 is insufficient when it operates in cloud mode.
Workaround: None.
List of resolved problems
Resolved problems in WA6500A-CMW710-R2592P02
202303171479
Symptom: The device fails to restart automatically after you change the working mode if the device came online from Cloudnet in fit AP mode.
Condition: This symptom might occur if you change the working mode of a device that came online from Cloudnet in fit AP mode.
202303171405
Symptom: The configured 160M bandwidth does not take effect on the WA6520S-D.
Condition: This symptom might occur if you set the 160M bandwidth for the WA6520S-D.
202303170338
Symptom: Added support for new model WA6522H-D.
Condition: None.
202303160637
Symptom: Adjusted the transmit power for the Malaysia and Pakistan country code with reference to the regulations.
Condition: None.
Resolved problems in WA6500A-CMW710-R2591P02
202302131895
Symptom: Clients might fail to come online if dual-5G load balancing is enabled.
Condition: None.
202302131896
Symptom: Downlink wired interfaces on an AP might become unreachable if that AP has been running for a long period of time.
Condition: None.
202302140612
Symptom: An AP fails to associate with an AC or Cloudnet because of insufficient IP addresses in the DHCP address pool if that AP requests a new IP address from the DHCP server after it goes offline.
Condition: This symptom might occur if an AP requests a new IP address from the DHCP server after it goes offline.
Resolved problems in WA6500A-CMW710-R2591P01
202301092065
Symptom: Cloud-managed APs cannot register on Cloudnet through Option252 or Option253.
Condition: None.
202301092056
Symptom: Added support for user interaction through command output to the ap-mode command.
Condition: None.
202301092049
Symptom: The probe application Web page cannot display probe AP details.
Condition: This symptom might occur if you use the probe application on the Web page.
202212290220
Symptom: APs restart unexpectedly because of repeated packet release.
Condition: This symptom might occur if a large amount of traffic is being transmitted.
Recurrence: Rarely.
Resolved problems in WA6500A-CMW710-E2590P81
202111230259
Symptom: Added support for the fast client keepalive feature.
Condition: None.
202209201156
Symptom: An AP cannot restart automatically after a kernel exception occurs.
Condition: This symptom might occur if an unexpected AP restart occurs.
202210140088
Symptom: An AP restarts unexpectedly when energy saving mode is enabled.
Condition: This symptom might occur if energy saving mode is enabled.
202212090121
Symptom: A client cannot come online when the number of onboarding and offboarding events of the client reaches a specific limit.
Condition: This symptom might occur if the rrop client fast-keep-alive enable command is configured (configured by default).
202212090115
Symptom: 2.4 G clients have difficulties in accessing the network.
Condition: None.
202212130557
Symptom: Portal authentication failure occurs in cloud mode.
Condition: This symptom might occur in cloud mode.
202211290196
Symptom: Resolved the problem that an AP restarts unexpectedly after running for a period of time.
Condition: None.
Resolved problems in WA6500A-CMW710-E2588P01
202210180776
Symptom: A user cannot be redirected from an endpoint to the authentication page if portal authentication and local forwarding are configured and an HTTPS address is entered.
Condition: This symptom might occur if portal authentication and local forwarding are configured and an HTTPS address is entered on an endpoint.[Always]
202210180612
Symptom: A WA6526 cannot restart automatically if it is stuck in the startup process.
Condition: This symptom might occur if the NAND flash has abnormal data.
[Rarely]
202210180609
Symptom: An AP restarts unexpectedly when energy saving mode is enabled.
Condition: This symptom might occur if energy saving mode is enabled.
[Rarely]
202210180127
Symptom: The device restarts unexpectedly if a client accesses invalid memory or a null pointer during the offboarding process.
Condition: This symptom might occur if a client goes offline.
[Rarely]
202210180122
Symptom: An AP might restart if a large amount of traffic is transmitted on the network.
Condition: This symptom might occur if a large amount of traffic is transmitted on the network.
[Rarely]
202209201547
Symptom: The bandwidth for a WA953 cannot be negotiated to 160M.
Condition: None.
Resolved problems in WA6500A-CMW710-E2587P03
Released a version that supports all the two AP modes (fit and cloud) for the first time.
Troubleshooting resources
To obtain troubleshooting resources for the product:
1.Access Technical Documents at http://www.h3c.com/en/Technical_Documents.
2.Select the device category and model.
3.Select the Maintain or Maintenance menu.
Related documentation
None.
Technical support
To obtain technical assistance, contact H3C by using one of the following methods:
Email:
[email protected] (countries and regions except Hong Kong, China)
[email protected] (Hong Kong, China)
Technical support hotline number. To obtain your local technical support hotline number, go to the H3C Service Hotlines website: https://www.h3c.com/en/Support/Online_Help/Service_Hotlines/
To access documentation, go to the H3C website at http://www.h3c.com/en/.
For information on the hardware features supported in this release, please refer to the product installation Guides in the Technical Documents under "Technical Documents" pages.
Category | Description |
Port Negotiation | Auto-negotiation for speed and duplex mode |
Networks | Ethernet II IPv4 protocol TCP/UDP ARP DHCP client IPv6 protocol IPv6 DHCP client |
Wireless | 802.11 protocol 802.11a/802.11b/802.11g/802.11n/802.11ac/11ax 802.11i protocol, supporting WEP40/WEP104/TKIP/CCMP encryption 802.11h protocol WPA/WPA2/WPA3 |
Virtual AP (Muti-SSID) | 16 |
Use Table 4 to determine the upgrade method.
Table 4 Software upgrade methods
Upgrade methods | AP modes | Remarks |
Upgrading through the associated AC | Fit | Use this method to upgrade multiple APs in bulk. This method requires AP restart and will interrupt services. |
<Sysname> display version H3C Comware Software, Version 7.1.064, Release 2592P02 Copyright (c) 2004-2023 New H3C Technologies Co., Ltd. All rights reserved. H3C WA6526 uptime is 0 weeks, 0 days, 1 hour, 14 minutes Last reboot reason : User soft reboot
Boot image: flash:/wa6500a-boot.bin Boot image version: 7.1.064, Release 2592P02 Compiled Mar 15 2023 15:00:00 System image: flash:/wa6500a-system.bin System image version: 7.1.064, Release 2592P02 Compiled Mar 15 2023 15:00:00
with 1 ARM 1.0GHz Processor 512M bytes DDR3 128M bytes NandFlash Memory
Hardware Version is Ver.A Basic Bootrom Version is 7.13 Extend Bootrom Version is 7.15 [Subslot 0]H3C WA6526 Hardware Version is Ver.A [SLOT 1]GE1/0/1 (Hardware)Ver.A, (Driver)1.0 [SLOT 1]GE1/0/2 (Hardware)Ver.A, (Driver)1.0 [SLOT 1]SGE1/0/1 (Hardware)Ver.A, (Driver)1.0 [SLOT 1]RADIO1/0/1 (Hardware)Ver.A, (Driver)1.0 [SLOT 1]RADIO1/0/2 (Hardware)Ver.A, (Driver)1.0 Upgrading from the Cloudnet | Cloud | Use this method to upgrade multiple APs in bulk. This method requires AP restart and will interrupt services. |
Upgrading from the Web interface | Cloud | This method requires AP restart and will interrupt services. |
Upgrading from the CLI | Cloud | This method requires AP restart and will interrupt services. |
Upgrading from the BootWare menu | Fit Cloud | Use this method to upgrade an AP that cannot be started. |
Using Xmodem to upgrade the BootWare through the console port | Fit Cloud | N/A |
Upgrading through the associated AC
Set up the upgrade environment as shown in Figure 1.
Figure 1 Setting up the upgrade environment
1.Configure AP settings on the AC:
# Create a manual AP named WA6526 and set the AP model to WA6526.
<Sysname> system-view
[Sysname] wlan ap WA6526model WA6526
# Specify the serial number of the AP.
[Sysname-wlan-ap-WA6526] serial-id 219801A1LHA10A100610
[Sysname-wlan-ap-WA6526] quit
2.Configure DHCP on the AC:
# Enable DHCP.
[Sysname] dhcp enable
# Create a DHCP address pool and enter its view.
[Sysname] dhcp server ip-pool dhcp1601
# Assign an IP subnet for the DHCP address pool for dynamic address allocation.
[Sysname-dhcp-pool-dhcp1601] network 160.1.1.0 mask 255.255.255.0
[Sysname-dhcp-pool-dhcp1601] quit
The AP automatically establishes a CAPWAP tunnel with the AC, and then loads the software image from the AC. You can execute the display wlan ap name WA6526 command to verify that the AP is downloading the software image.
<Sysname> display wlan ap all
Total number of aps: 1
Total number of connected aps: 0
Total number of connected configured aps: 0
Total number of connected auto aps: 0
Total number of connected anchor aps: 0
Maximum ap capacity: 512
Remaining ap capacity: 512
Maximum ap license: 0
Remaining ap license: 0
Maximum WTU license: 100
Remaining WTU license: 100
AP information
STAte : I = Idle, J = Join, JA = JoinAck, IL = ImageLoad
C = Config, DC = DataCheck, R = Run, M = Master, B = Backup
AP name AP ID STAte Model Serial ID
--------------------------------------------------------------------------------
WA6526 1 IL WA6526 219801A1LHA10A100610
3.Verify that the AP has come online through the AC after software upgrading. (Details not shown.)
4.Verify that the AP firmware has been updated to the most recent version.
H3C Comware Software, Version 7.1.064, Release 2592P02
Copyright (c) 2004-2023 New H3C Technologies Co., Ltd. All rights reserved.
H3C WA6526 uptime is 0 weeks, 0 days, 1 hour, 14 minutes
Last reboot reason : User soft reboot
Boot image: flash:/wa6500a-boot.bin
Boot image version: 7.1.064, Release 2592P02
Compiled Mar 15 2023 15:00:00
System image: flash:/wa6500a-system.bin
System image version: 7.1.064, Release 2592P02
Compiled Mar 15 2023 15:00:00
with 1 ARM 1.0GHz Processor
512M bytes DDR3
128M bytes NandFlash Memory
Hardware Version is Ver.A
Basic Bootrom Version is 7.13
Extend Bootrom Version is 7.15
[Subslot 0]H3C WA6526 Hardware Version is Ver.A
[SLOT 1]GE1/0/1 (Hardware)Ver.A, (Driver)1.0
[SLOT 1]GE1/0/2 (Hardware)Ver.A, (Driver)1.0
[SLOT 1]SGE1/0/1 (Hardware)Ver.A, (Driver)1.0
[SLOT 1]RADIO1/0/1 (Hardware)Ver.A, (Driver)1.0
[SLOT 1]RADIO1/0/2 (Hardware)Ver.A, (Driver)1.0
This feature can upgrade only online devices. To upgrade offline devices, download the images to a local directory and upgrade the devices locally. To download images, see Figure 2.
1.On the top navigation bar, click Network.
2.From the left navigation pane, select Maintain > Upgrade.
3.Select the target branch and site from the upper left corner of the work pane.
4.On the Upgrade by Device tab, expand the Filter menu, and filter devices as needed.
5.Select the target devices, and then click Upgrade.
Figure 2 Upgrading specific online devices

6.Select an upgrade method and then click OK.
Figure 3 Selecting the upgrade method

Upgrading devices of specific models
1.On the top navigation bar, click Network.
2.From the left navigation pane, select Maintain > Upgrade.
3.Select the target branch and site from the upper left corner of the work pane.
4.Click the Upgrade by Model tab, expand the Filter menu, and filter devices as needed.
5.To upgrade all devices of specific models, perform the following tasks:
a.Select the target device models, and then click Upgrade.
Figure 4 Upgrading online devices of specific models

b.Select an upgrade method and then click OK.
Figure 5 Selecting an upgrade method

6.To upgrade specific devices of a device model, click the device quantity link for the model. In the window that opens, select the target devices and then click Upgrade.
1.On the top navigation bar, click Network.
2.From the left navigation pane, select Maintain > Upgrade.
3.Select the target branch and site from the upper left corner of the work pane.
4.Click the Upgrade Details tab.
Devices Being Upgraded—Contains current version, progress, and upgrade time information.
Upgraded Devices—Contains current version, upgrade state, and failure reason information.
Upgrading from the Web interface
You can upgrade the software of an AP from the Web interface when the AP operates in cloud AP mode or anchor AC mode.
Set up the upgrade environment as shown in Figure 6 or Figure 7. Make sure the AP and PC can reach each other.
Figure 6 Setting up the upgrade environment (anchor AC mode)
Figure 7 Setting up the upgrade environment (cloud mode)
Upgrading from the Web interface
As a best practice, use the following Web browsers:
Internet Explorer 10 or higher.
Firefox 30.0.0.5269 or higher.
Chrome 35.0.1916.114 or higher.
Safari 5.1 or higher.
To access the Web interface, you must use the following browser settings:
Accept the first-party cookies (cookies from the site you are accessing).
Enable active scripting or JavaScript, depending on the Web browser.
If you are using a Microsoft Internet Explorer browser, you must enable the following security settings:
Run ActiveX controls and plug-ins.
Script ActiveX controls marked safe for scripting.
To ensure correct display of webpage contents after software upgrade or downgrade, clear data cached by the browser before you log in.
Logging in to the AP from the Web interface
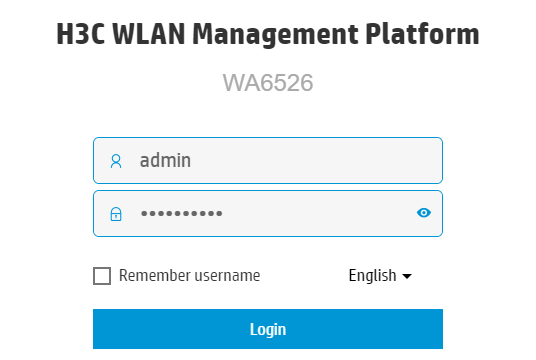
1.Enter the IP address of the AP in the address bar of the browser.
2.On the login page, enter the username and password. By default, the username and password are admin and h3capadmin, respectively.
Figure 8 Logging in to the AP from the Web interface
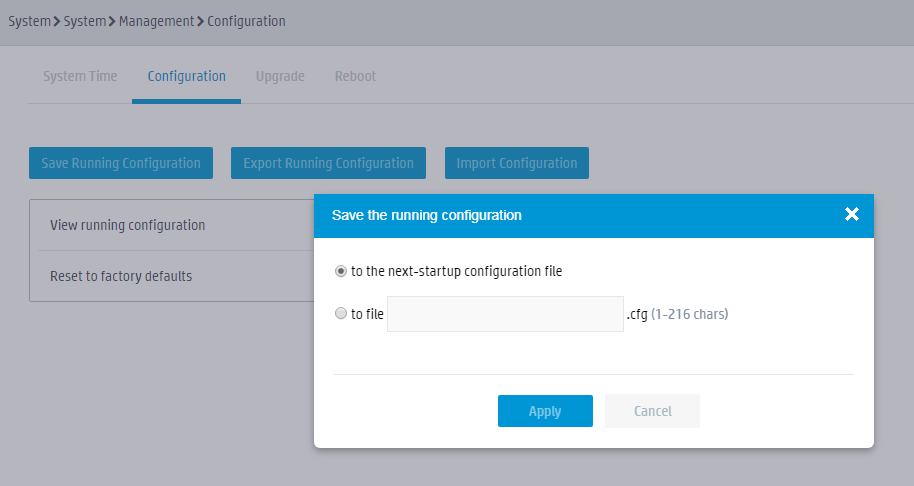
Saving and backing up the configuration file
1.Click the system view tab at the bottom of the page.
2.From the navigation tree, select System > Management.
3.Click the Configuration tab.
4.Click Save Running Configuration.
5.In the dialog box that opens, select to the next-startup configuration file, and then click Apply.
Figure 9 Saving the configuration file
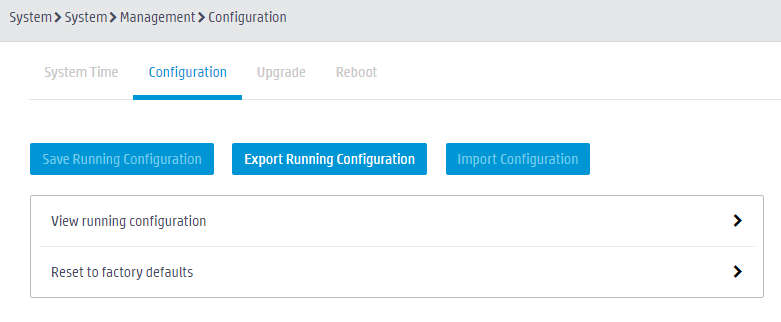
6.On the Configuration tab, click Export Running Configuration to download the configuration file.
Figure 10 Backing up the configuration file
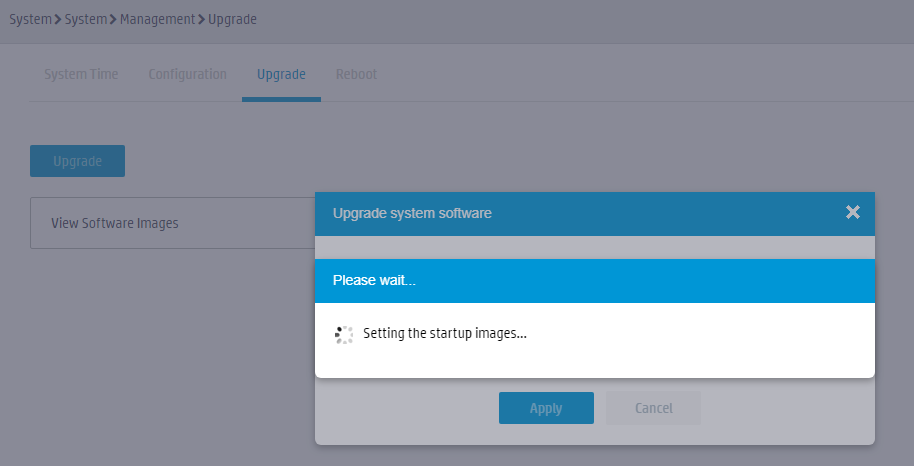
Upgrading the software
1.From the navigation tree, select System > Management.
2.Click the Upgrade tab.
3.Click Upgrade.
4.In the dialog box that opens, select a software image file and select Reboot now.
Figure 11 Selecting software image file

5.Click Apply.
Figure 12 Upgrading software
Finishing upgrading the software
1.After the AP restarts, log in to the AP from the Web interface.
2.Click the system view tab at the bottom of the page.
3.From the navigation tree, select System > Management.
4.Click the Configuration tab.
5.Click View running configuration.
6.Verify that the version number is correct.
Figure 13 Finishing upgrading the software version

Set up the upgrade environment as shown in Figure 14. Make sure you can log in to the AP through Telnet or the console port.
Figure 14 Setting up the upgrade environment
Saving the running configuration and verifying the storage space
1.Save the running configuration.
<Sysname>save
The current configuration will be written to the device. Are you sure? [Y/N]:y
Please input the file name(*.cfg)[flash:/startup.cfg]
(To leave the existing filename unchanged, press the enter key):
flash:/startup.cfg exists, overwrite? [Y/N]:y
Validating file. Please wait...
Configuration is saved to device successfully.
<Sysname>
2.Display files on the storage medium. Identify the system software image and configuration file names and verify that the flash card has sufficient space for the new system software image.
Directory of flash:
0 drw- - Jan 01 1970 08:00:37 anchor-ac
1 drw- - Mar 26 2021 10:31:49 cloud
2 -rw- 260649 Jan 01 1970 08:00:37 defaultfile.zip
3 drw- - Jan 01 1970 08:00:37 fit
4 -rw- 185 Mar 26 2021 10:31:49 ifindex.dat
5 drw- - Mar 26 2021 07:53:44 pki
6 -rw- 17470 Mar 26 2021 10:31:49 startup.cfg
7 -rw- 219723 Mar 26 2021 10:31:49 startup.mdb
8 -rw- 13936640 Mar 26 2021 07:59:52 wa6500a-boot.bin
9 -rw- 46117888 Mar 26 2021 08:00:06 wa6500a-system.bin
<Sysname>
Downloading the image file to the AP
You can use the TFTP or FTP commands on the AP to access the TFTP or FTP server to back up or download files.
Using TFTP
Transfer the configuration file to the disk of the AP.
<H3C>tftp 192.168.0.1 get wa6500a.ipe
Press CTRL+C to abort.
% Total % Received % Xferd Average Speed Time Time Time Current
Dload Upload Total Spent Left Speed
100 57.2M 100 57.2M 0 0 968k 0 0:00:50 0:00:50 --:--:-- 947k
Writing file...Done.
Using FTP
1.From FTP client view, download the system software image file to the disk of the server.
ftp> get wa6500a.ipe
227 Entering Passive Mode (192,168,0,1,208,167).
150 Data connection accepted from 192.168.0.50:1476; transfer starting.
...........................................................................................................
226 Transfer complete.
60061696 bytes received in 10.958 seconds (4.92 Mbytes/s)
ftp> quit
2.Return to user view.
<ftp> quit
221 Service closing control connection
<Sysname>
Specifying the startup image file
1.Specify the wa6500a.ipe file as the main image file for the AP at the next reboot.
<Sysname>boot-loader file flash:/wa6500a.ipe main
Verifying the file flash:/ wa6500a.ipe on the device...Done.
H3C WA6526 images in IPE:
wa6500a-boot.bin
wa6500a-system.bin
This command will set the main startup software images. Please do not reboot the device during the upgrade. Continue? [Y/N]:y
Add images to the device.
File flash:/wa6500a-boot.bin already exists on the device.
File flash:/wa6500a-system.bin already exists on the device.
Overwrite the existing files? [Y/N]:y
Decompressing file wa6500a-boot.bin to flash:/wa6500a-boot.bin.....Done.
Decompressing file wa6500a-system.bin to flash:/wa6500a-system.bin..............Done.
Verifying the file flash:/wa6500a-boot.bin on the device...Done.
Verifying the file flash:/wa6500a-system.bin on the device.......Done.
The images that have passed all examinations will be used as the main startup software images at the next reboot on the device.
Decompression completed.
You are recommended to delete the .ipe file after you set startup software images for all slots.
Do you want to delete flash:/wa6500a.ipe now? [Y/N]:y
2.Verify that boot.bin and system.bin have been specified as the main startup software images.
<Sysname> display boot-loader
Software images on the device:
Current software images:
Image Version
flash:/wa6500a-boot.bin Release 2591P01
flash:/wa6500a-system.bin Release 2591P01
Main startup software images:
Image Version
flash:/wa6500a-boot.bin Release 2591P01
flash:/wa6500a-system.bin Release 2591P01
Backup startup software images:
None
<Sysname>
Rebooting the AP to complete the upgrade
1.Reboot the AP.
<Sysname> reboot
Start to check configuration with next startup configuration file, please wait.........DONE!
This command will reboot the device. Continue? [Y/N]:y
Now rebooting, please wait...
<Sysname>
System is starting...
2.After the reboot is complete, verify that the system software image is correct.
<Sysname> display version
H3C Comware Software, Version 7.1.064, Release 2592P02 -------注①
Copyright (c) 2004-2023 New H3C Technologies Co., Ltd. All rights reserved.
H3C WA6526 uptime is 0 weeks, 0 days, 1 hour, 14 minutes
Last reboot reason : User soft reboot
Boot image: flash:/wa6500a-boot.bin
Boot image version: 7.1.064, Release 2592P02 --------注①
Compiled Mar 15 2023 15:00:00
System image: flash:/wa6500a-system.bin
System image version: 7.1.064, Release 2592P02 --------注①
Compiled Mar 15 2023 15:00:00
with 1 ARM 1.0GHz Processor
512M bytes DDR3
128M bytes NandFlash Memory
Hardware Version is Ver.A
Basic Bootrom Version is 7.13 --------注②
Extend Bootrom Version is 7.15 --------注②
[Subslot 0]H3C WA6526 Hardware Version is Ver.A
[SLOT 1]GE1/0/1 (Hardware)Ver.A, (Driver)1.0
[SLOT 1]GE1/0/2 (Hardware)Ver.A, (Driver)1.0
[SLOT 1]SGE1/0/1 (Hardware)Ver.A, (Driver)1.0
[SLOT 1]RADIO1/0/1 (Hardware)Ver.A, (Driver)1.0
[SLOT 1]RADIO1/0/2 (Hardware)Ver.A, (Driver)1.0
Upgrading from the BootWare menu
Set up the upgrade environment as shown in Figure 15.
Figure 15 Setting up the upgrade environment
Upgrading from the BootWare menu
1.Enter the EXTENDED-BOOTWARE menu
# Reboot the AP.
Starting......
Press Ctrl+D to access BASIC BOOT MENU
****************************************************************************
* *
* H3C WA6526 BootWare, Version 7.15 *
* *
****************************************************************************
Copyright (c) 2004-2023 New H3C Technologies Co., Ltd.
Compiled Date : Mar 22 2023
CPU L1 Cache : 32KB
CPU L2 Cache : 256KB
CPU Clock Speed : 2200MHz
Memory Type : DDR3 SDRAM
Memory Size : 1024MB
Memory Speed : 933MHz
Flash Size : 256MB
PCB Version : Ver.A
Press Ctrl+B to access EXTENDED 4
| NOTE: The output in this section is for illustration only. |
# Press Ctrl+B at the prompt to access the EXTENDED-BOOTWARE menu.
Password recovery capability is enabled.
Note: The current operating device is flash
Enter < Storage Device Operation > to select device.
==========================<EXTENDED-BOOTWARE MENU>==========================
|<1> Boot System |
|<2> Enter Serial SubMenu |
|<3> Enter Ethernet SubMenu |
|<4> File Control |
|<5> Restore to Factory Default Configuration |
|<6> Skip Current System Configuration |
|<7> BootWare Operation Menu |
|<8> Skip Authentication for Console Login |
|<9> Storage Device Operation |
|<0> Reboot |
============================================================================
Ctrl+Z: Access EXTENDED ASSISTANT MENU
Ctrl+F: Format File System
Ctrl+C: Display Copyright
Ctrl+Y: Change AP Mode
Enter your choice(0-9):
Table 5 EXTENDED-BOOTWARE menu options
Item | Description |
<1> Boot System | Boot the system software image. |
<2> Enter Serial SubMenu | Access the Serial submenu for upgrading system software through the console port or changing the serial port settings. |
<3> Enter Ethernet SubMenu | Access the Ethernet submenu for upgrading system software through an Ethernet port or changing Ethernet settings. |
<4> File Control | Access the File Control submenu to retrieve and manage the files stored on the device. |
<5> Restore to Factory Default Configuration | Delete the next-startup configuration files and load the factory-default configuration. |
<6> Skip Current System Configuration | Start the device with the factory default configuration. This is a one-time operation and does not take effect at the next reboot. You use this option when you forget the console login password. |
<7> BootWare Operation Menu | Access the BootWare Operation menu for backing up, restoring, or upgrading BootWare. When you upgrade the system software image, BootWare is automatically upgraded. H3C does not recommend upgrading BootWare separately. This document does not cover using the BootWare Operation menu. |
<8> Skip Authentication for Console Login | Clear all the authentication schemes on the console port. |
<9> Storage Device Operation | Access the Storage Device Operation menu to manage storage devices. Using this option is beyond this chapter. |
<0> Reboot | Restart the device. |
2.In the EXTEND-BOOTWARE menu, enter 3 to access the Ethernet submenu.
==========================<Enter Ethernet SubMenu>==========================
|Note:the operating device is cfa0 |
|<1> Download Image Program To SDRAM And Run |
|<2> Update Main Image File |
|<3> Update Backup Image File |
|<4> Download Files(*.*) |
|<5> Modify Ethernet Parameter |
|<0> Exit To Main Menu |
|<Ensure The Parameter Be Modified Before Downloading!> |
============================================================================
Enter your choice(0-5):
Table 6 Ethernet submenu options
Item | Description |
<1> Download Image Program To SDRAM And Run | Download a system software image to the SDRAM and run the image. |
<2> Update Main Image File | Upgrade the main system software image. |
<3> Update Backup Image File | Upgrade the backup system software image. |
<4> Download Files(*.*) | Download a system software image to the Flash or CF card. |
<5> Modify Ethernet Parameter | Modify network settings. |
<0> Exit To Main Menu | Return to the EXTEND-BOOTWARE menu. |
3.Enter 5 to configure the network settings.
=========================<ETHERNET PARAMETER SET>=========================
|Note: '.' = Clear field. |
| '-' = Go to previous field. |
| Ctrl+D = Quit. |
==========================================================================
Protocol (FTP or TFTP) :ftp
Load File Name :wa6500a.ipe
:
Target File Name :wa6500a.ipe
:
Server IP Address :192.168.1.1
Local IP Address :192.168.1.100
Subnet Mask :255.255.255.0
Gateway IP Address :0.0.0.0
FTP User Name :user001
FTP User Password :********
Table 7 Network parameter fields and shortcut keys
Field | Description |
'.' = Clear field | Press a dot (.) and then Enter to clear the setting for a field. |
'-' = Go to previous field | Press a hyphen (-) and then Enter to return to the previous field. |
Ctrl+D = Quit | Press Ctrl + D to exit the Ethernet Parameter Set menu. |
Protocol (FTP or TFTP) | Set the file transfer protocol to FTP or TFTP. |
Load File Name | Set the name of the file to be downloaded. |
Target File Name | Set a file name for saving the file on the device. By default, the target file name is the same as the source file name. |
Server IP Address | Set the IP address of the FTP or TFTP server. If a mask must be set, use a colon (:) to separate the mask length from the IP address. For example, 100.1.1.13:24. |
Local IP Address | Set the IP address of the device. |
Subnet Mask | Subnet Mask of the local IP address. |
Gateway IP Address | Set a gateway IP address if the device is on a different network than the server. |
FTP User Name | Set the username for accessing the FTP server. This username must be the same as configured on the FTP server. This field is not available for TFTP. |
FTP User Password | Set the password for accessing the FTP server. This password must be the same as configured on the FTP server. This field is not available for TFTP. |
4.Select the option 2 or 3 in the Ethernet submenu to upgrade a system software image. For example, enter 2 to upgrade the main system software image.
Loading.....................................................................
............................................................................
............................................................................
...................................................Done.
60061696 bytes downloaded!
Image file wa6500a-boot.bin is self-decompressing...
Saving file flash:/wa6500a-boot.bin .........................................
............................................................................
............................................................................
............................................................................
................................................Done.
Image file wa6500a-system.bin is self-decompressing...
Saving file flash:/wa6500a-system.bin .......................................
............................................................................
............................................................................
............................................................................
............................................................................
............................................................................
............................................................................
............................................................................
..............Done.
==========================<Enter Ethernet SubMenu>==========================
|Note:the operating device is cfa0 |
|<1> Download Image Program To SDRAM And Run |
|<2> Update Main Image File |
|<3> Update Backup Image File |
|<4> Download Files(*.*) |
|<5> Modify Ethernet Parameter |
|<0> Exit To Main Menu |
|<Ensure The Parameter Be Modified Before Downloading!> |
============================================================================
Enter your choice(0-5):
5.Enter 0 to return to the EXTEND-BOOTWARE menu
Enter your choice(0-5): 0
===========================<EXTENDED-BOOTWARE MENU>==========================
|<1> Boot System |
|<2> Enter Serial SubMenu |
|<3> Enter Ethernet SubMenu |
|<4> File Control |
|<5> Modify BootWare Password |
|<6> Skip Current System Configuration |
|<7> BootWare Operation Menu |
|<8> Skip Authentication for Console Login |
|<9> Storage Device Operation |
|<0> Reboot |
============================================================================
Ctrl+Z: Access EXTENDED ASSISTANT MENU
Ctrl+F: Format File System
Ctrl+C: Display Copyright
Enter your choice(0-9):
6.Enter 1 to boot the system.
Enter your choice(0-9): 1
Loading the main image files...
Loading file cfa0:/wa6500a-system.bin...........................
Done.
Loading file cfa0:/wa6500a-boot.bin..............Done.
Image file cfa0:/wa6500a-boot.bin is self-decompressing.........
.....Done.
System image is starting...
Line con0 is available.
Press ENTER to get started.
7.After the upgrade, verify that the AP's firmware has been upgraded to the most recent version.
<Sysname> display version
H3C Comware Software, Version 7.1.064, Release 2592P02
Copyright (c) 2004-2023 New H3C Technologies Co., Ltd. All rights reserved.
H3C WA6526 uptime is 0 weeks, 0 days, 1 hour, 14 minutes
Last reboot reason : User soft reboot
Boot image: flash:/wa6500a-boot.bin
Boot image version: 7.1.064, Release 2592P02
Compiled Mar 15 2023 15:00:00
System image: flash:/wa6500a-system.bin
System image version: 7.1.064, Release 2592P02
Compiled Mar 15 2023 15:00:00
with 1 ARM 1.0GHz Processor
512M bytes DDR3
128M bytes NandFlash Memory
Hardware Version is Ver.A
Basic Bootrom Version is 7.13
Extend Bootrom Version is 7.15
[Subslot 0]H3C WA6526 Hardware Version is Ver.A
[SLOT 1]GE1/0/1 (Hardware)Ver.A, (Driver)1.0
[SLOT 1]GE1/0/2 (Hardware)Ver.A, (Driver)1.0
[SLOT 1]SGE1/0/1 (Hardware)Ver.A, (Driver)1.0
[SLOT 1]RADIO1/0/1 (Hardware)Ver.A, (Driver)1.0
[SLOT 1]RADIO1/0/2 (Hardware)Ver.A, (Driver)1.0
Using Xmodem to upgrade the BootWare through the console port
Command output information varies by device model.
To use Xmodem to upgrade the BootWare through the console port:
2.Press Ctrl+D immediately after the "Press Ctrl+D to access BASIC-BOOTWARE MENU" message appears.
System is starting...
Press Ctrl+D to access BASIC-BOOTWARE MENU
=====================<BASIC-BOOTWARE MENU (Ver 7.13) >======================
|<1> Modify Serial Interface Parameter |
|<2> Update Extended BootWare |
|<3> Update Full BootWare |
|<4> Boot Extended BootWare |
|<5> Boot Backup Extended BootWare |
|<0> Reboot |
============================================================================
Ctrl+U: Access BASIC ASSISTANT MENU
Ctrl+A: Enter Command Line
Ctrl+C: Display Copyright
Enter your choice(0-5): 1
3.Enter 1 in the BASIC-BOOTWARE menu to access the menu for setting the baud rate of the console port.
===============================<BAUDRATE SET>===============================
|Note:'*'indicates the current baudrate |
| Change The HyperTerminal's Baudrate Accordingly |
|---------------------------<Baudrate Available>---------------------------|
|<1> 9600(Default)* |
|<2> 19200 |
|<3> 38400 |
|<4> 57600 |
|<5> 115200 |
|<0> Exit |
============================================================================
Enter your choice(0-5): 0
4.Select a baud rate.
IMPORTANT: If you use a baud rate value other than the default, you must reconnect to the configuration terminal and change its baud rate to be the same as the baud rate selected in the BootWare menu. Baud rate change is a one-time operation. The baud rate will be restored to the default (9600 bps) at reboot. To set up a console session with the device after a reboot, you must change the baud rate of the configuration terminal back to 9600 bps. |
In this example, enter 0. This option enables you to return to the BASIC-BOOTWARE menu with the default baud rate selected.
=====================<BASIC-BOOTWARE MENU (Ver 7.13) >======================
|<1> Modify Serial Interface Parameter |
|<2> Update Extended BootWare |
|<3> Update Full BootWare |
|<4> Boot Extended BootWare |
|<5> Boot Backup Extended BootWare |
|<0> Reboot |
============================================================================
Ctrl+U: Access BASIC ASSISTANT MENU
Ctrl+A: Enter Command Line
Ctrl+C: Display Copyright
Enter your choice(0-5):
Table 8 BASIC-BOOTWARE menu options
Option | Task |
<1> Modify Serial Interface Parameter | Change the baud rate of the console port. Perform this task before downloading an image through the console port for software upgrade. |
<2> Update Extended BootWare | Upgrade the extended BootWare segment. |
<3> Update Full BootWare | Upgrade the entire BootWare, including the basic segment and the extended segment. |
<4> Boot Extended BootWare | Run the primary extended BootWare segment. |
<5> Boot Backup Extend BootWare | Run the backup extended BootWare segment. |
<0> Reboot | Reboot the device. |
5.Enter 3 in the BASIC-BOOTWARE menu to upgrade the entire BootWare.
Please Start To Transfer File, Press <Ctrl+C> To Exit.
Waiting ...CCCCCCCCCC
6.Open the terminal, select Xmodem in the menu bar, and select the BootWare image version for upgrade.
Xmodem file transfer might be slow depending on the baud rate you selected.
7.After the file transfer is complete, enter Y to upgrade the BootWare.
Starting xmodem transfer. Press Ctrl+C to cancel.
Transferring 34368_v1.06.btw...
100% 644 KB 0 KB/s 00:12:48 0 Errors
Download successfully!
659456 bytes downloaded!
Updating Basic BootWare? [Y/N]Y
Updating Basic BootWare.........Done.
Updating Extended BootWare? [Y/N]Y
Updating Extended BootWare...........Done.
=====================<BASIC-BOOTWARE MENU (Ver 7.13) >======================
|<1> Modify Serial Interface Parameter |
|<2> Update Extended BootWare |
|<3> Update Full BootWare |
|<4> Boot Extended BootWare |
|<5> Boot Backup Extended BootWare |
|<0> Reboot |
============================================================================
Ctrl+U: Access BASIC ASSISTANT MENU
Ctrl+A: Enter Command Line
Ctrl+C: Display Copyright
Enter your choice(0-5): 0
8.Enter 0 in the BASIC-BOOTWARE menu to reboot the device for the new BootWare to take effect. The device displays information about the new BootWare version.
Appendix C Converting the AP mode
This feature is available only for APs of version R2442 or later.
Converting the AP mode from the BootWare menu
1.Set up the configuration environment as shown in Figure 16.
Figure 16 Setting up the configuration environment
2.Reboot the AP. The sample output is shown as follows:
System is starting...
Press Ctrl+D to access BASIC-BOOTWARE MENU...
Booting Normal Extended BootWare
The Extended BootWare is self-decompressing....Done.
****************************************************************************
* *
* H3C WA6526 BootWare, Version 7.15 *
* *
****************************************************************************
Copyright (c) 2004-2023 New H3C Technologies Co., Ltd.
Compiled Date : Mar 22 2023
CPU L1 Cache : 32KB
CPU L2 Cache : 256KB
CPU Clock Speed : 2200MHz
Memory Type : DDR3 SDRAM
Memory Size : 1024MB
Memory Speed : 933MHz
Flash Size : 256MB
PCB Version : Ver.A
BootWare Validating...
Press Ctrl+B to access EXTENDED-BOOTWARE MENU...
3.Press Ctrl+B at the prompt to enter the EXTENDED-BOOTWARE menu.
Password recovery capability is enabled.
Note: The current operating device is flash
Enter < Storage Device Operation > to select device.
==========================<EXTENDED-BOOTWARE MENU>==========================
|<1> Boot System |
|<2> Enter Serial SubMenu |
|<3> Enter Ethernet SubMenu |
|<4> File Control |
|<5> Restore to Factory Default Configuration |
|<6> Skip Current System Configuration |
|<7> BootWare Operation Menu |
|<8> Skip Authentication for Console Login |
|<9> Storage Device Operation |
|<0> Reboot |
============================================================================
Ctrl+Z: Access EXTENDED ASSISTANT MENU
Ctrl+F: Format File System
Ctrl+C: Display Copyright
Ctrl+Y: Change AP Mode
Enter your choice(0-9):
4.Press Ctrl+Y to convert the AP mode.
Please select the new mode
Current mode is Fit
============================================================================
|NO. Mode |
|1 Fit Mode |
|2 Anchor-AC (Virtual AC mode) |
|3 Cloud Mode |
|0 Exit |
============================================================================
Enter your choice(0-3):
5.Enter the mode number.
The mode takes effect immediately without an AP restart.
Converting the AP mode from the Cloudnet
1.Set up the configuration environment as shown in Figure 17, and configure the AP to obtain an IP address through DHCP.
Make sure the following conditions are met:
The AP cannot register on any AC.
The AP can use the IP address assigned by the DHCP server to reach the public network.
The DNS server can translate the address of the Cloudnet correctly.
Figure 17 Setting up the configuration environment
2.Visit oasiscloud.h3c.com through a browser, and then enter the username and password.
3.Add the AP to the Cloudnet.
a.On the top navigation bar, click Network, and then select Network > Devices from the left navigation pane.
b.Select the target branch and site from the upper left corner of the page, and then click Add.
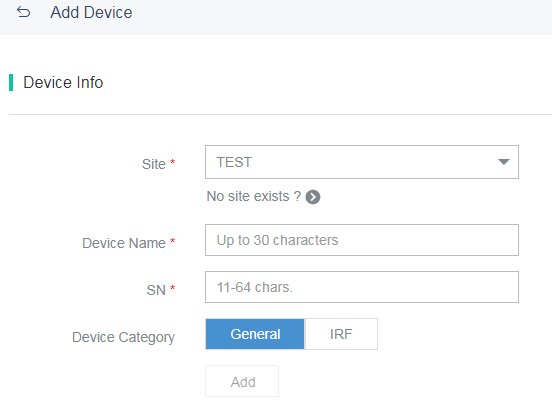
c.Specify the site, device name, and device serial number, and then click Add.
Figure 18 Adding a device
4.Start the AP. If the AP starts up and fails to discover any AC, its operating mode will change to cloud at the first association with the Cloudnet.
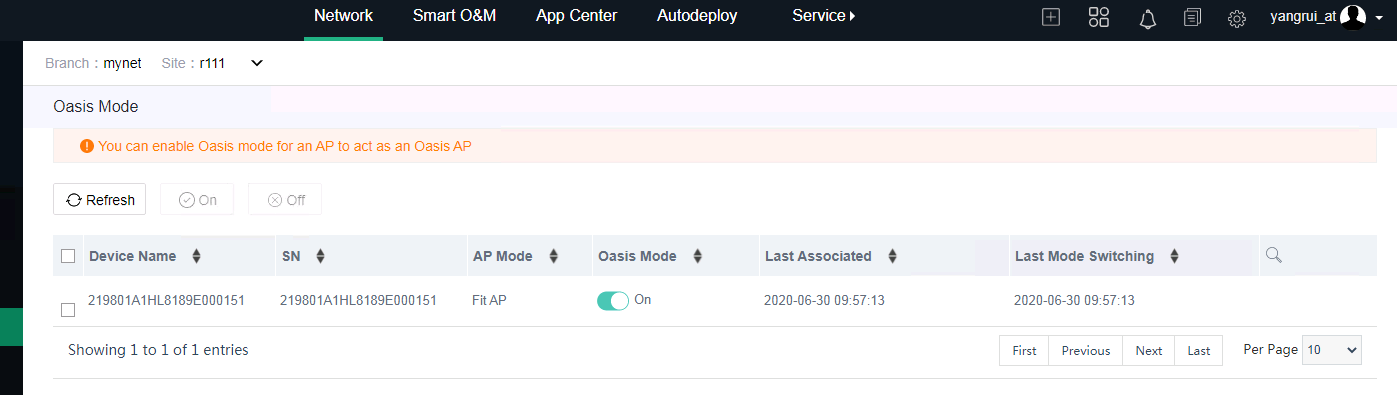
5.To manually convert the AP mode, click Network on the top navigation bar, and then select Settings > Cloud APs > Oasis Mode from the left navigation pane. Then, enable the cloud mode (oasis mode in the following figure) for the target AP.
Figure 19 Enabling the cloud mode
Converting the AP mode from the CLI
Access the CLI of the AP and then execute the ap-mode { anchor-ac | cloud | fit } command in system view. Then, the AP restarts for the new mode to take effect and uses the factory defaults or previously saved settings, if any, for the mode.
The CLI does not support entering a question mark (?) to display parameters of this command or using the Tab key to complete the command.
