| Title | Size | Downloads |
|---|---|---|
| 15-H3C IMC UAM PEAP-MSCHAPv2 Authentication with LDAP Configuration Examples-book.pdf | 1.29 MB |
- Related Documents
-
| Title | Size | Download |
|---|---|---|
| book | 1.29 MB |
|
H3C IMC UAM |
|
PEAP-MSCHAPv2 Authentication with LDAP Configuration Examples |
|
|
Software version: IMC UAM 7.2 (E0403)
|
Copyright © 2016 Hangzhou H3C Technologies Co., Ltd. All rights reserved. No part of this manual may be reproduced or transmitted in any form or by any means without prior written consent of Hangzhou H3C Technologies Co., Ltd. The information in this document is subject to change without notice. |
|
Contents
Example: Configuring UAM PEAP-MSCHAPv2 authentication with LDAP
Associating UAM with the LDAP server
Resetting the virtual computer password
Configuring an LDAP synchronization policy
Importing the server certificate
Creating an 802.1X connection in the iNode client
Triggering 802.1X authentication from the user's PC
Introduction
This document provides examples for using UAM and LDAP servers to provide PEAP-MSCHAPv2 authentication.
Prerequisites
Before you configure UAM PEAP-MSCHAPv2 authentication with LDAP, complete the following tasks:
· Verify that the access device supports 802.1X.
· Obtain the server certificate for certificate authentication.
Example: Configuring UAM PEAP-MSCHAPv2 authentication with LDAP
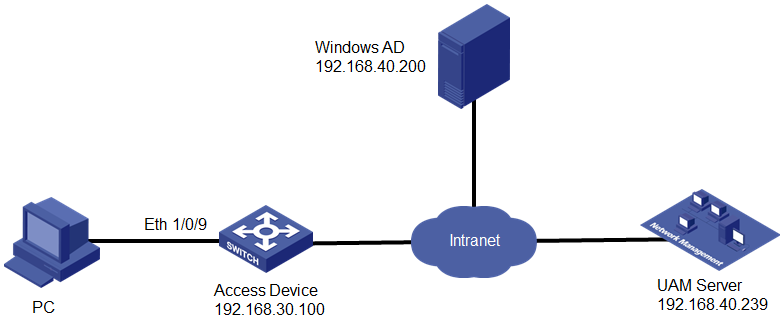
Network configuration
As shown in Figure 1, a company uses an LDAP server and UAM for user authentication. The LDAP server is Windows AD on Windows Server 2012.
The iNode client is installed on the user's PC, which triggers 802.1X certificate authentication.
UAM performs PEAP-MSCHAPv2 authentication and sends user authentication information to the LDAP server. The LDAP server authenticates the user and returns the authentication result to UAM.
Software versions used
This configuration example was created and verified on the following platforms:
· IMC UAM 7.2 (E0403).
· Windows AD, which runs on Windows Server 2012.
· HP A5500-24G EI Comware Software, Version 5.20, Feature 2212P02.
· iNode PC 7.2 (E0402).
Restrictions and guidelines
Access device configuration
When you add the switch to UAM as an access device, use the following guidelines:
· Use the NAS IP address (configured by using the nas-ip command on the switch) as the IP address of the access device on UAM.
· If the nas-ip command is not configured, use the IP address of the interface (including VLAN interface) that connects to UAM.
In this example, the nas-ip command is not configured.
Certificate configuration
The server certificate imported to UAM must be the same as the server certificate installed on the client.
Shared key configuration
The authentication and accounting shared keys configured on UAM must be the same as the authentication and accounting shared keys configured on the access device.
Service port configuration
The authentication port and accounting port configured on UAM must be the same as the authentication port and accounting port configured on the access device.
Service suffix configuration
The service suffix configuration on UAM depends on the ISP domain configuration on the access device and the account name used by the client for authentication.
Table 1 shows the parameter mapping.
Table 1 Parameter mapping
|
Account name |
Authentication domain on the access device |
Username format command on the access device |
Service suffixes in UAM |
|
X@Y |
Y |
user-name-format with-domain |
Y |
|
X@Y |
Y |
user-name-format without-domain |
No suffix |
|
X |
Default domain |
user-name-format with-domain |
Default domain |
|
X |
Default domain |
user-name-format without-domain |
No suffix |
In this example, the domain name is included in the usernames and you must specify a service suffix in UAM.
Configuring the LDAP server
1. Install Windows AD and configure the following parameters:
a. Configure the forest root domain name as xin.h3c.
b. Configure the domain NetBIOS name as xin.
2. Set the password to iMC123/ for the administrator in the Users group of the xin.h3c domain.
3. Create an organization unit named test-1 in the domain, and create users test001 and test002 in the organization unit.
4. Create a virtual computer named xin10939 in the xin.h3c domain. Then, execute the ModifyComputerAccountPass.vbs script to reset the virtual computer password.
In this example, Windows AD runs on a server named ad.xin.h3c.
Configuring UAM
Configuring an access policy
1. Click the User tab.
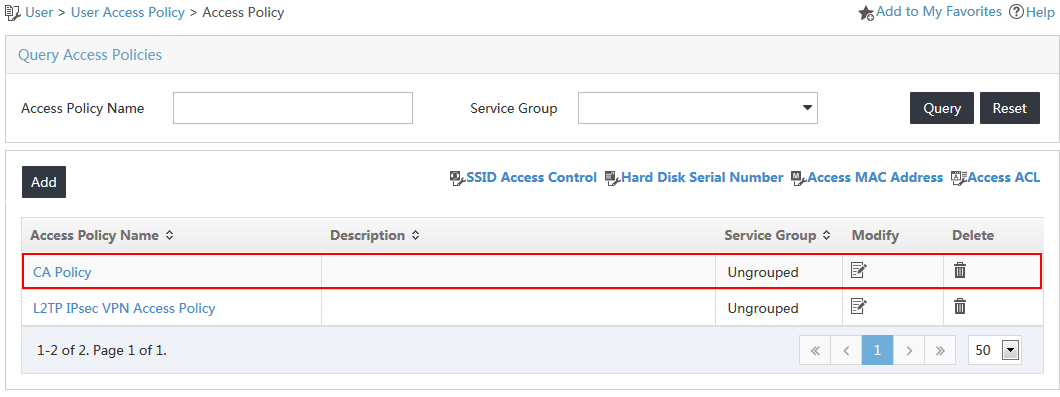
2. From the navigation tree, select User Access Policy > Access Policy.
The access policy list is displayed, as shown in Figure 2.
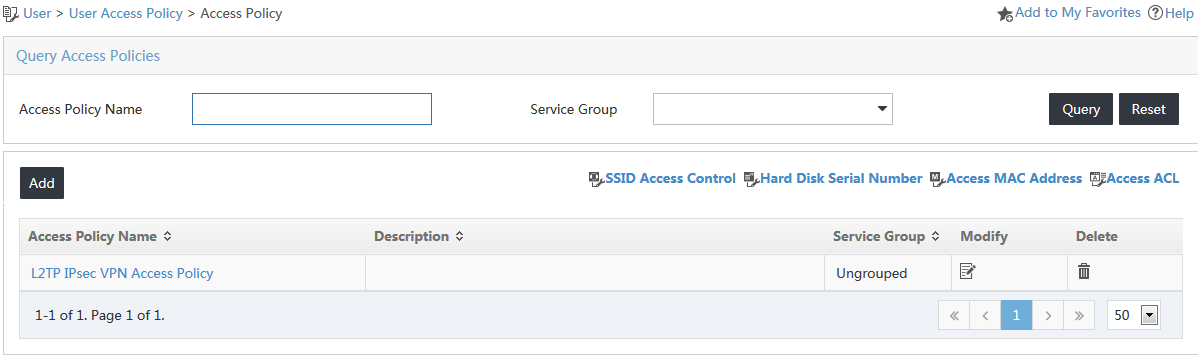
3. Click Add.
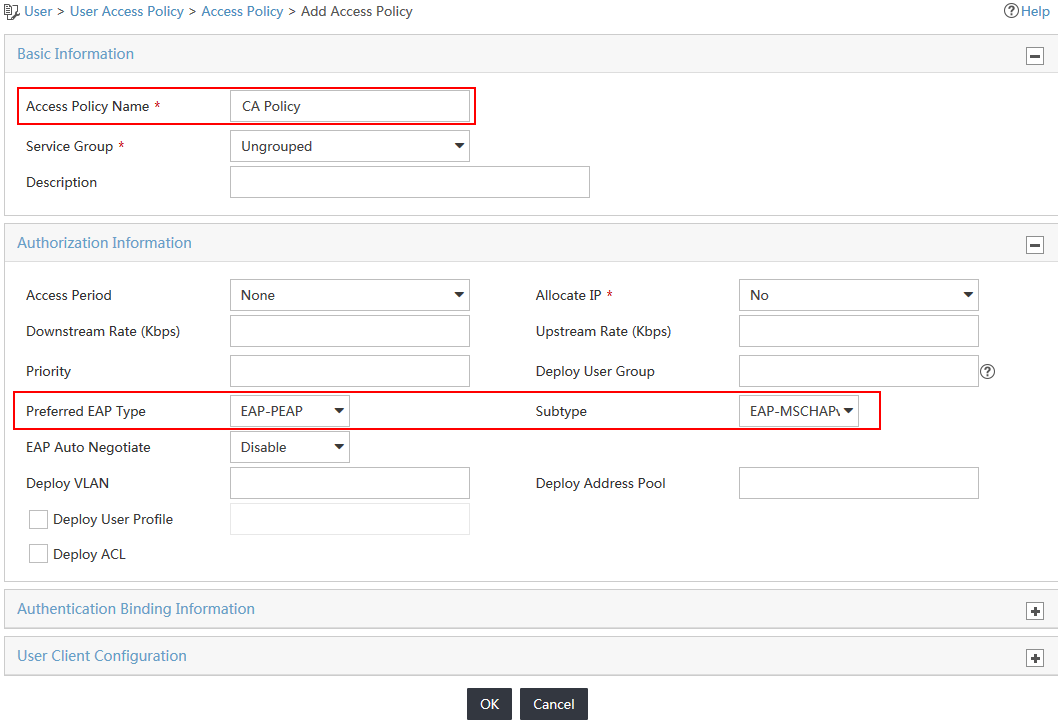
4. On the Add Access Policy page, configure the following parameters, as shown in Figure 3:
¡ Enter CA Policy in the Access Policy Name field.
¡ Select EAP-PEAP from the Preferred EAP Type list.
¡ Select EAP-MSCHAPv2 from the Subtype list.
¡ Use the default values for other parameters.
Figure 3 Configuring the access policy
5. Click OK.
The access policy named CA Policy is added to the access policy list, as shown in Figure 4.
Figure 4 Viewing the new access policy on the list
Configuring an access service
1. Click the User tab.
2. From the navigation tree, select User Access Policy > Access Service.
The access service list is displayed, as shown in Figure 5.

3. Click Add.
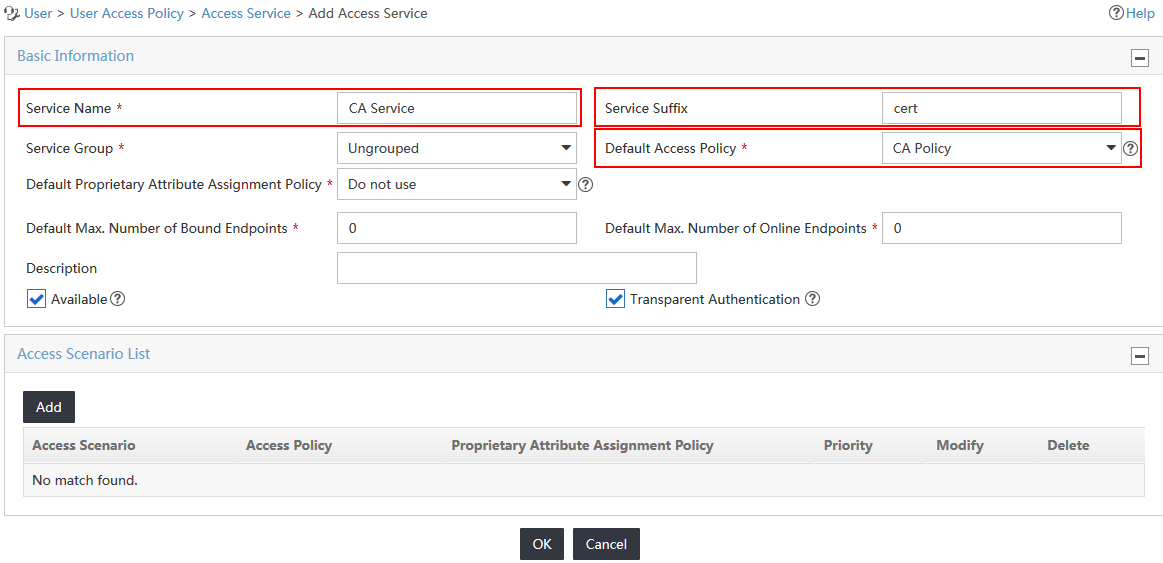
4. On the Add Access Service page, configure the basic information for the access service, as shown in Figure 6:
a. Enter CA Service in the Service Name field.
b. Enter cert in the Service Suffix field.
c. Select CA Policy from the Default Access Policy list.
d. Use the default values for other parameters.
Figure 6 Configuring the access service
5. Click OK.
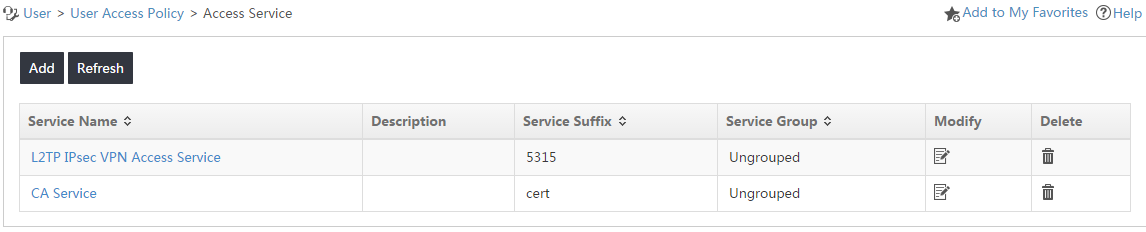
The access service named CA Service is added to the access service list, as shown in Figure 7.
Figure 7 Viewing the new access service on the list
Associating UAM with the LDAP server
1. Click the User tab.
2. From the navigation tree, select User Access Policy > LDAP Service > LDAP Server.
The LDAP server list is displayed, as shown in Figure 8.
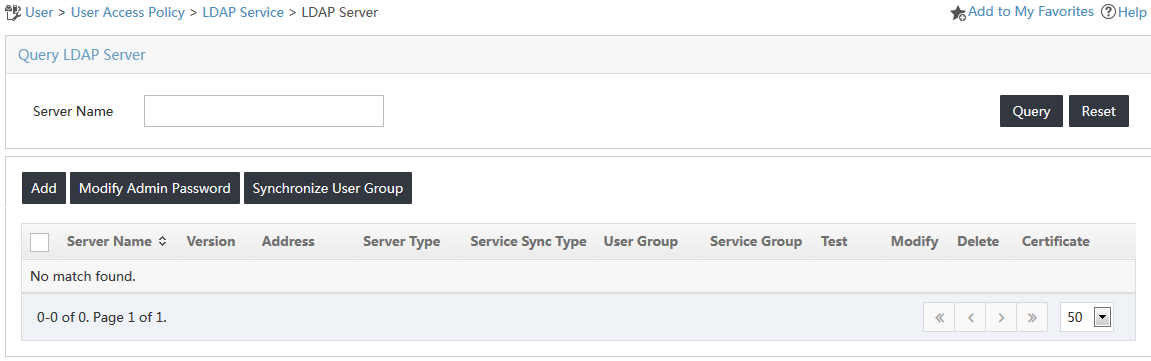
3. Click Add.
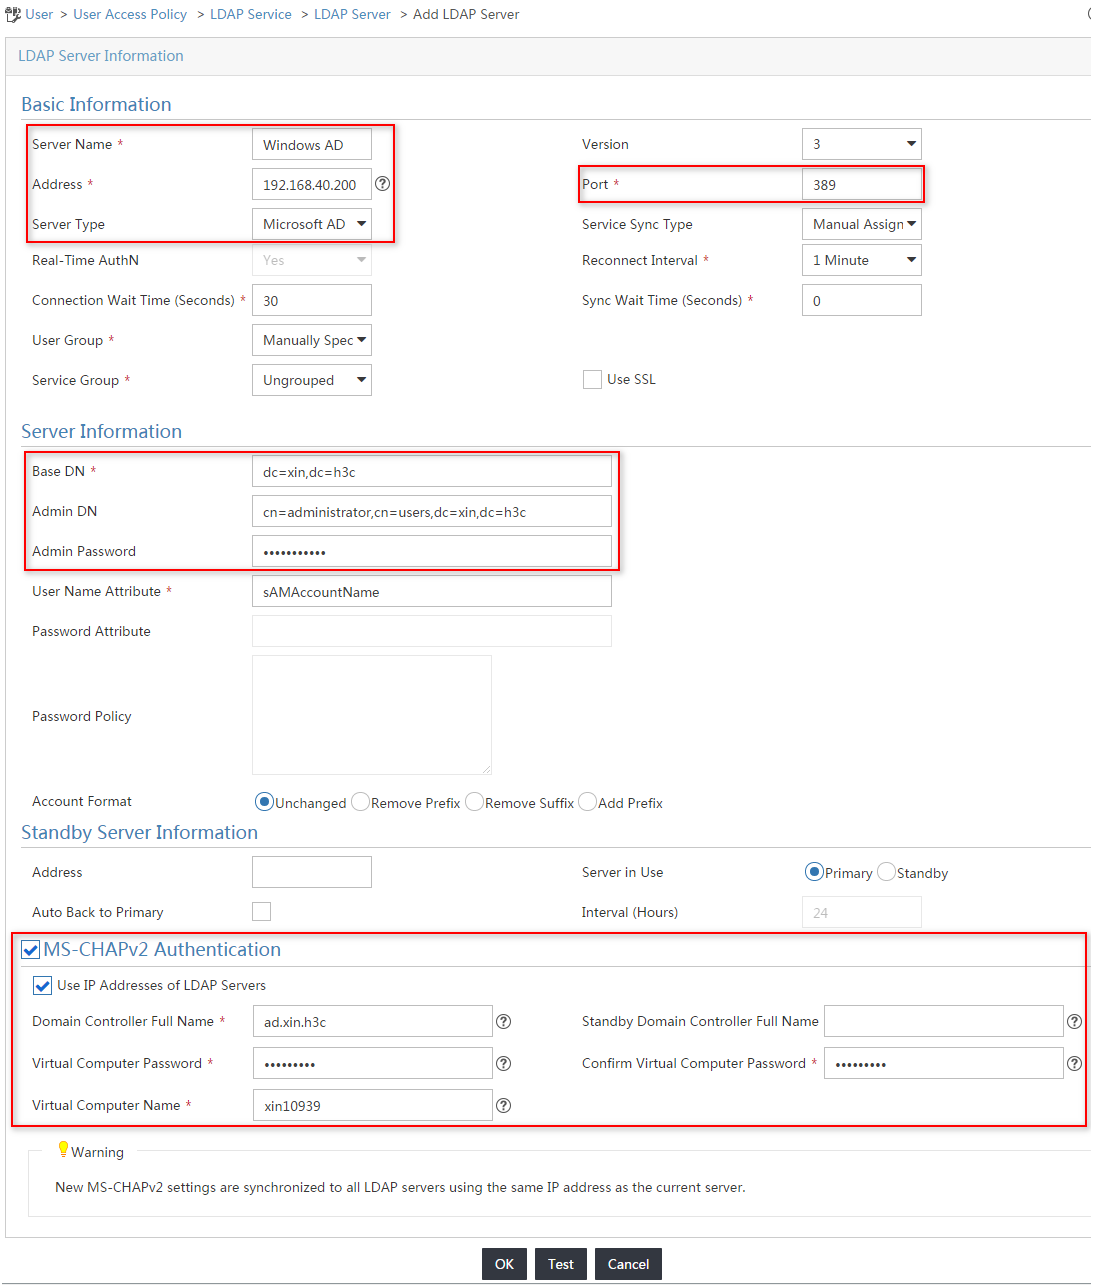
4. On the Add LDAP Server page, configure the following parameters, as shown in Figure 9:
¡ Enter Windows AD in the Server Name field.
¡ Enter 192.168.40.200 in the Address field.
¡ Select Synchronize by OU from the User Group list.
¡ Enter dc=xin,dc=h3c in the Base DN field.
¡ Enter cn=administrator,cn=users,dc=xin,dc=h3c in the Admin DN field.
¡ Enter iMC123/ in the Admin Password field.
¡ Select MS-CHAPv2 Authentication.
¡ Select Use IP Addresses of LDAP Servers.
¡ Enter ad.xin.h3c in the Domain Controller Full Name field.
¡ Enter the password in the Virtual Computer Password and Confirm Virtual Computer Password fields.
¡ Enter xin10939 in the Virtual Computer Name field.
¡ Use the default values for other parameters.
Figure 9 Adding an LDAP server
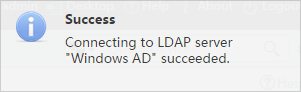
5. Click Test.
The connectivity test result is displayed, as shown in Figure 10.
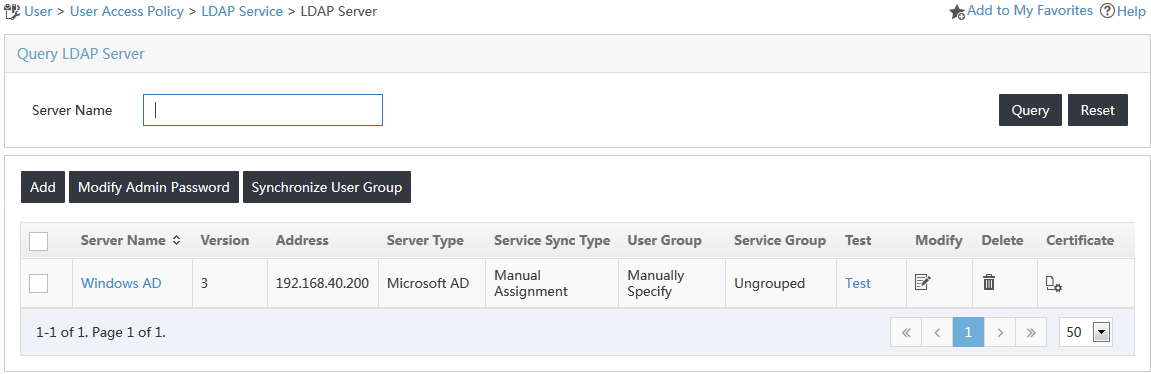
6. Click OK.
The LDAP server named Windows AD is added to the LDAP server list, as shown in Figure 11.
Figure 11 Viewing the new LDAP server on the list
Resetting the virtual computer password
1. Click the User tab.
2. From the navigation tree, select User Access Policy > LDAP Service > LDAP Parameters.
The LDAP Parameters page opens, as shown in Figure 12.
Figure 12 LDAP Parameters page

3. Click the link at the bottom of the page to download the script and save it locally, as shown in Figure 13.
Figure 13 Downloading the script
4. Use the text editor to modify the object value and password of the virtual computer in the script file, as shown in Figure 14.
Figure 14 Modifying the object value and password of the virtual computer

5. Execute the script on the domain controller.
Configuring an LDAP synchronization policy
1. Click the User tab.
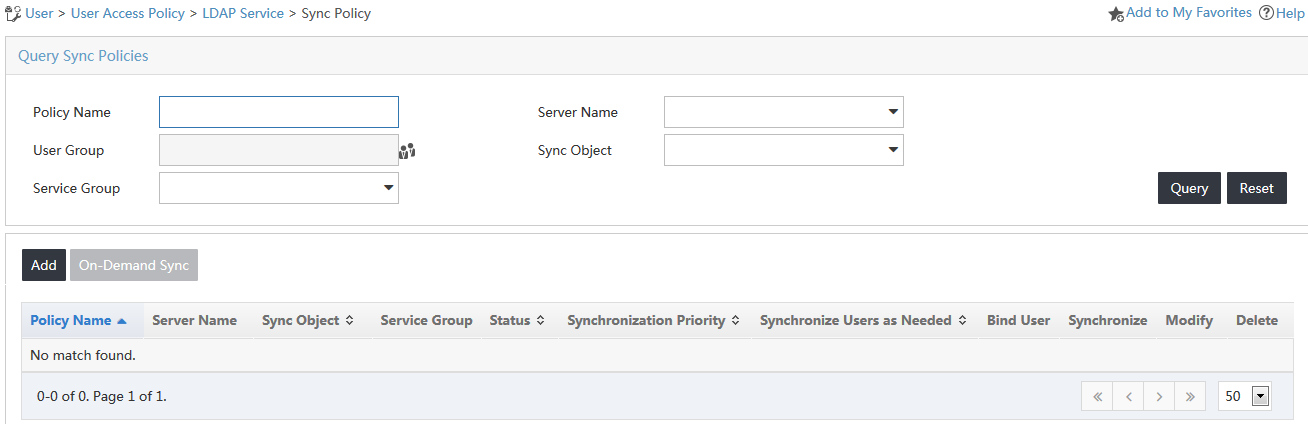
2. From the navigation tree, select User Access Policy > LDAP Service > Sync Policy.
The synchronization policy list is displayed, as shown in Figure 15.
Figure 15 Synchronization policy list
3. Click Add.
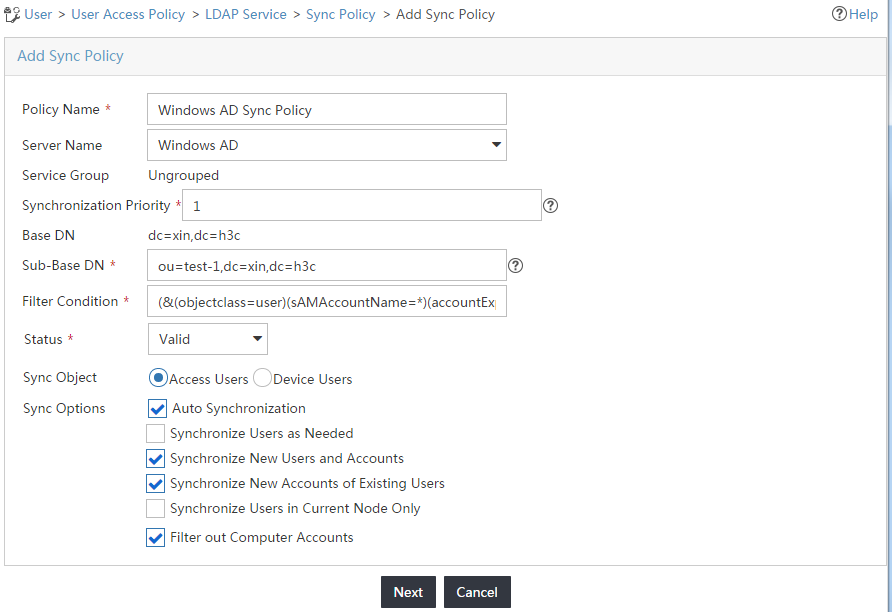
4. On the Add Sync Policy page, configure the following parameters, as shown in Figure 16:
¡ Enter Windows AD Sync Policy in the Policy Name field.
¡ Select Windows AD from the Server Name list.
¡ Enter ou=test-1,dc=xin,dc=h3c in the Sub-Base DN field.
¡ Use the default values for other parameters.
Figure 16 Adding a synchronization policy
5. Click Next.
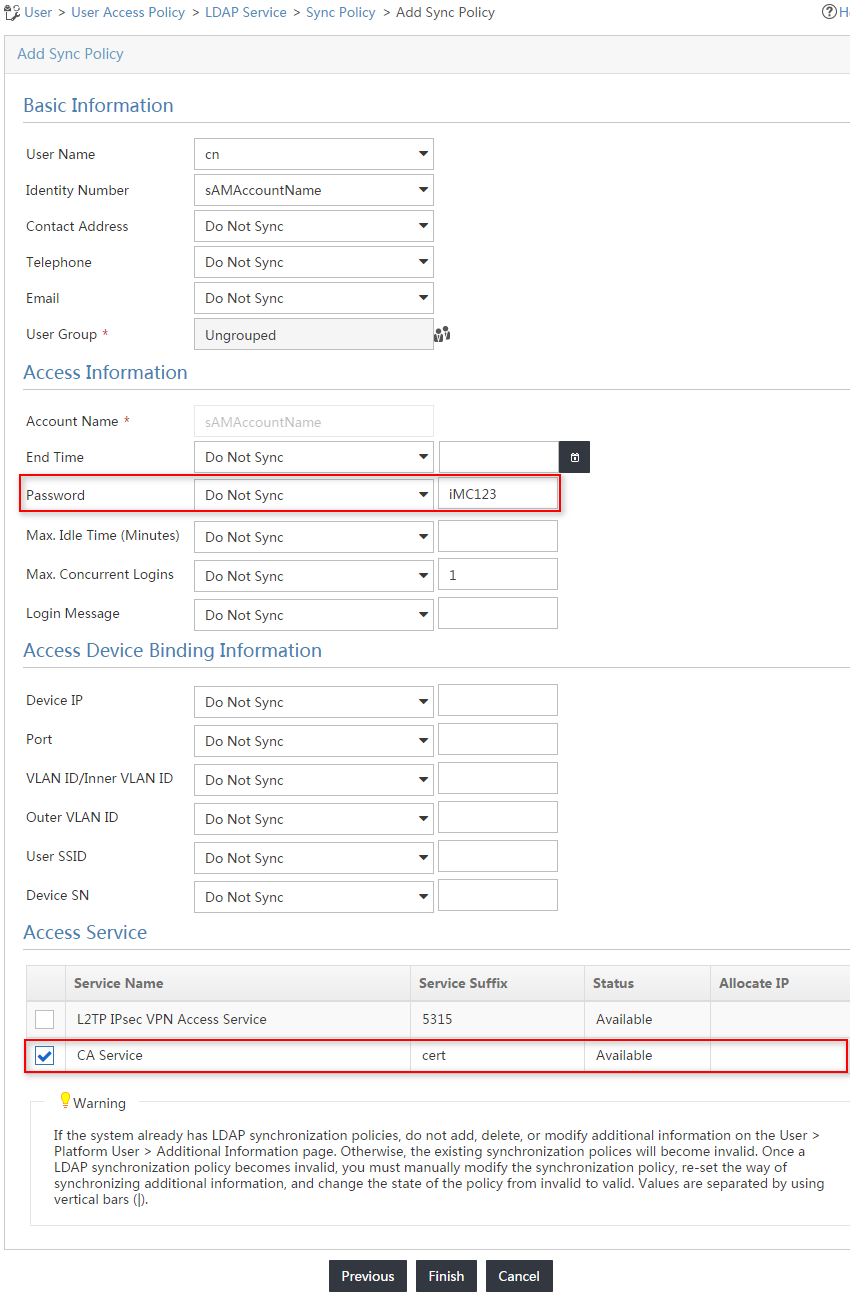
6. On the page shown in Figure 17, configure the following parameters:
¡ Enter iMC123 in the Password field.
This password is for users who are not bound to the LDAP server to pass authentication in UAM.
¡ Select CA Service on the Access Service list.
¡ Configure other parameters to be consistent with the configuration of the Windows AD server. In this example, the default values are used for other parameters.
Figure 17 Configuring the synchronization policy
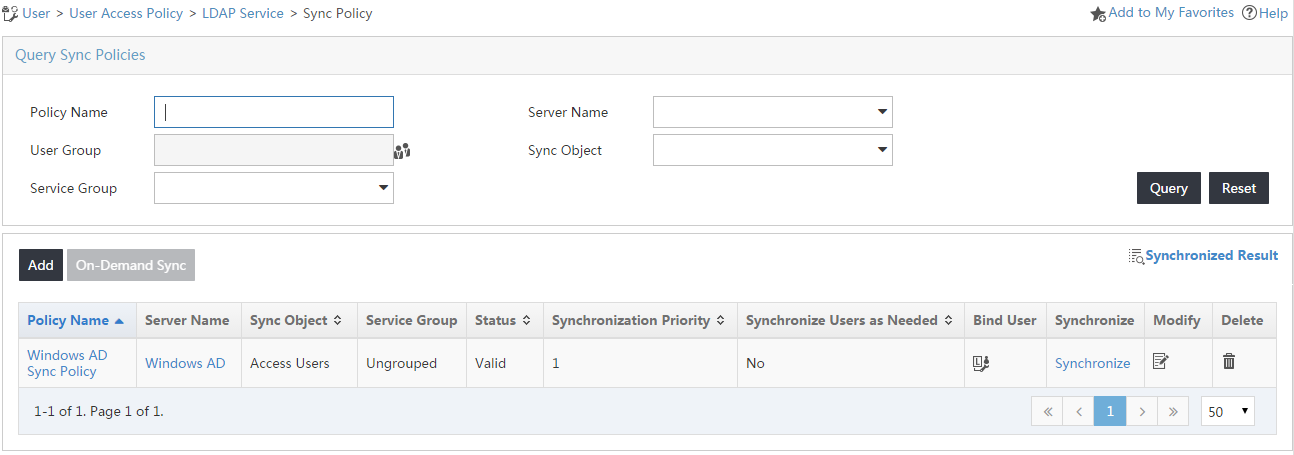
7. Click Finish.
The synchronization policy named Windows AD Sync Policy is added to the synchronization policy list, as shown in Figure 18.
Figure 18 Viewing the new policy on the synchronization policy list
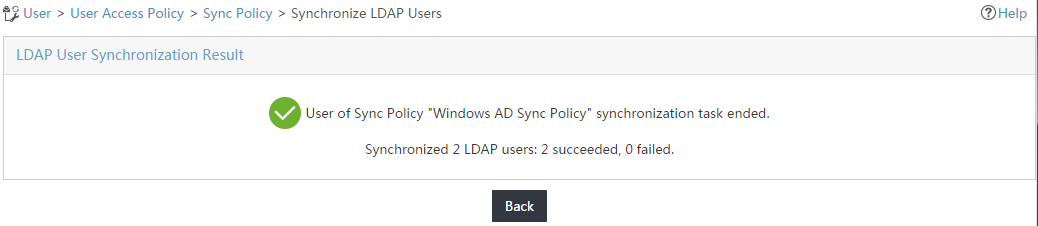
Synchronizing LDAP users
1. On the synchronization policy list, click Synchronize for the LDAP synchronization policy Windows AD Sync Policy.
The page displays the synchronization result, as shown in Figure 19.
Figure 19 Synchronizing LDAP users
2. Click Back.
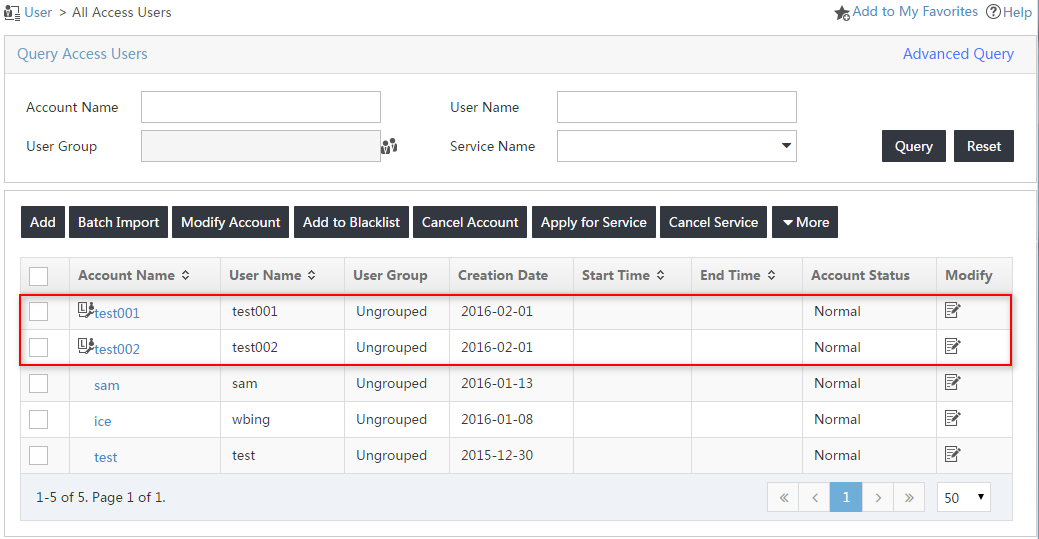
3. From the navigation tree, select Access User > All Access Users.
The access user list includes users synchronized from the LDAP server, as shown in Figure 20.
Figure 20 Viewing the LDAP users on the access user list
Importing the server certificate
1. Click the User tab.
2. From the navigation tree, select User Access Policy > Service Parameters > Certificate.
The certificate configuration page opens, as shown in Figure 21.
Figure 21 Configuring certificates
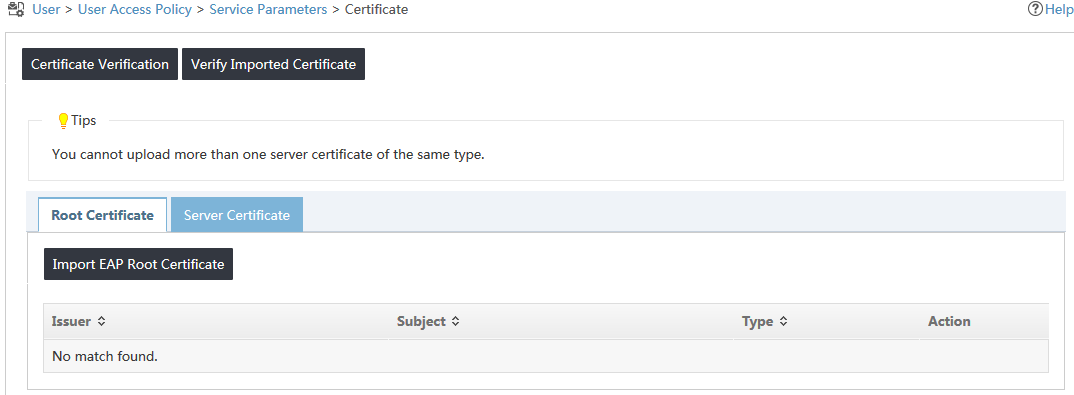
3. Click the Server Certificate tab.
The server certificate list is displayed, as shown in Figure 22.
Figure 22 Server certificate list

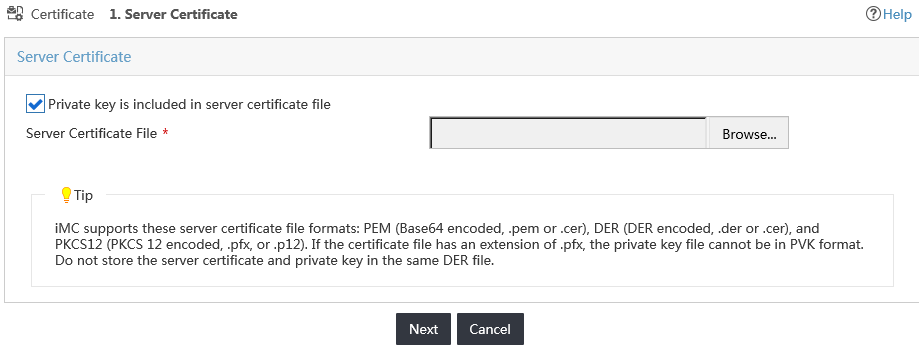
4. Click Import EAP Server Certificate.
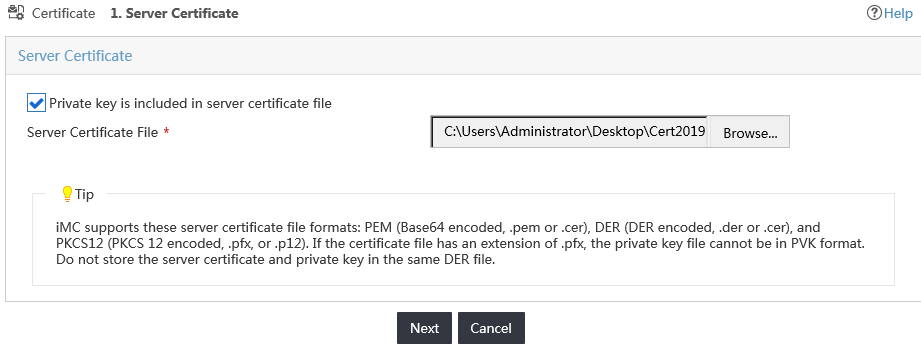
The Server Certificate page opens, as shown in Figure 23.
Figure 23 Configuring the server certificate

5. Select the Private key is included in server certificate file option.
6. Click Browse, as shown in Figure 24.
Figure 24 Choosing a server certificate file
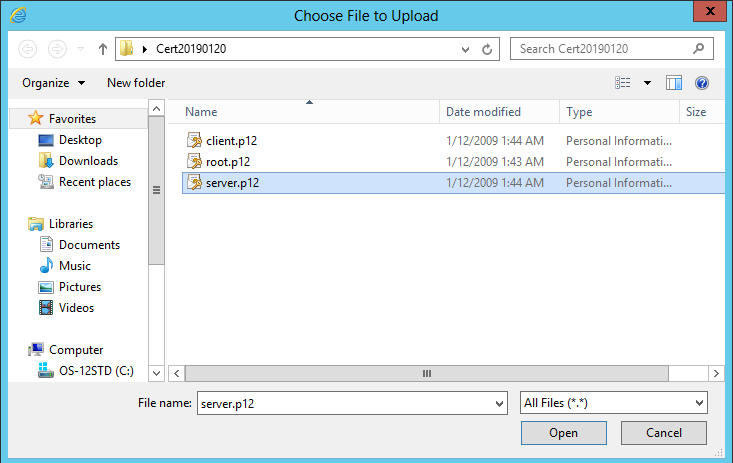
7. On the Choose File to Upload window, select the certificate file named server.p12, as shown in Figure 25.
Figure 25 Uploading the server certificate file
8. Click Open.
The Server Certificate page displays the name of the server certificate file, as shown in Figure 26.
Figure 26 Viewing the name of the server certificate file
9. Click Next.
10. On the Certificate Private Key Protection page, enter a password, and then click OK, as shown in Figure 27.
Figure 27 Configuring the password of the server private key

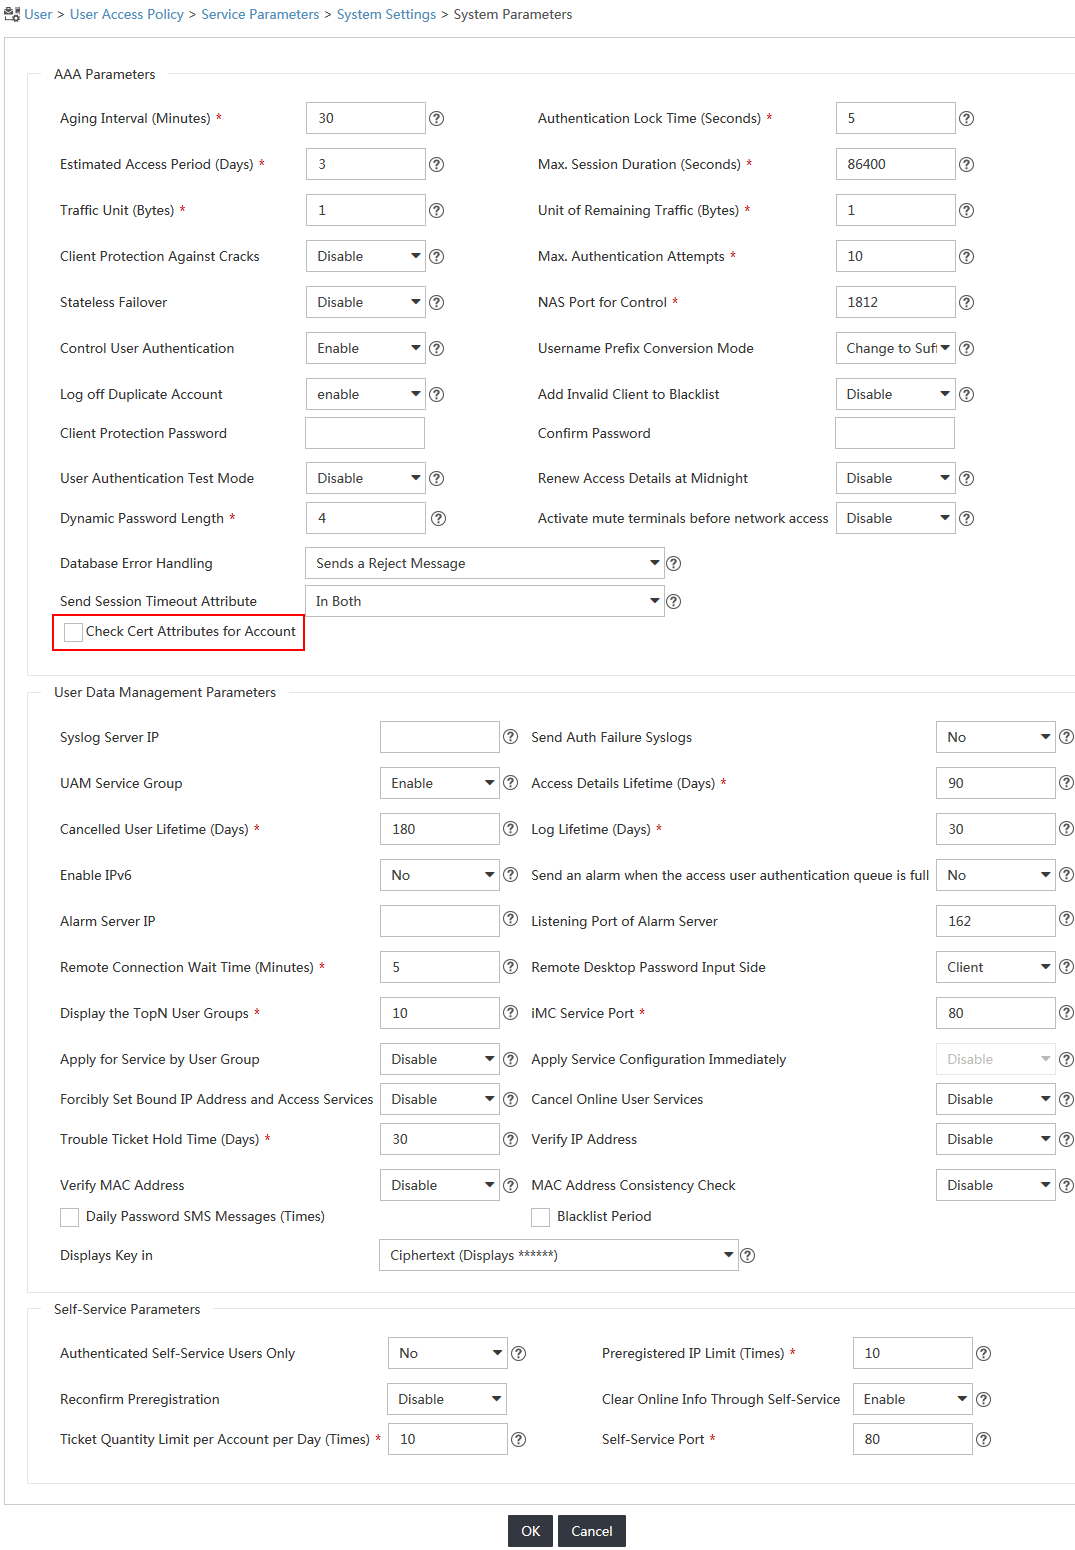
Configuring system parameters
To use certificate authentication, disable the system from checking the certificate attributes for user accounts.
1. Click the User tab.
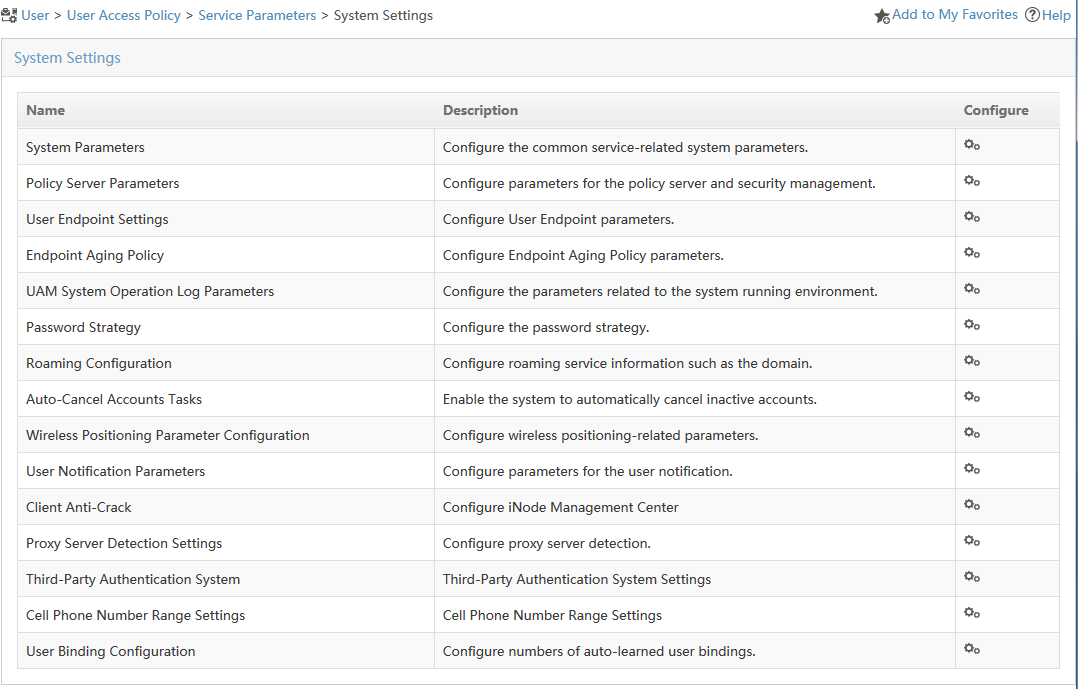
2. From the navigation tree, select User Access Policy > Service Parameters > System Settings.
The system settings list is displayed, as shown in Figure 28.
Figure 28 System settings list
3. Click the Configure icon ![]() for System Parameters.
for System Parameters.
4. On the System Parameters page, clear the Check Cert Attributes for Account option, and then click OK, as shown in Figure 29.
Figure 29 Configuring the system parameters
Adding an access device
1. Click the User tab.
2. From the navigation tree, select User Access Policy > Access Device Management > Access Device.
The access device list is displayed, as shown in Figure 30.
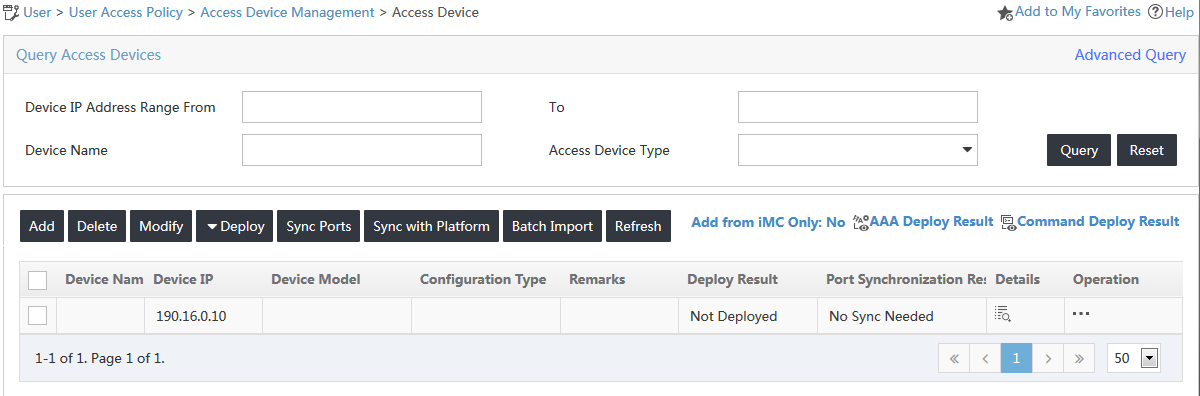
3. Click Add.
The Add Access Device page opens.
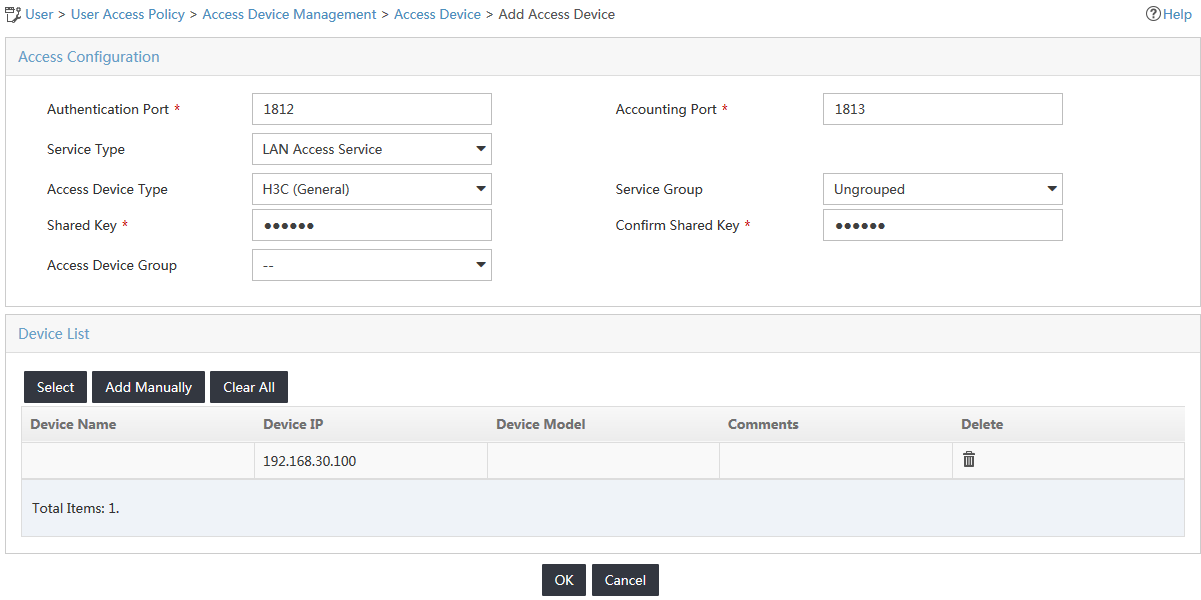
4. Configure the following parameters, as shown in Figure 31:
a. In the Access Configuration area, enter expert in the Shared Key field and Confirm Shared Key field, and use the default values for other parameters.
b. In the Device List area, click Select.
c. On the Select Devices window, select the access device with an IP address of 192.168.30.100, and then click OK.
d. Click OK.
Figure 31 Configuring the access device
5. On the operation result page, click Back to Access Device List.
The new access device is added to the access device list.
Configuring the switch
1. Configure a RADIUS scheme:
# Create RADIUS scheme test and enter RADIUS scheme view.
<HP> system-view
System View: return to User View with Ctrl+Z.
[HP] radius scheme test
New Radius scheme
# Specify UAM at 192.168.40.239 as the primary authentication server, and set the authentication port number to 1812.
[HP-radius-test] primary authentication 192.168.40.239 1812
# Specify UAM at 192.168.40.239 as the primary accounting server, and set the accounting port number to 1813.
[HP-radius-test] primary accounting 192.168.40.239 1813
# Set both the authentication and accounting shared keys to expert for secure RADIUS communication.
[HP-radius-test] key authentication expert
[HP-radius-test] key accounting expert
# Configure the access device to send usernames without domain names to UAM.
[HP-radius-test] user-name-format with-domain
[HP-radius-test] quit
2. Configure an ISP domain:
# Create domain cert and enter ISP domain view.
[HP] domain cert
New Domain added.
# Configure ISP domain cert to use RADIUS scheme test for authentication, authorization, and accounting of LAN users.
[HP-isp-cert] authentication lan-access radius-scheme test
[HP-isp-cert] authorization lan-access radius-scheme test
[HP-isp-cert] accounting lan-access radius-scheme test
[HP-isp-cert] quit
3. Configure 802.1X:
# Set the authentication method to EAP to support EAP-PEAP/EAP-MSCHAPv2 authentication.
[HP] dot1x authentication-method eap
EAP authentication is enabled.
# Enable 802.1X globally.
[HP] dot1x
802.1X is enabled globally.
# Enable 802.1X on Ethernet 1/0/1.
[HP] dot1x interface ethernet 1/0/1
802.1X is enabled on port Ethernet1/0/1.
Configuring the user's PC
Creating an 802.1X connection in the iNode client
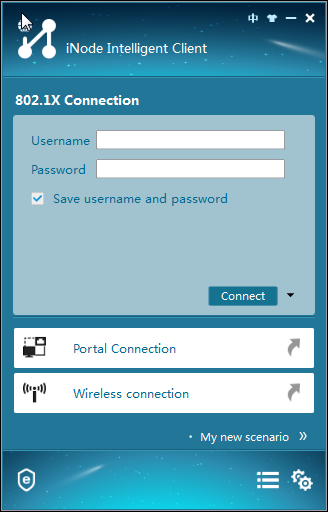
1. Launch the iNode client.
The iNode client window opens, as shown in Figure 32.
Figure 32 iNode client window
2. Click the More icon ![]() next
to Connect, and then select Properties.
next
to Connect, and then select Properties.
The Properties dialog box opens, as shown in Figure 33.
Figure 33 Properties dialog box
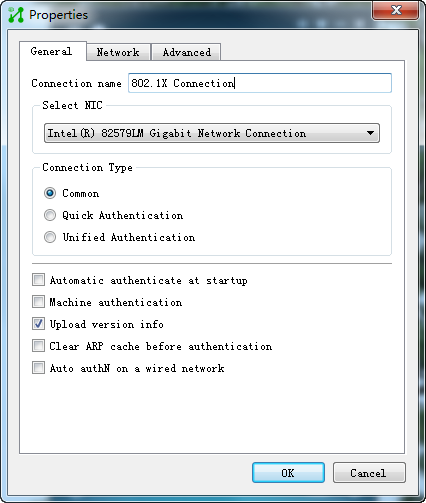
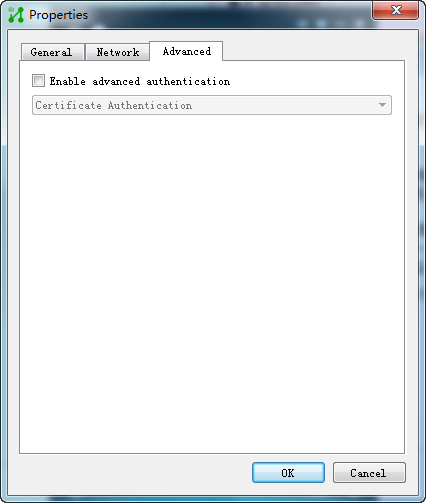
3. Click the Advanced tab.
The advanced authentication configuration page opens, as shown in Figure 34.
Figure 34 Advanced authentication configuration
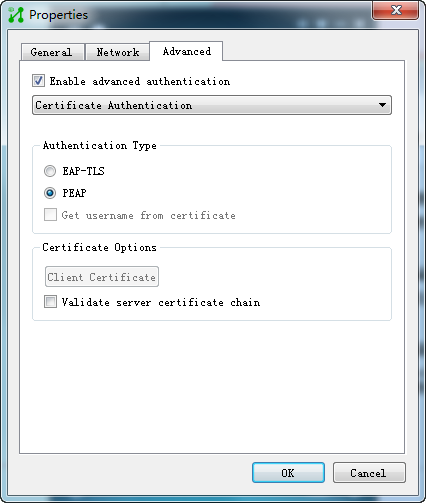
4. Configure the following parameters, as shown in Figure 35:
a. Select the Enable advanced authentication option.
b. Select Certificate Authentication from the list.
c. Select PEAP for Authentication Type.
d. Use the default values for other parameters.
Figure 35 Configuring 802.1X properties
5. Click OK.
Verifying the configuration
Triggering 802.1X authentication from the user's PC
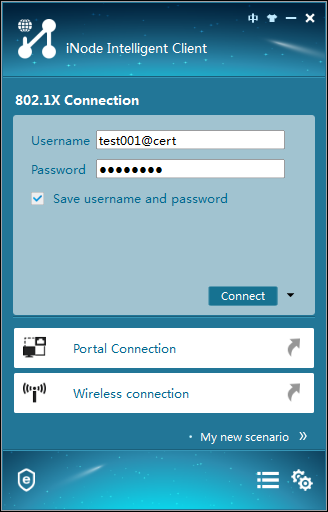
1. Launch the iNode client, as shown in Figure 36.
Figure 36 iNode client window

2. Enter the username and password for 802.1X access, and then click Connect, as shown in Figure 37.
Figure 37 802.1X authentication
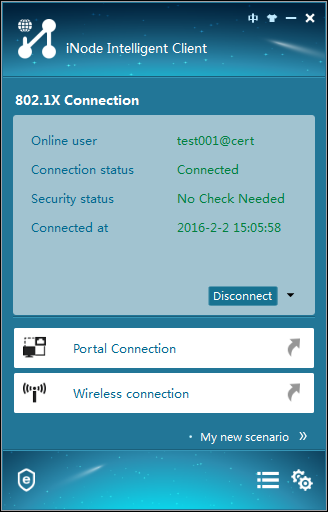
3. In the 802.1X Connection area, view the messages to verify that the user passed authentication, as shown in Figure 38.
Figure 38 Viewing the authentication result
Viewing online users in UAM
1. Click the User tab.
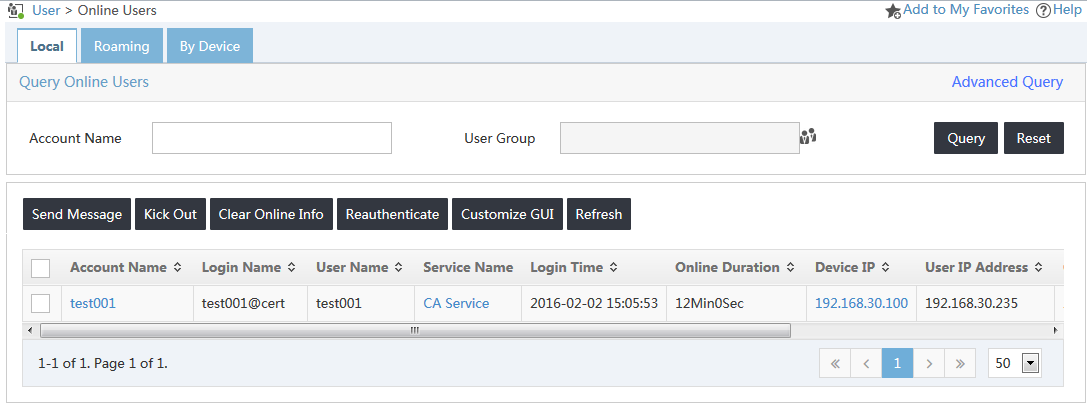
2. From the navigation tree, select All Access Users > Online Users.
The online user list displays online users, as shown in Figure 39.
Verify that the user test001 is in the online user list.
Figure 39 Viewing online users