| Title | Size | Downloads |
|---|---|---|
H3C Workspace Cloud Desktop Quick Start (Education Scenario)-E1013 Series-5W100-book.pdf  |
13.16 MB |
- Related Documents
-
| Title | Size | Download |
|---|---|---|
| book | 13.16 MB |
|
|
|
H3C Workspace Cloud Desktop |
|
Quick Start (Education Scenario) |
|
|
|
|
Document version: 5W100-20230803
Copyright © 2023 New H3C Technologies Co., Ltd. All rights reserved.
No part of this manual may be reproduced or transmitted in any form or by any means without prior written consent of New H3C Technologies Co., Ltd.
Except for the trademarks of New H3C Technologies Co., Ltd., any trademarks that may be mentioned in this document are the property of their respective owners.
The information in this document is subject to change without notice.
About H3C Workspace cloud desktop management software
Building a VOI course level-2 image
Configuring the teacher client
Logging in to the student client as a student user
Method of distinguishing UCC endpoints from non-UCC endpoints (IDV or VOI endpoints)
Uploading the optimization tool
Editing the virtual memory size
Disk space information about VOI endpoints
Creating a teaching image storage volume
Configuration cautions and guidelines
Major: Deleting a VM agent component
Major: Managing disks in the desktop running on a VOI endpoint
Minor: Creating a level-2 VOI image
About H3C Workspace cloud desktop management software
Introduction
H3C Workspace cloud desktop management software is a desktop virtualization solution developed based on virtual desktop infrastructure (VDI), intelligent desktop virtualization (IDV), and virtual OS infrastructure (VOI). With this software, you can move virtual desktop components including applications, OSs, and user data to a managed data center in the cloud for unified management and control. Users can access a desktop operating system from a thin client, fat client, mobile client, or PC as if they were using their own PC.
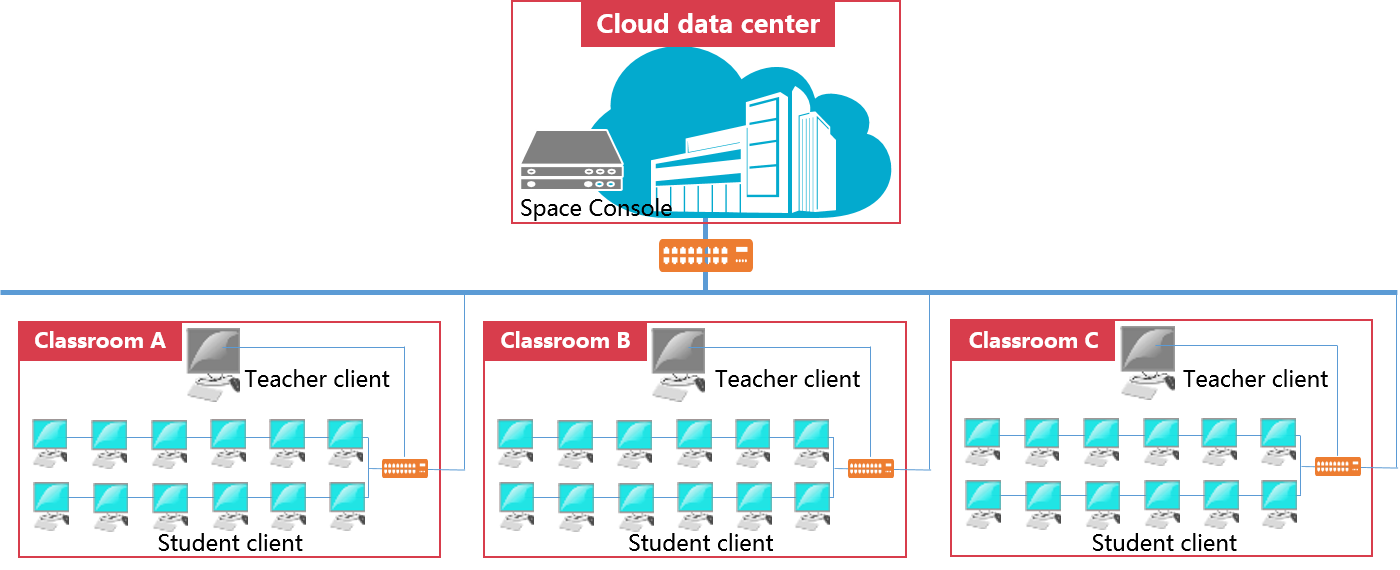
H3C Workspace cloud desktop management software can be deployed in office, education (also called Learningspace), and hybrid office and education scenarios. H3C Workspace cloud desktop management software deployed in the education scenario contains the following components:
· Space Console
Space Console is deployed on the cloud data center server and is accessed through the Web. You can use Space Console to perform operations, such as the cloud host management, course management, classroom management, account management, and system management.
· Learningspace teacher client
Learningspace used by a teacher and installed on the teacher endpoint, such as PC. Teachers can use Learningspace to perform operations such as class startup and dismissal, student client management, assignment space management, and starting teaching management software. To facilitate teachers' operation, the teacher client supports one-click operation for common features, such as one-click class startup and dismissal and one-click remote startup and shutdown of all student clients.
· Learningspace student client
Learningspace used by a student and installed on the student endpoint, such as thin client C113 and fat client C107V. Learningspace student client supports only VDI and VOI endpoints. Students can use Learningspace to obtain corresponding course desktops, and collaborate with the teacher client to complete the class startup and dismissal, and teaching-related operations during the class. Alternatively, students can select courses for self-study.
Figure 1 shows the relationship of the Learningspace components.
Figure 1 H3C Learningspace component relationship chart
Learningspace supports both VOI and VDI courses (vGPU can be enabled for VDI courses), and the adapted endpoint type varies by the course type. This document introduces a quick start for VDI, vGPU, and VOI courses, and guides users to perform operations on Space Console, such as fast creating a classroom, deploying courses, deploying endpoints, and class startup and dismissal.
The VOI client described in this document is a client deployed on a VOI endpoint, not a VOI client of a UCC endpoint. As from version E1012, the system performs only maintenance actions on VOI clients that are deployed on VOI endpoints. The new features will be added for VOI clients of UCC endpoints.
For more information about VOI client deployment on UCC endpoints, see H3C Workspace Cloud Desktop UCC Endpoint Configuration Guide.
Service workflow
1. An administrator creates a course, a classroom, and users on Space Console.
2. A teacher user registers the teacher client to the corresponding classroom and deploys student endpoints. Then, the teacher user selects courses, and click Start Class.
3. Space Console uses VMs corresponding to VDI courses as templates to bulk create VMs, and provides cloud desktops for students.
4. A student user logs in to the client to automatically obtain the cloud desktop and start the class.
5. To dismiss a class, perform one of the following tasks:
¡ Click Dismiss Class on Space Console
¡ Click Dismiss Class on the teacher client.
¡ Directly close the course window on the teacher client.
Then, the student client exits the course desktop, and the system automatically deletes the VM and reclaims resources.
A VOI course does not create a VM. When a class is started, the system deploys course images to student clients.
Prerequisites
Before the quick start, perform the following tasks:
· Install and deploy H3C Space Console.
· Complete the installation of Learningspace on H3C Learningspace clients (including teacher clients and student clients) and the endpoint deployment.
· Upload the system images to Space Console for the desktop image creation.
· Set up and configure the domain servers if domain users are required to be added.
· Upload the optimization tool to Space Console. For more information about the upload method, see "Uploading the optimization tool."
For more information about installation and deployment of H3C Space Console and H3C Learningspace clients, see client installtion and deployment for the education scenario in H3C Workspace Cloud Desktop Management Software Installation Guide.
Configuration workflow
Table 1 Workflow description
|
Workflow |
Description |
|
|
Specify the storage path for the course image file. |
||
|
Configuring a course |
Perform actions such as Creating a teaching storage, Creating a system image, Creating a VDI course, and Building a VDI course. |
|
|
Perform actions such as creating a VOI course and importing a VOI course. |
||
|
Perform actions such as Creating a teaching storage, Creating a system image, Creating a vGPU course, and Building a vGPU course. |
||
|
Method for creating a classroom. |
||
|
Create the account information of a student user or teacher user for the user to log in to the client through the username and password. |
||
|
View hardware configuration and recommended configuration for the teacher client. |
||
|
Register a teacher client to Space Console and log in to the teacher client. |
||
|
Deploy student endpoints. Student clients can be used only after the endpoint deployment. |
||
|
After the endpoint deployment, a student user logs in to the student client. |
||
|
Personalize settings used during the teaching process before starting the class, such as the directory and categorization format for file collection, the objects supported by remote commands, student endpoints, and classroom layout. |
||
|
Space Console uses VMs corresponding to courses as templates to bulk create VMs, and provides cloud desktops for students. A student user logs in to the client to automatically obtain the cloud desktop and start the class. |
||
|
The client provides various functions to help teachers teach courses. |
||
|
To dismiss a class, close the course window or click Dismiss Class on the teacher client. Then, the student client exits the course desktop. |
||
For more information about the teacher client usage, see H3C Workspace Cloud Desktop Teacher Client User Manual (Education Scenario).
For more information about the student client usage, see H3C Workspace Cloud Desktop Student Client User Manual (Education Scenario).
Configuring Learningspace
Learningspace supports both VOI and VDI courses (vGPU can be enabled for VDI courses), and the adapted endpoint type varies by the course type.
Configuring a VDI course
Creating a teaching storage
Before creating a course, configure the storage path for the course image. For more information, see ''Configuring teaching storage."
Creating a system image
Perform this task to create a system image on Space Console for you to build a course. The system image is supported on both VDI and VOI courses.
To create a system image:
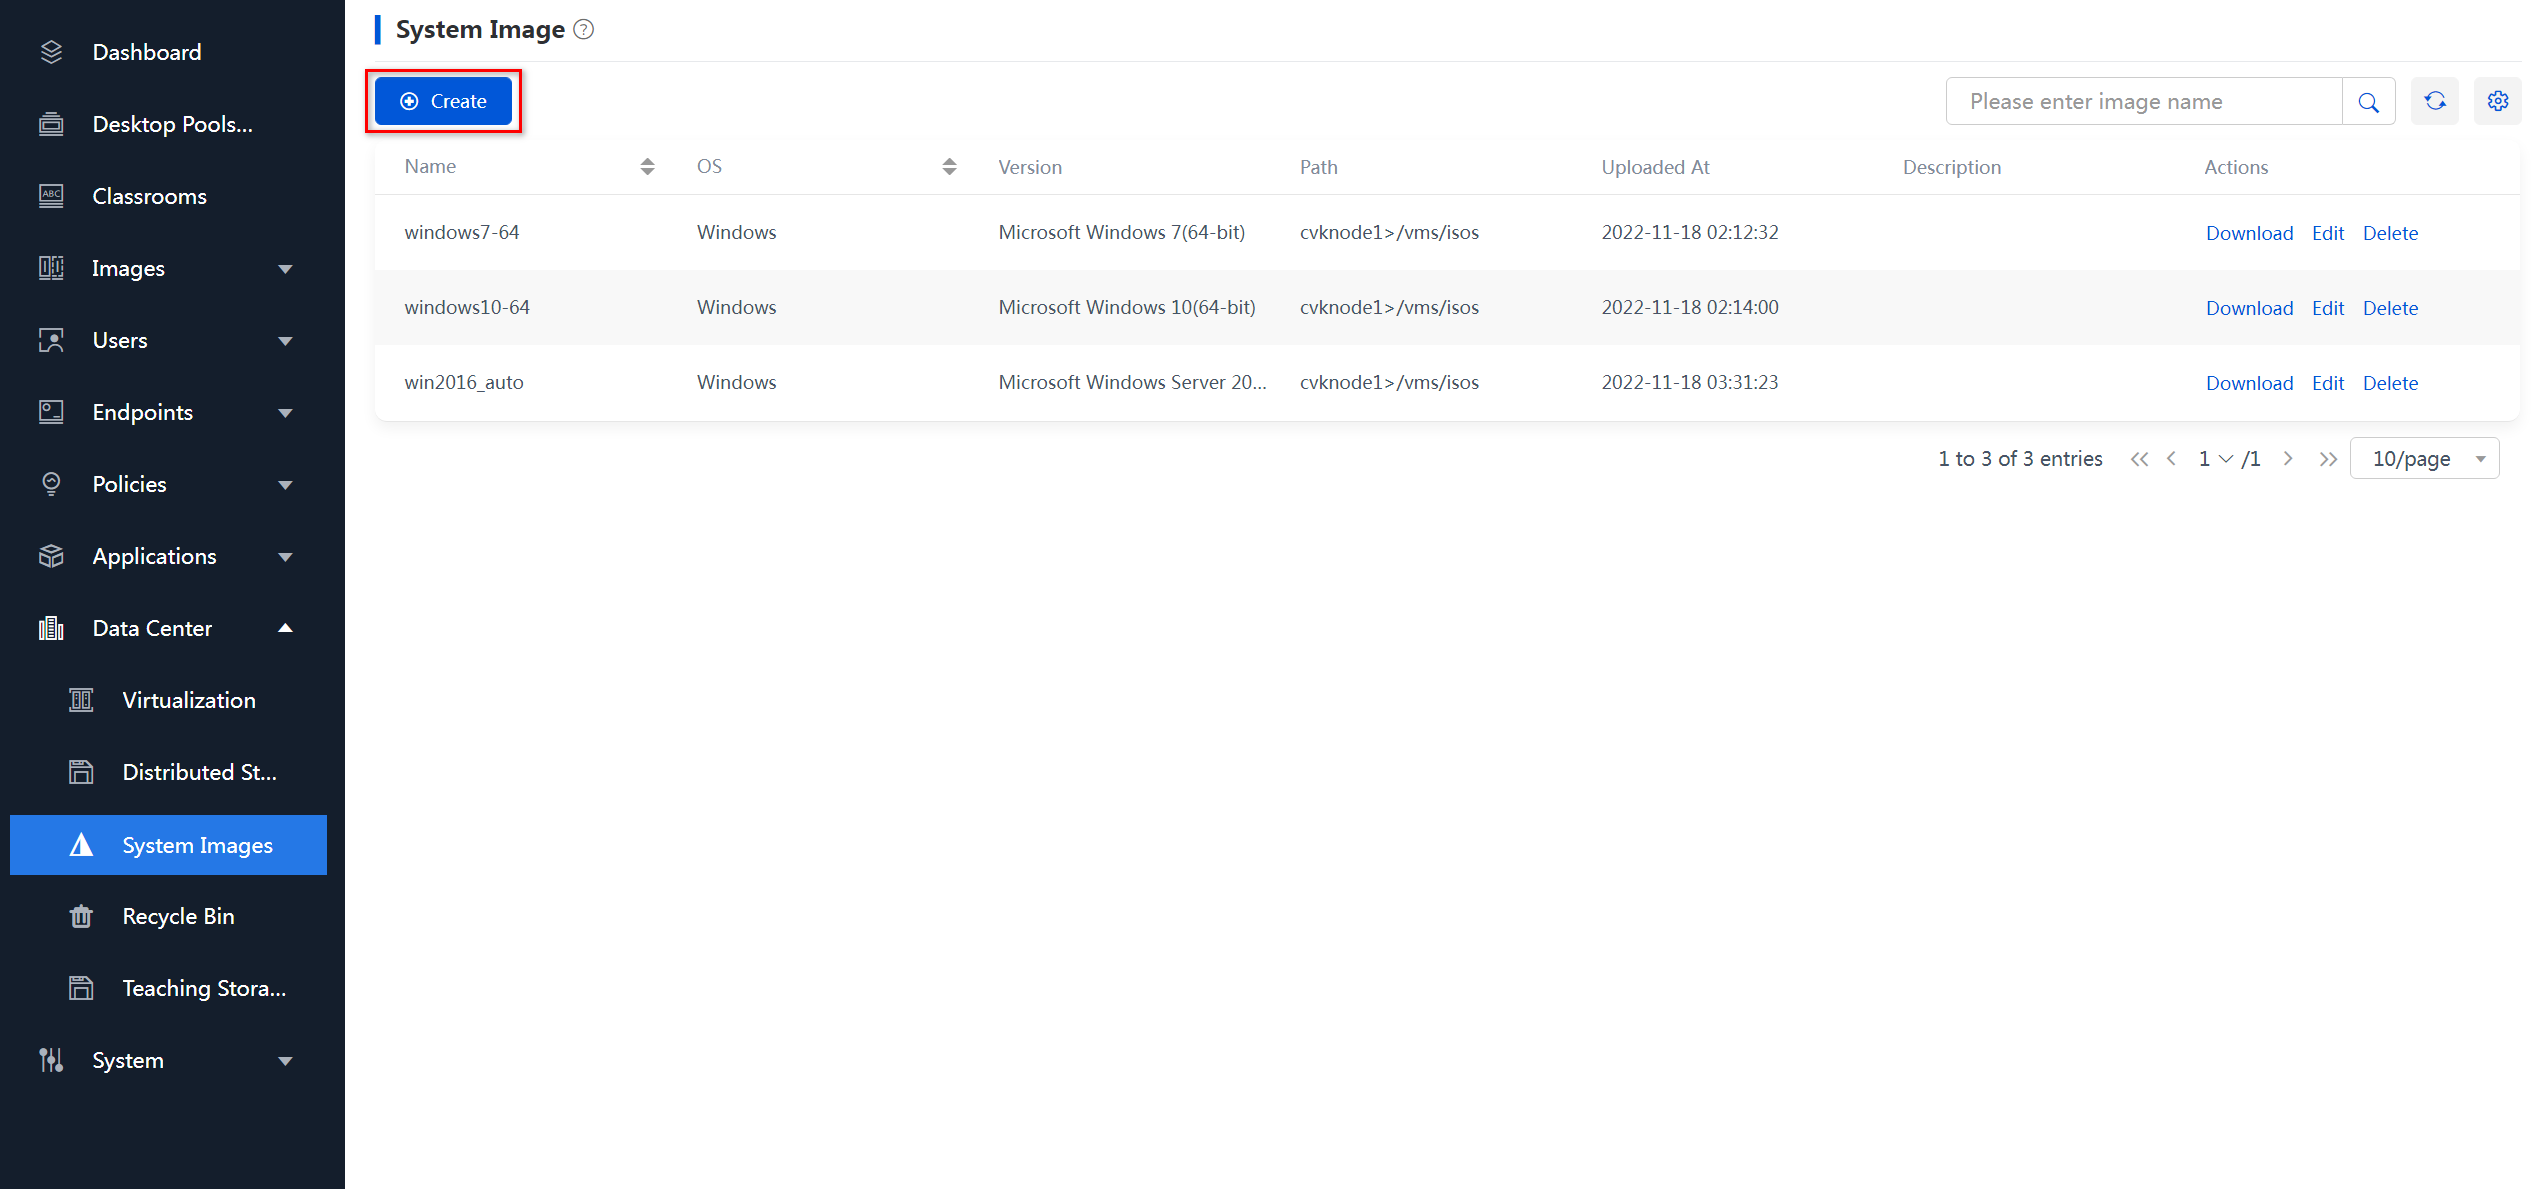
1. From the navigation pane, select Data Center > System Images, and click Create.
Figure 2 Creating a system image
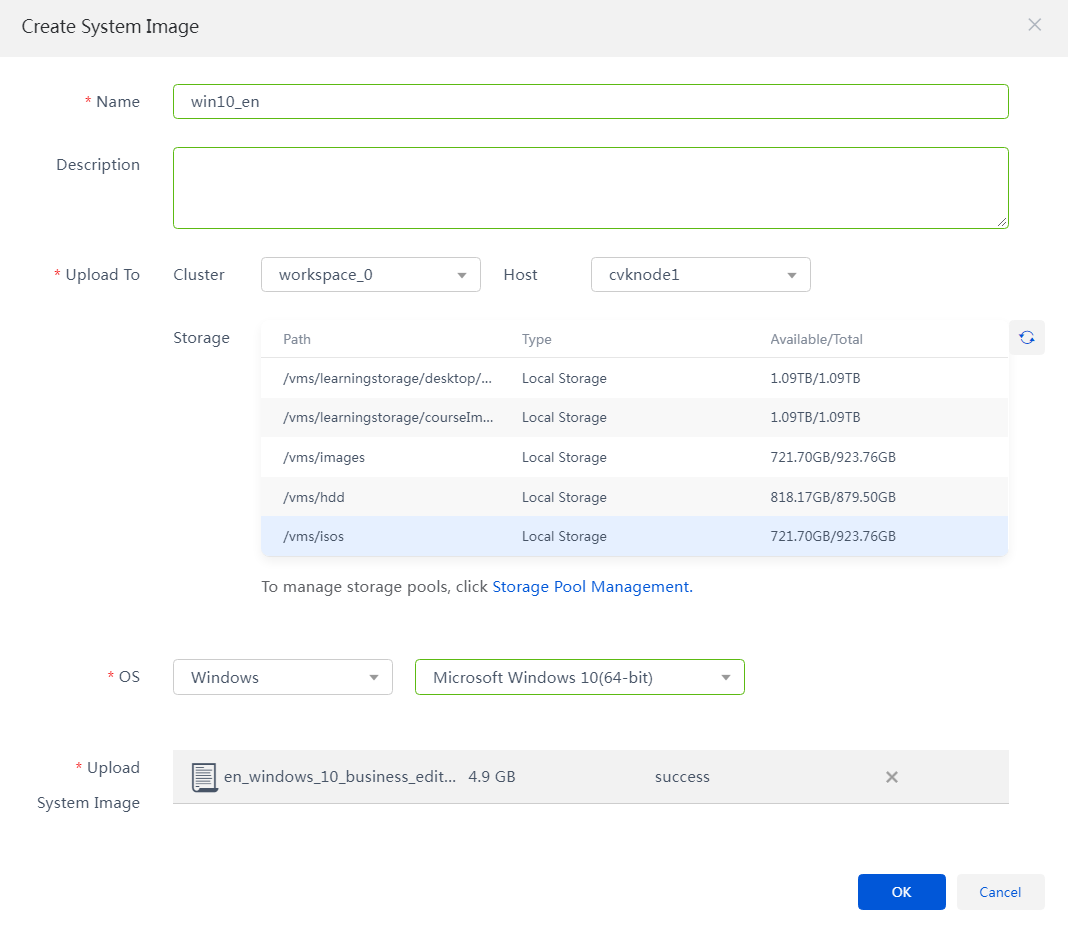
2. Configure the image name.
3. Select the type and version of the operating system according to the system image to be uploaded.
4. Set the upload path for the system image, and click Upload to select the file to be uploaded.
|
|
CAUTION: · To avoid the system image upload failure, make sure that the upload path has enough disk size, and select the upload path named /vms/isos as a best practice. · As a best practice, use version 1903 or a version later than 1909 for Windows 10, or use SP1 for Windows 7. For more information about operating system compatibility, see H3C Workspace Cloud Desktop Hardware & Software Compatibility Matrixes. · vGPU is not supported on a Windows 7, Windows 8, and Windows 8.1 VM. · The specified operating system type and version must be the same as those of the image to be uploaded. |
Figure 3 Configuring parameters for the new system image
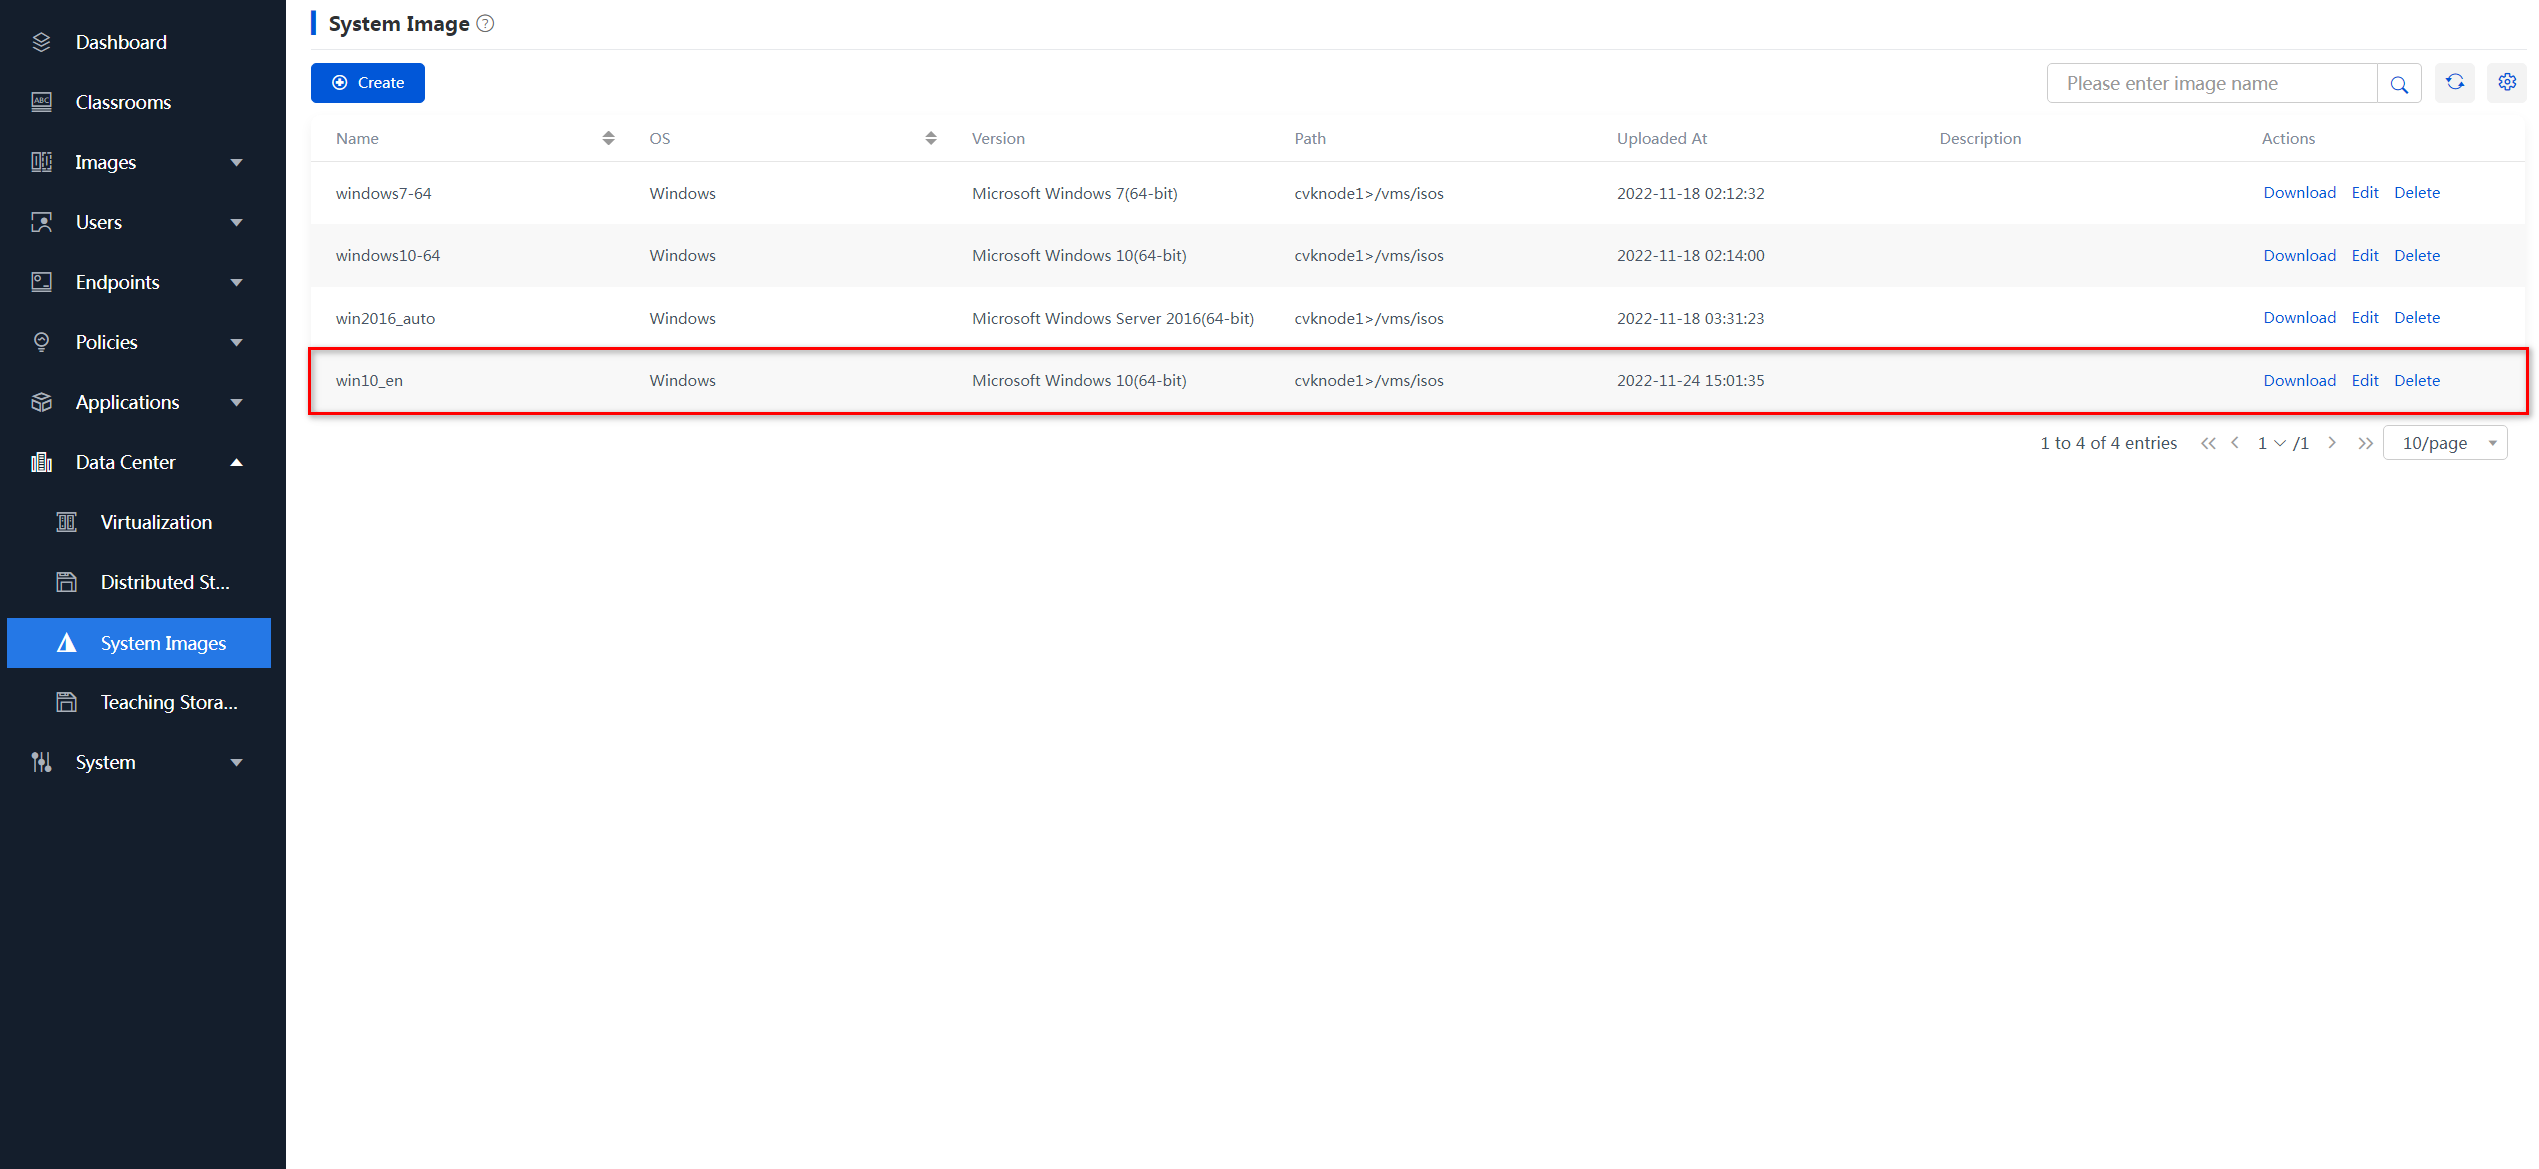
5. Click OK after the upload is completed.
Figure 4 New system image
Creating a VDI course
You can import an existing VDI course. For more information, see H3C Workspace Cloud Desktop Management Software User Manual.
To create a VDI course:
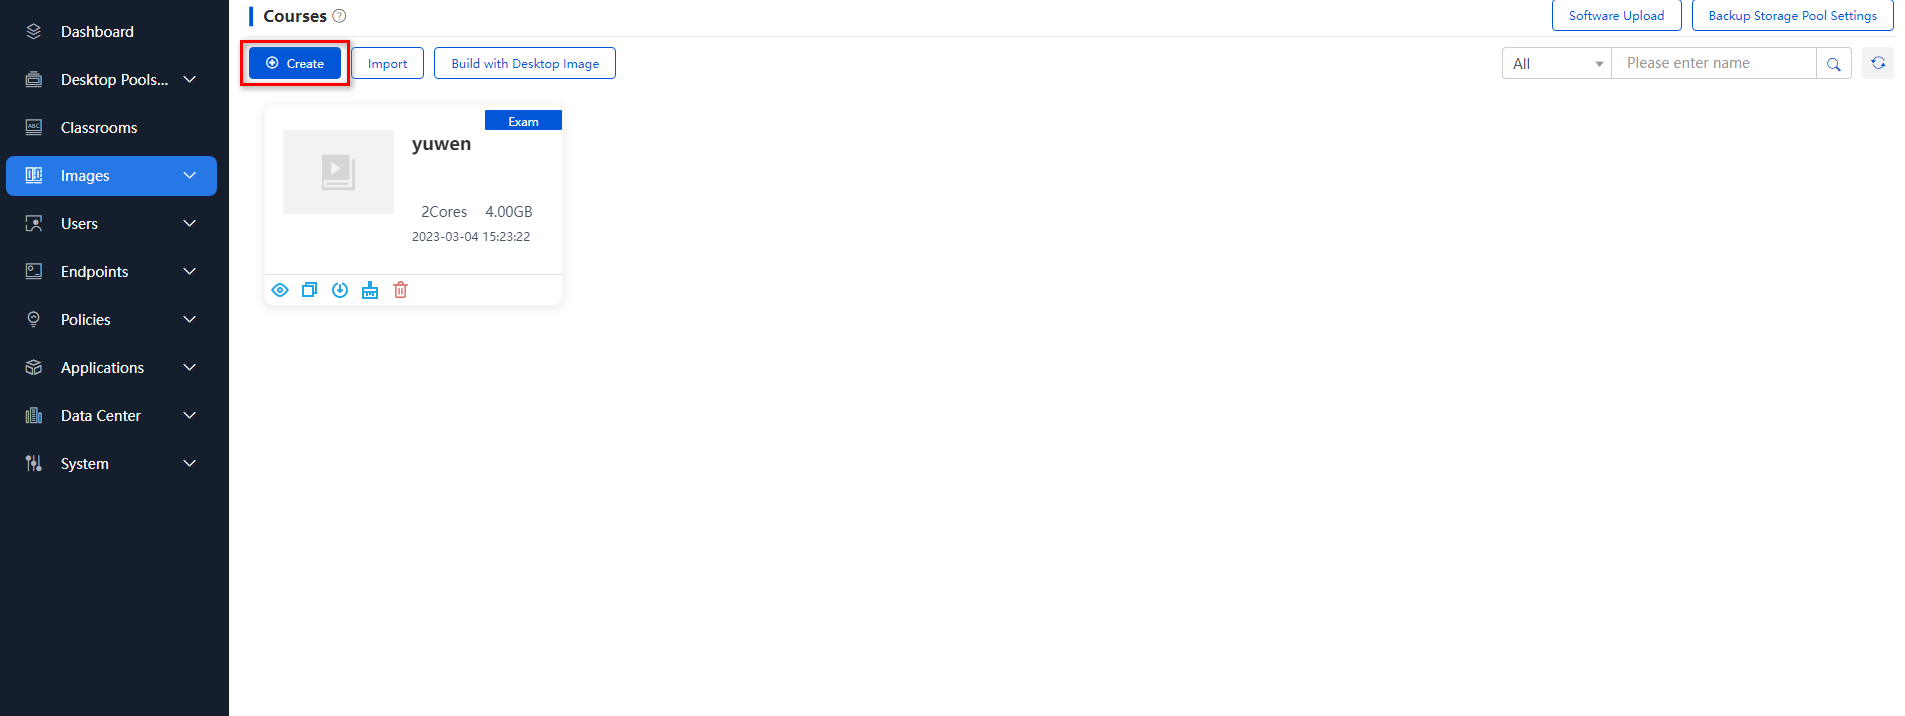
1. From the navigation pane, select Images > Course Images, and click Create.
Figure 5 Creating a course image
2. On the Basic Info tab, configure parameters for the new course, such as the basic information and the storage path. Select the system image uploaded in "Creating a system image." In addition, select a VDI course type.
3. To add a data disk for the course, click Attach Hardware, select Disk, and then set the disk size.
4. Click Save & Proceed.
Figure 6 VDI course basic information

|
Parameter |
Description |
|
Course Type |
Select the type of the course. Options include VDI and VOI. VDI is selected in this section. |
|
Course Name |
Specify the name of the course. |
|
Host |
Specify the host to which the VM where the course will be built belongs. |
|
Path |
Specify the storage path for the course image file. |
|
User Access |
Specify the users that can access the course. · All—The course is open to all users. · None—The course is not open to any users. · Selected—The course is open only to selected users. Login to the teacher client or student client is required before the class is started. |
|
Classroom Access |
Specify the classrooms to which the course is available. · All—The course is available to all classrooms. · Selected—The course is available only to selected classrooms. To select classrooms, click Edit. |
|
Exam Course |
If you enable this option, the course is intended only for exams. When the class is dismissed, the system closes all corresponding teaching desktops and saves the teaching desktops in the system background. In addition, the exam data in teaching desktops will be retained. For the next class of the course, students can use the virtual desktops they have accessed last time. Only VDI courses support exam courses. |
|
Private Disk |
Specify whether to enable private disk. By default, this parameter is disabled for an exam course. When private disk is enabled for student and teacher users and the course, the users can use a private disk only after they enter the course. |
|
Configure |
Select a resource flavor. You can select the default flavor or select a self-defined flavor. A C200V endpoint supports only Windows 10 whose version is 1709 or later. For more information about the flavor configuration, see H3C Workspace Cloud Desktop Management Software User Manual. |
|
Network |
Select the vSwitch for the course image VM network. |
|
System Image |
Specify the ISO image of the operating system used by the course VM. |
|
Course Logo |
Specify a logo for the course. |
|
4K Resolution |
Specify whether to enable 4K resolution. 4K resolution requires endpoint hardware and monitor support. As a best practice, use an endpoint of 106v or above and a 4K monitor. Enabling 4K resolution might consume more server resources. |
|
vGPU |
Specify whether to enable vGPU for the course. This parameter is available only when the host where the VM is attached has GPUs. Only VDI courses support this parameter. vGPU is not enabled when you create a common course. |
|
Username Prefix |
Specify the username prefix for course desktops created for classes. By default, username prefix is Administrator. After you modify this parameter, select User h3cvdiuser customization when you optimize the course. For more information, see Table 3. |
|
Digits in Username Suffix |
Set the number of digits in the username suffix. For example, if you set this parameter to 2, usernames are suffixed with 01, 02, 03, and so on. By default, no suffix is added to usernames. |
|
Login Password |
Set the password used for SSO on course desktops. |
|
Reset Computer Name |
Enable this option to change the computer names of the teaching desktops to the endpoint names, for example, Stu-1. |
|
Auto Restart |
Enable this option to automatically restart the teaching desktops. This parameter is available only when the Reset Computer Name option is enabled. As a best practice, enable this option for an exam course to enable the exam software to adapt to the course desktops with the computer names changed. |
5. Click Upload Files.
6. In the dialog box that opens, click Upload.
7. Select H3C_Learningspace_App-version-win32.zip and other required software.
You can create subfolders under the default folder for saving uploaded software and files, and upload files or software to the subfolders.
The management platform supports bulk file upload, resuming file upload, and filtering files by username or user who uploaded a file.
The VDI course-related software installation package can be obtained by using the Attach Shared Disk method.
Figure 7 Software upload for the VDI course
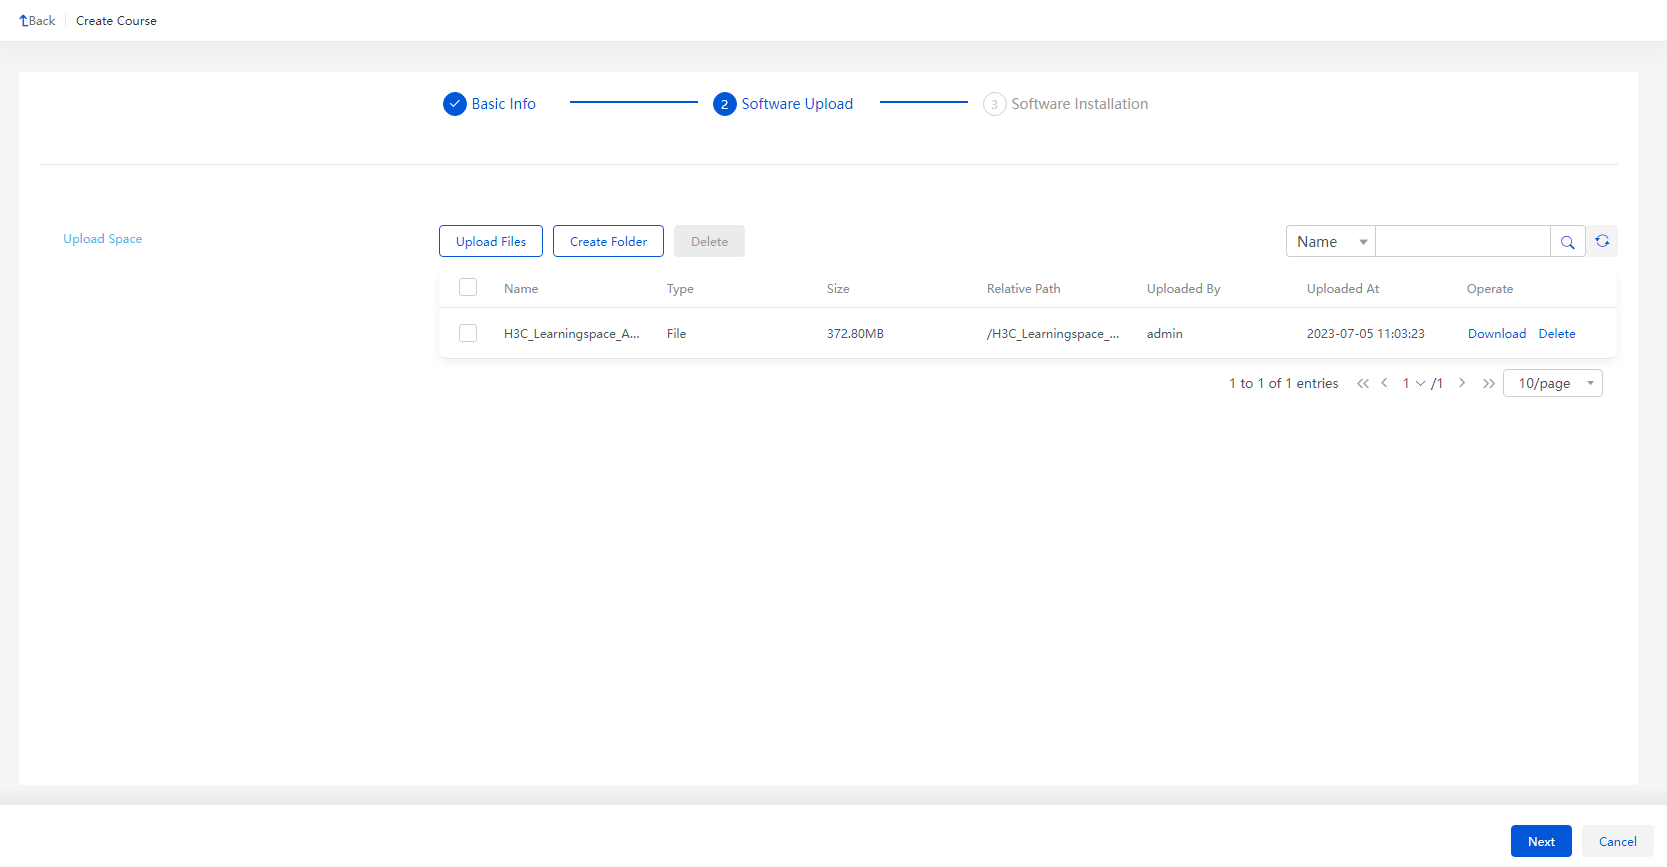
8. Click Next to build a VDI course.
During the software installation process,
you can click Finish at any time to quit software installation. To continue building the
course, click the ![]() icon for the course to open the course console.
icon for the course to open the course console.
To use the quiz, score statistics, and game functions, install Chrome browser (Chrome 45 or higher as a best practice) in the course image. For more information, see H3C Workspace Teacher Client User Manual (Education Scenario).
Figure 8 New VDI course

The newly created VDI course is actually an empty VM which has no operating system or required drivers installed.
Building a VDI course
Installing an operating system
1. Click the ![]() icon under the
target newly created course.
icon under the
target newly created course.
Figure 9 Opening the console for the course
2. If the VM is shut down, start the VM.
3. After the VM is started, select a language and other preference options, and click Next. Click Install Now to start installing the operating system.
Figure 10 Selecting a language and other preference options
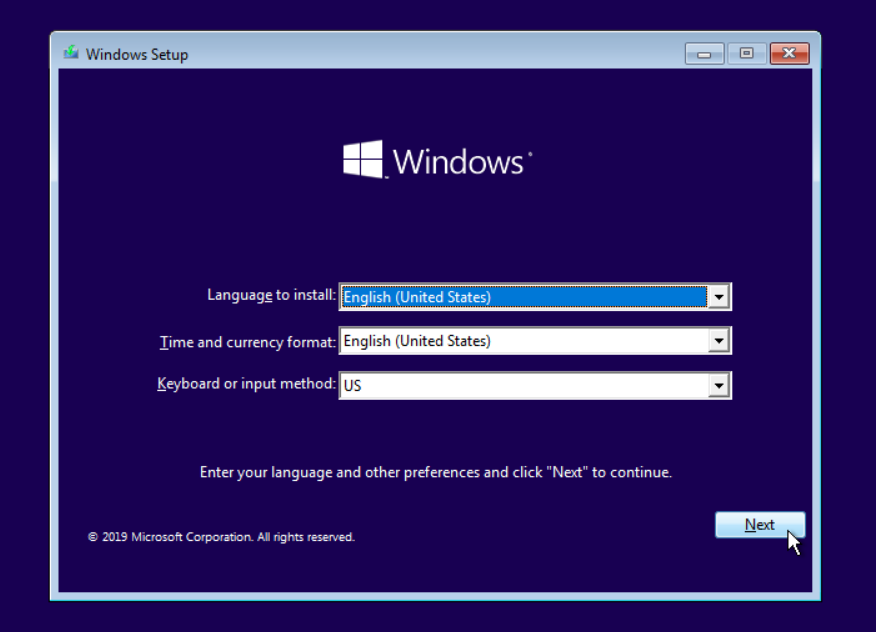
Figure 11 Starting to install the operating system

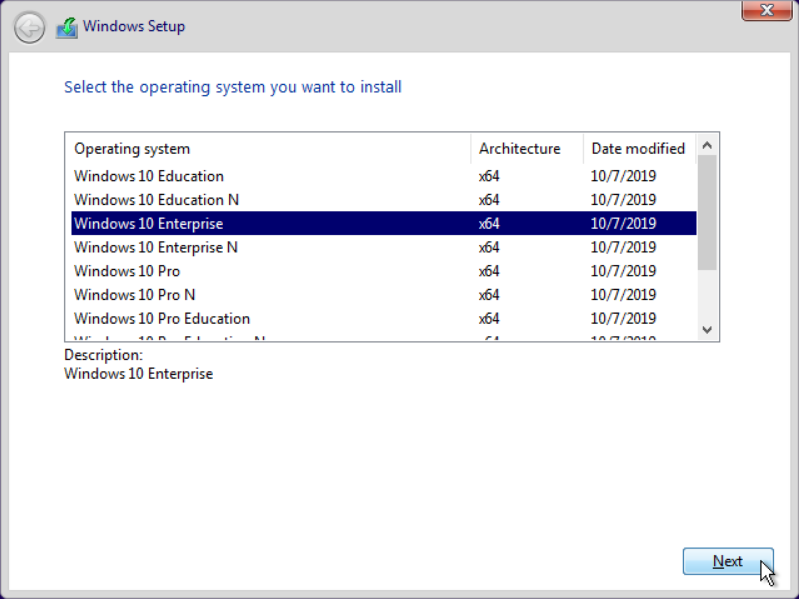
4. Select a Windows 10 edition to be installed. Install Windows 10 Enterprise as a best practice. Then, click Next.
Figure 12 Selecting a Windows 10 edition
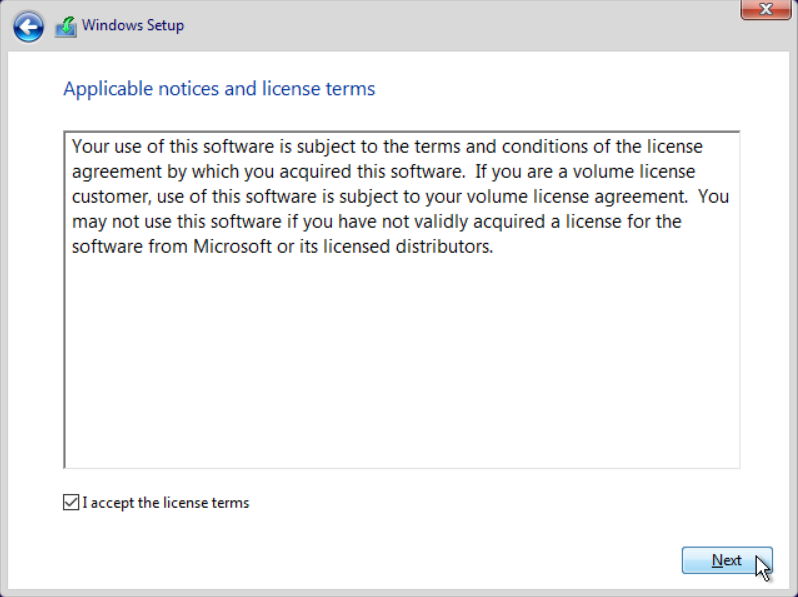
5. Click I accept the license terms, and click Next.
Figure 13 Accepting the license terms
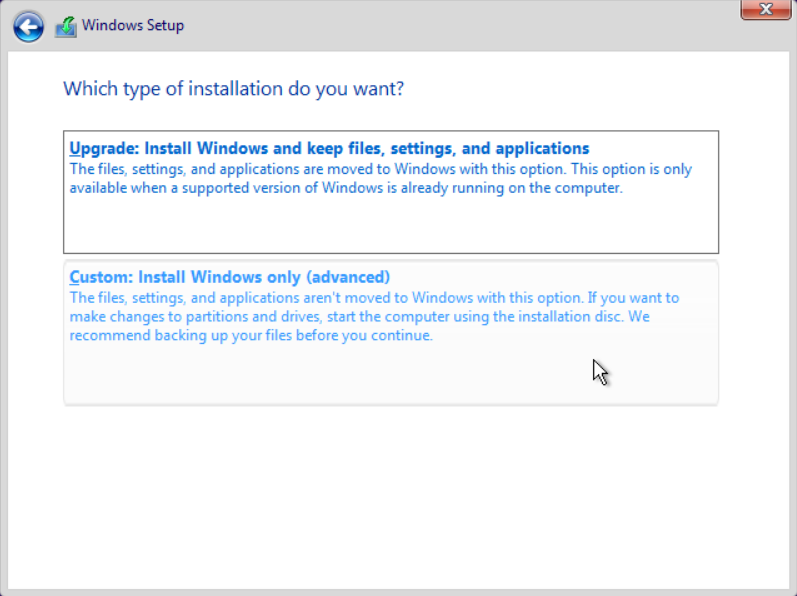
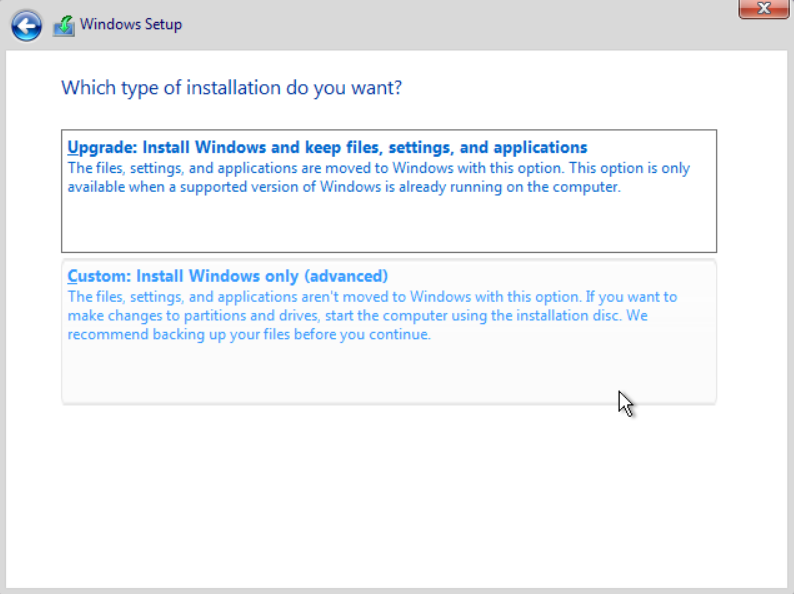
6. Select the installation type Custom: Install Windows only (advanced).
Figure 14 Selecting the installation type
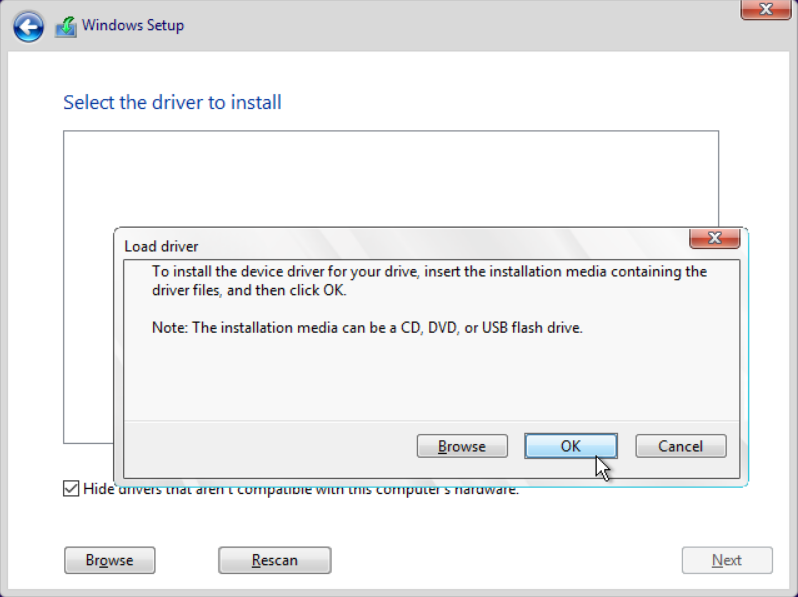
7. Click Load Driver. In the Load Driver dialog box, click OK.
Figure 15 Clicking Load Driver
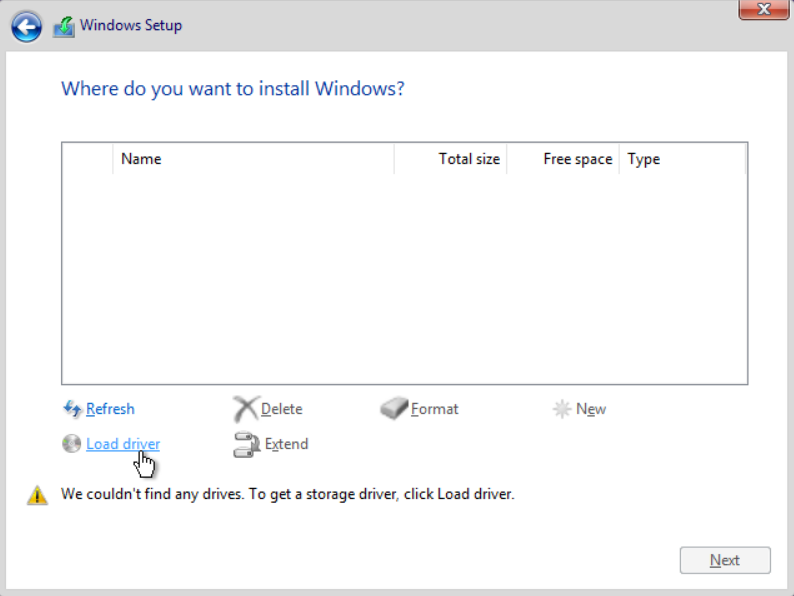
Figure 16 Load Driver dialog box
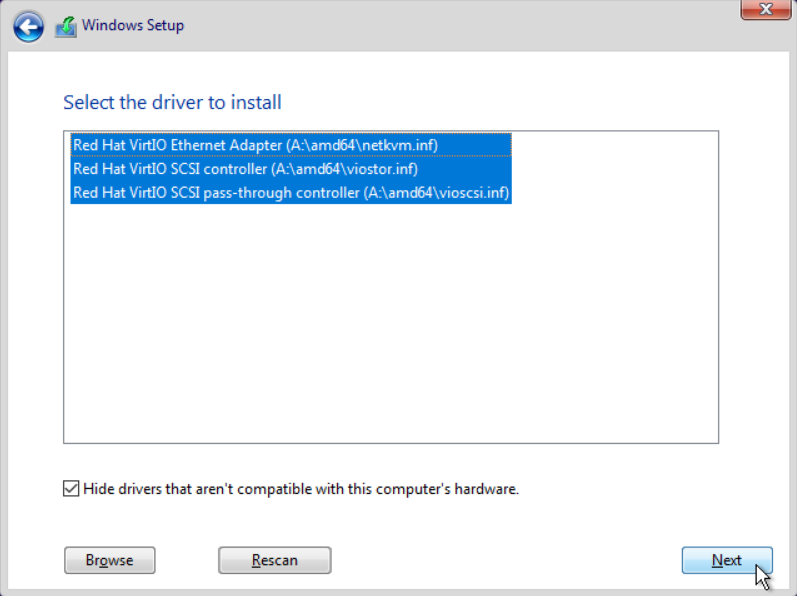
8. Select all drivers, and click Next.
|
|
CAUTION: · The system automatically loads the drivers to be installed based on the number of bits of the operating system. · You must load the drivers and make sure all compatible drivers are selected in the driver selection dialog box. Lack of drivers will affect the proper operation of the course. |
Figure 17 Selecting all drivers
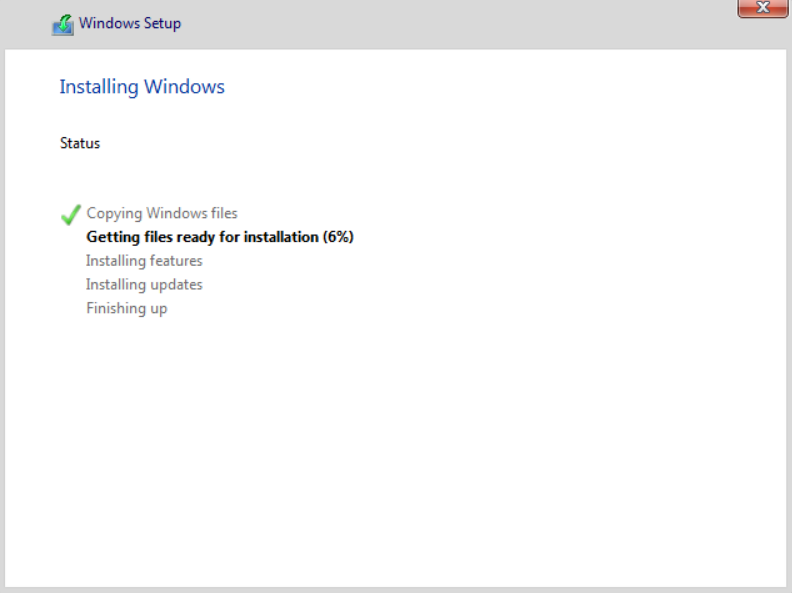
9. When the system prompts Where do you want to install Windows?, partition the disks as required and click Next. Wait until the operating system is installed.
During the installation process, the VM might reboot several times.
|
|
CAUTION: · When installing the operating system, partition the disks if multiple disks exist. · Do not partition the system disk. To add a data disk for the course, click Attach Hardware. For more information about attaching hardware, see H3C Workspace Cloud Desktop Management Software User Manual. |
Figure 18 Partitioning the disks
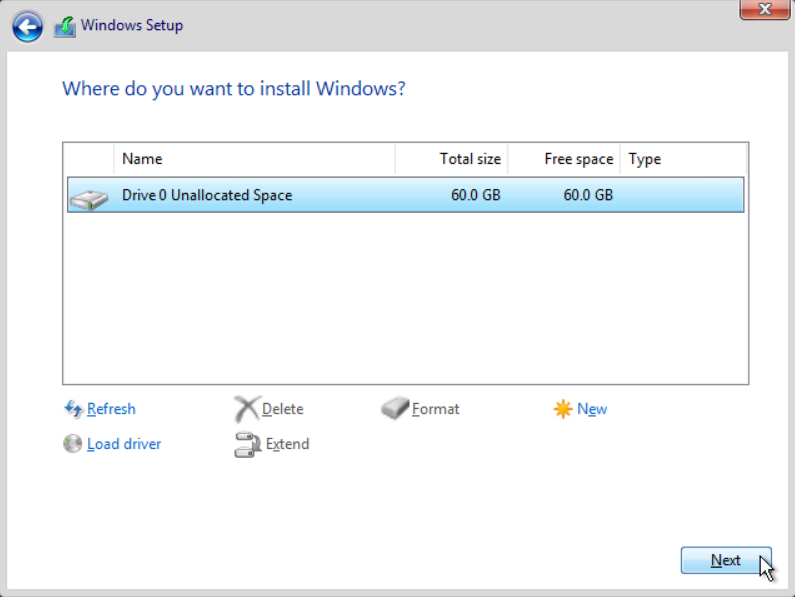
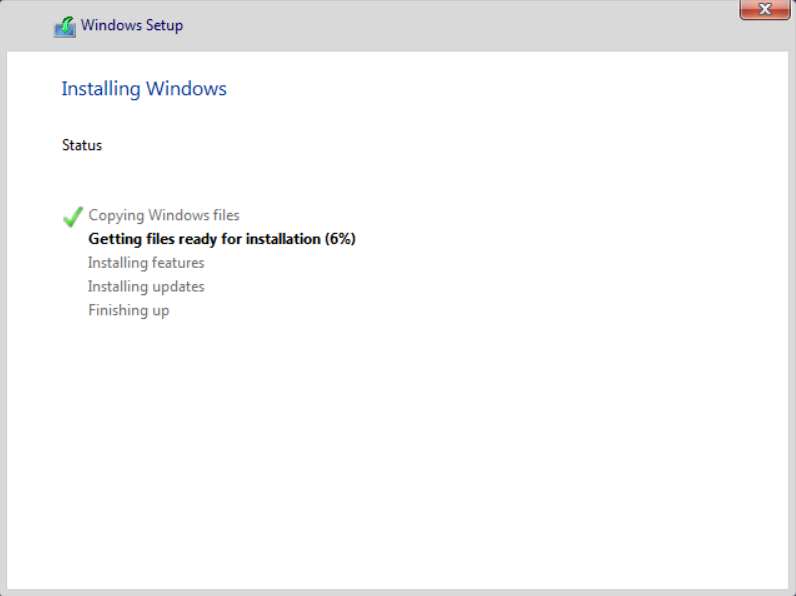
Figure 19 Installing Windows
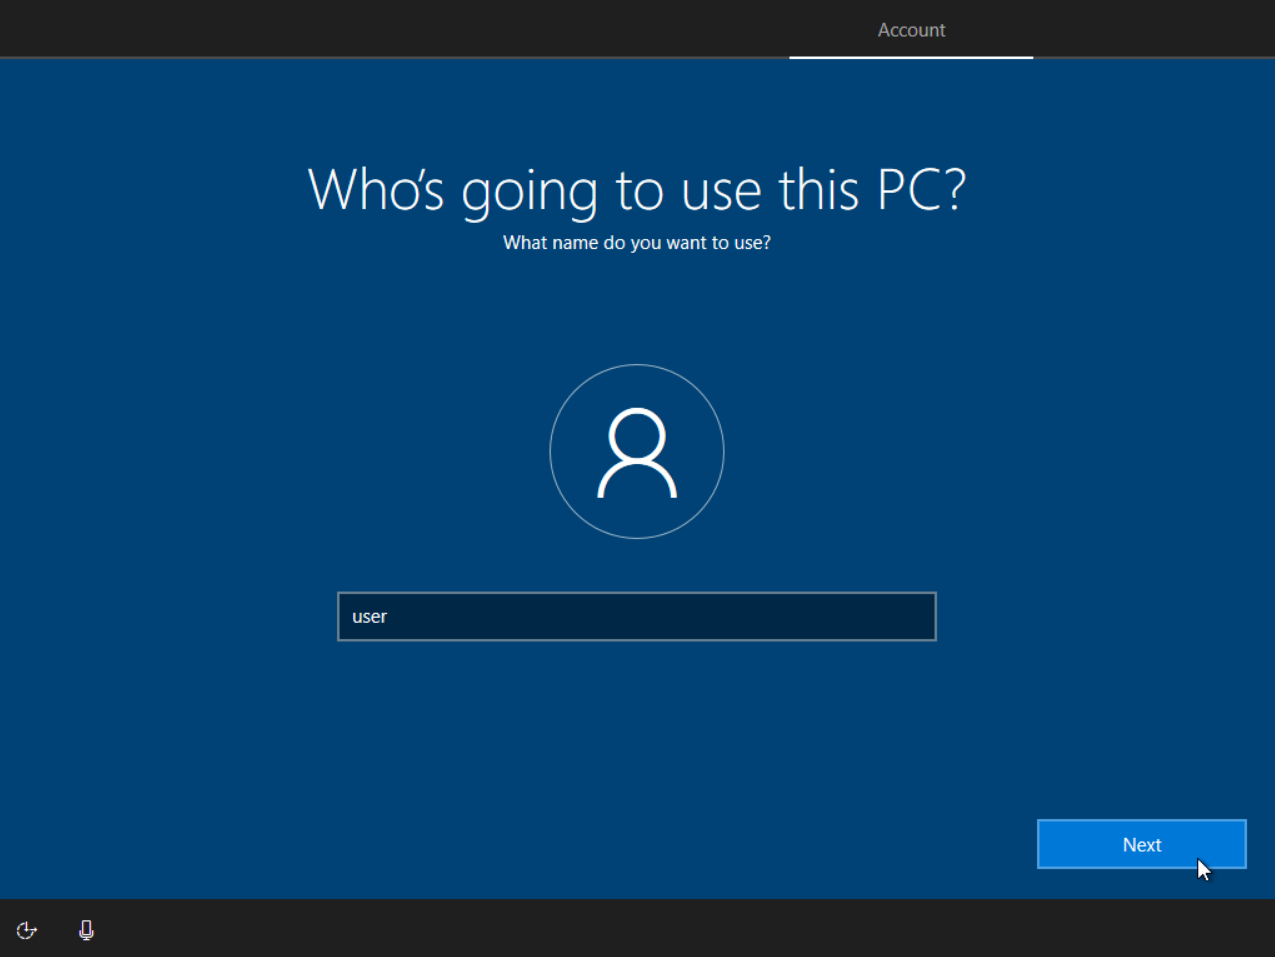
10. After the installation is completed, configure basic settings such as region, keyboard layout, network, and accounts.
Figure 20 Configuring the account

If you want to optimize the system later, you must log in as Administrator. The user account set here is used only to enter the desktop after installation. After entering the desktop, you must switch to the Administrator user.
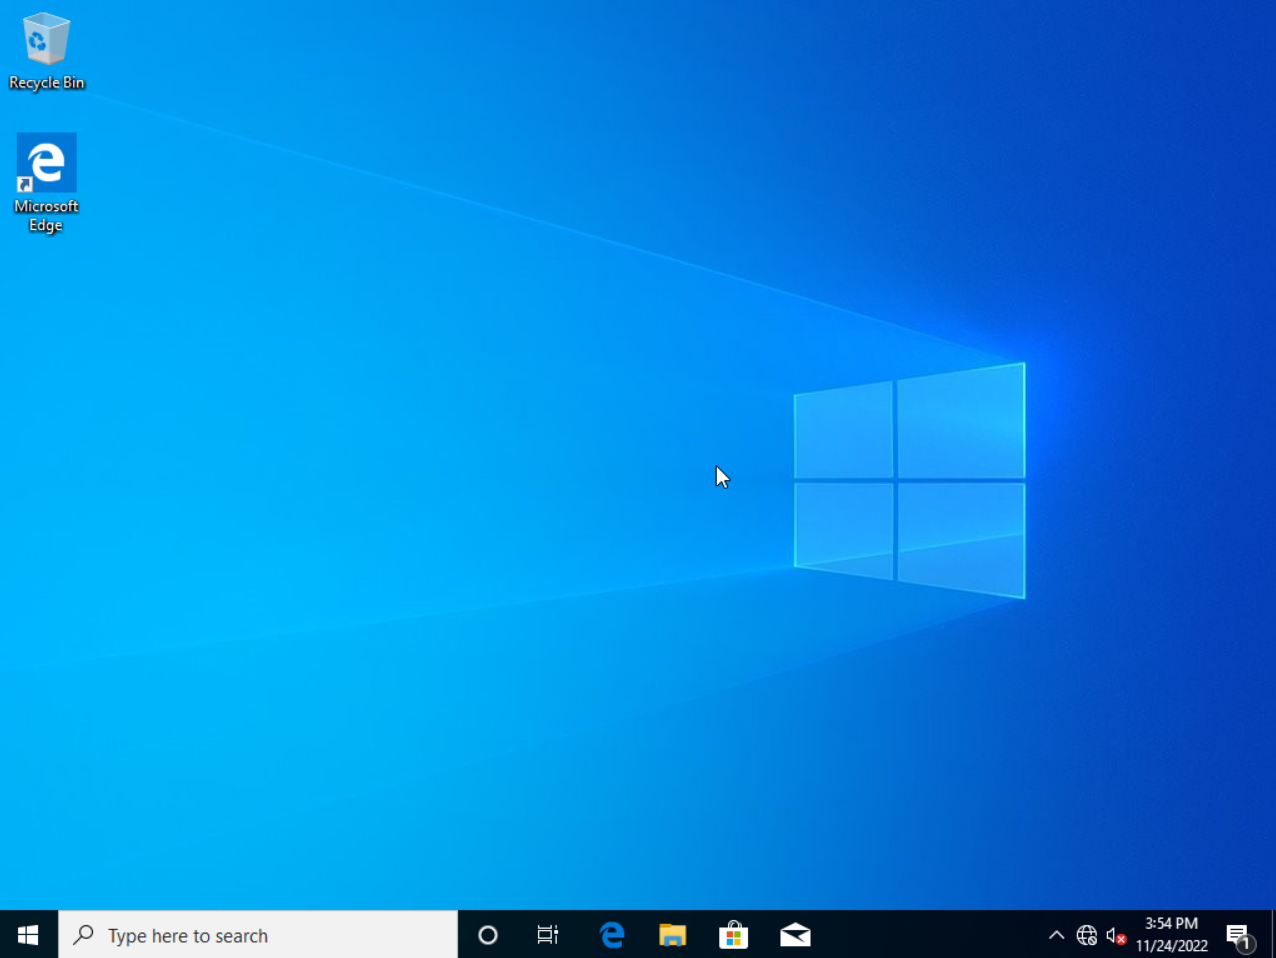
11. Enter the Windows desktop after all system settings are configured.
Figure 21 Entering the Windows desktop
Switching to the Administrator user
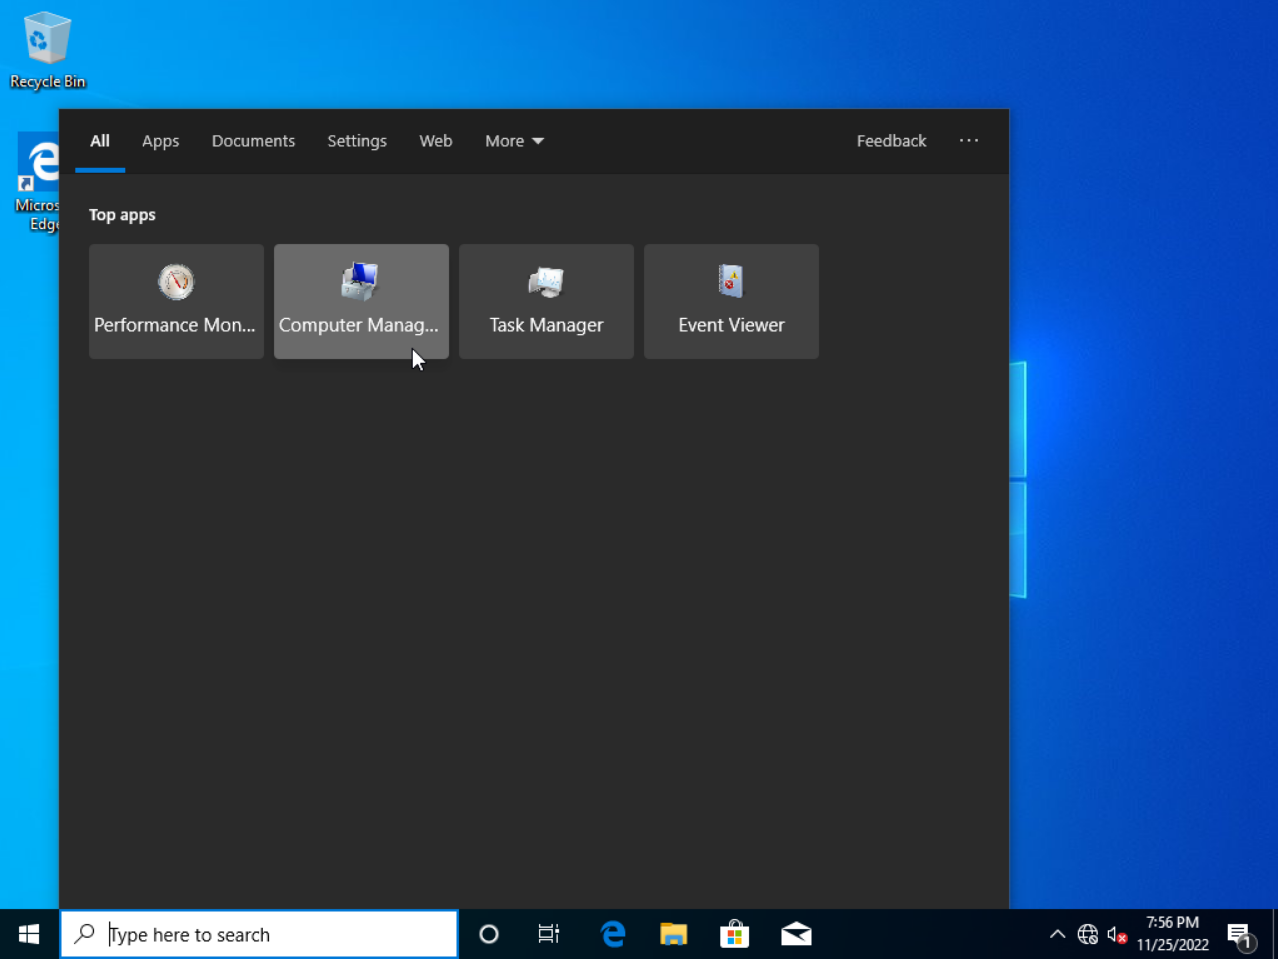
1. Enter Computer Management in the cortana search box. From the menu that opens, click Computer Management.
Figure 22 Clicking Computer Management
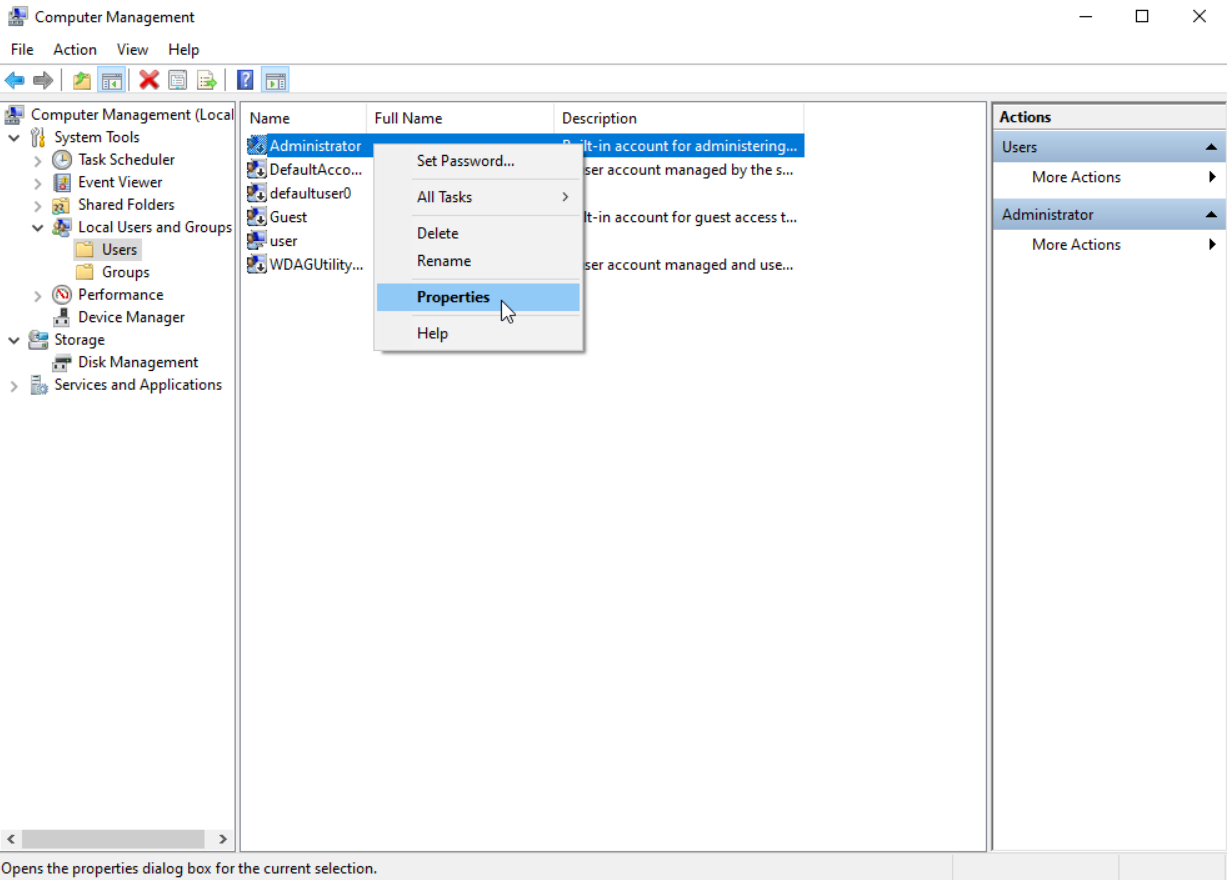
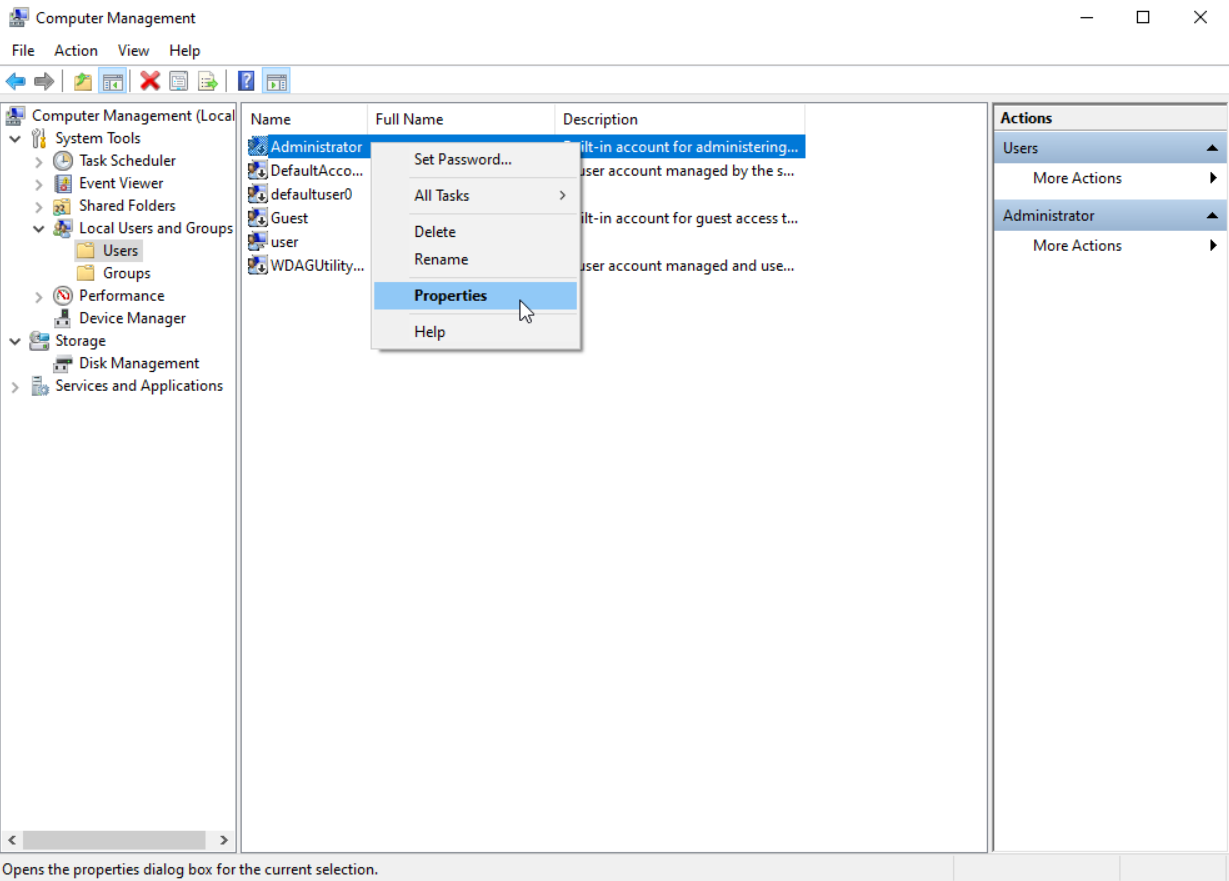
2. On the computer management window, select Local Users and Groups > Users. In the user list, right-click Administrator, and select Properties from the shortcut menu.
Figure 23 Navigating to property management
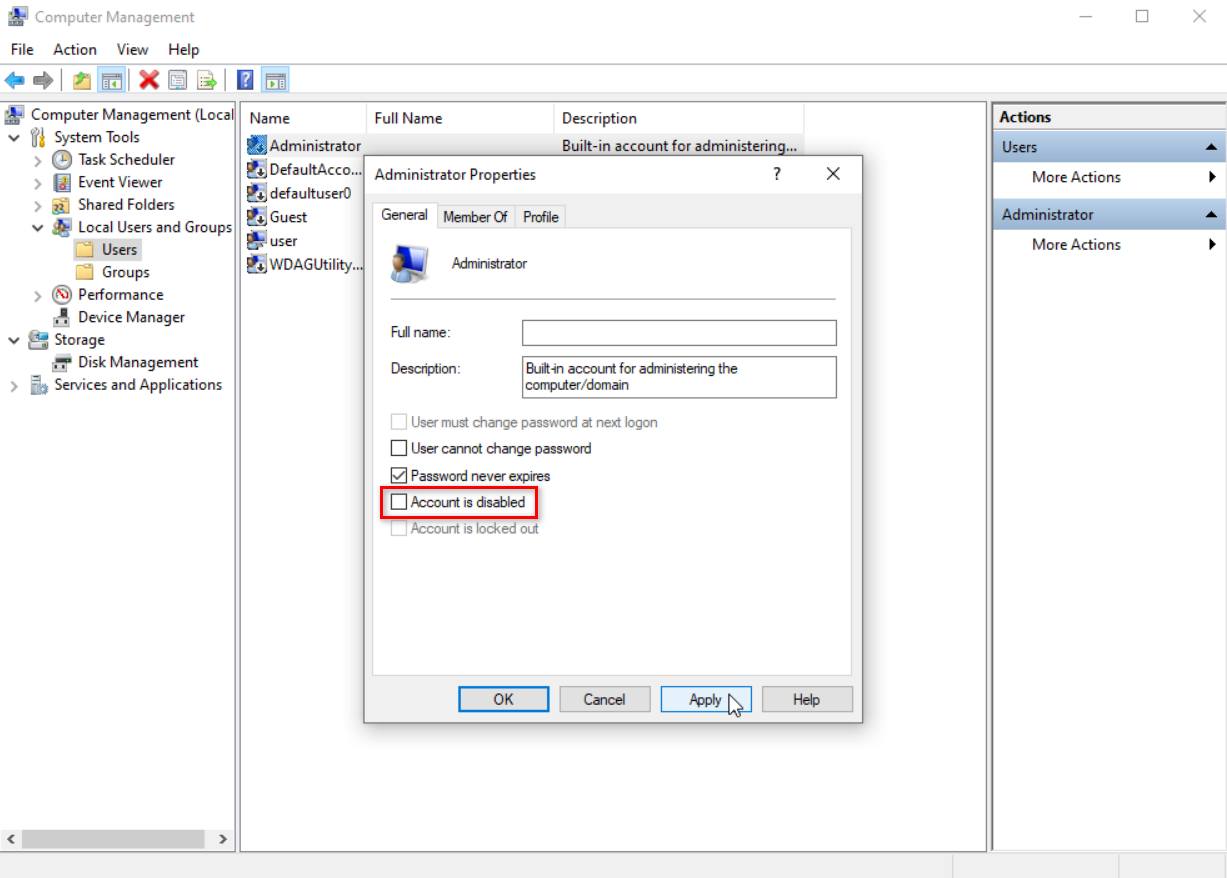
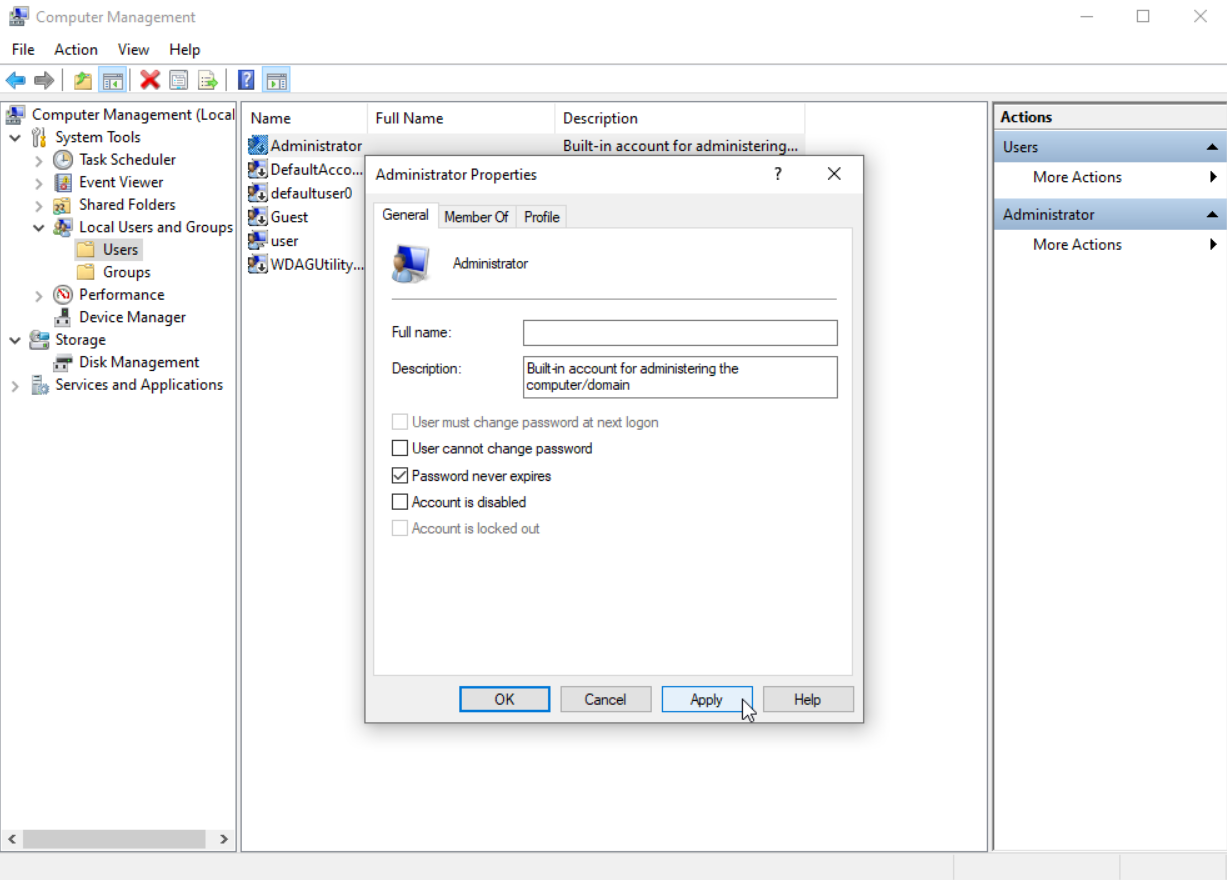
3. On the properties window, clear the Account is Disabled option to enable the administrator account, click Apply, and then click OK.
Figure 24 Enabling the Administrator account
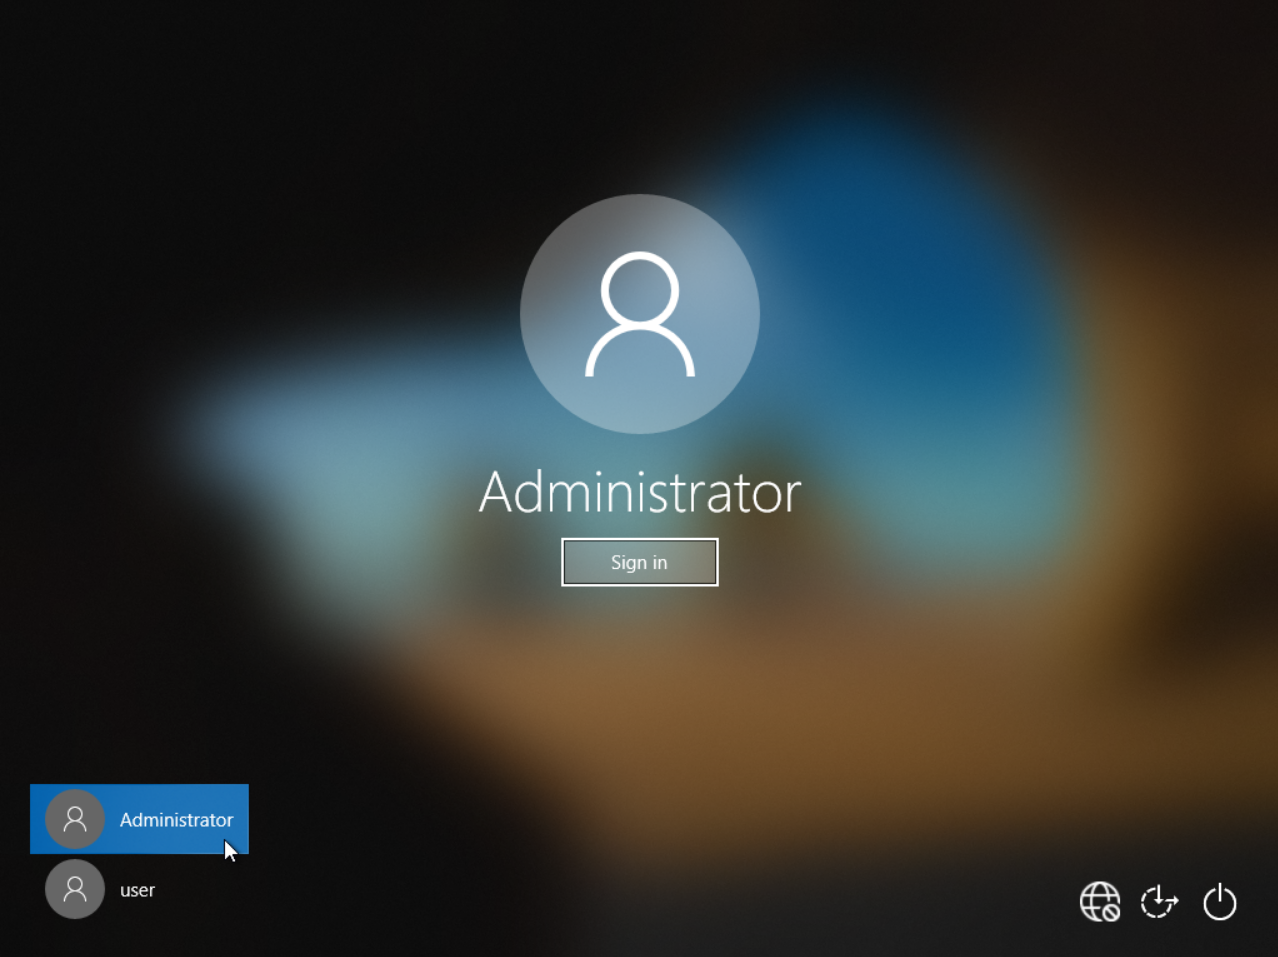
4. On the Start menu, select Administrator to log in to the desktop with the Administrator account.
Figure 25 Logging in to the desktop with the Administrator account

5. Open the control panel. Click User Accounts, and then click Remove user accounts. On the Manage Accounts page, select the account created when you install the operating system. On the Change an Account page, click Delete the account.
Figure 26 Deleting the account created when you install the operating system

Installing CAStools and VdiAgent
CAStools and VdiAgent are integrated in the agent_tools installation package. The system automatically parses the CAStools installation package during the VdiAgent installation and installs CAStools.
To install CAStools and VdiAgent:
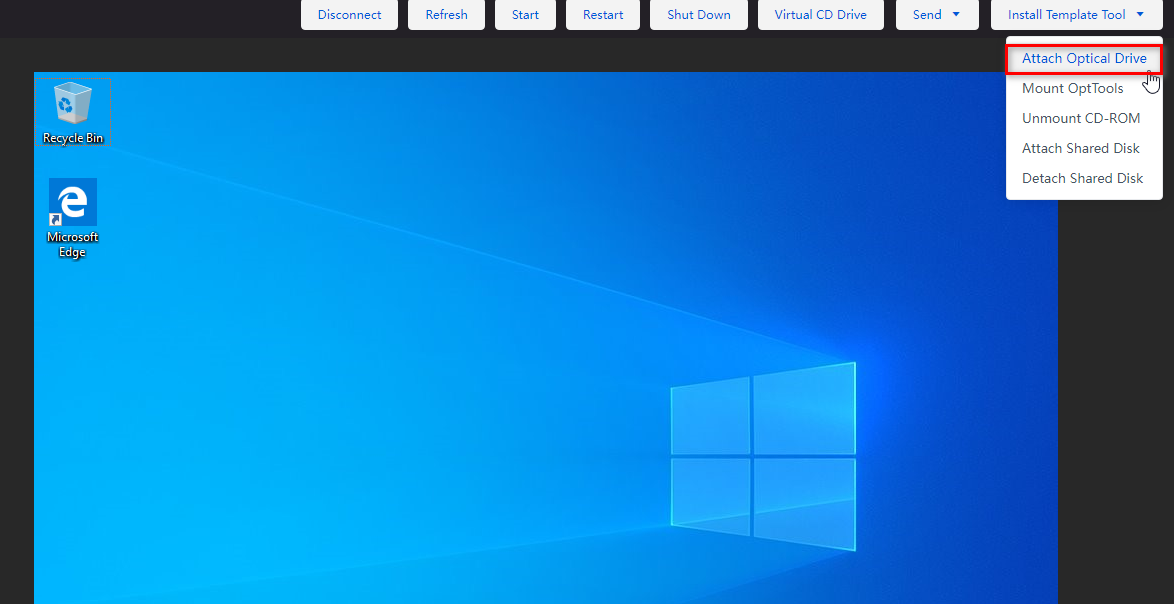
1. Click Install Template Tool, and select Attach Optical Drive.
Figure 27 Attaching an optical drive
2. Access This PC\CD Drive (D:) agenttools\windows, run the agent_tools_setup program, and click Next.
Figure 28 Running the agent_tools_setup program
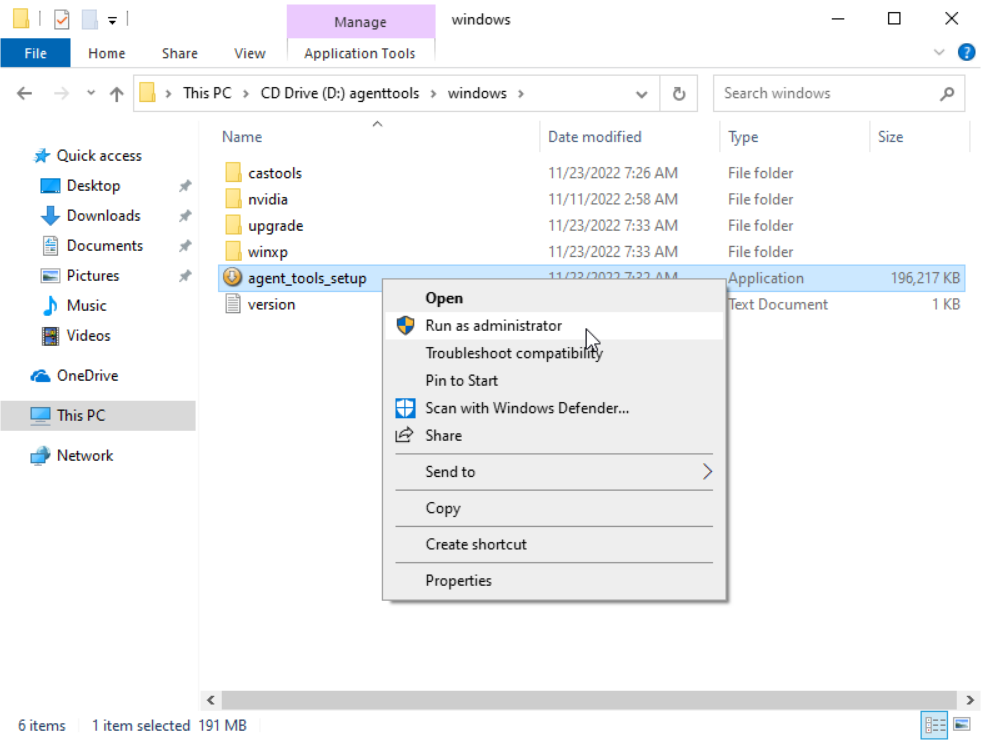
Figure 29 Installing the VdiAgent

3. Enter the IP address or domain name (a FQDN) of the management node host for Space Console, use the default port setting, and click Next.
Figure 30 Configuring the communication environment

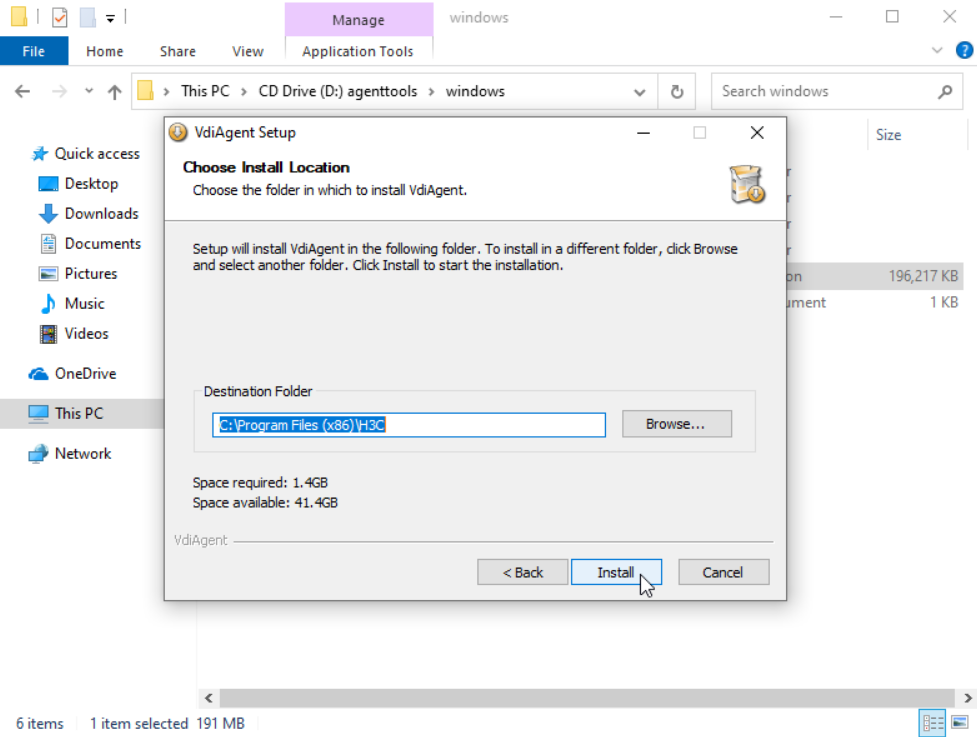
4. Select a target directory for VdiAgent installation, and click Install.
Figure 31 Selecting a target directory for VdiAgent installation
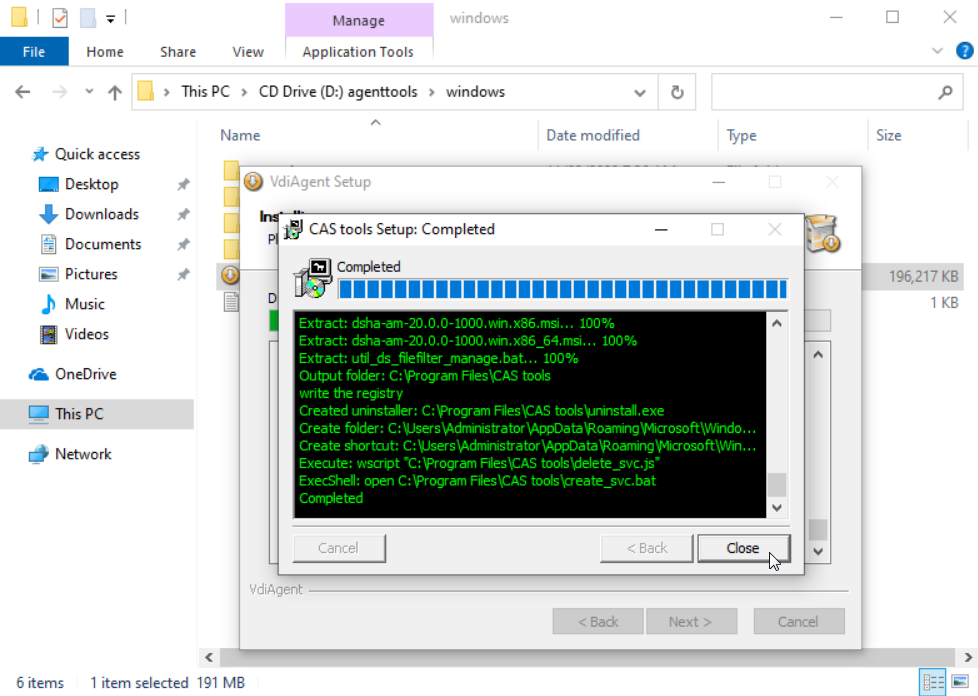
5. During the VdiAgent installation, the system automatically installs CAS tools.
6. During the CAS tools installation, click OK in the dialog box prompting you that the system must be restarted. Then, click Close after CAStools is installed.
Figure 32 Prompt for restarting the system
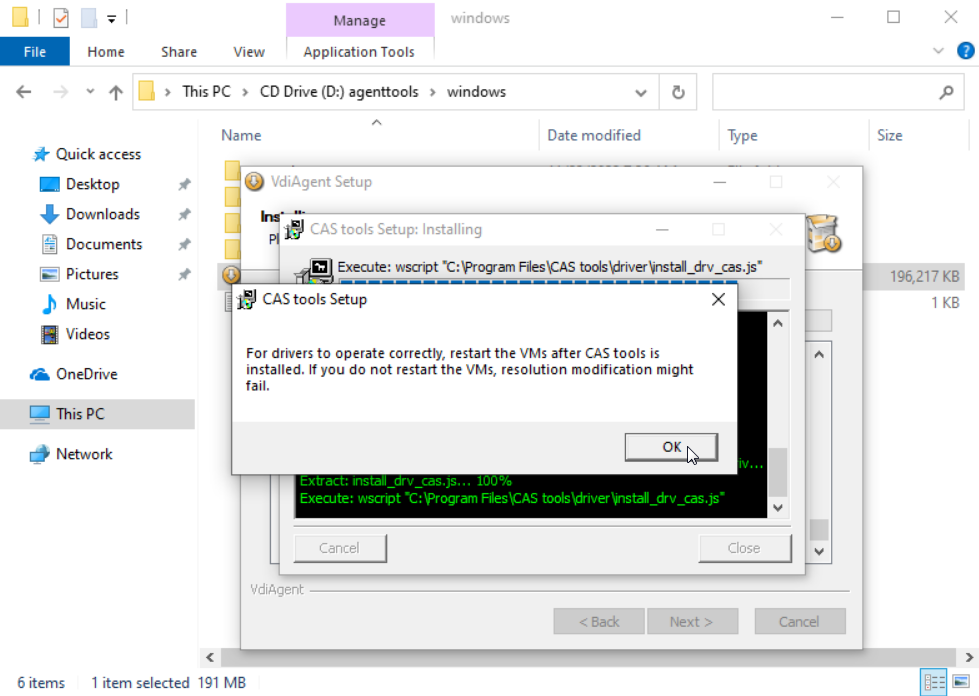
Figure 33 CAStools installation completed
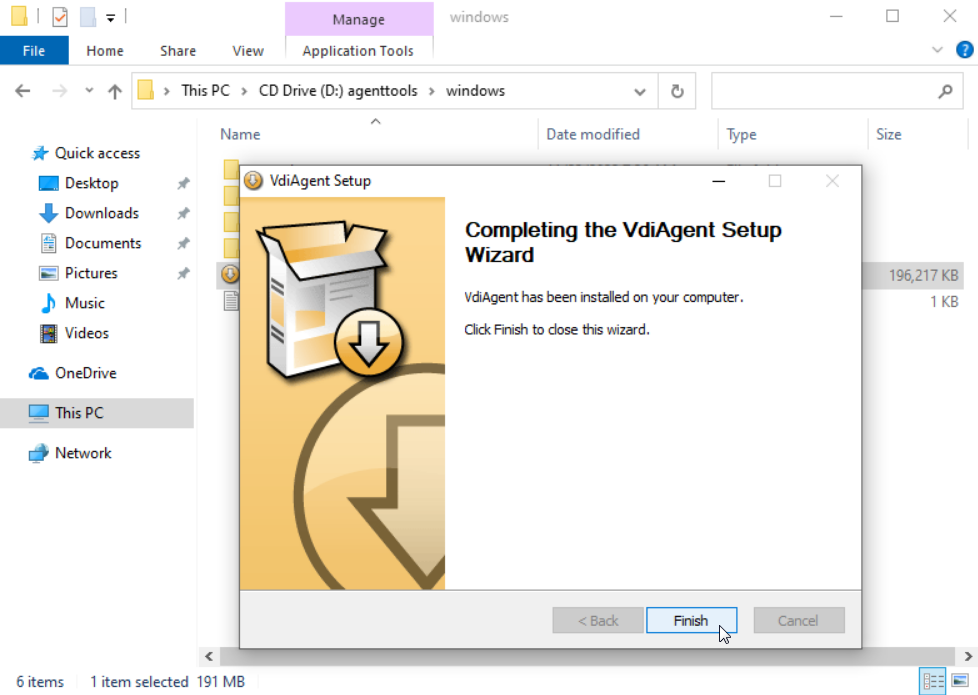
7. After the VdiAgent installation is completed, click Finish.
Figure 34 Installing VdiAgent
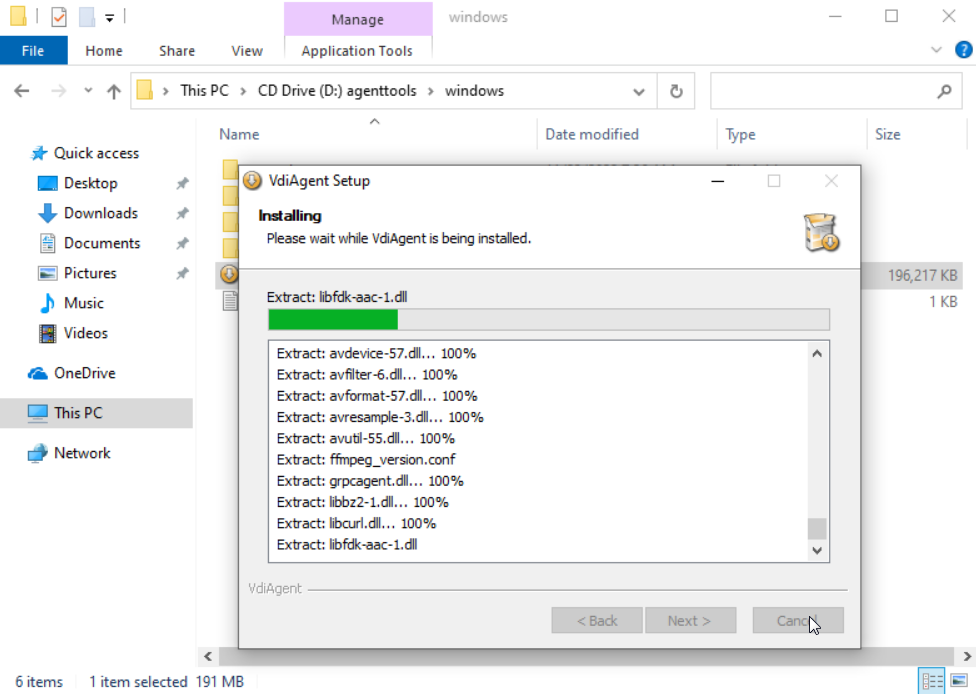
Figure 35 VdiAgent installation completed
8. Restart the VM.
Configuring and optimizing the system services
The optimization tool improves the client desktop operating speed and teaching experience by optimizing the software settings and operating system.
Before configuring and optimizing the system services, make sure the optimization tool is uploaded to Space Console. For more information about the upload method, see "Uploading the optimization tool."
To configure and optimize the system services:
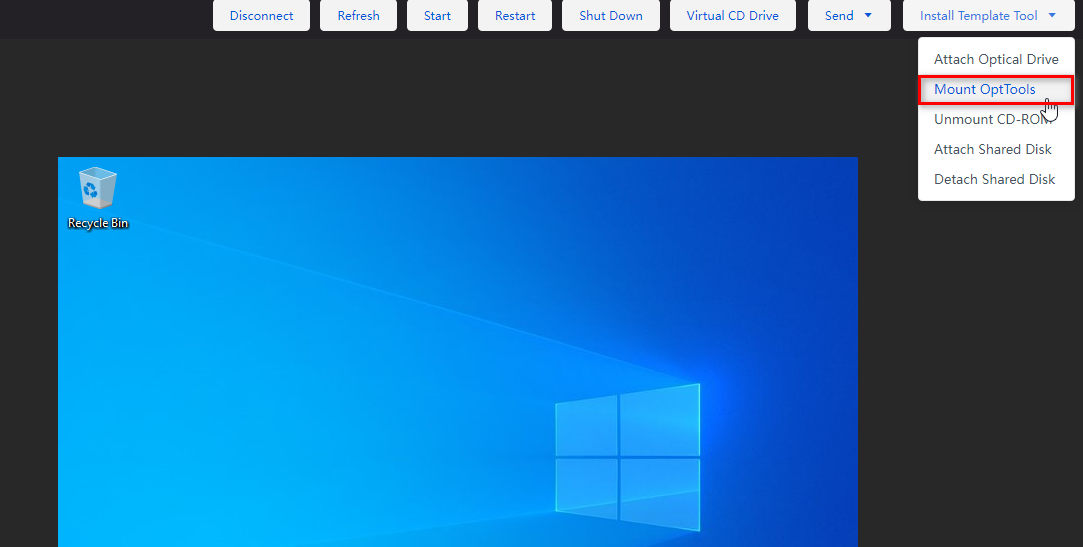
1. Click Install Template Tool, and then select Mount OptTools.
Figure 36 Mounting OptTools
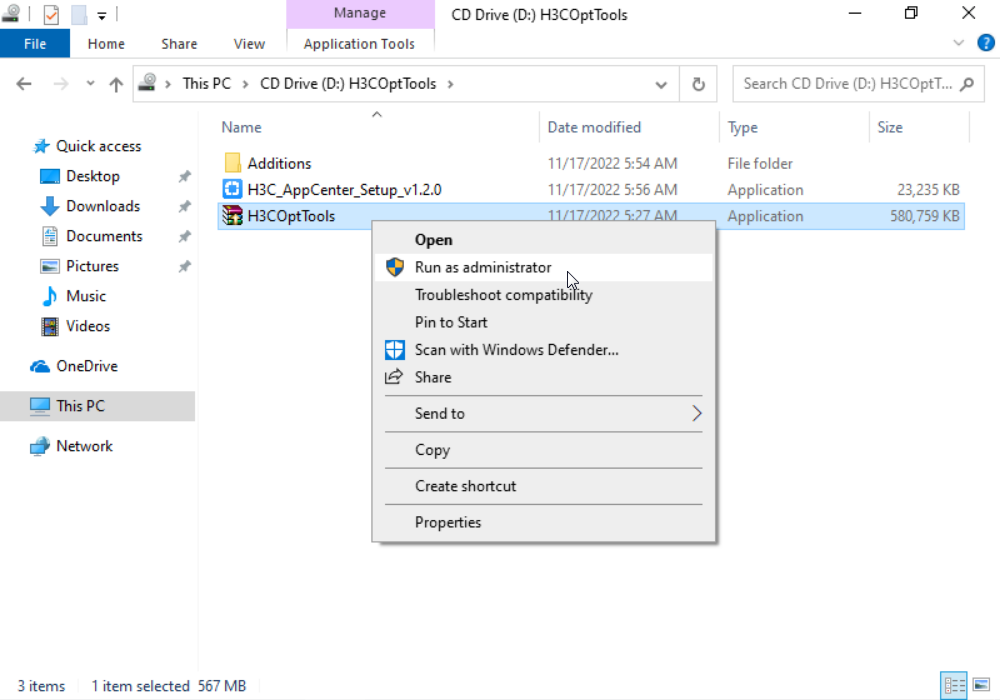
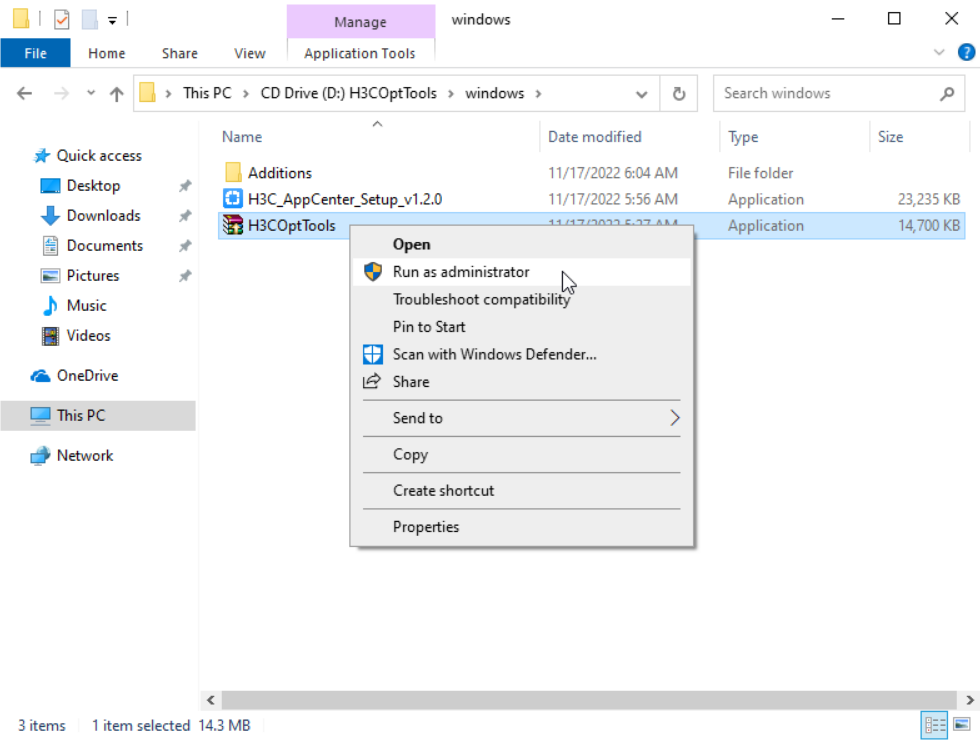
2. Enter the CD-ROM, and run the H3COptTools application program.
Figure 37 Running the H3COptTools application program
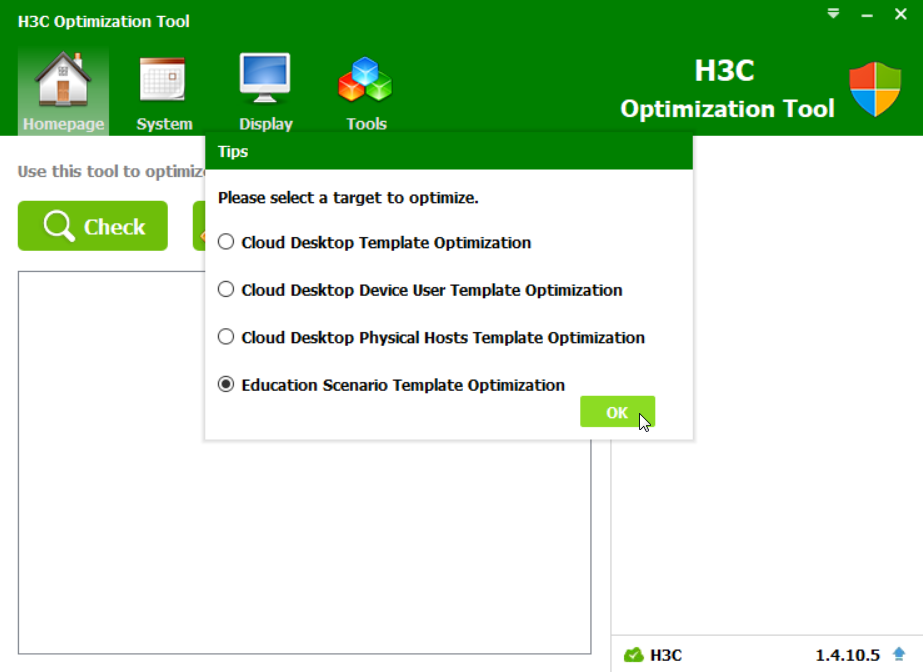
3. Select Education Scenario Template Optimization as the optimization scenario.
Figure 38 Selecting Education Scenario Template Optimization
4. Click Check on the homepage to check the operating system.
Figure 39 Checking the operating system

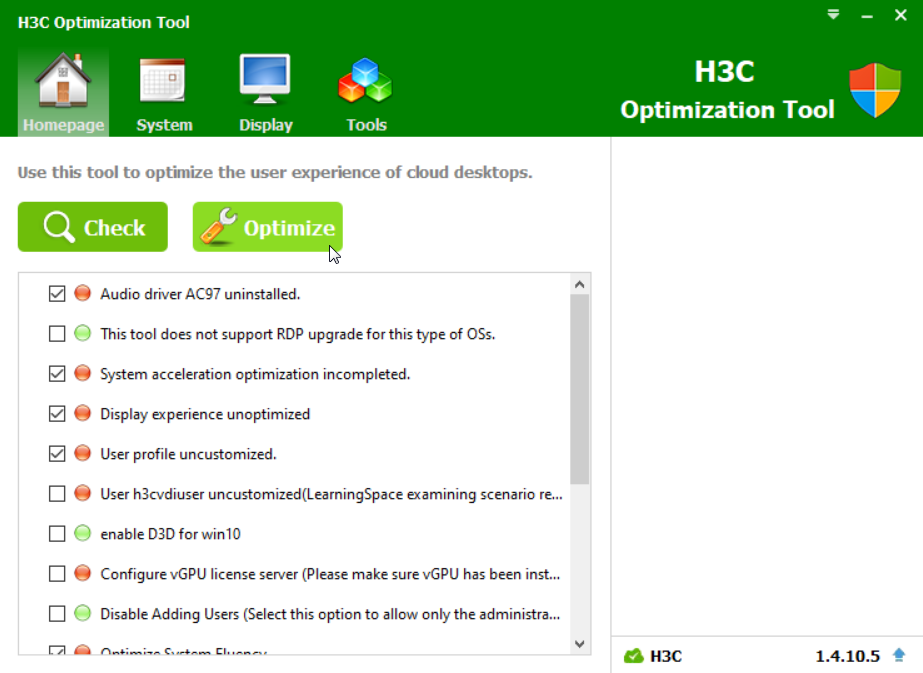
5. After the check is completed, items that fail the check are marked red. Click Optimize to optimize the items that failed the check as required.
Figure 40 Optimizing the items that failed the check
|
Optimization item |
Scenario and description |
|
Auto driver AC97 installation |
Automatic driver installation. Required. |
|
System acceleration optimization |
User experience optimization. Recommended. |
|
Display experience optimization |
User experience optimization. Recommended. |
|
User profile customization |
Template deployment. Required. |
|
User h3cvdiuser customization |
If you configure the username prefix as a value other than Administrator, select this item. In other scenarios, you can skip this item. For more information about the username prefix, see Table 2. |
|
vGPU license server configuration |
Required for courses with vGPUs attached. Not required for common courses. |
|
System fluency optimization |
User experience optimization. Recommended. |
|
Video display optimization |
User experience optimization. Recommended. |
|
Enable SMB1.0 |
User experience optimization. Recommended. |
|
Renesas USB driver installation |
USB driver installation. Required. |
|
Office scenario optimization |
User experience optimization. Recommended. |
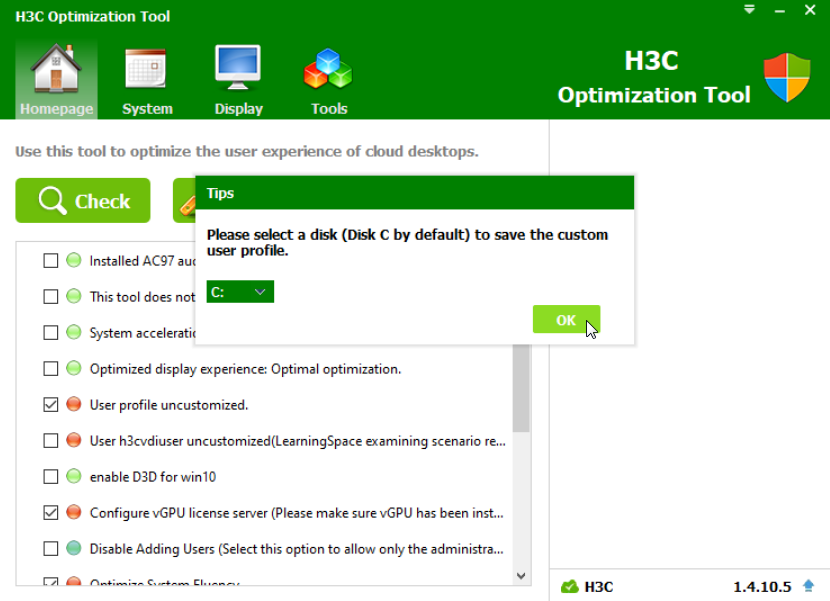
6. Select a disk for customizing a user profile, and click OK.
Figure 41 Selecting a disk for customizing a user profile

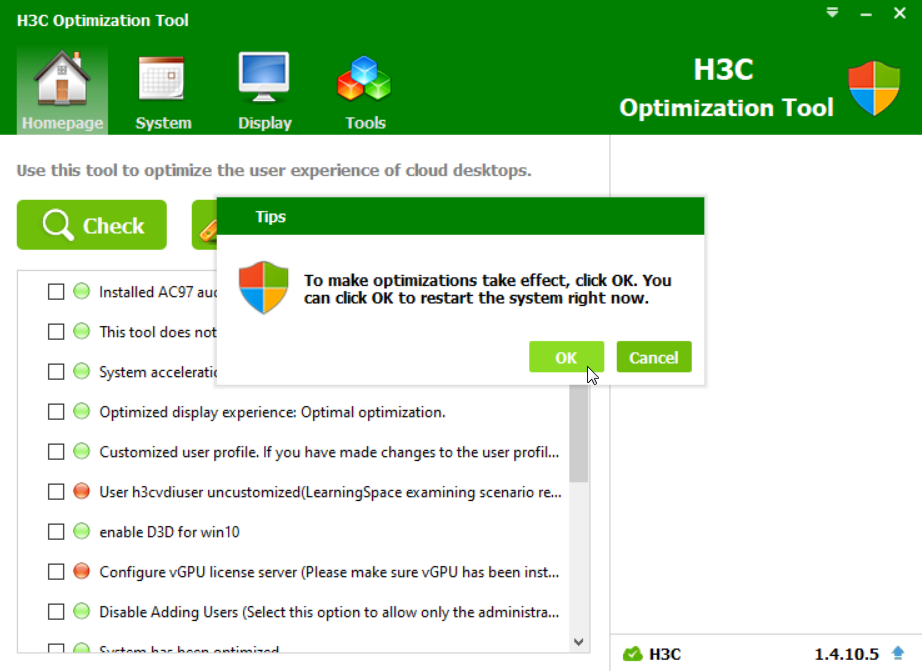
7. After the optimization is completed, click OK, and restart the VM.
Figure 42 Restarting the VM after completing the optimization
Installing VDI course software
Install H3C_Learningspace_App (VM) and teaching-related software. You can obtain required software for VDI courses through attaching the shared disk.
Log in to the course and install software with the Administrator account. If you use the h3cvdiuser account created for optimization purposes, some software products might be invisible during class.
The H3C_Learningspace_App installation package includes the teacher client, student client, and VM. This section uses the VM installation as an example.
To use the quiz, score statistics, and game functions, install Chrome browser (Chrome 45 or higher as a best practice) in the course image. For more information, see H3C Workspace Cloud Desktop Teacher Client User Manual (Education Scenario).
To install VDI course software:
1. Click Install Template Tool, and then select Attach Shared Disk.
|
|
NOTE: Before you mount a shared disk, verify the following prerequisites: · The VM has been installed with the Agent software correctly, and the Agent version is consistent with the management platform version. · The VM has been configured with the correct IP address and can ping the management platform's IP address. · The Workstation service is enabled if the operating system is Windows 7. To check or configure the service state, navigate to Task Manager > Services. |
If shared disks cannot be correctly attached, verify that the VdiAgent communication environment settings and the course VM network settings are correct. Make sure the course VM is reachable to Space Console.
Figure 43 Attaching the shared disk
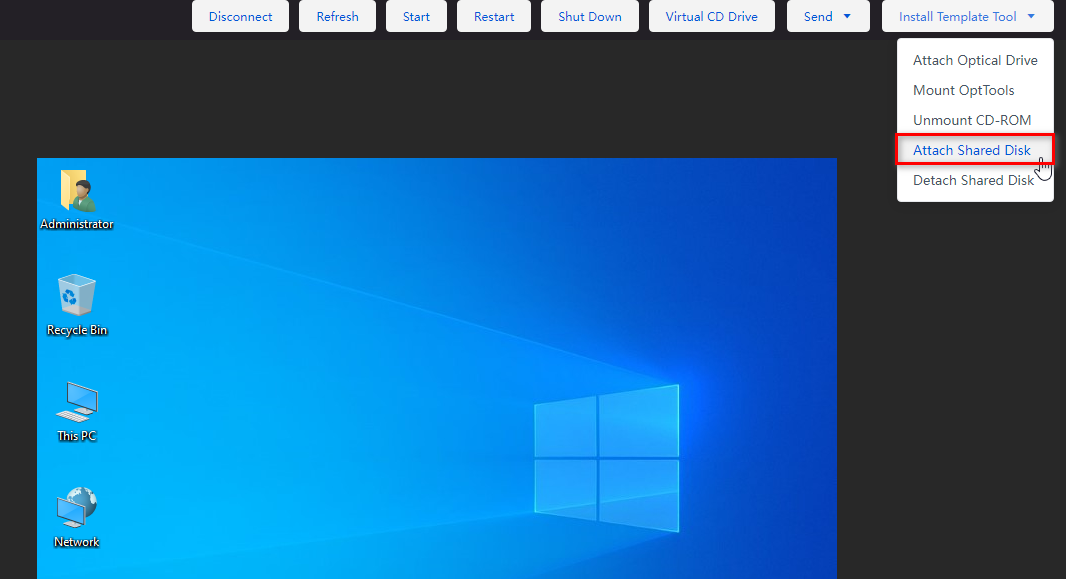
Figure 44 Opening the shared disk
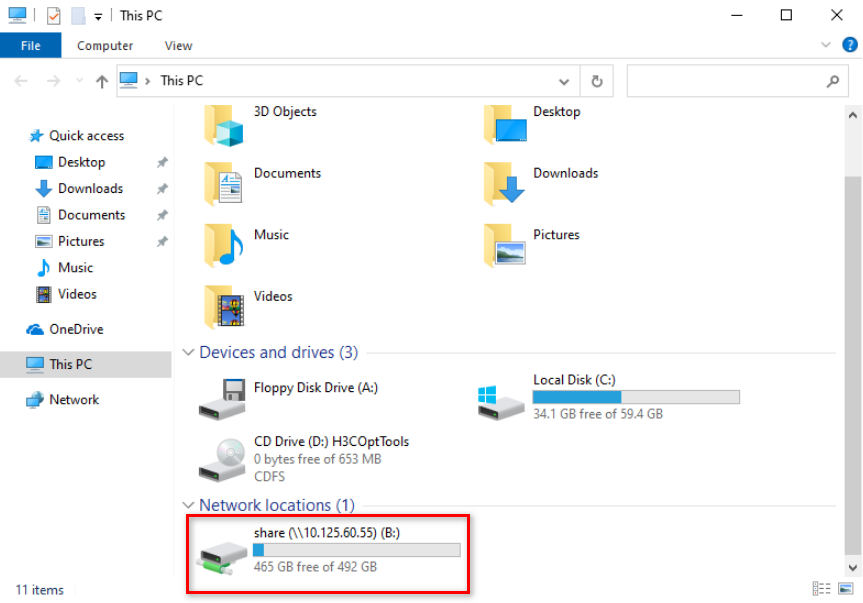
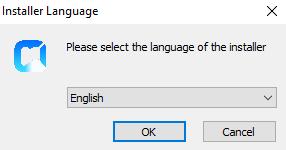
2. Copy Learningspace_App from the shared disk and then decompress it. Run the H3C_Learningspace_App application, select the language, and then click OK.
Figure 45 Selecting the language
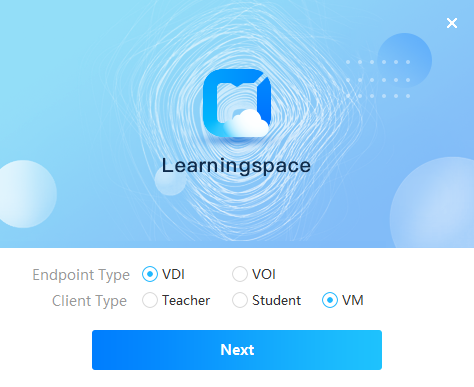
3. Select the VDI endpoint type, select the VM client type, and then click Next.
Figure 46 Installing Learningspace
4. Click the ![]() icon to select an
installation path. This step uses the default path. Select I have read and accept License Agreement and Terms of Service,
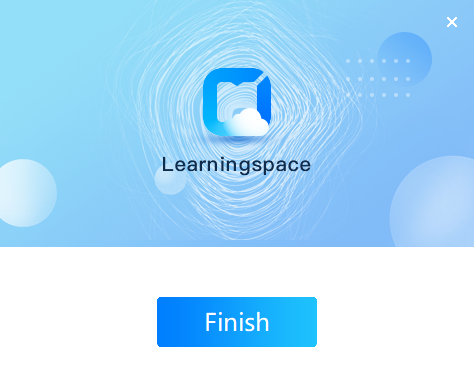
and click Install. After the installation is
completed, click Close.
icon to select an
installation path. This step uses the default path. Select I have read and accept License Agreement and Terms of Service,
and click Install. After the installation is
completed, click Close.
Figure 47 Starting the installation
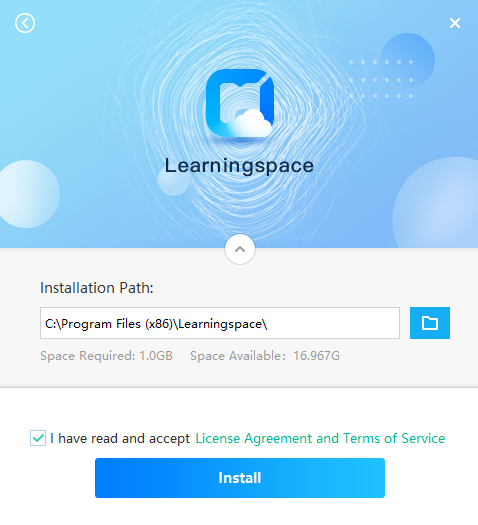
Figure 48 Installation completed
5. Install other required software, such as media players and browsers (Chrome as a best practice).
|
|
CAUTION: If the anti-virus software installation is involved, add Workspace components to the allowlist after the anti-virus software is installed. |
Figure 49 Software installation completed
Finishing and publishing the VDI course
|
|
CAUTION: Before publishing the VDI course, shut down the course VM. |
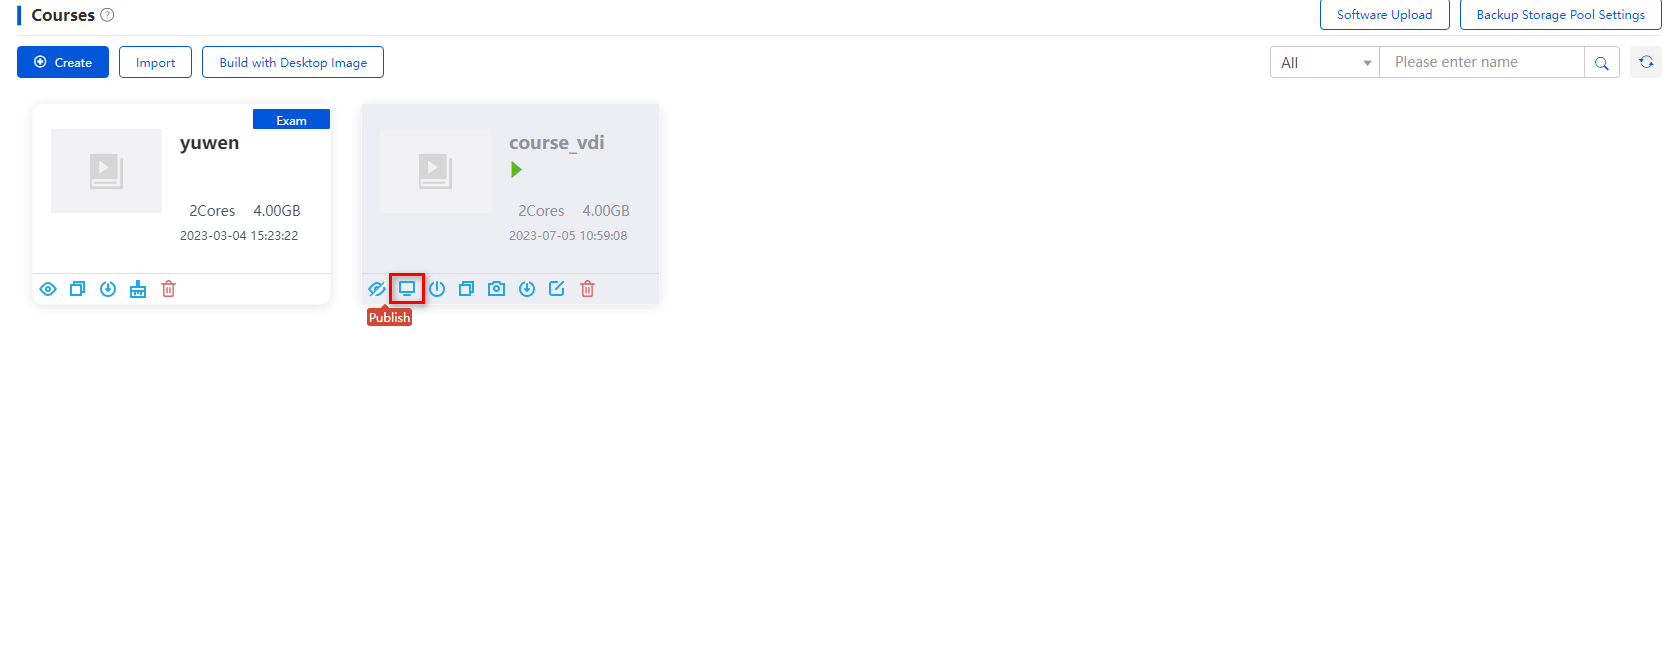
To finish and publish the VDI course:
1. The course building is complete once software products are installed and the course VM is shut down. Click the Publish icon under the course on the course page, and select the storage path for the course image.
2. Click OK.
After the course is published, the teacher can log in to the teacher client, and select the published course from the classroom to start a class.
When you publish a course, you can select the storage path created by Glusterfs on the Data Center > Teaching Storage page or the storage path created on the Images > Image Pools page.
Figure 50 VDI course building completed
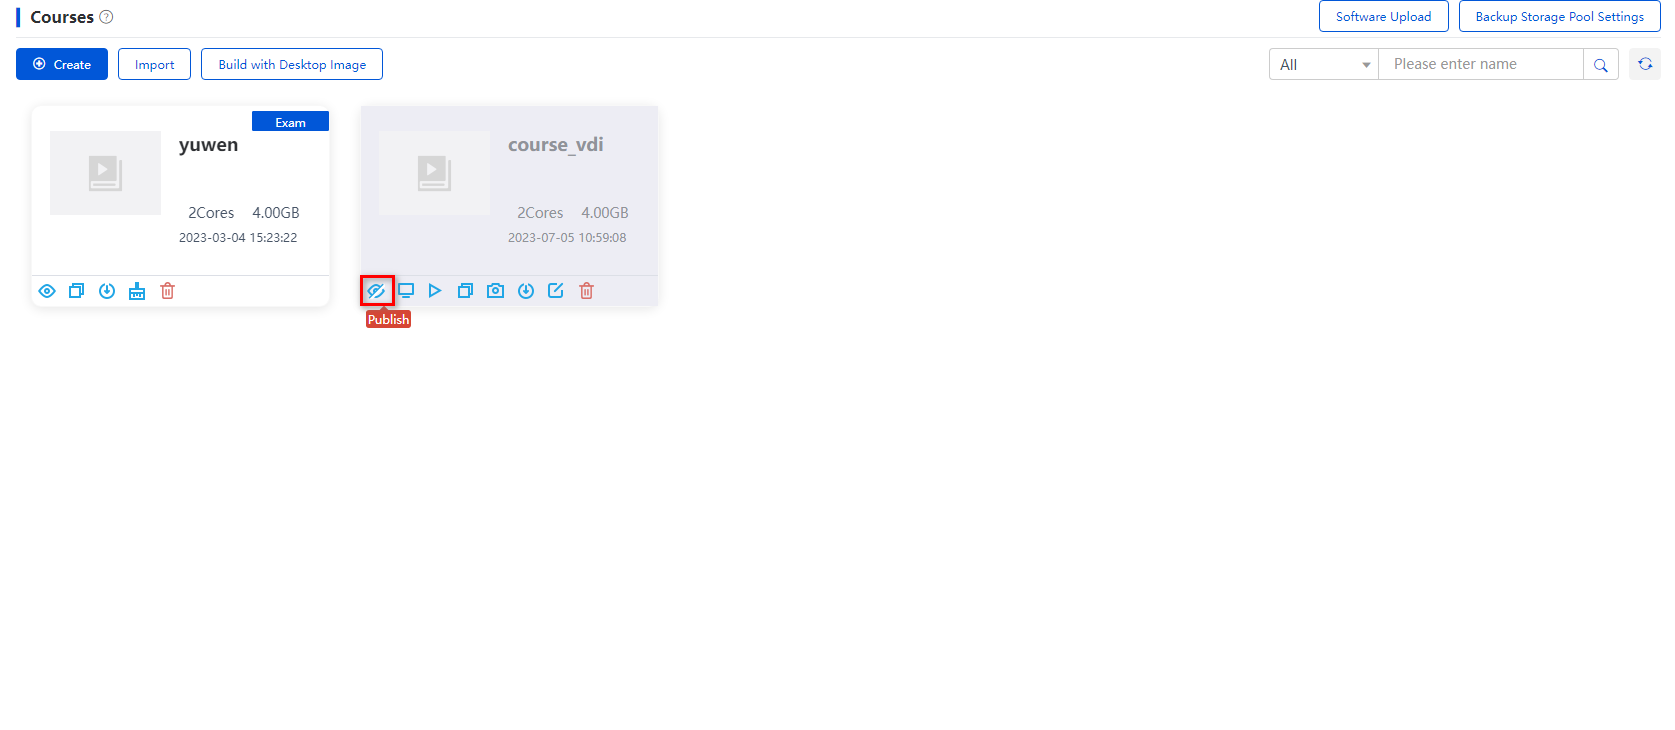
Figure 51 VDI course publishing completed
Configuring a VOI course
The system supports adding a VOI course by creating or importing the VOI course. You can use the system image ISO file to create a VOI course, or import an existing VOI course image file to create the course.
The VOI client described in this section is a client deployed on a VOI endpoint, not a VOI client of a UCC endpoint. For more information, see "Method of distinguishing UCC endpoints from non-UCC endpoints (IDV or VOI endpoints)."
As from version E1012, the system performs only maintenance actions on VOI clients that are deployed on VOI endpoints, and new VOI-related features will not be added for these VOI clients. The new features will be added for VOI clients of UCC endpoints. For more information, see H3C Workspace Cloud Desktop UCC Endpoint Configuration Guide.
Restrictions and guidelines
· The VOI course configuration procedures are irreversible. You must strictly follow the following procedures.
· For the network feature configured on the teacher client to take effect on the course desktop of a student client, make sure firewall is enabled on VOI course images.
Creating a teaching storage
Before creating a course, configure the storage path for the course image. For more information, see ''Configuring teaching storage."
Creating a VOI course
Creating a system image
|
|
CAUTION: For Windows 7, VOI course images support only 64-bit Ultimate and Enterprise edition. For more information about operating system compatibility, see H3C Workspace Cloud Desktop Hardware & Software Compatibility Matrixes. |
For more information, see "Creating a system image."
Creating a VOI course
|
|
CAUTION: Before creating a VOI course for a C201V endpoint, register the C201V endpoint with Space Console, and view the endpoint type on Space Console. · If the user endpoint model is VOI-Default string, create a flavor named VOI-Default string on the System > Flavors page, and make sure the flavor parameters are the same as that of the C201V endpoint. If the user endpoint model is VOI-Default string C201V, select the flavor named VOI-Default string C201V when creating a VOI course. For more information about flavor configuration, see H3C Workspace Cloud Desktop Management Software User Manual. · If the user endpoint model is VOI-C201V, use the default C201V flavor on Space Console. |
To create a VOI course:
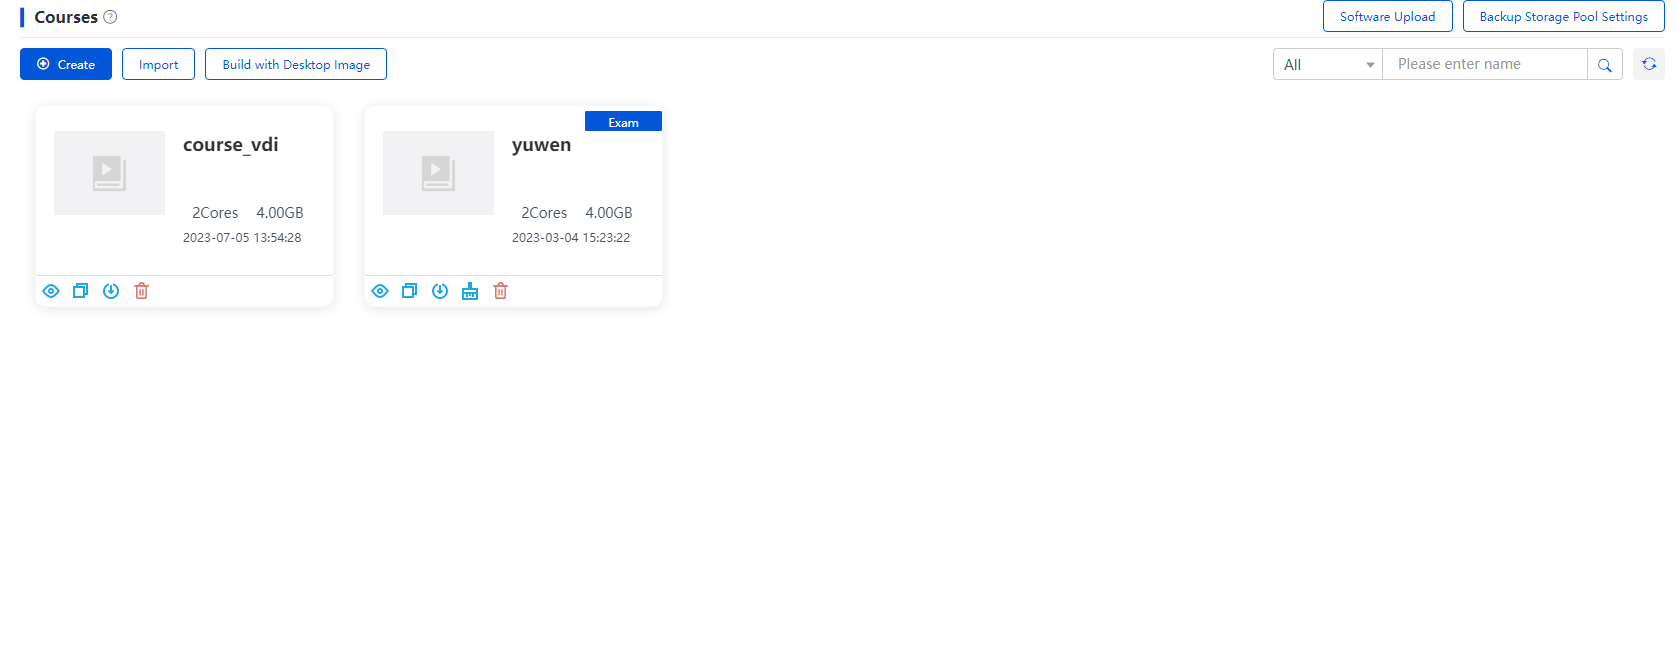
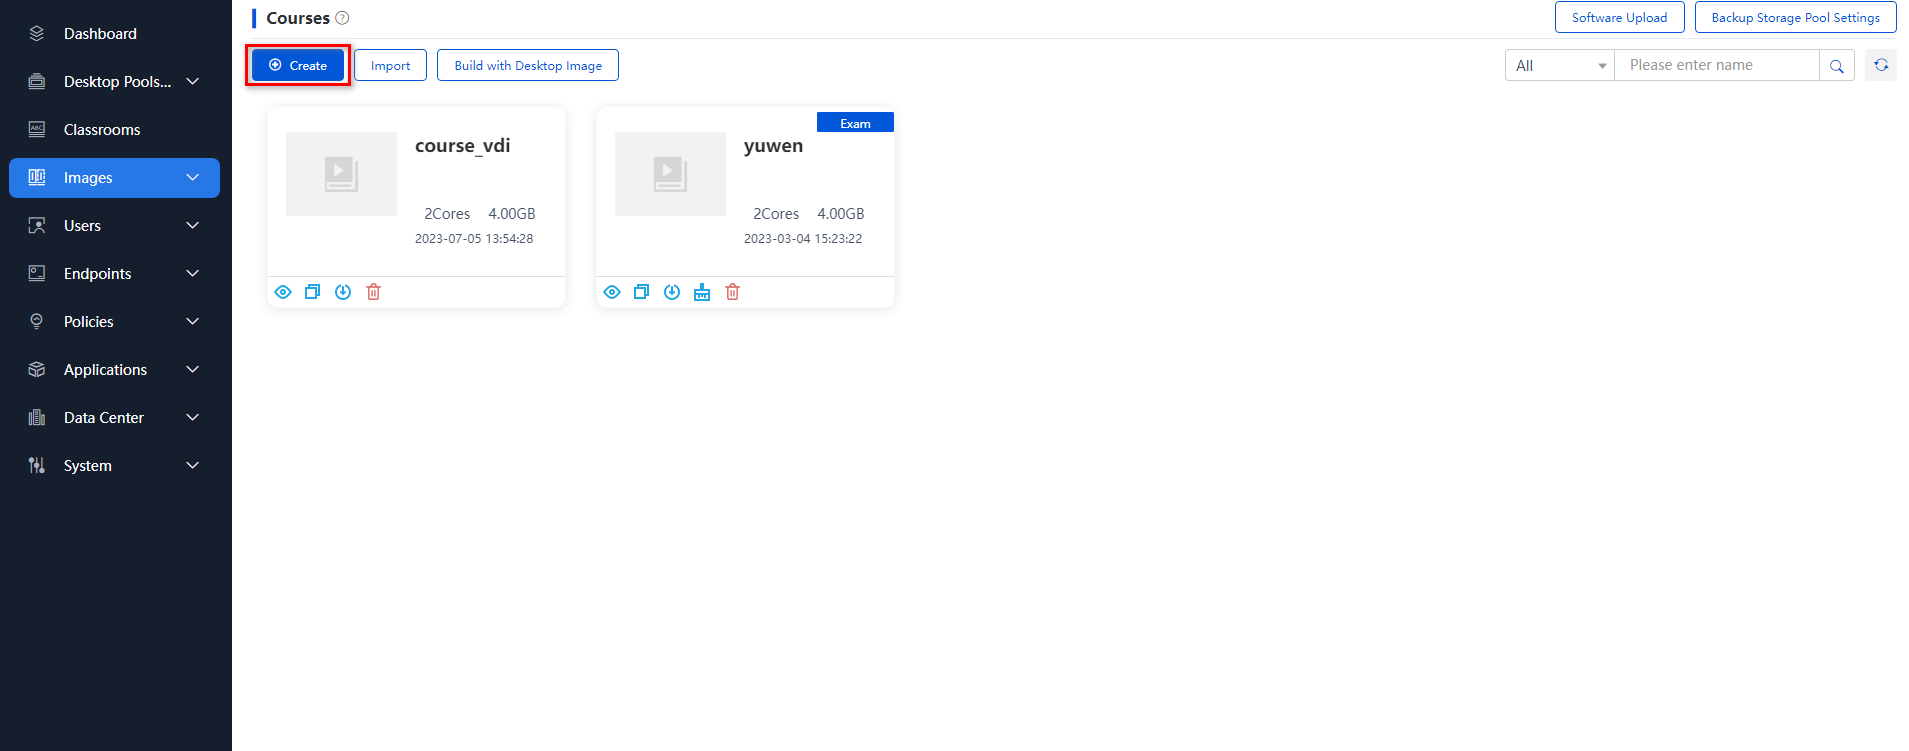
1. From the navigation pane, select Images > Course Images, and click Create.
Figure 52 Course page
2. On the Basic Info tab, configure parameters for the new course, such as the basic information and the storage path. Select the system image uploaded in "Creating a system image." In addition, select a VOI course type.
3. Click Save & Proceed.
Figure 53 VOI course basic information

Table 4 VOI course parameters
|
Parameters |
Description |
|
Course Type |
Select VOI. Endpoints of a specific type can access only the course of that type. |
|
Course Name |
Specify the name of the course. |
|
Host |
Specify the host of the VM where the course will be built. |
|
Path |
Specify the storage path for the course image file. Configure the storage path for the course image in advance. For more information, see ''Configuring teaching storage." For a cluster environment, select the GlusterFS storage. |
|
Course File Type |
Select the course image endpoint firmware. Options include QCOW2 and VHD. · Select QCOW2 in the following scenarios: ¡ The course image file is used for TCI. ¡ The course image file is used for VOI, and its operating system is Linux. · Select VHD if the course image file is used for VOI and its operating system is Windows. |
|
User Access |
Specify the users that can access the course. Teachers can use the course to start classes. Students can use only the course in self-study scenarios. · All—The course is open to all users. · None—The course is not open to any users. · Selected—The course is only open to selected users. Login to the teacher client or student client is required before the class is started. To select users, click Edit. |
|
Classroom Access |
· All—The course is available to all classrooms. · Selected—The course is available only to selected classrooms. To select classrooms, click Edit. |
|
Boot Firmware |
Select a firmware boot mode for course VMs based on the startup mode of VOI endpoints. Options include BIOS and UEFI. Endpoints with Intel 10 and later support only UEFI. Endpoints with Intel 9 and earlier supports CSM (UEFI and BIOS), but BIOS is recommended. If the /sys/firmware/efi file exists in the endpoint background, select UEFI as the firmware boot mode for the endpoint. Otherwise, select BIOS. |
|
Configure |
Select the VOI endpoint model compatible with the course. · Dedicated: Applies to the scenario where the endpoints are the same model or are official endpoints. You can select the system default VOI endpoint model or a user-defined VOI endpoint model in flavor settings. The selected model in flavor settings must be consistent with the user endpoint model. For example, if the user endpoint model is C206V, you must select the model C206V in flavor settings. · General: Applies to the scenario where the endpoints are different models or are unofficial endpoints. You need to set the CPU, memory, and system disk sizes according to the general endpoint hardware configuration. If the configured CPU and memory sizes are larger than the general endpoint hardware configuration, the desktop uses the CPU and memory sizes in the hardware configuration. If the configured CPU and memory sizes are smaller than the general endpoint hardware configuration, the desktop uses the configured CPU and memory sizes. Make sure the configured system disk size is not larger than the system disk size of the general endpoint. For more information about flavors, see H3C Workspace Cloud Desktop Management Software User Manual. For more information about the system disk configuration, see "Disk space information about VOI endpoints." The system disk size configured in the flavor configuration is the recommended value for optimal experience. As a best practice, do not edit this system disk size. |
|
Network |
Select the vSwitch for the course image VM network. |
|
System Image |
Specify the ISO image of the operating system used by the course VM. |
|
Course Logo |
Specify a logo for the course. |
|
Username Prefix |
Specify the username prefix for course desktops created for classes. By default, username prefix is Administrator. |
|
Digits in Username Suffix |
Set the number of digits in the username suffix. For example, if you set this parameter to 2, usernames are suffixed with 01, 02, 03, and so on. By default, no suffix is added to usernames. |
|
Login Password |
Set the password used for SSO on course desktops. |
|
Reset Computer Name |
Turn on this option to change the computer names of the teaching desktops to the endpoint names, for example, Stu-1. |
4. Click Next to enter the software installation procedure, and start building a VOI course.
The system does not support obtaining the software installation package for VOI courses through software upload. You can obtain the installation package through shared files. For more information, see "Installing VOI course software."
During the software installation process,
you can click Finish at any time to quit software installation. To continue
building the course, click the ![]() icon for the
course to open the course console.
icon for the
course to open the course console.
Figure 54 New VOI course
The newly created VOI course is actually an empty VM which has no operating system or required drivers installed.
Building a VOI course level-1 image
A VOI course image includes a level-1 course image and a level-2 course image. The level-1 image is the parent image of the level-2 image, and the level-1 image does not have a parent image. The purpose of building a VOI course image is to install and optimize the operating system, drivers, and required software products for the new VOI course.
Installing an operating system
1. Click the ![]() icon under the
target newly created course.
icon under the
target newly created course.
Figure 55 Opening the console for the course
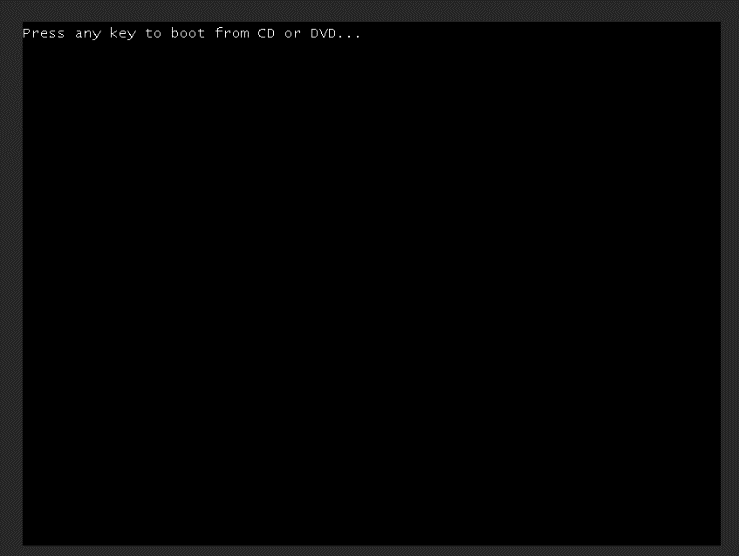
2. After opening the console for an image source VM, press any key as prompted by Press any key to boot from CD or DVD that appears when the image source VM is started. Then, the image source VM is started in UEFI mode. Otherwise, the loaded disk will be unavailable when the system prompts the Where do you want to install Windows? message.
If you miss the prompt message, click Restart on top of the console.
This step is required only when the boot firmware is UEFI.
Figure 56 Pressing any key to start the image source VM in UEFI mode
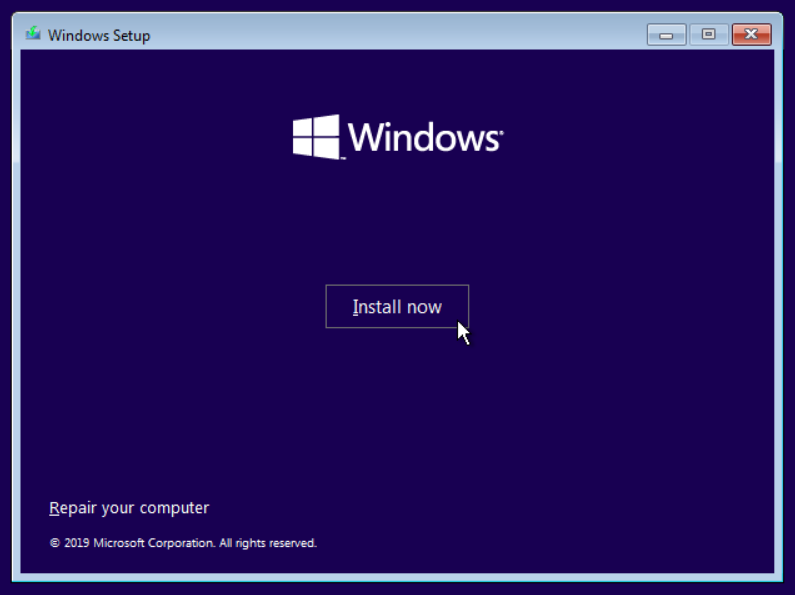
3. After the VM is started, select a language and other preference options, and click Next. Click Install Now to start installing the operating system.
Figure 57 Selecting a language and other preference options
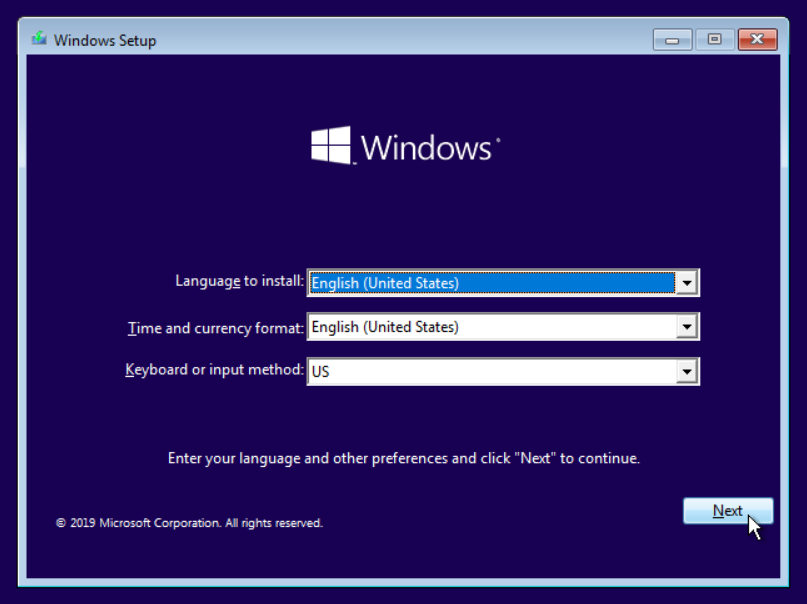
Figure 58 Starting to install the operating system
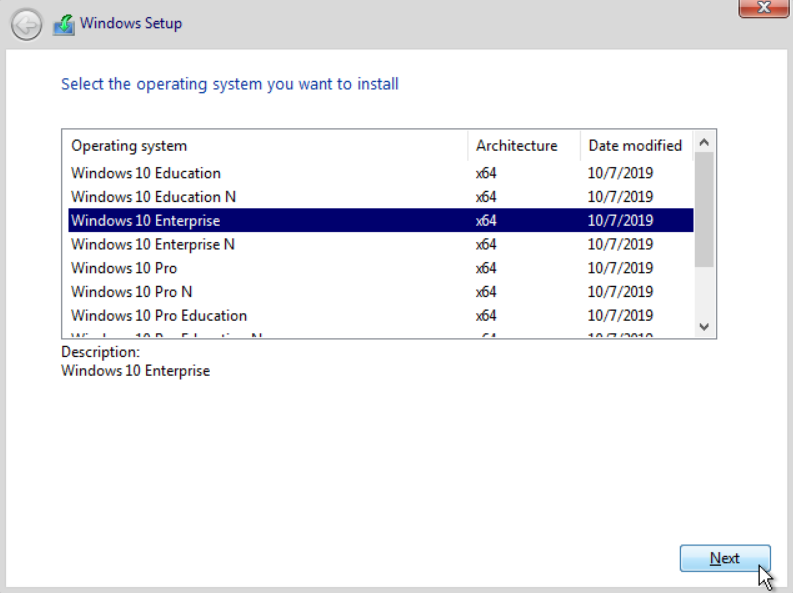
4. Select a Windows 10 edition to be installed. Install Windows 10 Enterprise as a best practice. Then, click Next.
Figure 59 Selecting a Windows 10 edition
5. Accept the installation license agreements, click Next, and select the installation type Custom: Install Windows only (advanced).
Figure 60 Selecting the installation type
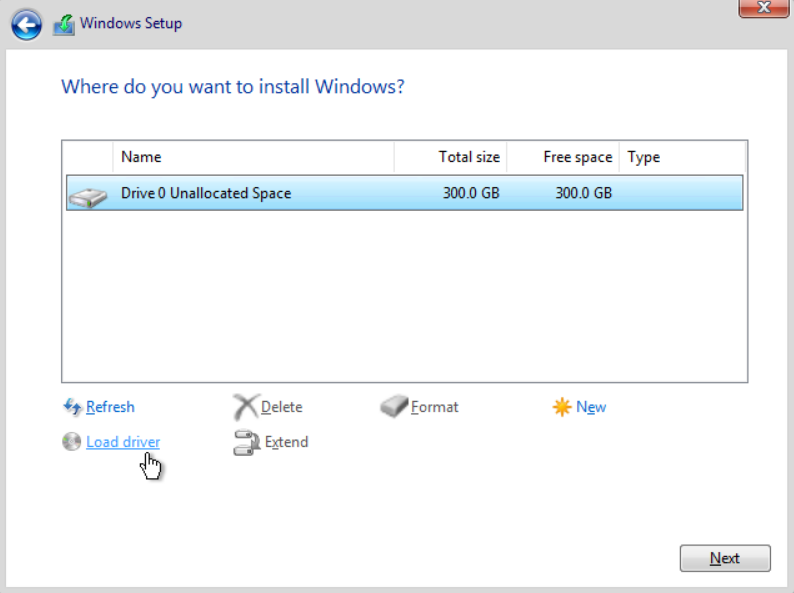
6. When the system prompts Where do you want to install Windows?, partition the disks as required, and click Load Driver.
Figure 61 Clicking Load Driver
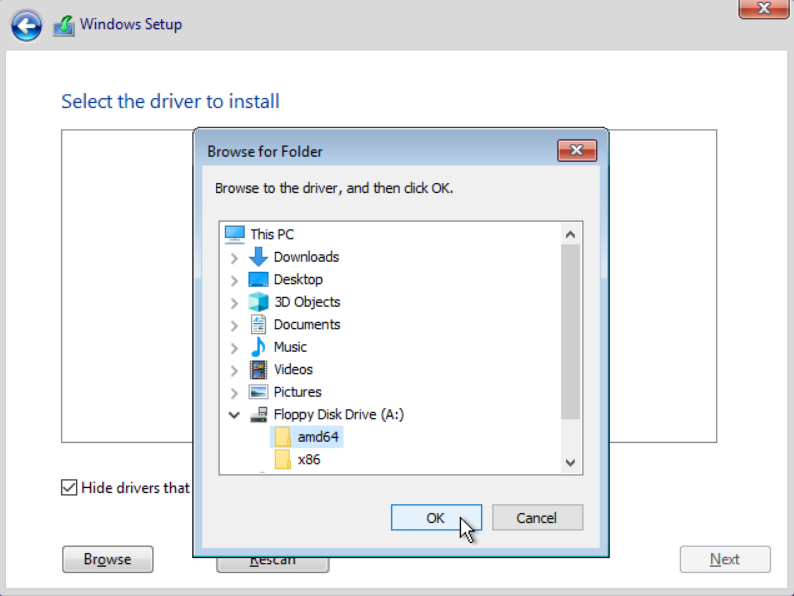
7. In the Load Driver dialog box that opens, click Browser, and select Floppy Disk Drive (A:)/amd64.
Figure 62 Load Driver dialog box

Figure 63 Selecting Floppy Disk Drive (A:)/amd64
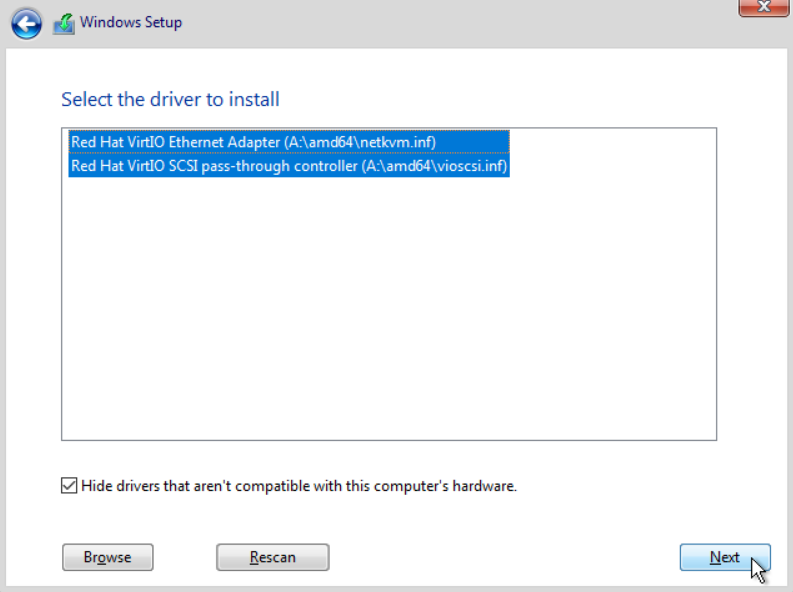
8. Select all drivers by pressing Ctrl or Shift, and click Next.
|
|
CAUTION: · For drivers installed on the 32-bit Windows operating system, select Floppy Disk Drive (A:)/x86. · For drivers installed on the 64-bit Windows operating system, select Floppy Disk Drive (A:)/amd64. · You must load the drivers and make sure all compatible drivers are selected in the driver selection dialog box. Lack of drivers will affect the proper operation of the desktop image. |
Figure 64 Selecting all drivers
9. Click Next. Wait until the operating system is installed.
During the installation process, the VM might reboot several times.
Figure 65 Partitioning the disks
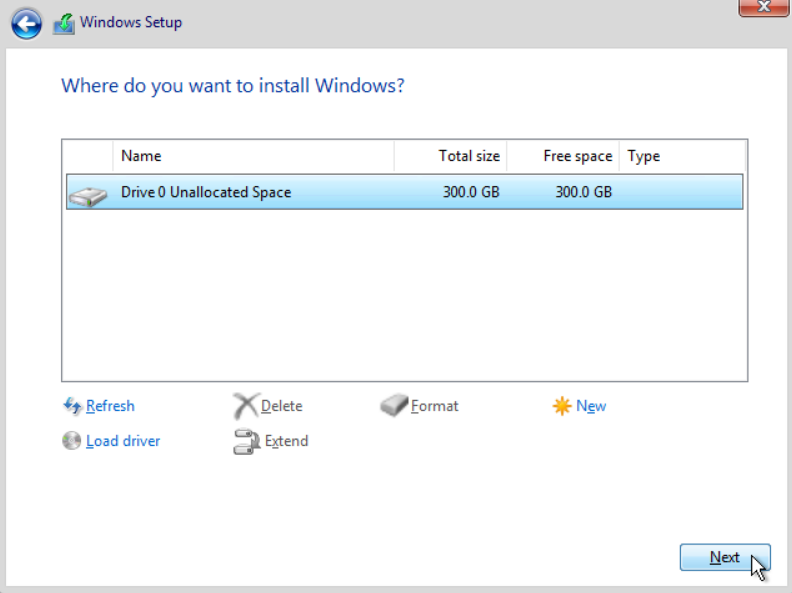
Figure 66 Installing Windows
10. After the installation is completed, configure basic settings such as region, keyboard layout, network, and accounts.
Figure 67 Configuring the region
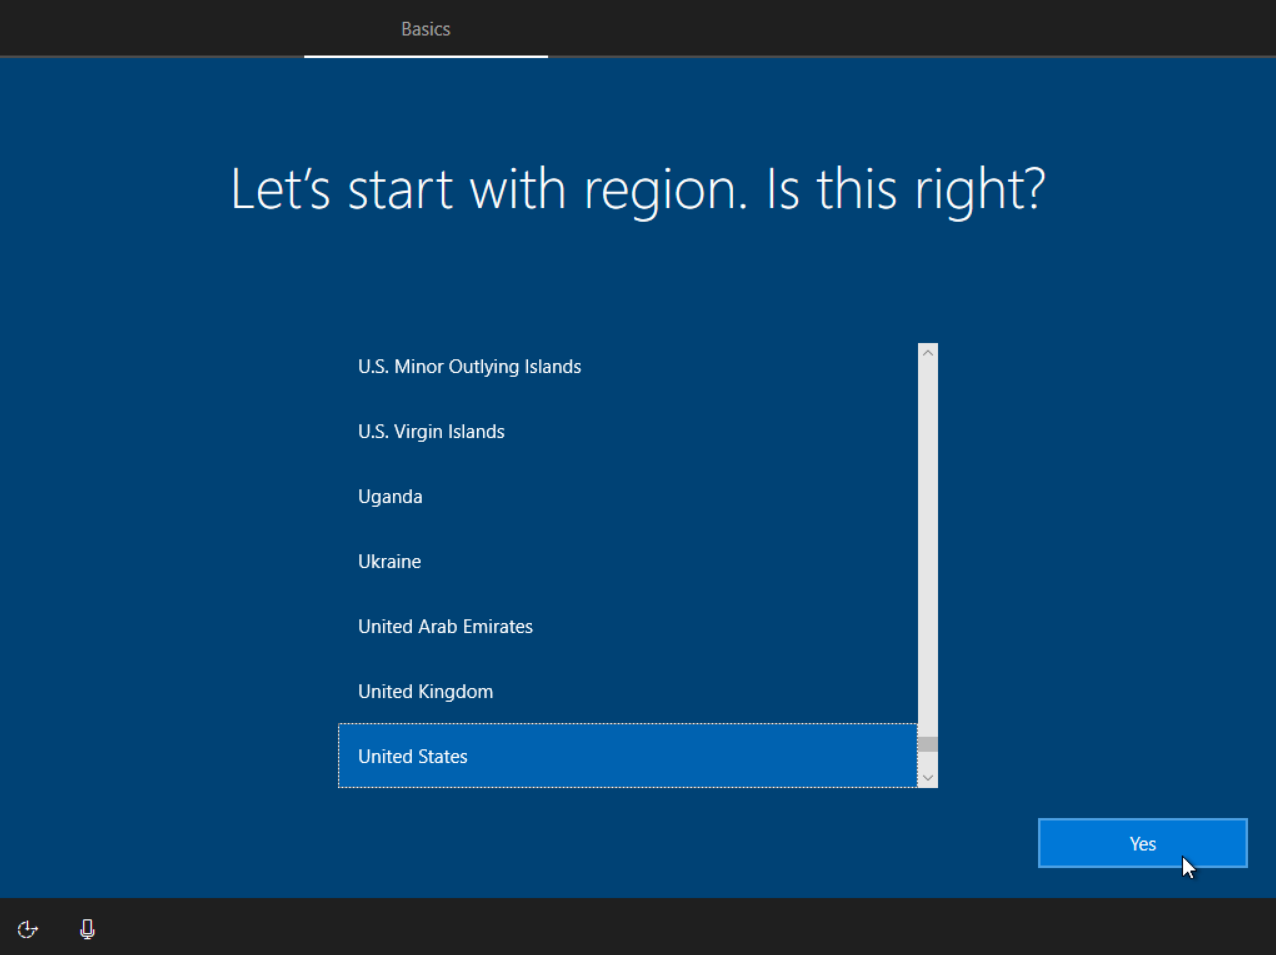
Figure 68 Configuring the account
If you want to optimize the system later, you must log in as Administrator. The user account set here is used only to enter the desktop after installation. After entering the desktop, you must switch to the Administrator user.
11. Enter the Windows desktop after all system settings are configured.
Figure 69 Entering the Windows desktop

Switching to the Administrator user
1. Enter Computer Management in the cortana search box. From the menu that opens, click Computer Management.
Figure 70 Clicking Computer Management

2. On the computer management window, select Local Users and Groups > Users. In the user list, right-click Administrator, and select Properties from the shortcut menu.
Figure 71 Navigating to property management
3. On the properties window, clear the Account is Disabled option to enable the Administrator account, and click OK.
Figure 72 Enabling the Administrator account
4. Restart the system after enabling the Administrator account, and log in to the desktop by using this account.
Figure 73 Logging in to the desktop with the Administrator account
5. Open the control panel. Click User Accounts, and then click Remove user accounts. On the Manage Accounts page, select the account created when you install the operating system. On the Change an Account page, click Delete the account.
Figure 74 Deleting the account created when you install the operating system

Configuring and optimizing the system services
The optimization tool improves the client desktop operating speed and teaching experience by optimizing the software settings and operating system.
Before configuring and optimizing the system services, make sure the optimization tool is uploaded to Space Console. For more information about the upload method, see "Uploading the optimization tool."
To configure and optimize the system services:
1. Click Install Template Tool, and select Mount OptTools.
Figure 75 Mounting the OptTools

Figure 76 Running the H3COptTools
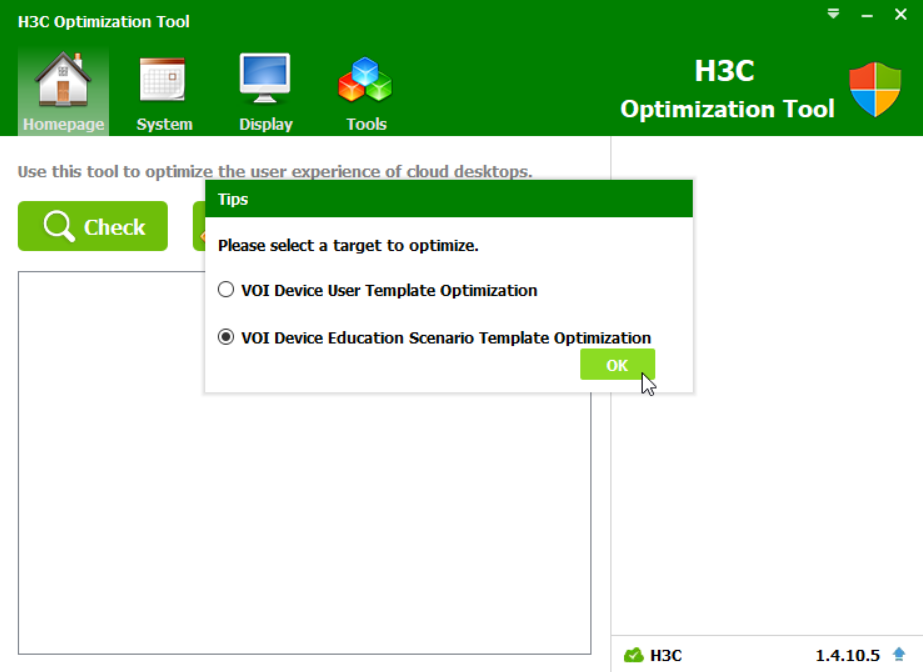
2. Select the VOI Device Education Scenario Template Optimization scenario, and click OK.
Figure 77 Selecting the VOI Device Education Scenario Template Optimization scenario
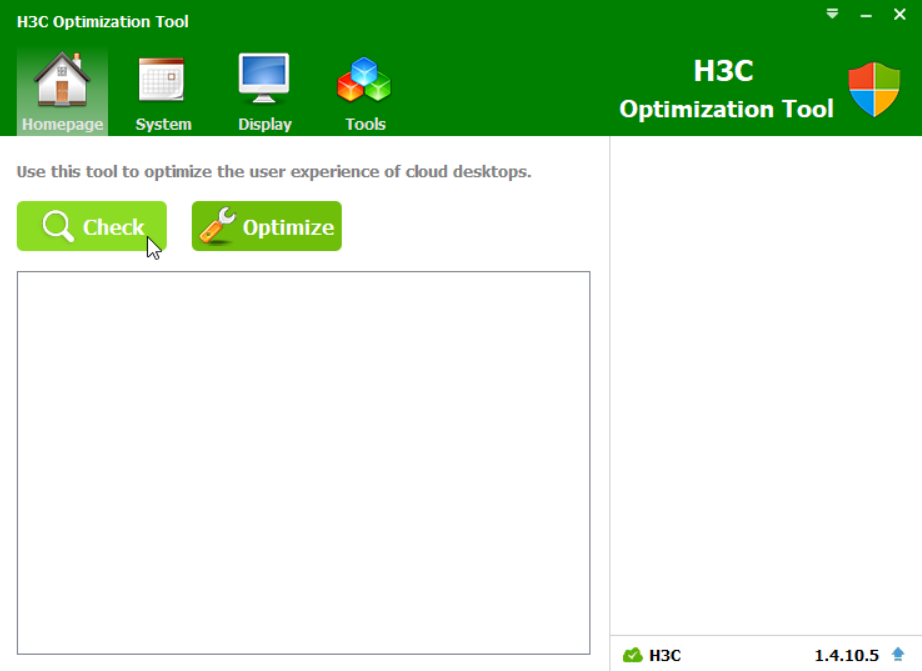
3. On the homepage, click Check to check the operating system.
Figure 78 Checking the operating system
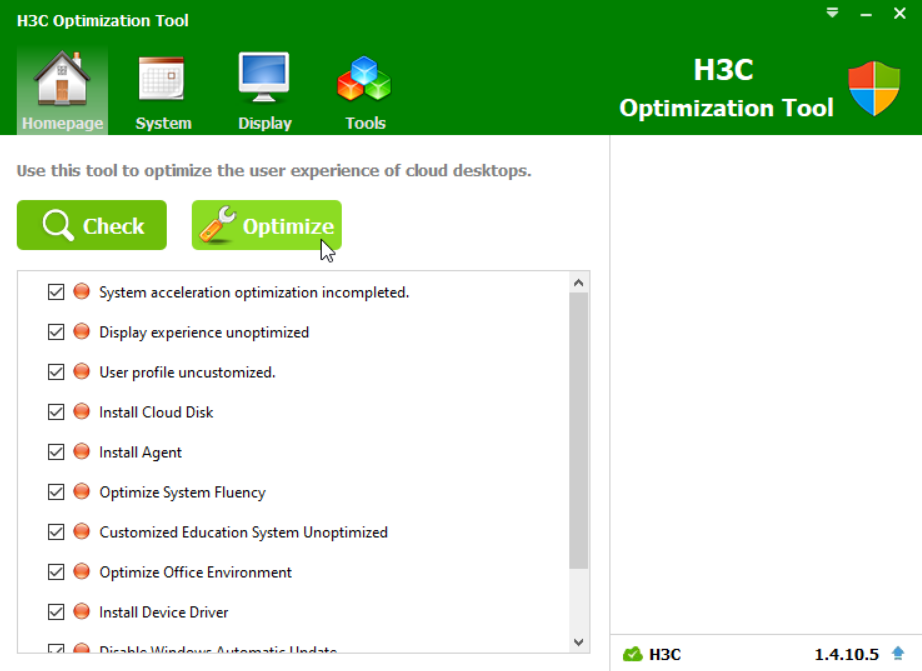
4. After the check is completed, the items that failed the check are marked red. Select all items to optimize and click Optimize to start optimization.
Figure 79 Optimizing the items that failed the check
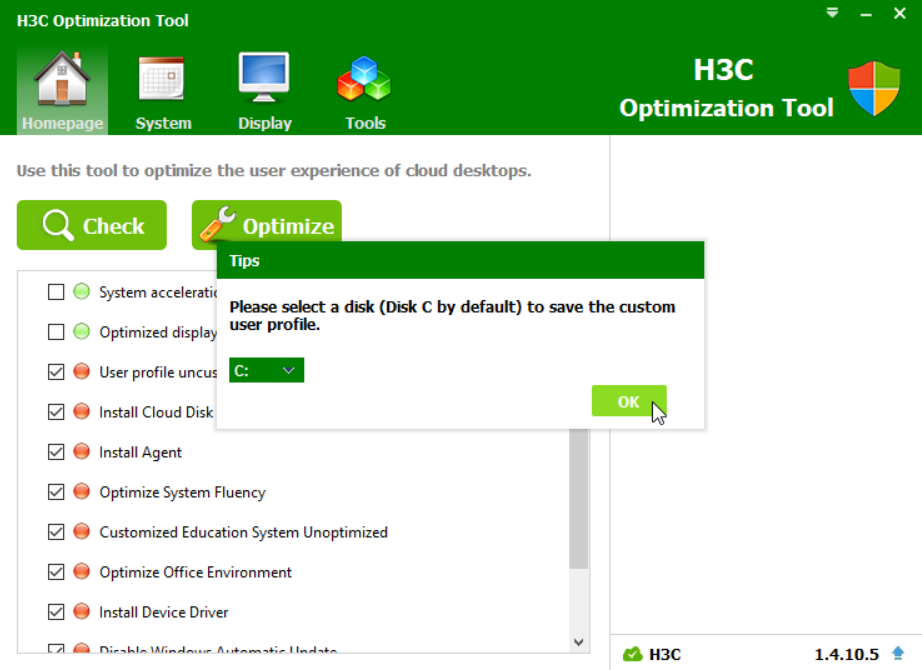
5. Select a disk for customizing a user profile.
Figure 80 Selecting a disk for customizing a user profile
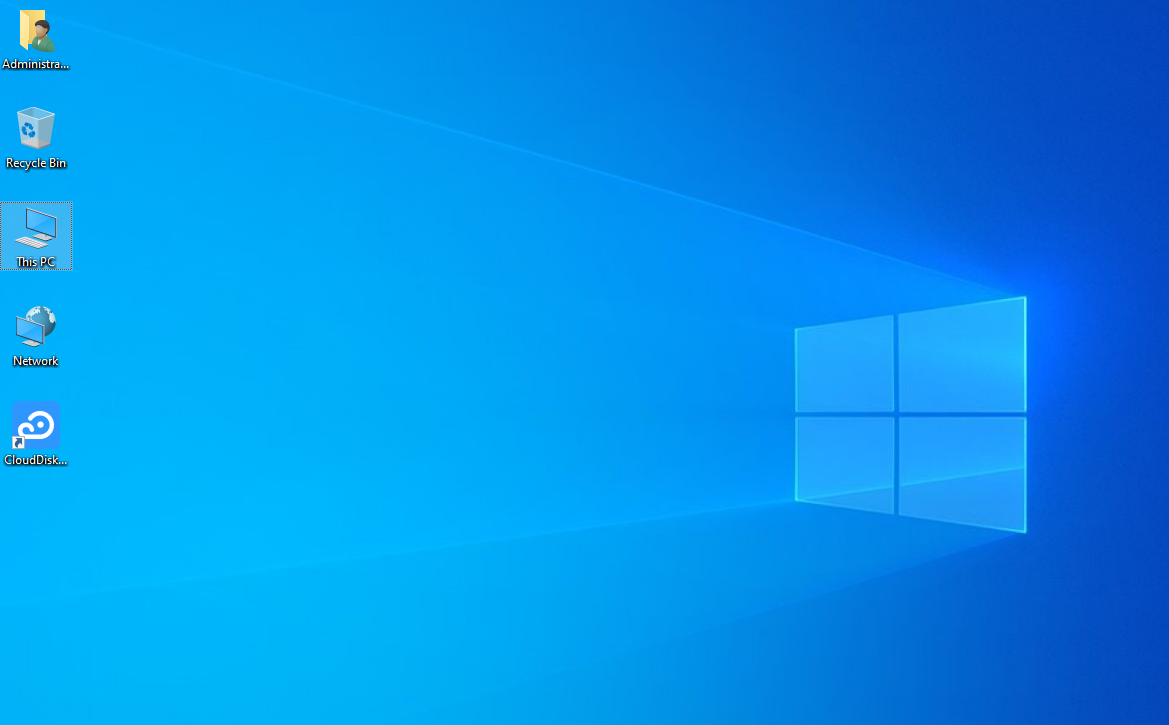
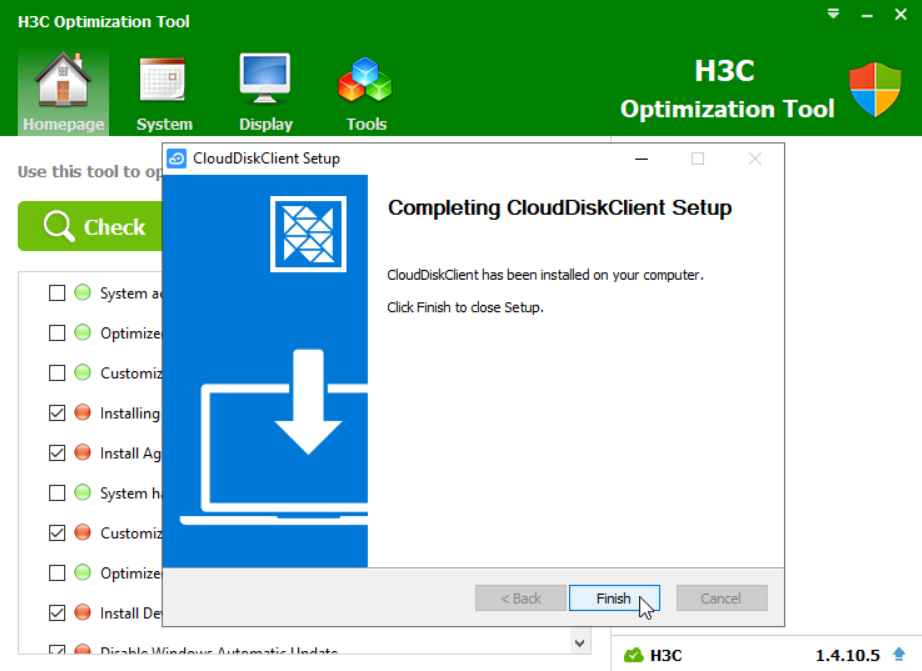
6. On the CloudDiskClient installation wizard window, click Install. After the CloudDiskClient installation is completed, click Finish.
Figure 81 CloudDiskClient installation wizard

Figure 82 CloudDiskClient installation completed
7. On the VoiAgent installation wizard window, install VoiAgent based on the wizard.
Figure 83 VoiAgent installation wizard
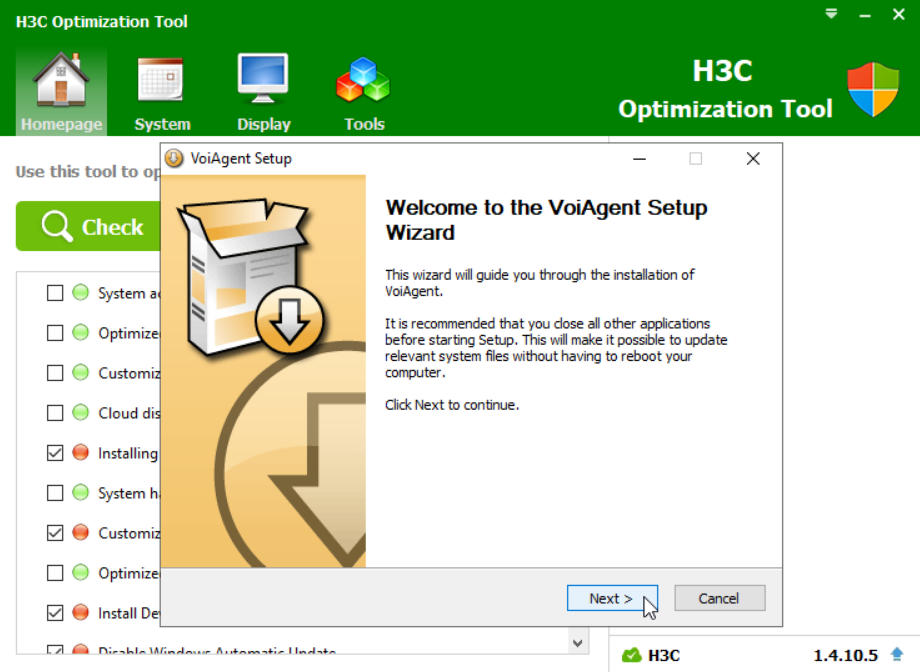
Figure 84 Configuring the communication environment
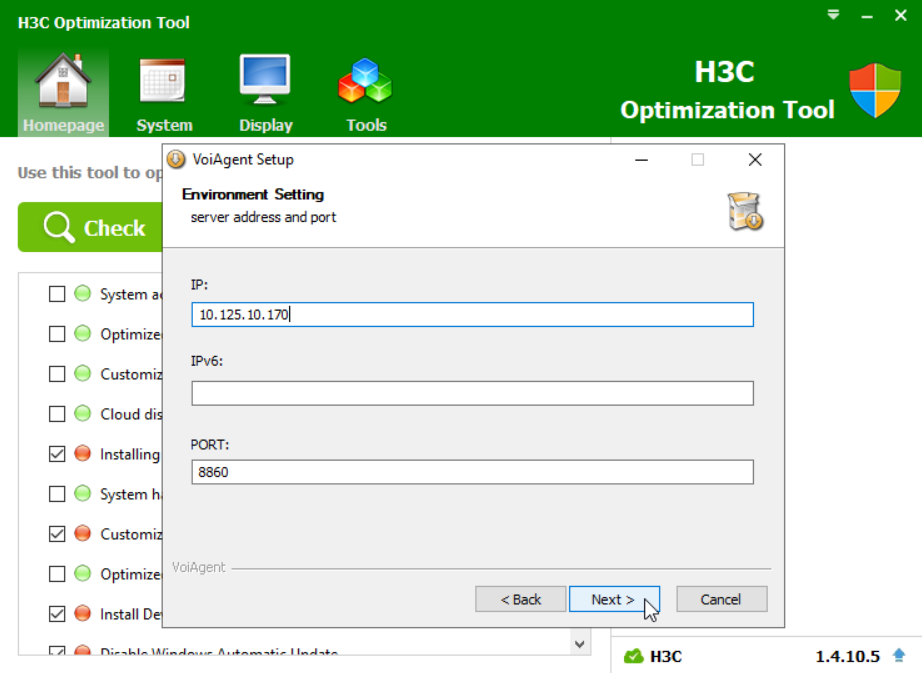
Figure 85 Selecting a target directory for VoiAgent installation
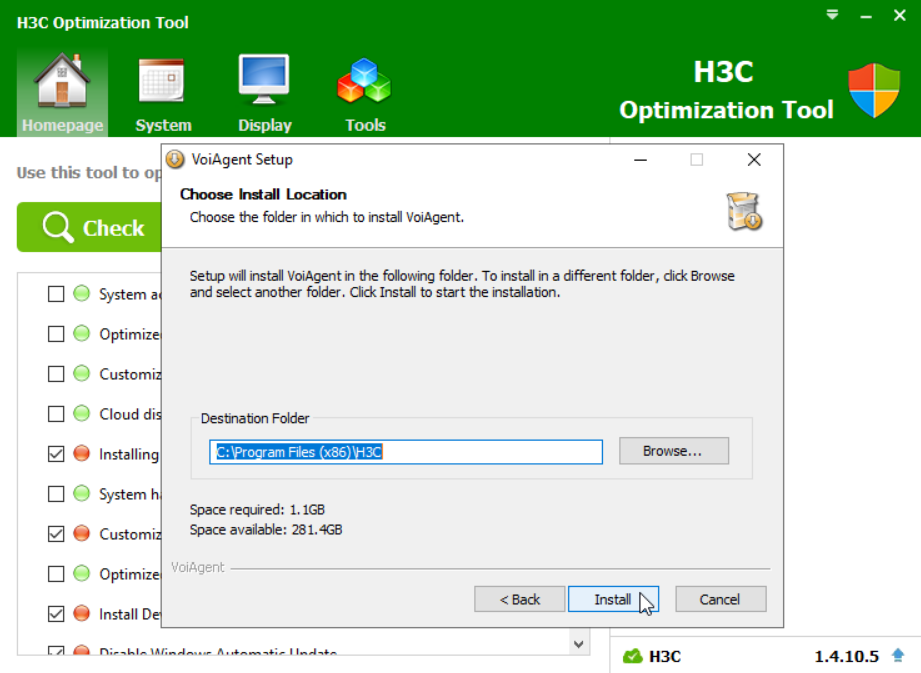
Figure 86 VoiAgent installation completed
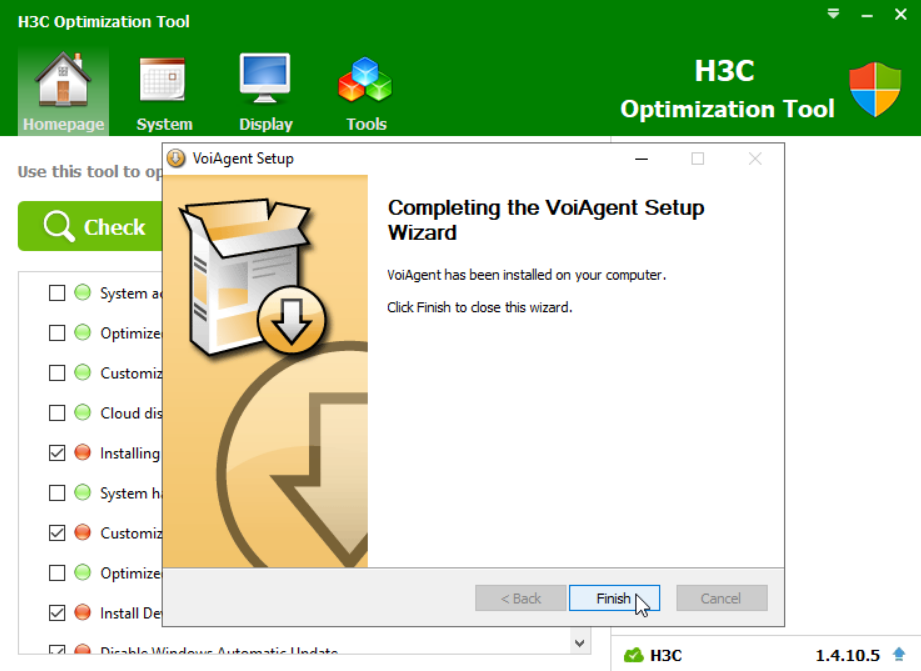
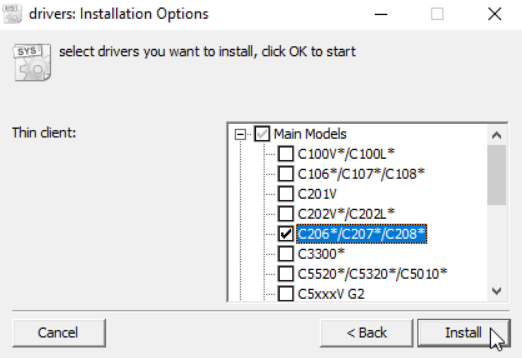
8. In the drivers: License Agreement dialog box, click I Agree to enter the drivers: Installation Options dialog box. In the dialog box, select the target endpoint type, and click Install to start installation.
Figure 87 Drivers: License Agreement dialog box
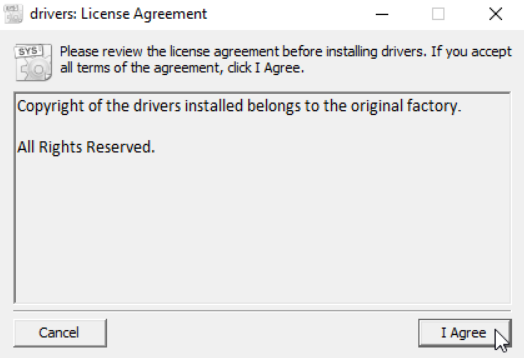
Figure 88 Selecting an endpoint type
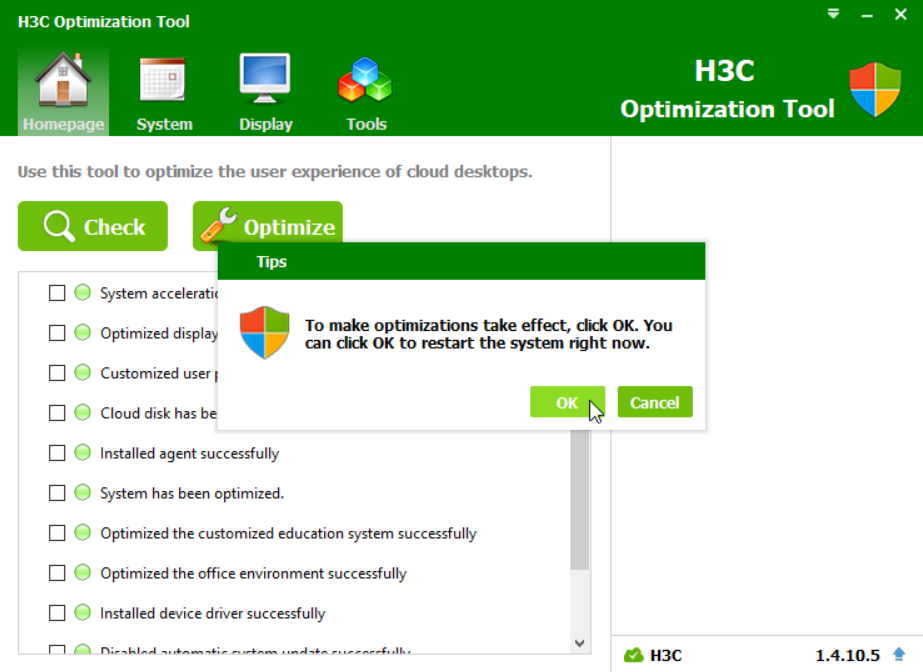
9. After the optimization is completed, restart the operating system to ensure that the installed software and drivers take effect.
Figure 89 Restarting the operating system
Installing VOI course software
Install H3C_Learningspace_App (student client) and teaching-related software. The VOI course-related software cannot be obtained by using the Attach Shared Disk method. To obtain the software, upload it to the course by using the file sharing feature of Windows. Make sure the PC that shares the specific folder is on the same network as the VM, and the VM can access the local network of the PC.
The H3C_Learningspace_App installation package includes the teacher client, student client, and VM. You can install the student client only on a VOI endpoint.
To use the quiz, score statistics, and game functions, install Chrome browser (Chrome 45 or higher as a best practice) in the course image. For more information, see H3C Workspace Cloud Desktop Teacher Client User Manual (Education Scenario).
To install VOI course software:
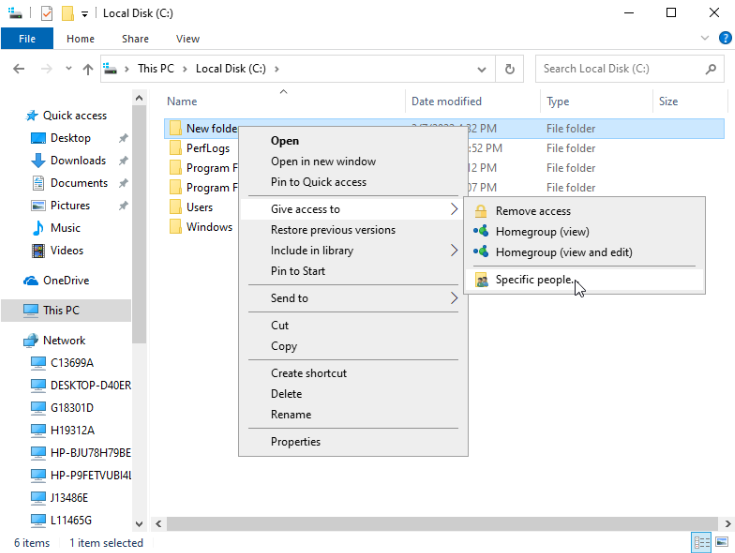
1. Create a folder on the PC, and add the Learningspace_App client installation package and required software to the folder. Right-click on the folder, and select Give access to > Specific people.
Figure 90 Creating a folder for sharing
2. In the Choose people to
share with dialog box, click the ![]() icon next to the Add button, select Everyone,
click Add, and then click Share.
icon next to the Add button, select Everyone,
click Add, and then click Share.
Figure 91 Choosing people to share with
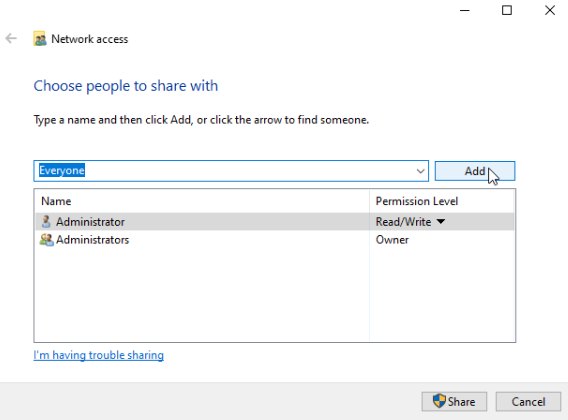
Figure 92 Folder sharing completed

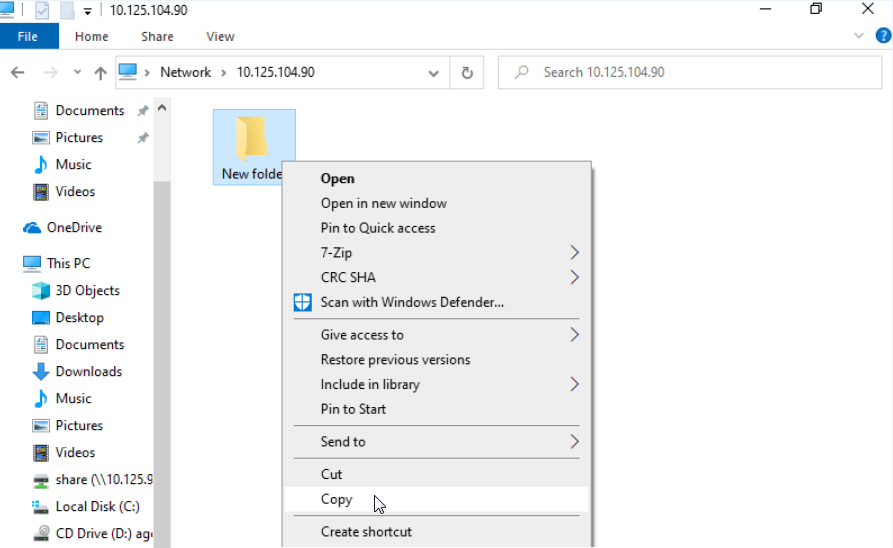
3. Press shortcut keys Win + R on the course VM to open the Run dialog box. Enter double backslash and the IP address of the NIC attached to the network where the local PC resides, and then click OK to open the shared folder. Then copy the Learningspace_App client installation package and other required software to the course VM. For security purposes, cancel sharing after the sharing is complete.
Figure 93 Copying the installation package
4. Copy Learningspace_App from the shared disk and then decompress it. Run the application, select the language in the language selection dialog box that opens, and then click OK.
Figure 94 Running the Learningspace_App application

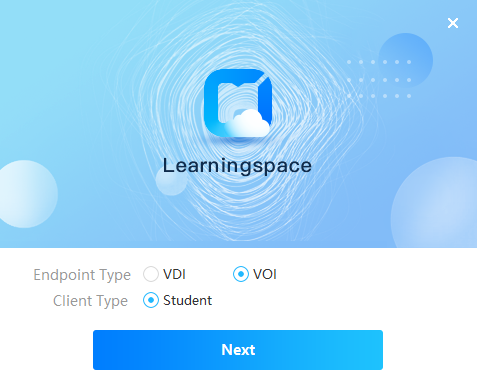
5. Select the VOI endpoint type, select the student client type, and then click Next.
Figure 95 Installing the VOI student client
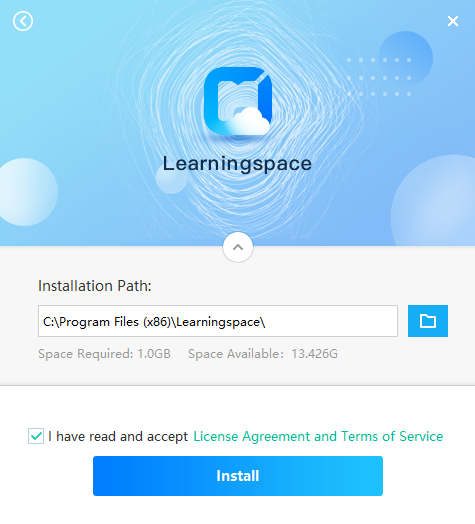
6. Select an installation path. Click I have read and accept License Agreement and Terms of Service, and click Install.
Figure 96 Installing Learningspace
7. After the installation is complete, click Finish, and install other required software.
|
|
CAUTION: If the anti-virus software installation is involved, add Workspace components to the allowlist after the anti-virus software is installed. |
Figure 97 Installation completed
Finishing and publishing a VOI course level-1 image
|
|
CAUTION: Before publishing the VOI course, shut down the corresponding course VM. |
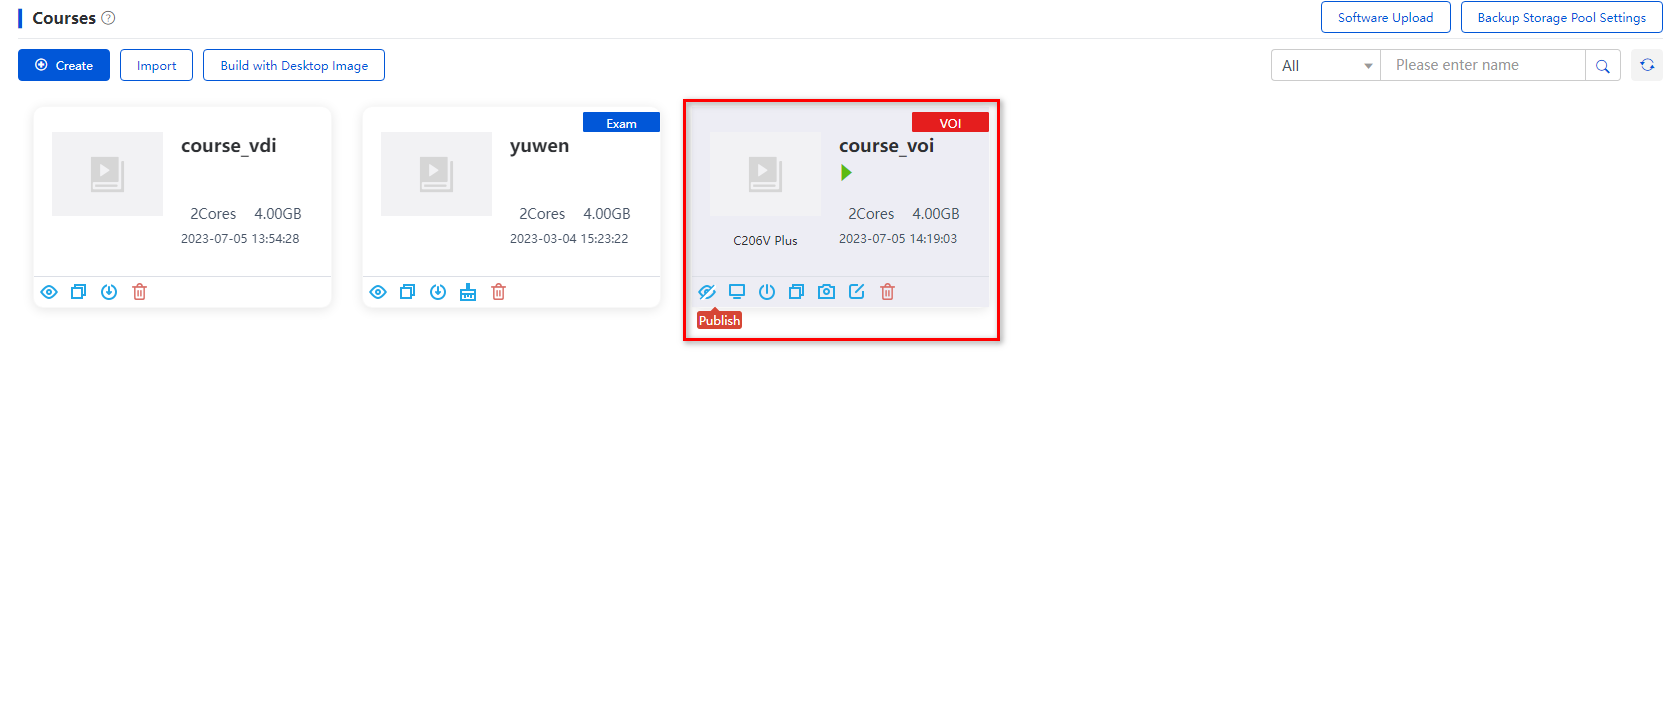
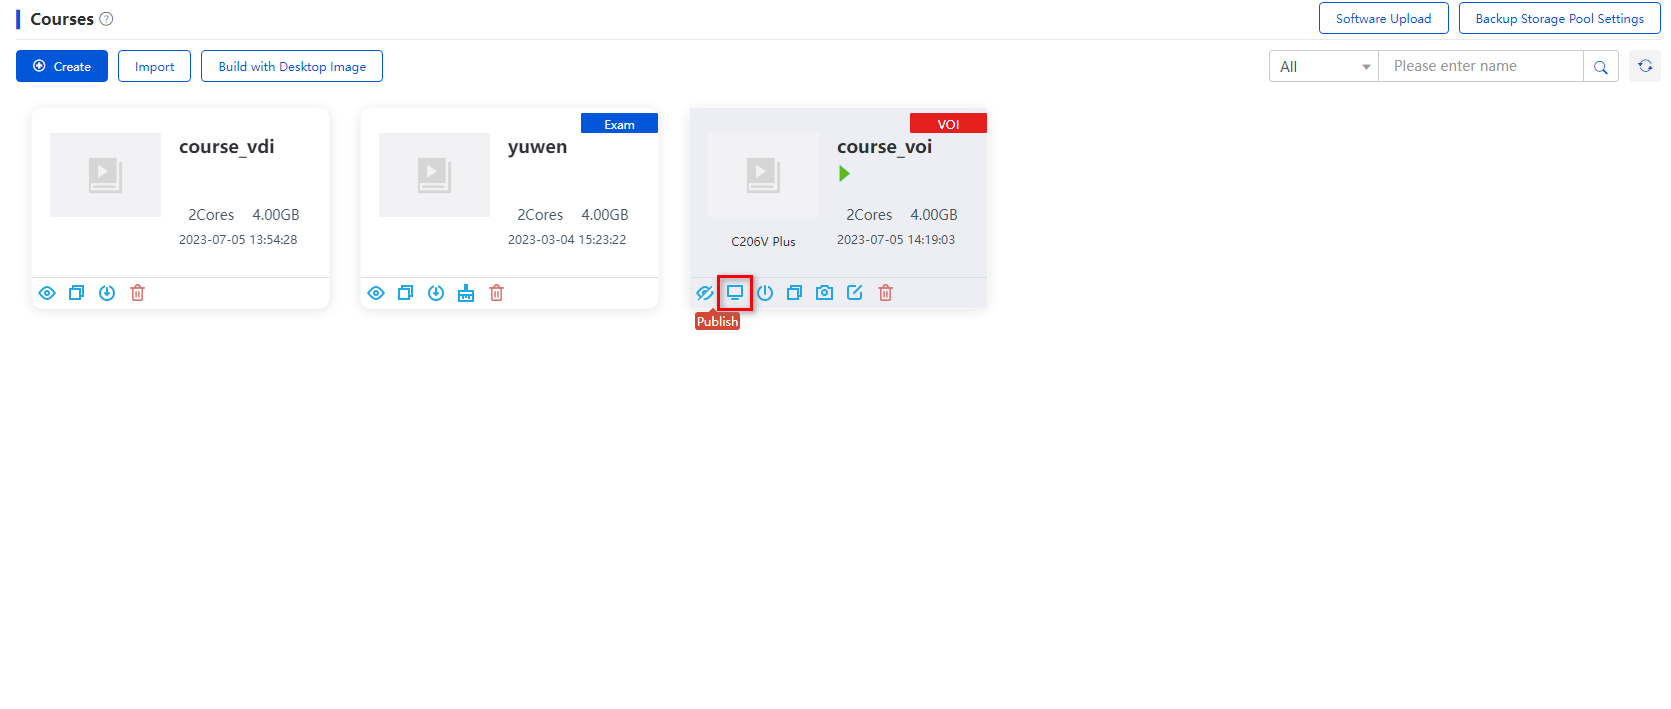
To finish and publish a VOI course level-1 image:
1. The course level-1 image building is complete once software products are installed and the course VM is shut down. Click the Publish icon under the course on the course page, and select the storage path for the course image.
2. Click OK.
When you publish a course, you can select the storage path on the Data Center > Teaching Storage > GlusterFS Settings page or the storage path created on the Images > Image Pools page.
After finishing and publishing the VOI course level-1 image, you can build a VOI course level-2 image as needed.
Figure 98 VOI course building completed

Importing a VOI course
Space Console supports importing VOI course level-1 images and level-2 images. Before importing a level-2 image, upload the corresponding parent image. This section uses the VOI course level-1 image importing as an example.
|
|
CAUTION: Before importing a VOI course for a C201V endpoint, register the C201V endpoint with Space Console, and view the endpoint type on Space Console. · If the user endpoint model is VOI-Default string, create a flavor named VOI-Default string on the System > Flavors page, and make sure the flavor parameters are the same as that of the C201V endpoint. If the user endpoint model is VOI-Default string C201V, select the flavor named VOI-Default string C201V when importing a VOI course. For more information about flavor configuration, see H3C Workspace Cloud Desktop Management Software User Manual. · If the user endpoint model is VOI-C201V, use the default C201V flavor on Space Console. · Before importing a VOI course, confirm the endpoint flavor of the course image and select the corresponding endpoint type. Otherwise, the desktop image cannot be used. |
To import a VOI course:
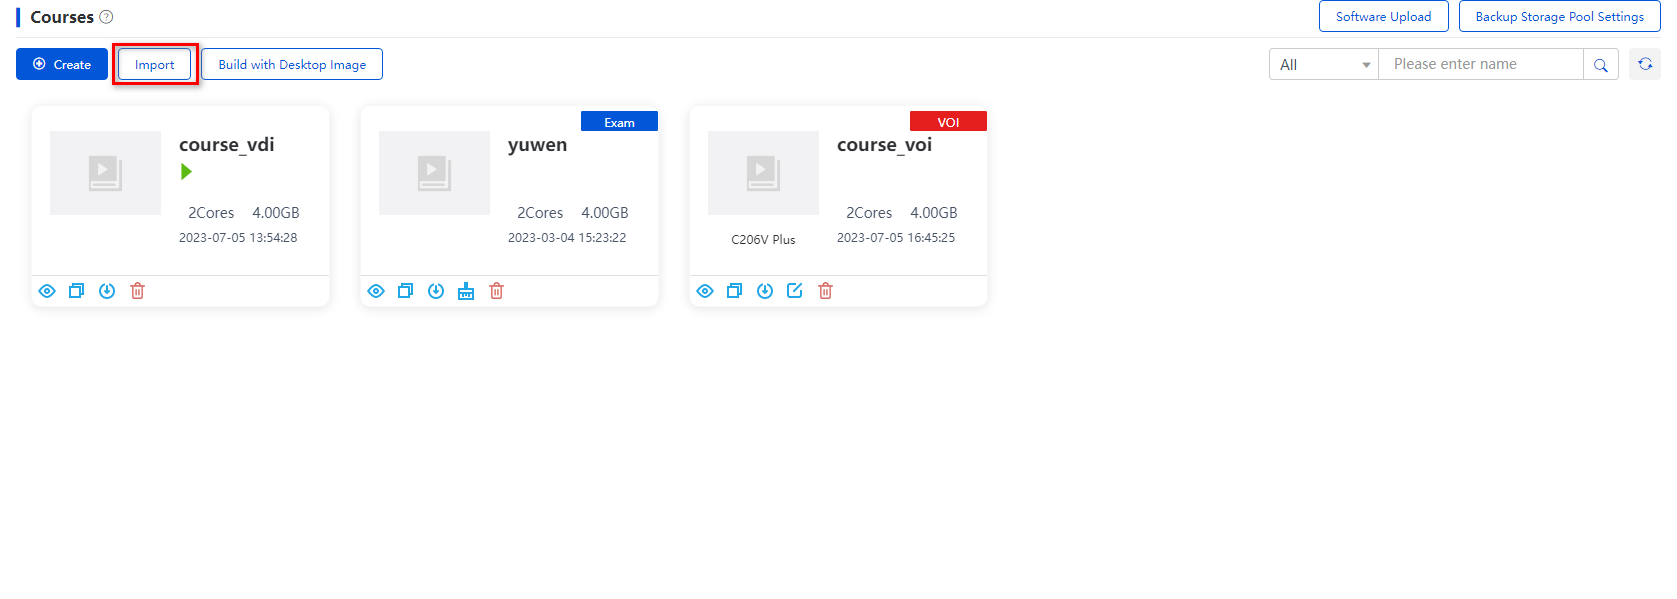
1. From the navigation pane, select Images > Course Images, and click Import.
Figure 99 Course image page
2. Select the VOI course type, upload the VOI course level-1 image file, and configure relevant settings as shown in Table 4.
Figure 100 Importing a VOI course

3. Click Finish.
The imported course is displayed in the course list.
Building a VOI course level-2 image
A level-2 image is created based on a level-1 image (parent image) or an existing level-2 image. You can build a level-2 image on an endpoint and upload the level-2 image to Space Console only after a level-1 image or an existing level-2 image is downloaded to the endpoint. A level-2 image can be used only when the level-2 image and its level-1 image both exist on Space Console. The purpose of building a level-2 image is to enable driver loading (Windows 7) and differentiated software installation. Building a level-2 image includes the following scenarios:
· For a VOI course level-1 image running Windows 7, to use restoration mode, you must build a level-2 image to make the graphic card drivers on the course image take effect and install required software products and drivers. You can use a VOI course level-1 image running Windows 10 after this image build is completed.
· For a VOI course level-1 image on a C200V endpoint, you must build a level-2 image to make the graphic card drivers on the course image take effect and install required software products and drivers.
· Install differentiated software products and drivers based on an imported level-1 image to generate a new image.
· Create a new image for better experience based on a level-1 image.
Restrictions and guidelines
· Before building a VOI course level-2 image, make sure the published level-1 image that matches the endpoint type exists on Space Console.
· Before building a VOI course level-2 image, create a VOI endpoint group, and assign endpoints to this endpoint group. When you create a VOI endpoint group, select Learningspace for the matching client. For more information, see H3C Workspace Cloud Desktop Management Software User Manual.
· You can use a level-1 image as a parent image to build multiple level-2 images, but a level-2 image does not support secondary production. As a best practice, install common teaching software products in the level-1 image, and install course-related differentiated software products in the level-2 image.
· The level-2 image is available only when its level-2 image (parent image) exists at the same time.
Downloading a level-1 image to an endpoint
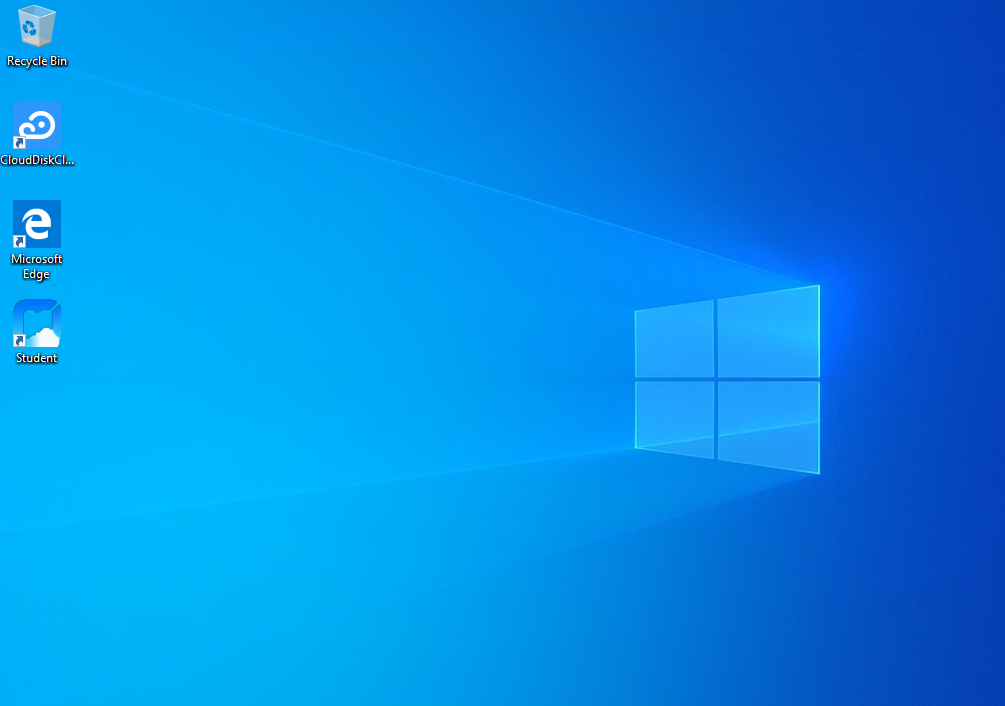
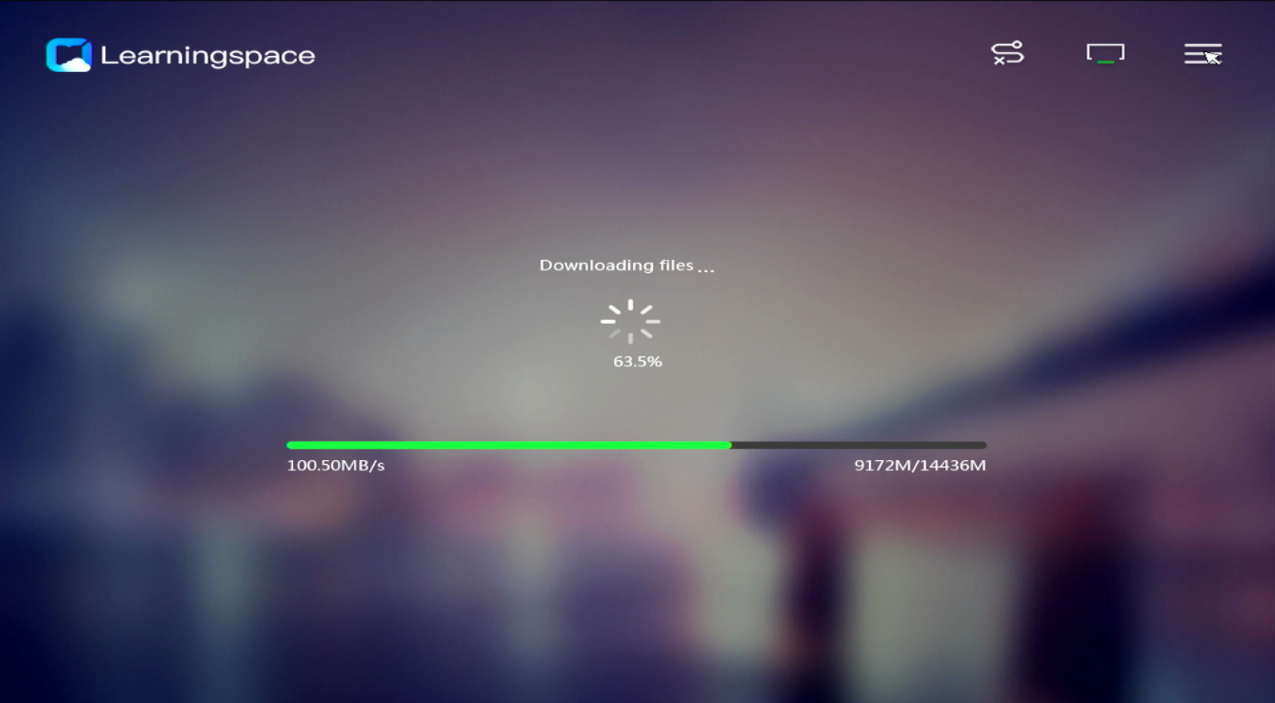
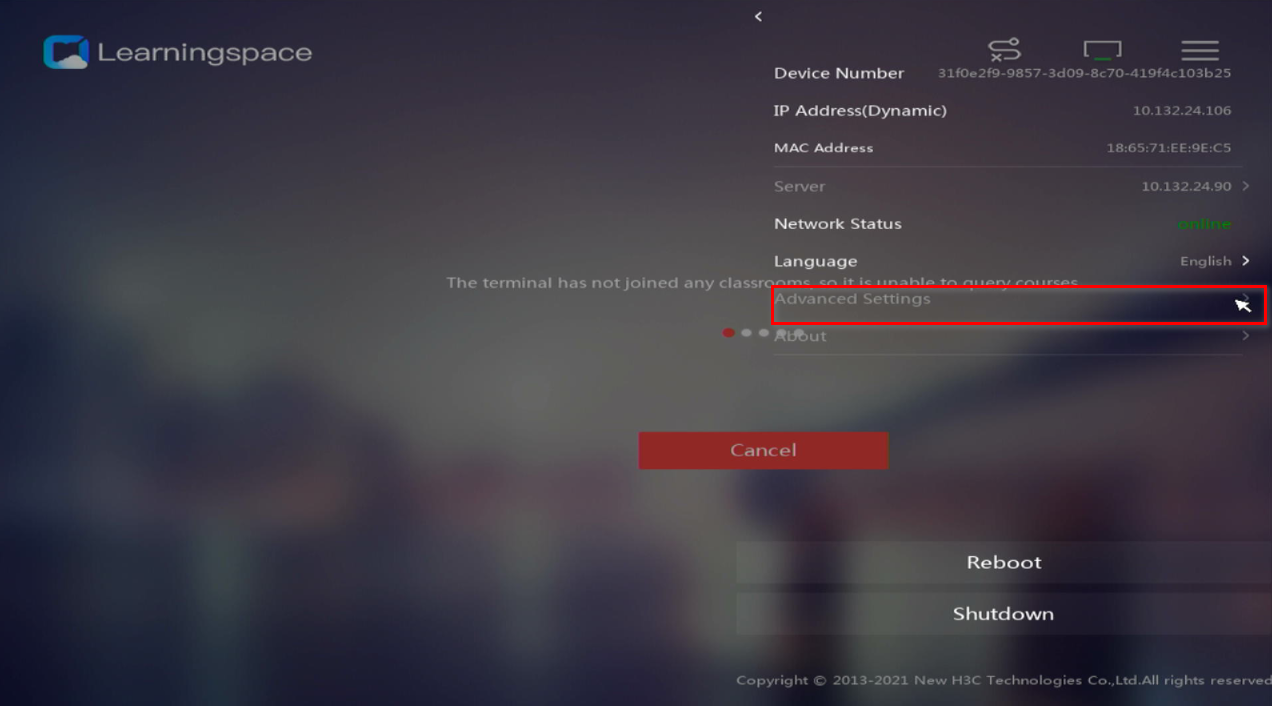
1. Files are automatically downloaded after the
endpoint is started. After the download is completed, click the ![]() icon
in the top right corner.
icon
in the top right corner.
Figure
101 Clicking the ![]() icon
in the top right corner
icon
in the top right corner
2. In the dialog box that opens, click Advanced Settings, and enter the endpoint management password (Password@1234).
Figure 102 Clicking Advanced Settings
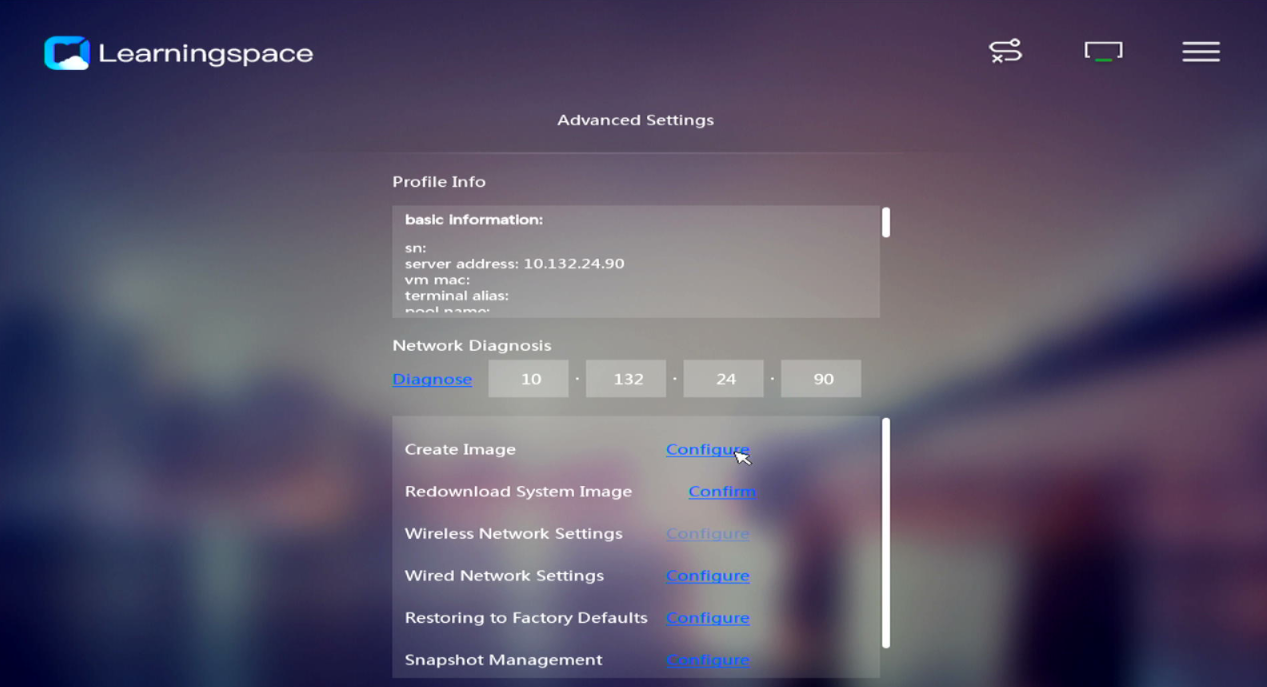
3. Click Configure for the Create Image field on the Advanced Settings page.
Figure 103 Advanced Settings page
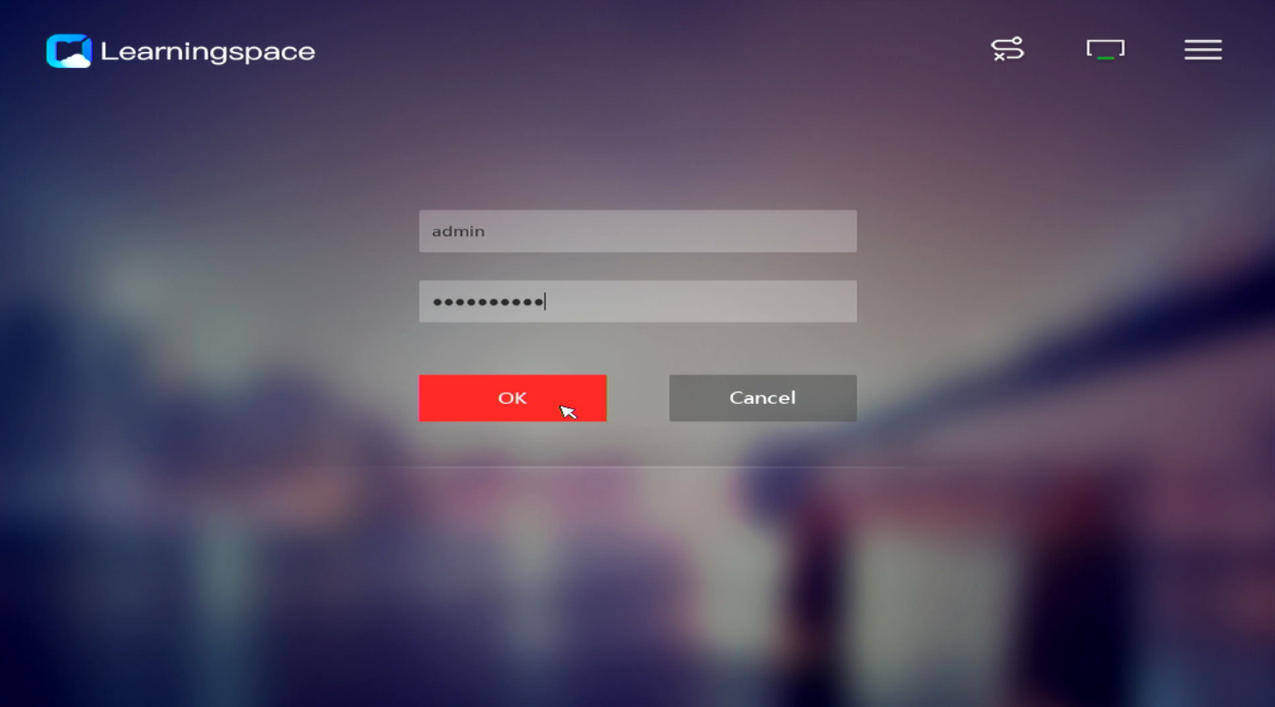
4. In the dialog box that opens, enter the administrator's username and password, and click OK.
You can obtain the administrator's username and password from Space Console. To use the default administrator account, verify that its password is the default password.
Figure 104 Entering the administrator's username and password
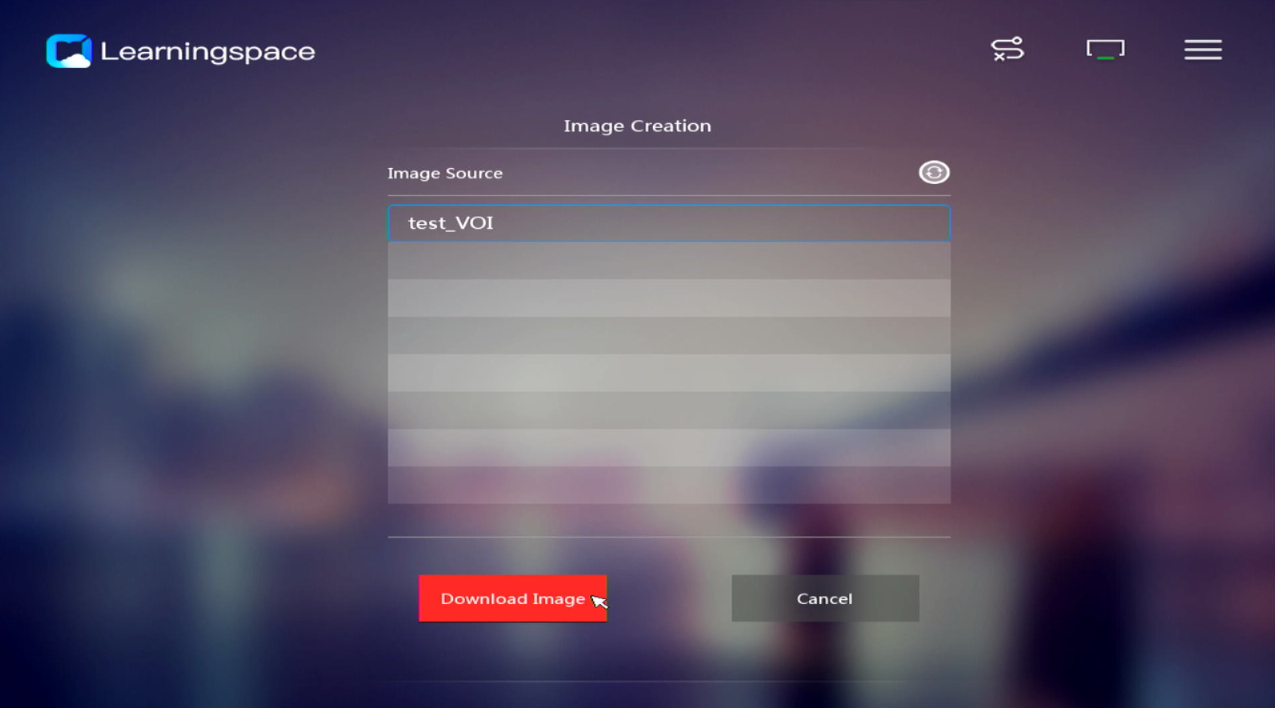
5. On the Image Creation page, select a level-1 image as the image source, and click Download Image to download the level-1 image file to the endpoint.
If the image file exists in the endpoint, the download will be completed immediately.
Figure 105 Selecting a level-1 image as the image source
Building a level-2 image
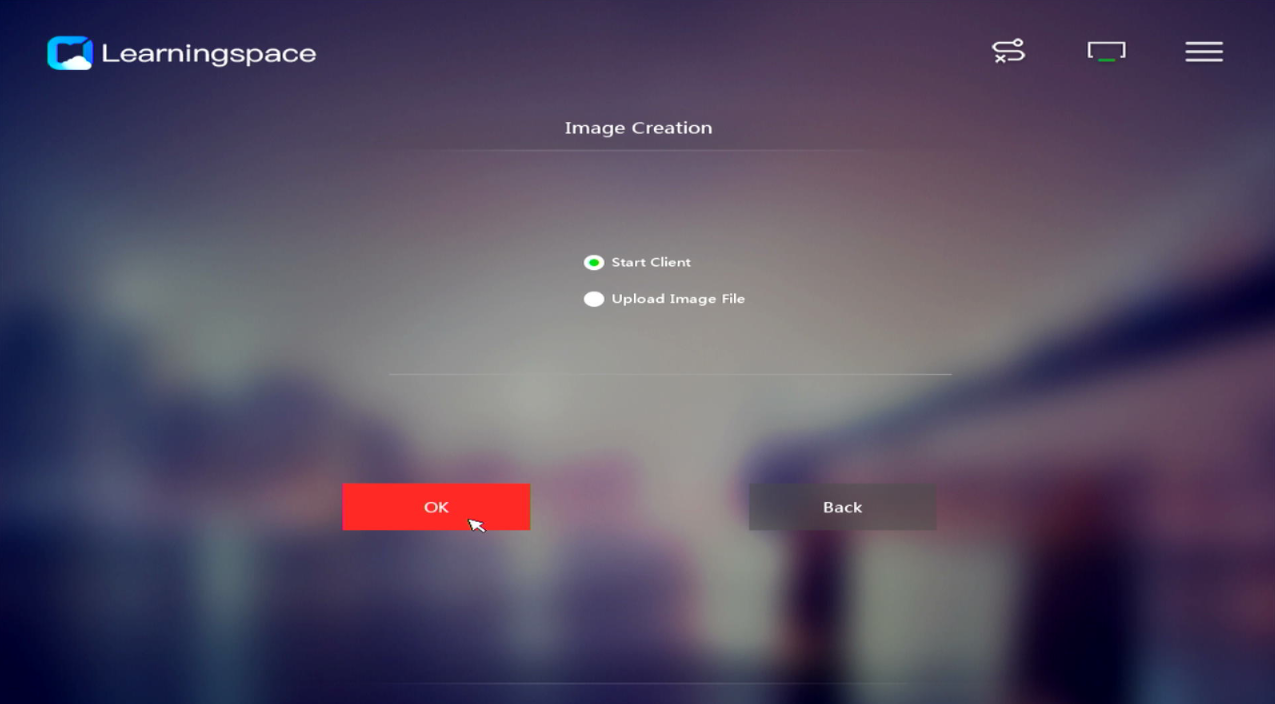
1. On the Image Creation page, select Creating new image, and click Next.
If you select Modifying the original image, you can modify the original level-1 image.
Figure 106 Selecting Creating new image

2. Select Start Client, and click OK to start the parent image as a client.
After you start the level-1 image running Windows 7 as a client, the level-2 image desktop will be stuck for 3 to 5 minutes to load the driver. During the loading process, the system cannot perform the mouse and keyboard actions, and you need to wait. For the driver to take effect, restart the level-2 image after the loading is completed. Then, perform other actions.
The operating system of a VOI desktop for a C200V endpoint automatically prompts a graphics card installation dialog box. Complete the installation according to the wizard.
Figure 107 Starting the level-1 image as a client
3. Log in to the desktop by using the Administrator account, use a USB to copy the required software products and drivers to the level-2 course image, and install the required software products and drivers.
4. After the installation is completed, log in to Space Console.
5. Navigate to the Applications > Image Tools page, download the VOIOptTools.iso file, and decompress it and run the program H3CoptTools.
6. Select VOI Device User Template Optimization, click Check, and then click Optimize to start the optimization.
7. After the optimization is completed, restart the desktop.
Upload the level-2 image to Space Console
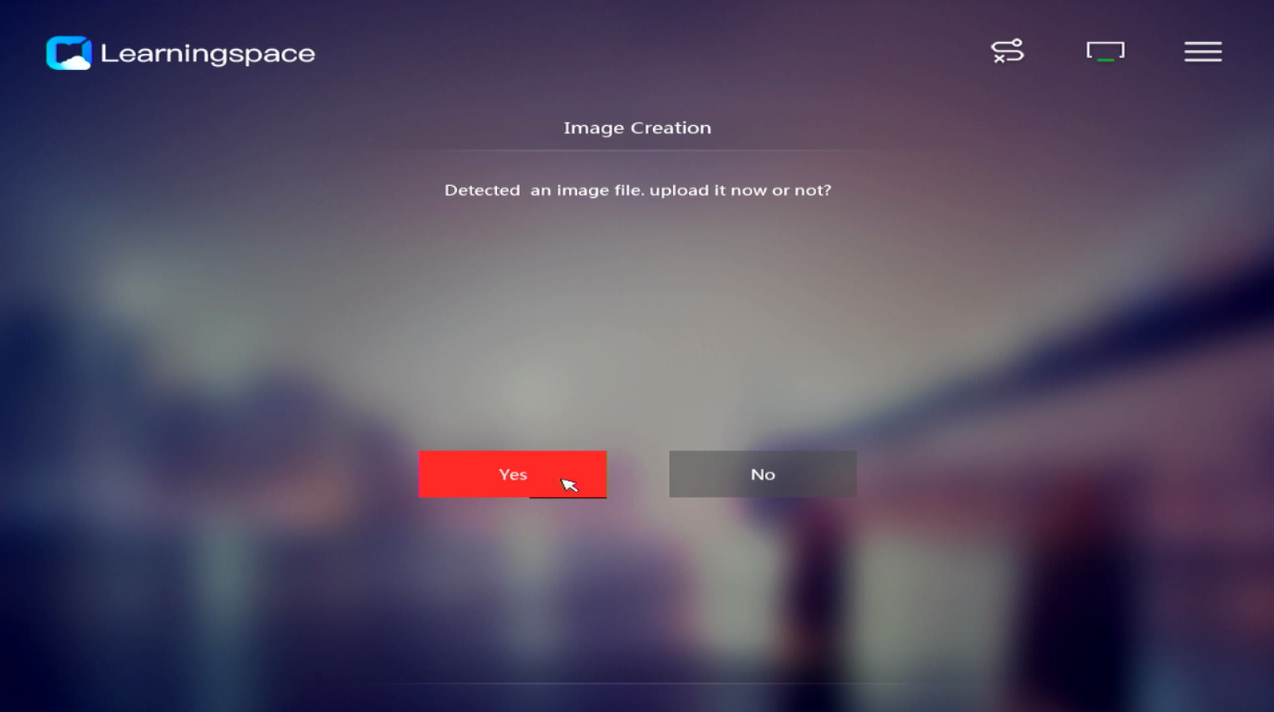
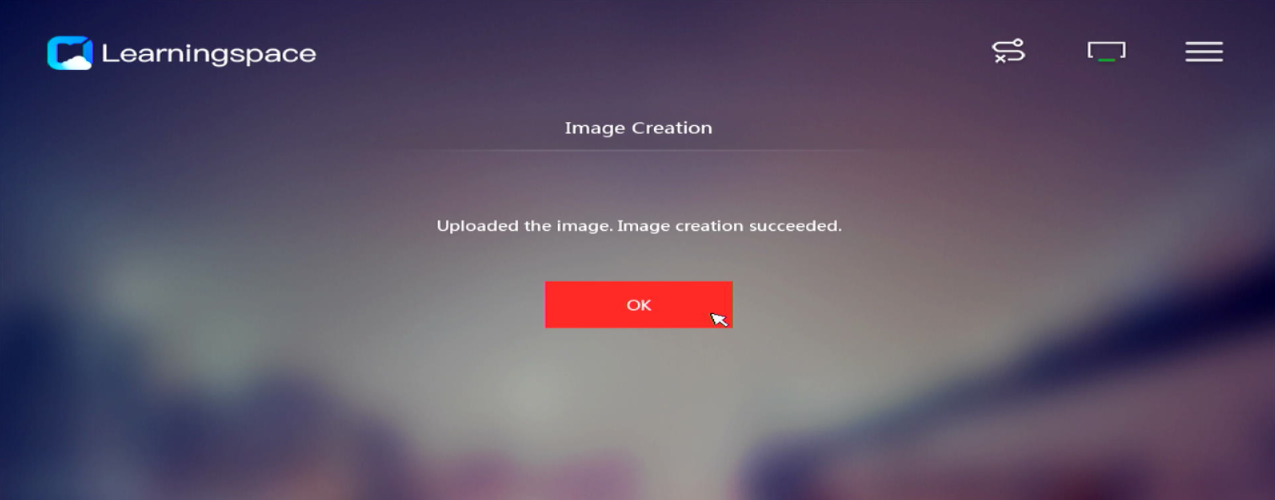
1. After the system is restarted, perform one of the following tasks on the Image Creation page:
¡ If the level-2 image creation is required, select Start Client.
¡ If the level-2 image creation is completed, select Upload Image File.
In this section, select Upload Image File, and click OK.
Figure 108 Selecting Upload Image File

Figure 109 Upload confirmation window
2. After completing the level-2 image file upload, configure the level-2 image name and description, and click Report to Server.
Figure 110 Uploading the level-2 image file
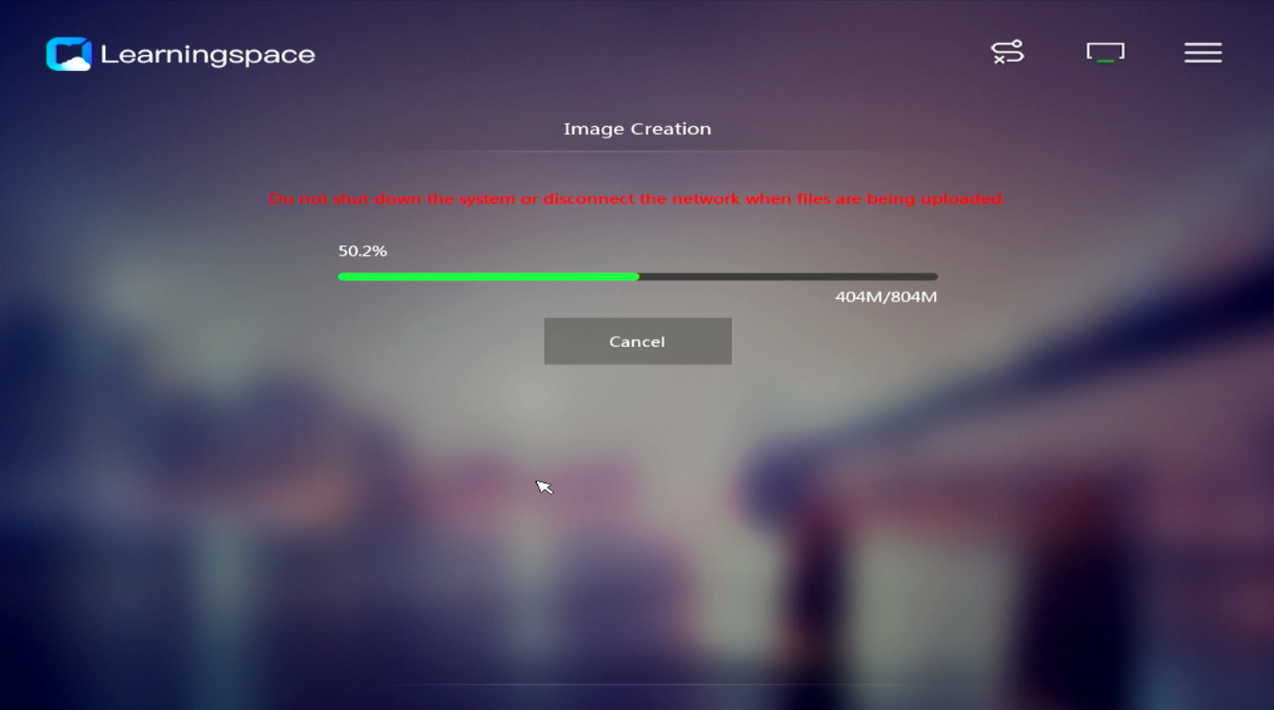
Figure 111 Entering the level-2 image name and description
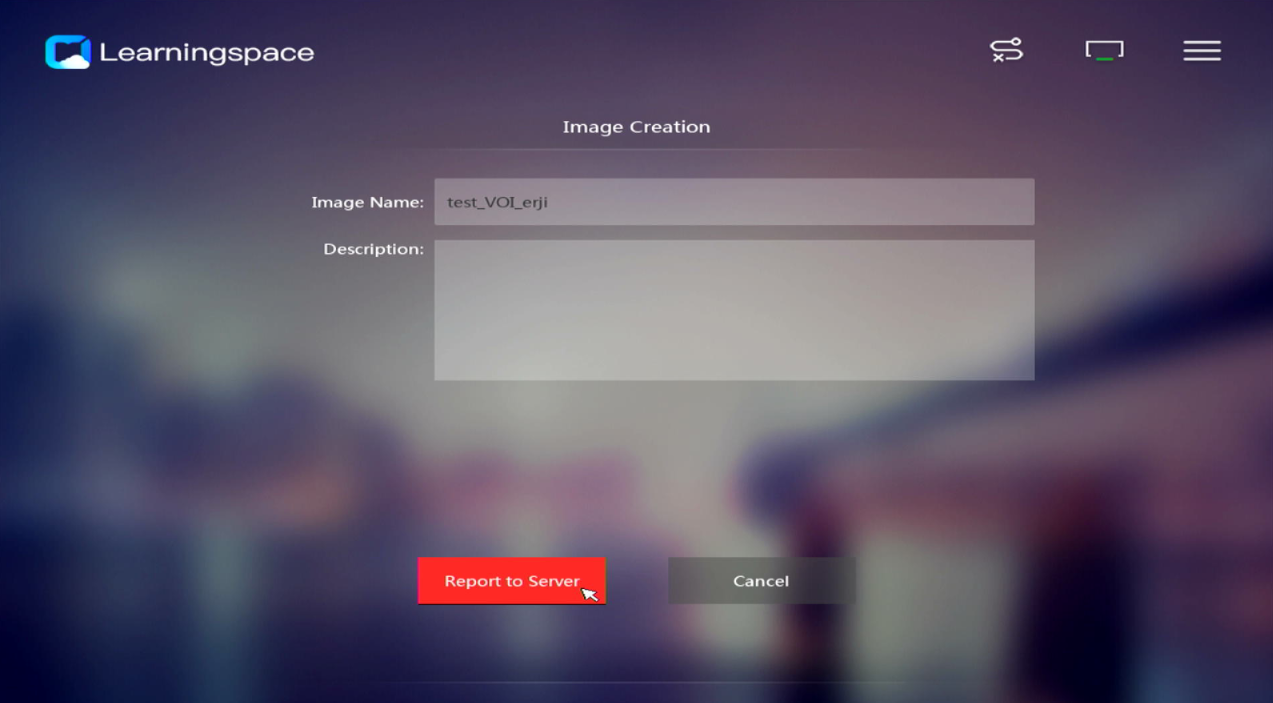
On a VOI endpoint or UCC endpoint in VOI mode, you can enter only letters for the level-2 image's name and description.
Figure 112 Level-2 image file creation and upload completed
After the level-2 image creation and upload is completed, you can view the created and uploaded level-2 course image on the course page of Space Console, and its parent image is the level-1 image selected previously.
After the VOI course level-2 image creation and upload is completed, the teacher can log in to the teacher client to select a published course from the classroom and start a class.
To facilitate the teacher to use the course to start a class, you can rename the level-2 image course that is created and uploaded.
Configuring a vGPU course
Creating a teaching storage
Before creating a course, configure the storage path for the course image. For more information, see ''Configuring teaching storage."
Creating a system image
For more information, see "Creating a system image."
Creating a vGPU course
Restrictions and guidelines
· Only VDI courses support vGPU.
· VMs running Windows 7, Windows 8, and Windows 8.1 do not support vGPU.
· Before creating a vGPU course, perform the following tasks:
a. Obtain the NVIDIA License file, and deploy a license server.
b. Install the NVIDIA GPU graphics card for the license server, and virtualize GPU into multiple vGPUs and configure iRS to configure vGPUs as a vGPU resource pool. For more information, see H3C Workspace Cloud Desktop vGPU Configuration Guide.
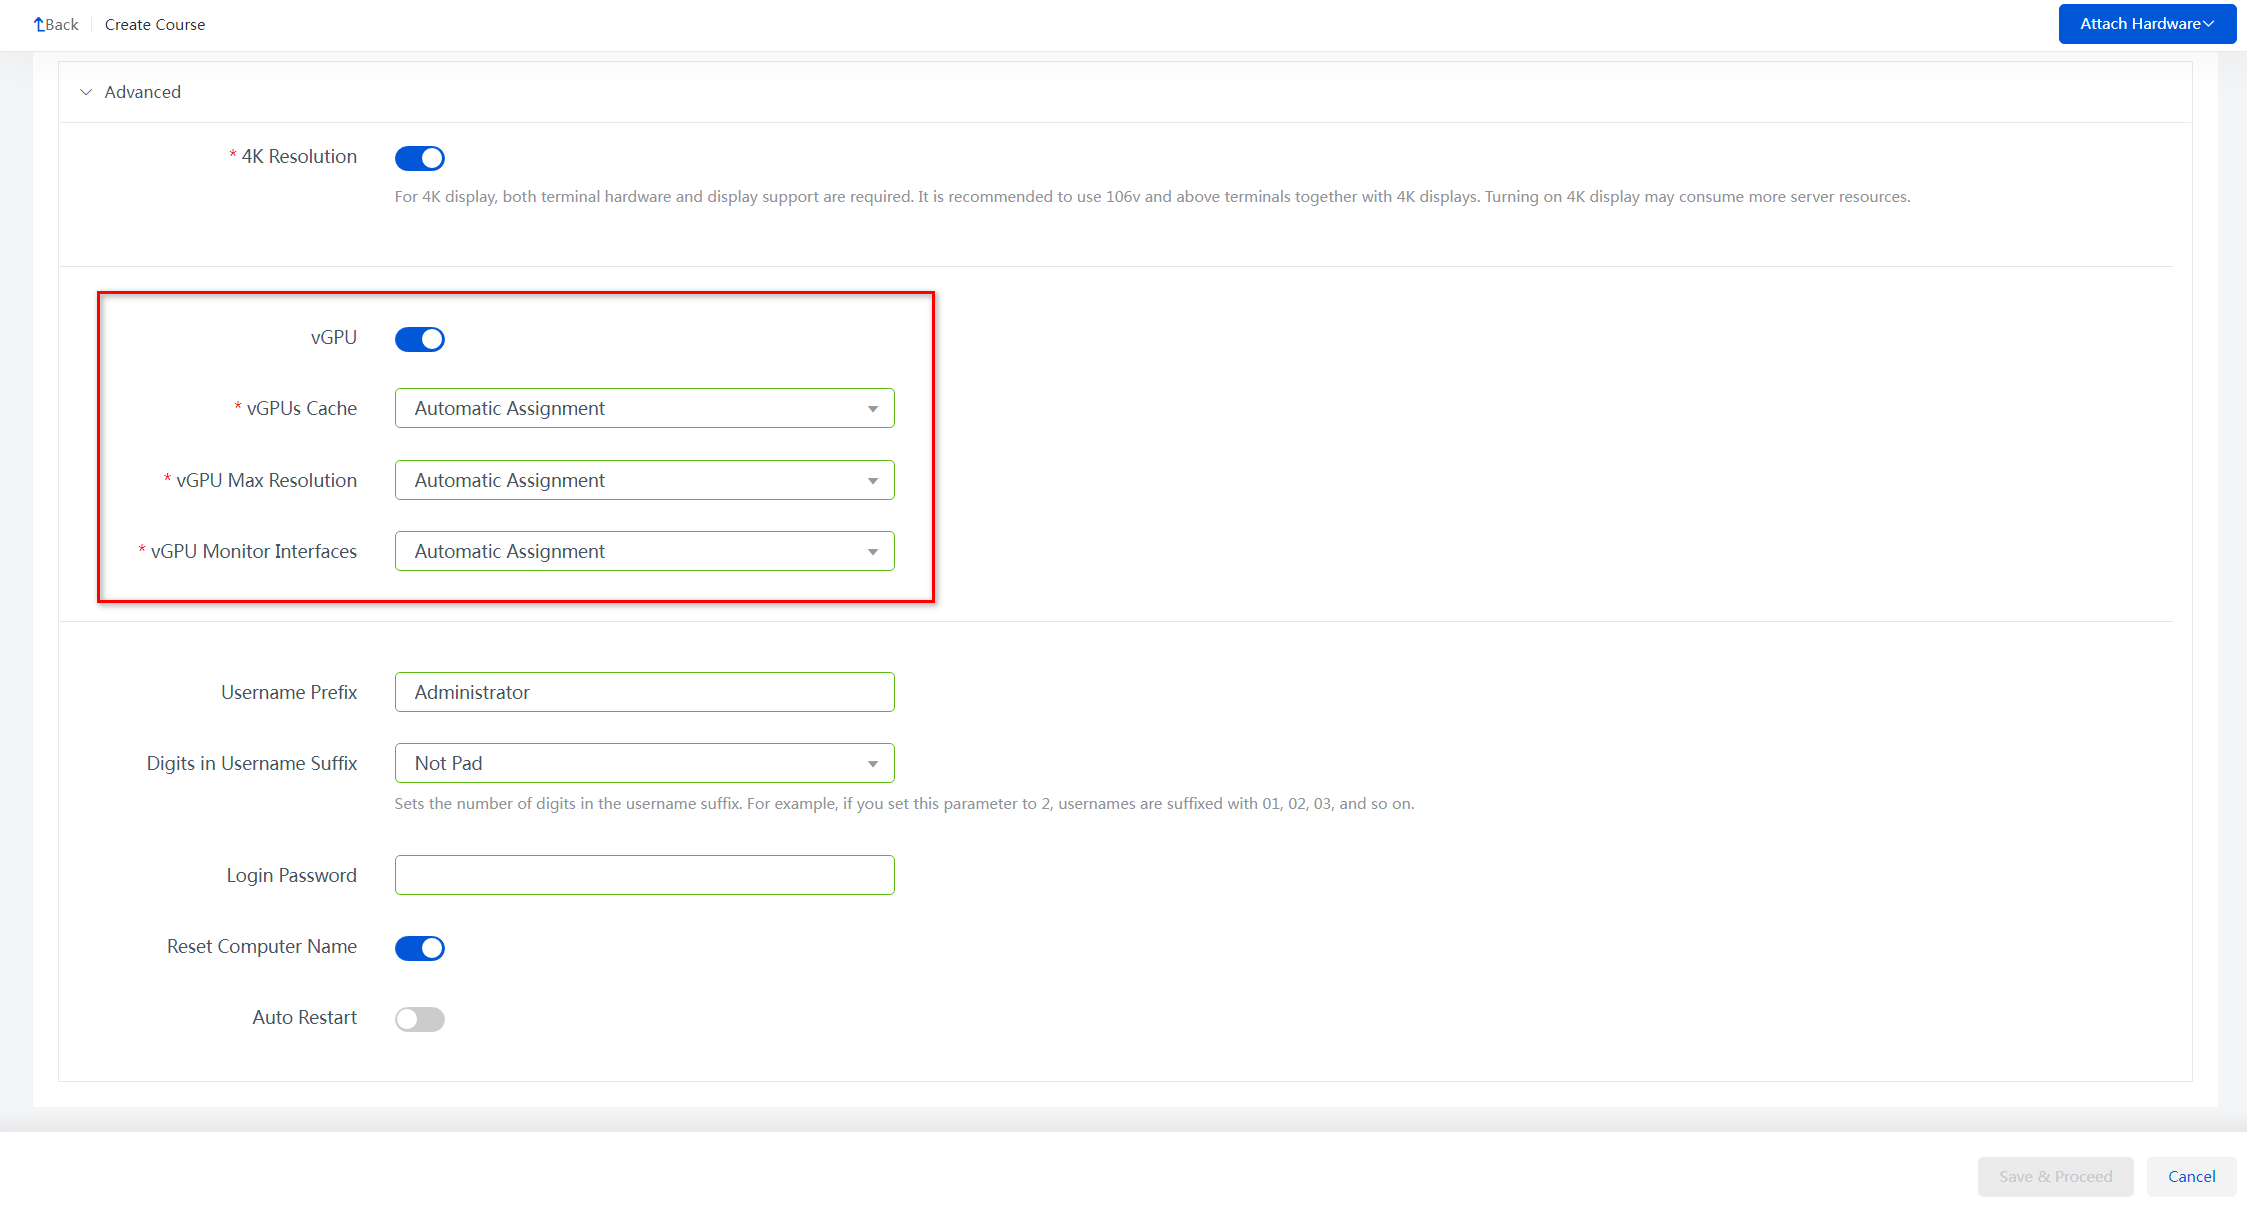
Procedure
In addition to procedures as shown in "Creating a VDI course," you only need to enable vGPU when creating a vGPU course. After enabling vGPU, set the vGPU cache, vGPU maximum resolution, and vGPU monitor interfaces as required. By default, these parameters are configured as Automatic Assignment.
Figure 113 Creating a vGPU course
Building a vGPU course
Installing an operating system
The installation method is the same as that for a common course. For more information, see "Installing an operating system."
Switching to the Administrator user
The configuration method is the same as that for a common course. For more information, see "Switching to the Administrator user."
Installing CAStools and VdiAgent
The installation method is the same as that for a common course. For more information, see "Installing CAStools and VdiAgent." During the installation, the NVIDIA Graphics driver is automatically installed.
Installing software products
For more information about the installation procedures, see "Installing VDI course software."
Configuring and optimizing the system services
Optimize the operating system for the course VM and configure settings for the license server.
To configure and optimize the system services:
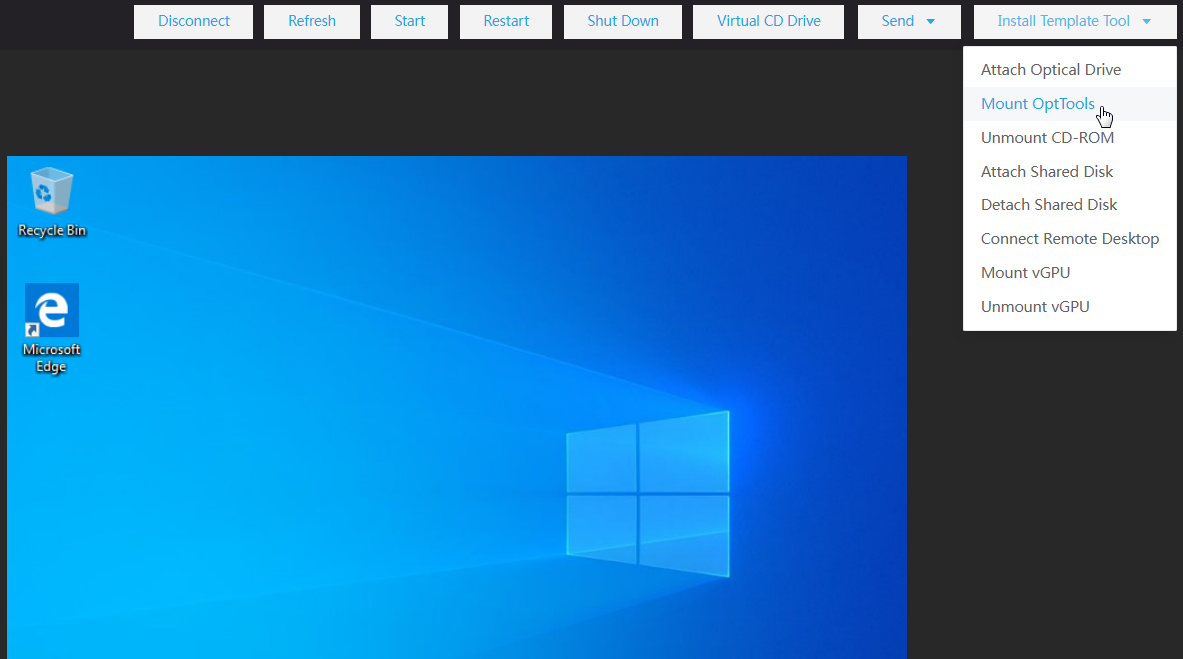
1. Click Install Template Tool, and then select Mount OptTools.
Figure 114 Mounting OptTools
2. Enter the CD-ROM, and run the H3COptTools application program.
Figure 115 Running the H3COptTools application program

3. Select Education Scenario Template Optimization as the optimization scenario. Click OK, and click Check on the homepage to check the operating system.
Figure 116 Selecting Education Scenario Template Optimization

4. After the check is completed, items that fail the check are marked red. Click optimization items as required. In this section, click Configure vGPU license server for the vGPU course, and click Optimize to optimize the items that failed the check as required.
Figure 117 Clicking Configure vGPU license server
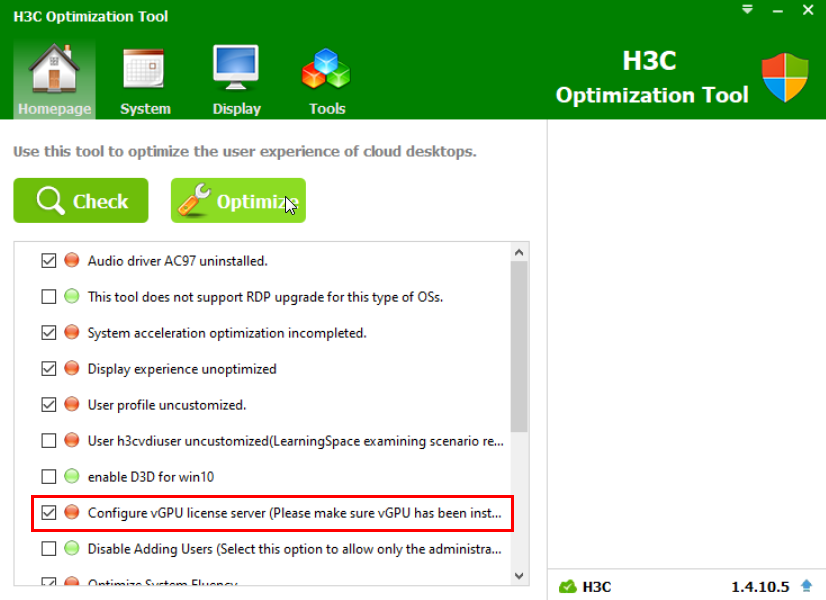
Table 5 Optimization items
|
Optimization item |
Scenario and description |
|
Auto driver AC97 installation |
Automatic driver installation. Required. |
|
System acceleration optimization |
User experience optimization. Recommended. |
|
Display experience optimization |
User experience optimization. Recommended. |
|
User profile customization |
Template deployment. Recommended. |
|
User h3cvdiuser customization |
If you configure the username prefix as a value other than Administrator, select this item. In other scenarios, you can skip this item. For more information about the username prefix, see Table 2. |
|
vGPU license server configuration |
Required for courses with vGPUs attached. Not required for common courses. |
|
System fluency optimization |
User experience optimization. Recommended. |
|
Video display optimization |
User experience optimization. Recommended. |
|
Enable SMB1.0 |
User experience optimization. Recommended. |
|
Renesas USB driver installation |
USB driver installation. Required. |
|
Office scenario optimization |
User experience optimization. Recommended. |
5. Select a disk for customizing a user profile, and click OK.
Figure 118 Selecting a disk for customizing a user profile
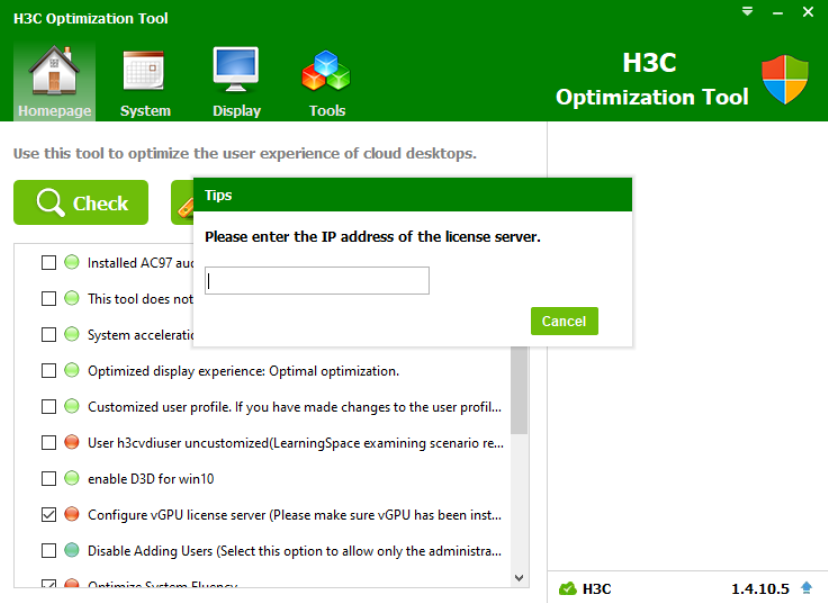
6. When the Configure vGPU license server item is optimized, enter the IP address of the vGPU license server, and click OK.
Figure 119 Entering the license server IP address
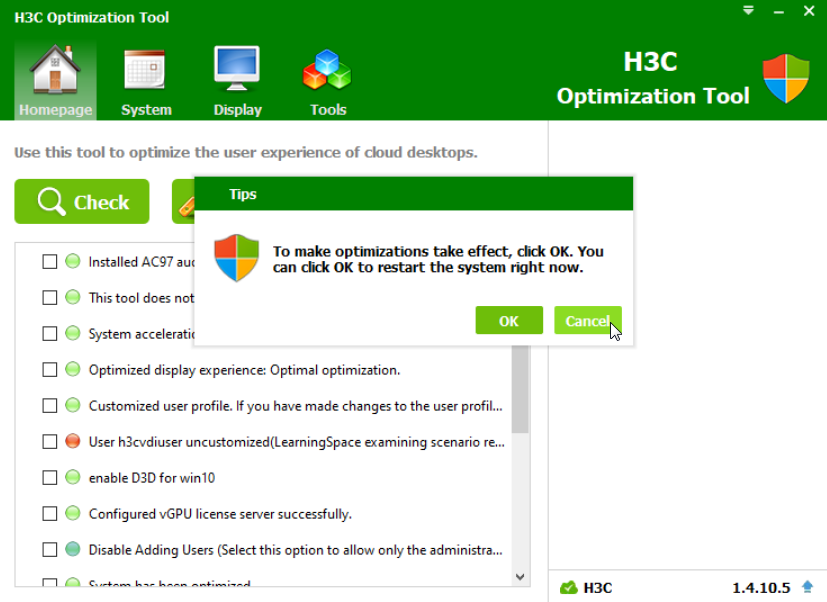
7. After the optimization is completed, click Cancel in the dialog box that opens, and restart the VM later.
|
|
CAUTION: · After the optimization is completed, do not restart the course image immediately. · Before the restart, you must enable Allow Remote Assistance connections to this computer, and allow remote desktop apps to communicate through Windows Defender Firewall. · To connect to the course VM remotely after the course image is restarted, click Connect Remote Desktop on the console because the vGPU driver has taken effect and the VM screen cannot be displayed on the console. Then, use h3cvdiuser to log in to Learningspace and access the course to confirm settings before publishing courses. |
Figure 120 Canceling the restart
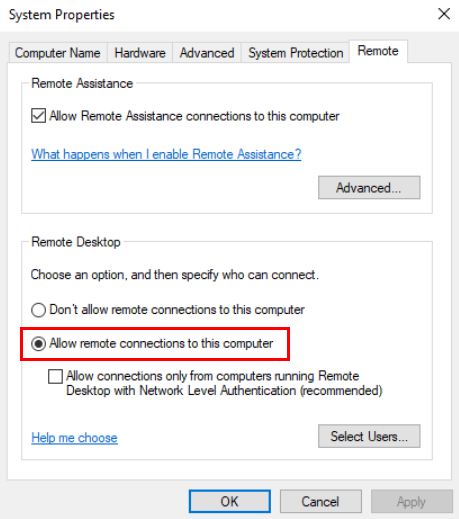
8. Enabling Allow remote connections to this computer.
Figure 121 Enabling Allow remote connections to this computer
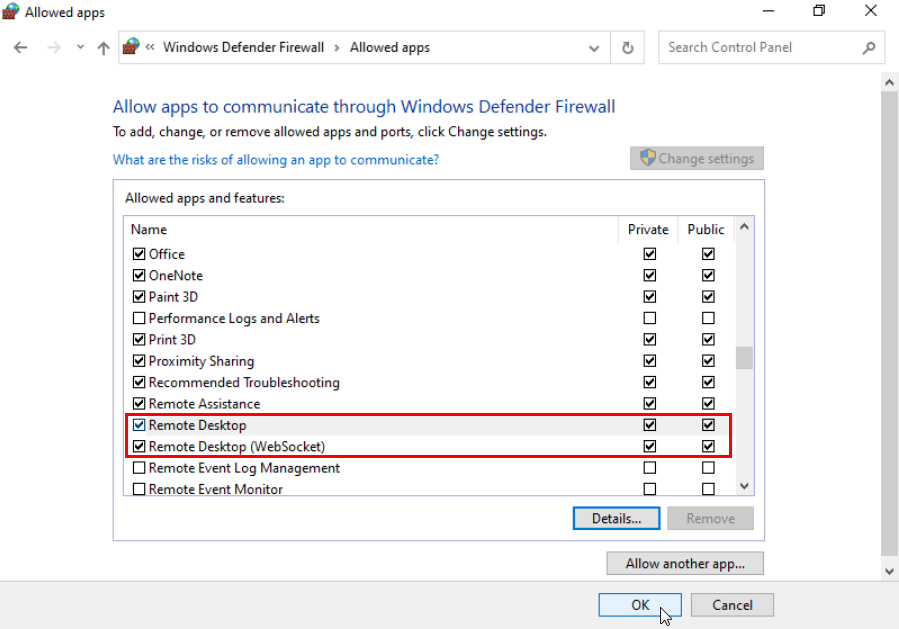
9. Allowing remote desktop apps to communicate through Windows Defender Firewall.
Figure 122 Allowing remote desktop apps to communicate through Windows Defender Firewall
10. Restart the course image.
Checking settings before publishing a vGPU course
Users can connect to the course image through the remote desktop connection program or the console to check settings before publishing a vGPU course. The check contents include whether the VM disabled the QXL graphics card and obtained licenses. This section uses course image connection through the remote desktop connection program as an example.
To check settings before publishing a vGPU course:
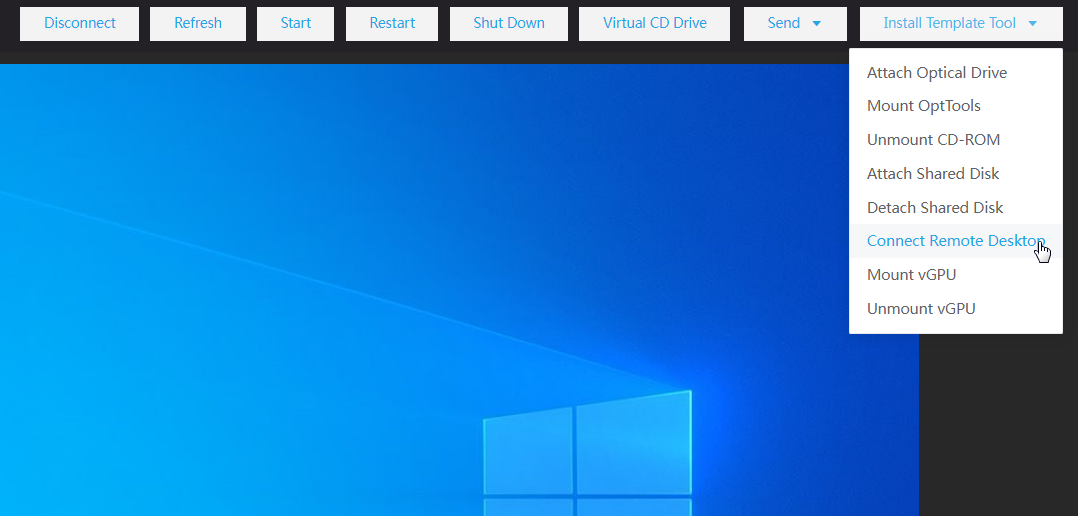
1. On the image creation page, click Install Template Tool, click Connect Remote Desktop to download the desk.rdp remote desktop connection program.
2. Run the desk.rdp remote desktop connection program, and log in to the course image.
To access the course console, you can also click Console under the vGPU course on the courses page.
Figure 123 Downloading the desk.rdp remote desktop connection program
3. Access the Device Manager > Display adapters page of Computer Management, and verify that the QXL graphics card is disabled. If the QXL graphics card is not disabled, right-click the corresponding graphics card, and click Disable device.
Figure 124 Disabling the QXL graphics card
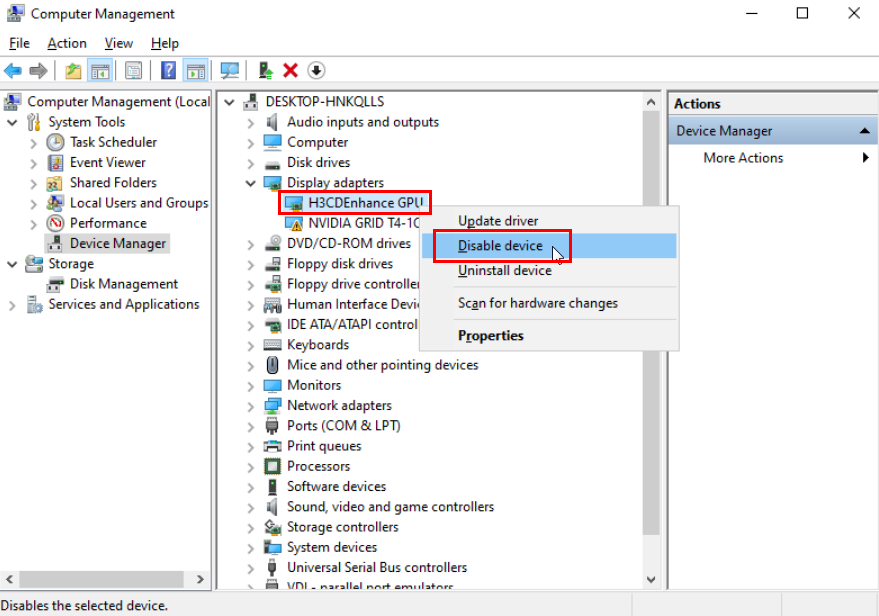
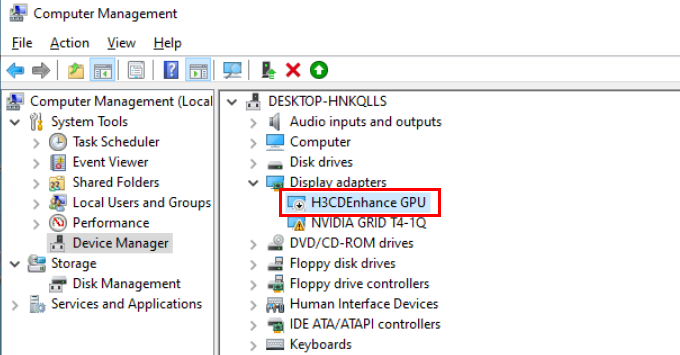
Figure 125 QXL graphics card disabled
4. To verify that the license has been obtained, perform the following tasks:
a. Right-click the desktop, click NVIDA Control Panel. In the dialog box that opens, you can view the configured license server IP address during the optimization.
b. If no license is obtained, click the Services tab on Task Manager, and restart the NVDisplay.ContainerLocalSystem service.
In an HA system, you can specify the Secondary License Server field as the IP address of another license server and the Port Number field as 7070.
Figure 126 Clicking NVIDIA Control Panel
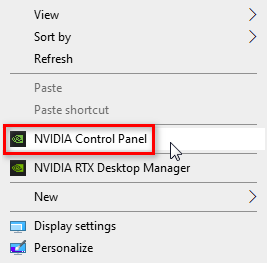
Figure 127 NVIDIA Control Panel
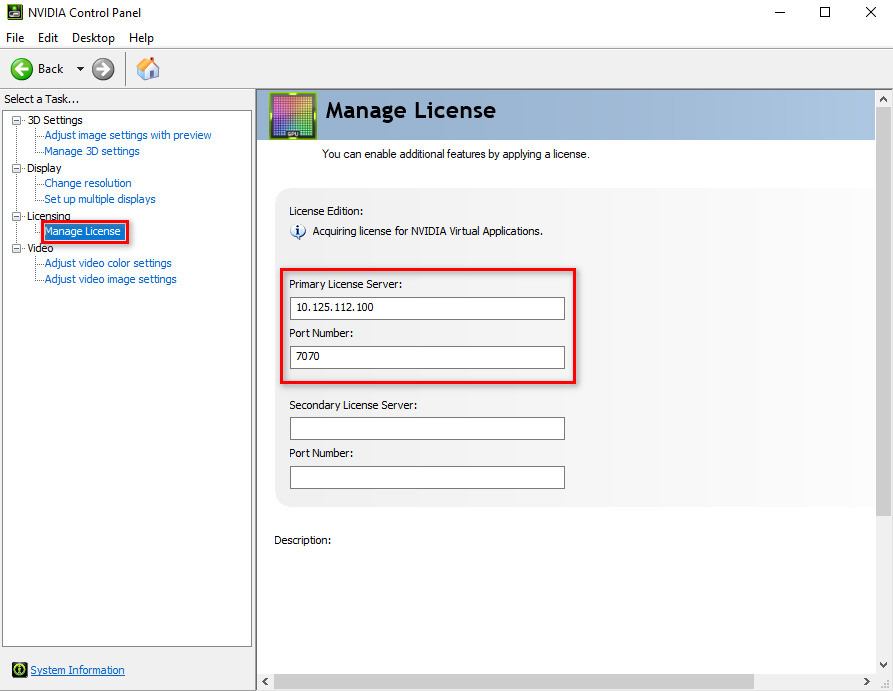
Figure 128 Restarting the NVDisplay.ContainerLocalSystem service

5. Confirm the configuration.
Finishing and publishing the vGPU course
1. The course building is complete once the course VM is shut down. Click the Publish icon under the course on the course page, and select the storage path for the course image.
2. Click OK.
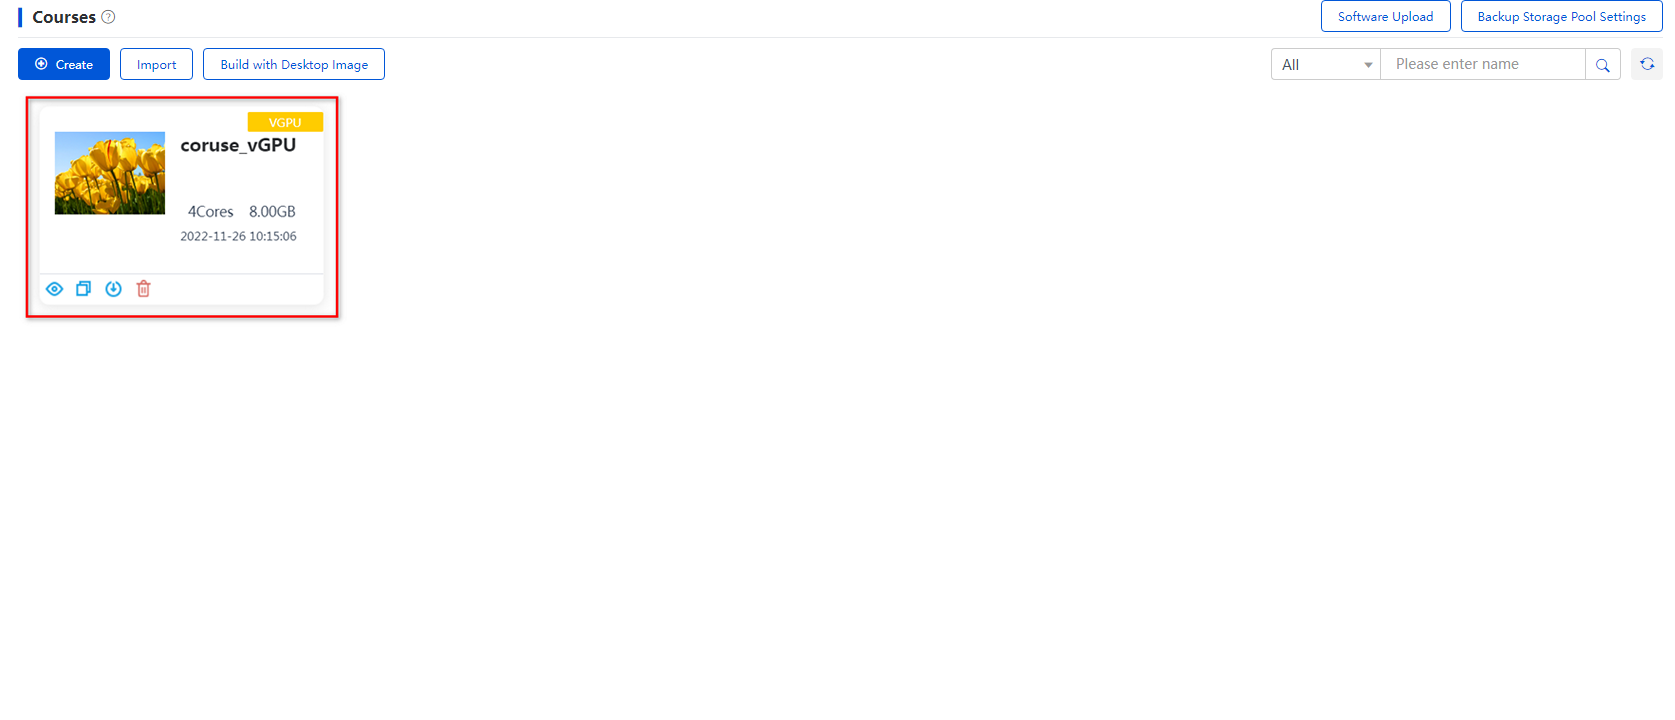
After the course is published, the teacher can log in to the teacher client, and select the published course from the classroom to start a class.
When you publish a course, you can select the storage path on the Data Center > Teaching Storage > GlusterFS Settings page or the storage path created on the Images > Image Pools page.
Figure 129 vGPU course building completed
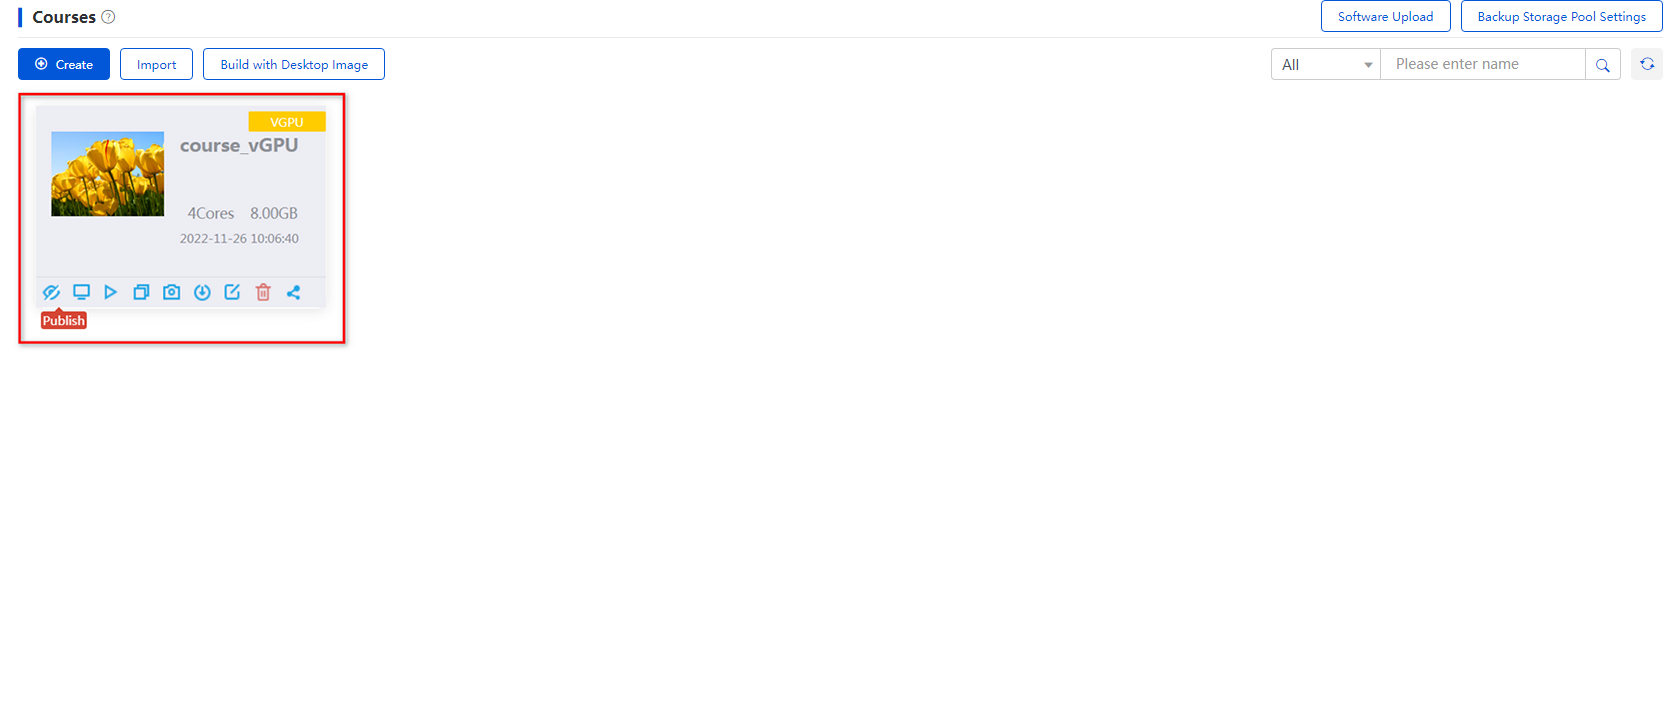
Figure 130 vGPU course publishing completed
Creating a classroom
Perform this task to create a classroom. When a class is in progress in a classroom, the system automatically creates a virtual desktop for the teacher or students in the classroom to use. The newly created classroom can configure related parameters about the classroom, automatically generate a VDI and a VOI authorization policy, and apply the authorization policies to corresponding endpoints in the classroom. In the education scenario, you can set the user usage permissions only through the automatically generated authorization policies when creating or editing a classroom. For more information, see H3C Workspace Cloud Desktop Management Software User Manual.
To create a classroom:
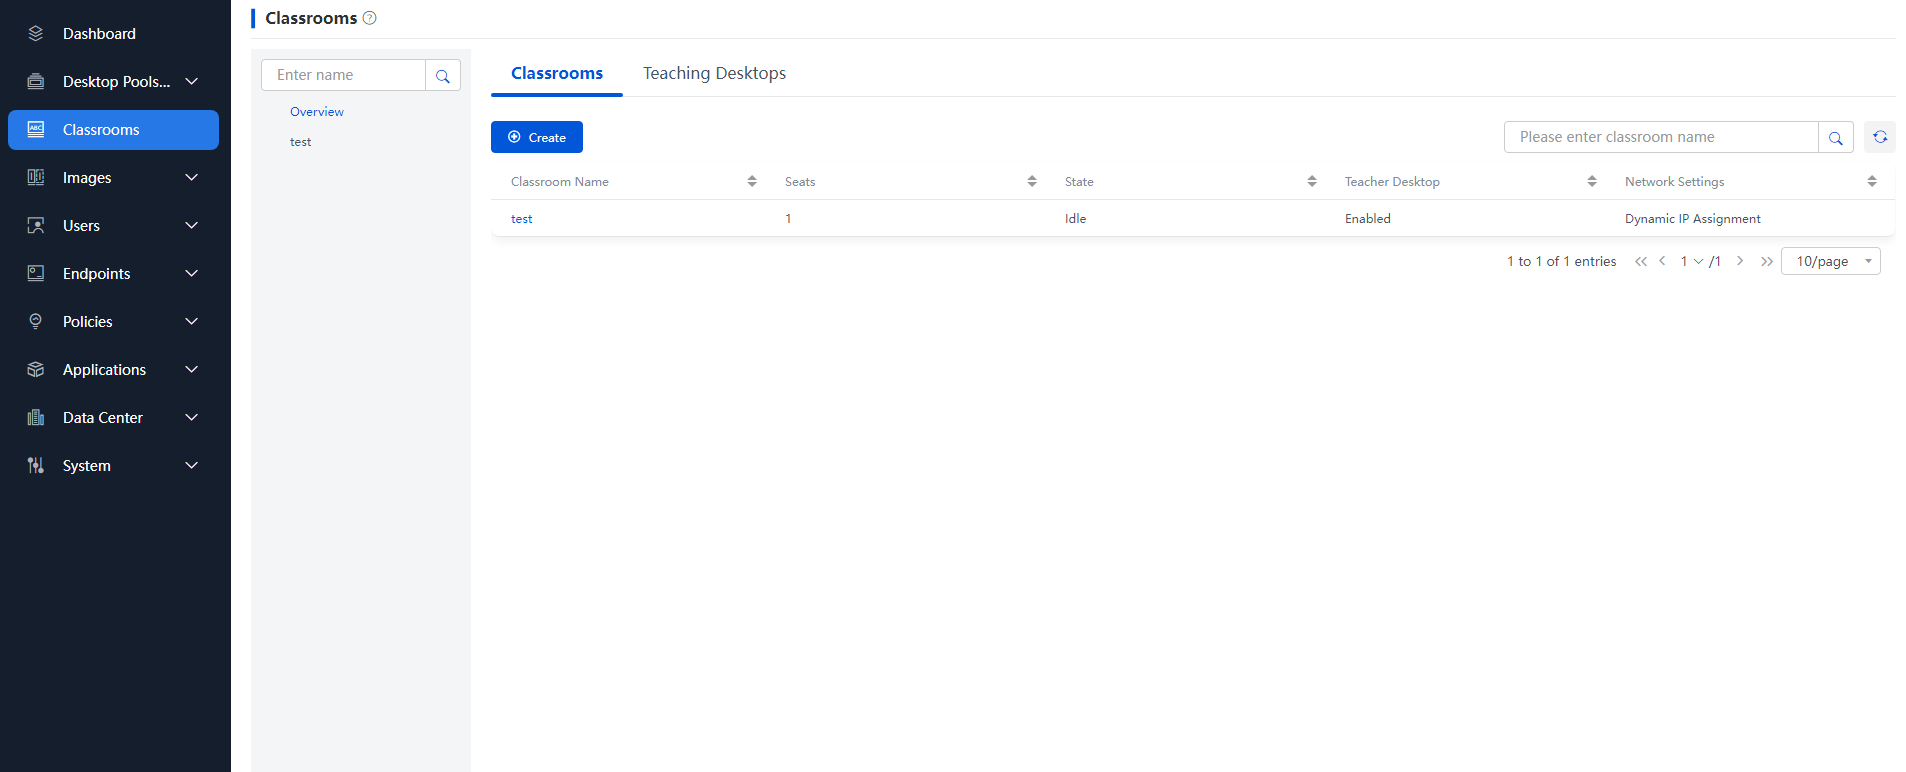
1. From the navigation pane, select Classrooms.
2. Click Create Classroom in the bottom of the Classrooms page or click Create on the Classrooms page.
Figure 131 Classrooms page
3. On the Create Classroom page, configure classroom settings. When you enable VOI Mode, the classroom supports VOI endpoints. Then, click OK.
Figure 132 Creating a classroom
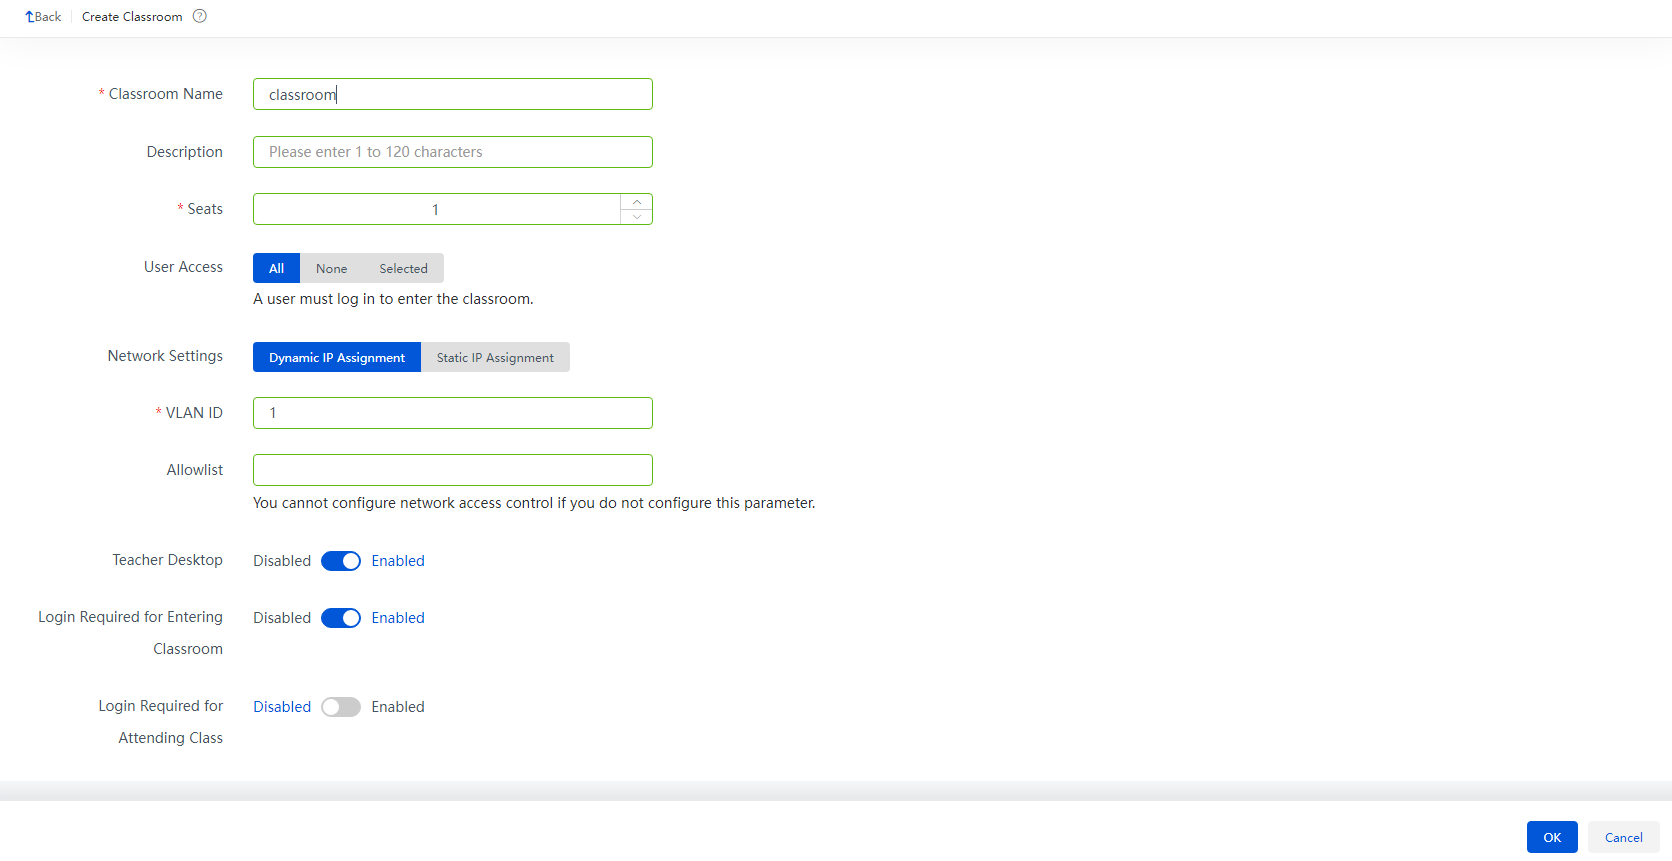
Table 6 New classroom parameters
|
Parameter |
Description |
|
Seats |
Specify the maximum number of VMs for students in the classroom. |
|
User Access |
Specify the users that can register with the classroom. · All—All users can register with the classroom. · None—The classroom is closed. No user can register with the classroom. · Selected—Only selected users can register with the classroom and they must log in before registering with the classroom. |
|
Network Settings |
Configure network settings, including dynamic IP assignment and static IP assignment settings. · Dynamic IP Assignment—Enables dynamic IP allocation from the DHCP server. · Static IP Assignment—Enables you to manually specify a start IP address and an end IP address for cloud desktops. |
|
Start IP |
Specify the start IP address for cloud desktops. The start IP address will be reserved for the teacher desktop. This parameter is required if the Network Settings parameter is configured as Static IP Assignment. |
|
End IP |
Specify the end IP address for cloud desktops. This parameter is required if the Network Settings parameter is configured as Dynamic IP Assignment. |
|
Subnet Mask |
Specify the subnet mask for the start and end IP addresses. This parameter is required if the Network Settings parameter is configured as Static IP Assignment. |
|
Gateway |
Specify the gateway for the start and end IP addresses of cloud desktops. |
|
DNS |
Specify the DNS server for the start and end IP addresses of cloud desktops. |
|
Backup DNS |
Specify the backup DNS server for the start and end IP addresses of cloud desktops. |
|
VLAN ID |
Specify the VLAN ID for cloud desktops. |
|
Allowlist |
Specify the list of network addresses allowed to be accessed. For network access control purposes, VMs can access only the IP addresses in the allowlist. To ensure communication between VMs and student endpoints and between VMs and the DHCP server, add the network address of the student endpoints and the VMs to the allowlist. The format is IP address/mask length, for example, 192.168.1.0/24. Use commas (,) to separate multiple networks addresses. |
|
Teacher Desktop |
Enable the teacher desktop to create a cloud desktop for the teacher when the teacher is attending class in the classroom. |
|
Login Required for Entering Classroom |
Specify whether login with username and password is required for entering the classroom. By default, login is required. If this parameter is enabled, you can set the Login Required for Attending Class parameter. |
|
Login Required for Attending Class |
Specify whether login with username and password is required for students to attend classes. |
|
Automatic Classroom Dismissal |
Specify whether to enable automatic classroom dismissal. The class is dismissed at the classroom dismissal intervals. |
|
Classroom Dismissal Interval |
Specify the interval at which the classroom is dismissed. |
|
Automatic Self-Study Desktop Cleanup |
Specify whether to enable automatic self-study desktop cleanup. After you enable this parameter, you must also specify the time when the desktops will be cleaned. The system automatically cleans the student desktops generated during self-study at the specified time every day. |
|
Automatic Exam Desktop Cleanup |
Specify whether to enable automatic exam desktop cleanup. After you enable this parameter, you must also specify the time when the desktops will be cleaned. After an exam course is finished, the system automatically clears the data of the course after the specified number of days. |
|
VOI Mode |
Specify whether the classroom supports VOI endpoints. You must enable this mode before you can configure the Offline Graceful Period, Endpoint Type, Auto Restoration, and Restoration Type parameters. |
|
Offline Graceful Period |
Set the amount of time that a user can continue to use a VOI endpoint after the VOI client goes offline because of network disconnection or disconnection from Space Console. |
|
Endpoint Type |
Specify the VOI endpoint model. · Dedicated: Applies to the scenario where the endpoints are the same model or are official endpoints. You need to specify an endpoint model defined in flavor settings of Space Console. For a classroom with dedicated endpoints, the default course can only be a course of the dedicated type (upon creation) with the same model as the endpoints. · General: Applies to the scenario where the endpoints are different models or are unofficial endpoints. For a classroom with general endpoints, the default course can only be a course of the general type (upon creation). |
|
Endpoint Firmware |
Select the course image endpoint firmware. Options include QCOW2 and VHD. · Select QCOW2 in the following scenarios: ¡ The course image file is used for TCI. ¡ The course image file is used for VOI, and its operating system is Linux. · Select VHD if the course image file is used for VOI and its operating system is Windows. |
|
Default Course |
Specify the default VOI course for the classroom. If you disable auto restoration, only default courses are displayed for the classroom and available for starting classes. When a VOI endpoint restarts for the first time after auto restoration is disabled, it will restore the default course if the course in use before restart is the same as the default course. It will download and enter the default course if the course in use before restart is different from the default course. |
|
Auto Restoration |
Specify whether to automatically restore the course desktops when VOI endpoints restart in the classroom. If you disable auto restoration, the recovery point management will be unavailable for the classroom. |
|
Bound Course |
If you disable Auto Restoration, the classroom displays only the bound course and users can use only the bound course when the class is started. When a VOI endpoint restarts for the first time after auto restoration is disabled, it will restore the bound course if the course in use before restart is the same as the bound course. It will download and enter the bound course if the course in use before restart is different from the bound course. |
|
Restoration Type |
Select a restoration type. · Full Restoration: Both the system and data disks of the course desktop will be restored. · System Restoration: Only the system disk of the course desktop will be restored. |
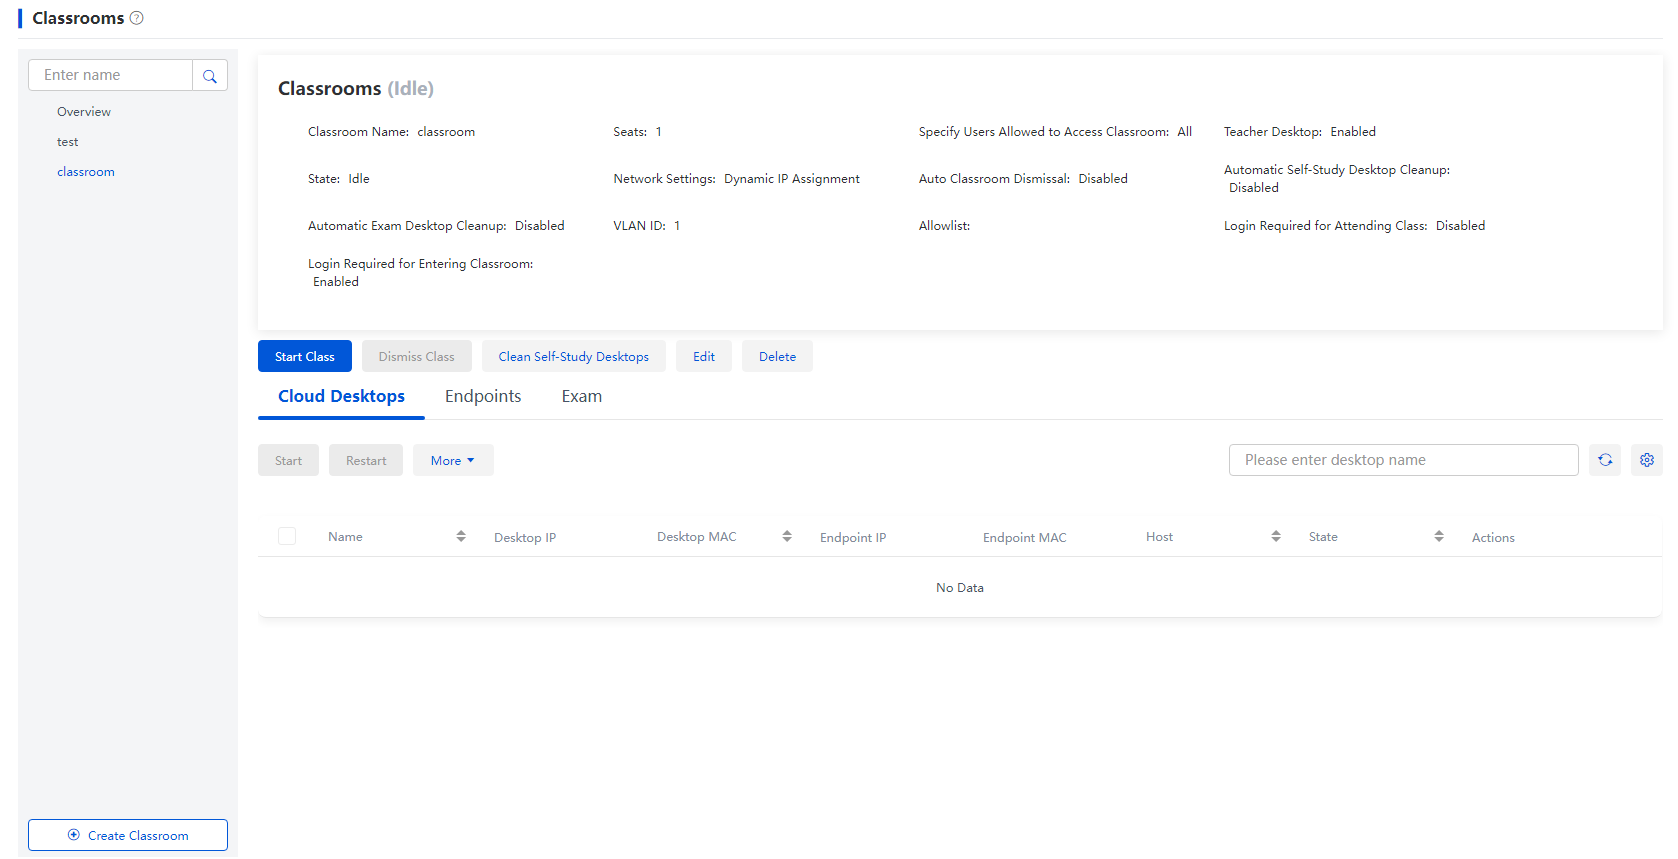
4. After the creation, you can view the settings of the created classroom in the classroom list.
Figure 133 Viewing the created classroom
Creating a user
Perform this task to add a user account on Space Console for a student user or a teacher user to performing teaching activities by logging in to a H3C Learningspace student client or H3C Learningspace teacher client.
This section uses local user creation as an example. For more information about domain user creation, see H3C Workspace Cloud Desktop Management Software User Manual.
You can authenticate local users through Local Auth and LDAP Auth. All settings of local users are stored in the local user database on Space Console. All settings of LDAP users are stored in a separately deployed generic LDAP server. For more information about the LDAP server deployment, see H3C Workspace Cloud Desktop Management Software User Manual.
Before creating a student user, you must create a grade level and a class. A student user can belong only to one user group of the class type.
To create a user:
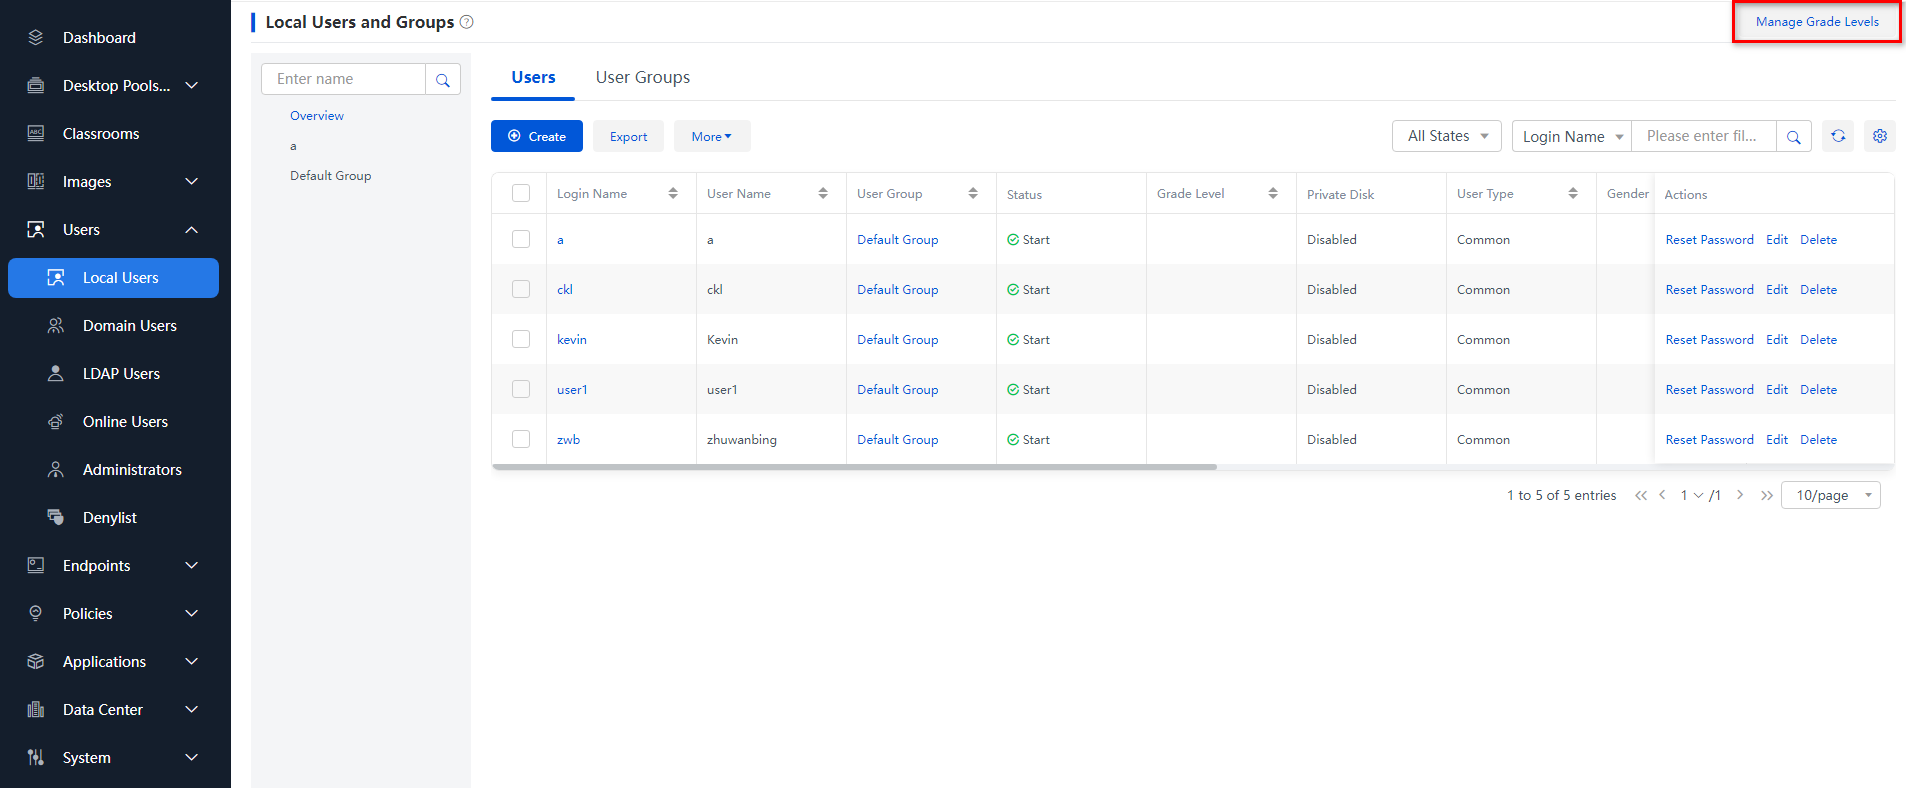
1. From the navigation pane, select Users > Local Users.
2. Click Manage Grade Levels.
Figure 134 Clicking Manage Grade Levels
3. Click Create. In the dialog box that opens, enter the grade level name, and click OK.
Figure 135 Grade level management
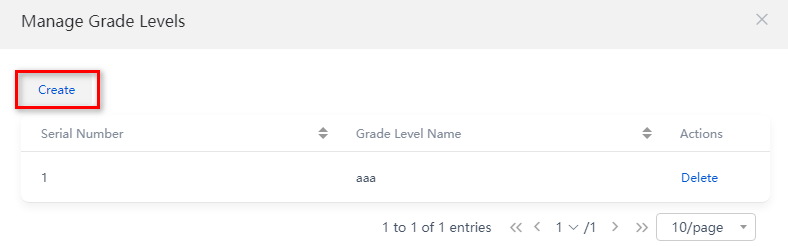
Figure 136 Creating a grade level
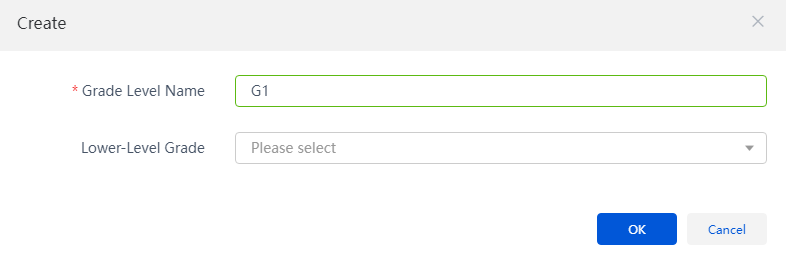
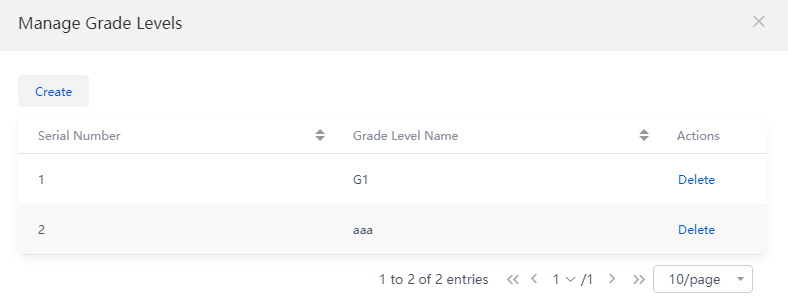
Figure 137 Grade level creation completed
4. From the navigation pane, select Users > Local Users.
5. On the User Groups tab of the Overview page, click Create.
Figure 138 Creating a user group

6. In the dialog box that opens, configure user group parameters, and click OK.
Figure 139 Configuring local user group parameters
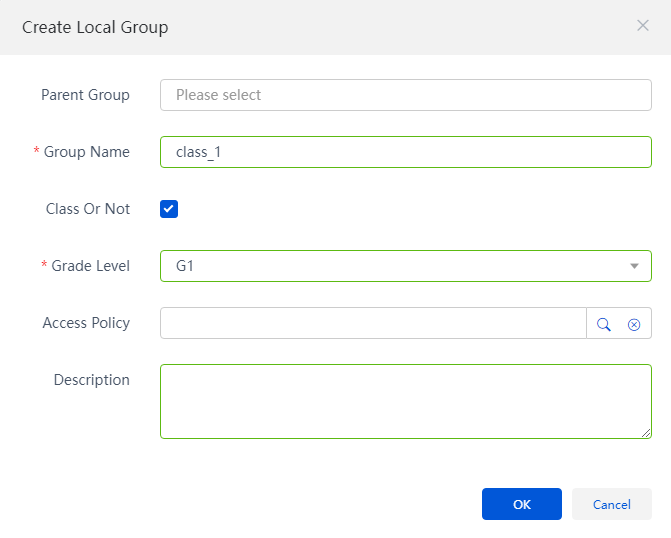
Table 7 New local user group parameters
|
Parameter |
Description |
|
Parent Group |
Parent group of the local user group. If the parent group is the root group, the value for this field is a slash (/). |
|
Group Name |
Name of the local user group. |
|
Class Or Not |
Select whether the local user group is a class. If the group is a class, you must select a grade level for the class. |
|
Grade Level |
Grade level of the class. You can click Manage Grade Levels to create a grade level or manage the grade level parameters. |
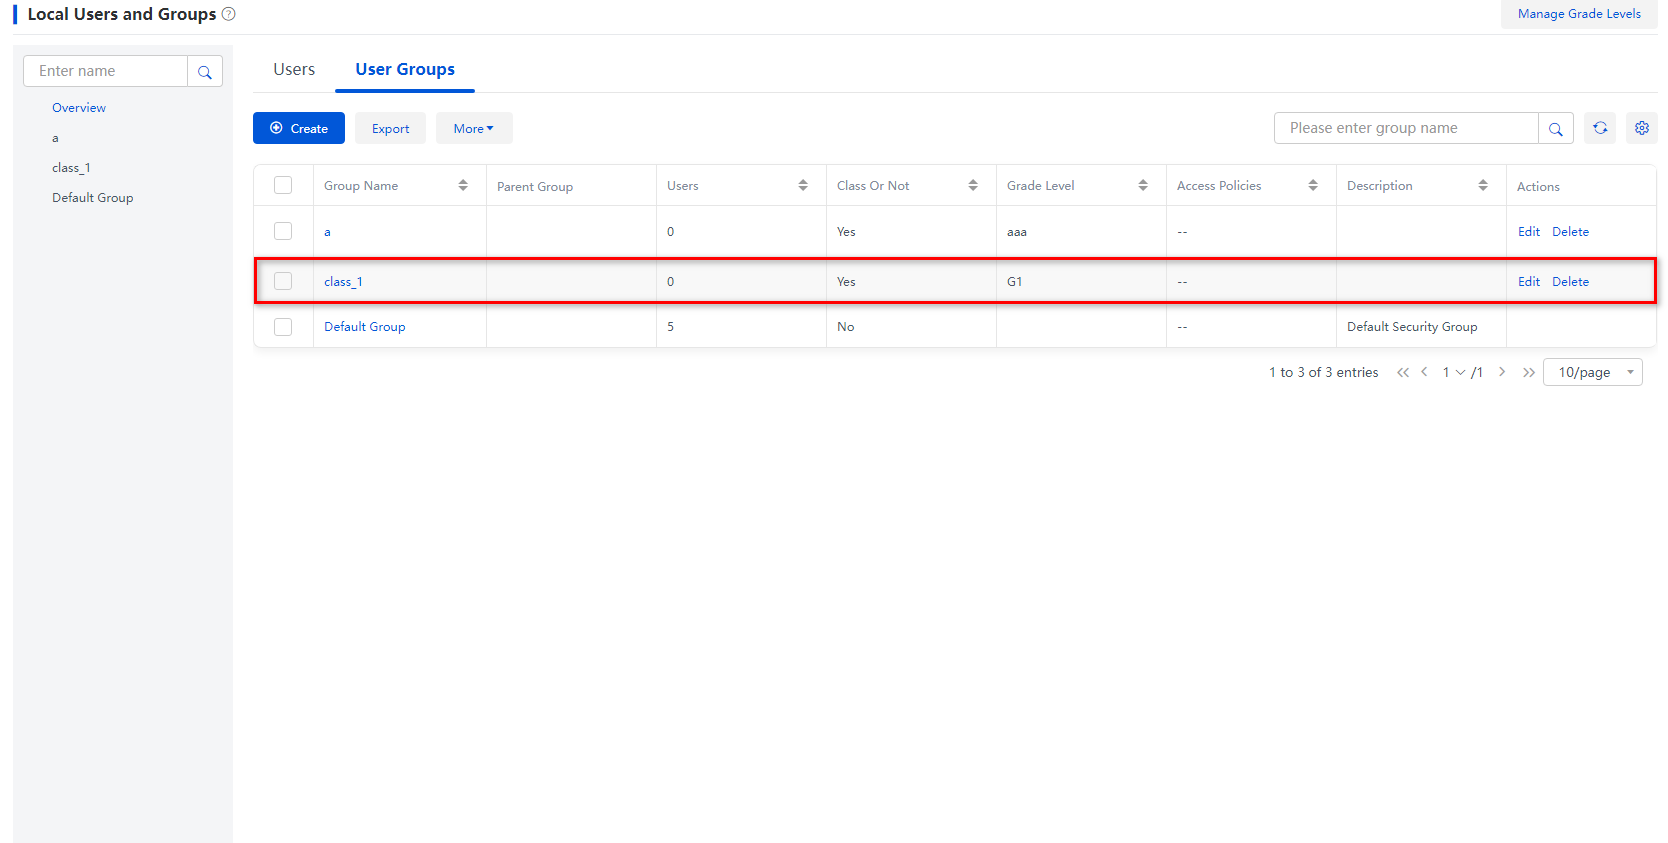
7. View the newly created group on the User Groups tab.
Figure 140 User group creation completed
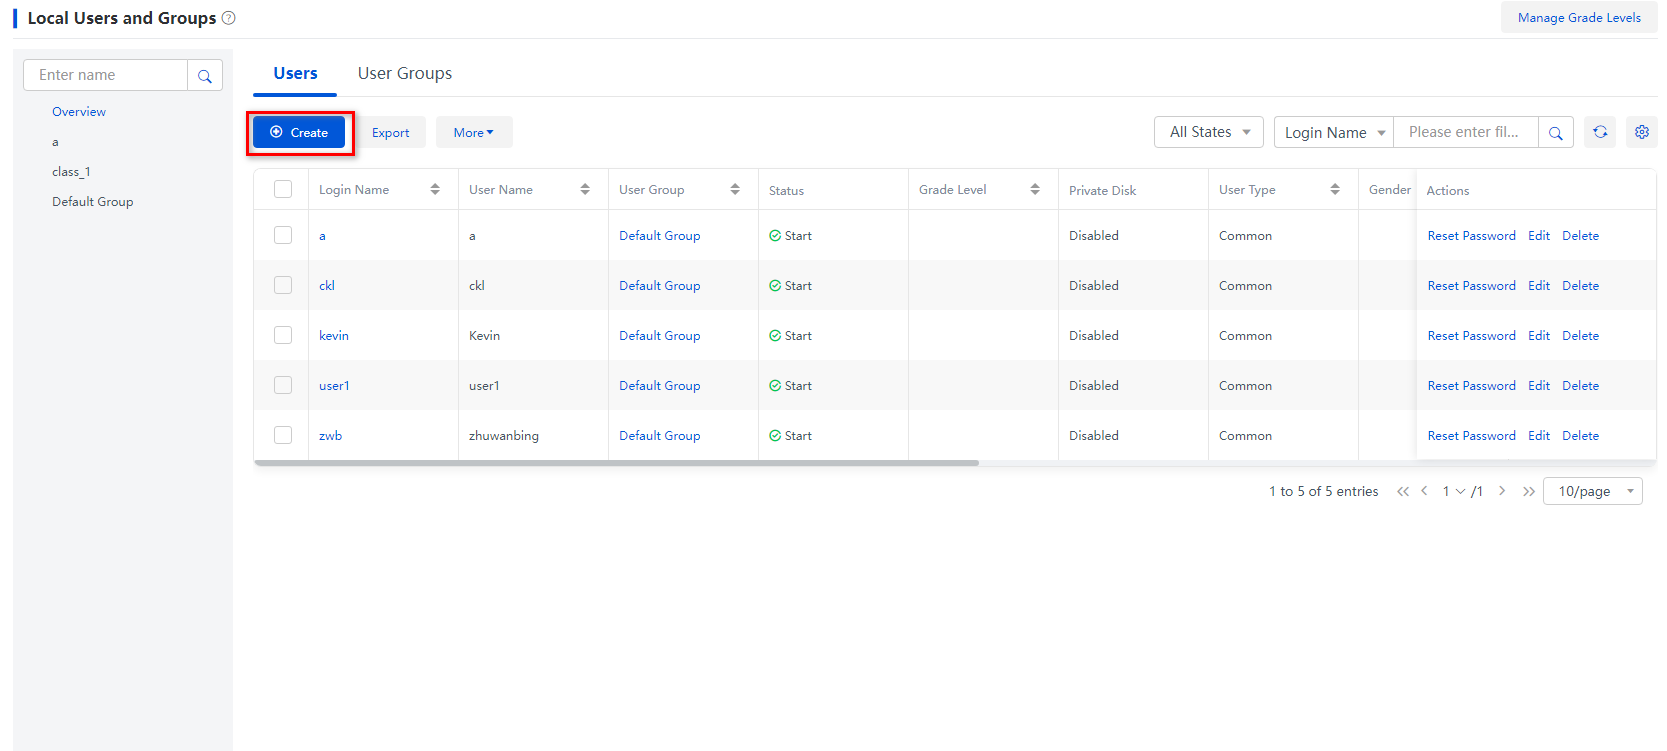
8. From the navigation pane, select Users > Local Users.
9. On the Users tab of the Overview page or the Users tab on the page of a user group, click Create.
Figure 141 Creating a local user
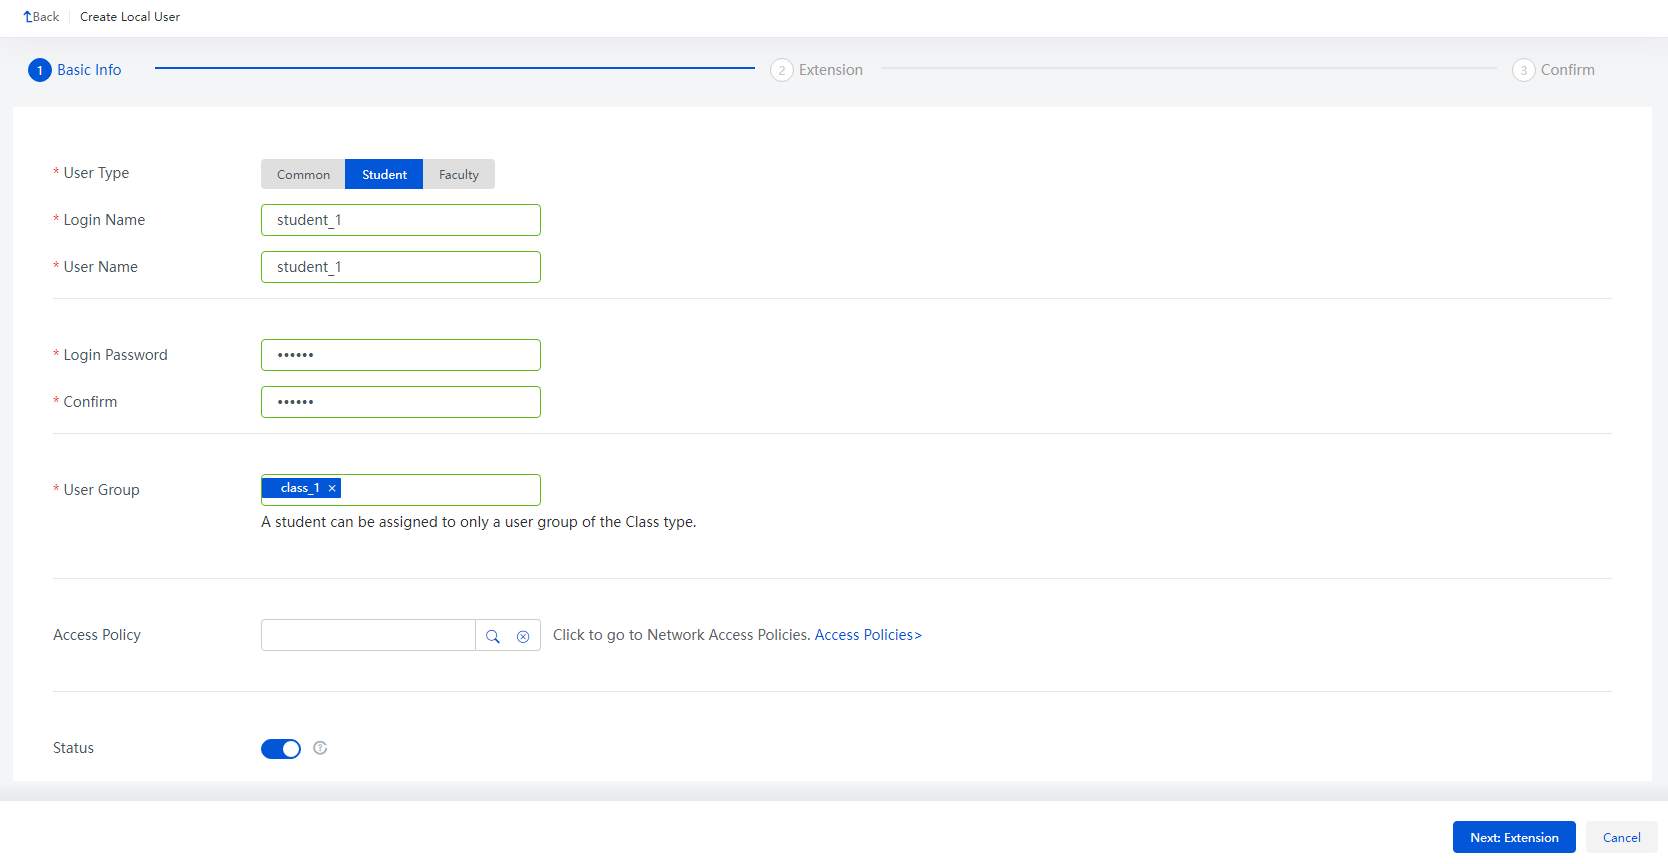
10. Configure basic parameters for the user, and then click Next: Extension.
Options for the user type include Student and Faculty. This section uses the student user type as an example.
Figure 142 Configuring basic parameters for the new local user
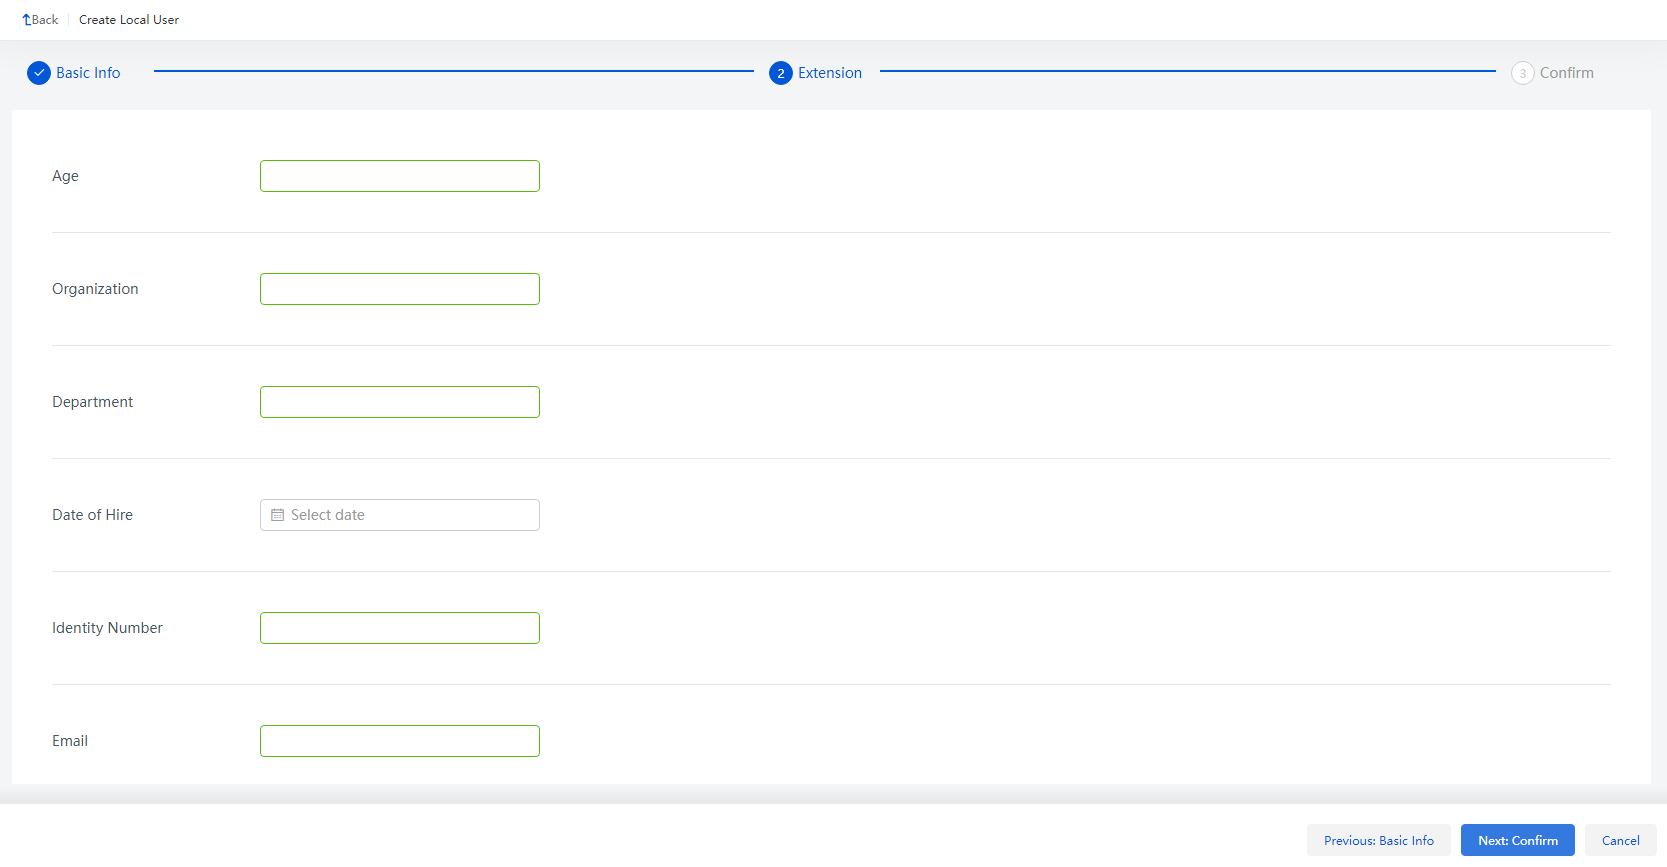
11. Configure extended parameters for the user, and then click Next: Confirm Configuration.
Figure 143 Configuring extended parameters for the new local user
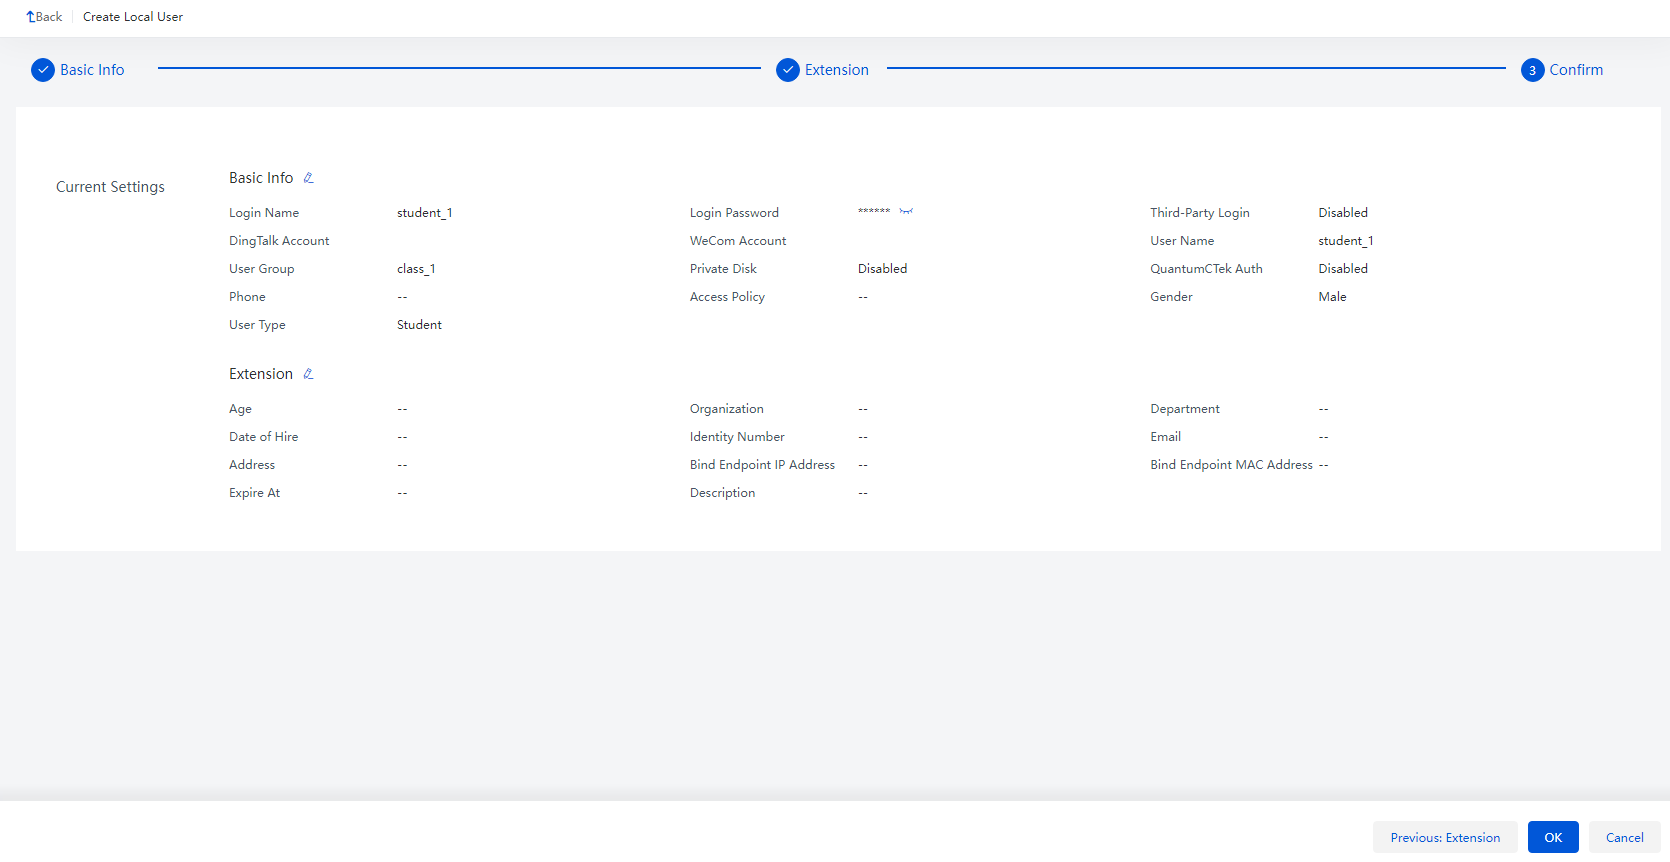
12. Verify that the configuration is correct, and click OK.
After the user creation is completed, the user can log in to the corresponding client to perform teaching activities.
Figure 144 Confirming the configuration for the user
13. After the user creation is completed, you can view the newly created student user on the Users tab. You can use the same procedures to create a teacher user.
Figure 145 Newly created student users and teacher users

Table 8 New local user parameters
|
Parameter |
Description |
|
User Type |
Select a user type. Options include Common, Student, and Faculty. Student users can log in to the student desktop client and faculty users can log in to the teacher desktop client. |
|
Login Name |
Account used by the user to log in to the desktop client. The value is a string of up to 20 characters. The login name cannot contain Chinese characters. |
|
User Name |
Name of the local user. |
|
Login Password |
Password used to log in to the client. The password must be longer than six characters. As a best practice to enhance password security, enter a password that contains a minimum of three character types from uppercase letters, lowercase letters, digits, and special characters. |
|
User Group |
User group to which the local user belongs. A student user can belong only to one user group of the class type. Other types of users each can belong to multiple user groups. |
|
Access Policy |
Access policy used to restrict the time when the user can access a cloud desktop or course desktop and the IP address used by the user to access the desktop. Configure this parameter if a user account is required for login. |
|
Private Disk |
A private disk is disk space in the data center allocated to a user for read and write data. You can enable private disk after specifying the shared storage pool on the System > Advanced Settings > System Parameters > Advanced Parameters > Private Disk Parameters page. If you enable private disk for the user, you must set the private disk size. Private disk supports only VDI cloud desktops and does not support domain users. For more information about private disk, see H3C Workspace Cloud Desktop Private Disk Configuration Guide. |
|
QuantumCTek Auth |
Select whether to enable QuantumCTek authentication. When QuantumCTek authentication is enabled, the user must bind a USB key provided by QuantumCTek for login authentication when it logs in to the client installed on a Windows endpoint through its username and a password. The user can log in to the client only after it binds to the USB key successfully. Before enabling QuantumCTek authentication, you must configure QuantumCTek authentication parameters on the System > Security > QuantumCTek Auth page. For more information, see H3C Workspace Cloud Desktop Management Software User Manual. |
|
Third-Party Login |
Select whether to enable third-party login. After you enable third-party login, a user can log in through SMS, DingTalk verification code and QR code, WeCom verification code and QR code. |
|
Phone |
Phone number of the user. As a best practice, configure this parameter if SMS login is enabled. |
|
Gender |
Select the user gender, male or female. This parameter is available only for a student user or a faculty user. |
|
SMS Auth |
Select whether to enable SMS authentication. If you enable this parameter, Space Console sends an SMS verification code to a user, and the user can log in to the client only after entering the verification code. The user with SMS Auth enabled must configure the Phone parameter. |
|
Age |
Specify the age of the user. |
|
Organization |
Specify the organization of the user. |
|
Department |
Specify the department of the user. |
|
Date of Hire |
Specify the date when the user was hired. |
|
Identity Number |
Identity number of the user. For example, you can enter the identity number on the user's identity card or passport. The identity number is a string of up to 32 characters. |
|
|
Email address of the user, which is a string of up to 256 characters. The value must be in standard format, for example, [email protected]. |
|
Address |
Contact address of the local user. |
|
Bind Endpoint IP Address |
Specify the endpoint IP addresses that can be used by the user to connect to the cloud desktop. You can enter an IP address or a hyphenated IP address range in each line. If you do not specify an IP address or IP address range, the user can use any endpoint IP address to connect to the cloud desktop |
|
Bind Endpoint MAC Address |
Select whether to bind endpoint MAC addresses to the user. The user can use only the bound endpoint MAC addresses to access the desktop. To allow the user to use the endpoint MAC address at the first login to access the desktop, select Bind First-Login MAC Address. You do not need to enter the first-login MAC address. To bind other endpoint MAC addresses to the user, you must manually enter the MAC addresses. You can enter a MAC address in each line. |
|
Expire At |
Expiration time of the user. The Space Console will delete the user when it expires. If this field is empty, the user will never expire. |
Configuring the client
Configuring the teacher client
|
|
CAUTION: Complete the Learningspace teacher client installation in advance. For more information, see H3C Workspace Cloud Desktop Management Software Installation Guide. |
Checking hardware configuration
1. Double-click the teacher client.
2. Verify the hardware check result, and click
the ![]() icon.
icon.
Figure 146 Hardware check result
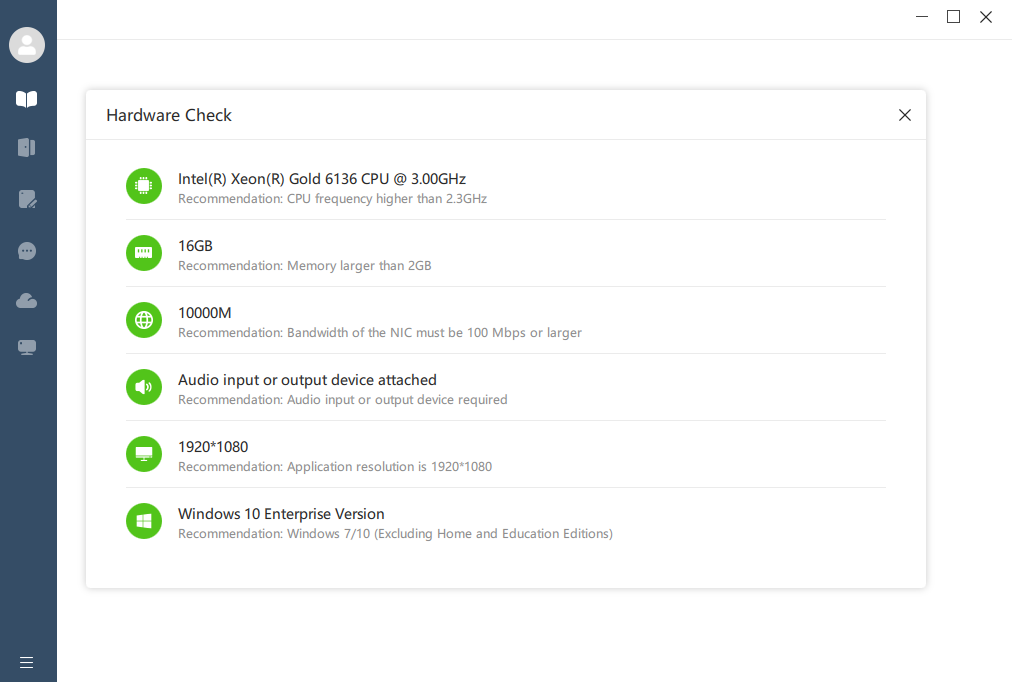
Registering the teacher client with Space Console
1. Double-click the teacher client to access the login page.
2. Click Configure in the bottom.
3. Select a scenario, set the server name and IP address of Space Console, select a classroom, and then click Register Classroom.
4. In the dialog box that opens, click OK.
To edit the basic parameters after your first login, click Configure.
If you select the dual-network isolation scenario, you must register the teacher client with the classrooms on two servers as follows:
a. Register the teach client with a classroom on the server you have configured.
b. Switch to the other network.
c. Configure the other network and register the teacher client with a classroom on the server on that network.
Figure 147 Registering the teacher client with Space Console
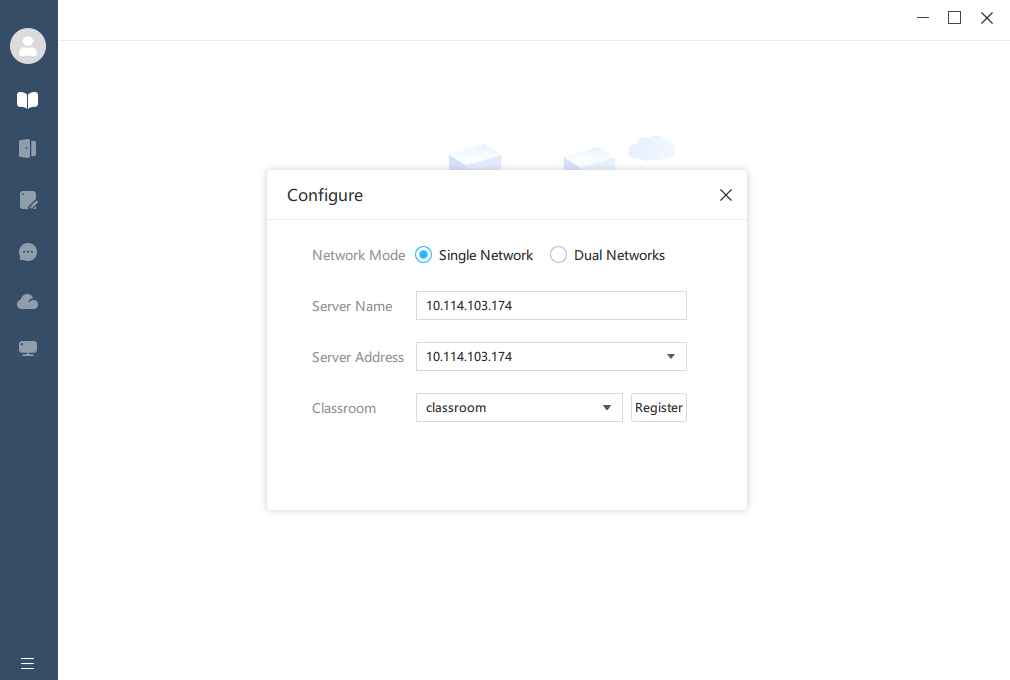
5. Click Back after registration to return to the login page.
6. Enter your username and password, enable automatic login, keep the username, and remember the password as needed, and then click Log In.
Figure 148 Teacher client login page
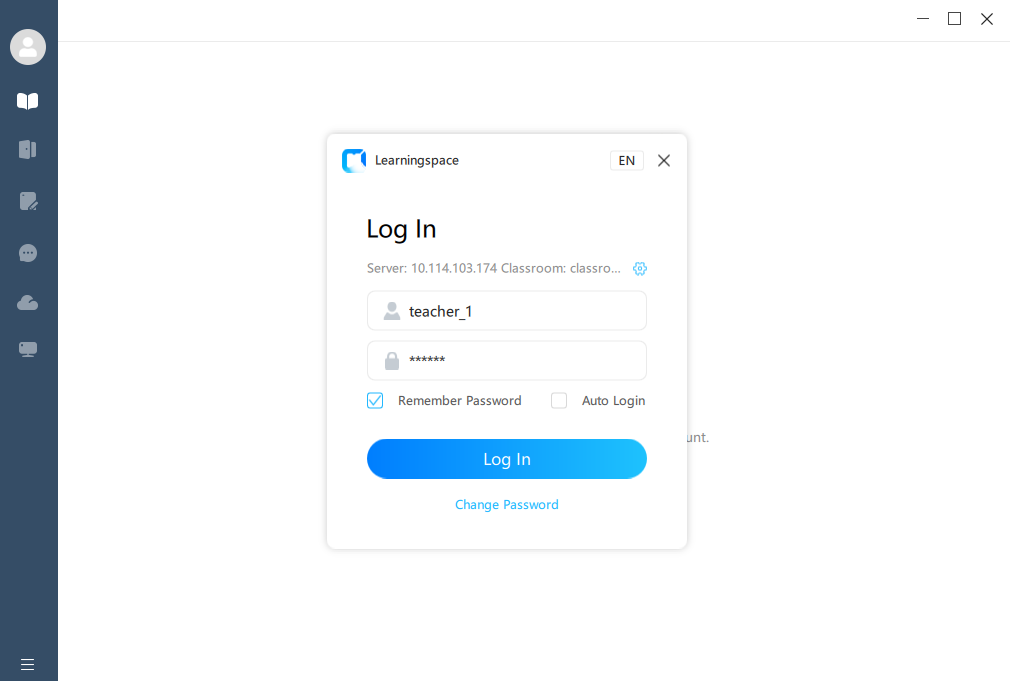
Figure 149 Teacher client login succeeded
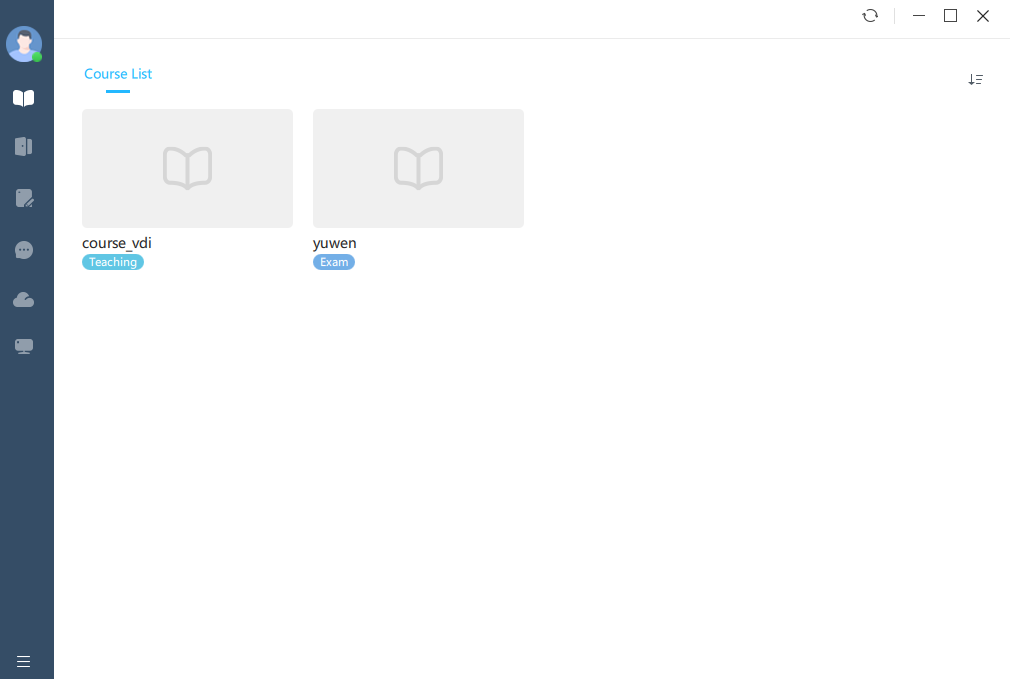
Deploying student endpoints
Restrictions and guidelines
· Complete the Learningspace student client installation in advance. For more information, see H3C Workspace Cloud Desktop Management Software Installation Guide.
· You can deploy a VOI endpoint to a classroom only from Space Console. For more information, see H3C Workspace Cloud Desktop Management Software Installation Guide.
· You can deploy a VDI student endpoint to a classroom from Space Console or the teacher client. This section introduces the endpoint deployment method with the example of deploying a VDI student endpoint to a classroom from the teacher client.
· During the deployment, do not restart or power off the student endpoints.
Procedure
1. On the Classroom page, click More > Maintenance.
Figure 150 Maintenance
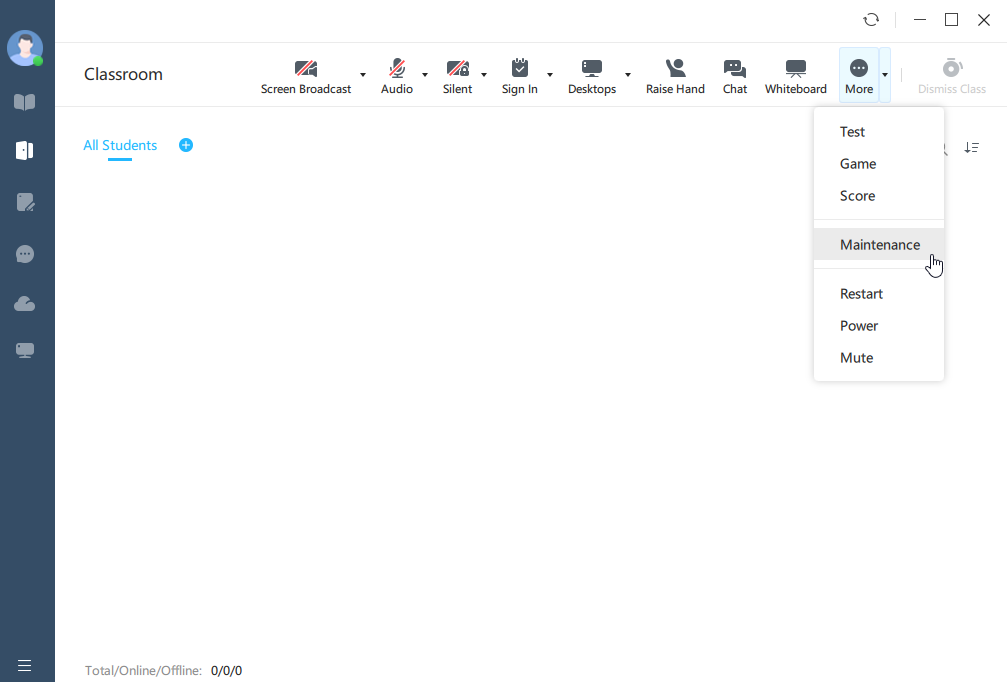
2. In the dialog box that opens, enter the password for endpoint authentication, and then click Authentication.
The default password for endpoint authentication is Password@1234.
Figure 151 Endpoint password authentication
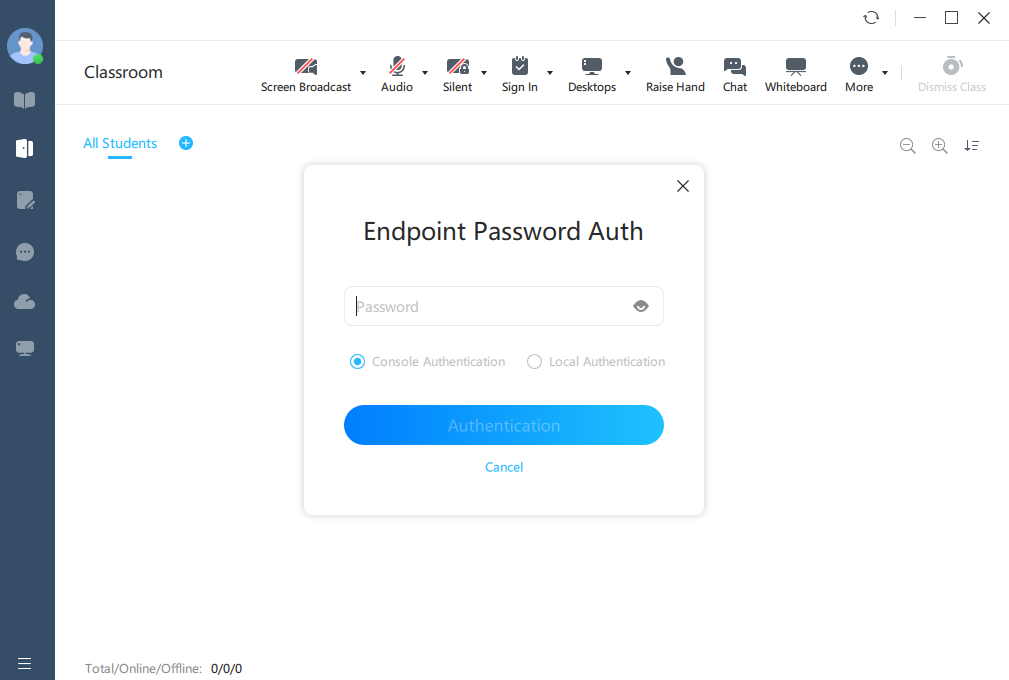
Figure 152 Maintaining the endpoint
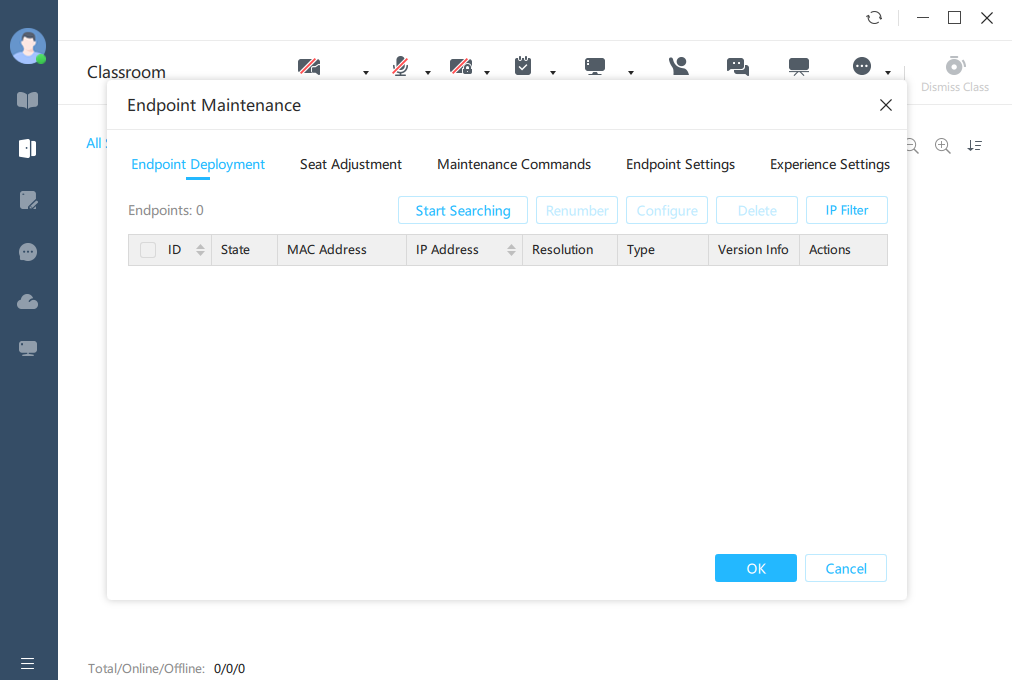
3. Perform the following tasks as needed:
¡ To discover and number the student endpoints that have connected to the teacher client, click Start Searching. To end endpoint discovery, click Stop Searching.
¡ To renumber the student endpoints, click Renumber. Click Start Numbering, press the space bar to number the target student endpoints, and then click Stop Numbering. If you do not renumber a student endpoint, the client automatically numbers it. You can click Edit in the Actions column for a student endpoint to renumber it.
¡ To configure student endpoints, select one or multiple student endpoints and then click Configure. Configure the resolution and determine whether to enable the Ctrl+Alt+Del key combination, and then click OK.
- If the teacher sets the resolution to Auto for student endpoints, the actual resolution of the student endpoints will take effect.
- To prevent students from accidentally closing or uninstalling the student client in class, lock hot keys for the student endpoints as a best practice.
¡ To delete student endpoints, select one or multiple student endpoints, and then click Delete.
¡ To specify the IP range for endpoint discovery, click Configure IP Range, configure an IP range, and then click OK.
¡ To replace an undeployed endpoint with a discovered endpoint, click Replace for the undeployed endpoint, and then click Finish.
¡ To deploy a student endpoint registered with another classroom to the current classroom, reset the student endpoint. Then, the endpoint can be discovered during the endpoint deployment.
4. Click OK.
5. In the dialog box that opens, click OK.
Figure 153 Upload Deployment Info dialog box
You can also adjust seats, manage maintenance commands, and configure endpoint settings. For more information, see H3C Workspace Cloud Desktop Teacher Client User Manual (Education Scenario).
Configuring preferences
Before starting the class, you can configure preferences for teaching features. If you do not configure the preferences, the system will retain the default configuration, as shown in the following figures.
1. Click the ![]() icon in the
bottom left corner, and select Preferences.
icon in the
bottom left corner, and select Preferences.
Figure 154 Preferences
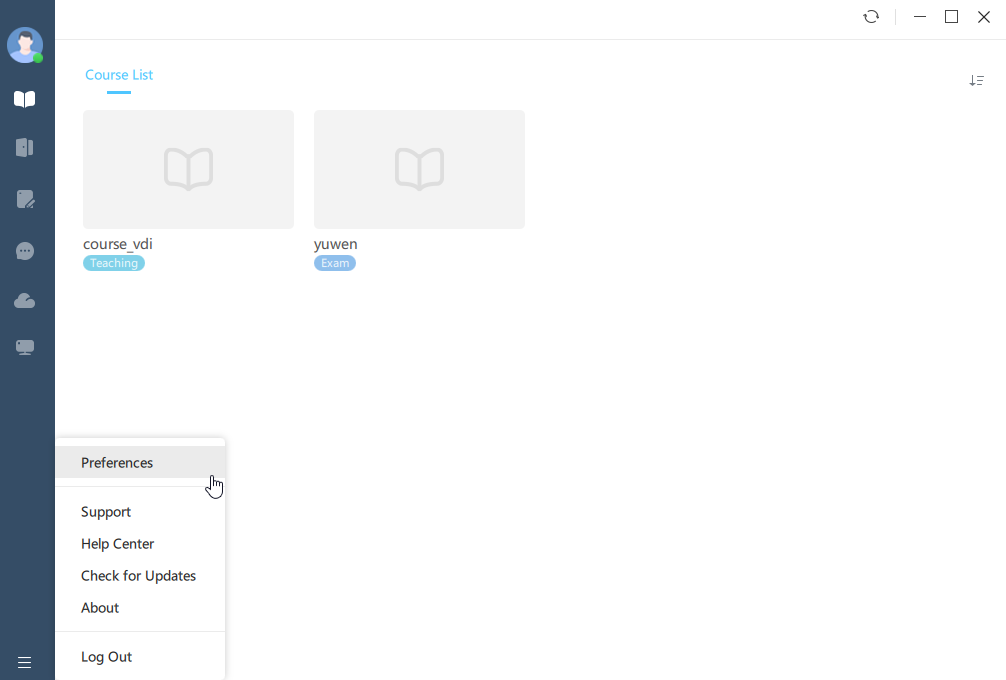
2. Configure the common settings and teaching settings. For more information, see Table 9.
Figure 155 Common settings
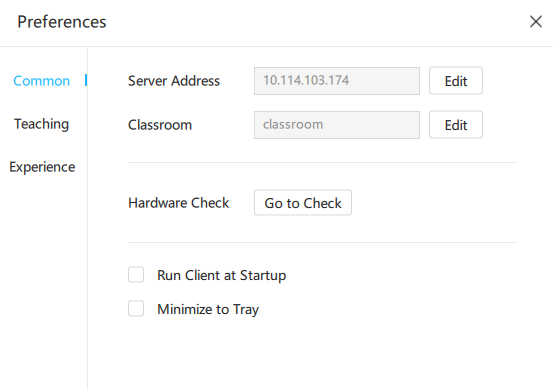
Figure 156 Teaching settings
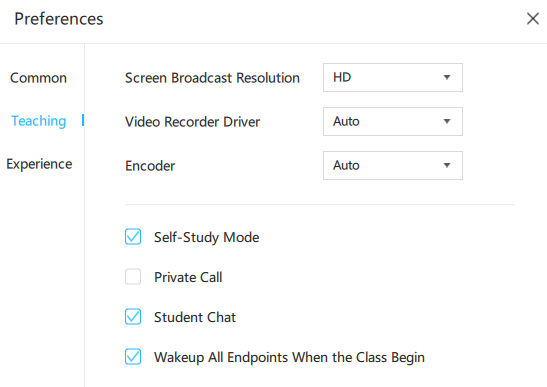
|
Parameter |
Description |
|
Common |
· Server Address: Click Edit to log out the current user and go to the configuration page. After selecting the application scenario, configuring the server, and successfully registering with the classroom, close the configuration page and enter the teacher login page. Upon login, the server address and classroom will be the modified ones. · Classroom: Click Edit to log out the current user and go to the configuration page. Then, configure the application scenario, server address, and classroom. · Hardware Check: To review the teacher endpoint configuration, click Go to Check · Run Client at Startup: Allow the teacher endpoint to start the teacher client at startup. · Minimize to Tray: Minimize the teacher client to the system tray when the teacher client is closed. |
|
Teaching |
· File Collection Directory: Set the default directory for saving collected files. · Screen Broadcast Resolution: Set the resolution for screen broadcast. The higher the resolution, the more bandwidth used. · Video Recorder Driver: Specify the driver used for screen recording. If you use the default setting, the DirectShow driver is used as long as it is available. If the DirectShow driver is unavailable, the gdigrab driver is used. · Encoder: Specify the encoder used for screen broadcast. If you use the default setting, the QVS encoder is used as long as it is available. If the QVS encoder is unavailable, the CPU encoder is used. · Self-Study Mode: Allow students to turn to self-study when no class is going on. · Private Call: Allow students to talk in pairs. · Student Chat: Allow students to chat after class. · Wakeup All Endpoints When the Class Begin: Wake up the endpoints that have been powered on. Before you wake up all endpoints, make sure the endpoint wakeup on LAN feature is enabled. |
Logging in to the student client as a student user
After the endpoint deployment is completed, double-click the Learningspace student client icon to start the client, and the default page is displayed as follows:
· If the classroom requires authentication, the student client displays the login page as shown in Figure 157. After entering a student ID and password, the student logs in to the student client and enters the course page as shown in Figure 158 and Figure 159.
· If the classroom does not require authentication, the student directly enters the course page as shown in Figure 158 and Figure 159.
Whether a classroom requires authentication depends on the classroom settings on Space Console. To change the authentication setting for the classroom, contact the administrator or see H3C Workspace Cloud Desktop Management Software User Manual.
Figure 157 Login page on the student client
Figure 158 Default course page on the VDI student client
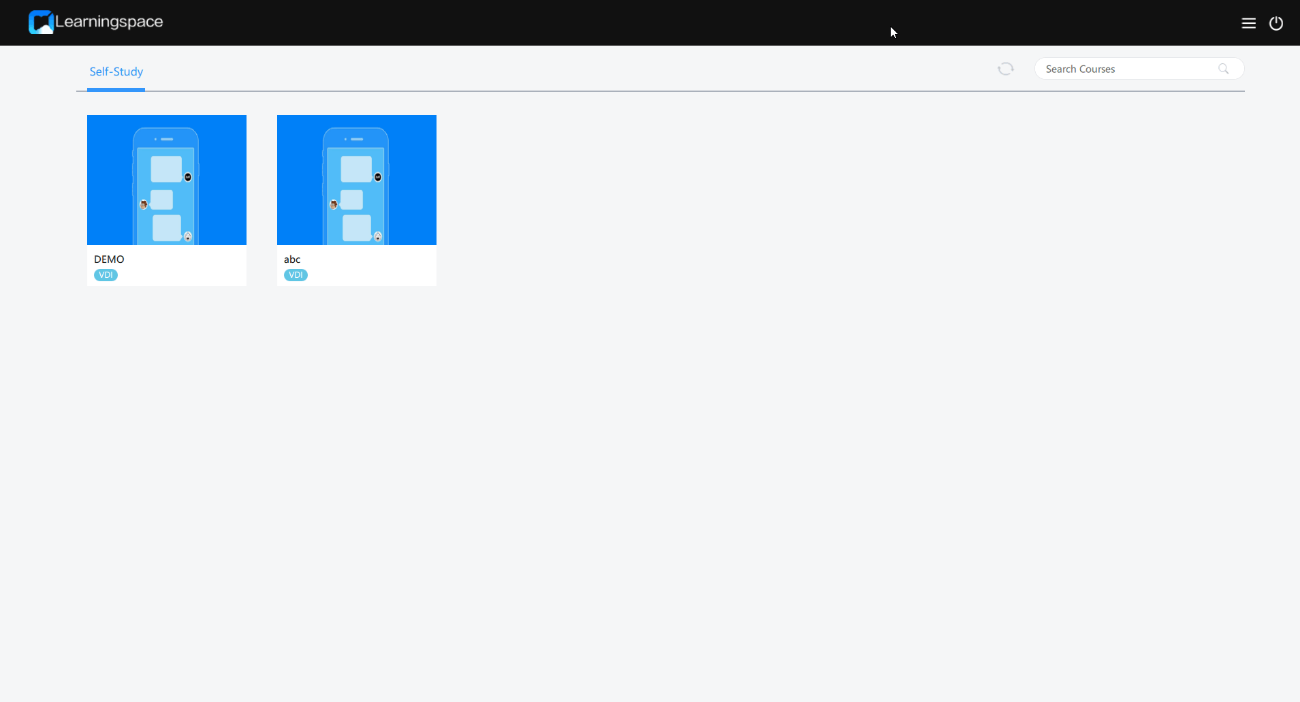
Figure 159 Default course page on the VOI student client
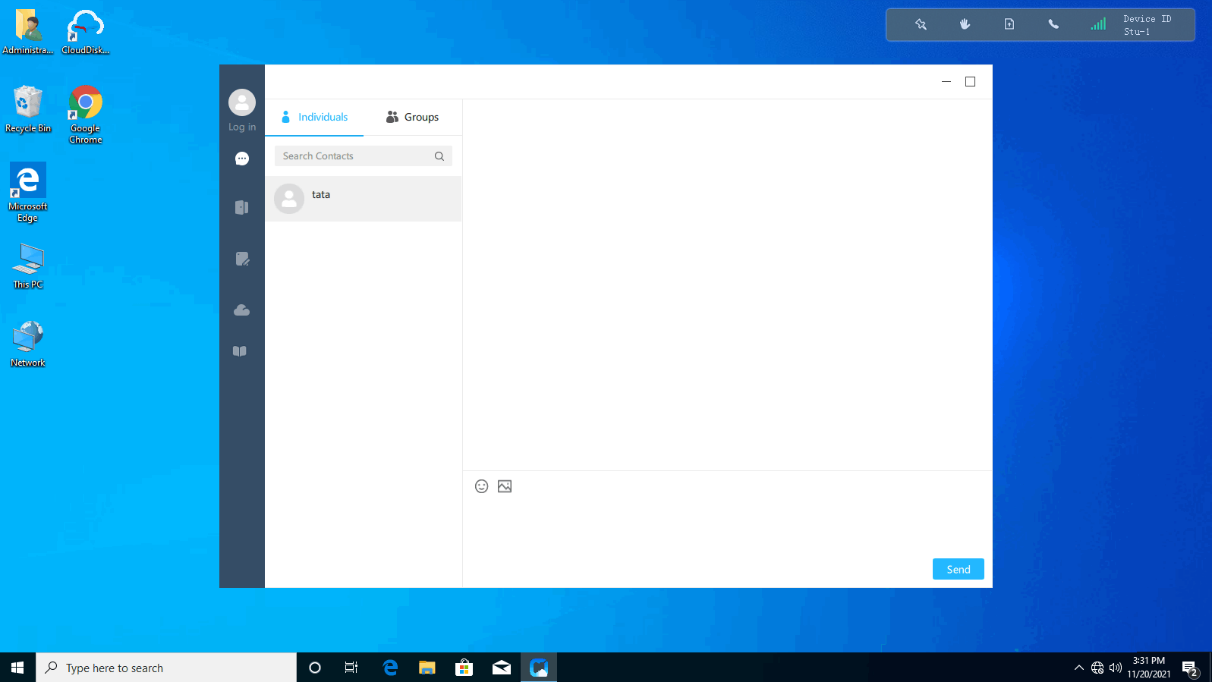
Starting a class
1. On the Courses
page, click the ![]() icon to synchronize courses with Space Console.
icon to synchronize courses with Space Console.
2. Double-click a course, select Associate to Student Desktops, click Advanced Settings, select a classroom, and then click Start Class.
The client will display all student desktops that have been deployed in the classroom.
¡ Exam Course: Select this parameter to create an exam course. After the class is dismissed for an exam course, Space Console retains the VMs created for the class. For a non-exam course, Space Console automatically deletes the VMs created for the class upon class dismissal.
¡ Teaching Course: The current course is a teaching course.
¡ Associate to Student Desktops: Select this parameter to create desktops for students. VOI courses do not support this parameter.
¡ Classrooms: Select one or multiple classrooms. By default, the classroom you are in is selected. If you select multiple classrooms, the classrooms are merged into one classroom, and all students in other classrooms are connected to the current teacher client.
Figure 160 Starting a class
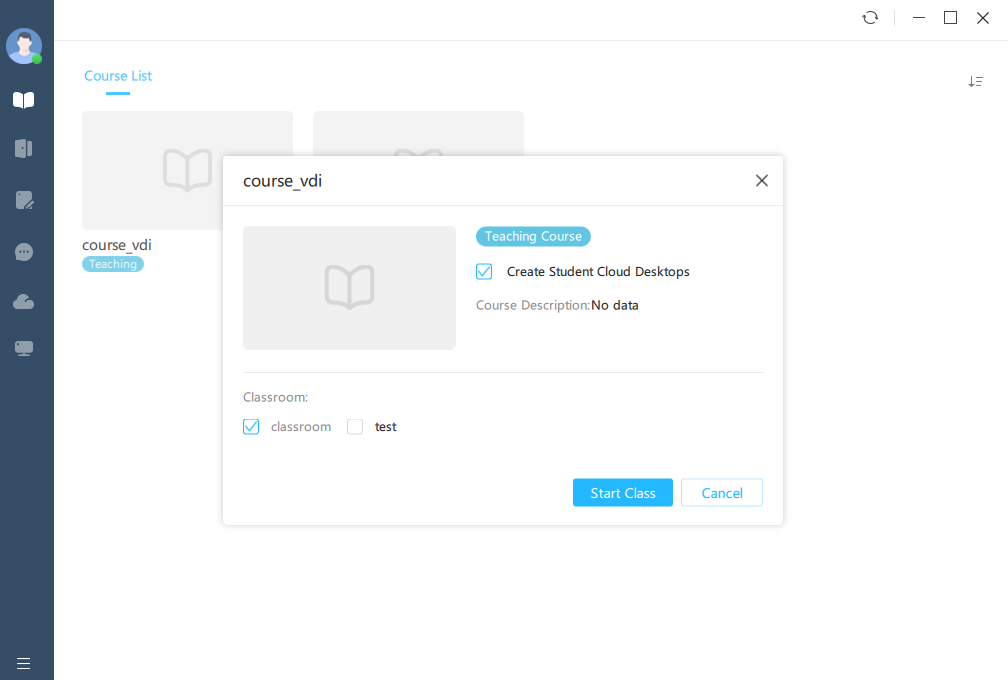
Using teaching functions
After you start a class, a floating toolbar will be displayed in the top right corner of your desktop. The toolbar offers frequently used functions such as display the main window, broadcast the screen, issue commands remotely, distribute assignments, and blank student screens. For more information about the toolbar, see H3C Workspace Cloud Desktop Teacher Client User Manual (Education Scenario).
Figure 161 Toolbar
![]()
Use teaching functions such as use the whiteboard for demonstration, broadcast the screen, and collect and distribute assignments on the class management page. For more information about teaching functions, see H3C Workspace Cloud Desktop Teacher Client User Manual (Education Scenario).
Figure 162 Class management page
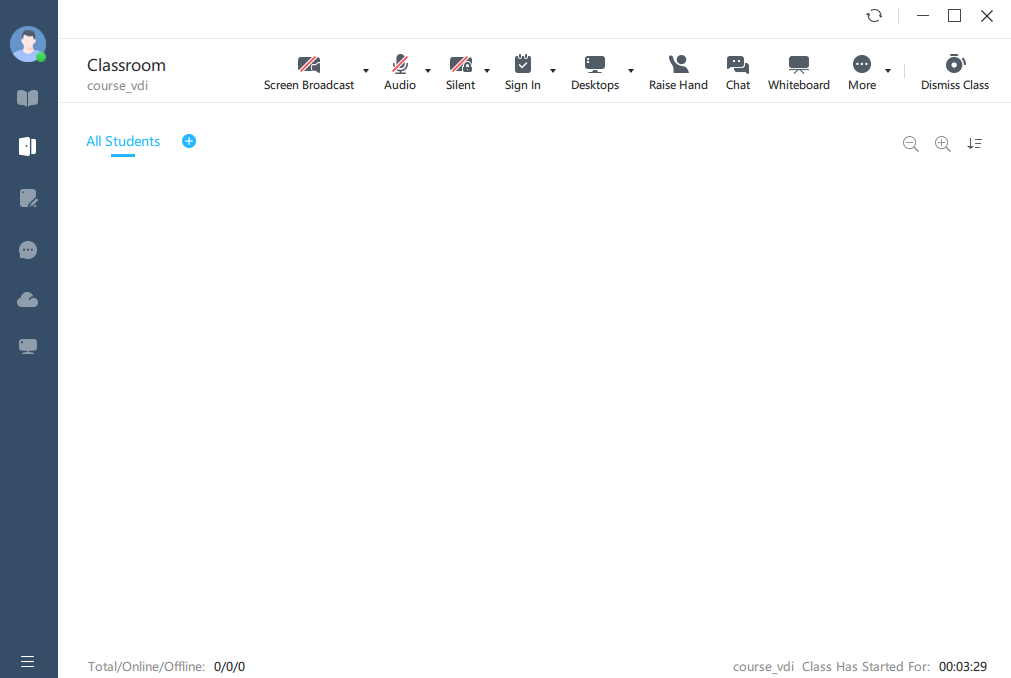
Dismissing a class
To dismiss a class manually:
1. On the class management page, click Dismiss Class in the bottom left corner.
2. Select whether to shut down the teacher client or student client, and then click OK.
The Shut Down Servers option is supported only when the feature of allowing teacher clients to shut down server is enabled on Space Console. This feature is available only when the education scenario is deployed by using compute virtualization and no other classrooms are in class.
For a non-exam course, Space Console automatically deletes all the student cloud desktops created for the class upon class dismissal.
Figure 163 Dismissing a class manually
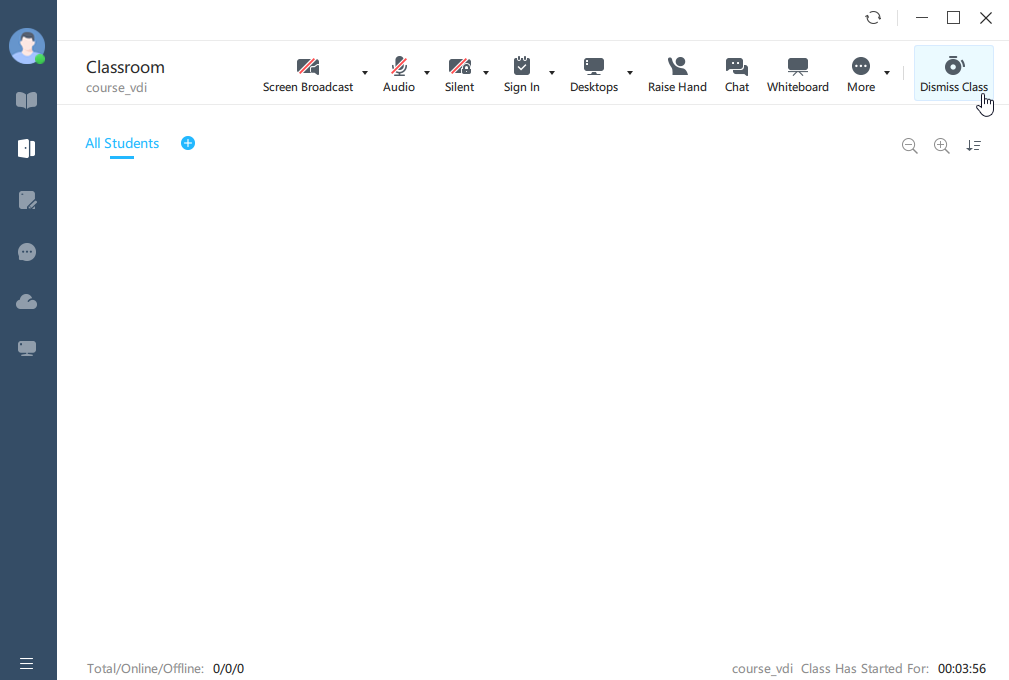
3. To dismiss a class automatically, enable automatic class dismissal on Space Console. The client will display a prompt 60 seconds ahead of class dismissal.
¡ To dismiss a class immediately, click Dismiss Now.
¡ To cancel dismissing the class, click Cancel Class Dismissal.
¡ To
let Space Console dismiss a class and log out your account, do not perform any
operation or click the ![]() icon in the top right corner.
icon in the top right corner.
Figure 164 Dismissing a class automatically
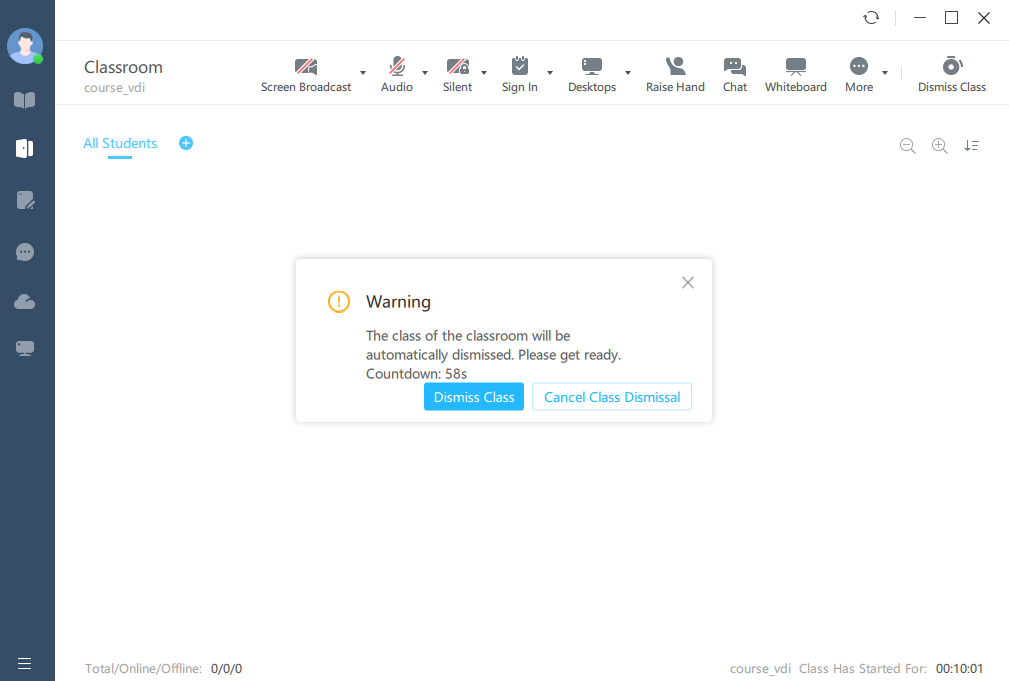
Appendixes
Method of distinguishing UCC endpoints from non-UCC endpoints (IDV or VOI endpoints)
If SpaceOS Initialization is displayed on the advanced settings page of an endpoint, the endpoint is a UCC endpoint, as shown in Figure 165.
Figure 165 SpaceOS initialization
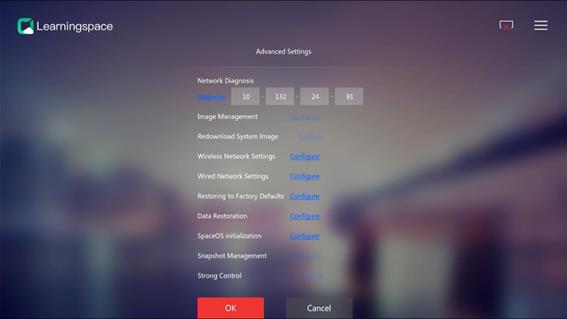
Uploading the optimization tool
The optimization tool is an independent package released with the Space Console installation package. After the deployment or upgrade of Space Console is completed, you must upload the optimization tool package on the Image Tools page of Space Console. The VMs can mount and use the optimization tool only after the optimization tool package is uploaded and parsed by Space Console.
The optimization tool package contains VDI, VOI, and IDV optimization tools. The education scenario uses only VDIOptTools and VOIOptTools.
To upload the optimization tool:
1. Obtain the optimization tool package from the general package of Workspace, copy the optimization tool package to a computer or an endpoint from which you will upload the optimization tool.
2. Log in to Space Console, navigate to the Applications > Image Tools page, and click Upload.
Figure 166 Image Tools page
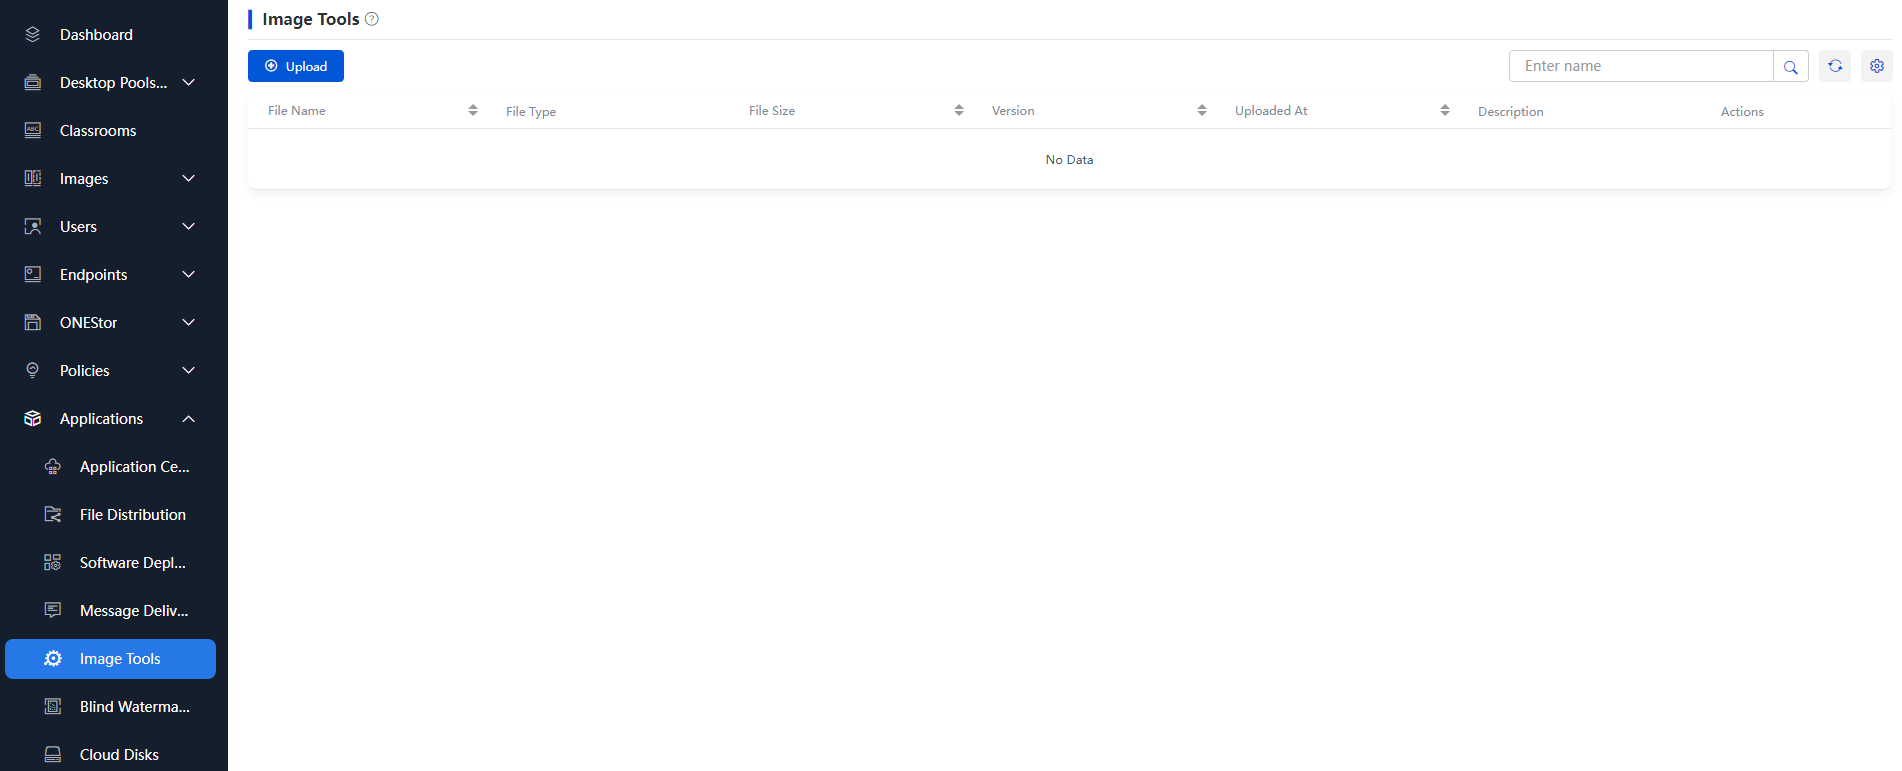
3. In the Upload dialog box, click Upload, select the optimization tool package, and click Open to start the upload.
Figure 167 Uploading the optimization tool
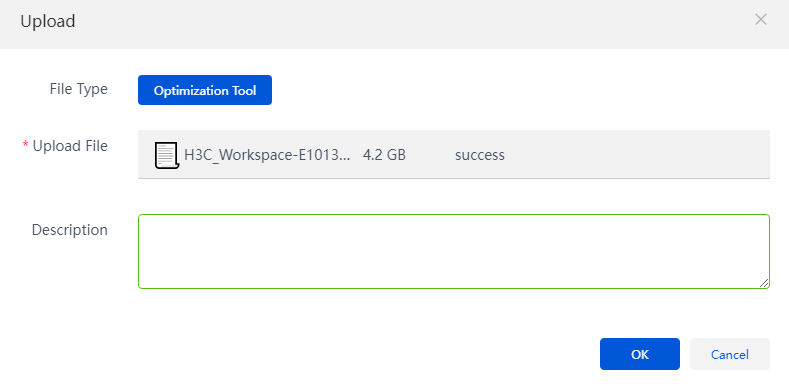
4. After the upload is completed, click OK, and then the uploaded optimization tool is displayed on the image tool list.
Figure 168 Optimization tool upload completed
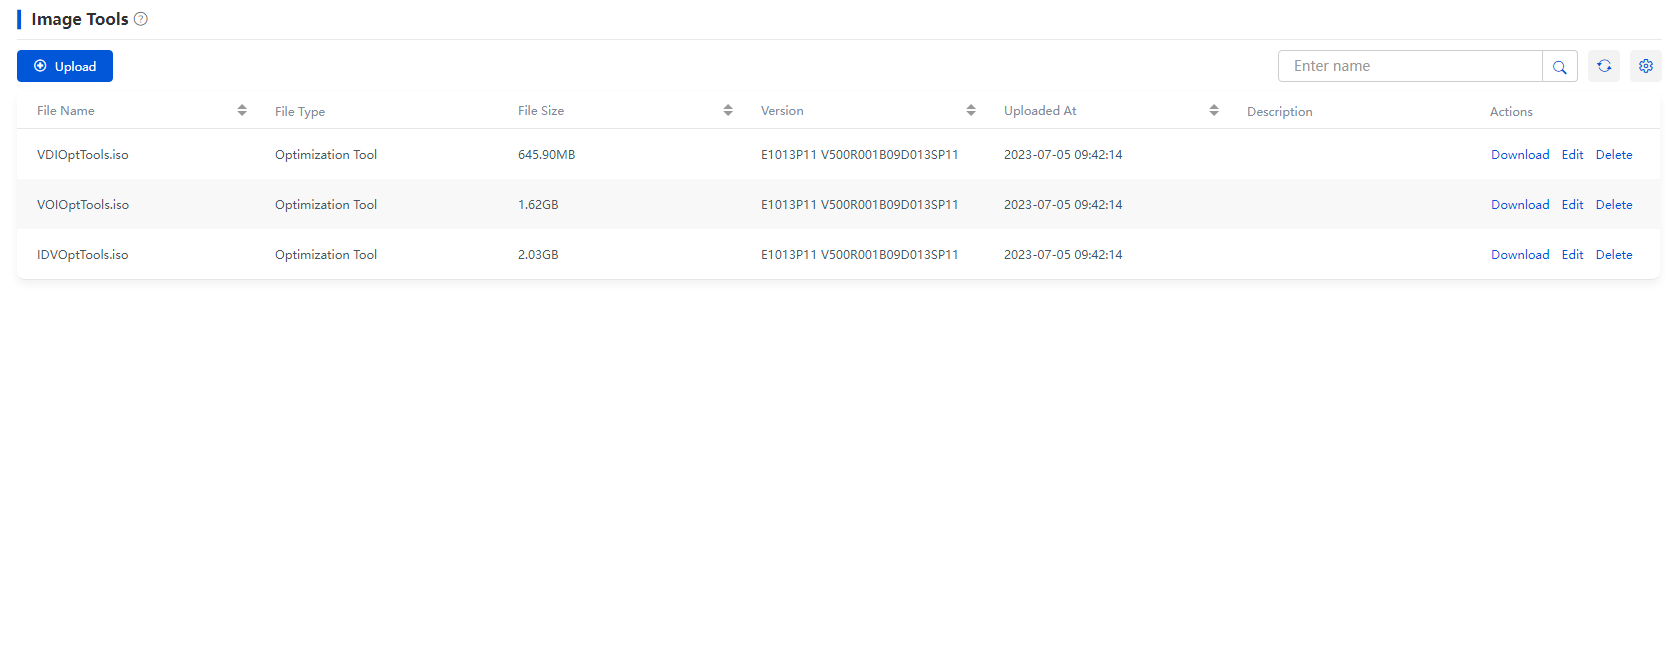
Editing the virtual memory size
1. After modification of the data disk (Winswap disk) size, when building the child image, the system automatically changes the data disk size to the data disk size displayed in the flavor list. Modify the virtual memory size in the child image as required, as shown in Figure 169.
Figure 169 Modifying the virtual memory size
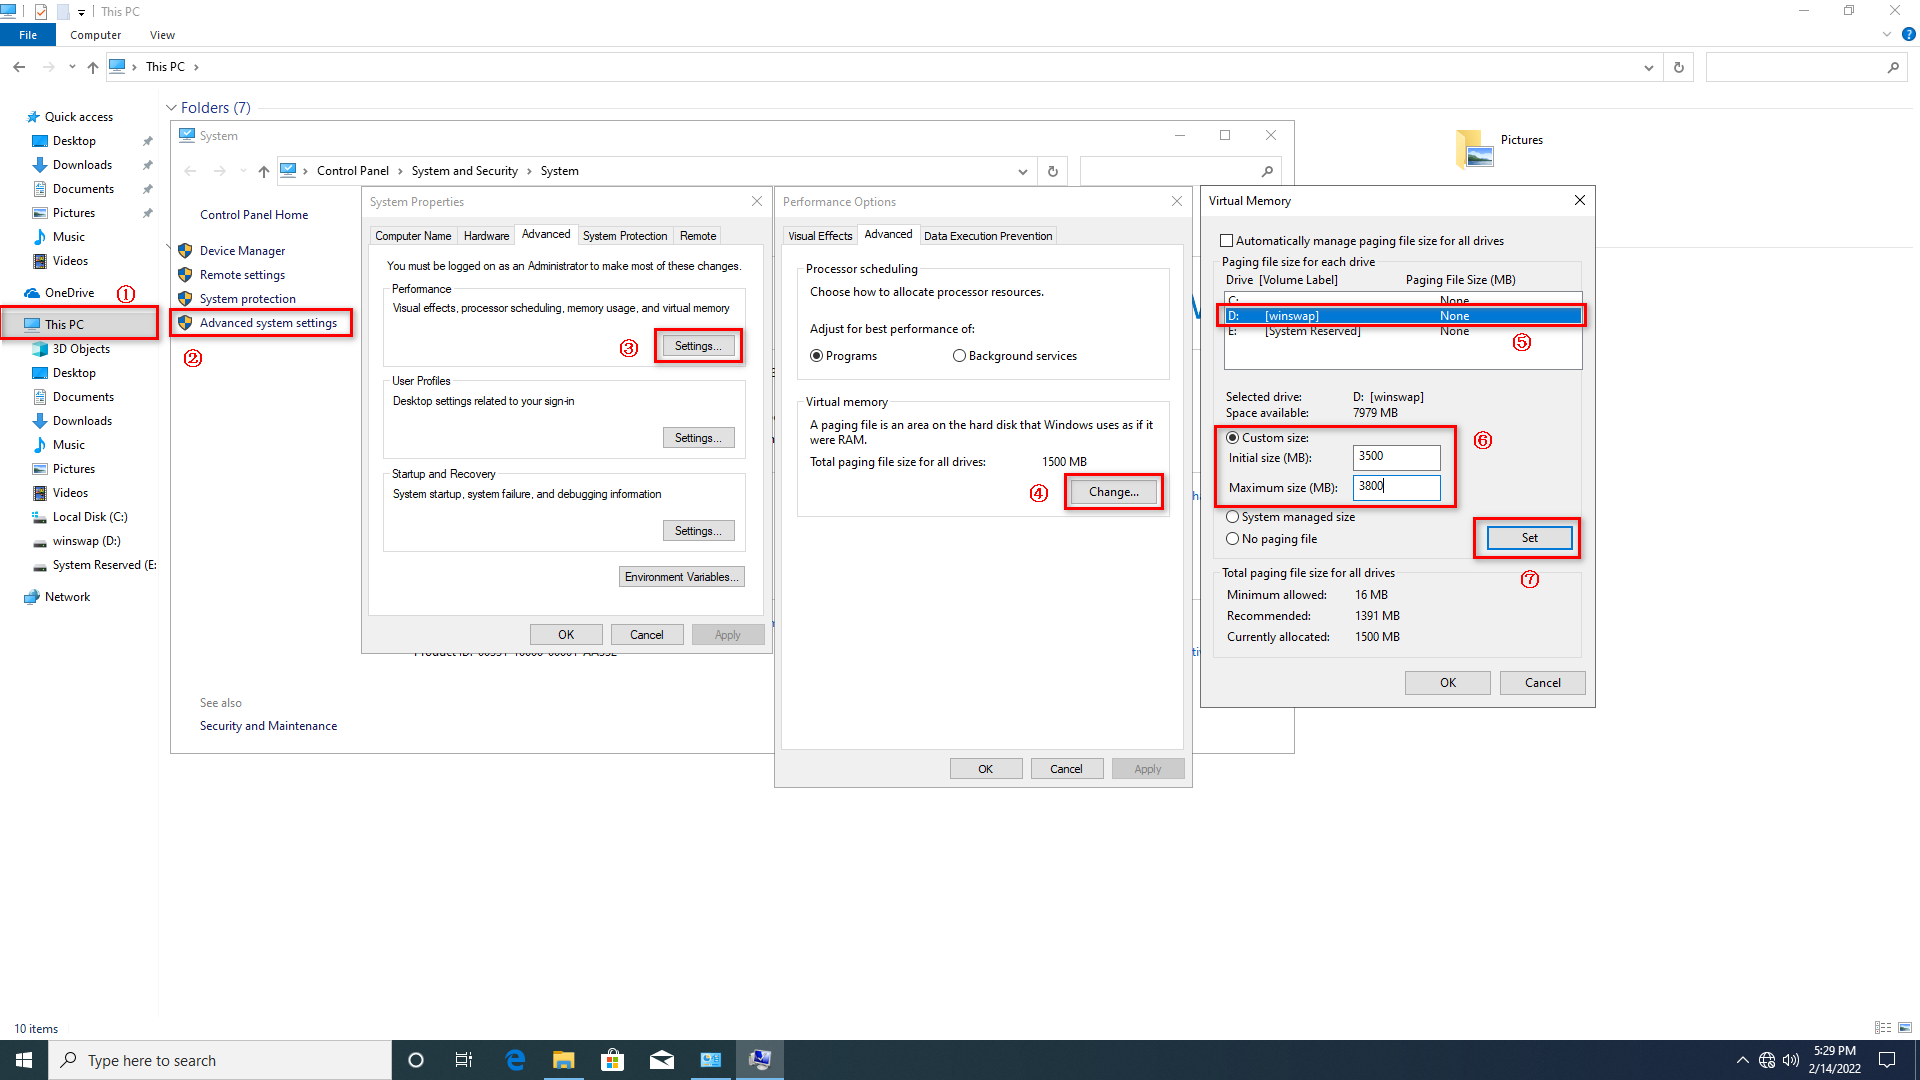
2. After modifying the virtual memory size, restart the system to make the configuration take effect.
The used space of the Winswap disk shown in Figure 170 equals the virtual memory size, which indicates that the modification of the virtual memory takes effect.
Figure 170 Successful modification of the virtual memory
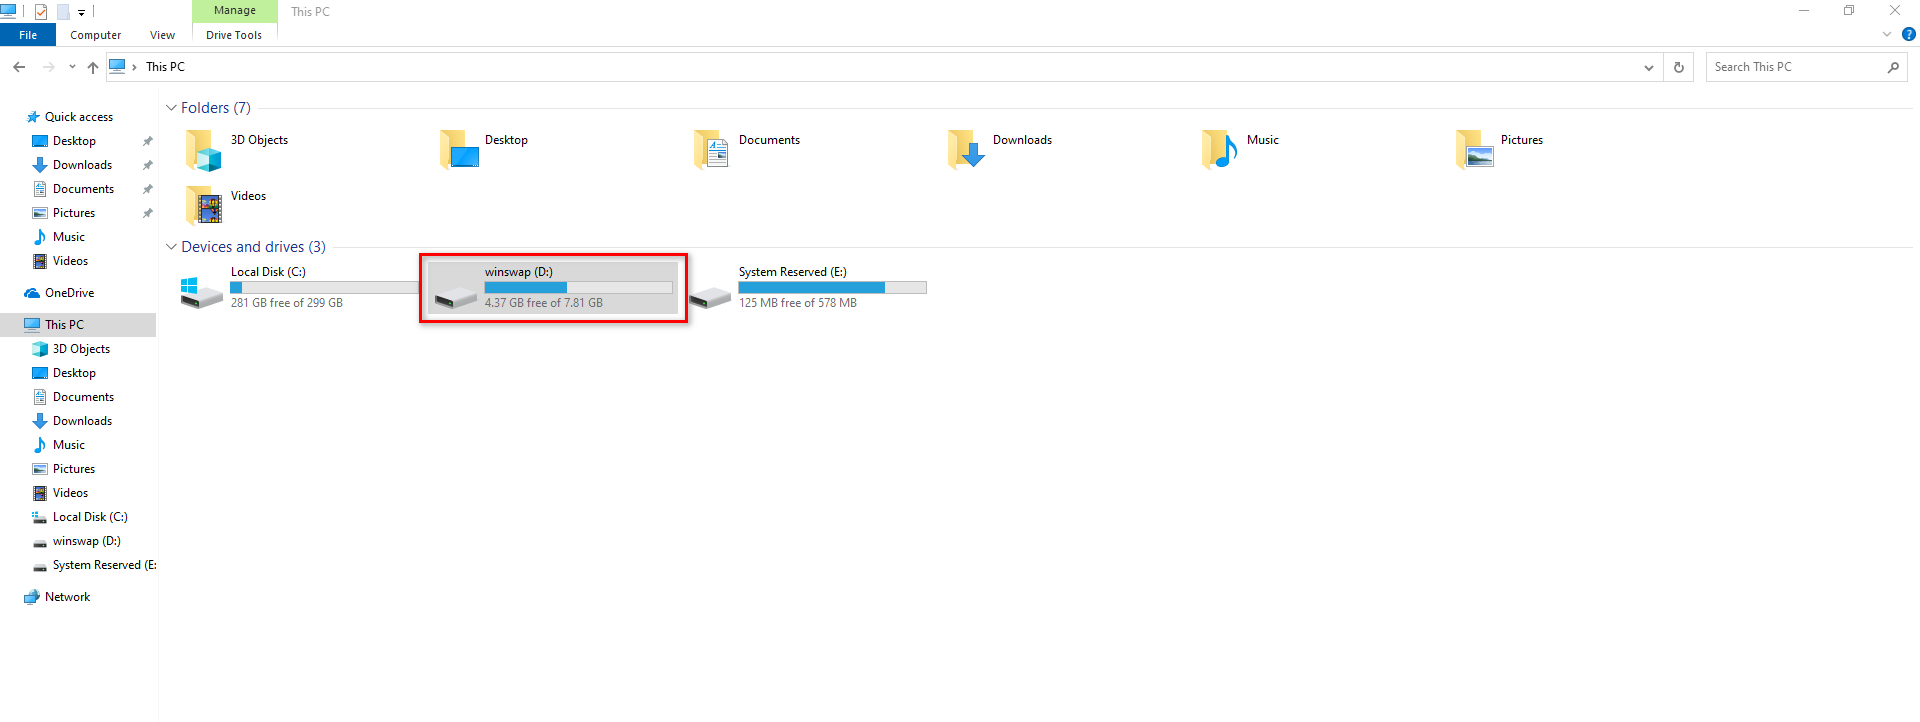
Disk space information about VOI endpoints
The disk space information about a VOI endpoint is as follows:
· Total disk space = space occupied by the endpoint's operating system (about 4 GB) + data disk space + space occupied by the image VHD file + system disk space + remaining space.
· The system disk size and data disk size are configurable.
· When a guest operating system runs on a VOI endpoint, the endpoint loads the image VHD file in the disk to the system disk. In this scenario, the system disk space = space occupied by the guest VM's image VHD file + remaining space of the system disk.
Figure 171 shows the disk space information about a C206V endpoint. The data disk size is 2 GB, the system disk size is 120 GB, and the image VHD file size is 15 GB.
Figure 171 Disk space information about C206V endpoint
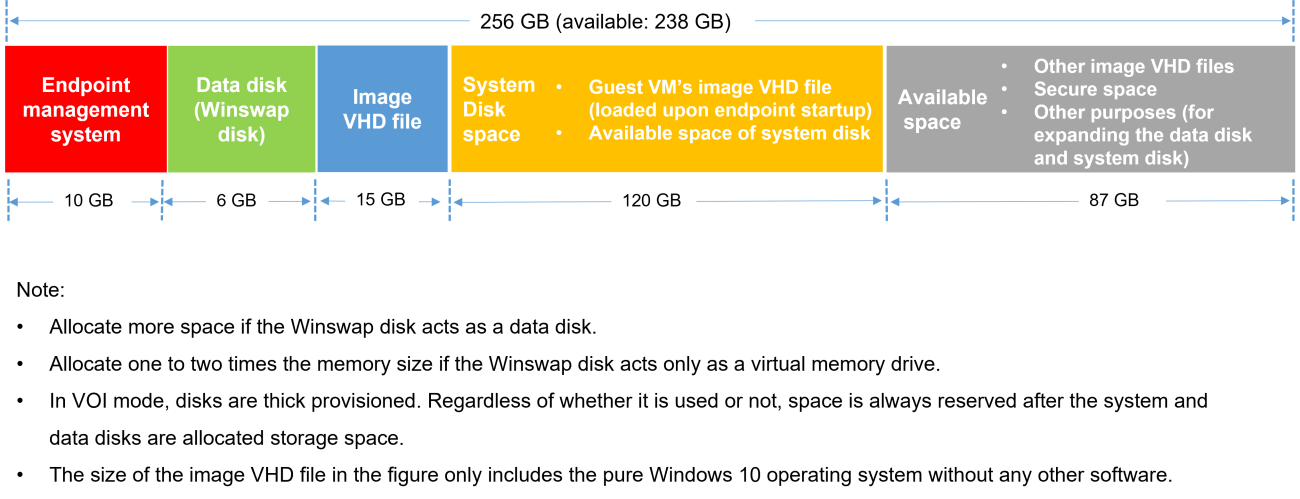
Calculate and plan the system disk size and data disk size for a VOI flavor as follows:
· Set the data disk size based on the Winswap data disk application scenario, as shown in Figure 171.
· Estimate the image VHD file size, which is the sum of the operating system size and the size of the installed applications.
· To use image switchover in an education scenario, reserve space for other image VHD files.
· Calculate the system disk size based on the above planning.
Configuring teaching storage
Teaching storage configuration includes local storage settings and GlusterFS storage settings. In a single-host system, you can use local storage settings only to configure teaching storage. In a cluster system, you can configure GlusterFS storage settings on all hosts after local storage settings are configured.
Creating a teaching image storage volume
Perform this task to format an idle disk on a host, and then mount the disk to the local storage path /vms/learningspace, which is used for teaching VM operation and teaching image local storage (located in the SSD disk of the host) and can provide efficient VM operation experience.
To create a teaching image storage volume:
1. From the navigation pane, select Data Center > Teaching Storage.
2. Click Create.
Figure 172 Creating a teaching image storage volume
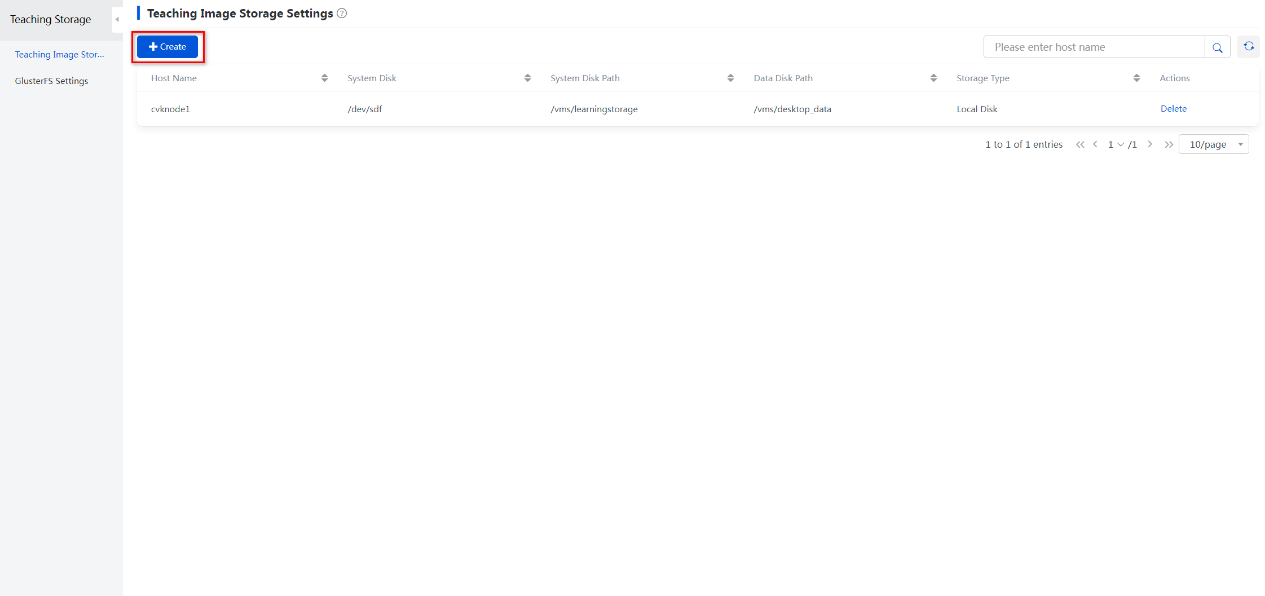
3. In the dialog box that opens, select a storage type, and then click Next.
Options for the storage type include Local Disk and Shared Storage. This section uses Local Disk as an example.
Figure 173 Selecting a storage type
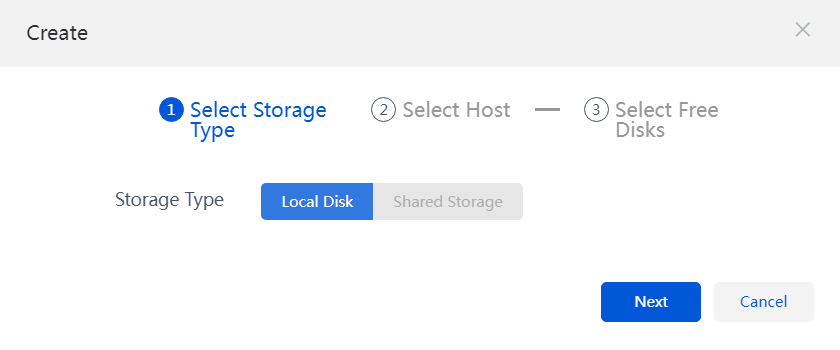
4. Select a host pool, storage cluster, and host, and click Next.
Figure 174 Selecting a host pool, storage cluster,and host
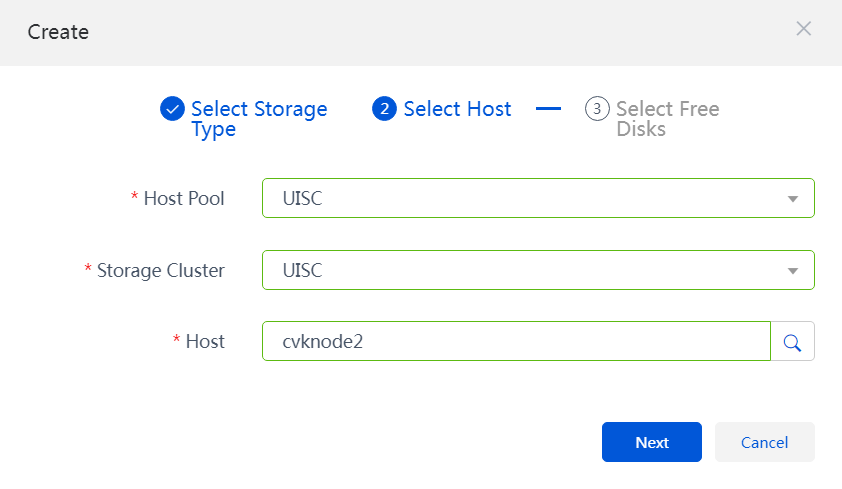
5. Select a free disk, and click OK.
6. In the dialog box that opens, enter CONFIRM (case-insensitive), and then click OK.
|
|
CAUTION: · The selected free disk must be an SSD disk. You can confirm the disk type on the BIOS interface. · The selected disk will be formatted, which might cause data loss on the disk. Make sure you are fully aware of the impact of this operation. |
Figure 175 Selecting a free disk
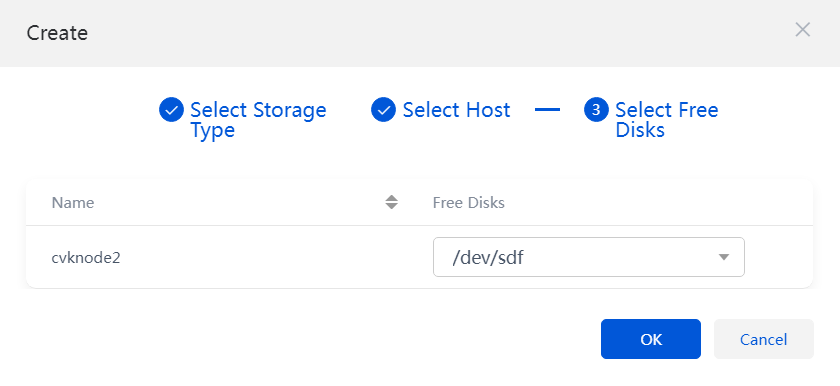
Figure 176 Confirming the disk formatting
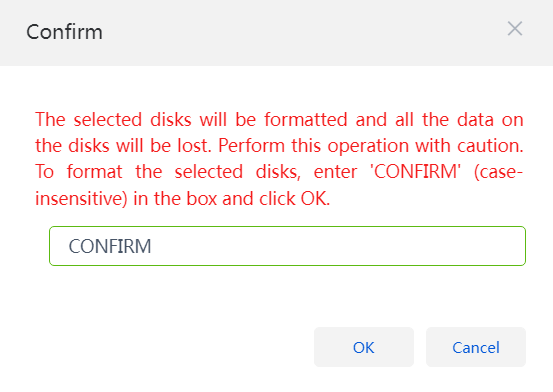
Figure 177 Newly created teaching image storage volume
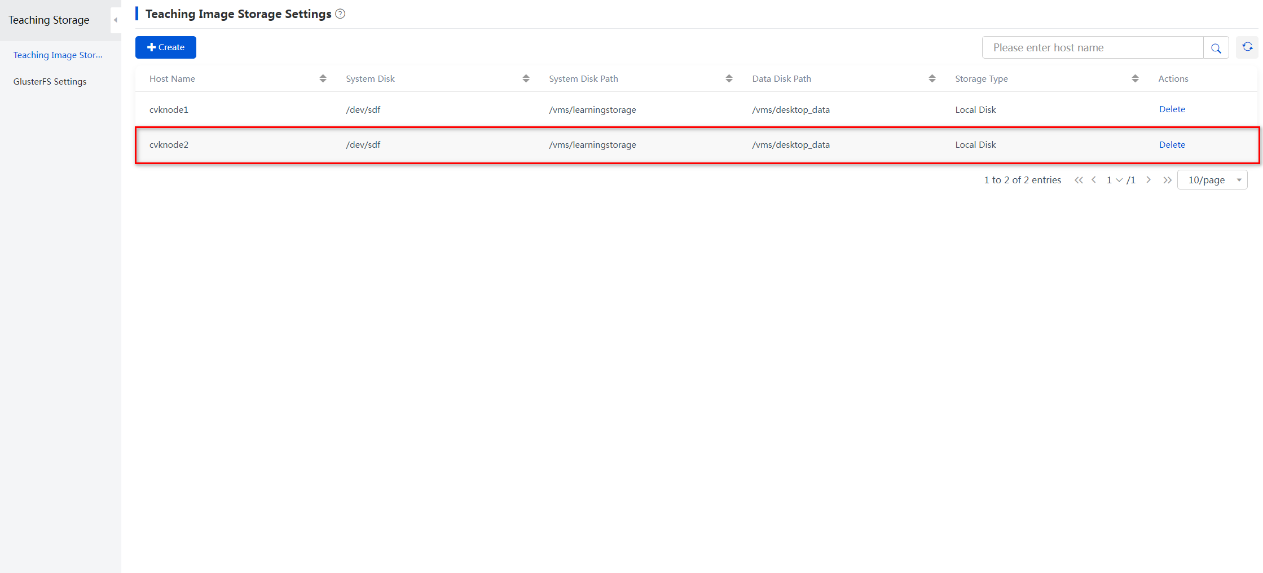
Configuring GlusterFS storage
GlusterFS features high expandability, high availability, and super-high performance, and it is applicable to school scenarios that require high system performance.
Adding a vSwitch
For a cluster to use GlusterFS storage, you must add a storage vSwitch with the same name on each host that has GlusterFS configured.
If the management node in the Learningspace cluster will not be used as a service node, to use GlusterFS storage, you must add a storage vSwitch on the management node, and make sure the name of the storage vSwitch is the same on each node. Add the management node to the cluster, add a storage vSwitch, and then delete the management node from the cluster.
To add a vSwitch:
1. From the navigation pane, select Data Center > Virtualization > Cluster name.
2. Select a host on the left, click the vSwitches tab, and click Add.
Figure 178 Adding a vSwitch
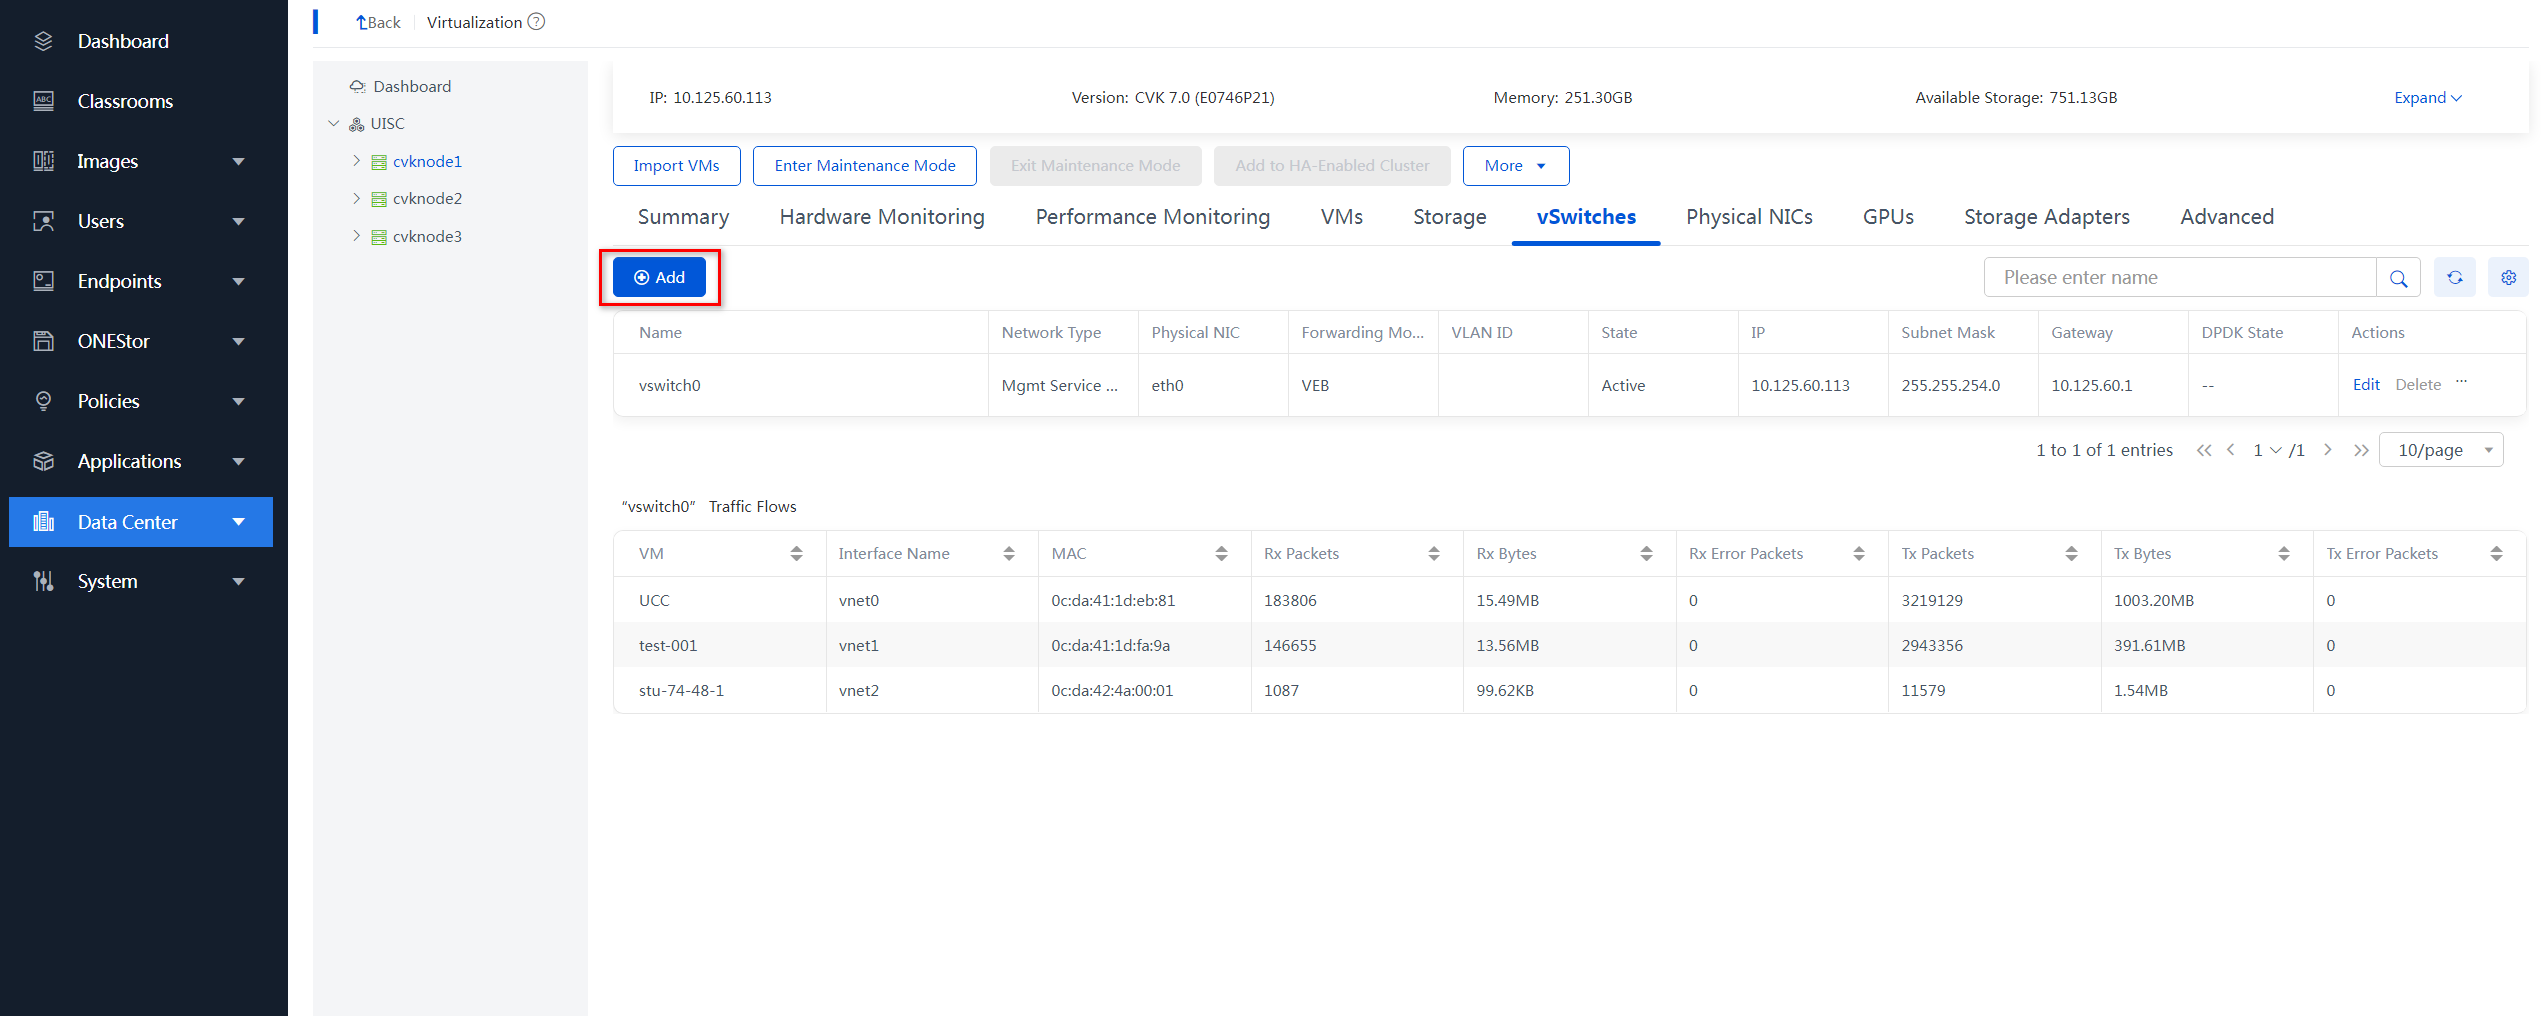
3. In the dialog box that opens, configure basic information as required, and click Next.
Select Storage for the Network Type field.
Figure 179 Configuring basic information for the vSwitch
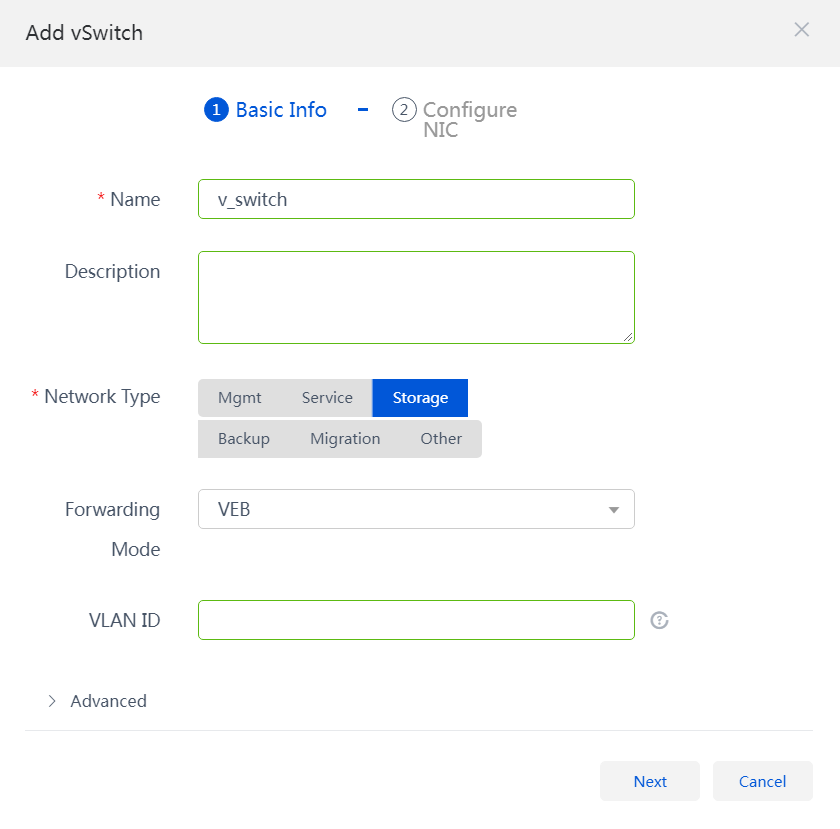
4. Configuring network parameters, and click OK.
If you specify multiple physical NICs for the vSwitch, you must configure the link aggregation mode and LB mode.
The gateway configuration is not required for the new vSwitch.
Figure 180 Configuring network parameters
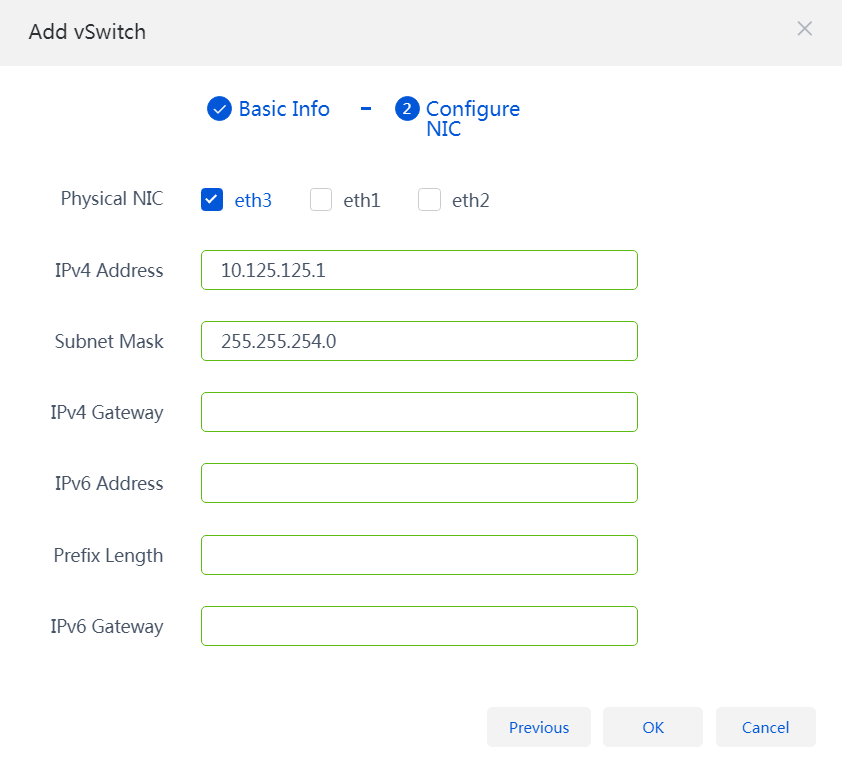
Figure 181 Newly added vSwitch
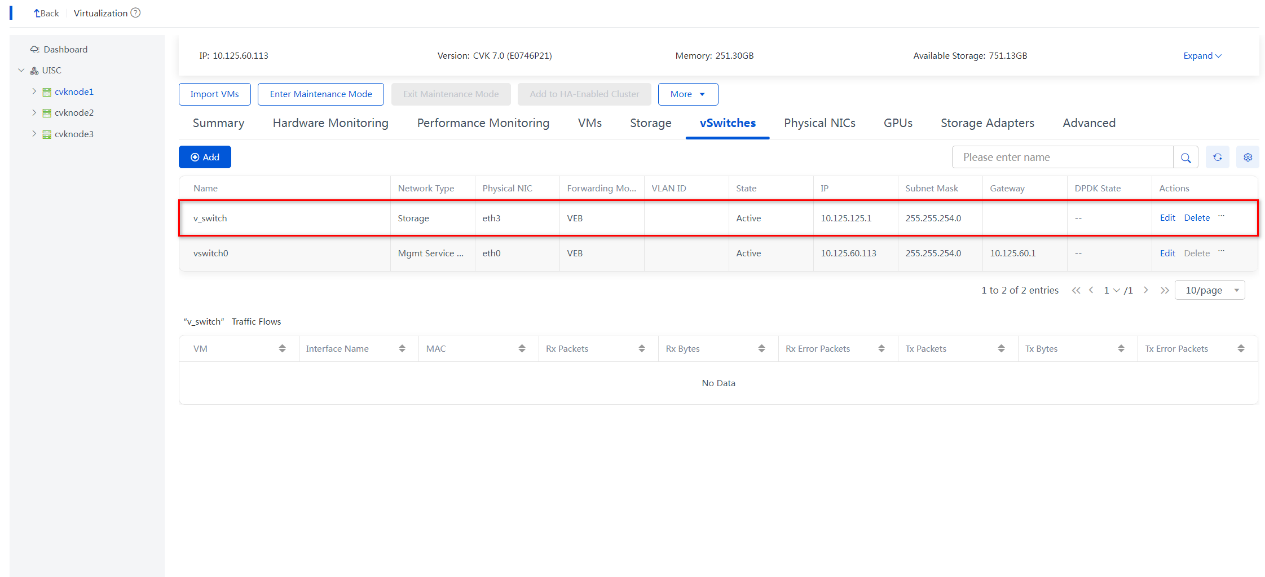
5. Use the above procedures to add vSwitches with the same name on other hosts.
Creating a GlusterFS volume
1. Creating teaching image storage volumes on all hosts in the cluster. For more information, see "Creating a teaching image storage volume."
2. From the navigation pane, select Data Center > Teaching Storage > GlusterFS Settings.
3. Click Create Volume.
Figure 182 Creating a GlusterFS volume
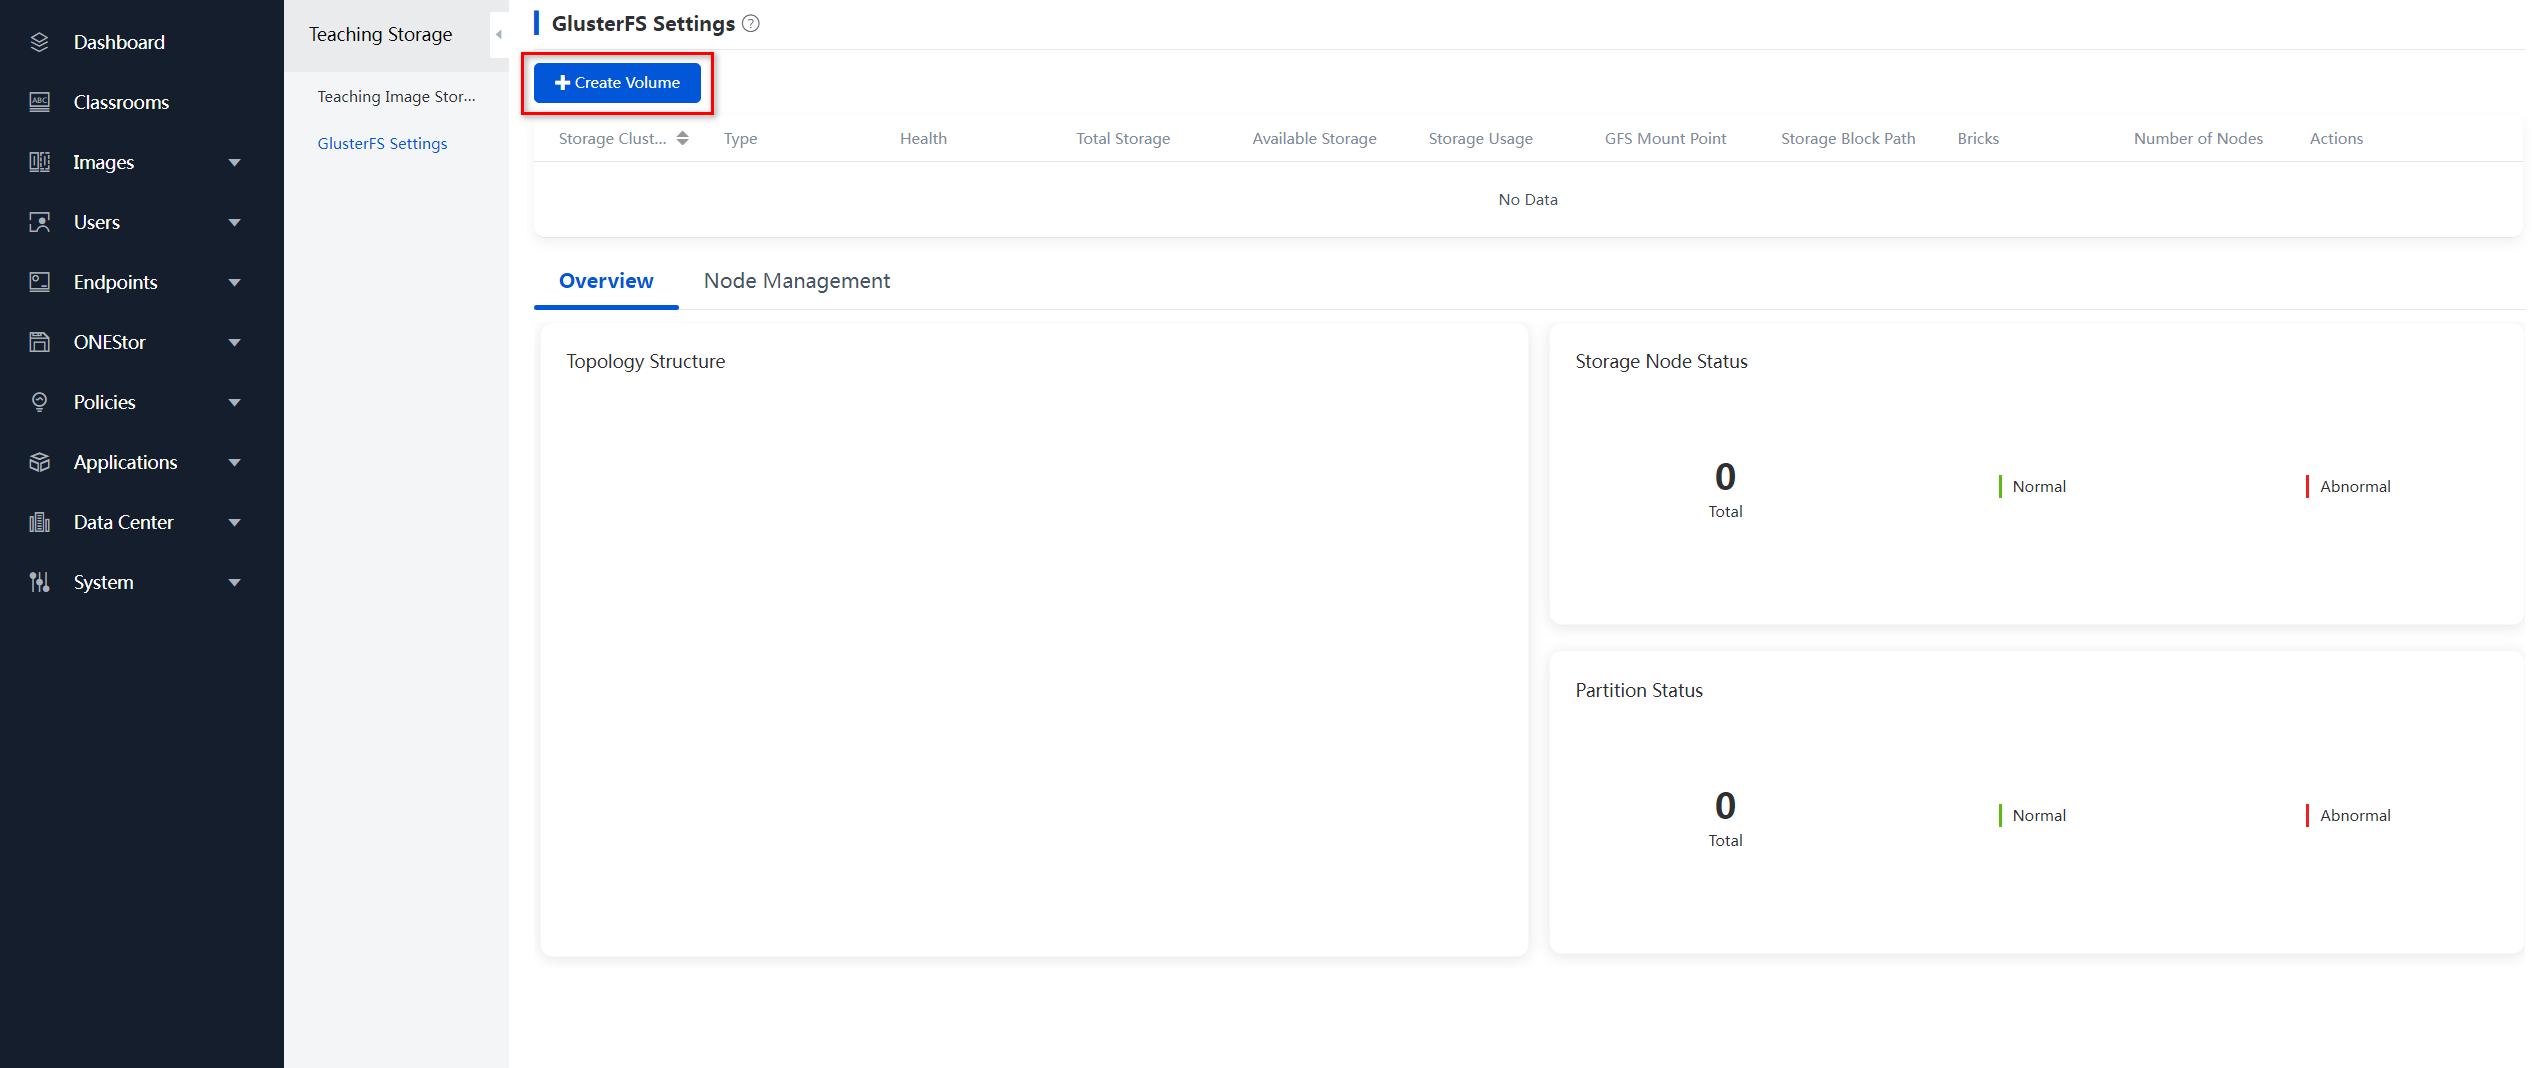
4. In the dialog box that opens, configure parameters such as type, storage cluster, host pool, vSwitch and topology type, and click OK.
Select the newly added vSwitch for the Select vSwitch field.
If you select Teaching Image Storage, GlusterFS is used for storing course images and desktop VM files, and the GFS mount point and the storage block path are default settings and cannot be edited. If you select Custom Storage, GlusterFS is used for storing space campus files, and you can define a GFS mount point and storage block path as needed.
GFS Mount Point: Directory where the GFS storage will be mounted.
Storage Block Path: Directory where the GlusterFS physical storage block resides.
Figure 183 Configuring the GlusterFS volume parameters
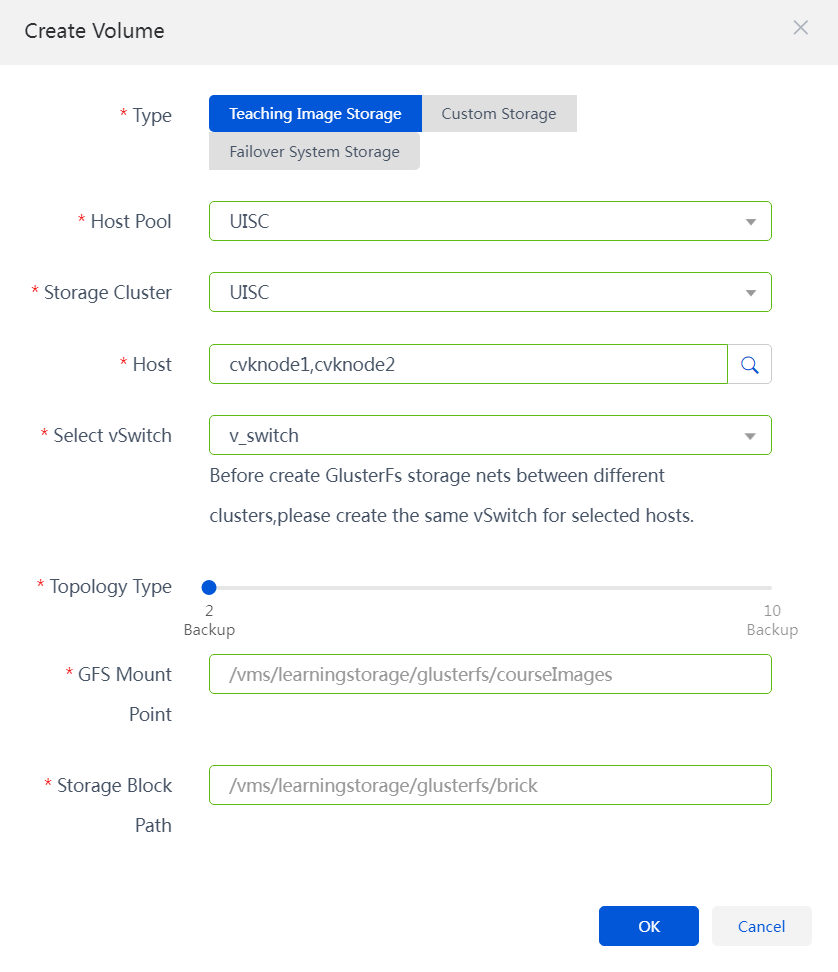
5. The GlusterFS volume creation is completed.
Configuration cautions and guidelines
The severity of configuration cautions and guidelines described in this section includes Critical, Major, and Minor. For services to operate correctly, before you perform operations based on the operational recommendations, understand the impact of each operation.
Major: Deleting a VM agent component
Procedure
Delete files in the VM agent installation path on a VM.
Impact
Some functions on the VM agent become abnormal. If import files are lost, the agent cannot operate correctly, Space Console cannot monitor the VMs and VMs cannot be restarted from endpoints.
Major: Managing disks in the desktop running on a VOI endpoint
Procedure
Manage disks in the desktop running on a VOI endpoint, for example, formatting, expanding, shrinking, and deleting a disk, or adding a drive letter in the desktop running a Windows operating system.
Impact
Failed to start the endpoint, or local data loss occurred on the endpoint.
Minor: Creating a level-2 VOI image
Procedure
Create a level-2 VOI image based on a system image that has a student client installed and deployed in a classroom.
Impact
If a VOI endpoint starts with the level-2 VOI image, the student client installed on the VOI endpoint cannot be automatically deployed in a classroom, and the teacher functions are unavailable.
Guidelines
Verify that the student client is not deployed in any classroom for the system image used for creating a level-2 image.
