H3C Workspace Cloud Desktop Student Client User Manual(Education Scenario)-E1016 Series-5W107-book.pdf  (7.26 MB)
- Released At: 14-12-2023
- Page Views:
- Downloads:
- Table of Contents
- Related Documents
-
|
|
|
H3C Workspace Cloud Desktop |
|
Student Client User Manual (Education Scenario) |
|
|
|
|
Software version: H3C_Workspace-E1016P02
Document version: 5W107-20231128
Copyright © 2023 New H3C Technologies Co., Ltd. All rights reserved.
No part of this manual may be reproduced or transmitted in any form or by any means without prior written consent of New H3C Technologies Co., Ltd.
Except for the trademarks of New H3C Technologies Co., Ltd., any trademarks that may be mentioned in this document are the property of their respective owners.
The information in this document is subject to change without notice.
Using the Learningspace student client (for students)
Managing the student client from the toolbar
Using the Learningspace window
Managing the student client from the system tray
Configuring the Learningspace student client (for the administrator)
Viewing the student client information
Configuring the advanced settings of the student client
Configuring the UCC client (VOI mode) (for the administrator)
Editing the management platform IP
Testing the network connectivity
Connecting to a wireless network
Connecting to a mobile network
Configuring auto computer name reset
Rebooting or shutting down the cloud desktop
Troubleshooting the student client
Method of distinguishing UCC endpoints from non-UCC endpoints (IDV or VOI endpoints)
System initialization failure after a VOI endpoint starts
About Learningspace
H3C Workspace Cloud Desktop can be applied to the office scenario, education scenario, or hybrid office and education scenario.
Learningspace is a solution developed based on H3C Workspace Cloud Desktop, orienting to the education scenario. Learningspace includes the following components:
· Space Console—Web-based management platform deployed in a cloud data center. On the space console, an administrator can manage virtual desktops, courses, classrooms, accounts, and system parameters.
· Learningspace teacher client—Installed on teacher endpoints, PCs for example. With a Learningspace teacher client, you can teach classes, manage student clients, manage assignments, and manage teaching software. The teacher client supports bulk operations for ease of use. You can start or stop a class, or shut down or start all student clients with only one click.
· Learningspace student client—Installed on student endpoints, thin client C113L+ or fat client C107V for example. In the current software version, VDI, VOI, and TCI clients are supported. A student can access a cloud desktop to attend classes or select courses for self-study from the student client.
Figure 1 shows the components in Learningspace.
Figure 1 Learningspace components

Prepare the Learningspace course environment as follows:
1. The administrator configure the course, classroom, teacher account, and student account on the space console.
2. The administrator installs the Learningspace teacher client and Learningspace student client on the teacher endpoint and student endpoint, respectively.
3. The teacher registers the teacher client in the classroom and logs in to the teacher client.
4. The teacher registers the student client in the same classroom.
This document describes how to use the Learningspace student client. For information about how to install the student client, see H3C Workspace Cloud Desktop Management Software Installation Guide.
Using the Learningspace student client (for students)
About the default page
Learningspace supports VDI, VOI, and TCI courses. The type of courses supported by the client depends on the type of the endpoint on which the client is deployed. To obtain the type of supported courses, contact the administrator. For more information about courses, see H3C Workspace Cloud Desktop Management Software User Manual.
The default page displayed after the student client starts up varies by authentication configuration for the classroom and the student client type.
· For VDI student clients:
¡ If the classroom requires authentication, the student client displays the login page as shown in Figure 3. After entering a student ID and password, the student logs in to the student client and enters the course page as shown in Figure 2.
¡ If the classroom does not require authentication, the student directly enters the course page as shown in Figure 2.
· For VOI/TCI student clients:
¡ If the classroom does not require authentication, the student directly enters the course page as shown in Figure 4. If the teacher selects a non-default course supported by the endpoint type, the student client will automatically restart and then load the specified VOI course after startup. For more information about the default VOI course, contact the administrator or see H3C Workspace Cloud Desktop Management Software User Manual.
¡ If the classroom requires authentication, the student client displays the login page as shown in Figure 3. After entering a student ID and password, the student logs in to the student client and enters the course page as shown in Figure 4.
Whether a classroom requires authentication depends on the classroom settings on Space Console. To change the authentication setting for the classroom, contact the administrator or see H3C Workspace Cloud Desktop Management Software User Manual.
Figure 2 Default course page on the VDI student client
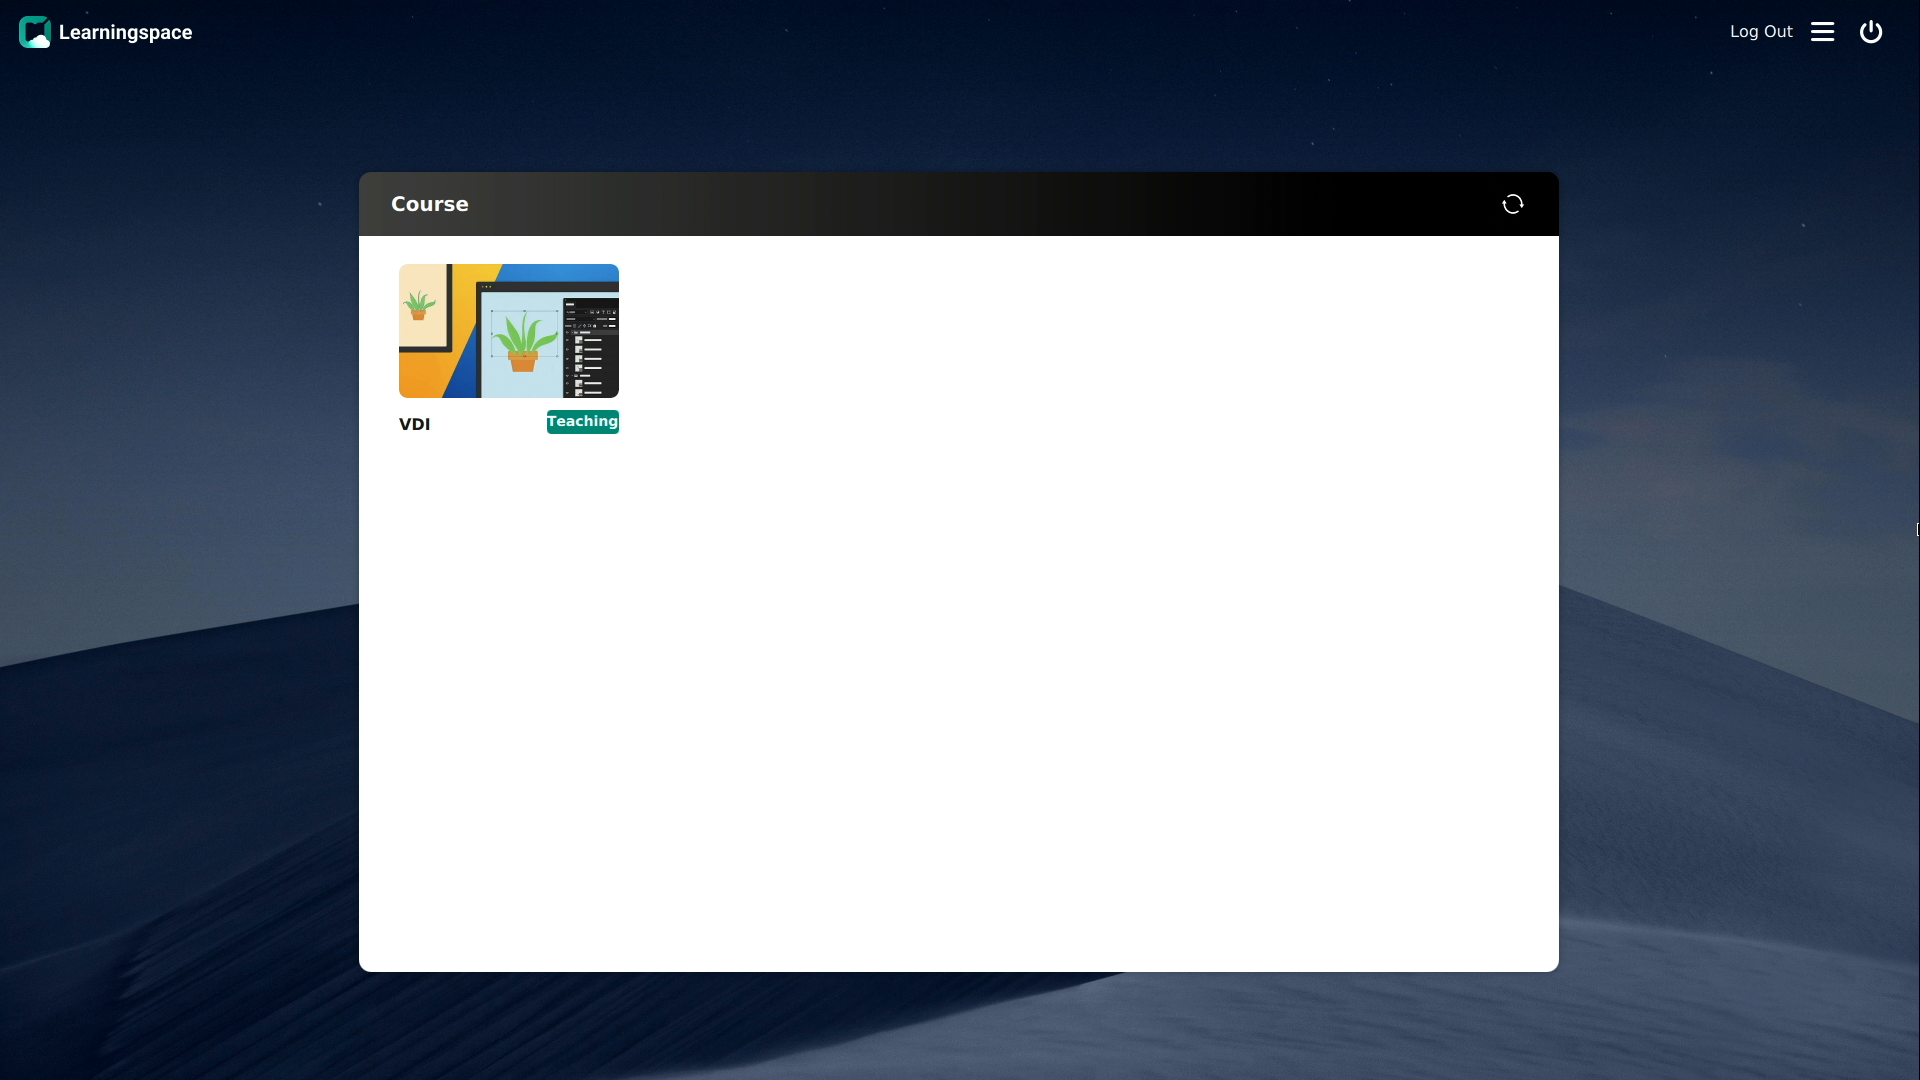
Figure 3 Login page on the student client
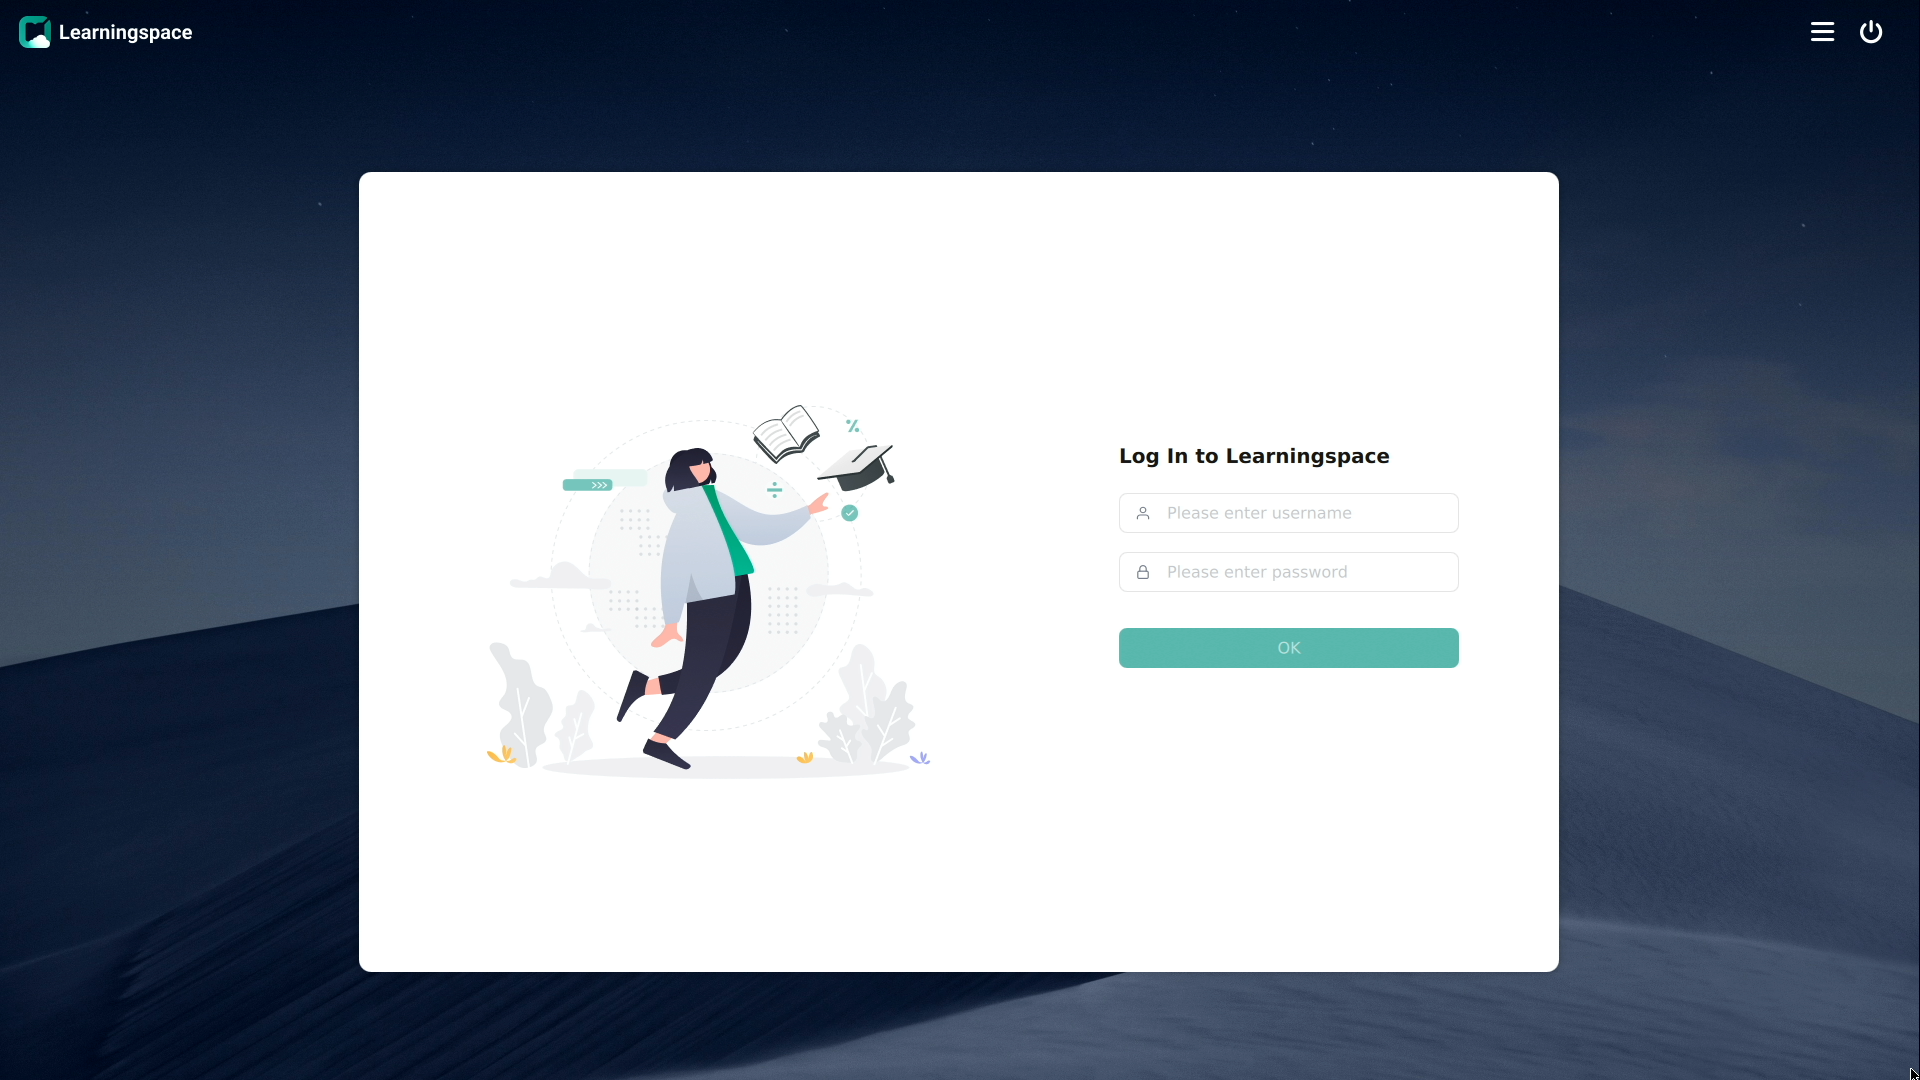
Figure 4 Default course page on the VOI/TCI student client

|
|
NOTE: · This example uses the default course for Windows 10. · If students are allowed to study by themselves, they can double click any course to enter the course desktop for self-study. If students are not allowed to study by themselves, they need to wait for the teacher to start the class before they can enter the corresponding course desktops. Whether students are allowed to study by themselves is set from the teacher client. For more information, see H3C Workspace Cloud Desktop Teacher Client User Manual (Education Scenario). |
About the course page
After the teacher starts a class, the student client will automatically enter the desktop of the course.
Figure 5 Course desktop (for the VDI client)
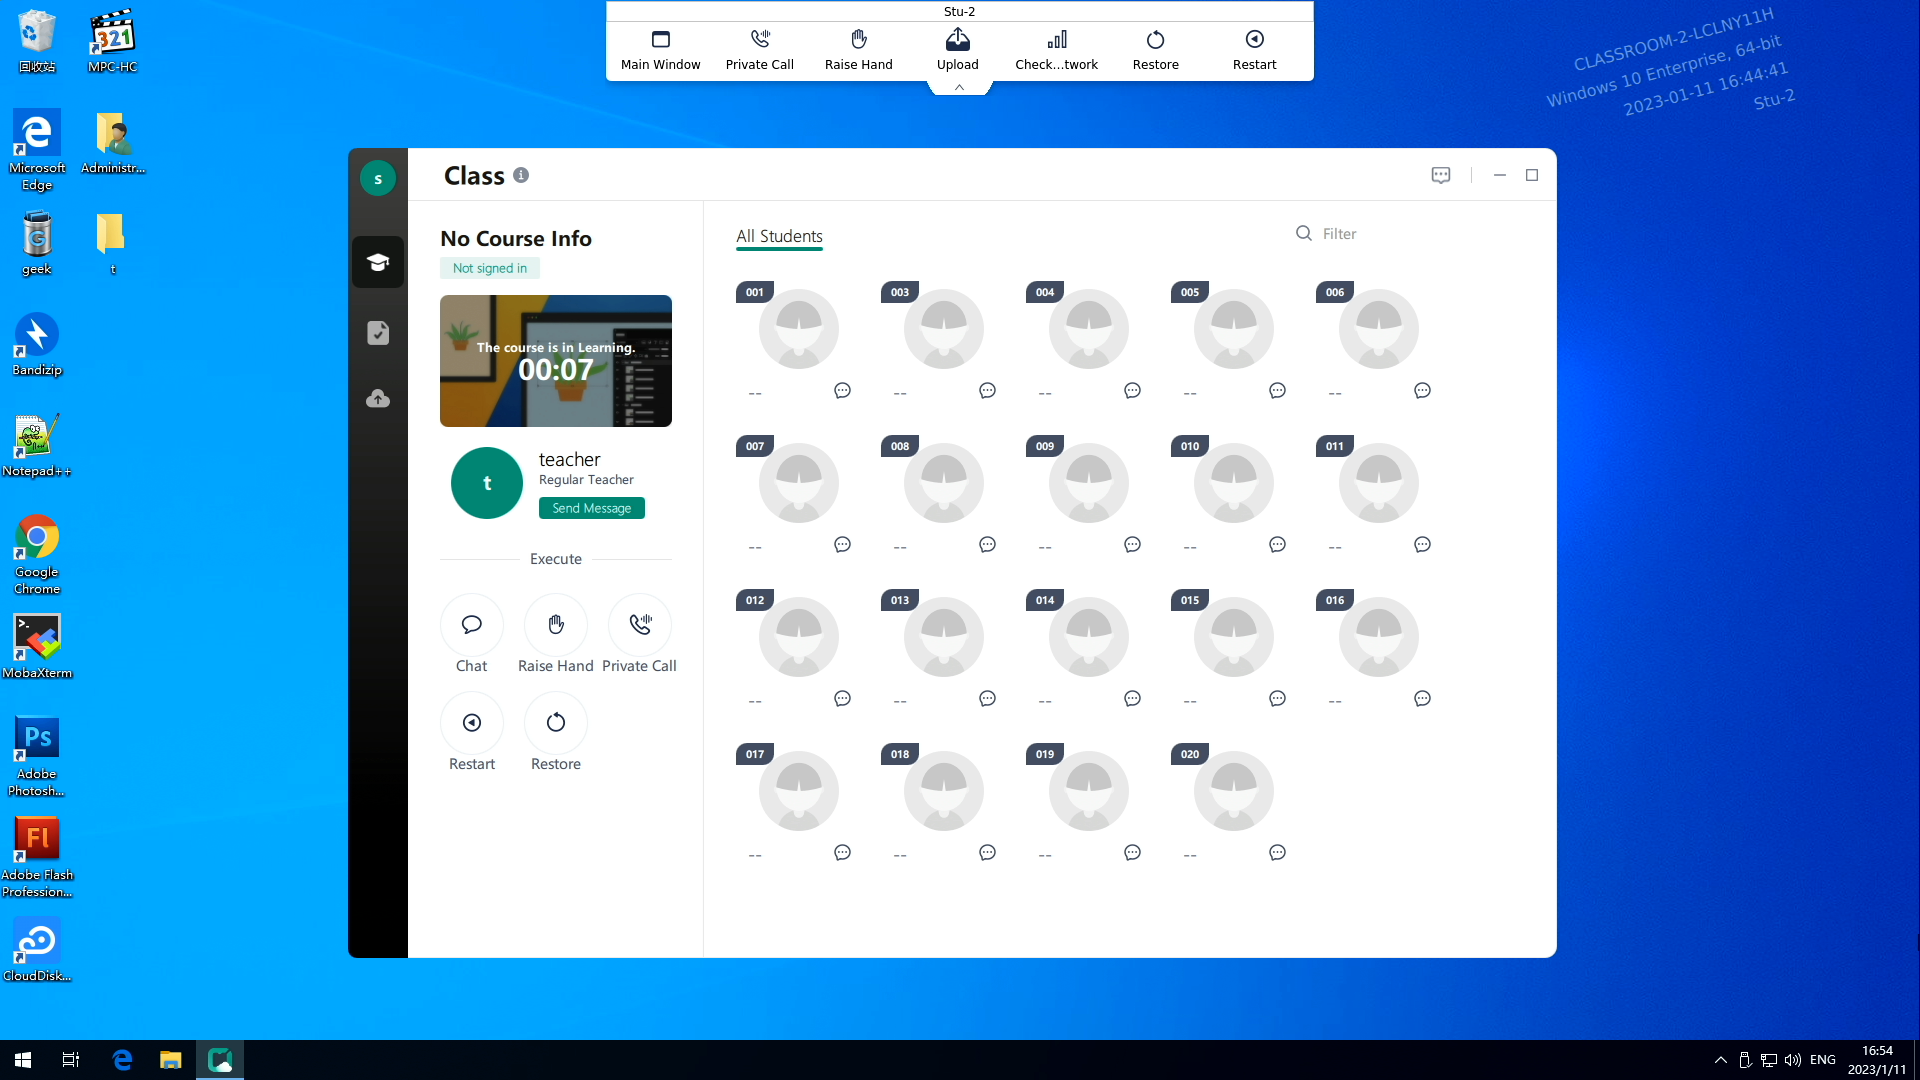
Figure 6 Course desktop (for the VOI/TCI client)
This example uses the default course in Windows 10.
Managing the student client from the toolbar
After the student client enters the course desktop, a toolbar is displayed on the top as shown in Figure 7. You can use the toolbar to manage the student client.
If the toolbar is hidden, you can display
it through the displaying the toolbar feature in the system tray in the bottom
right corner of the system. For more information, see "Managing the student client from the system
tray." To hide the toolbar, click the ![]() icon in the bottom of the toolbar.
icon in the bottom of the toolbar.
Figure 7 Toolbar on the course desktop (for the VDI client)

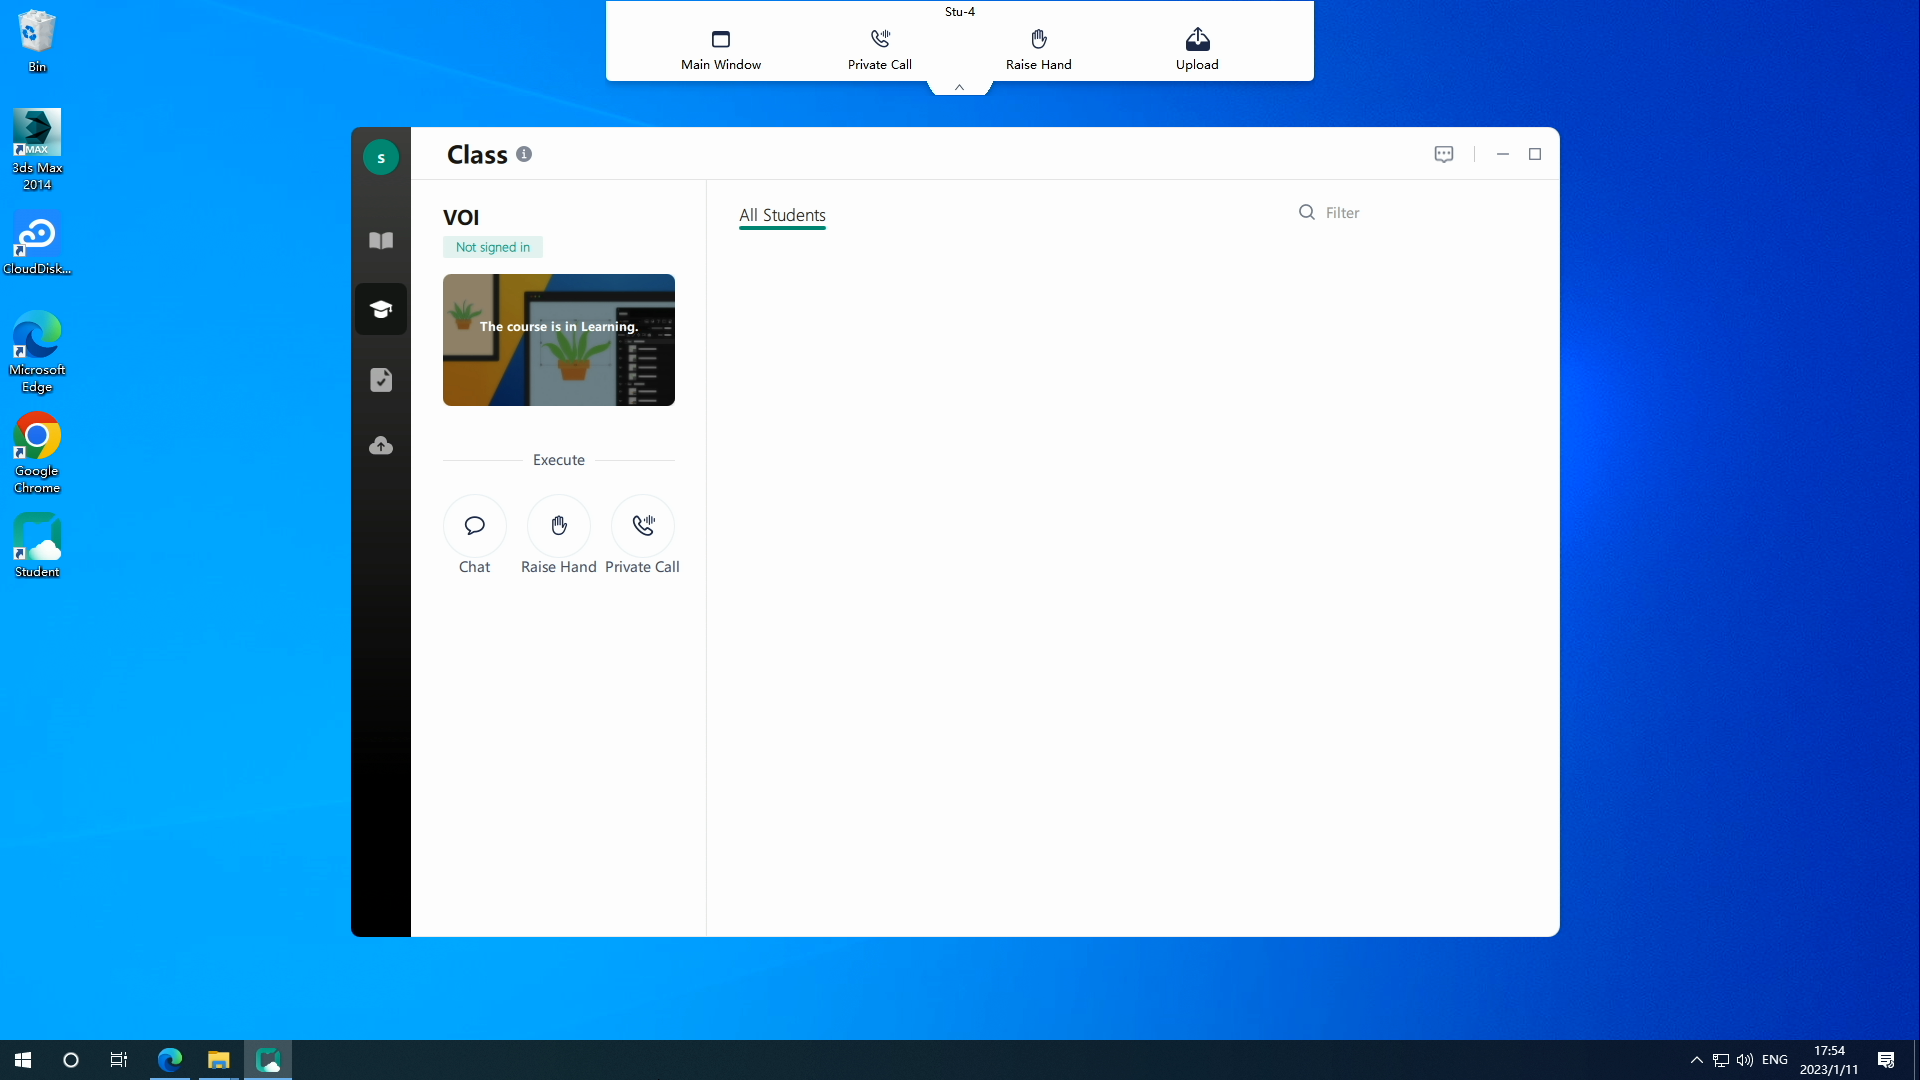
Figure 8 Toolbar on the course desktop (for the VOI/TCI client)

|
Item |
Description |
|
Device ID |
Display the ID of the student client that has registered with the classroom. This ID is generated after the student endpoint has been deployed from the teacher client. |
|
|
Open the Learningspace window. |
|
|
Raise a hand to indicate that you want to speak. This feature is available only when the raise hand feature is enabled on the class management page of the teacher client. |
|
|
Upload assignments. You can upload a file folder or a file. Uploading an empty file folder or file is not allowed. This feature is available only when the Upload by Students parameter is enabled on the assignment collection configuration page of the teacher client. If the Upload by Students parameter is disabled, the assignment can be uploaded only when the teacher initiates the assignment collection. For more information about uploading assignments, see Figure 9. |
|
|
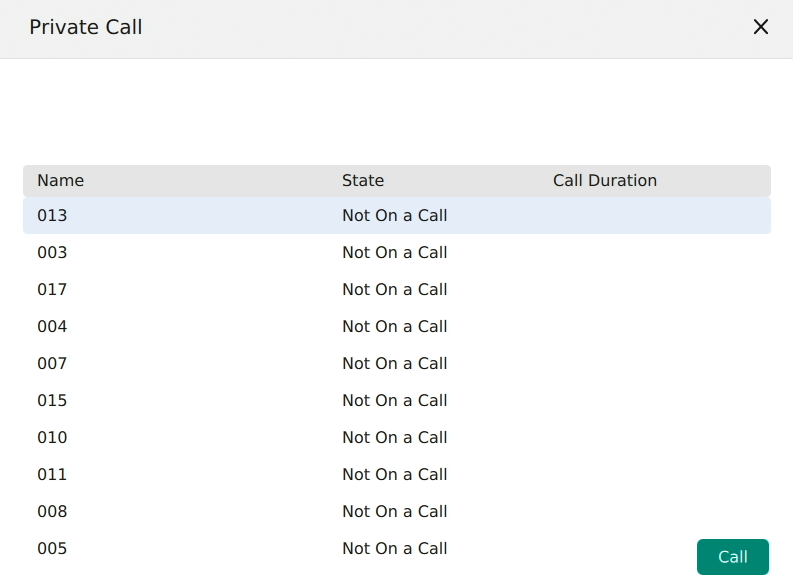
Place a private call to another student. The called student can choose to answer or reject your call. This feature is available only when the private call feature is enabled on the preferences page of the teacher client. For more information about placing a private call, see Figure 10. |
|
|
Restart the course desktop. This feature is supported only for VDI courses. This feature is available only when the Allow Students to Restart Desktop parameter is enabled on the teacher client. |
|
|
Restore the course desktop to the initial state. This feature is supported only by VDI courses. This feature is available only when the Allow Students to Restore Desktop parameter is enabled on the teacher client. |
|
|
Display the network connectivity on the student client. This feature is supported only by VDI courses. |
Figure 9 Uploading assignments
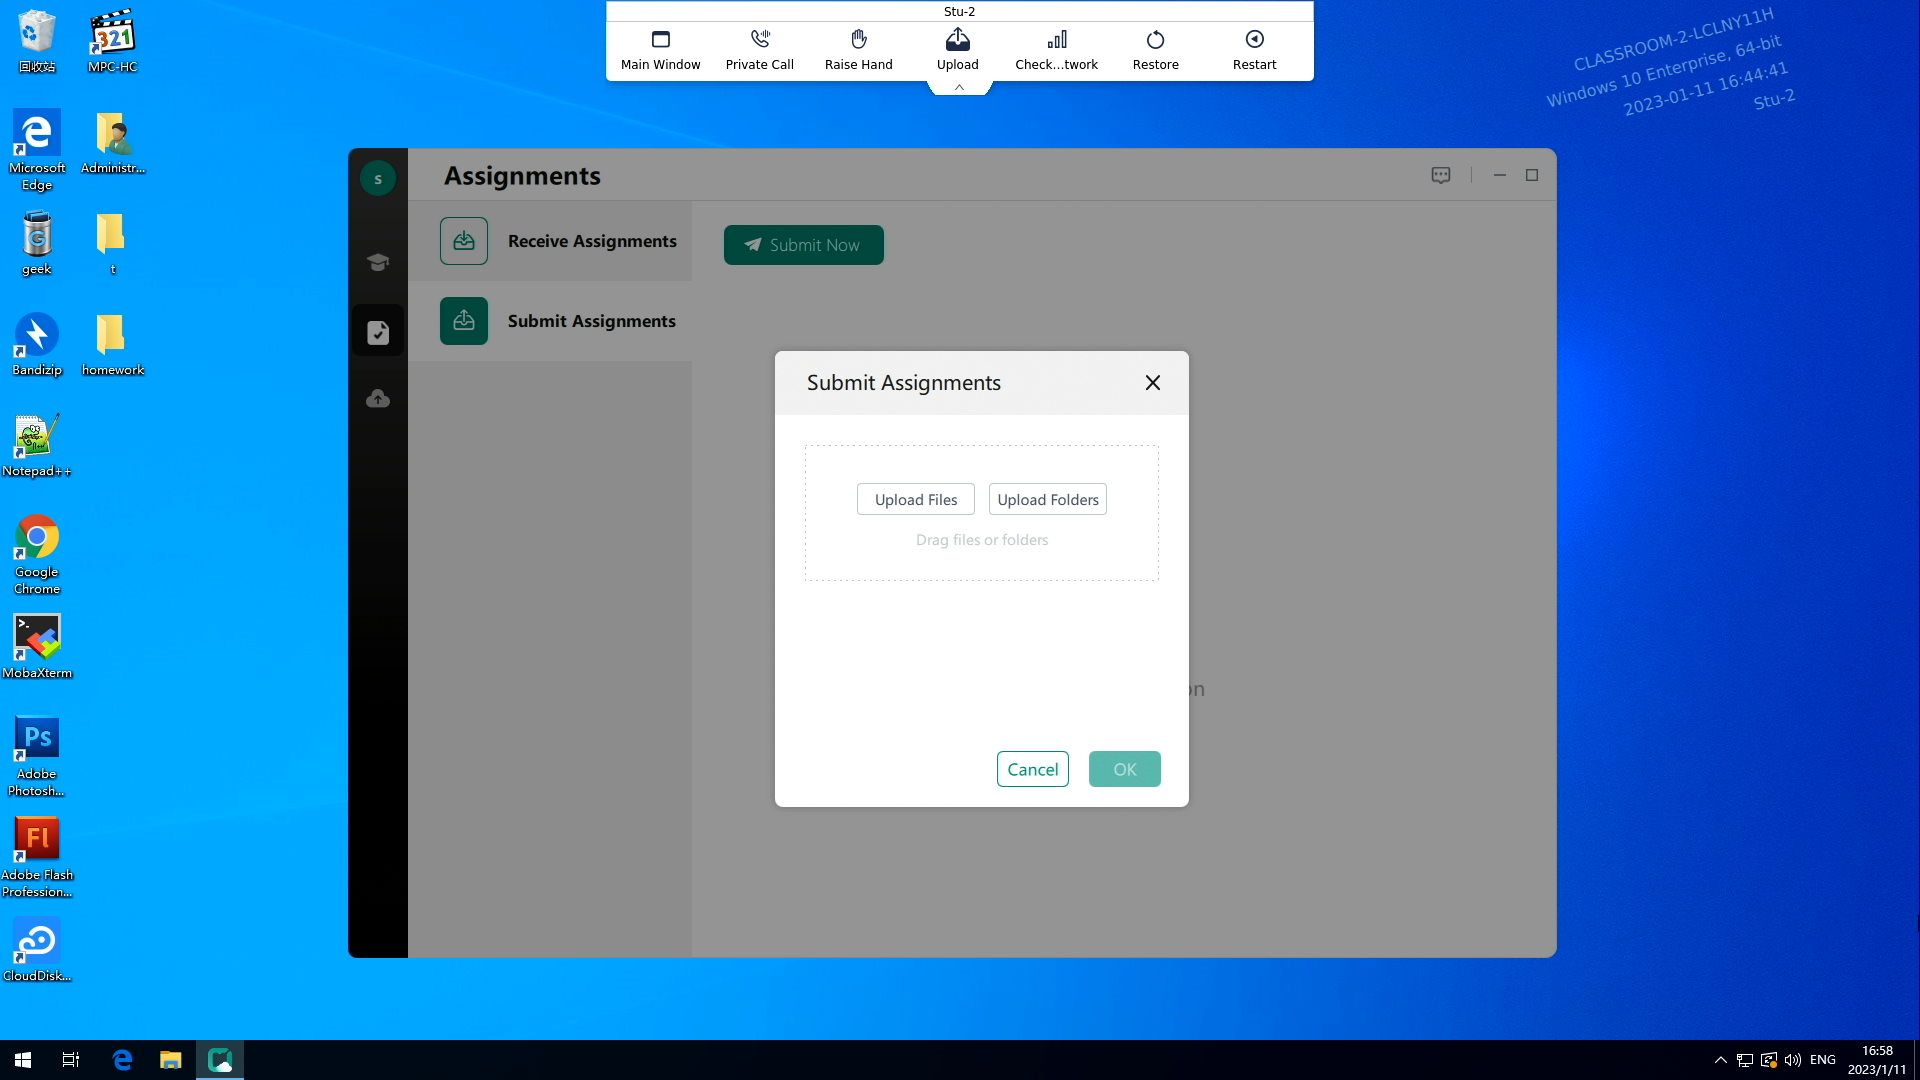
Figure 10 Placing a private call
Using the Learningspace window
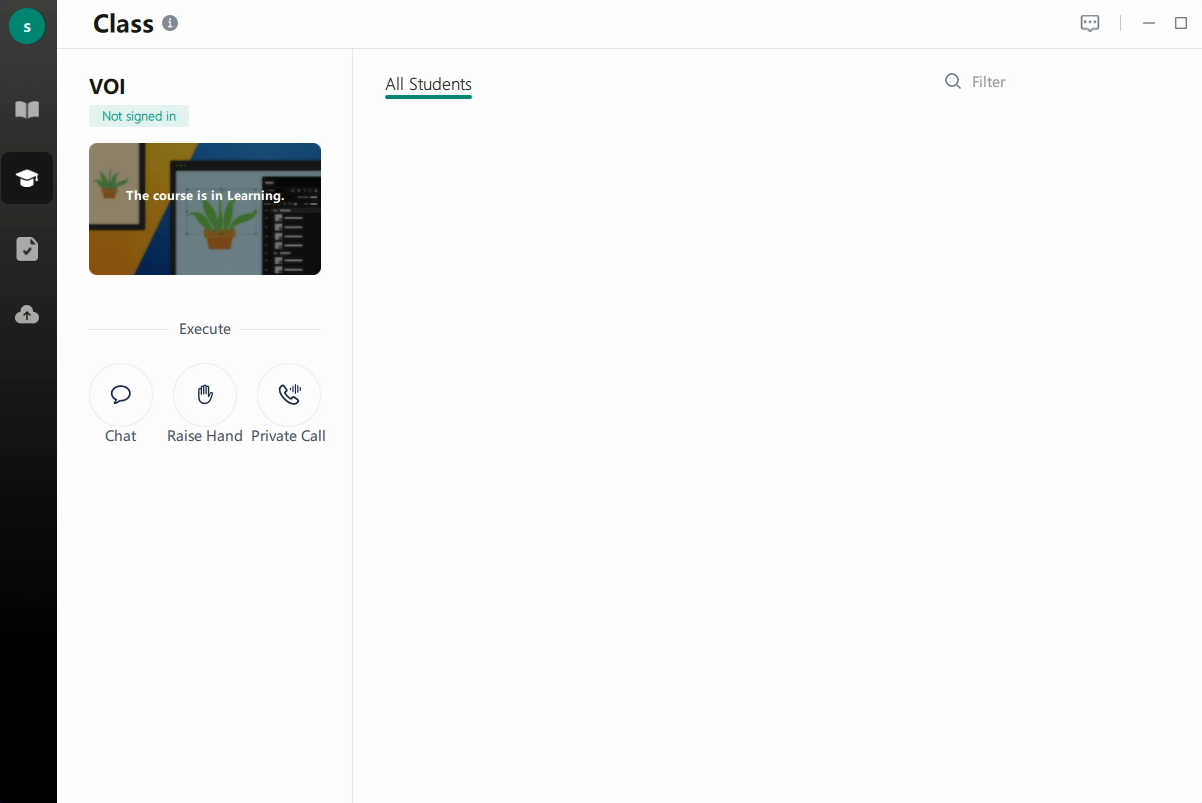
After the student enters the course desktop, the Learningspace window is displayed in the middle of the desktop. The class management page is displayed by default as shown in Figure 11 and Figure 12.
Figure 11 Learningspace window (for the VDI client)
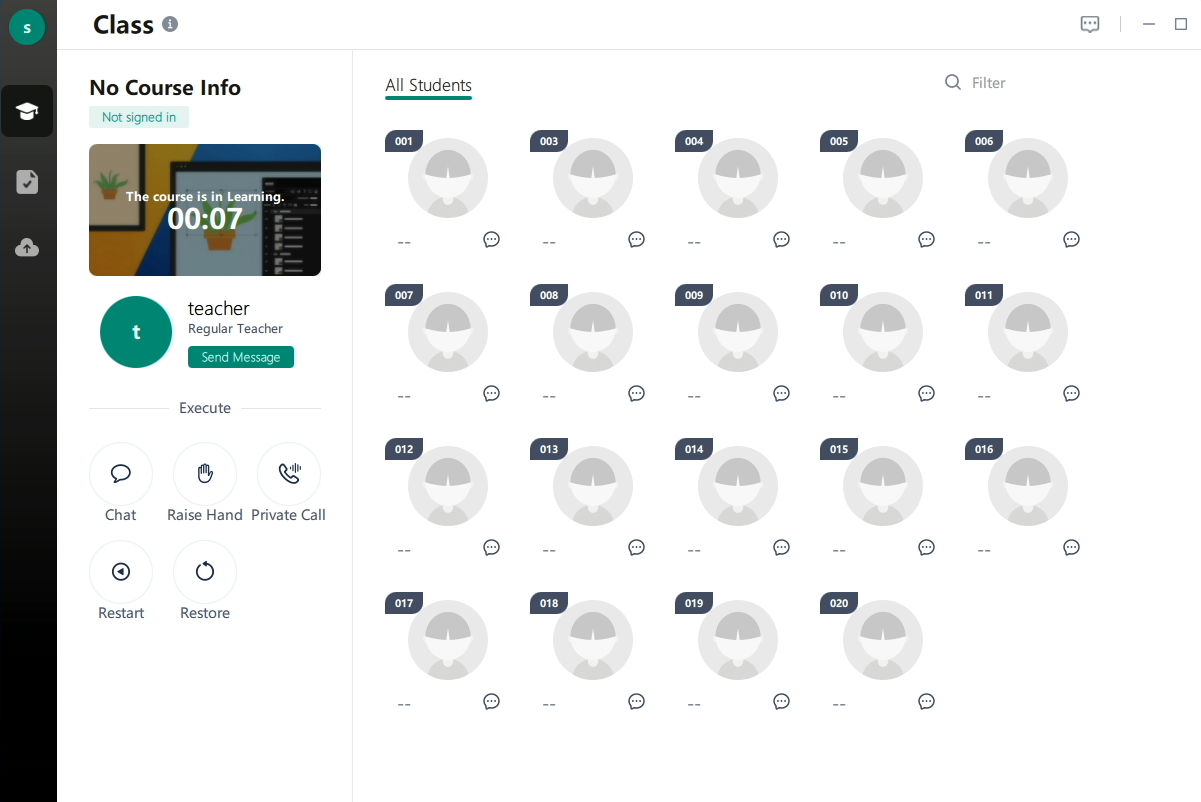
Figure 12 Learningspace window (for the VOI/TCI client)
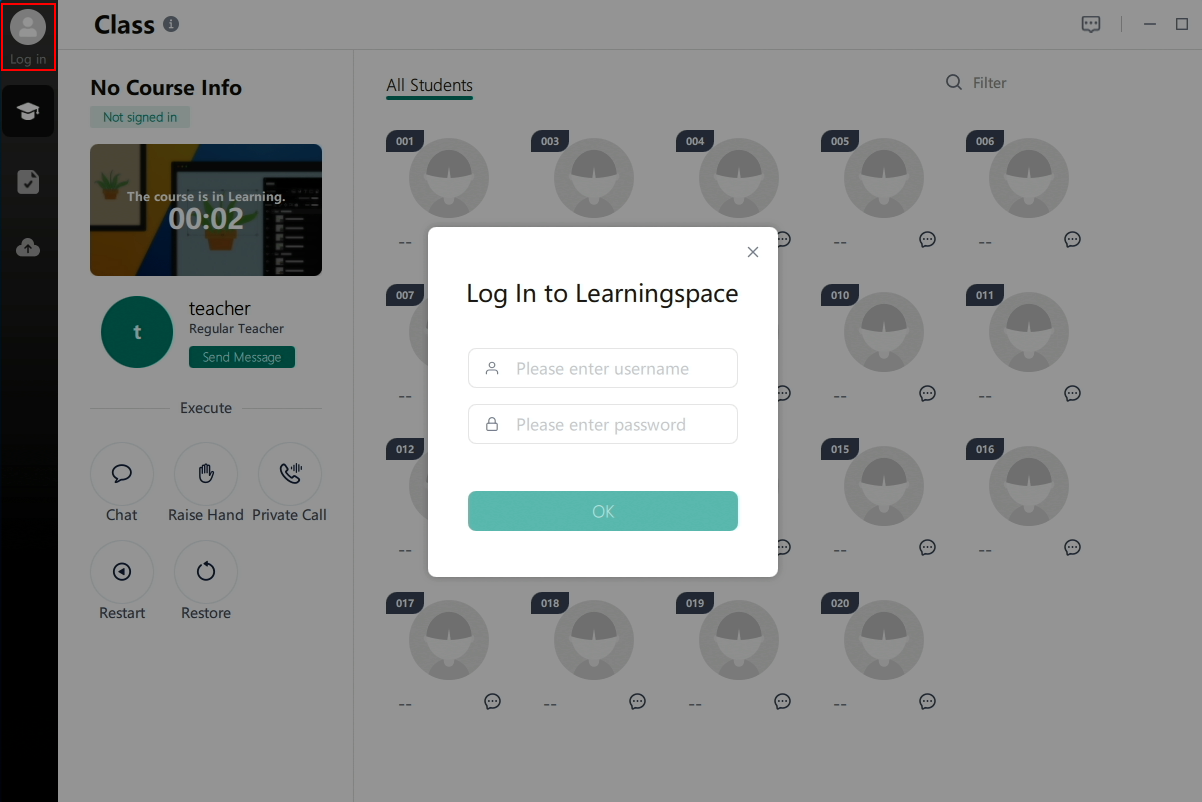
Login
To log in to a student client:
1. Click the icon in the top left corner of the Learningspace window.
2. In the dialog box that opens, enter the username and the password of a student.
3. Click OK.
Figure 13 Logging in to Learningspace
Class
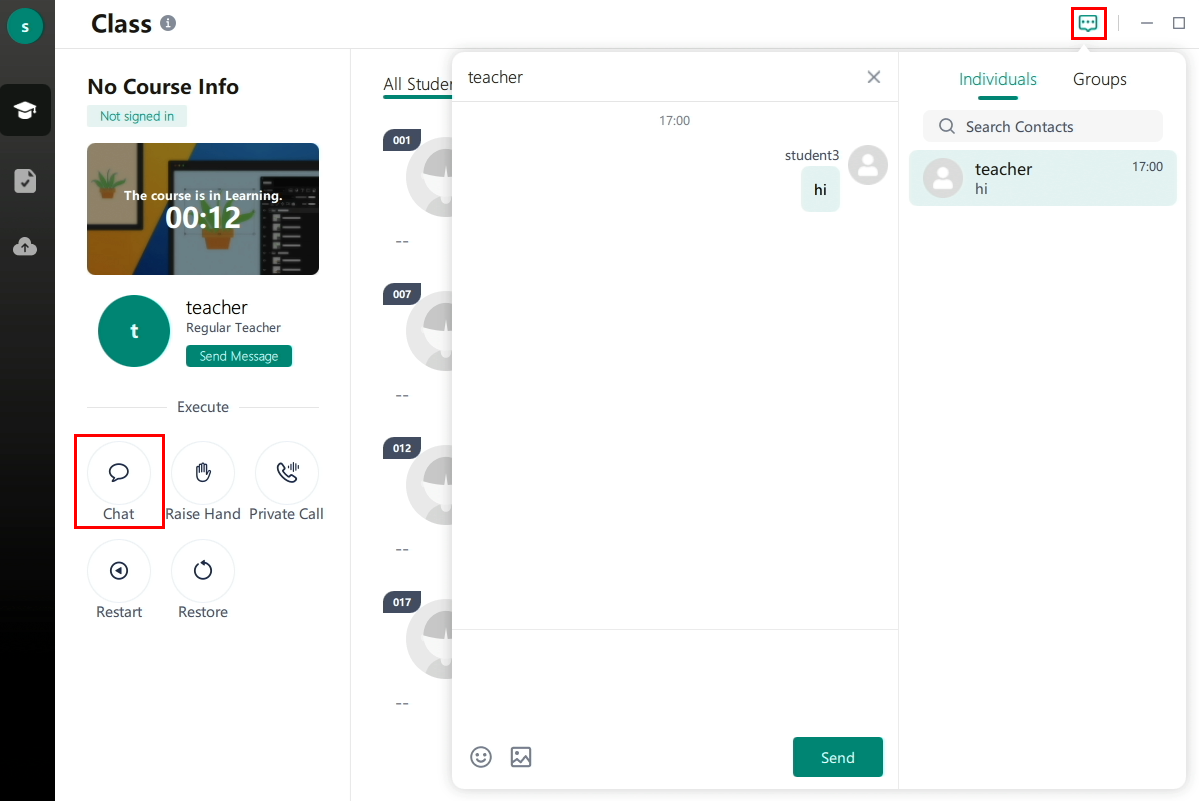
Chat
The student can send text, pictures, and emoji to the teacher, other students, or student groups.
1. To access the chat dialog box, enter the course desktop, select Class from the navigation pane, and then perform one of the following tasks:
¡ To send messages to the regular teacher, click Send Message below Regular Teacher on the class management page.
¡ To
directly send messages to all users, click the Chat icon in the tool pane. Alternatively, click the ![]() icon in the top right corner.
icon in the top right corner.
¡ To
directly send messages to a specific student, right-click another student
desktop on the class management page, and select Send
Message. Alternatively, click the ![]() icon in the bottom right corner of the student desktop.
icon in the bottom right corner of the student desktop.
2. Click a user or user group on the right of the chat dialog box.
3. Perform one of the following tasks:
¡ To send text, enter the text in the input box.
¡ To
send a picture, click the ![]() icon in the
left corner of the input box, and select a picture.
icon in the
left corner of the input box, and select a picture.
¡ To
send an emoji, click the ![]() icon in the
left corner of the input box, and select an emoji.
icon in the
left corner of the input box, and select an emoji.
4. Click Send.
Text receivers can receive reminders of the unread messages.
Figure 14 Chat dialog box
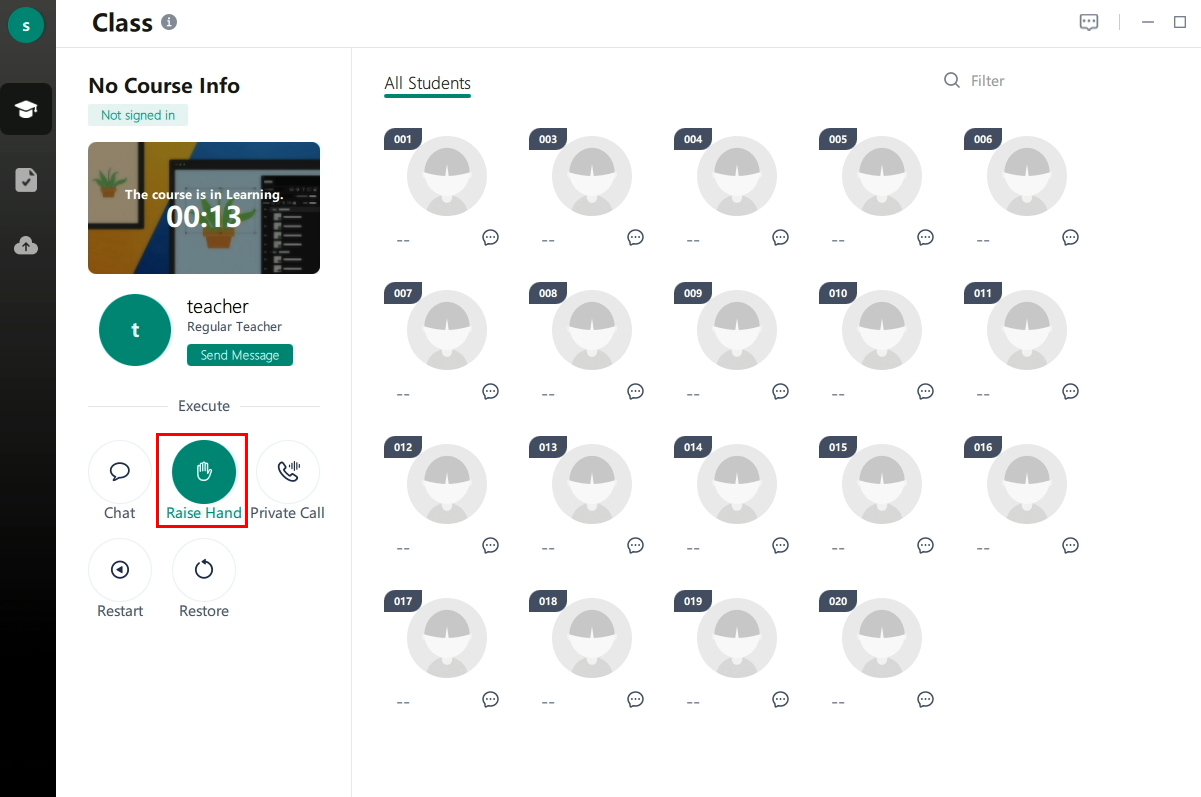
Hand raise
To raise a hand for attention, click the Raise Hand icon in the tool pane on the class management page. For more information, see hand raise as shown in Table 1.
Figure 15 Raise Hand icon
Private call
To access the private call page, click the Private Call icon in the tool pane on the class management page. For more information, see the private call feature as shown in Table 1.
Figure 16 Private Call icon

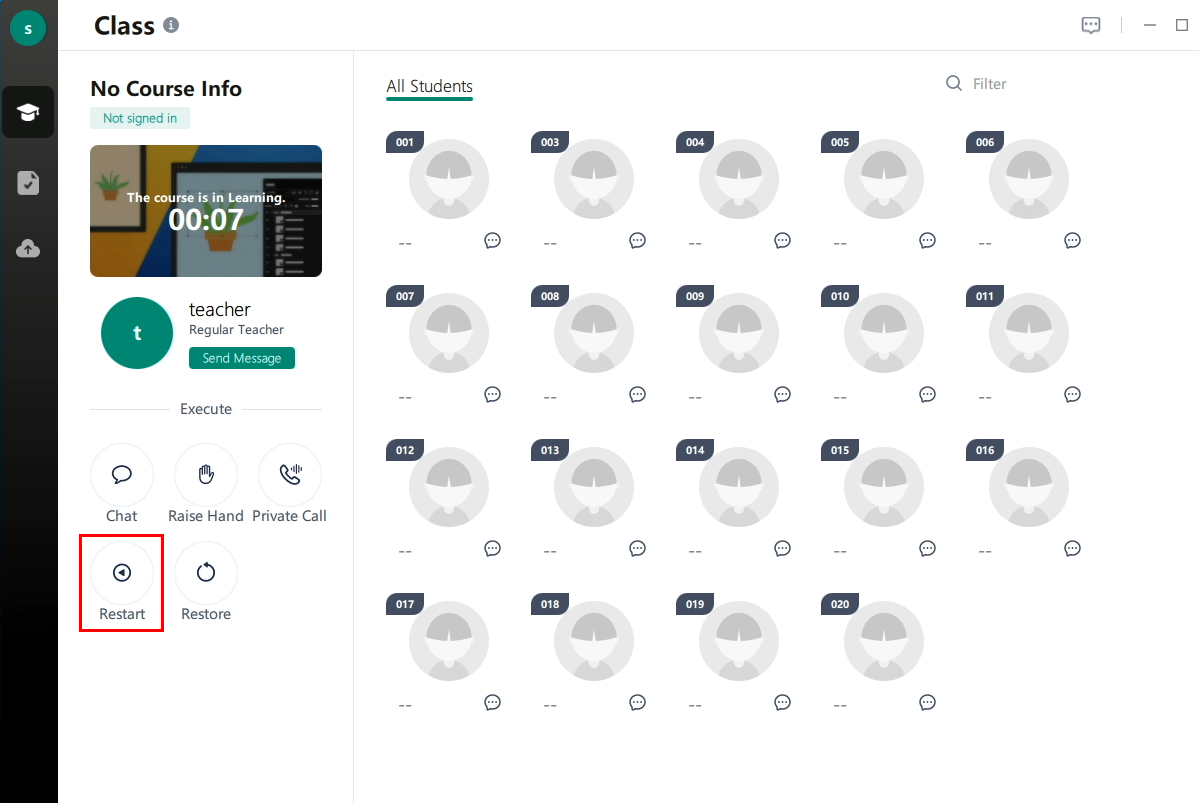
Course restart
To restart the course, click the Restart icon in the tool pane on the class management page. For more information, see the course restart feature as shown in Table 1.
This feature is available only for VDI courses.
Figure 17 Restart icon
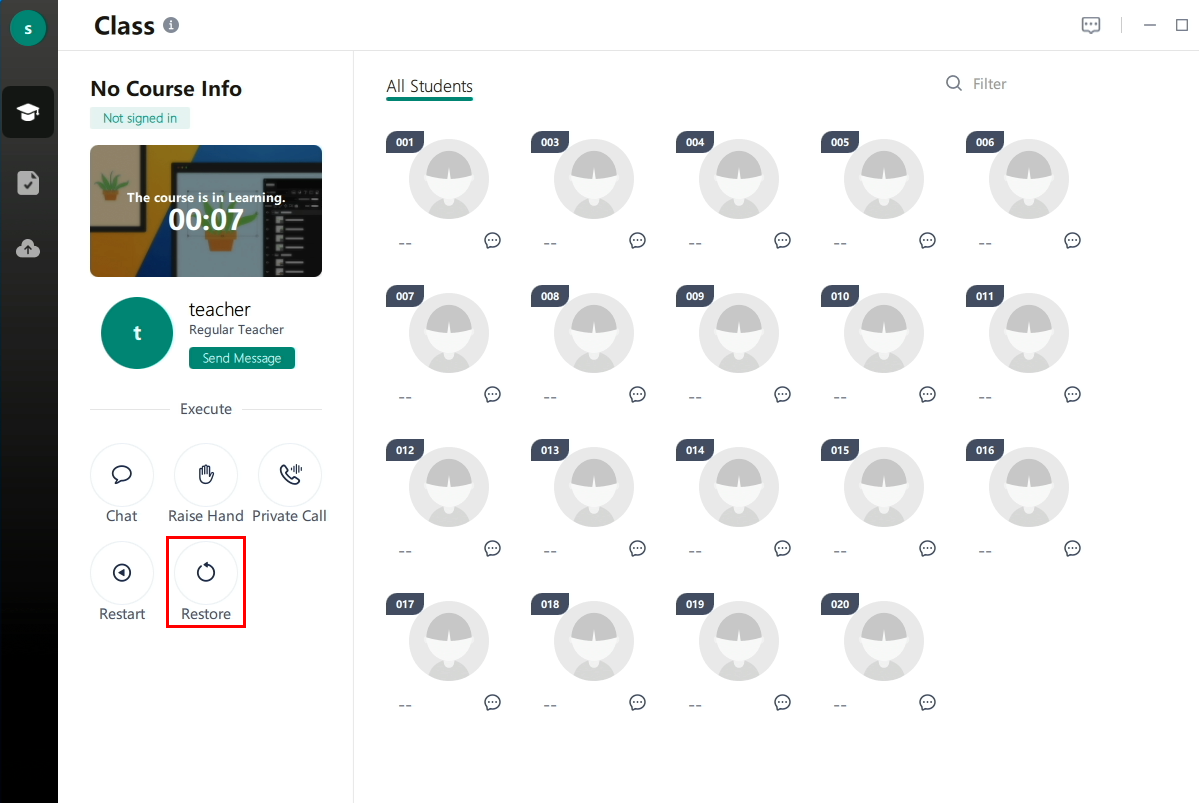
Course restoration
To restore the course desktop to the initial state, click the Restore icon in the tool pane on the class management page. For more information, see the course restoration feature as shown in Table 1.
This feature is available only for VDI courses.
Figure 18 Restore icon
Group demonstration
Students within a group can show their screens and engage in interactive annotation to facilitate learning and communicate with other group members.
|
|
IMPORTANT: · The group demo feature is available on the student client only when this feature is enabled on the teacher client. · The screen in a group for demonstration is not visible for other groups. · In a group, only one student can show their screen at a time, and only the presenter has the authority to end the group demonstration. · When the teacher is broadcasting their screen, students are unable to conduct group presentations. If a student is conducting a group presentation, it will be interrupted when the teacher starts screen broadcasting. |
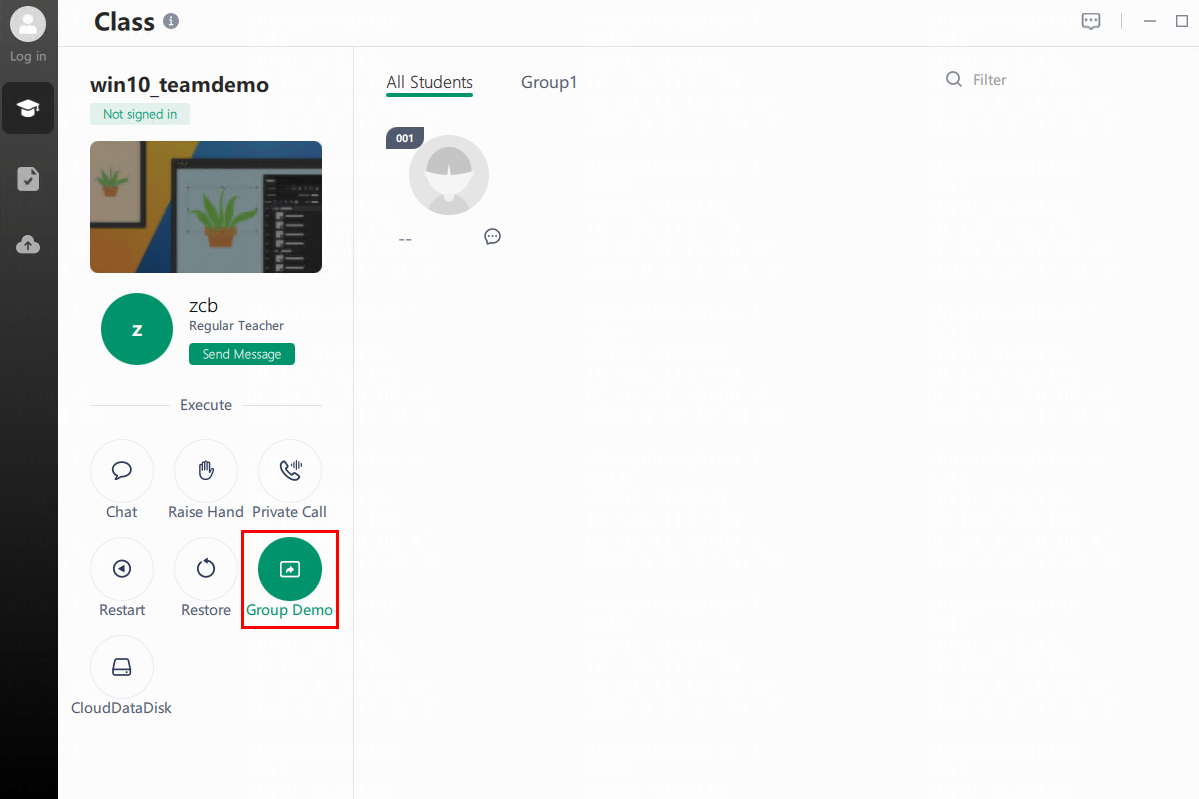
To perform group demonstration:
1. Click the Group Demon icon in the tool pane on the class management page to show the screen for other members in the group..
Figure 19 Class page
2. Click Annotation in the upper right corner
to display the annotation toolbar. The presenter can make annotations within the presentation
window. By clicking ![]() above the annotation toolbar, the annotation features will be
displayed.
above the annotation toolbar, the annotation features will be
displayed.
Table 2 Annotation features
|
Annotation feature |
Description |
|
Switch |
Click |
|
Revoke |
Click |
|
Redo |
Click |
|
Eraser |
Click |
|
Clear Screen |
Click |
|
Place at Top |
Click |
|
Fast Save/Right-click to save as file |
Click |
|
Load |
Click |
|
Export Paintbrush Info/Right-click to export paintbrush information and background |
Click |
|
Hide Paintbrush Info |
Click |
|
Release Screen |
Click |
|
Orientation |
Click |
Figure 20 Annotation for group demo

3. To quit group demo, click Stop Demo in the upper right corner.
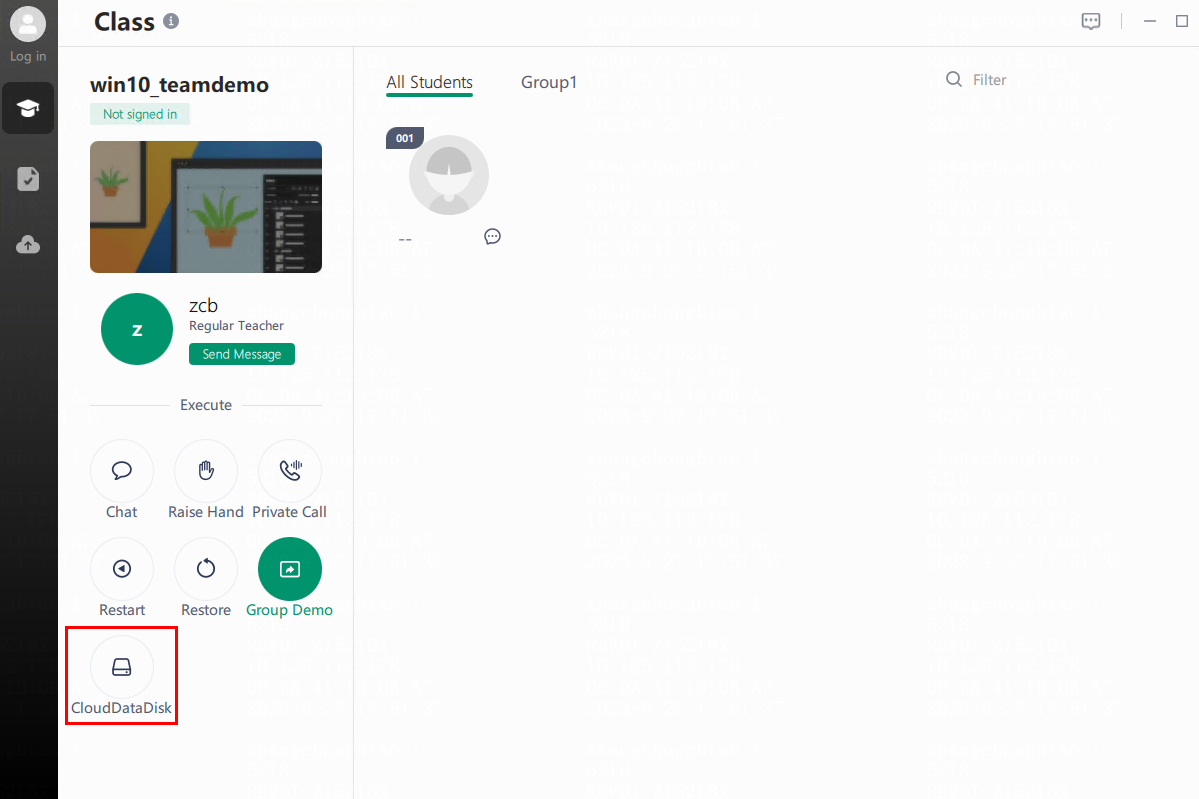
Cloud data disk
To access the cloud data disk, click the CloudDataDisk icon in the tool pane on the class management page.
Before the access, you must configure and enable a cloud data disk on Space Console, enable the cloud data disk in the course image, and bind the cloud data disk to the current client. For more information, see H3C Workspace Cloud Desktop Cloud Disk Configuration Guide.
Figure 21 Cloud data disk
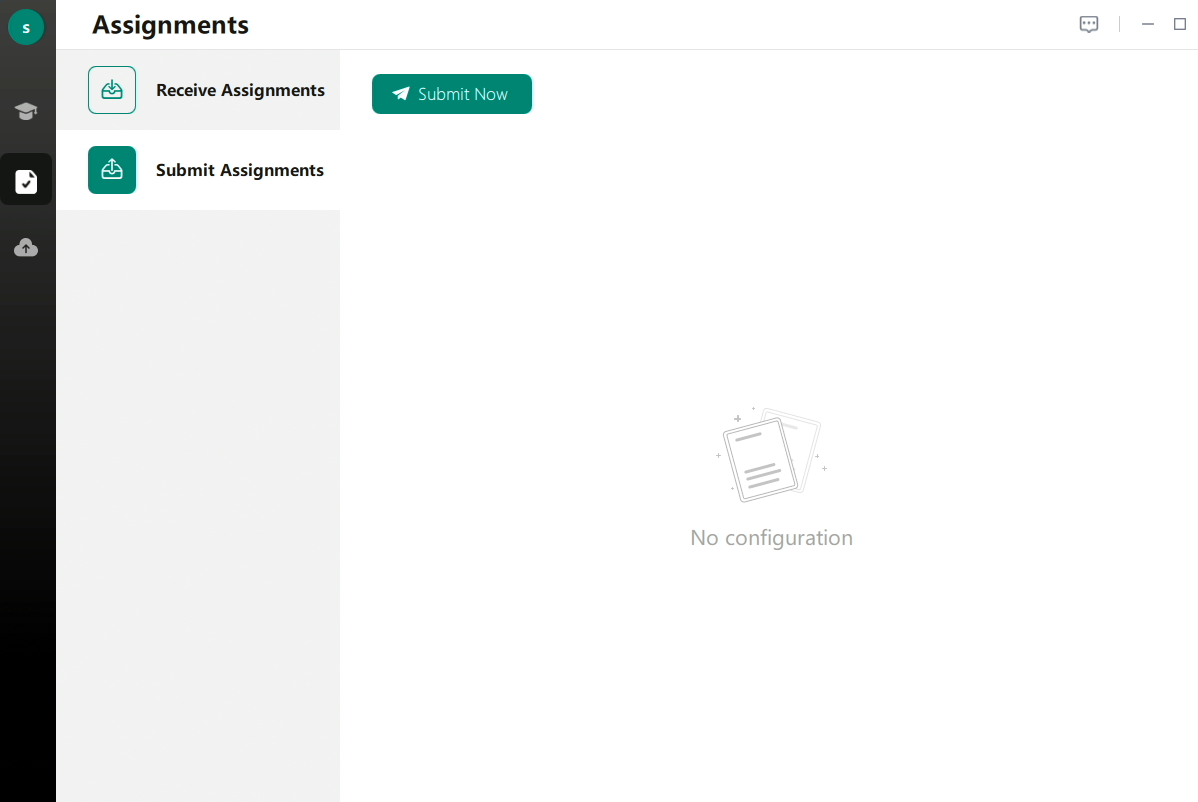
Assignment
The student can view the received assignments or submit assignments on the assignment management page. For more information, see Figure 10 and Figure 11.
This example uses the VDI client.
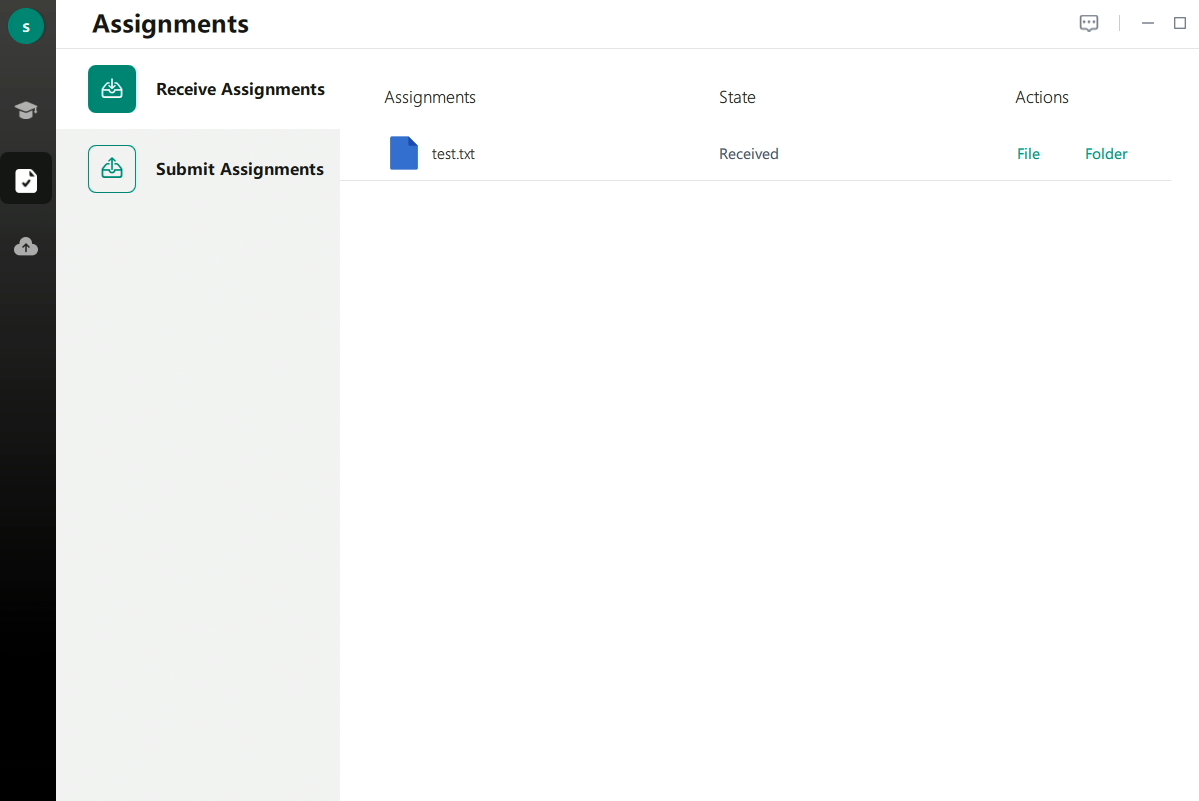
To view the received assignments:
1. Navigate to Assignments > Receive Assignments.
2. Click File or Folder in the Actions column to view an assignment distributed by the teacher.
|
|
NOTE: If a student successfully receives an assignment and then modifies or deletes the assignment folder, the system will prompt that the assignment file or assignment folder does not exist after the File or Folder link is clicked. |
Figure 22 Viewing the received assignments (for the VDI client)
To submit assignments:
1. Navigate to Assignments > Submit Assignments.
2. Click Folder or File at the top of the assignment submission list to upload assignments.
Figure 23 Submitting assignments (for the VDI client)
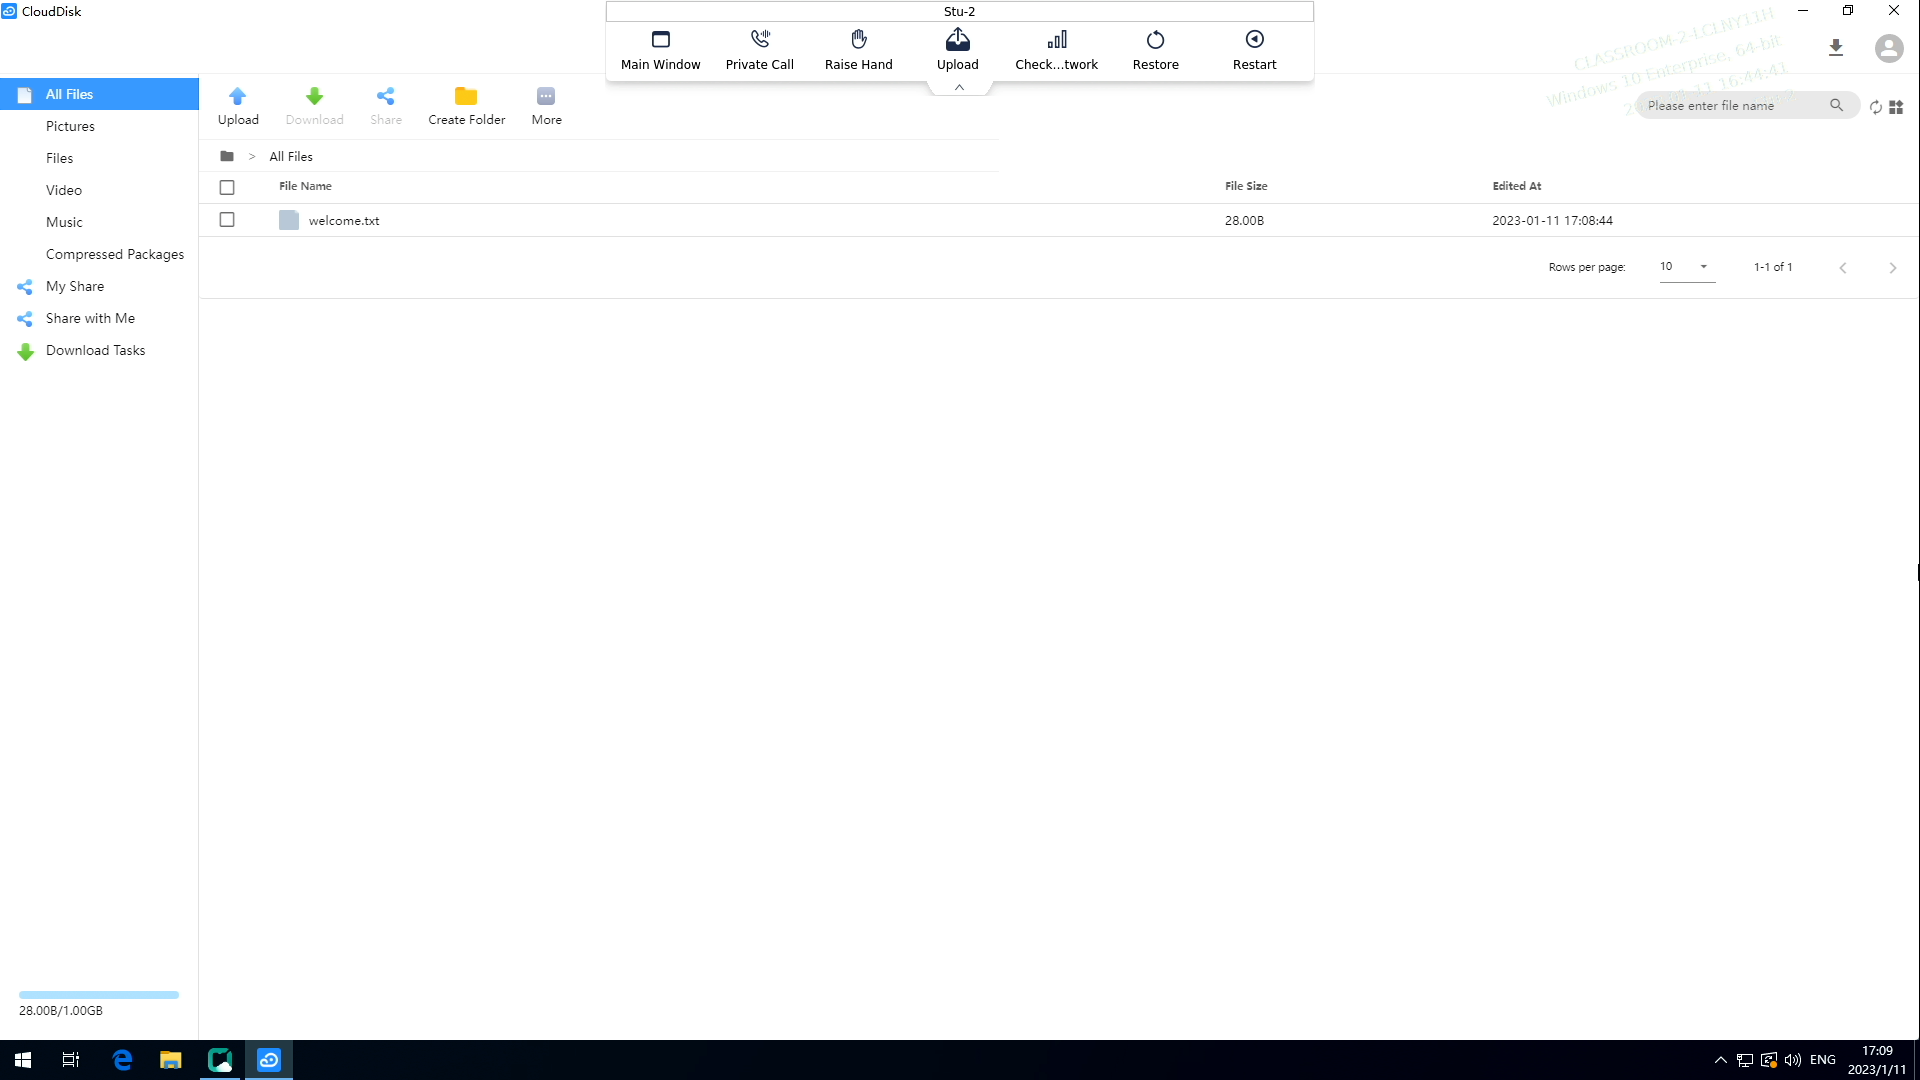
Cloud disk
The cloud disk provides the student a private data space for accessing data anytime anywhere. The default size of the cloud disk is 1 GB. Files in the cloud disk can be automatically categorized. The student can download, copy, move, delete, or share files in the cloud disk in bulk.
The cloud disk feature is available only when the administrator authorizes the student to use the cloud disk on Space Console.
If you need to modify the size of the cloud disk, contact the administrator.
To use the cloud disk:
1. Enter the course desktop.
2. Select Cloud Disk from the navigation pane.
3. On the private cloud disk login page as shown in Figure 4, enter the login parameters as described in Table 2.
4. Click Log In.
After logging in to the student desktop through Learningspace, you can click Cloud Disk from the navigation pane or double-click the cloud disk client to automatically log in to the private cloud disk.
Figure 24 Logging in to the private cloud disk
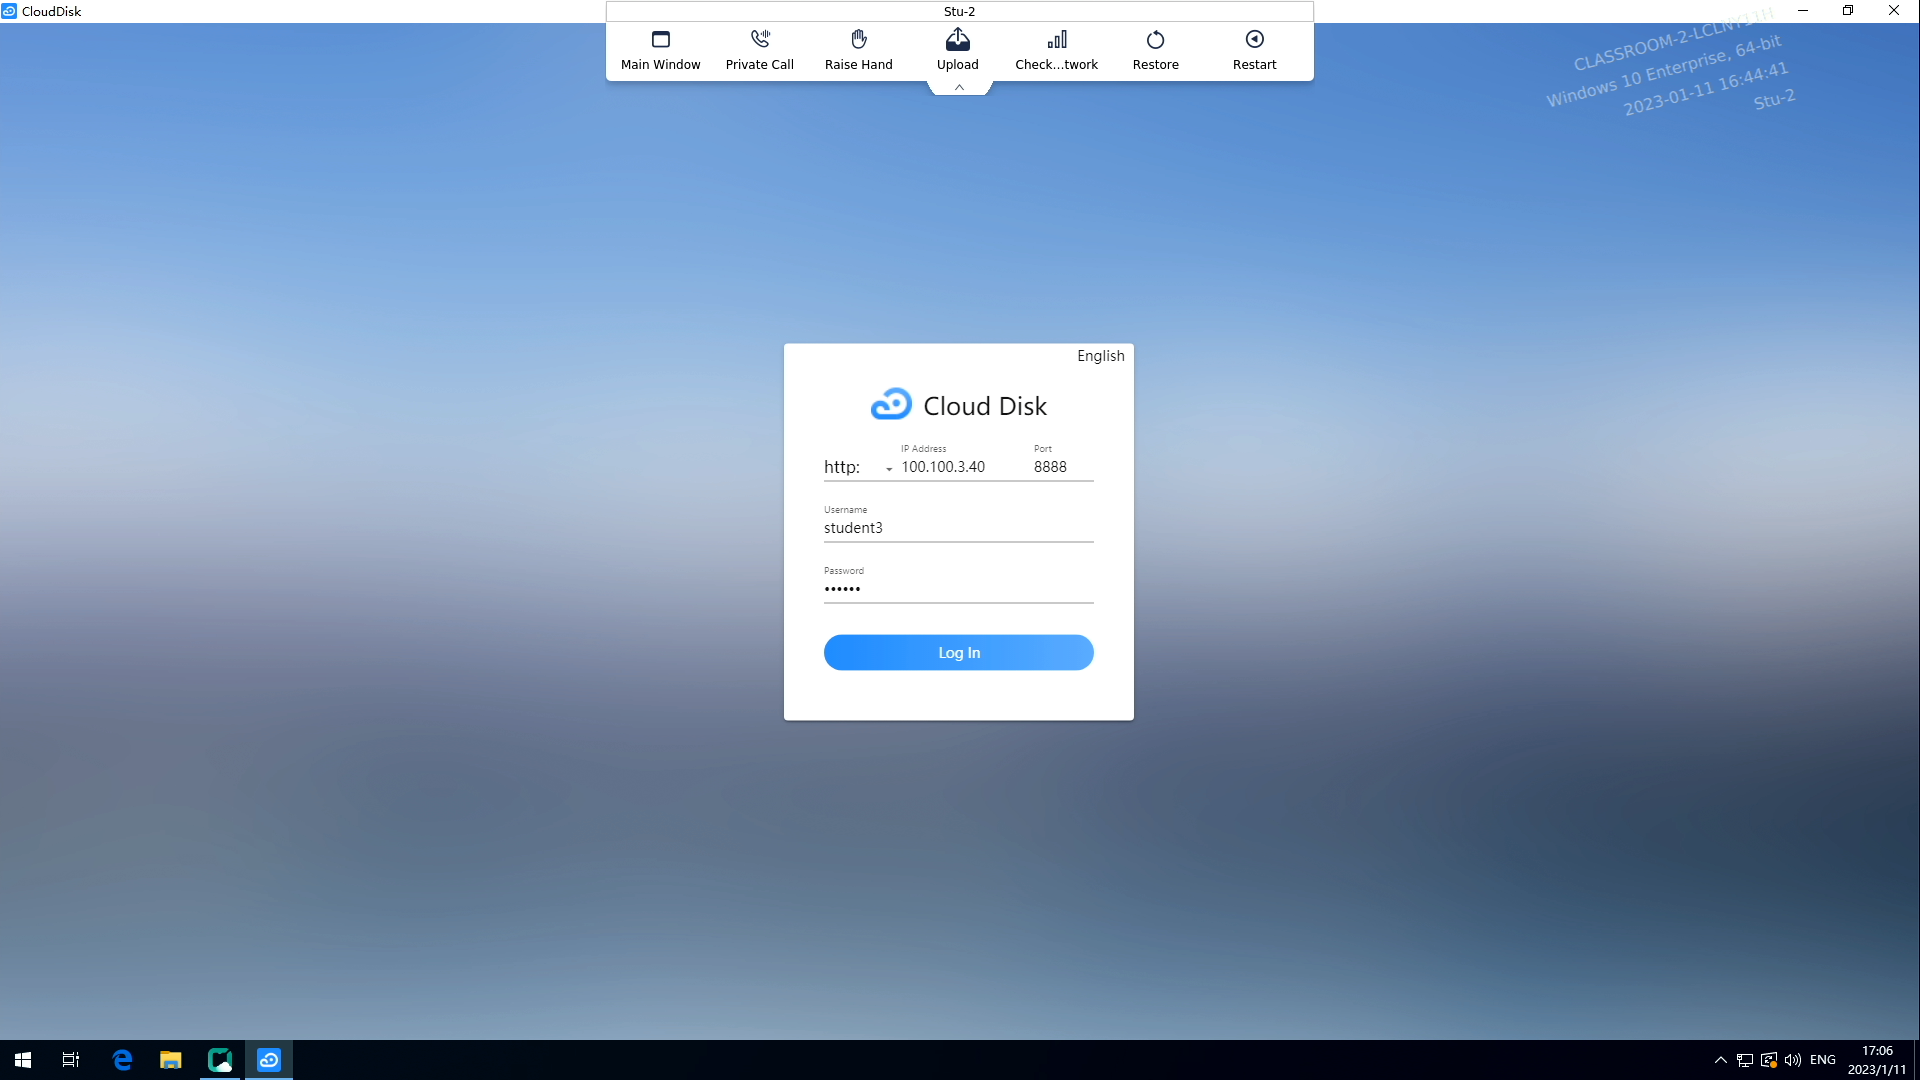
Table 3 Cloud disk login parameters
|
Parameter |
Description |
|
Cloud Disk Address |
Enter the address of the cloud disk configured on Space Console. To obtain the address, contact the administrator. |
|
Username |
Enter the username of the student. Make sure the username is an existing username on Space Console and is authorized to use the cloud disk. |
|
Password |
Enter the password of the username. |
Figure 25 Cloud disk
Self-study
If the teacher select the Self-Study Mode option on the teaching settings page from the menu settings, students in a classroom are allowed to enter the self-study mode, a student can select any course to start self-study.
For information about how to allow students to enter the self-study mode, see H3C Workspace Cloud Desktop Teacher Client User Manual (Education Scenario).
Self-study (for the VDI client)
1. To start self-study on a VDI client, double-click any course on the Learningspace course page as shown in Figure 6. The system will create a self-study desktop for the student to self-study the course.
Figure 26 Starting self-study (for the VDI client)

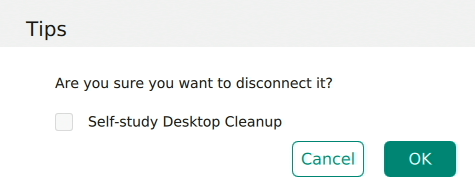
After the student connects to the self-study desktop, the system displays a toolbar in the top right corner of the desktop, as shown in Figure 7. The toolbar provides the same functions as a course desktop toolbar and allows you to disconnect the self-study desktop.
Figure 27 Toolbar on the self-study desktop

2. After you finish self-study, click the ![]() icon, select Self-study Desktop Cleanup in the dialog box that opens as required, and then click OK.
icon, select Self-study Desktop Cleanup in the dialog box that opens as required, and then click OK.
If you select Clear VM, the desktop will be deleted after you disconnect the self-study desktop.
Figure 28 Selecting whether to clear the VM
Self-study (for the VOI/TCI client)
To start self-study on a VOI/TCI client, double-click a course. The system will download the course and enter the self-study mode for the course.
Figure 29 Starting self-study (for the VOI/TCI client)

Managing the student client from the system tray
Managing the VDI student client from the system tray
You can manage the following VDI student client programs from the system tray:
· Learningspace—Program for the VDI student course VM. This program controls the class window and the toolbar.
· Private disk—Private disk authorized to the student. If the administrator enables private disk for the student, the system will automatically mount the private disk after the student enters the class. For more information, see H3C Workspace Cloud Desktop Private Disk Configuration Guide.
To manage the VDI student client from the system tray:
1. Enter the course desktop.
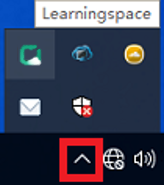
2. Click the upward chevron icon ![]() in the bottom right corner of the desktop.
in the bottom right corner of the desktop.
The system tray is displayed as shown in Figure 10.
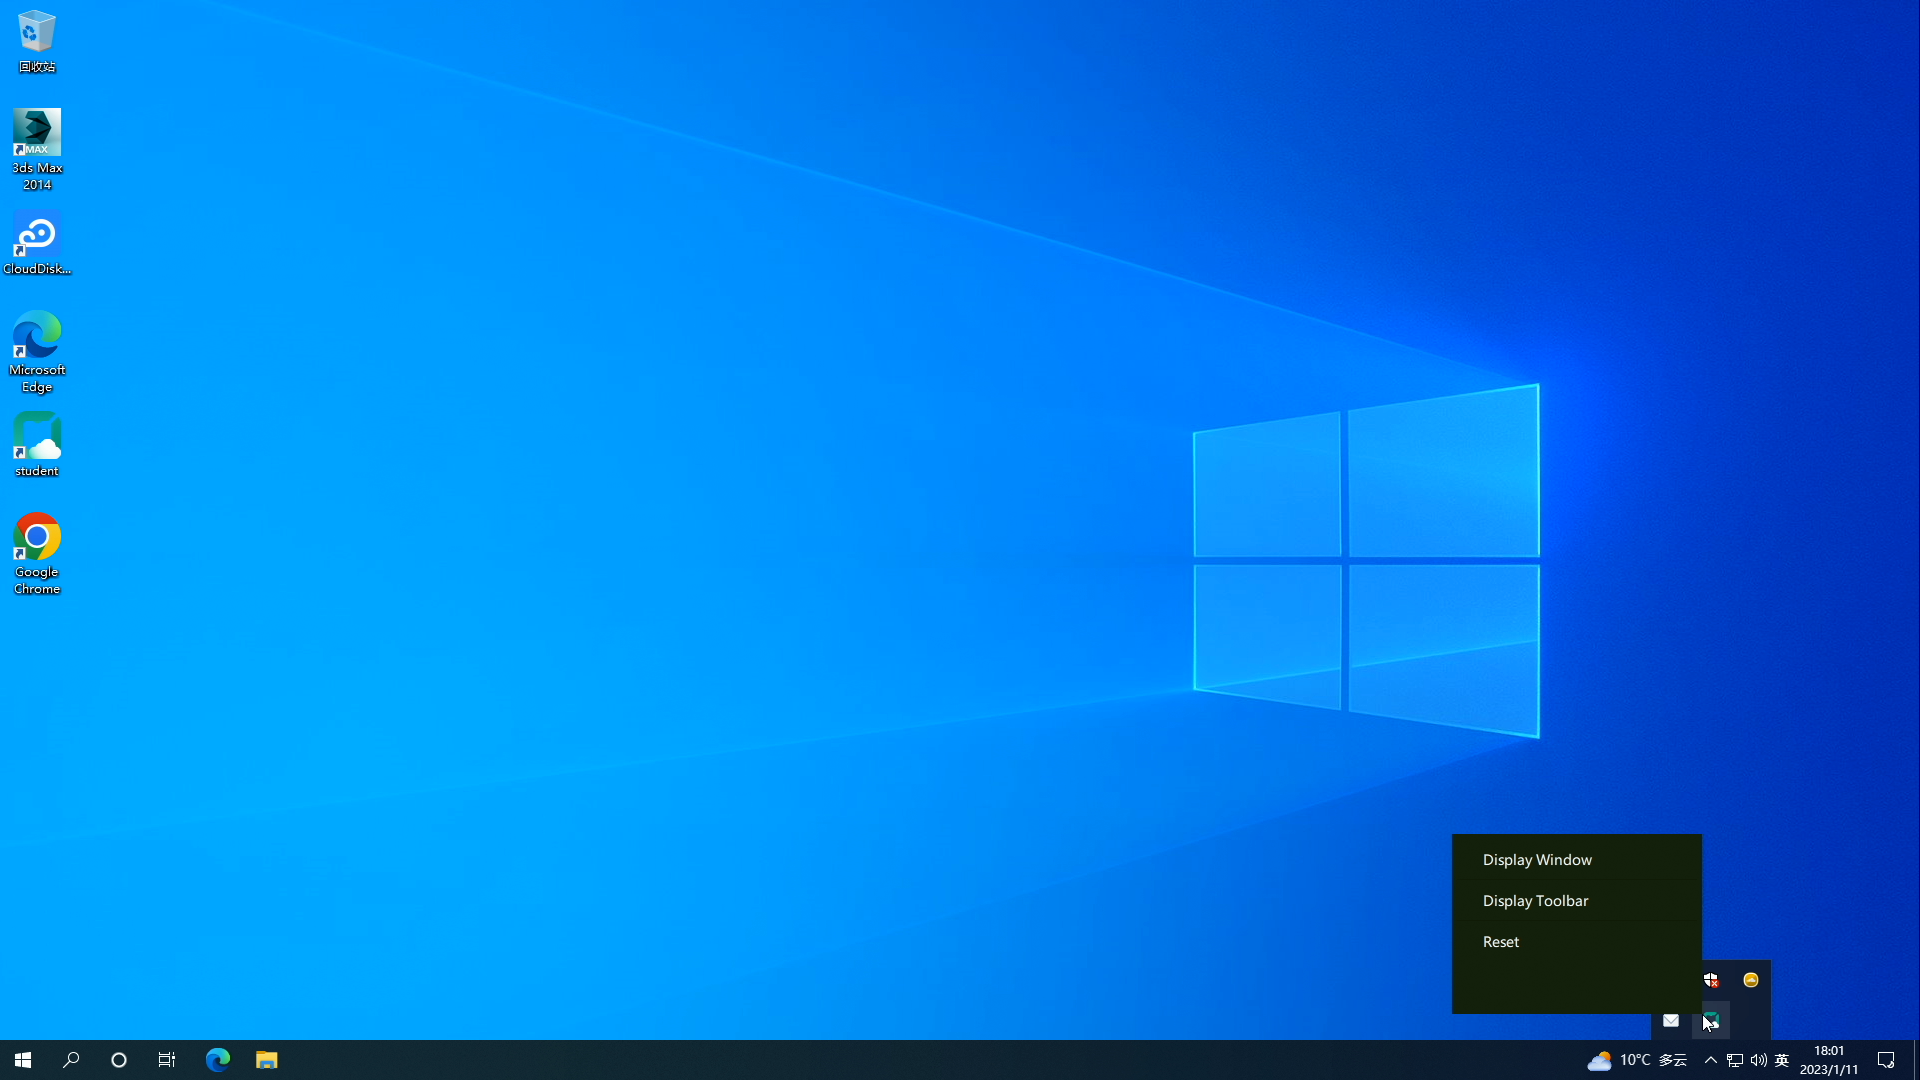
Figure 30 System tray (for the VDI endpoint)
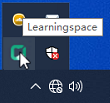
3. Right-click the Learningspace
icon ![]() and then perform one of the following
tasks:
and then perform one of the following
tasks:
¡ To display the Learningspace class window, click Display Window.
¡ To display the toolbar, click Display Toolbar.
Figure 31 Learningspace menu items (VDI)

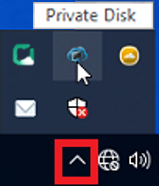
4. Right-click the Private Cloud Disk and perform one of the following tasks:
¡ To open the window for logging to the private disk, click Open.
¡ To unmount the private disk, click Unmount.
For more information, see H3C Workspace Cloud Desktop Private Disk Configuration Guide.
Figure 32 Private disk menu items
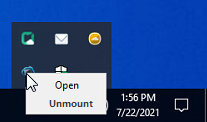
Figure 33 Logging to the private disk

Figure 34 Private disk

Managing the VOI/TCI student client from the system tray
You can manage Learningspace from the system tray of a course desktop. Learningspace is a VM program for the VOI/TCI student client. This program is used to control the class window and the toolbar.
To manage the VOI/TCI student client from the system tray:
1. Click the upward chevron icon ![]() in the bottom
right corner of the desktop.
in the bottom
right corner of the desktop.
The system tray is displayed as shown in Figure 15.
Figure 35 System tray (for the VOI/TCI endpoint)
2. Right-click Learningspace and then perform one of the following tasks:
¡ To display the Learningspace class window, click Display Window.
¡ To display the toolbar, click Display Toolbar.
¡ To reset the student client to the state before deployment, click Reset and then enter the endpoint management password.
To obtain the endpoint management password, contact the administrator.
Figure 36 Learningspace menu items (VOI/TCI)
Configuring the Learningspace student client (for the administrator)
This section describes how the administrator configures the student client in the teaching environment. The tasks in this section are intended only for the administrator.
The configuration procedure for the VDI client is the same as that for the VOI/TCI client. Unless stated, this section uses the VDI client as an example.
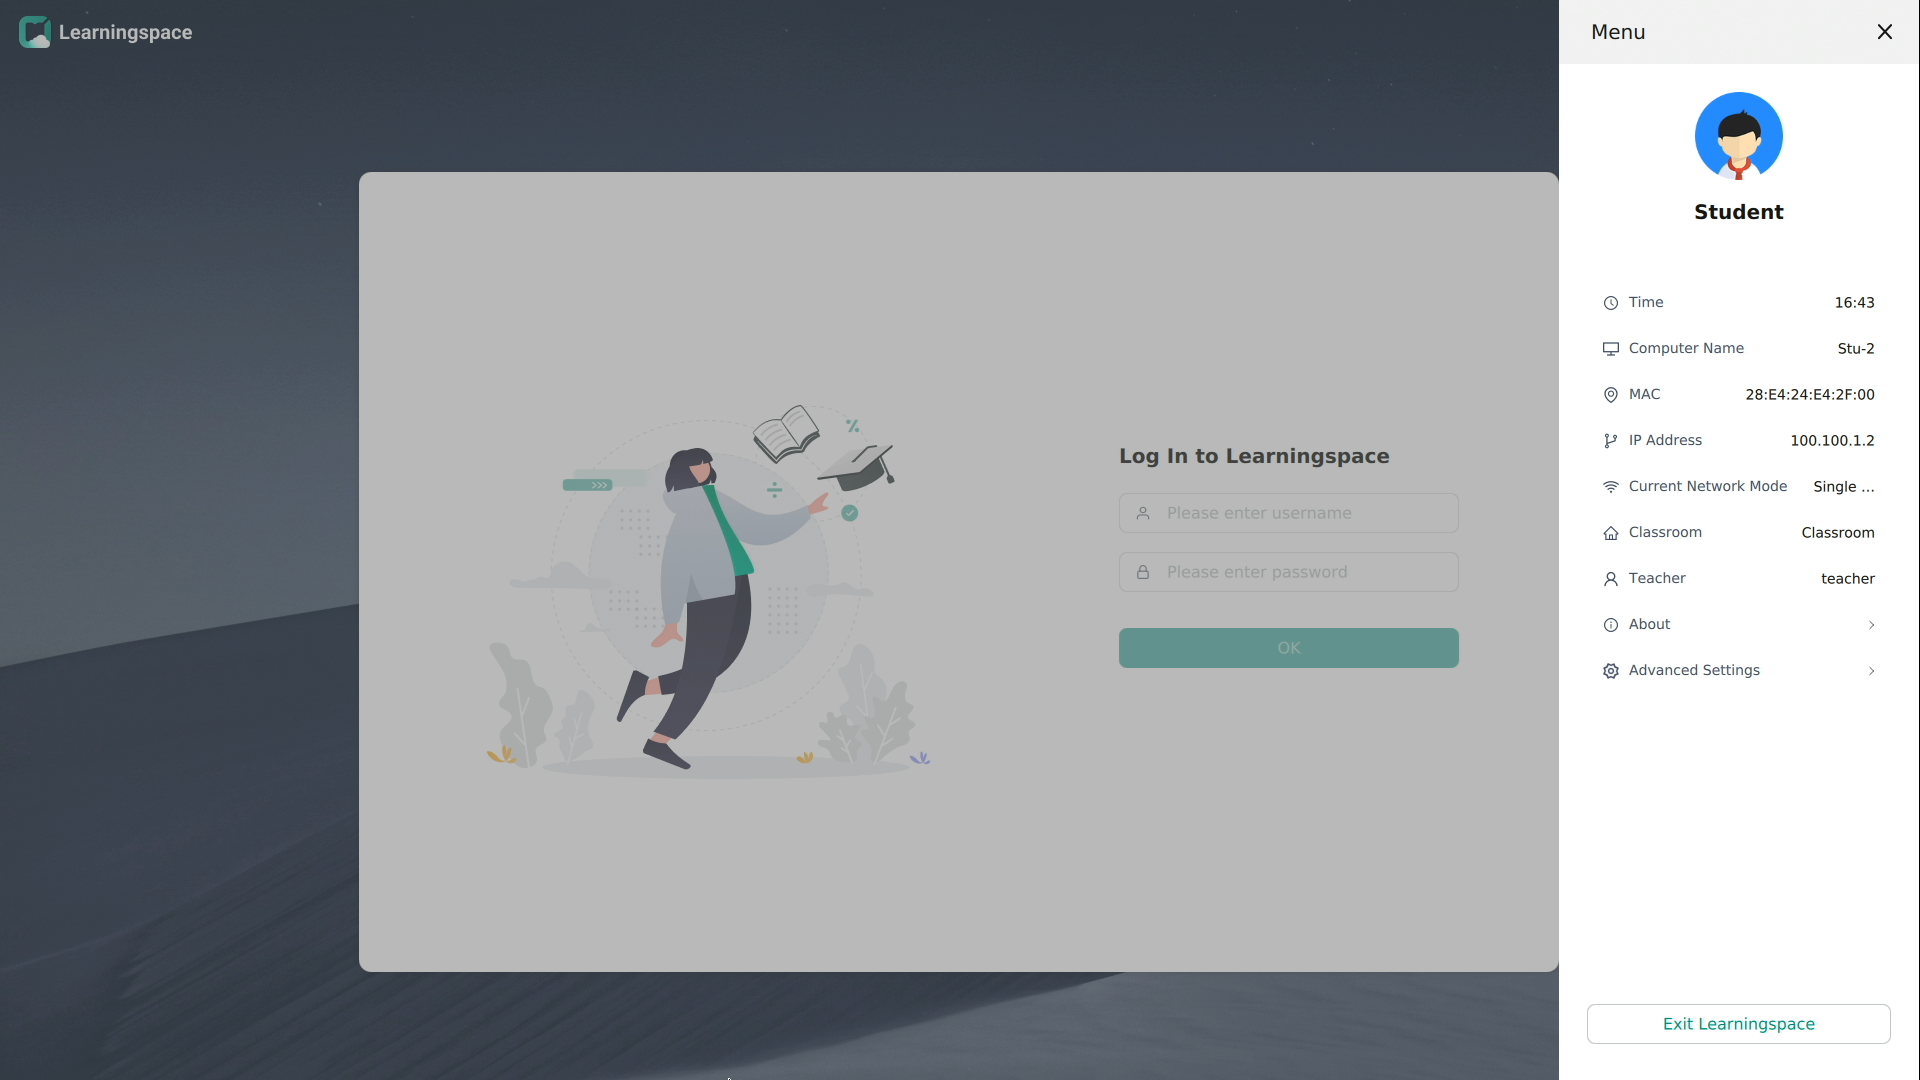
Viewing the student client information
You can view the student client information from the settings menu. Table 3 describes parameters on the settings menu.
For the VDI client, click the ![]() icon in the top right corner of the
self-study page, login page, or the page for deployment. The settings menu is
displayed.
icon in the top right corner of the
self-study page, login page, or the page for deployment. The settings menu is
displayed.
For the VOI/TCI client, click the ![]() icon in the top right corner of the page
for deployment. The settings menu is displayed.
icon in the top right corner of the page
for deployment. The settings menu is displayed.
This example uses the login page of the VDI client.
|
Parameter |
Description |
|
Time |
Display the current time of the endpoint. |
|
Computer Name |
Display the name of the endpoint in the Learningspace environment. |
|
MAC |
Display the MAC address of the endpoint. |
|
IP Address |
Display the IP address of the endpoint. |
|
Classroom |
Display the current classroom that the endpoint enters. |
|
Teacher |
Display the teacher account associated with the student client (the teacher account that registers with the classroom). |
|
About |
Display the client information, including the product name, technical support number (400-810-0504), official website (www.h3c.com), system information, and copyright information. |
|
Advanced Settings |
Display, configure, or reset the student client setting. Figure 18 shows the advanced settings submenu and Table 4 describes the items on the submenu. To configure or reset the advanced settings, you must unlock the advanced settings. |
|
Exit Learningspace |
Return to the local system of the endpoint. This operation requires a password. If the student client does not register with Space Console, you need to enter password Password@1234. If the student client has registered with Space Console, you need to enter the endpoint management password. To obtain the endpoint management password, access the System > Advanced Settings > System Parameters > Cloud Desktop Parameters page on Space Console. |
Figure 38 Viewing the advanced settings for VDI
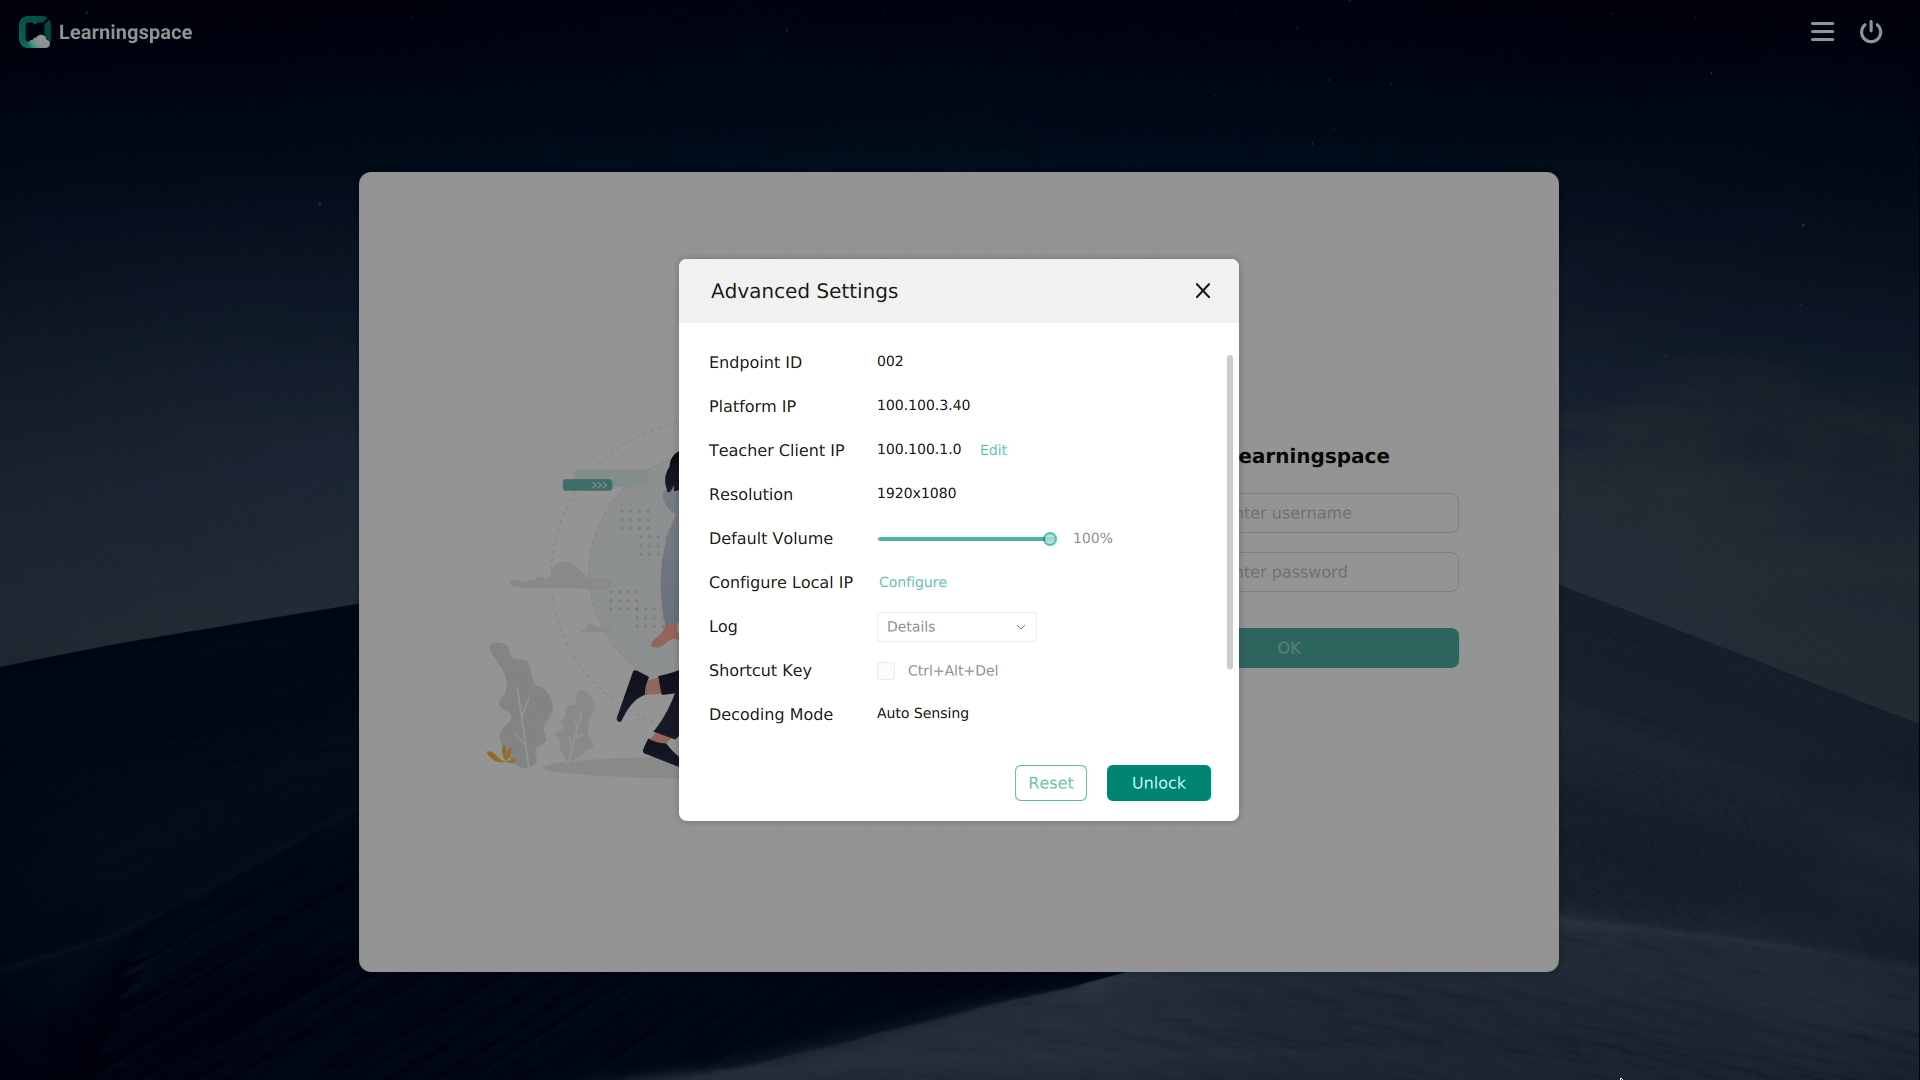
Figure 39 Viewing the advanced settings for VOI/TCI

|
Parameter |
Description |
|
Endpoint ID |
Display the ID of the student client that has registered with the classroom. This ID is generated after the student endpoint has been deployed from the teacher client. |
|
Management Platform IP |
Display the IP address of the management platform with which the student client registered. |
|
Teacher Client IP |
Display the IP address of the teacher client associated with the student client. |
|
Switch Teacher Client |
This function is supported only by VOI/TCI endpoints. Switch the undeployed student client to teacher client mode. Then, the client will automatically restart to switch to teacher client mode and display the teacher client login page. For more information about teacher client operations, see H3C Workspace Cloud Desktop Teacher Client User Manual (Education Scenario). |
|
Resolution |
Display the resolution of the student client. This setting is set by the teacher on the teacher client. |
|
Default Volume |
Display the default volume of the student client. |
|
Configure Local IP |
Configure the IP address of the endpoint where the student client is deployed. |
|
Log |
Display the severity level for logs generated by the student client. |
|
Shortcut Key |
Display the enabling status of the Ctrl+Alt+Del hot keys. To prevent students from accidentally closing or uninstalling the student client in class, disable the hot keys for the student endpoints as a best practice. |
|
Experience |
Configure the experience settings for the student client. These settings are determined by the settings on the teacher client, including the following parameters: · Decoding Mode: Set the video decoding mode. Options include Hardware Decoding, Software Decoding, and Auto Sensing. · Image Compression: Set the picture compression method. Options include Lossless Compression and Lossy Compression. |
|
Reset |
Reset the student client to the initial state before deployment. |
|
Unlock |
Unlock the advanced settings. You must first unlock the advanced settings before editing them. |
|
|
IMPORTANT: To ensure the correct running of the student client, do not delete the files in the student client installation directory (Learningspace folder). |
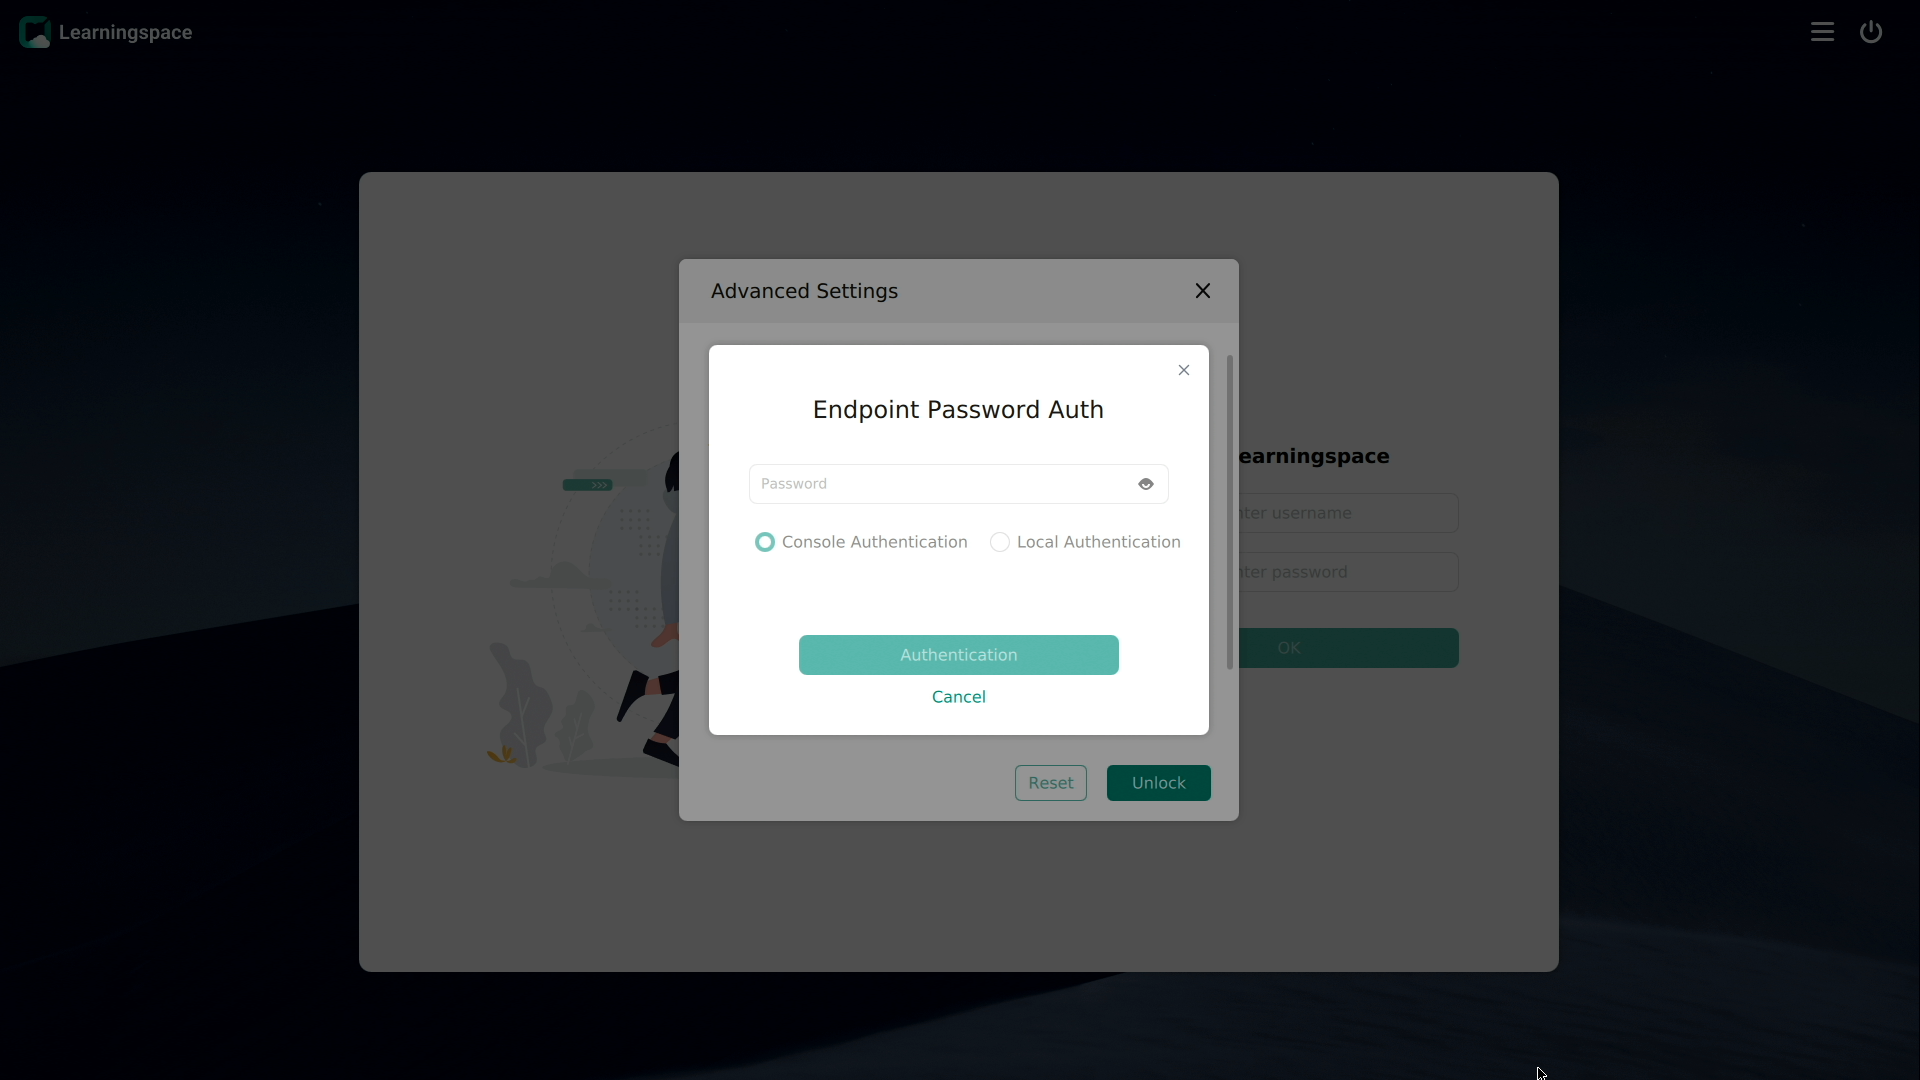
Configuring the advanced settings of the student client
1. Click the ![]() icon in the top right corner of the client.
icon in the top right corner of the client.
2. Select Advanced Settings.
3. Click Unlock. In the dialog box that opens, enter the password to unlock the advanced settings.
¡ If the student client has registered with Space Console, Console authentication is performed. You need to enter the endpoint management password. To obtain the endpoint management password, access the System > Advanced Settings > System Parameters > Cloud Desktop Parameters page on Space Console.
¡ If the student client does not register with Space Console, local authentication is performed. You need to enter password Password@1234. To prevent the student from returning to the local system, make sure the student client has registered with Space Console before the class starts.
Figure 40 Password verification to unlock the advanced settings
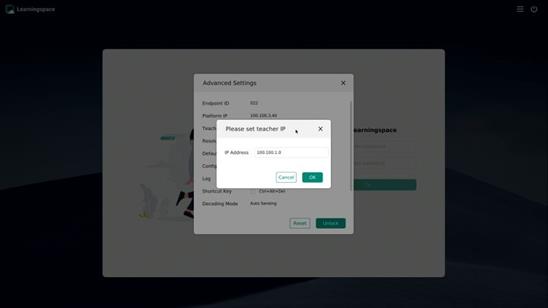
4. Edit the IP address of the teacher client:
a. Click Teacher Client IP.
b. In the dialog box that opens, enter the new IP address.
c. Click OK.
Figure 41 Editing the teacher client IP
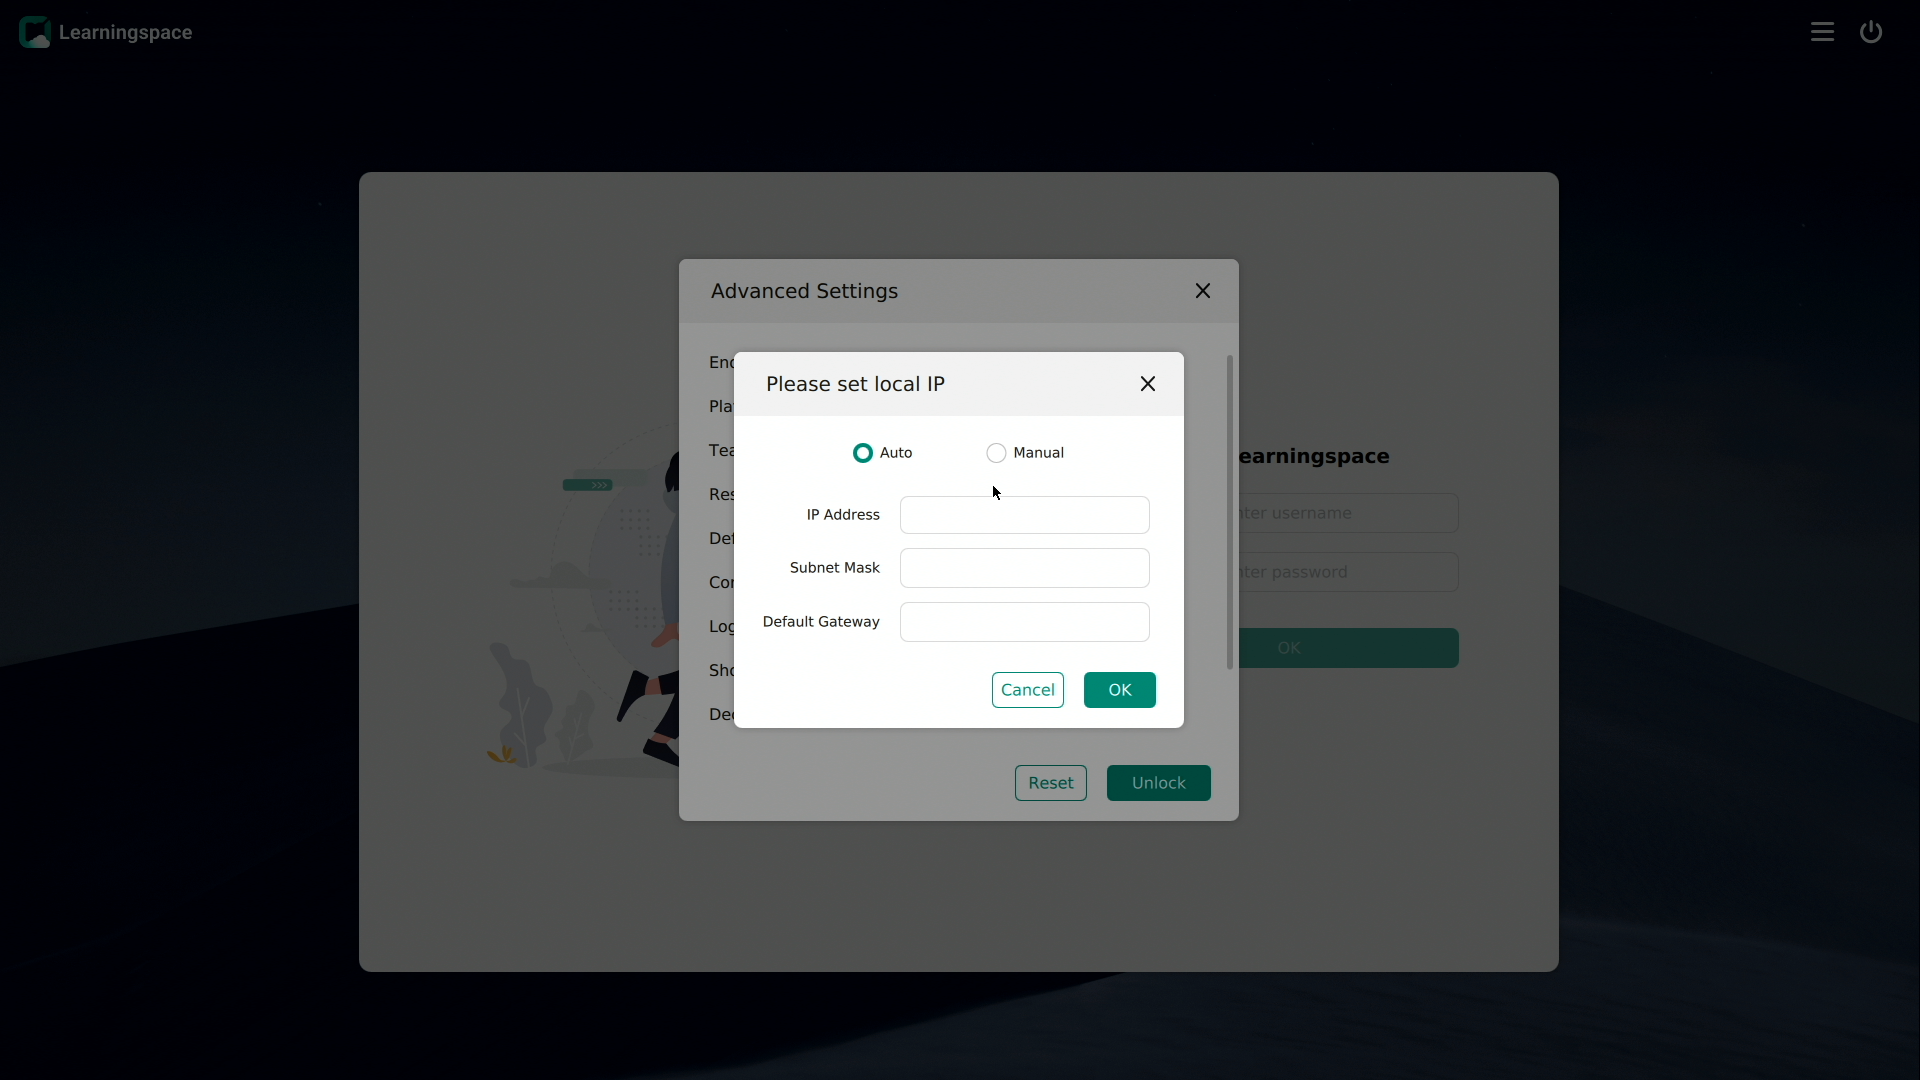
5. Configure the local IP address of the student endpoint:
a. Click Configure Local IP.
b. In the dialog box that opens, configure the IP address by using one of the following methods:
- To configure the system to automatically populate the local IP address, select Auto.
- To manually configure the local IP address, select Manual. Then, enter the local IP address of the endpoint, subnet mask, and default gateway.
c. Click OK.
Figure 42 Configuring the local IP address of the student endpoint
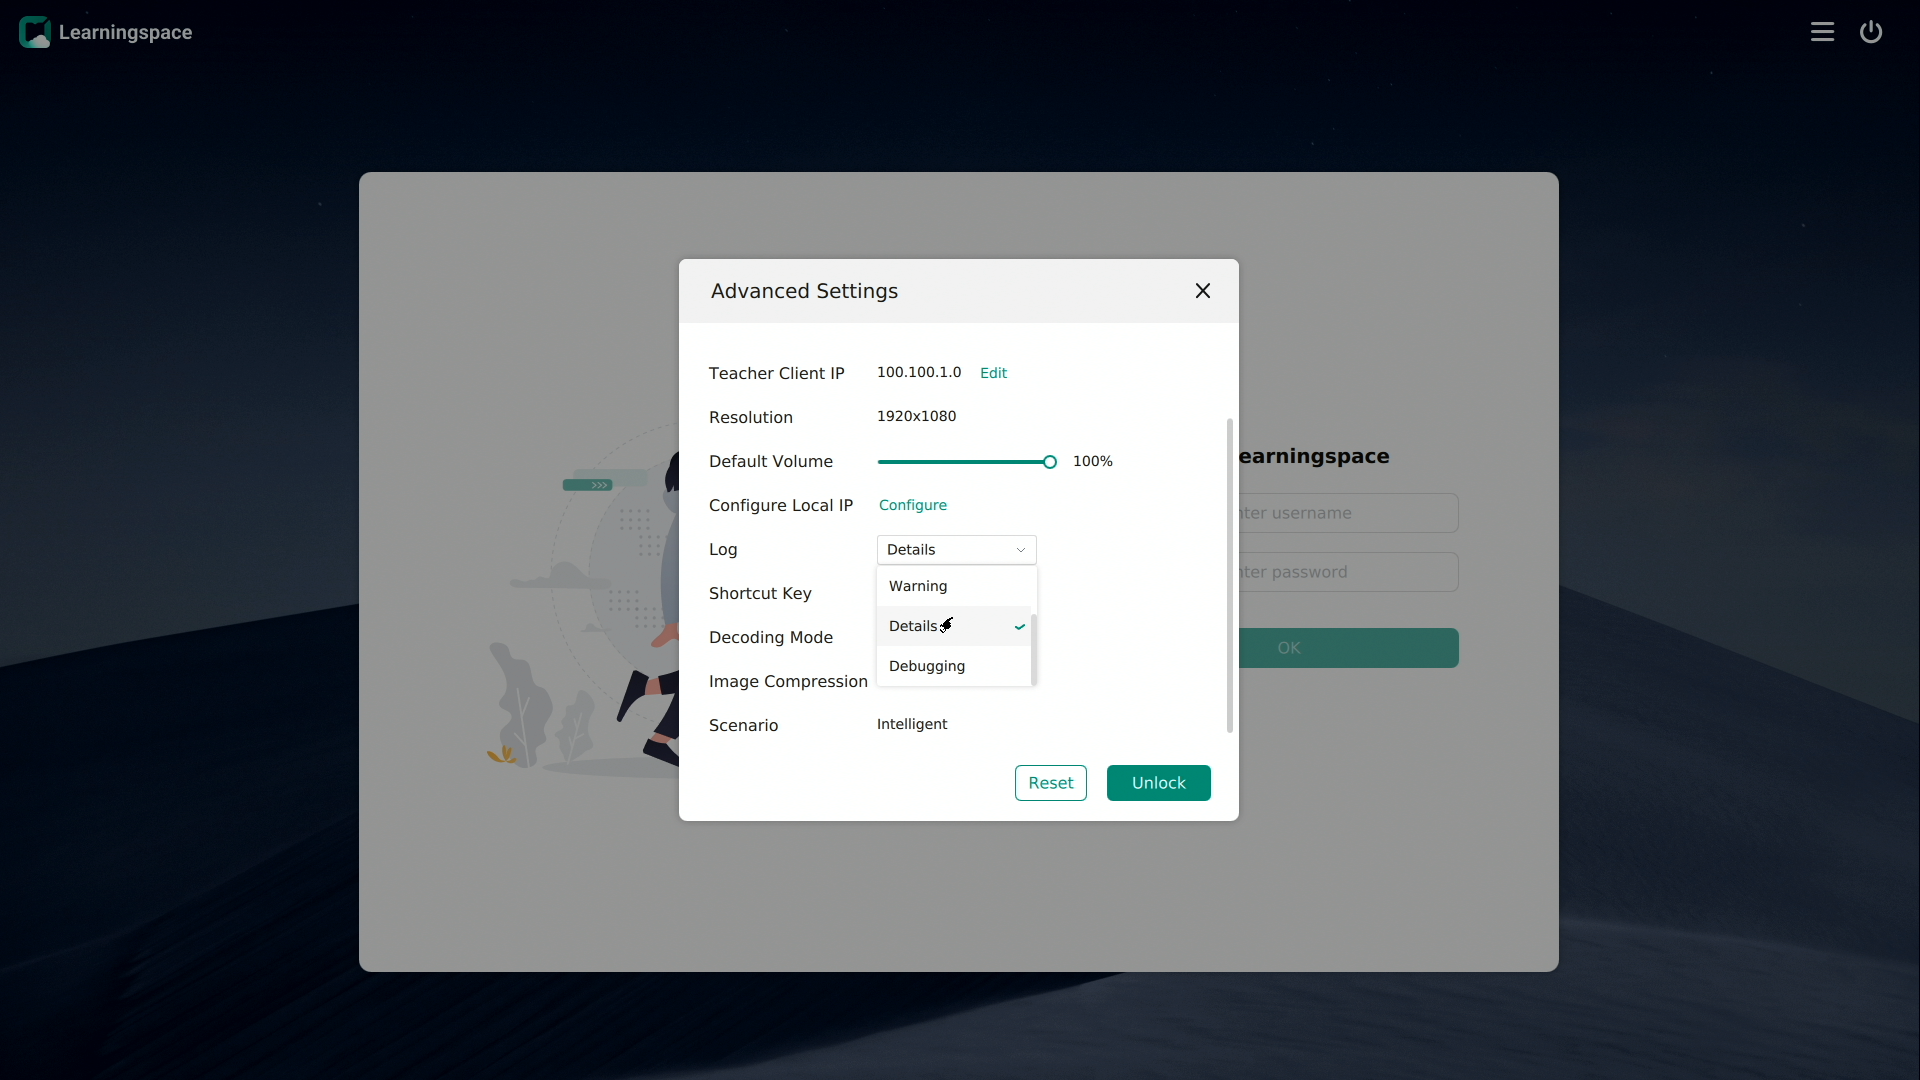
6. Set the log severity level:
a. Click the right chevron on the Log submenu.
b. Select a log severity level. Options include: Critical, Error, Warning, Details, and Debugging.
Figure 43 Setting the log severity level
7. To reset the student client to the initial state before deployment, click Reset. In the dialog box that opens, enter the password.
¡ If the student client has registered with Space Console, Console authentication is performed. You need to enter the endpoint management password. To obtain the endpoint management password, access the System > Advanced Settings > System Parameters > Cloud Desktop Parameters page on Space Console.
¡ If the student client does not register with Space Console, local authentication is performed. You need to enter password Password@1234. To prevent the student from returning to the local system, make sure the student client has registered with Space Console before the class starts.
Figure 44 Password verification

Figure 45 Student client to be deployed

Configuring the UCC client (VOI mode) (for the administrator)
Ultra Cloud Client (UCC) refers to H3C fat client all-in-one solutions, which integrate IDV, VOI, and TCI technologies. UCC endpoint supports clients in IDV, VOI, and TCI mode, and the client operating in one of the three modes are UCC clients.
As from version E1013, all VOI-related features are added for VOI clients of UCC endpoints. For clients that are deployed on non-UCC endpoints (IDV or VOI endpoints), the system performs only maintenance actions and does not add new features. For more information, see "Method of distinguishing UCC endpoints from non-UCC endpoints (IDV or VOI endpoints) "
This section describes how the administrator manages the UCC student endpoint (VOI mode). The tasks in this section are intended only for the administrator.
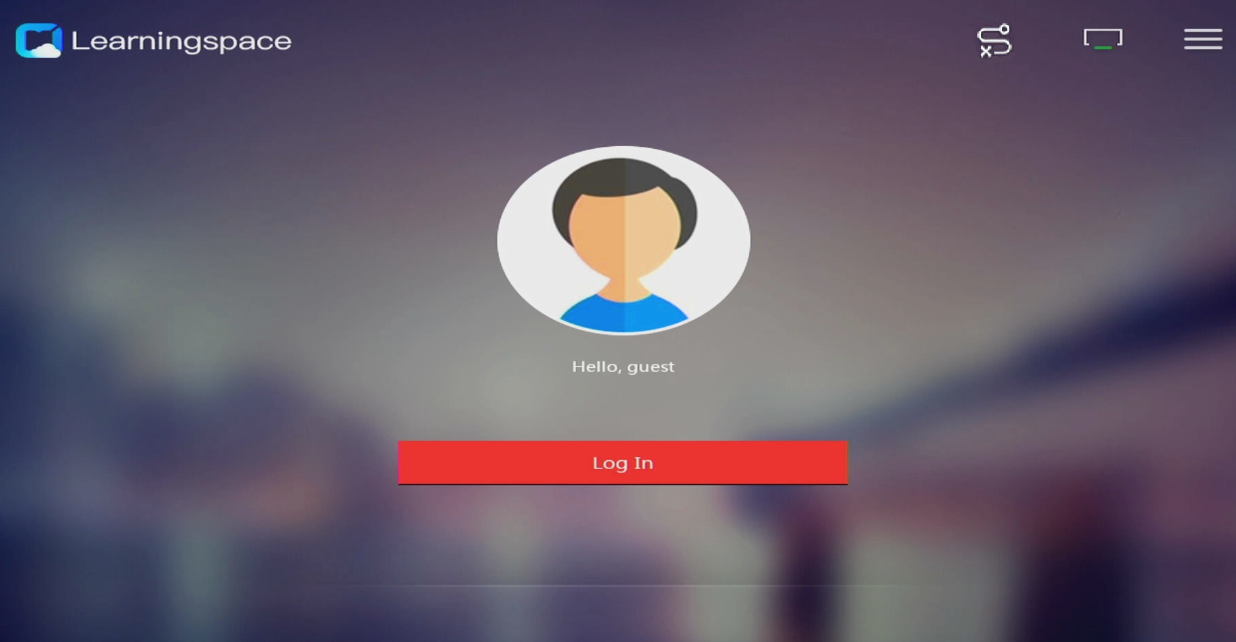
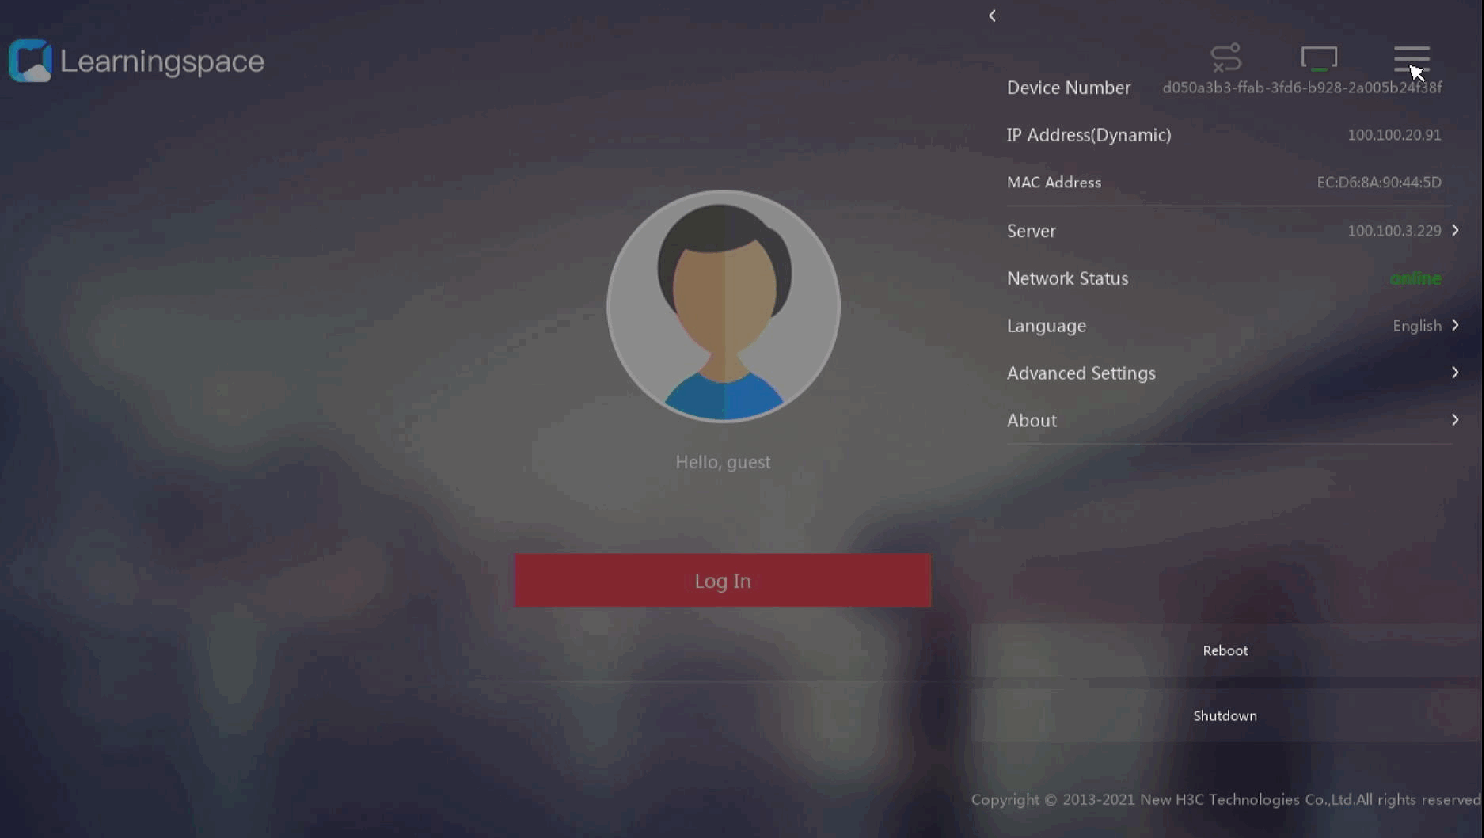
To enter the advanced settings page, first
restart the UCC student endpoint (VOI mode). On the initializing page, press ESC consecutively or click ![]() icon
to enter the login page.
icon
to enter the login page.
Figure 46 Login page
Editing the management platform IP
1. Click the ![]() icon
in the top right corner of the page, and select Server.
icon
in the top right corner of the page, and select Server.
Figure 47 Setting the server
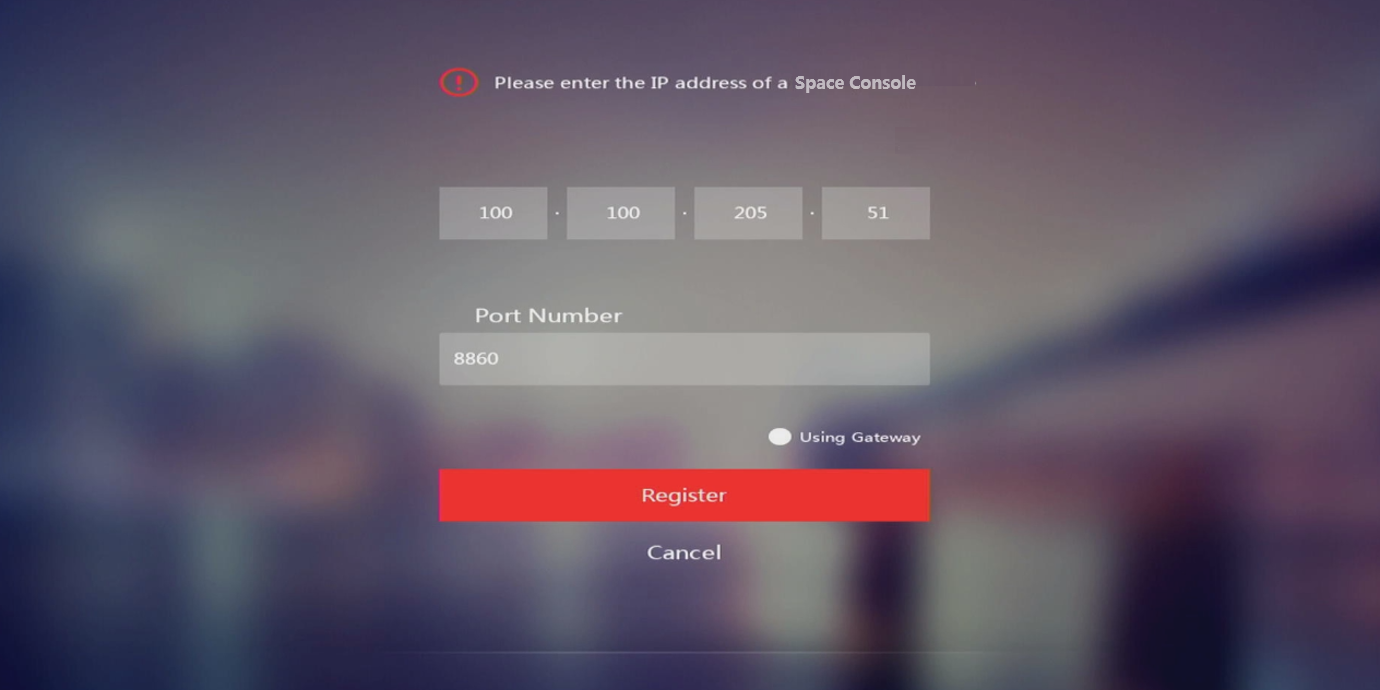
2. Enter the IP address and port number of a management platform, and click Register. The system will register the student client with the specified management platform.
¡ In a scenario with no gateway proxy, enter the IP address or domain name of the management platform and use the default port number.
¡ In a scenario with a gateway proxy, enter the gateway IP address or domain name according to the following on-site network plans.
- If the gateway's public IP and port have been mapped (such as mapped to the egress firewall of the company), enter the mapped IP address and port number. To obtain the mapped network information, contact the administrator.
- If the gateway's public IP and port have not been mapped, enter the gateway's public IP address and port number 443.
|
|
CAUTION: If you want to connect the cloud desktop through a gateway, the gateway address cannot be automatically discovered. You must configure the gateway address manually. |
Figure 48 Editing the IP address of the management platform
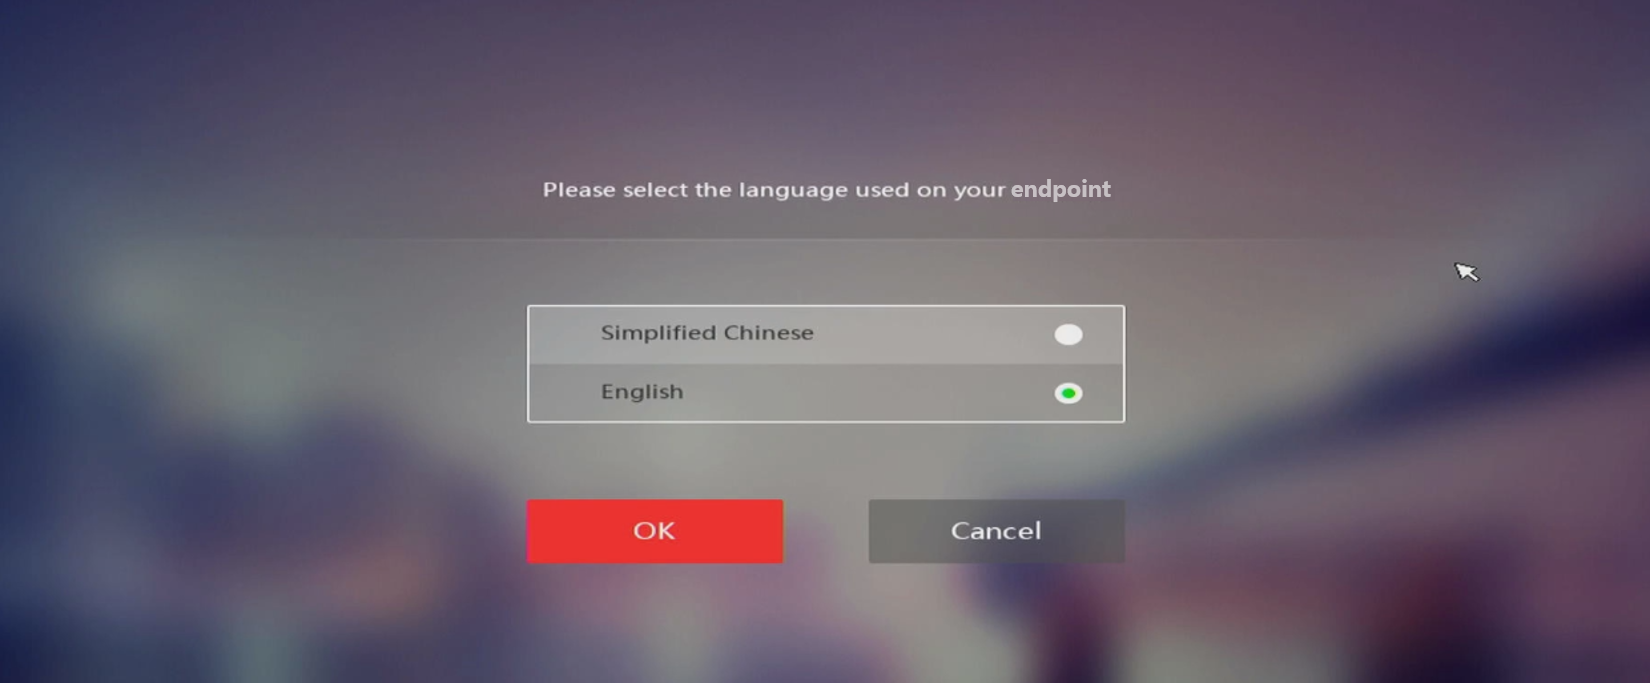
Selecting endpoint language
1. To select the endpoint language, click the More icon ![]() in
top right corner, and click Language.
in
top right corner, and click Language.
Figure 49 Select endpoint language
Configuring advanced settings
Testing the network connectivity
1. Click the More icon ![]() in
top right corner, and select Advanced
Settings.
in
top right corner, and select Advanced
Settings.
2. In the dialog box that opens, enter the endpoint management password.
To obtain the endpoint management password, access the System > Advanced Settings > System Parameters > Cloud Desktop Parameters page on Space Console.
3. Click Diagnosis.
The system will check the network connectivity between the student client and Space Console.
Figure 50 Testing the network connectivity

Managing the image
1. Click the More icon ![]() in
top right corner, and select Advanced
Settings.
in
top right corner, and select Advanced
Settings.
2. In the dialog box that opens, enter the endpoint management password.
To obtain the endpoint management password, access the System > Advanced Settings > System Parameters > Cloud Desktop Parameters page on Space Console.
3. Click Configure next to Create Image.
4. In the dialog box that opens, enter the administrator account and password.
You can obtain the administrator account and password from Space Console. If you use the default administrator account, identify whether the password is the default.
5. Select an image source and then click download.
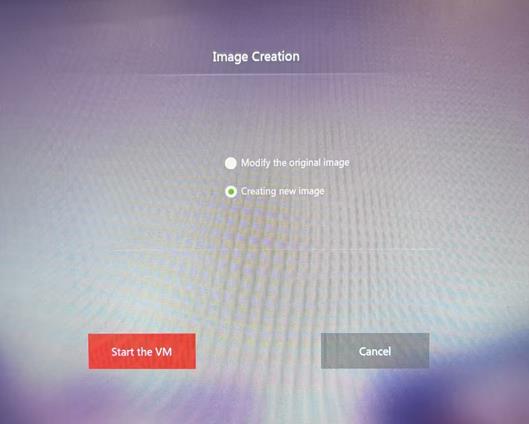
If the image source has not been downloaded, the endpoint will download the image source automatically. After the download, click OK. Then, select one of the following image creation methods and click Start the VM :
¡ Modify the Original Image: Create a new level-1 image based on the selected image.
¡ Creating New Image: Creates a level-2 image based on the selected image.
|
|
NOTE: The available images are level-1 images, which are desktop images on Space Console. You can create a new image (level-2 image) based on the selected level-1 image. The level-2 image can be uploaded to Space Console as a VOI desktop image. |
|
|
IMPORTANT: Before you create an image, back up the local image data, because creating an image might restore the system disk that hosts the local image. |
Figure 51 Selecting an image source
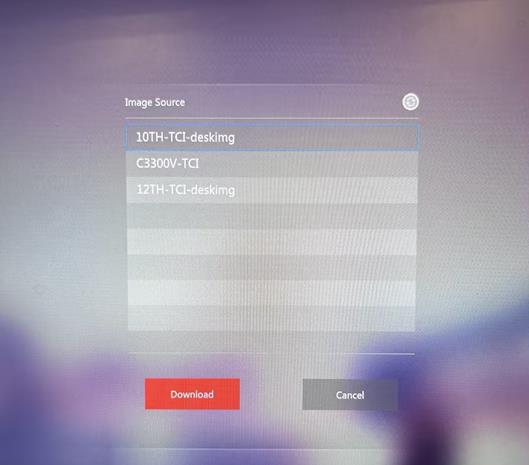
Figure 52 Selecting the image creation method
6. After image creation, restart the endpoint, and perform one of the following tasks:
¡ To enter the operating system of the new image, select Start Client.
¡ To upload the image to Space Console, select Upload Image File. In the dialog box that opens, click Yes. The system will upload the image to Space Console. After the upload completes, configure the name and description of the image, then click Report to Space Console.
Redownloading the system file
1. Click the More icon ![]() in
top right corner, and select Advanced
Settings.
in
top right corner, and select Advanced
Settings.
2. In the dialog box that opens, enter the endpoint management password.
To obtain the endpoint management password, access the System > Advanced Settings > System Parameters > Cloud Desktop Parameters page on Space Console.
3. Click Confirm next to Redownload System Image. In the dialog box that opens, enter the administrator account and password, and click OK. The system will automatically download the default VOI course bound to the endpoint.
This task is applicable to scenarios where a client fault occurs, for example, a C drive fault or client startup fault.
Connecting to a wireless network
Restrictions and guidelines
· Only some endpoints support connecting to wireless networks. The Wi-Fi enablement button is greyed on the other endpoints.
· When both the Wi-Fi and wired network features are enabled, the endpoint uses only wired networks by default.
· It might take a long time if you download images through a wireless connection. As a best practice, use a wired network to download images.
Procedure
To connect to a wireless network:
1. Click the More icon ![]() in
top right corner, and select Advanced
Settings.
in
top right corner, and select Advanced
Settings.
2. In the dialog box that opens, enter the endpoint management password.
To obtain the endpoint management password, access the System > Advanced Settings > System Parameters > Cloud Desktop Parameters page on Space Console.
3. Click Configure next to Wireless Network Settings.
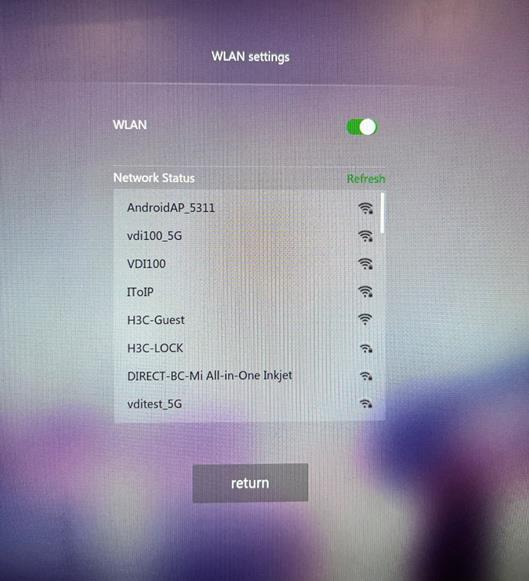
4. In the dialog box that opens, enable the WLAN feature.
5. Double-click the name of the target WLAN, enter the password, and then click Connect.
If you select Boot with connection, the endpoint will connects to the WLAN automatically if the Wi-Fi can be detected.
Figure 53 Connecting to a wireless network
Connecting to a wired network
By default, an endpoint obtains an IP address through DHCP. You can also configure an IP address for the endpoint manually.
To connect to a wired network:
1. Click the More icon ![]() in
top right corner, and select Advanced
Settings.
in
top right corner, and select Advanced
Settings.
2. In the dialog box that opens, enter the endpoint management password.
To obtain the endpoint management password, access the System > Advanced Settings > System Parameters > Cloud Desktop Parameters page on Space Console.
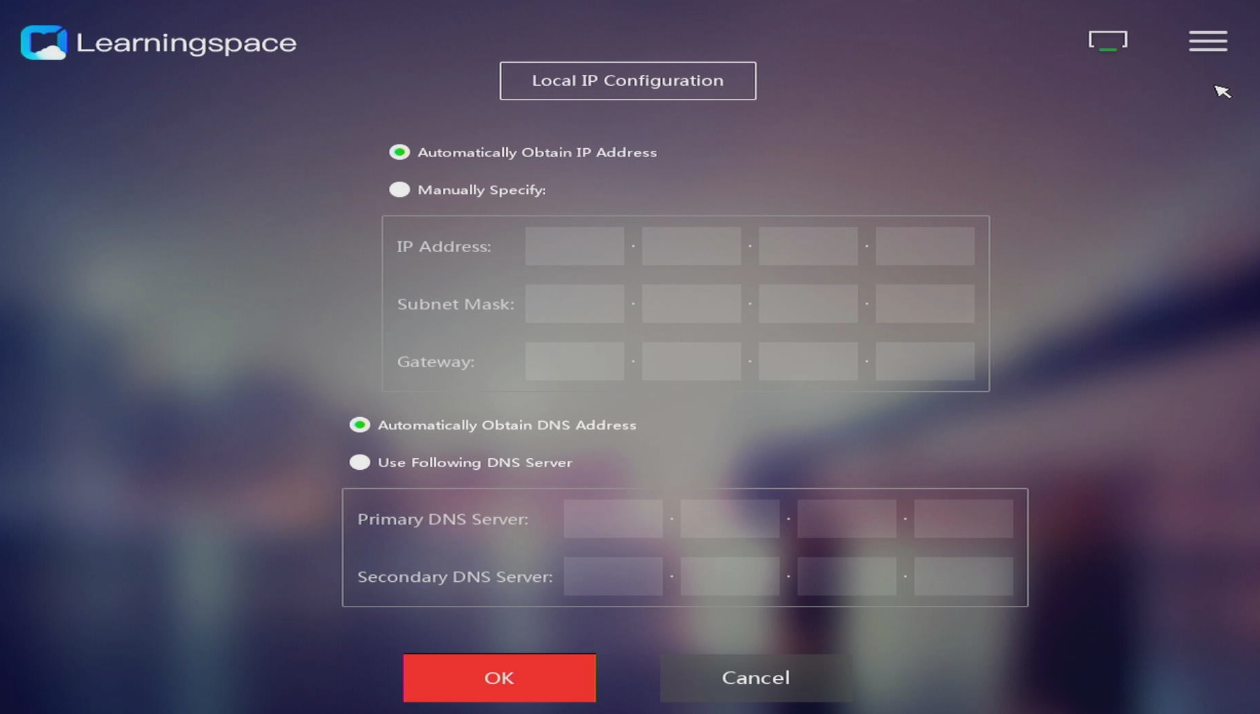
3. Click Configure next to Wired Network Settings, and then access the Local IP Configuration page as shown in Figure 45.
4. Perform one of the following tasks:
¡ Select Automatically Obtain IP Address and Automatically Obtain DNS Address.
¡ Select Manually Specify and Use Following DNS Server, and then configure the endpoint and DNS server IP addresses.
If the domain controller server has enabled domain tree configuration (for relevant operations, see authentication server configuration in UniCloud Workspace Cloud Desktop Management Software User Manual), configure the secondary DNS server address as the domain tree address.
5. Click OK.
The endpoint will be restarted automatically.
Figure 54 Connecting to a wired network
Connecting to a mobile network
Perform this task to enable or disable mobile network connection. By default, mobile network connection is enabled after endpoint system initialization. You can use the mobile network function after the endpoint is inserted with a SIM card.
Restrictions and guidelines
· The mobile network IP cannot be manually configured, and can only be obtained automatically.
· As a best practice, use a 4G mobile network or higher.
· SIM card providers are not limited.
· SIM cards supports hot swapping.
Procedure
1. Click the More icon ![]() in
top right corner, and select Advanced
Settings.
in
top right corner, and select Advanced
Settings.
2. Click Configure next to Mobile Network Settings.
3. On the page that opens, you can view the mobile network IP address, signal strength, and network type information, and click Turn On Mobile Data or Turn Off Mobile Data to enable or disable the mobile network.
Restoring to factory defaults
1. Click the More icon ![]() in
top right corner, and select Advanced
Settings.
in
top right corner, and select Advanced
Settings.
2. In the dialog box that opens, enter the endpoint management password.
To obtain the endpoint management password, access the System > Advanced Settings > System Parameters > Cloud Desktop Parameters page on Space Console.
3. Click Configure next to Restoring to Factory Defaults.
4. In the dialog box that opens, enter the endpoint management password. The system will restore the settings to factory defaults.
For information about the endpoint management password, see H3C Workspace Cloud Desktop Management Software User Manual.
Restoring data
1. Click the More
icon ![]() in top right corner, and select Advanced
Settings.
in top right corner, and select Advanced
Settings.
2. Click Configure next to Data Restoration.
3. Select a restoration type and click OK. Then, enter CONFIRM (case-insensitive) to start data restoration. The endpoint will restart after the restoration finishes.
¡ Full Restoration: The system disk and user data disk of the corresponding course on the endpoint will be restored to the restoration point or the initial state. That is, the user data in the system disk and user data disk of the corresponding course will be deleted.
¡ System Restoration: The system disk of the corresponding course on the endpoint will be restored to the restoration point or the initial state. That is, the user data in the system disk of the corresponding course will be deleted.
Figure 55 Selecting a restoration type

|
|
NOTE: The system disk refers to the logical disk loaded during OS installation for the course image. When the system disk is restored, the system restores the entire logical disk. If multiple partitions other than the C drive partition, such as D and E partitions, are added during OS installation, all partitions will be restored. |
Managing the snapshot
|
|
NOTE: Snapshot management is available only for system disks, instead of data disks. |
This function is a supplement to the restoration function of the management platform. This function applies to the following scenarios:
· User restoration point management in offline mode.
· Manual abnormal VOI endpoint restoration after restoration points are created in bulk on the management platform.
1. Click the More icon ![]() in
top right corner, and select Advanced
Settings.
in
top right corner, and select Advanced
Settings.
2. In the dialog box that opens, enter the endpoint management password.
To obtain the endpoint management password, access the System > Advanced Settings > System Parameters > Cloud Desktop Parameters page on Space Console.
3. On the advanced configuration page, click Configure next to Snapshot Management.
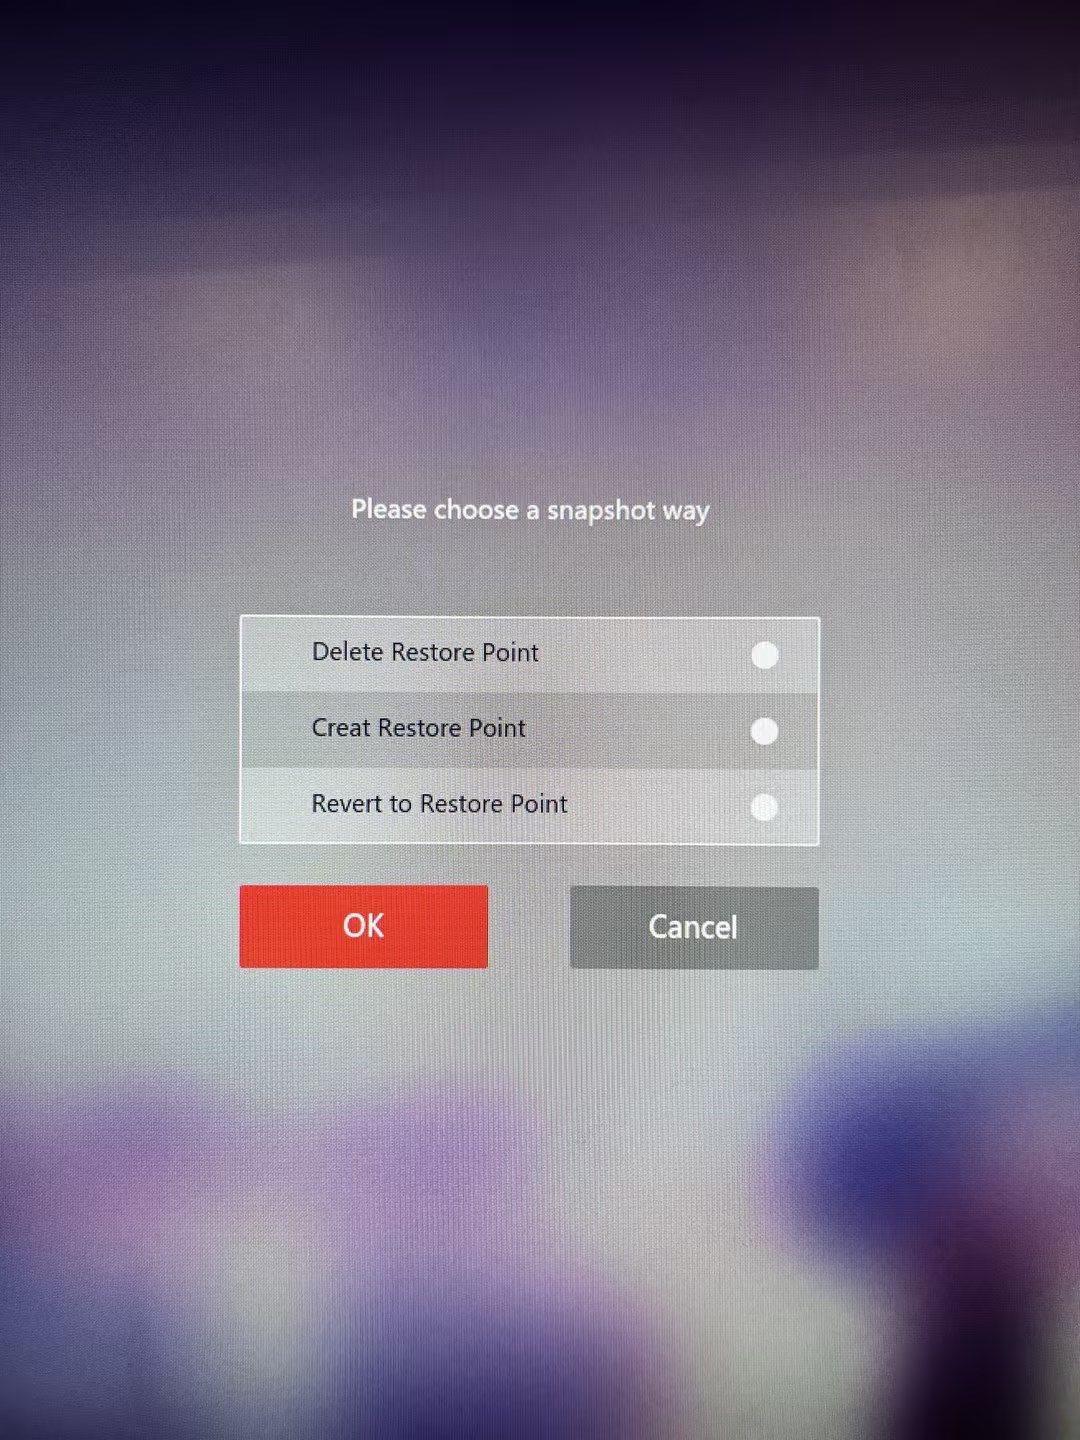
4. Perform one of the following tasks:
¡ Click Delete Restore Point and click OK to delete the existing restoration point for the used course image and return to the login page.
¡ Click Create Restore Point and click OK to delete the existing restoration point for the used desktop image, create a new restoration point, and return to the login page.
¡ Click Revert to Restore Point and click OK to restore the course image from a restoration point and return to the login page.
Figure 56 Managing the snapshot
Configuring auto computer name reset
To reset the computer name every time you shut down or restart the desktop, enable auto computer name reset. This function is disabled by default, and the computer name of the desktop is not changed when the desktop is shut down or restarted.
To configure auto computer name reset:
1. Click the More icon ![]() in
top right corner, and select Advanced
Settings.
in
top right corner, and select Advanced
Settings.
2. In the dialog box that opens, enter the endpoint management password.
To obtain the endpoint management password, access the System > Advanced Settings > System Parameters > Cloud Desktop Parameters page on Space Console.
3. Click Enable or Disable next to Auto Computer Name Reset to enable or disable this feature.
With this feature enabled, the system resets the computer name every time you shut down or restart the desktop. By default, this feature is disabled.
Specifying the offline mode
When the endpoint network is disconnected from Space Console, you can still use the desktop in offline mode if the following conditions are met:
· The endpoint has a course image.
· In non-anonymous mode, you have logged in to the desktop at least once on the client.
· In the classroom to which the endpoint belongs on Space Console, the period for offline use has been set.
To specify the offline mode:
1. Click the More icon ![]() in
top right corner.
in
top right corner.
2. Click the Offline Mode button to enable the offline mode.
After the offline mode is enabled, you can log in to the desktop in case of network disconnection.
|
|
NOTE: In offline mode, policy updates on Space Console cannot be synchronized to the endpoint. Only the local policies take effect, which are the latest synchronized policies from Space Console. When the network is connected and you log in to the desktop, policies on Space Console will be synchronized to the local. |
Viewing version information
1. Click the More icon ![]() in
top right corner, and select About.
in
top right corner, and select About.
2. View the information on the Version page, including the product name, device ID, version information, and technical support number.
Rebooting or shutting down the cloud desktop
1. Click the More icon ![]() in
top right corner, and perform
one of the following tasks:
in
top right corner, and perform
one of the following tasks:
¡ To reboot the endpoint, select Reboot.
¡ To shut down the endpoint, select Shut Down.
Troubleshooting the student client
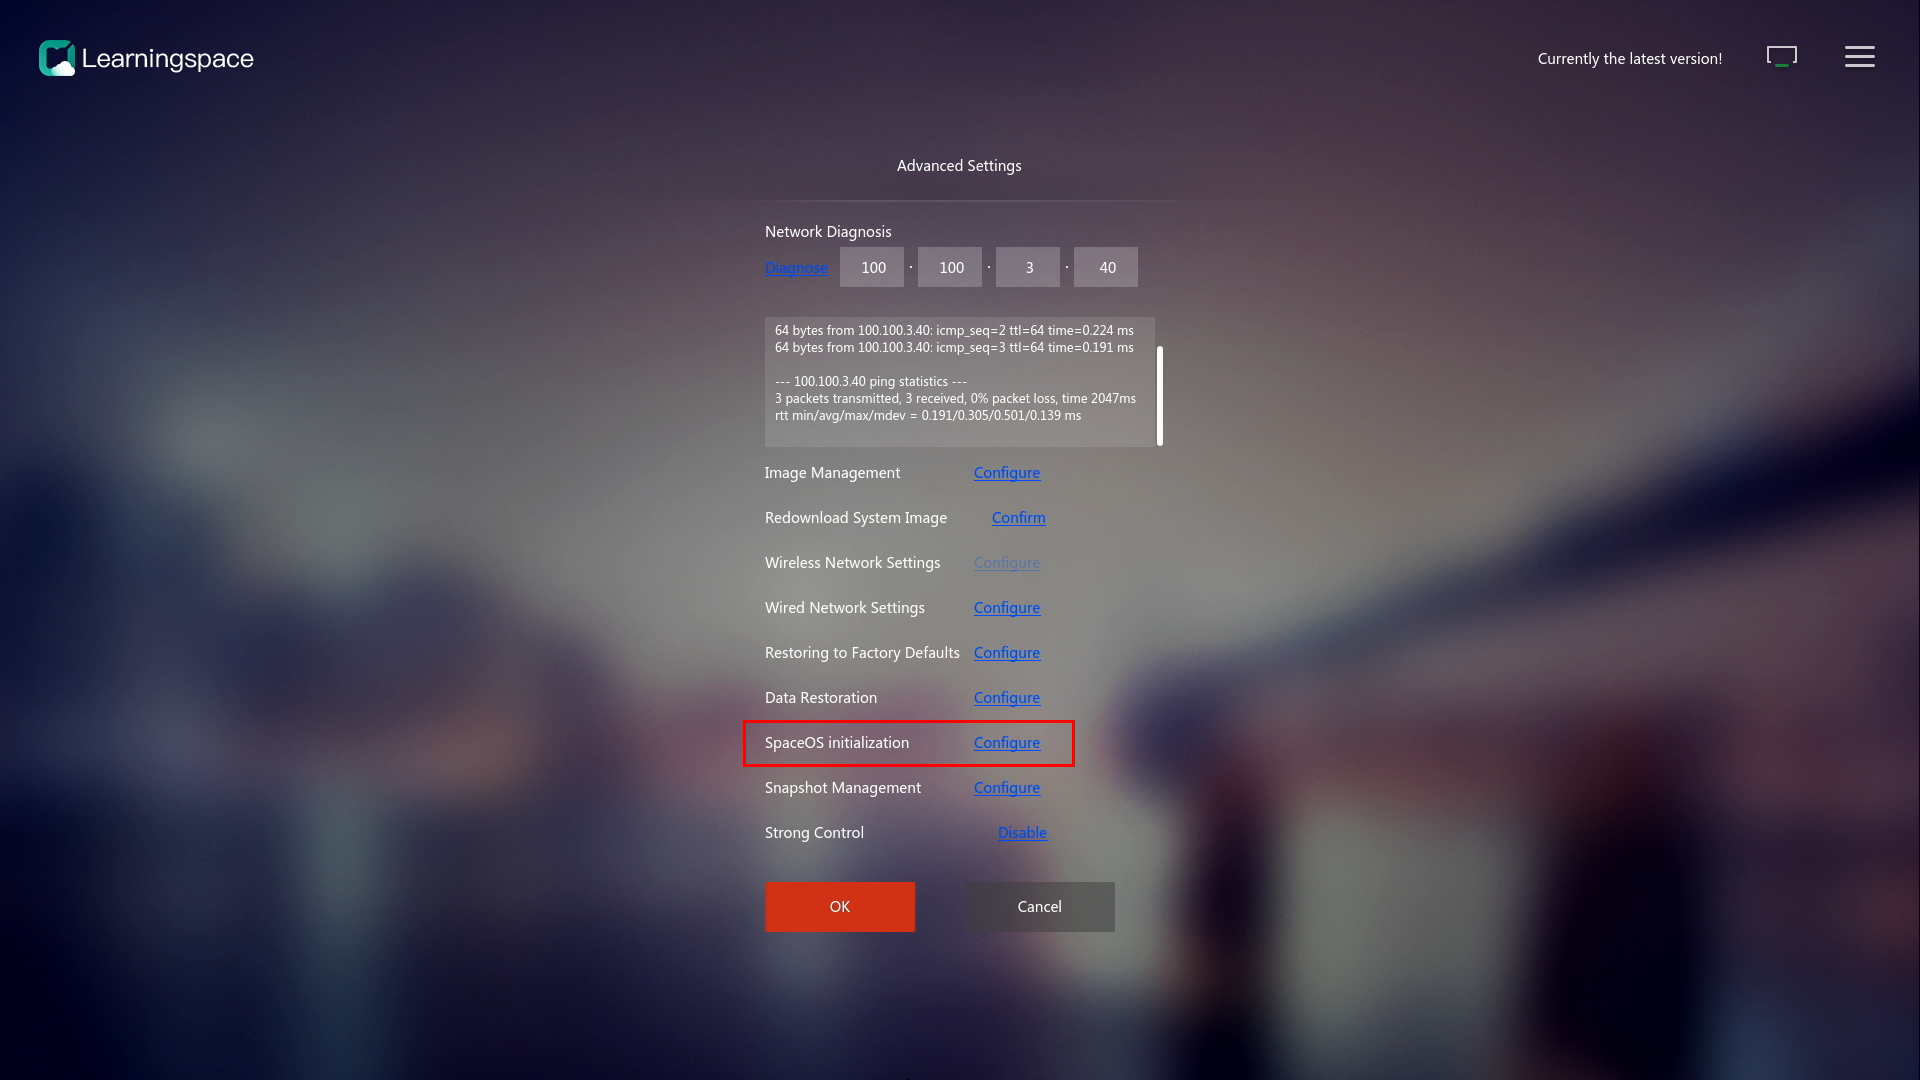
Method of distinguishing UCC endpoints from non-UCC endpoints (IDV or VOI endpoints)
If SpaceOS Initialization is displayed on the advanced settings page of an endpoint, the endpoint is a UCC endpoint, as shown in Figure 34.
Figure 57 SpaceOS Initialization
System initialization failure after a VOI endpoint starts
Symptom
After a VOI endpoint starts up, the system reports an initialization failure error.
Solution
It might because that it took a long time for the client to obtain the IP address through DHCP.
To resolve this issue, configure the ports on the access switch as edge ports. For example:
<switch> system-view
[switch] interface range GigabitEthernet 1/0/1 to GigabitEthernet 1/0/48
[switch-if-range] stp edged-port
The student client fails to log in after advanced settings of Learningspace have been edited on Space Console
Symptom
After the administrator edits the advanced settings of Learningspace on Space Console, the student client fails to log in even it is not in any class.
Solution
To resolve this issue, execute the following command on the CVM server or the primary management node in a failover system:
mysql -uroot -p -e "USE workspace;INSERT INTO TBL_PARAMETER(TYPE,NAME,VALUE) SELECT 'learningSpace.sys.conf','class.appointment.mode','off' FROM DUAL WHERE NOT EXISTS(SELECT * FROM TBL_PARAMETER WHERE NAME = 'class.appointment.mode');UPDATE TBL_PARAMETER SET VALUE='off' WHERE NAME='class.appointment.mode';UPDATE TBL_CLASSROOM SET IS_FORCE_LOGIN=IS_MANDATORY_LOGIN"
To obtain the password for MySQL, contact H3C Support.
