| Title | Size | Downloads |
|---|---|---|
| H3C Workspace Cloud Desktop Client Customization Configuration Guide (Office Scenario)-E1013 Series-5W101-book.pdf | 839.53 KB |
- Table of Contents
- Related Documents
-
|
|
|
H3C Workspace Cloud Desktop |
|
Client Customization Configuration Guide |
|
(Office Scenario) |
|
|
Document version: 5W101-20230728
Copyright © 2023 New H3C Technologies Co., Ltd. All rights reserved.
No part of this manual may be reproduced or transmitted in any form or by any means without prior written consent of New H3C Technologies Co., Ltd.
Except for the trademarks of New H3C Technologies Co., Ltd., any trademarks that may be mentioned in this document are the property of their respective owners.
The information in this document is subject to change without notice.
About client customization
Client customization allows users to customize the client system name, logo, copyright information, and background picture.
This function is applicable to users that need to customize the interface style and system name for their Workspace clients.
Customizing the client
Use WorkspaceConfiger to customize parameters for the client installation package, such as the logo picture, background picture, copyright information, and copyright information picture. After the customization is completed, a .zip installation package is generated for the customized client. You can install the client after decompression of the installation package.
This document uses the E1013P11 version as an example. The customization methods might differ if you use a different version.
Prerequisites
Before customizing the client, perform the following tasks:
· Prepare the following pictures:
¡ A 350 × 82 pixels logo picture.
¡ A background picture that has the same resolution as that used by the cloud desktop.
¡ A 350 × 82 pixels copyright information picture.
· To obtain the H3C_Workspace_Configure installation package and the target client installation package from official channels.
Restrictions and guidelines
· Make sure the background picture and logo picture meet the format and size requirements.
· Client customization supports only .png pictures.
· Client customization supports only .zip client installation packages.
Procedure
Installing WorkspaceConfiger
Install one of the following WorkspaceConfiger installation files:
· For the client running on a Windows endpoint, use the H3C_Workspace_Configure-version-win32.exe installer.
· For the client running on a C101LS endpoint with SpaceOS installed, use the H3C_Workspace_Configure-version-linux-x64.deb installation package.
· For the client running on a C113 endpoint with SpaceOS installed, use the H3C_Workspace_Configure-version-linux-x64.deb installation package.
The installation procedure for WorkspaceConfiger on SpaceOS does not differ between endpoint models. This section uses the C113 endpoint as an example.
Running the H3C_Workspace_Configure-version-win32.exe installer
1. Obtain the H3C_Workspace_Configure-version-win32.exe installer.
2. Double-click the H3C_Workspace_Configure-version-win32.exe installer on the Windows endpoint.
After the WorkspaceConfiger installation is completed, the system creates a shortcut for WorkspaceConfiger.
Installing the H3C_Workspace_Configure-version-linux-arm32.deb installation package
1. Obtain the H3C_Workspace_Configure-version-linux-arm32.deb installation package.
2. Copy the installation package to the desktop of the C113 endpoint.
3. Start the Linux terminal, and execute the following commands to install WorkspaceConfiger.
spaceos@localhost:~$ cd /home/spaceos/Desktop
spaceos@localhost:~/Desktop$ ll
spaceos@localhost:~/Desktop$ dpkg –I H3C_Workspace_Configure-E1013P11-linux-arm32.deb
Customizing the Workspace client by using WorkspaceConfiger
1. Click the ![]() shortcut icon on the Windows endpoint or the
shortcut icon on the Windows endpoint or the ![]() shortcut icon on
the SpaceOS endpoint.
shortcut icon on
the SpaceOS endpoint.
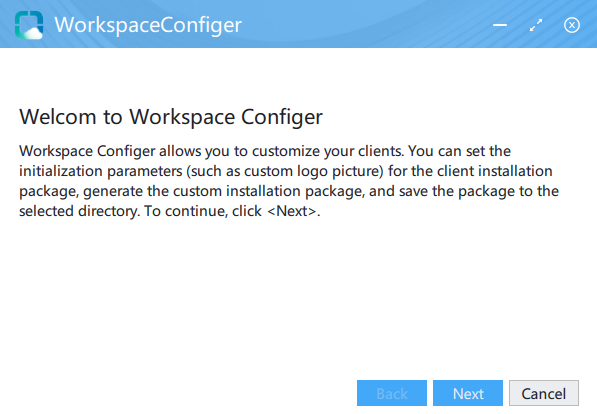
2. In the WorkspaceConfiger dialog box, click Next.
Figure 1 WorkspaceConfiger dialog box
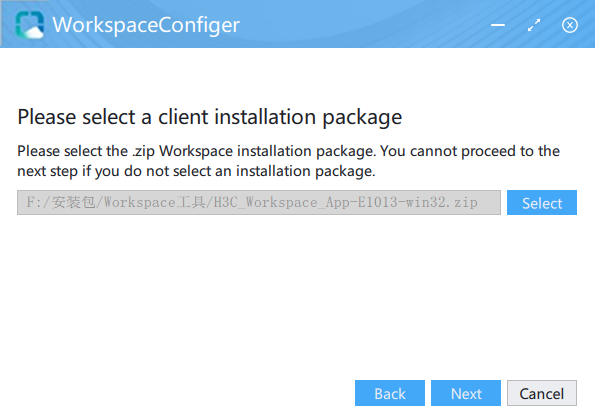
3. Select a client installation package to customize, and click Next.
The client installation package must be a .zip file. The version is E1013 in this example
Figure 2 Selecting the target client installation package
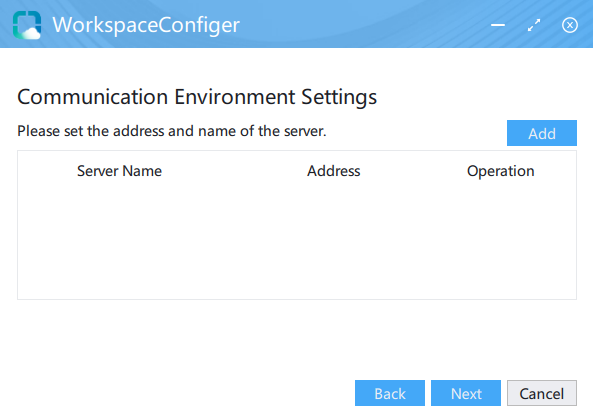
4. Configure the server name and IP address for Space Console, and click Next.
Figure 3 Configuring communication environment settings
5. Customize a logo picture, and customize a background picture for full screen client, and click Next.
Figure 4 Customizing the target pictures
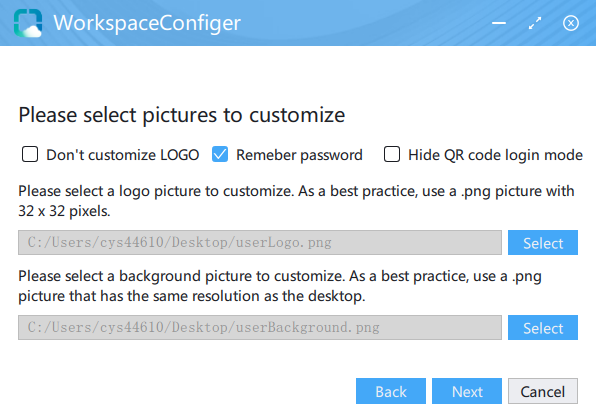
Figure 5 Logo picture on the login page
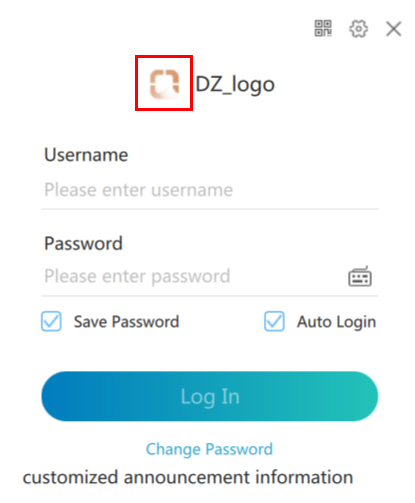
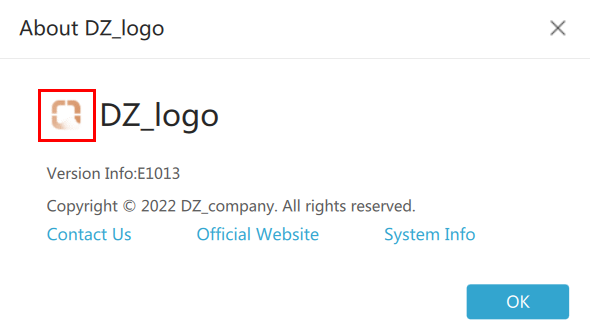
Figure 6 Logo picture on the About page
6. Customize the copyright information, and click Next.
Figure 7 Customizing the copyright information
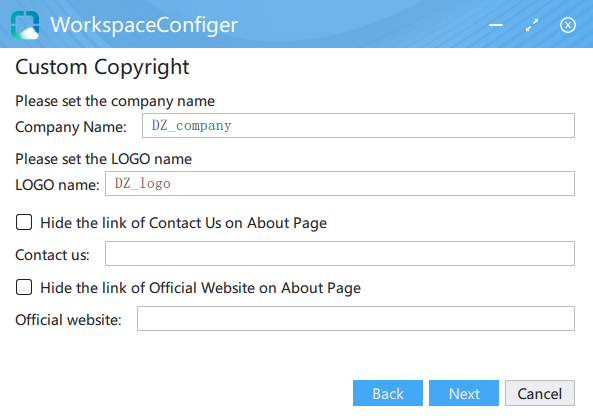
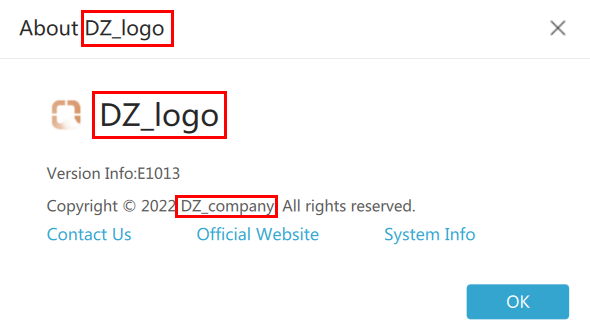
Figure 8 Copyright information on the About page
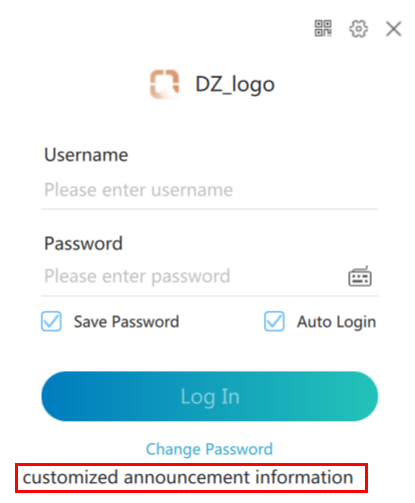
7. Customize the login announcement, and click Next.
Figure 9 Customizing the login announcement
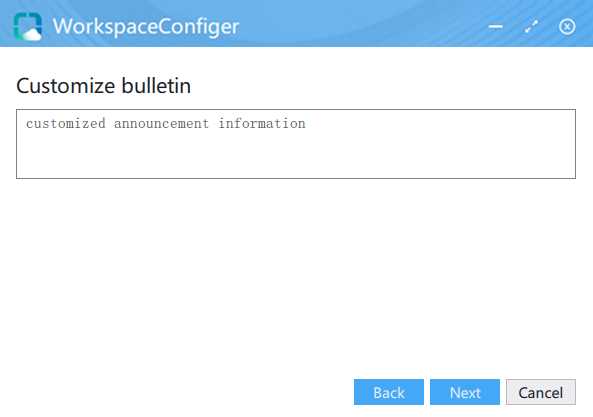
Figure 10 Login announcement on the login page
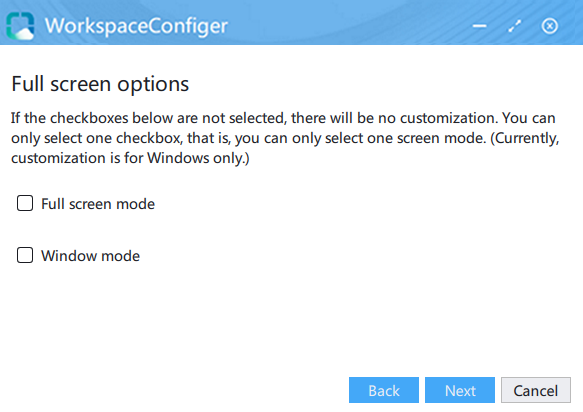
8. Customize the full screen options, and click Next. Only Windows clients support full screen options.
Figure 11 Customizing the full screen options
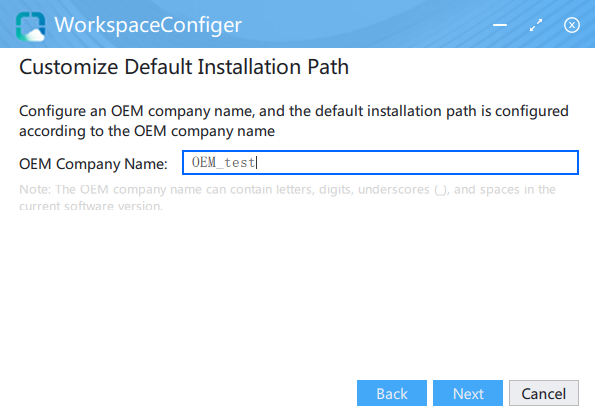
9. Customize the default installation path, and click Next.
Figure 12 Customizing the default installation path
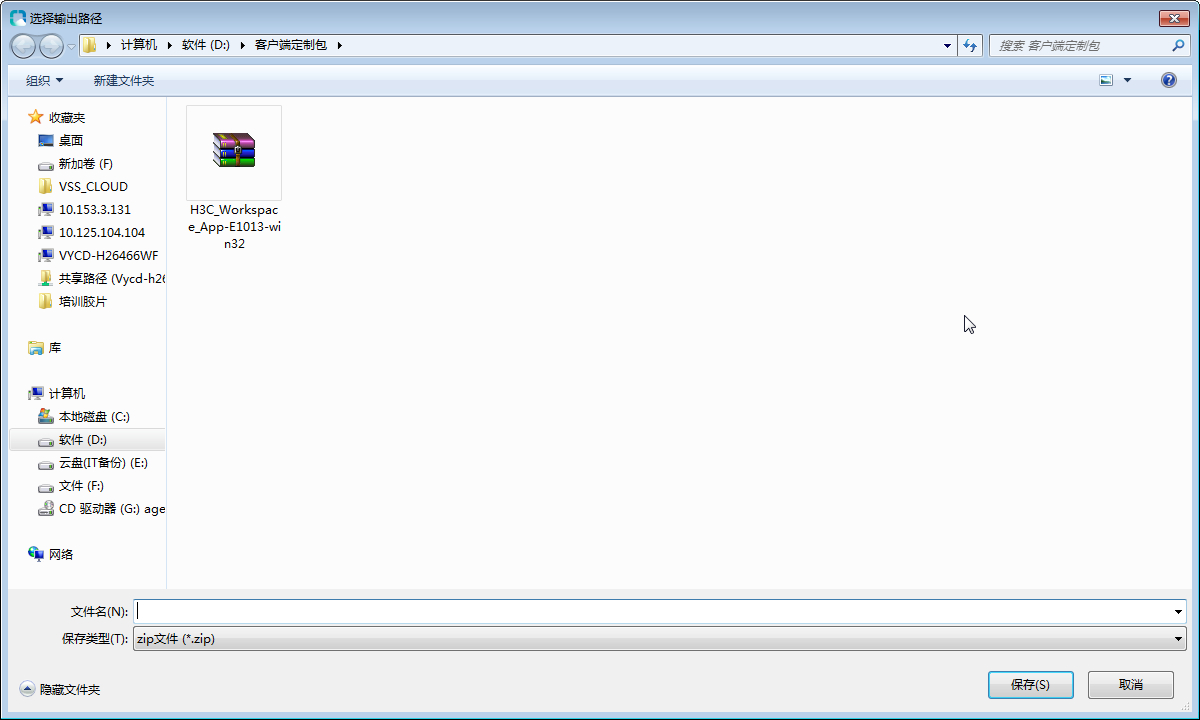
10. Click Generate, select a path to save the client installation package, and then click Finish.
Figure 13 Generating the customized client
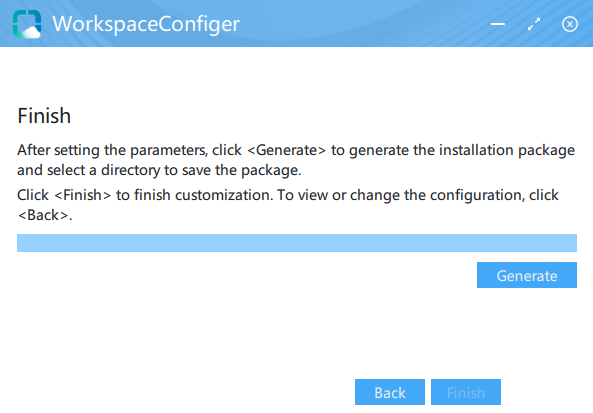
Figure 14 Selecting a storage path
11. Decompress the installation package, and install the customized client.
