H3C Workspace Cloud Desktop Shared Desktop Pool Configuration Examples-E1016 Series-5W102-book.pdf  (3.02 MB)
- Released At: 07-12-2023
- Page Views:
- Downloads:
- Table of Contents
- Related Documents
-
|
|
|
H3C Workspace Cloud Desktop |
|
Shared Desktop Pool Configuration Examples |
|
|
|
|
Document version: 5W102-20231128
Copyright © 2023 New H3C Technologies Co., Ltd. All rights reserved.
No part of this manual may be reproduced or transmitted in any form or by any means without prior written consent of New H3C Technologies Co., Ltd.
Except for the trademarks of New H3C Technologies Co., Ltd., any trademarks that may be mentioned in this document are the property of their respective owners.
This document provides generic technical information, some of which might not be applicable to your products.
The information in this document is subject to change without notice.
Example: Configuring a shared desktop pool
Synchronizing the Space Console with the domain controller
Checking before publishing a desktop image
Creating a shared desktop pool
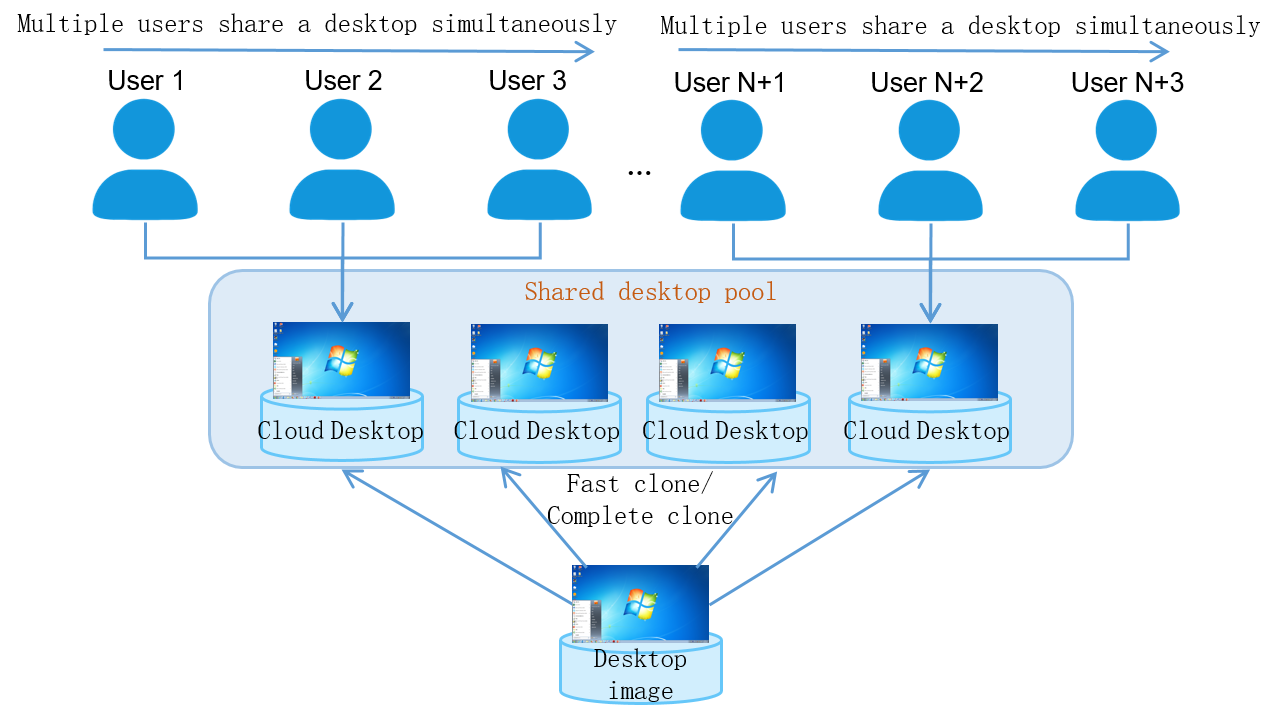
About shared desktop pools
Based on the Windows server system, the shared desktop pool supports multi-user login, and a desktop can be created and used concurrently by multiple users. When users only need a desktop for simple operations or basic applications, there is no need to allocate independent desktops for each user. Instead, the desktop can be shared to maximize utilization of server resources.
The following information describes how to share a desktop among multiple users through the shared desktop pool and domain users on the Space Console of H3C Workspace.
Prerequisites
· Complete the building of the H3C Workspace Cloud Desktop environment, including installing the H3C Space Console and completing its initial deployment, and making the endpoint with the self-developed SpaceOS system connected to the network. For more information, see H3C Workspace Desktop Management Software Installation and Deployment Guide.
· After initialization configuration is completed, the license server is installed on the virtual machine (VM) of the Space Console or on another physical server, and the configuration is completed on the License page of the Space Console. For details, see "License management" in the H3C Workspace Cloud Desktop Space Console User Manual.
· For E1009 and later versions, you also need to upload the client installation package of the corresponding endpoint to the Upgrade Services page on Space console, and upload the optimization tool zip package H3C_Workspace-version-OptTools.zip to the Image Tool page on Space Console.
Restrictions and guidelines
· The shared desktop supports local disk mapping and clipboard peripherals, which are enabled by default without policy control.
· The operating system for a shared desktop must be Windows Server 2008, 2012 R2, 2016 (recommended), or 2019 (recommended).
· To use a webcam through USB redirection on a shared desktop, use a Windows endpoint, and make sure the shared desktop runs Windows Server 2016 or 2019.
· A shared desktop can be accessed through the Workspace APP client or Web client. When you connect to a shared desktop from the Web client, select the application connection mode. For the detailed procedure, see H3C Workspace Cloud Desktop Client User Manual (Office Scenario).
· The configuration was created and verified in a lab environment, and all the servers and software were started with the factory default configuration. If the device has been configured, ensure that the existing configuration does not conflict with the configuration in the following example.
Example: Configuring a shared desktop pool
Network requirements
The R&D Department of a company restricts access to external websites, but sometimes the R&D personnel need to use the desktop to obtain work-related resources from some external websites. If everyone is allocated a desktop, it will cause a great waste of server resources. This problem can be effectively solved by the shared desktop pool, that is, by creating a desktop that can be used concurrently by multiple users. Network requirements are as follows:
· Multiple users access the same desktop system, and users' personal data is stored in different user files and isolated from each other.
· The shared desktop is bound to the user account. Employees can log in to the desktop using their own accounts and passwords.
Analysis
In this configuration example, the shared desktop pool is configured:
· The shared desktop pool is applicable to endpoints using operating systems (OS) including Windows, SpaceOS, Android, iOS, MacOS, UOS, NeoKylin, and KylinOS.
· A desktop in the shared desktop pool can be authorized for multiple users to use at the same time, and multiple desktops can also be authorized for a single user.
· Different users log in to the desktop with their own accounts and passwords. Drive C of each user is the same. Users can only access their own user files on C:\Users, and the data disks of users are the same and shared. After the desktop is restarted, the system will not be restored, the corresponding user account will not be deleted, and the user data and settings will also be preserved.
The specific configuration is as follows:
1. Enable the Space Console to synchronize the employees' account information on the domain controller.
2. Based on the application scenario and frequently-used software, create the corresponding desktop image, and use this desktop image to create a shared desktop pool.
3. Deploy a desktop through the created shared desktop pool and authorize users to use the desktop. A shared desktop pool supports local users and domain users.
4. Perform user login authentication.
Figure 1 Network diagram
Procedures
Version E1016 is used as an example to describe the typical configuration method of the shared desktop pool. For other versions, configure the shared desktop pool based on an actual situation.
Synchronizing the Space Console with the domain controller
|
|
NOTE: It is assumed that you has set up the domain controller and created the accounts for employees. |
On the Space Console, synchronize the configuration information on the domain controller.
1. Select System > Auth Collaboration > Primary Auth > LDAP Auth from the left navigation pane.
Figure 2 LDAP authentication

2. Select a domain controller server from the authentication server list, and click Create in the Sync OU area. Configure the parameters, and click then OK.
Figure 3 Creating a configuration synchronization task

Table 1 Configuration synchronization parameters
|
Parameter |
Description |
|
Name |
A name of the OU (subdomain base DN). |
|
Authentication Server |
Selected authentication server. |
|
Subdomain Base DN |
Subdomain base DN on the selected authentication server. |
|
Synchronize to LDAP Sever |
If you select this option, an OU will be created and synchronized to the authentication server. If you do not select this option, the specified OU on the authentication server will be added on the management platform. |
3. Click Sync Now in the Actions column for the configuration synchronization task.
Figure 4 Synchronizing the OU configuration

Creating a system image
On the H3C Space Console, upload the ISO system image of the Windows Server series to build an image source VM. In this example, Windows Server 2012 R2 is used. If a qualified system image already exists in the system, skip this step.
|
|
IMPORTANT: · If the upload path of the system image is the local directory of a host, only this host can use the system image. · If the upload path of the system image is a shared storage path, all hosts can use the system image. |
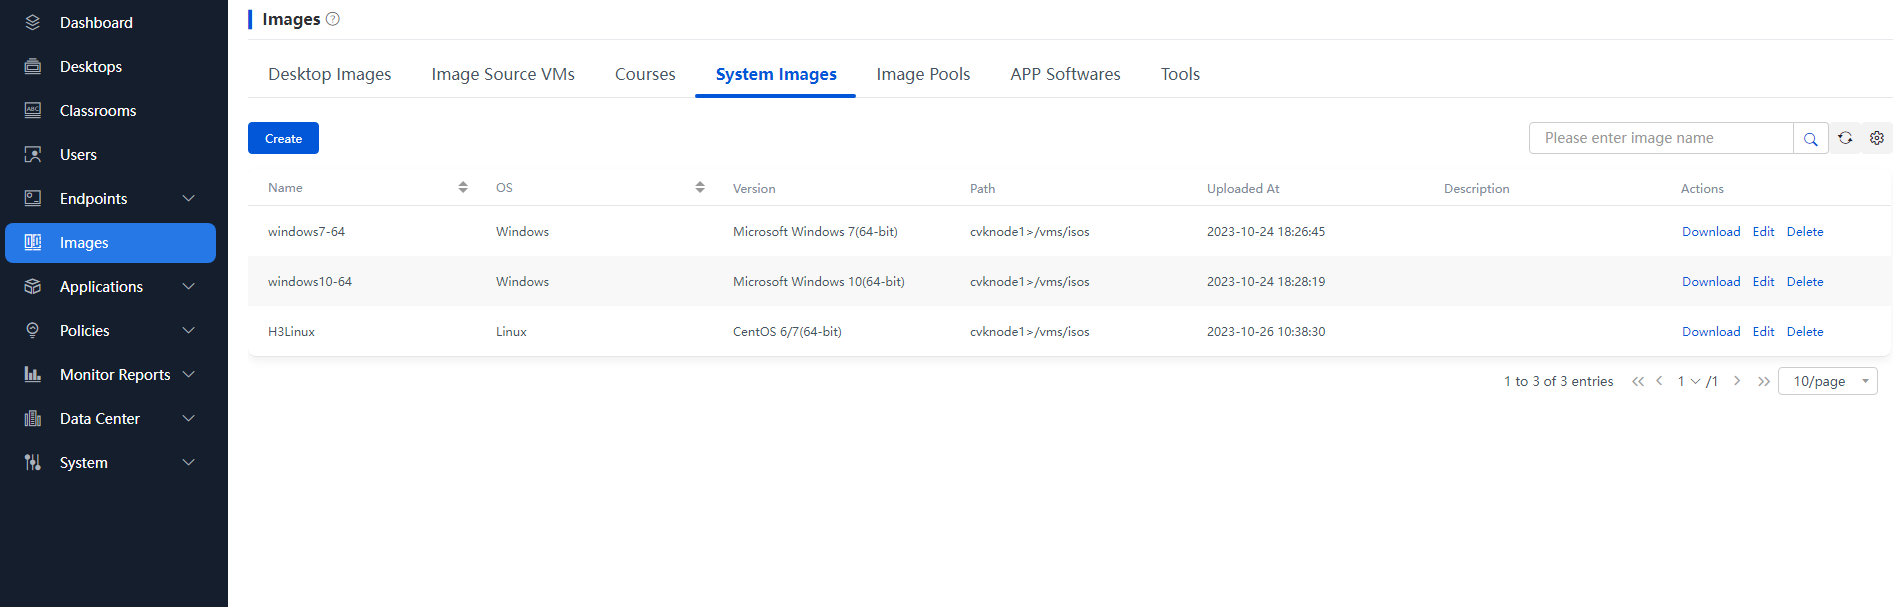
1. From the left navigation pane, select Images. Click the System Images tab, and then click Create.
Figure 5 Creating a system image
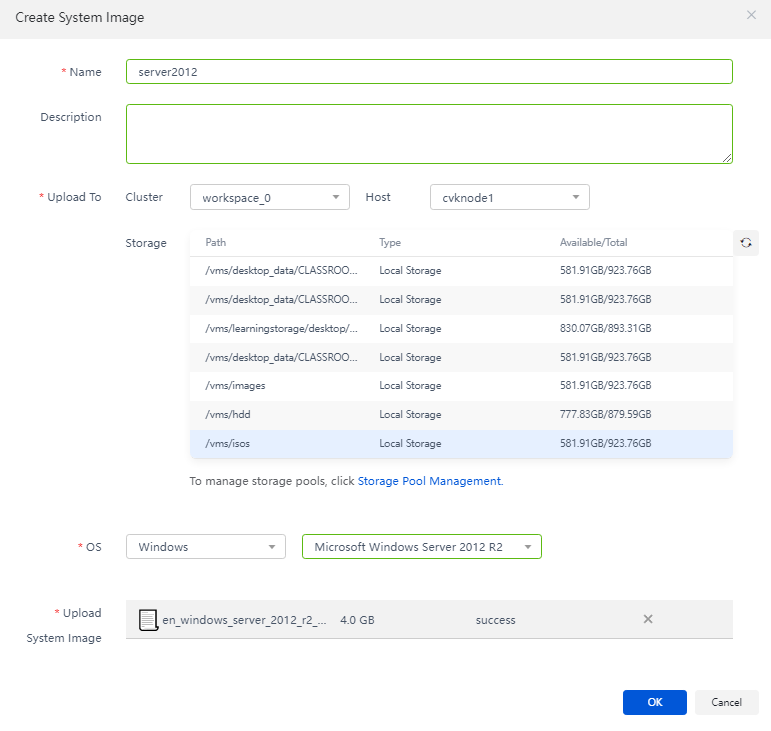
2. Configure the image name and image upload path. Select Windows and Microsoft Windows Server 2012 R2 as the operating system. Click Upload, select the ISO system image file, and then click Open to start uploading the image. After the upload is completed, click OK.
Figure 6 Uploading a system image
Creating an image source VM
On the H3C Space Console, create an image source VM "share" for department A.
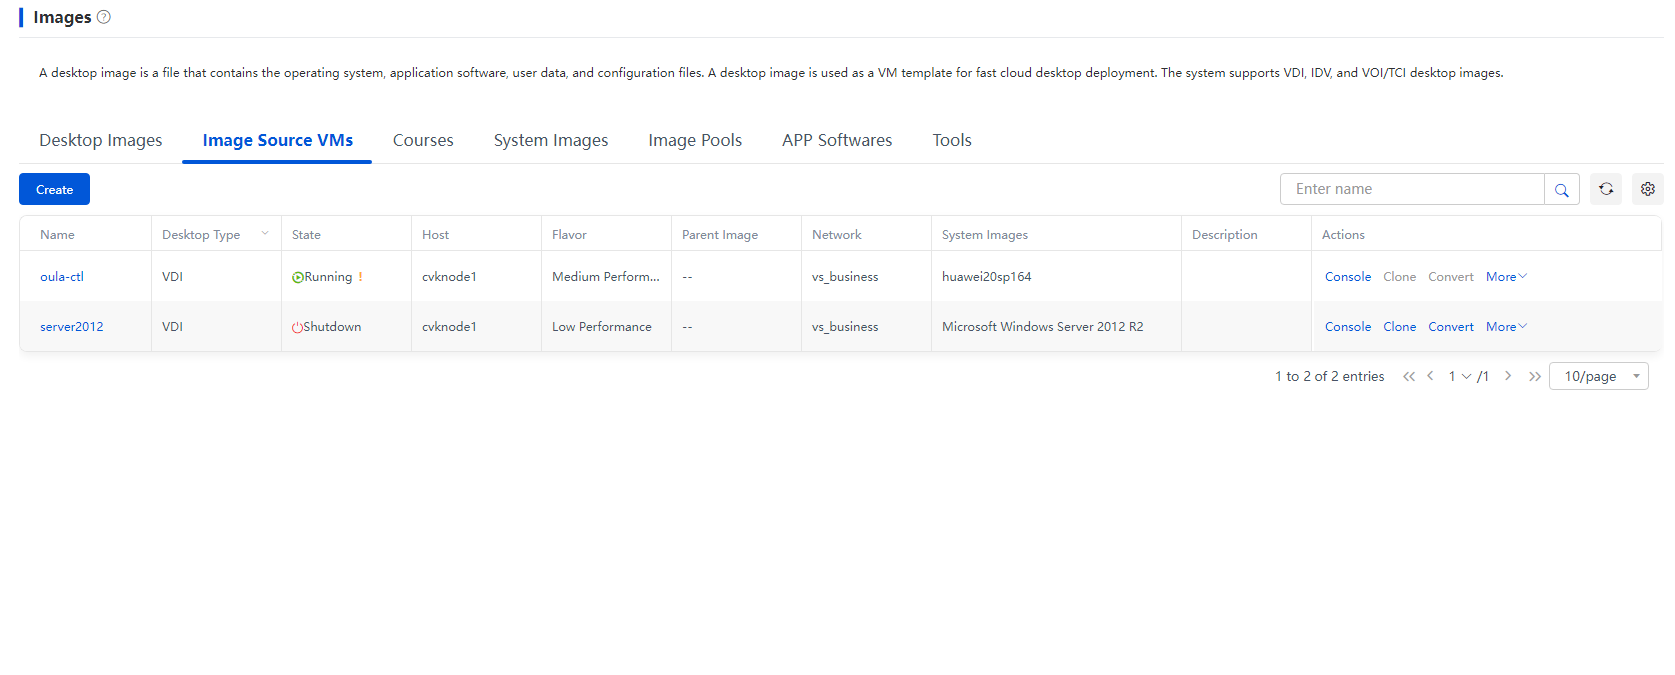
1. From the left navigation pane, select Images. Click the Image Source VMs tab, and then click Create.
Figure 7 Creating an image source VM
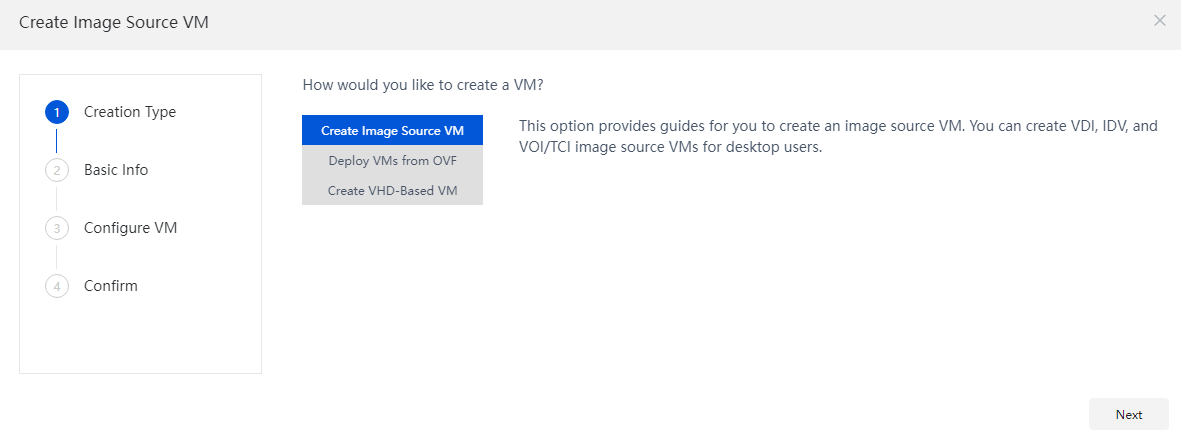
2. On the Create Image Source VM page, select Create Image Source VM for the creation type, and then click Next. Three creation types are available, including Create Image Source VM, Deploy VMs from OVF, and Create VHD-Based VM. In this example, the first type is selected.
Figure 8 Selecting a creation type
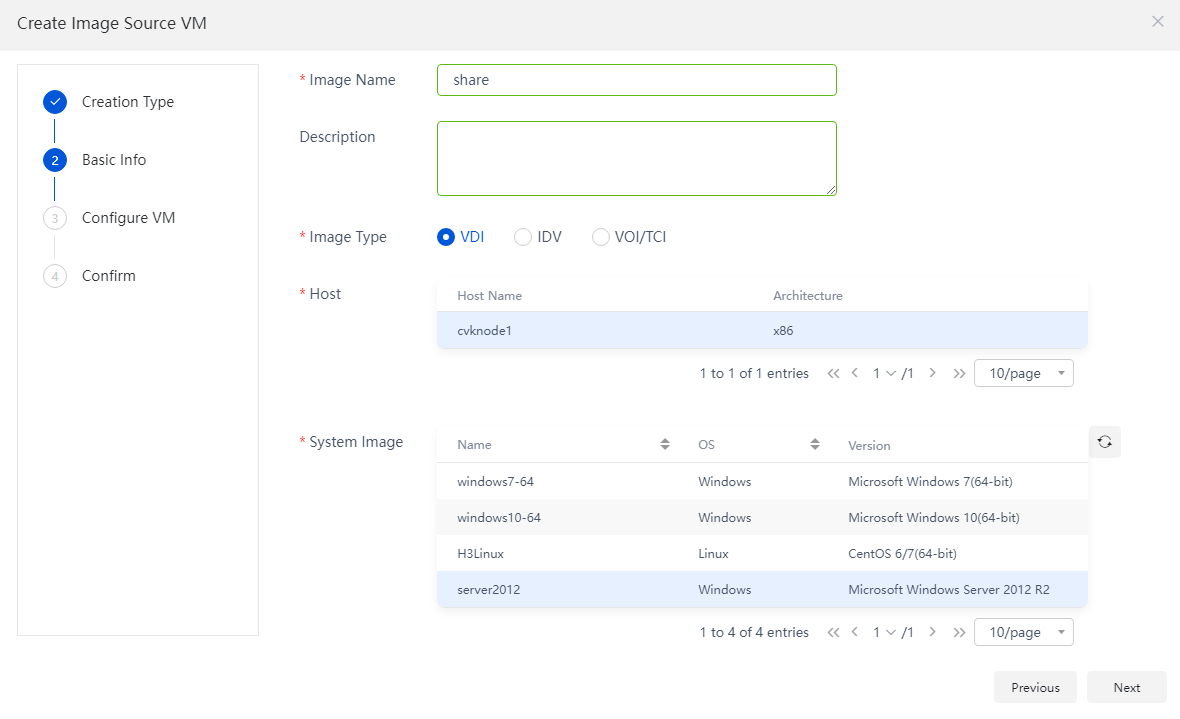
3. On the Basic Info page, configure the image name and other parameters as needed, and set Image Type to VDI and System Image to the system image uploaded in "Creating a system image."
Figure 9 Configuring the basic information of the new source image VM
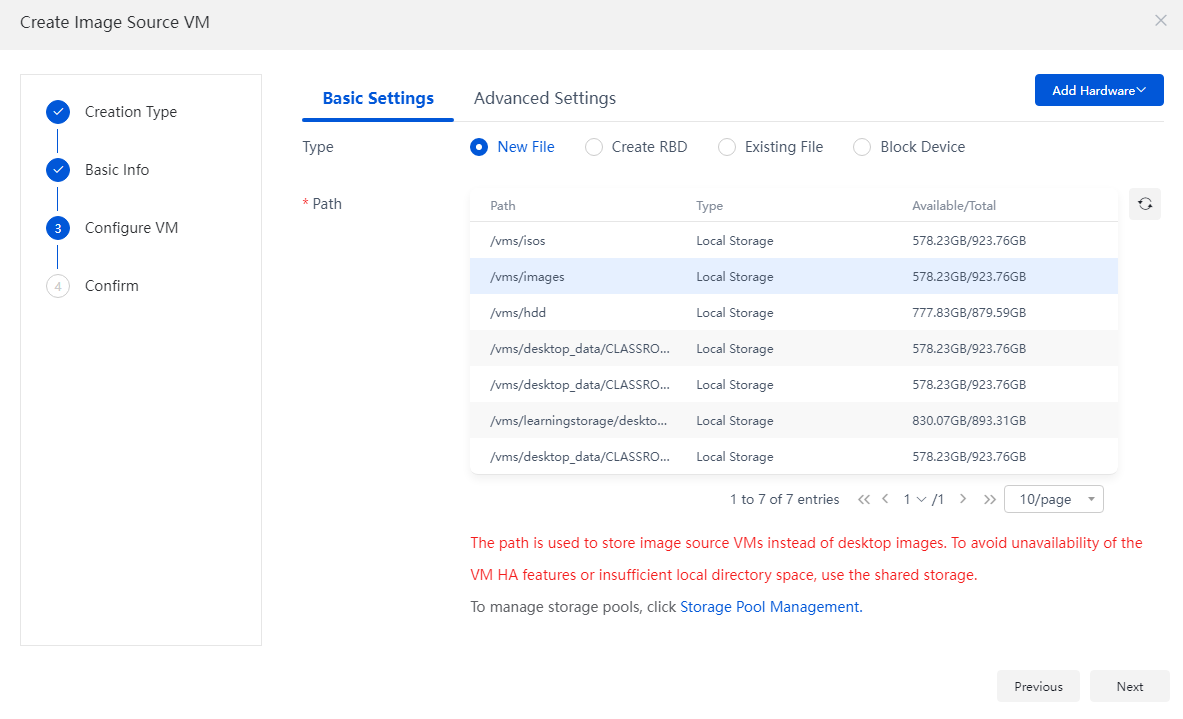
4. On the Configure VM page, select the Basic Settings tab, and configure the storage path, flavors, and network. Select the Advanced Settings tab, and configure parameters, such as the CPU working mode and file name. After completing the configuration, click Next.
Figure 10 Settings of the image source VM
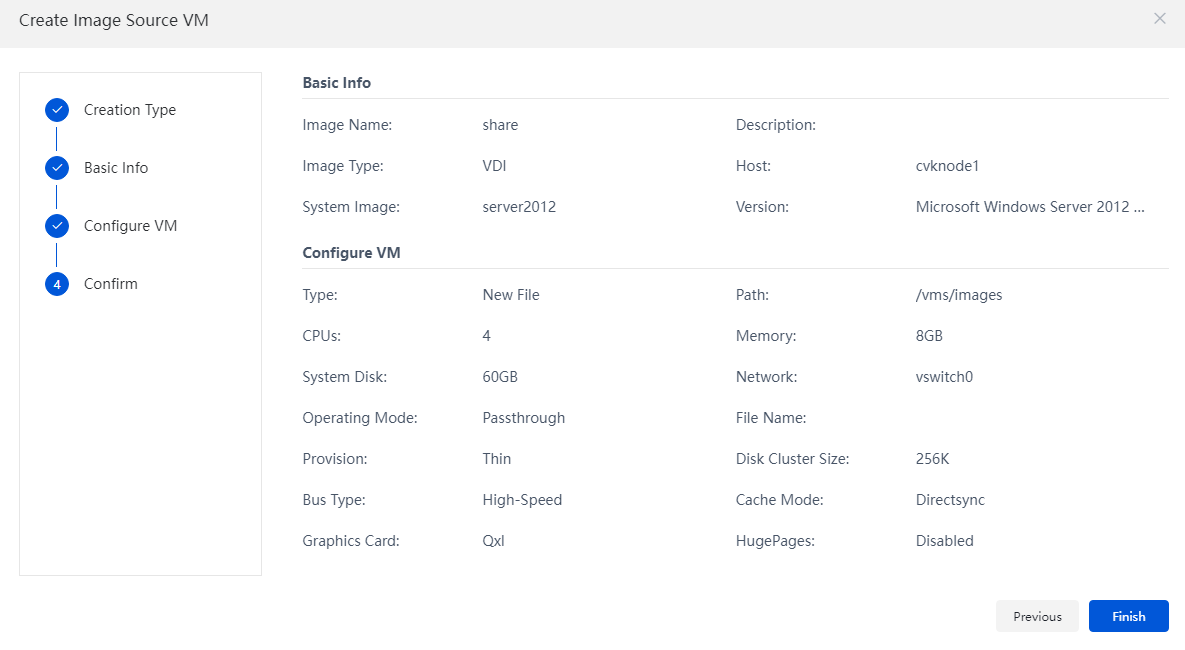
5. Verify that the configuration is correct, and then click Finish.
Figure 11 Verifying image source VM configuration
Building an image source VM
Installing an operating system
1. Click Console in the Actions column to start building an image source VM.
Figure 12 Clicking Console to start building an image source VM

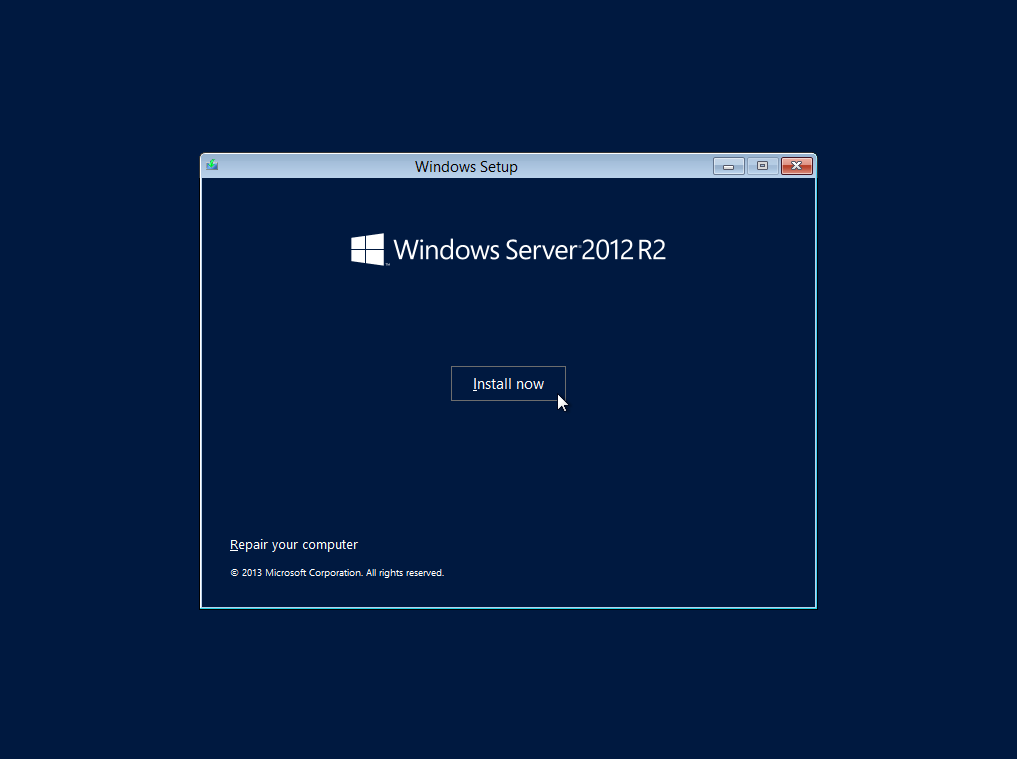
2. Install the operating system for the image source VM according to the wizard, as shown below.
Figure 13 Selecting a language and other preferences
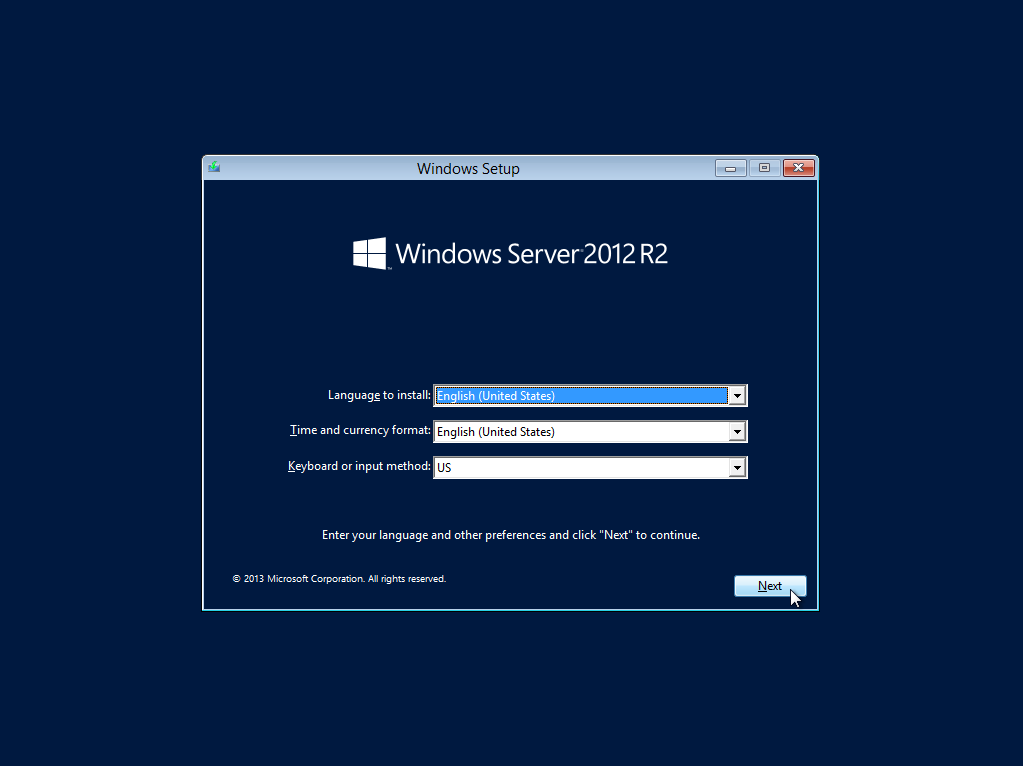
Figure 14 Start installing the operating system
|
|
NOTE: Select the operating system to be installed. As a best practice, select Windows server 2012 R2 Standard (server with a GUI). |
Figure 15 Selecting the operating system to be installed
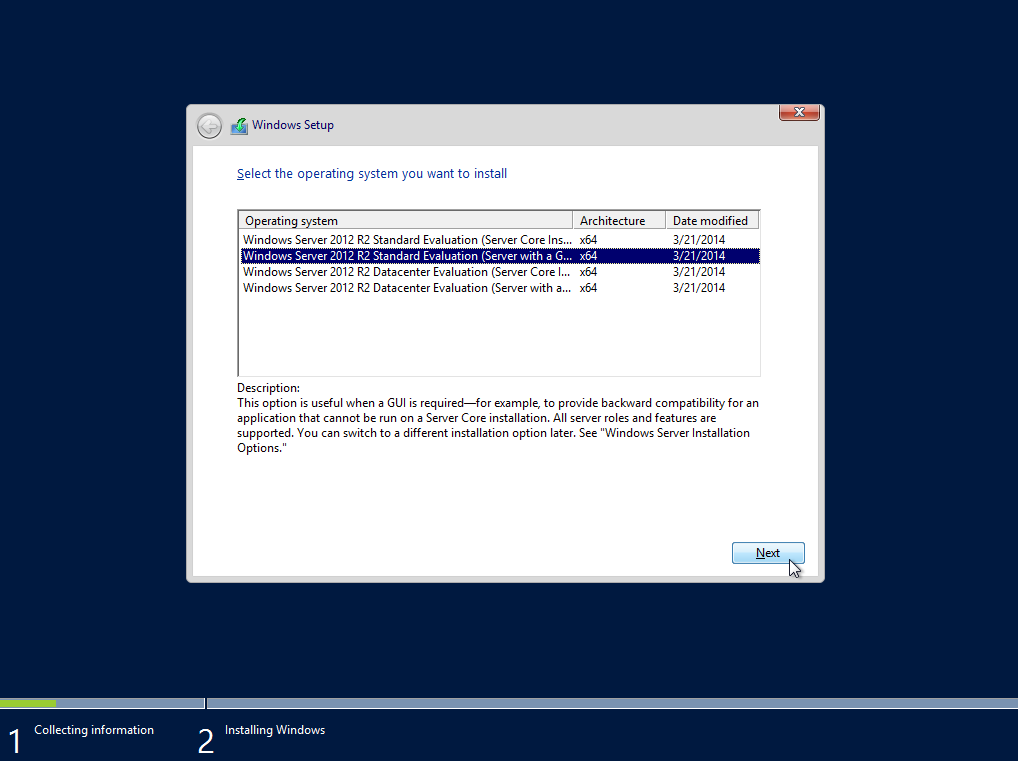
Figure 16 Accepting the installation license agreements
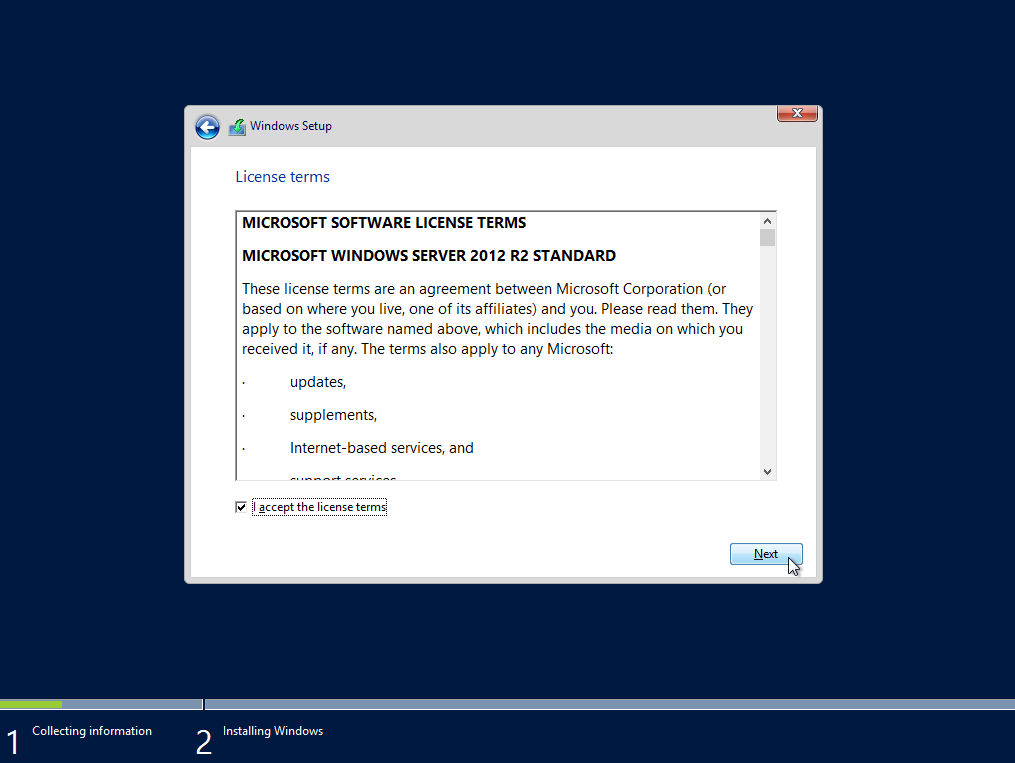
Figure 17 Selecting the installation type Custom install Windows only (advanced)
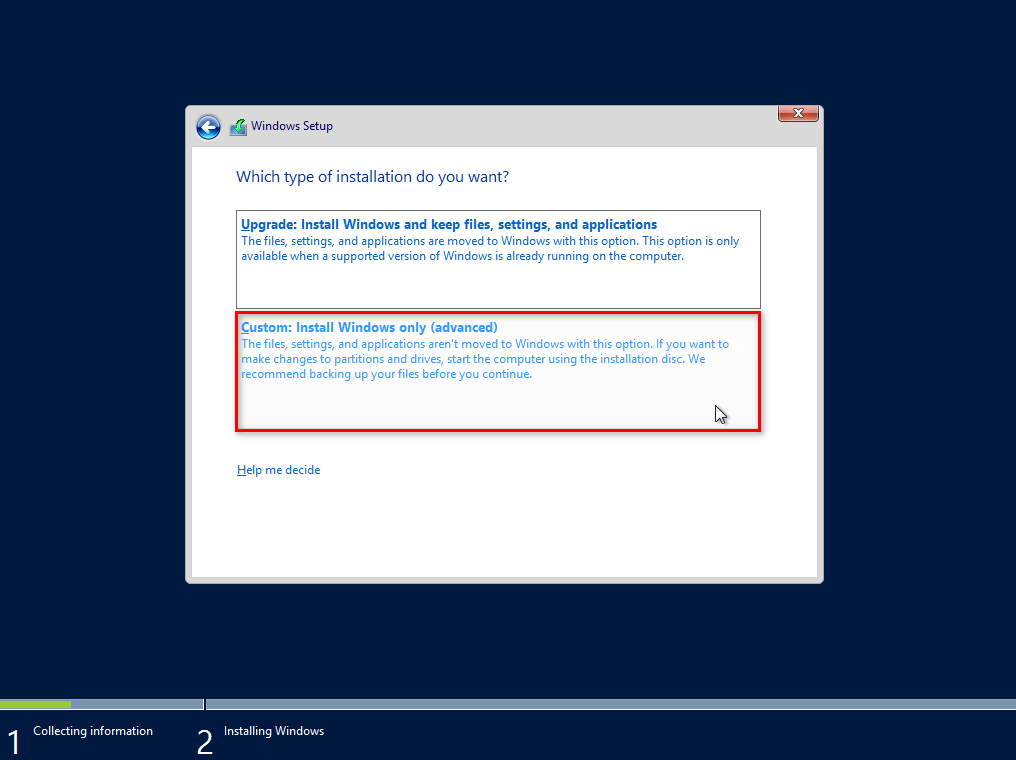
Figure 18 Clicking Load Driver (L)
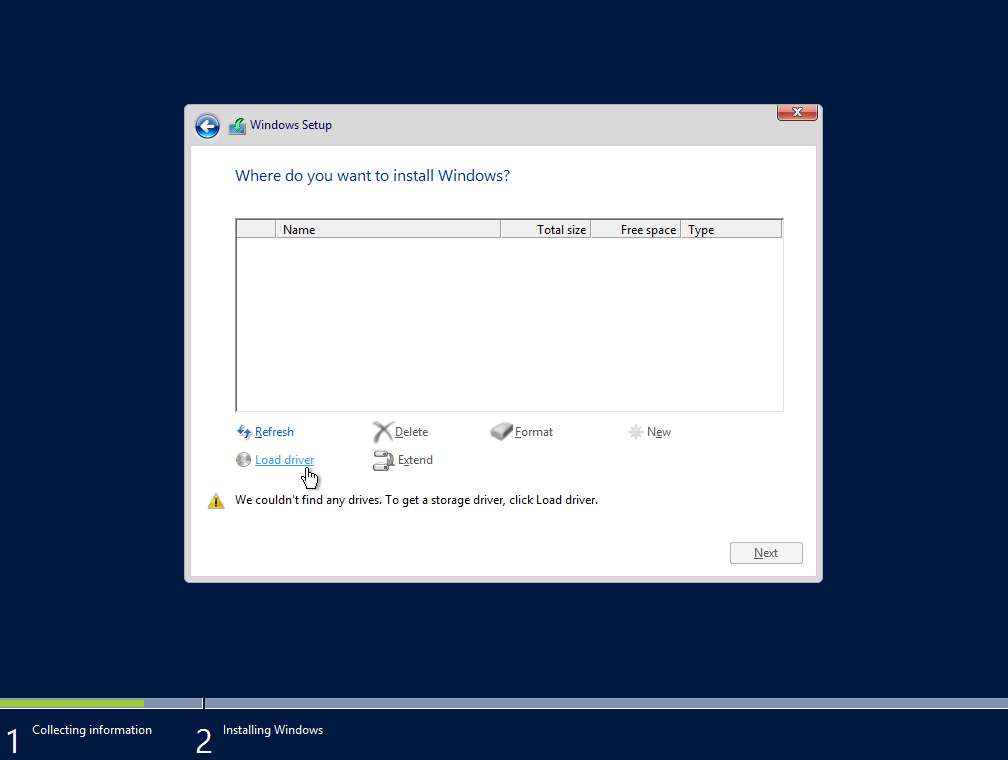
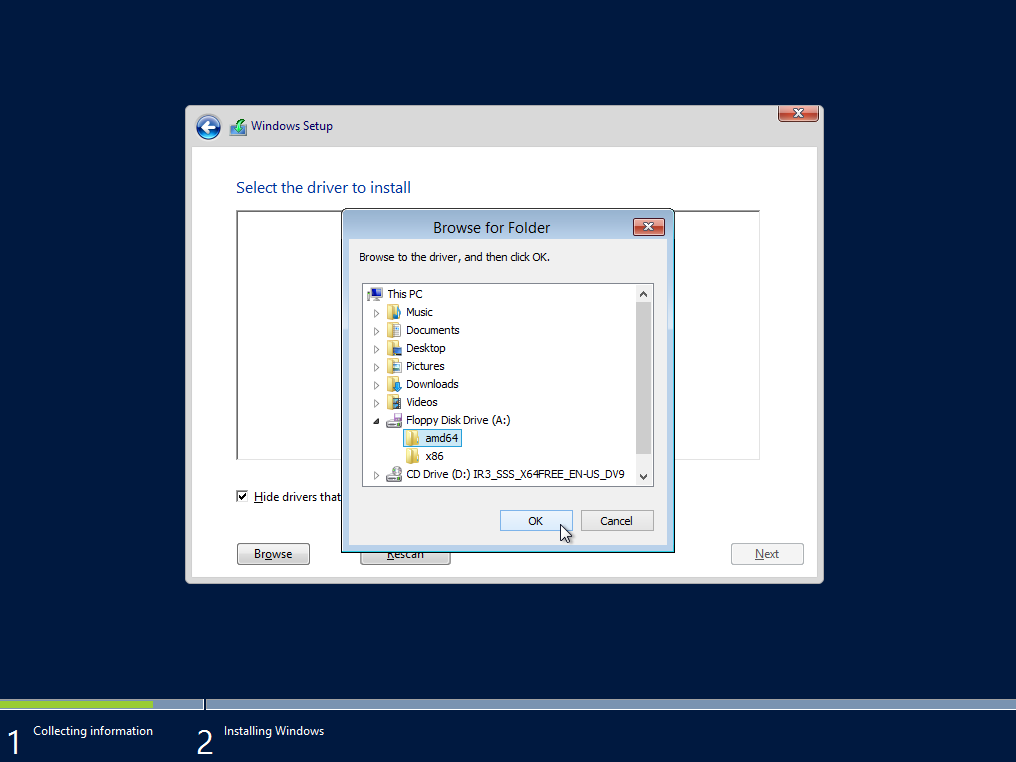
Figure 19 Selecting the driver to be installed based on the operating system
|
|
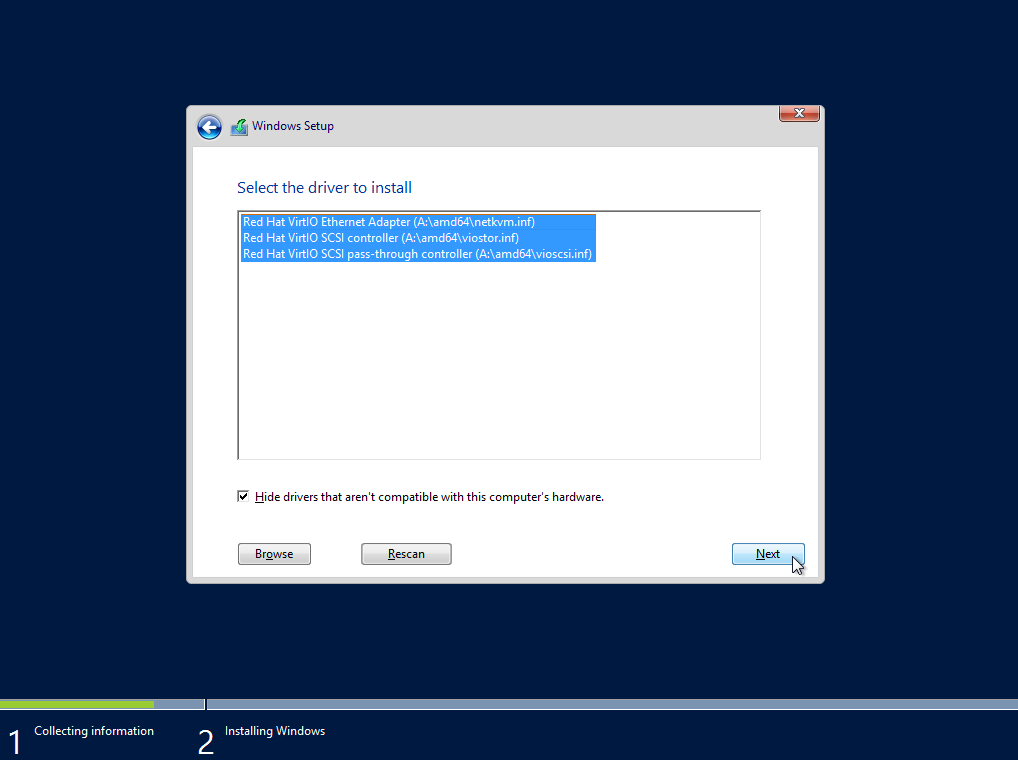
IMPORTANT: · For the 32-bit Windows operating system, select the driver under A:\x86\. · For the 64-bit Windows operating system, select the driver under A:\amd64\. · You must load the drivers and make sure all compatible drivers are selected in the driver dialog box. Otherwise the VM may fail to run normally due to absence of drivers. |
Figure 20 Selecting all compatible drivers
|
|
NOTE: When installing the operating system, partition the disks if there are multiple disks. |
Figure 21 Selecting the partition for installing the operating system
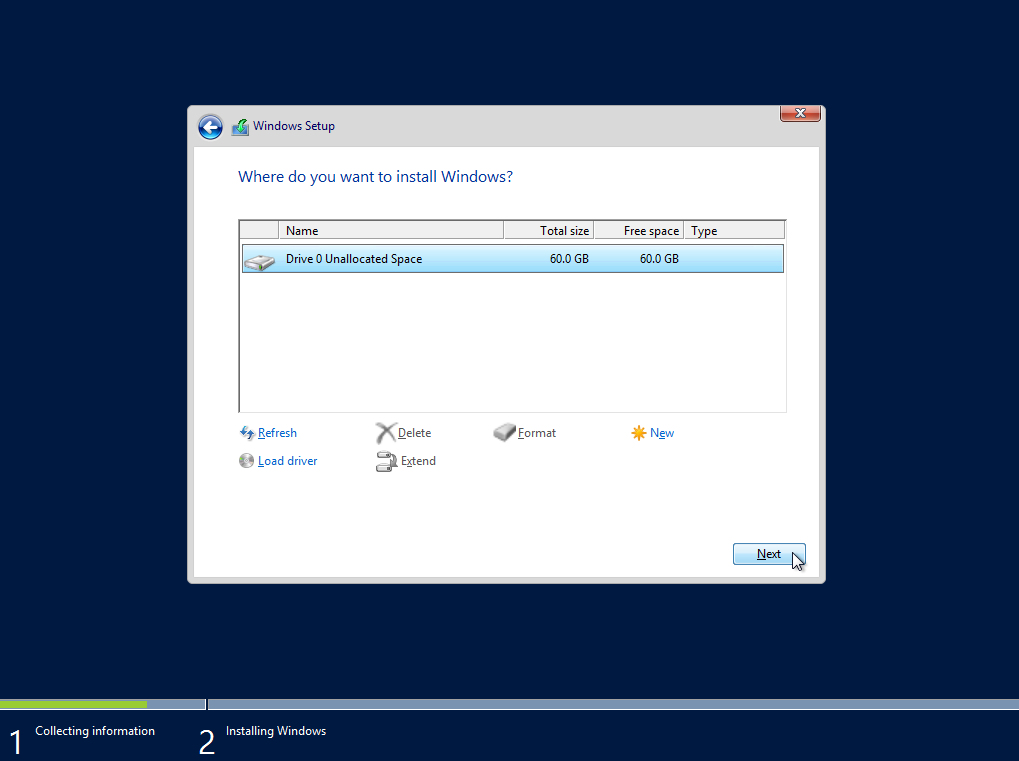
Figure 22 Waiting until installation is completed
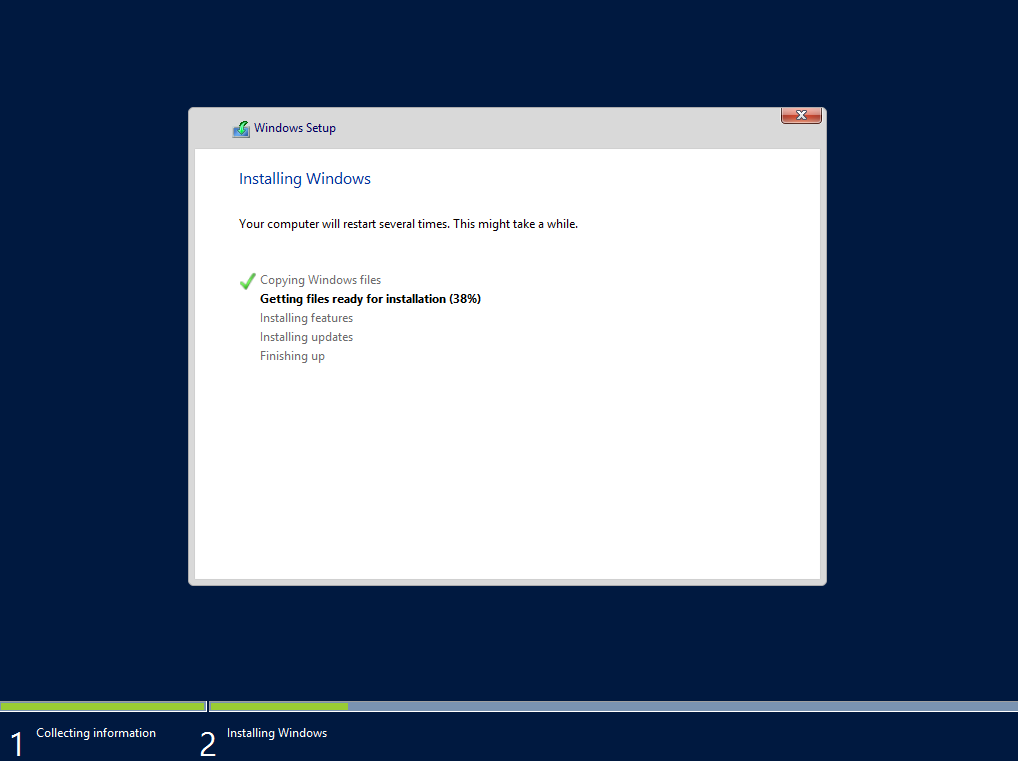
Figure 23 Configuring the Admin password
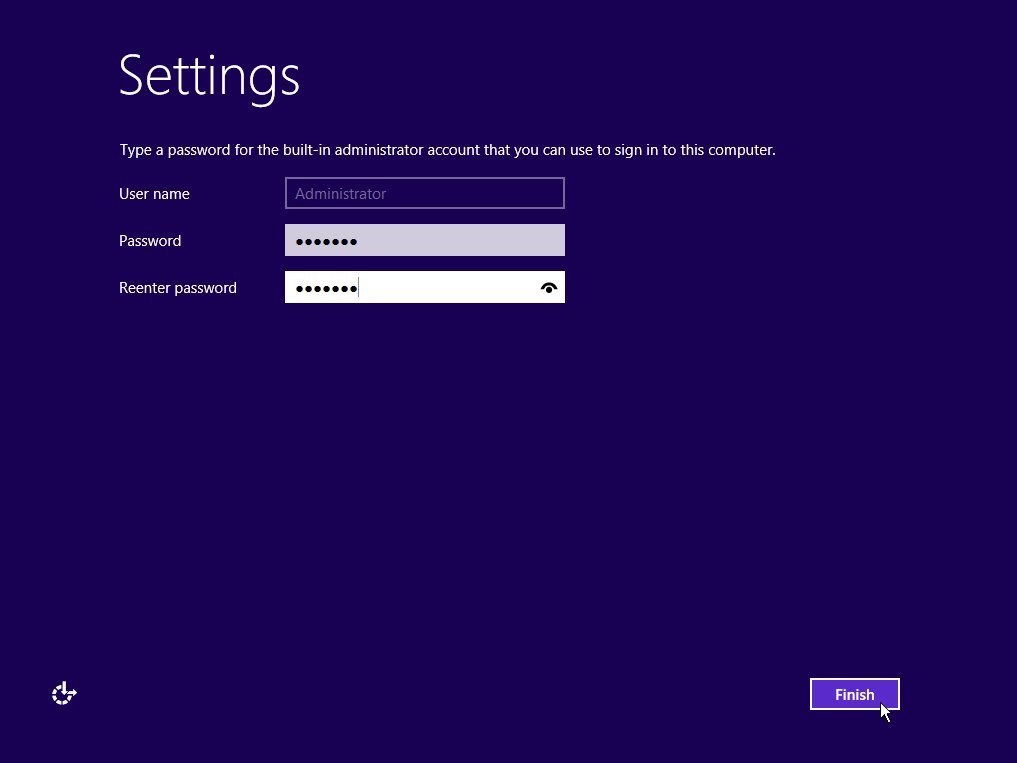
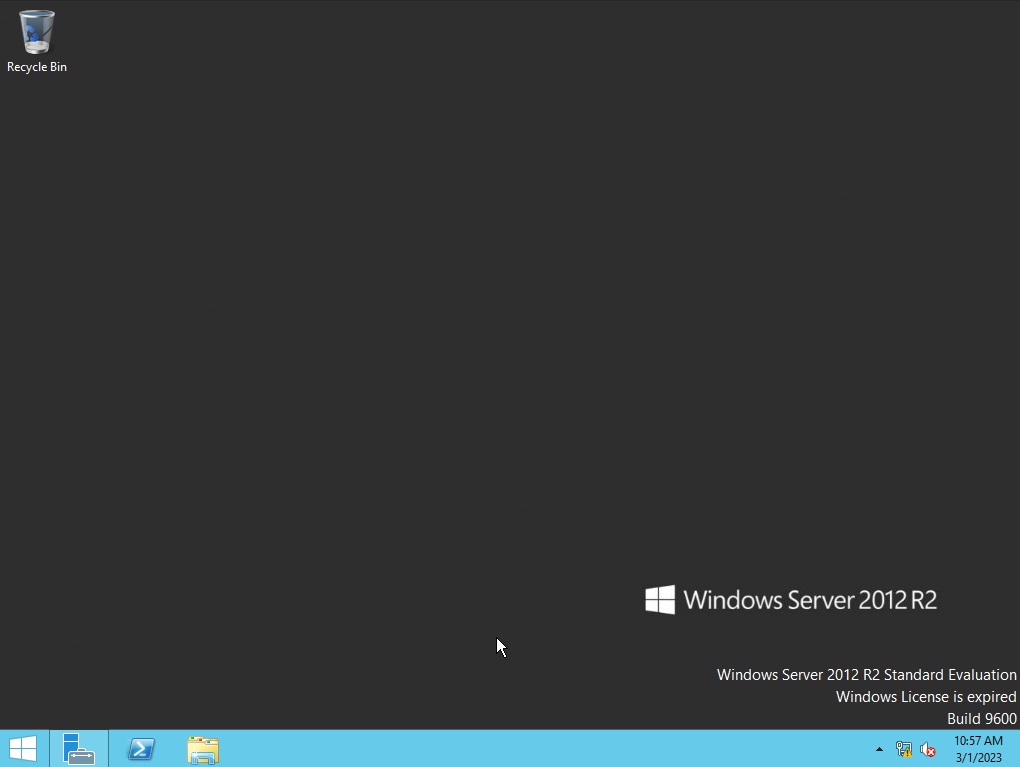
Figure 24 Image source VM after the operating system is installed
3. Click More > Edit in the Actions column for the image source VM.
Figure 25 Editing the VM
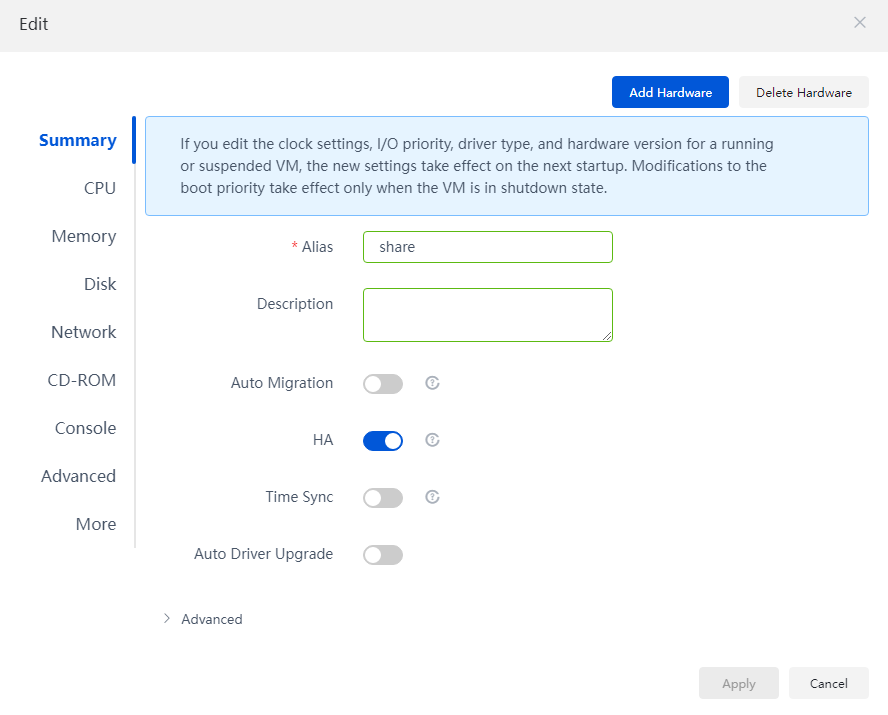
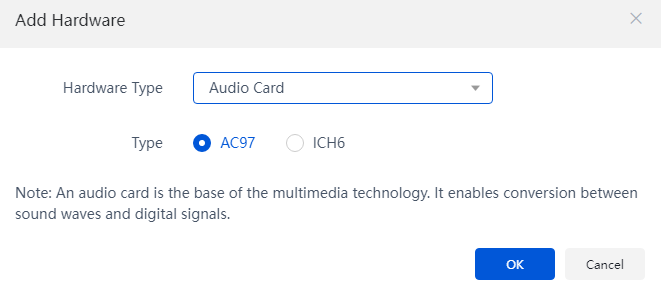
4. Click Attach Hardware in the upper right corner, set Hardware Type to Audio Card and Type to AC97, and click OK.
Figure 26 Adding an audio card device
Installing CAStools and VdiAgent
CAStools and VdiAgentt are integrated in the agent_tools tool. VdiAgent is installed first, during which the CAStools installer is started automatically. After installation of CAStools is completed, the VdiAgent installation process continues.
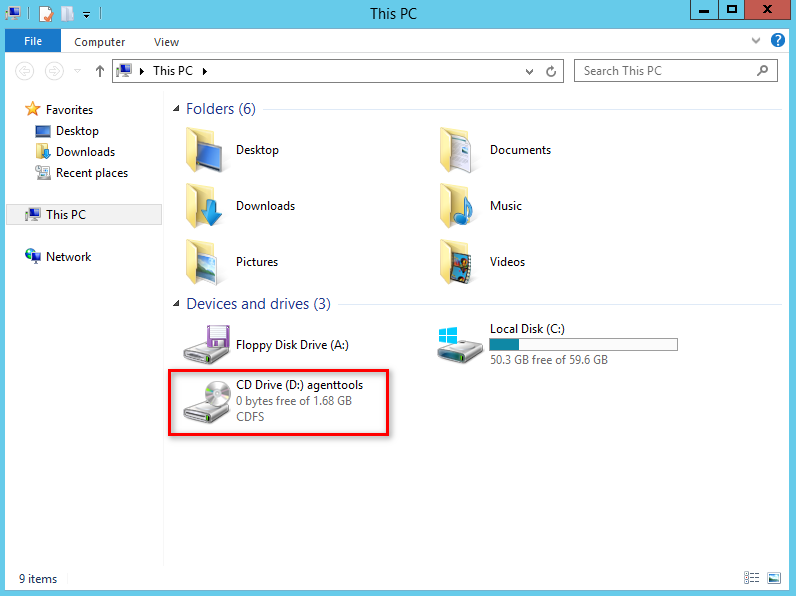
1. On the image source VM console, select Install Template Tool > Attach Optical Drive, and open CD Drive (D:) agenttools.
Figure 27 Attaching an optical drive
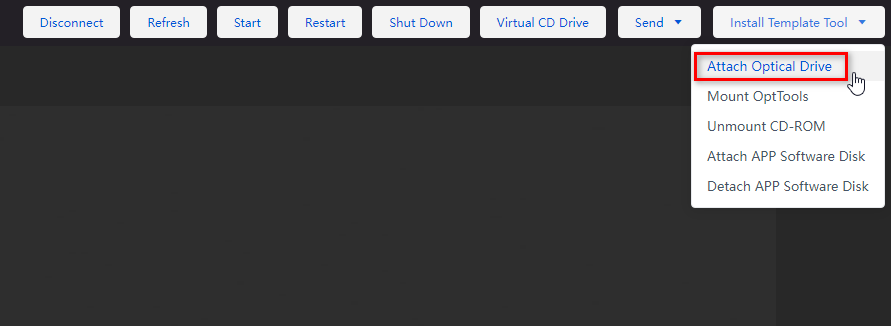
Figure 28 Opening CD Drive (D:) agenttools
2. Open the windows folder, and run agent_tools_setup as administrator. In the VdiAgent Setup dialog box, click Next.
Figure 29 Installing agent_tools
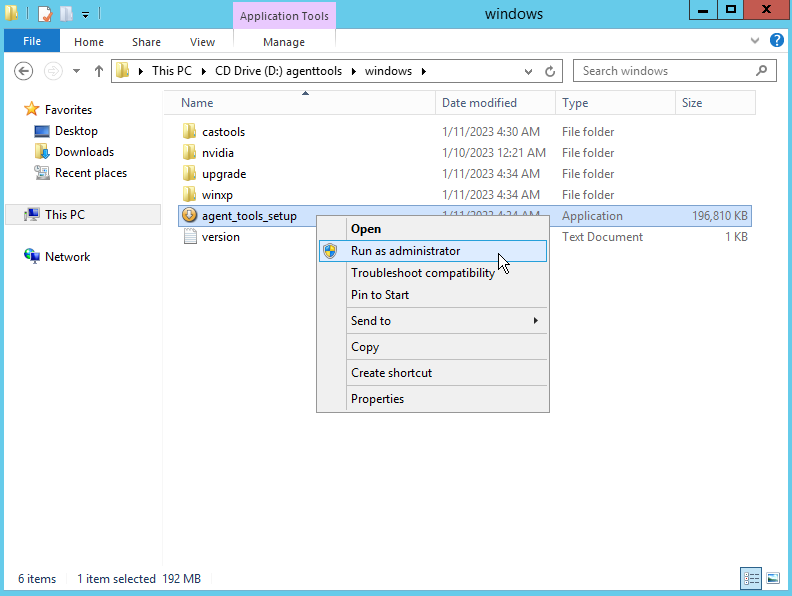
Figure 30 VdiAgent Setup dialog box

3. In the Environment Setting dialog box, enter the IP address or domain name (a FQDN) of the management node host for Space Console, use the default port setting, and click Next.
Figure 31 Environment Setting dialog box

4. Select the target folder for installing VdiAgent, and click Install to start the installation.
Figure 32 Selecting the target folder

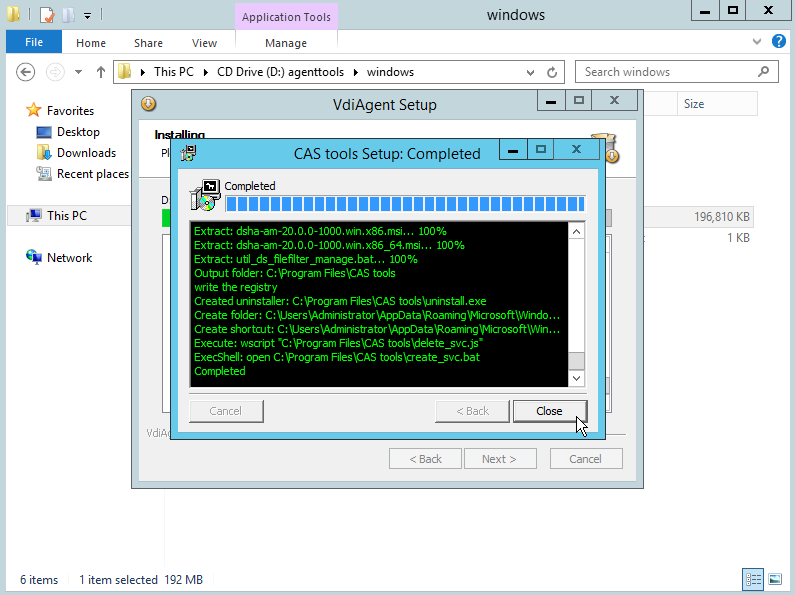
5. In the VdiAgent installation process, the CAStools installer is automatically started. In the dialog box displayed during CAStools installation, click OK to continue with the installation. After installation is completed, click Close.
Figure 33 Restart dialog box displayed during CAStools installation
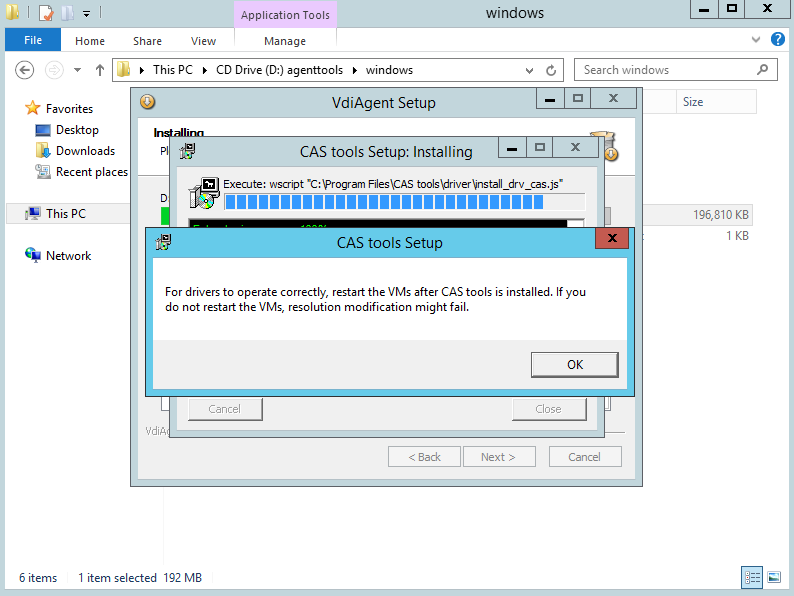
Figure 34 Completing CAStools installation
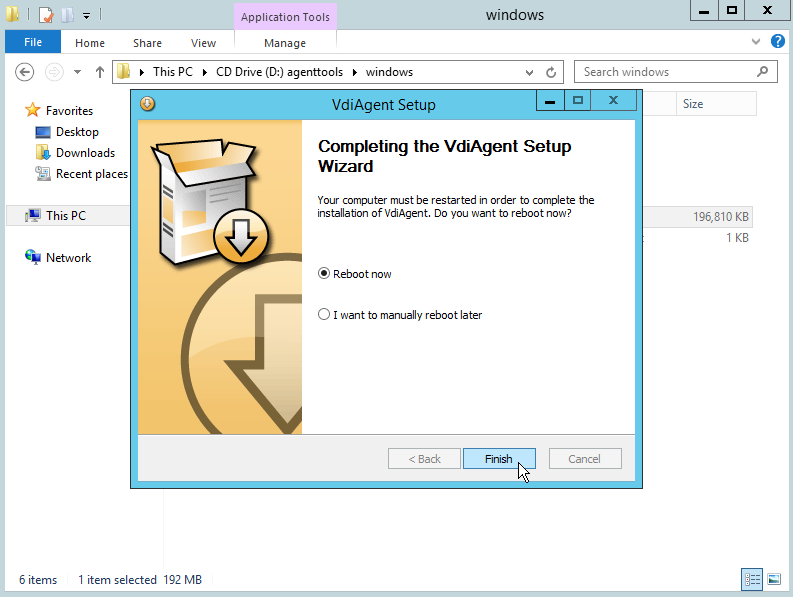
6. After the CAStools installer is closed, the system continues with VdiAgent installation. After VdiAgent installation is completed, click Finish.
Figure 35 Installing VDIAgent
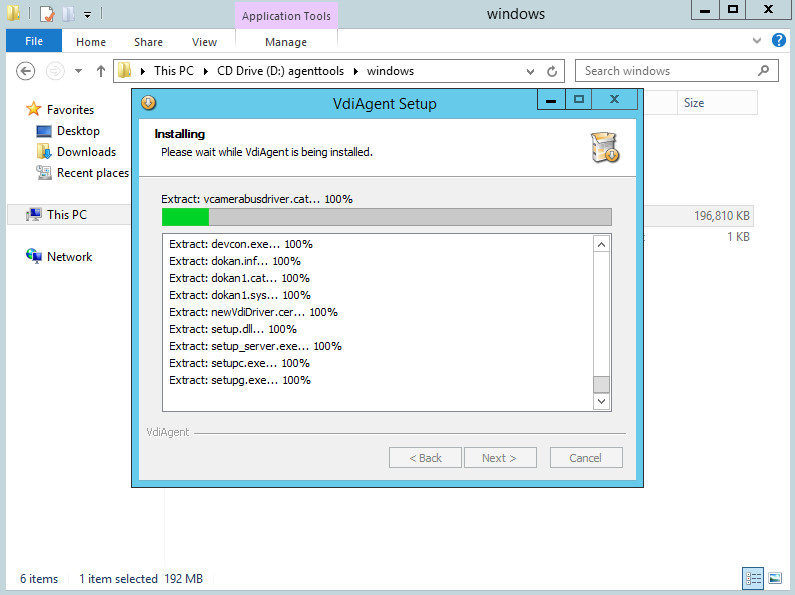
Figure 36 VDIAgent installation completed
|
|
IMPORTANT: · The image source VM requires the deployment of RDS to allow users to access shared desktops via remote connections. Users will be unable to connect to shared desktops once the RDS service expires. · The RDS service will be installed automatically during the installation of VdiAgent for the image source VMs with Windows Server series OS installed. After the installation is completed, restart the image source VM for the RDS service to take effect. |
7. Restart the image source VM.
8. Upload the required office software to the image source VM by mounting shared disk or FTP server. Install the software after the upload is completed.
Configure and optimize the system service
Use the optimization tool to optimize system configuration and improve system operation efficiency. You must upload the optimiazation tool to the management platform in advance. For more information, see H3C Workspace Cloud Desktop Quick Deployment Guide (Office Scenario).
|
|
NOTE: The optimization tool will customize the user software configuration and system. Use the optimization tool after installing the required software on the image source VM. Perform optimization as the last step of image source VM building to improve the VM's performance and the connection experience with cloud desktops. |
1. Select Install Template Tool > Mount OptTools.
Figure 37 Mounting OptTools

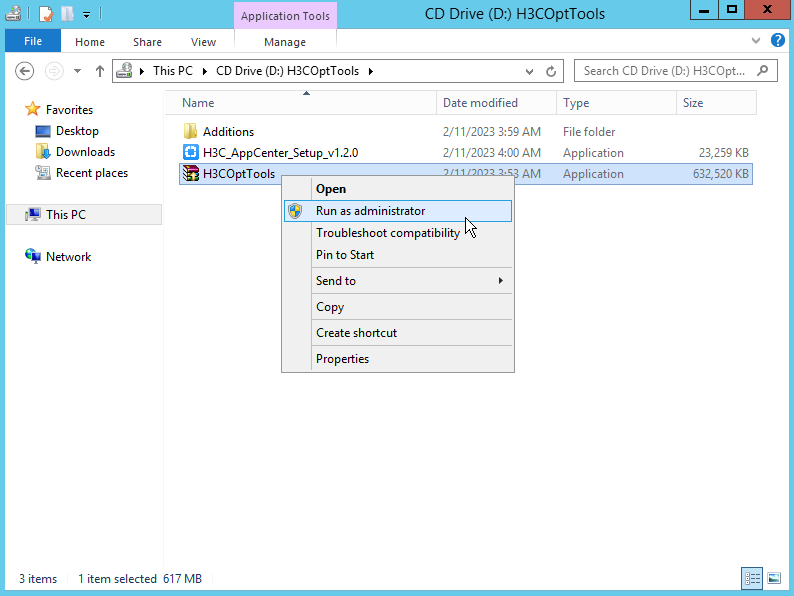
2. Switch to the CD-ROM drive and run H3COptTools.
Figure 38 Running H3COptTools
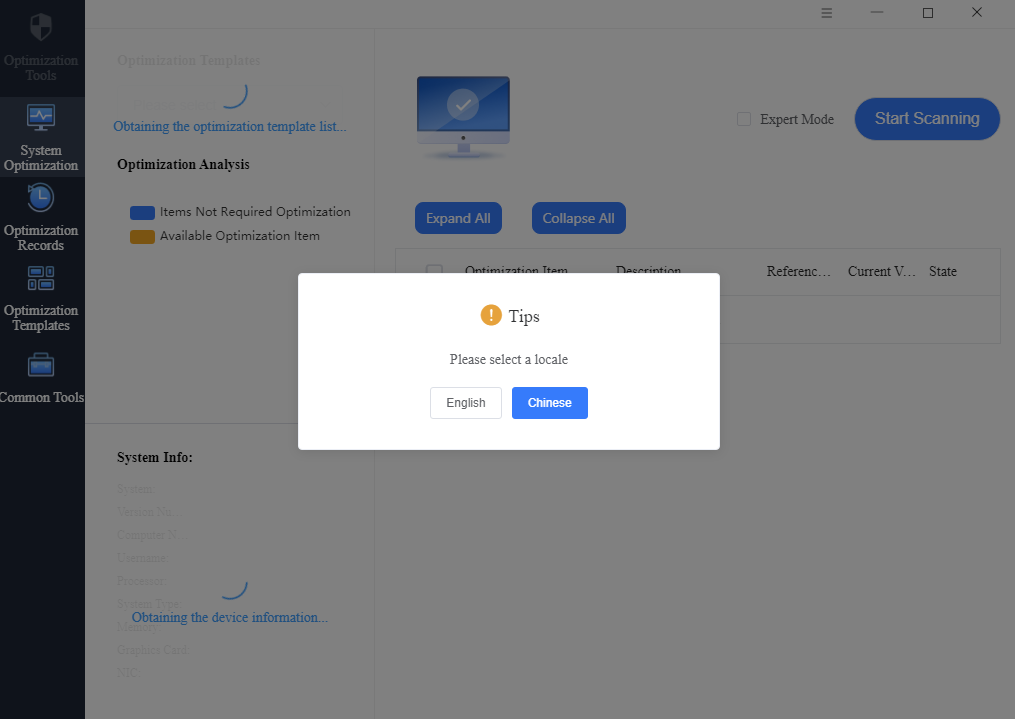
3. Select a locale.
Figure 39 Selecting a locale
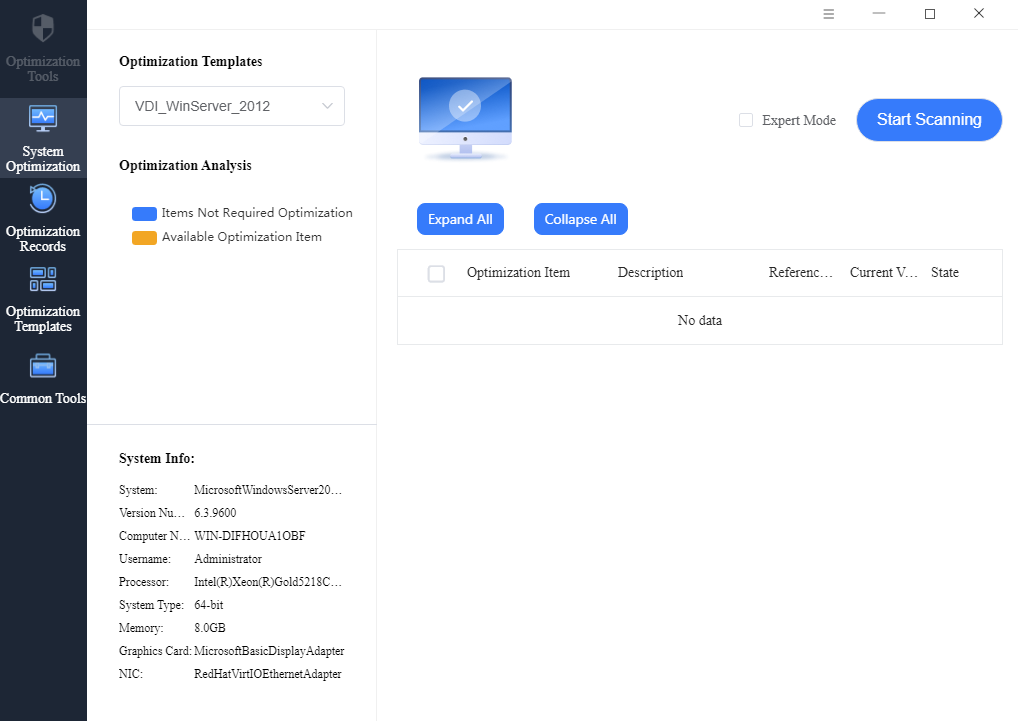
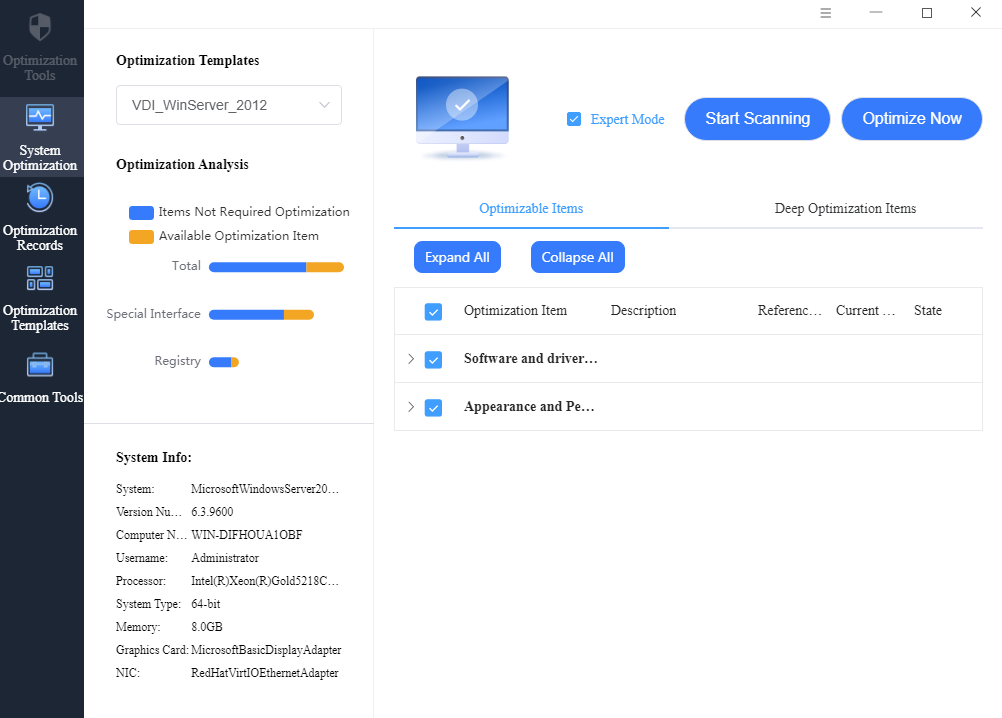
4. The system will automatically select an optimization template. Click Start Scanning to scan for optimization items.
Figure 40 Start scanning
5. After the scan is finished, click OK in the popped-up dialog box. Select the Expert Mode option as needed and select the optimization items. Click Optimize Now to start the optimization.
Figure 41 Scanning result
6. Select an installation path for the cloud disk service, and then click Install. After the installation is complete, click Finish.
Figure 42 Installing the cloud disk service

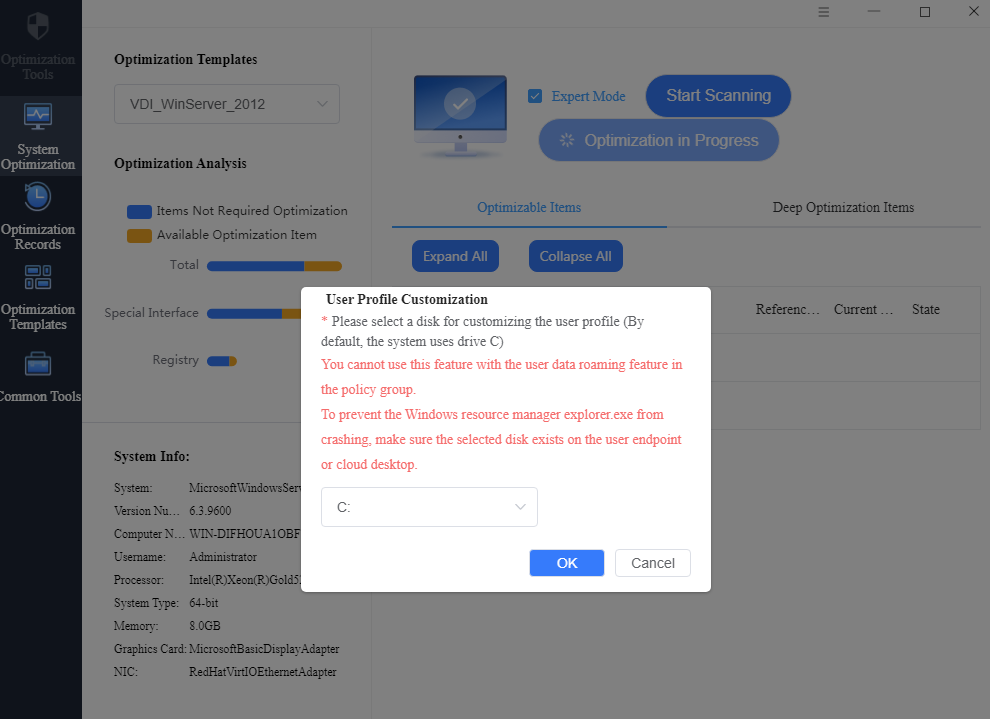
7. Select a disk for user profile customization, and then click OK.
Figure 43 Selecting a disk for user profile customization
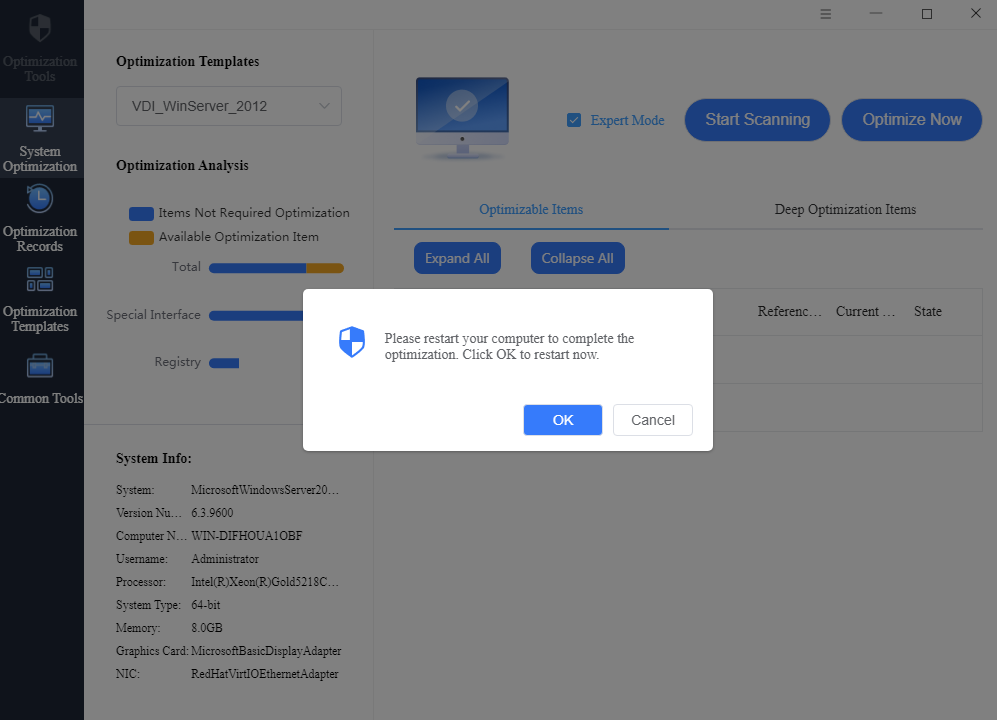
8. After the optimization is complete, click OK. Reboot the VM to finish building the image source VM.
Figure 44 Rebooting the VM after optimization
Configuring DNS
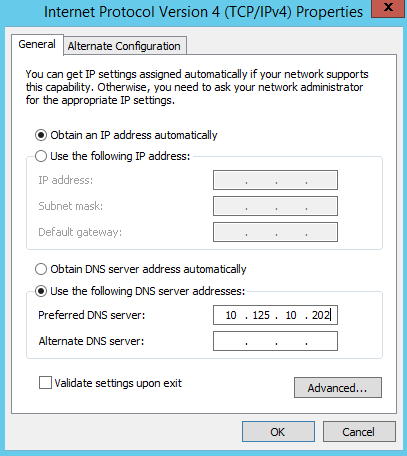
Set the DNS server address of the image source VM to the IP address of Microsoft Active Directory (AD) domain controller. The purpose is to allow cloud desktops to automatically join a domain.
1. Select Control Panel > Network and Internet > Network and Sharing Center > Local Area Connection Properties > Internet Protocol Version 4 (TCP/IPv4), and set the DNS address of the image source VM to the IP address of the Microsoft AD domain controller
Figure 45 Configuring the DNS
|
|
NOTE: If the domain controller server has trust domain configuration enabled, configure the alternate DNS server address as the trusted domain address. |
Modifying the startup type of Windows Audio service
To ensure that the desktop supports software that needs to play audio, you need to change the startup type of Windows Audio service to Automatic in this step.
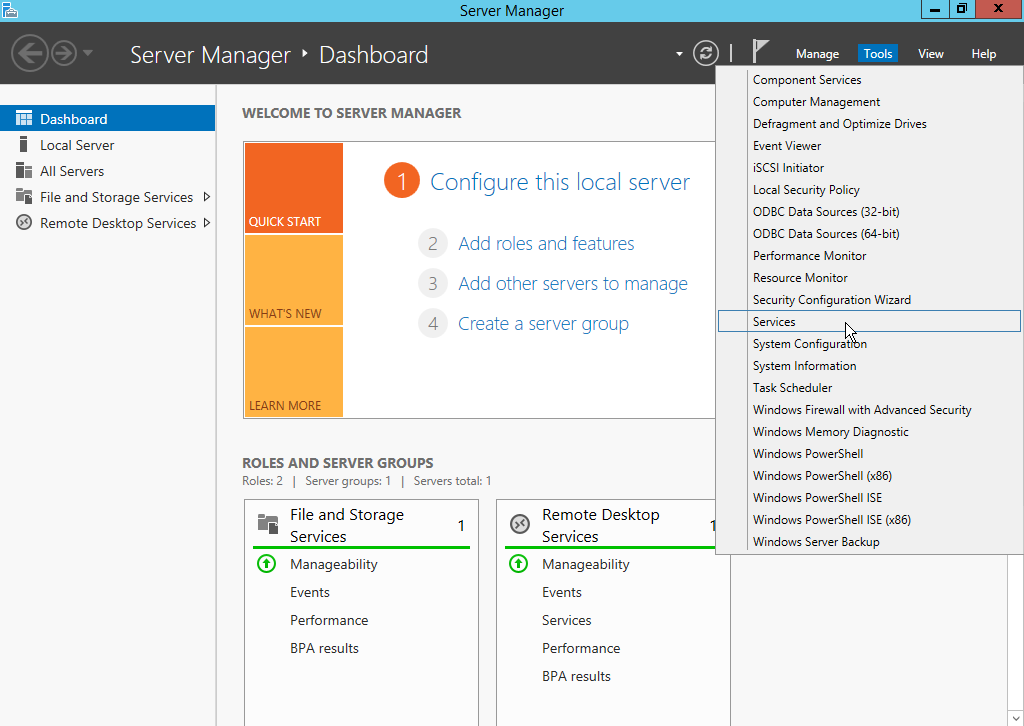
1. On the Server Manager page, select Tools > Services.
Figure 46 Server Manager page
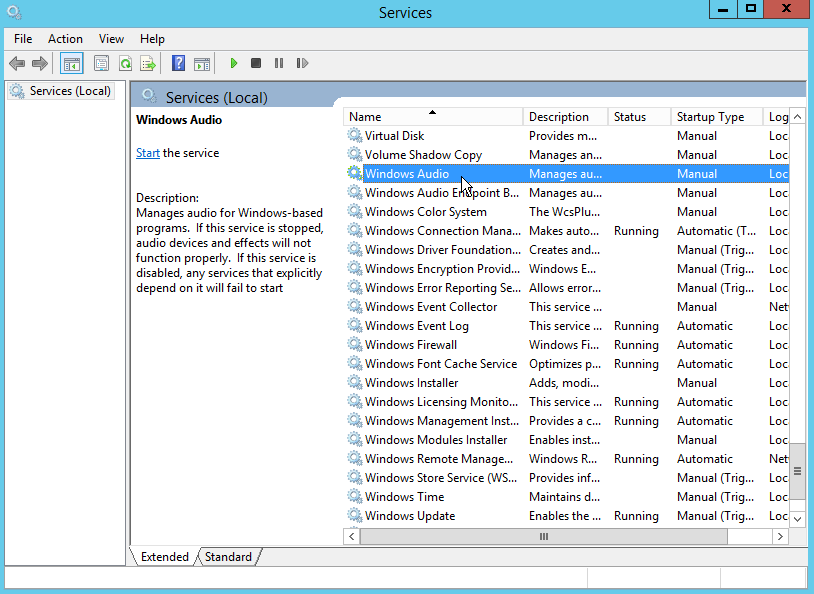
2. In the Services dialog box, double-click Windows Audio. The Windows Audio Properties (Local Computer) dialog box opens.
Figure 47 Double-clicking Windows Audio
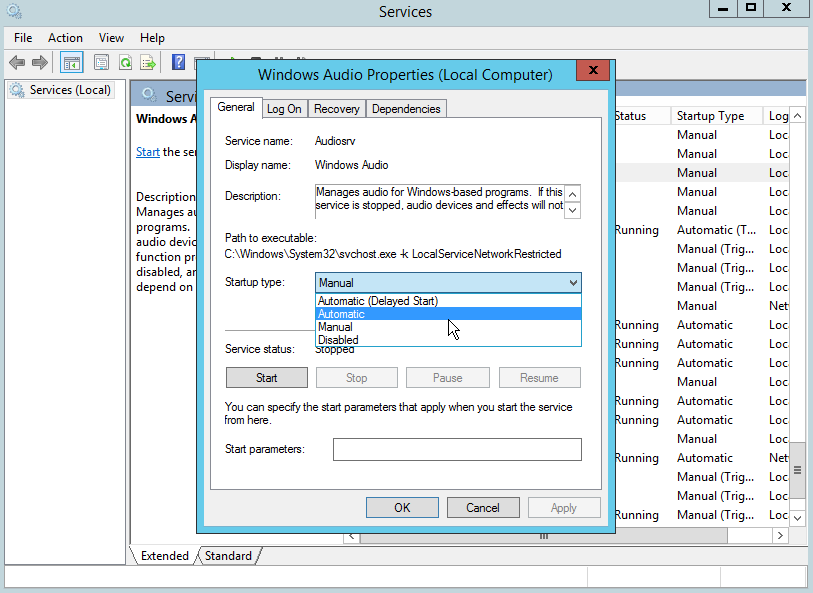
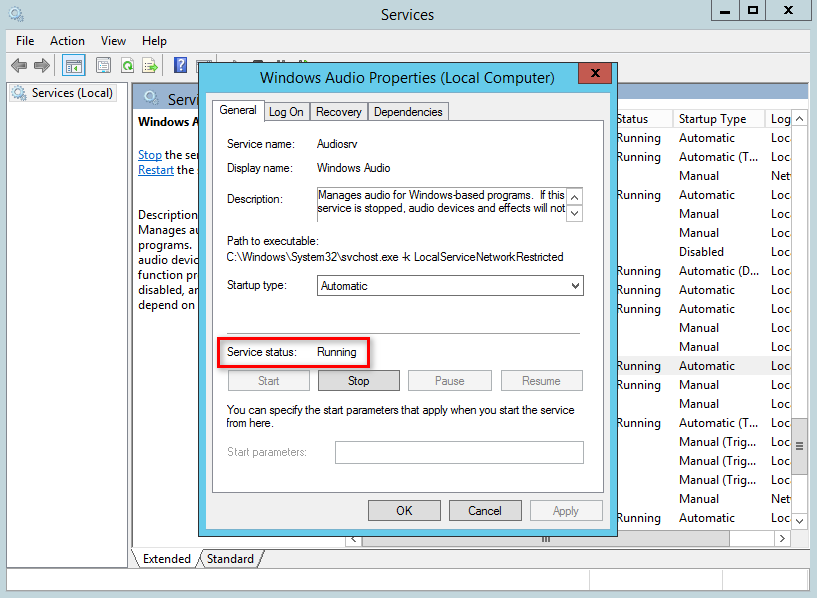
3. Click Start to start the Windows Audio service, change its startup type to Automatic, click Apply, and click OK.
Figure 48 Modifying the startup type of Windows Audio service
4. Restart the VM.
5. If the operating system of the image source VM is Microsoft Windows Server 2008 R2, install two patches NDP452-KB2901907-x86-x64-AllOS-ENU.exe and Win7AndW2K8R2-KB3191566-x64.msu sequentially. To obtain the patch package, contact Technical Support.
Checking before publishing a desktop image
1. Check whether the Windows Audio service is running: Check the lower right corner of the screen. If the Windows Audio service is not running, start the service according to "Modifying the startup type of Windows Audio service."
Figure 49 Checking the running status of the Windows Audio service
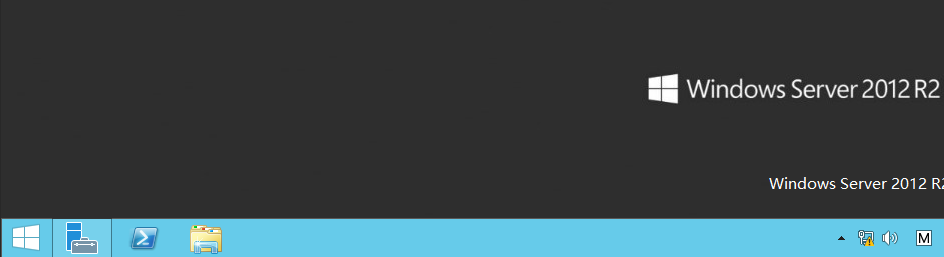
Figure 50 Windows Audio service in running state
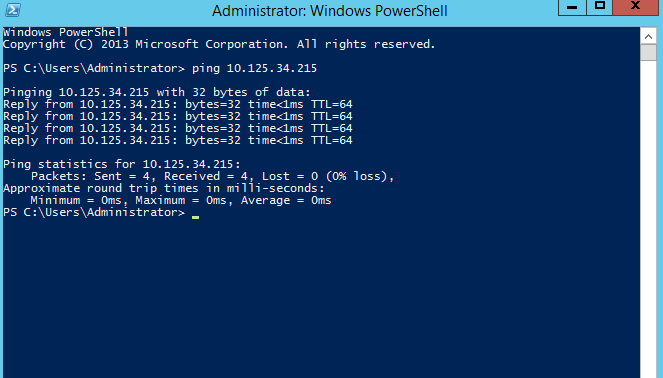
2. Check whether the domain name of the domain
controller can be pinged: Click ![]() on the toolbar to
open the Windows PowerShell window as Admin, and ping the IP address or domain name of the authentication
server.
on the toolbar to
open the Windows PowerShell window as Admin, and ping the IP address or domain name of the authentication
server.
Figure 51 Pinging the IP address of the authentication server
3. Check whether the remote desktop is enabled: Select Control Panel > System and Security > System, and click Remote settings. On the System Properties dialog box displayed, select the Remote tab, and check whether "Allow Remote Assistance connections to this computer" is selected. If not, select this option, click Apply, and then click OK.
Figure 52 Accessing the Remote settings page

Figure 53 Confirming that "Allow remote connections to this computer" is selected

Publishing a desktop image
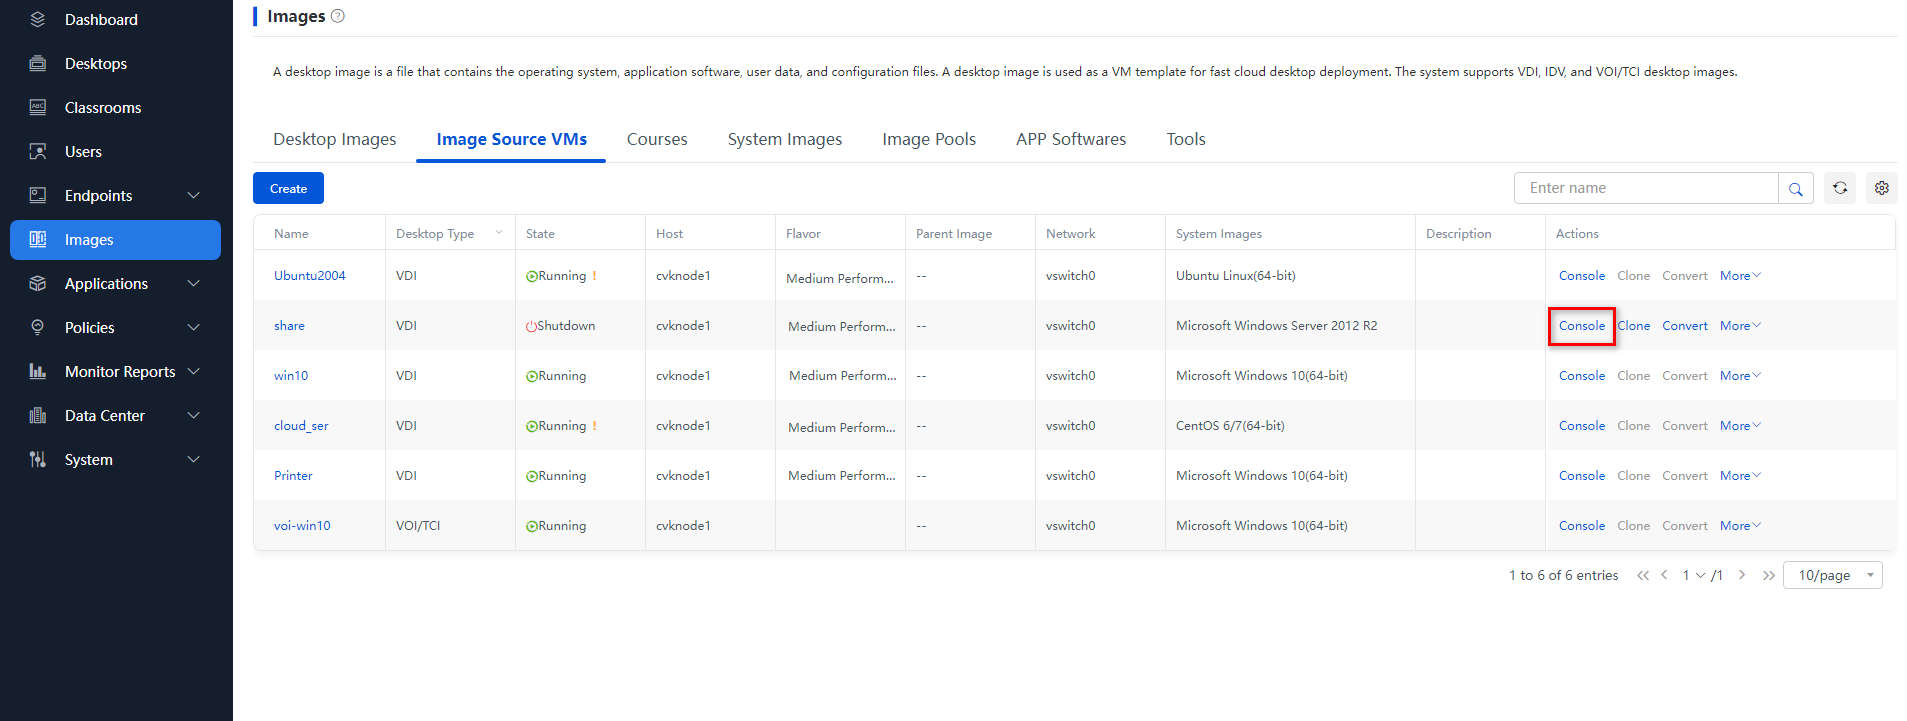
You can publish the built image source VM as a desktop image by means of cloning or converting. Later, use this desktop image to create a desktop pool or deploy a desktop. Taking cloning an image source VM to a desktop image as an example
1. On the image source VM list page, click Clone.
Figure 54 Cloning as desktop image
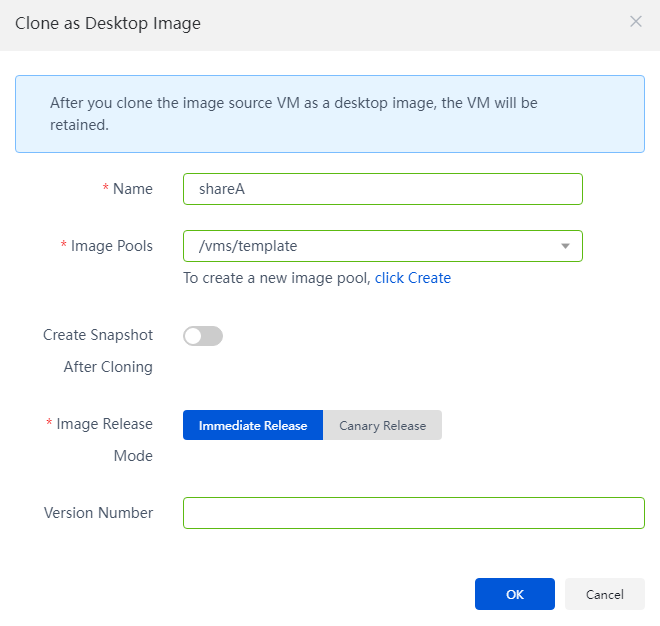
2. Configure the desktop image name, select the image storage, and enable Create Snapshot After Cloning according to the actual needs, and click OK.
Figure 55 Configuring parameters in the Clone as Desktop Image dialog box
Creating a shared desktop pool
After the desktop image is published, create a shared desktop pool named DeptA on the management platform. The number of desktops is equal to the number of R&D personnel in the department (20 people).
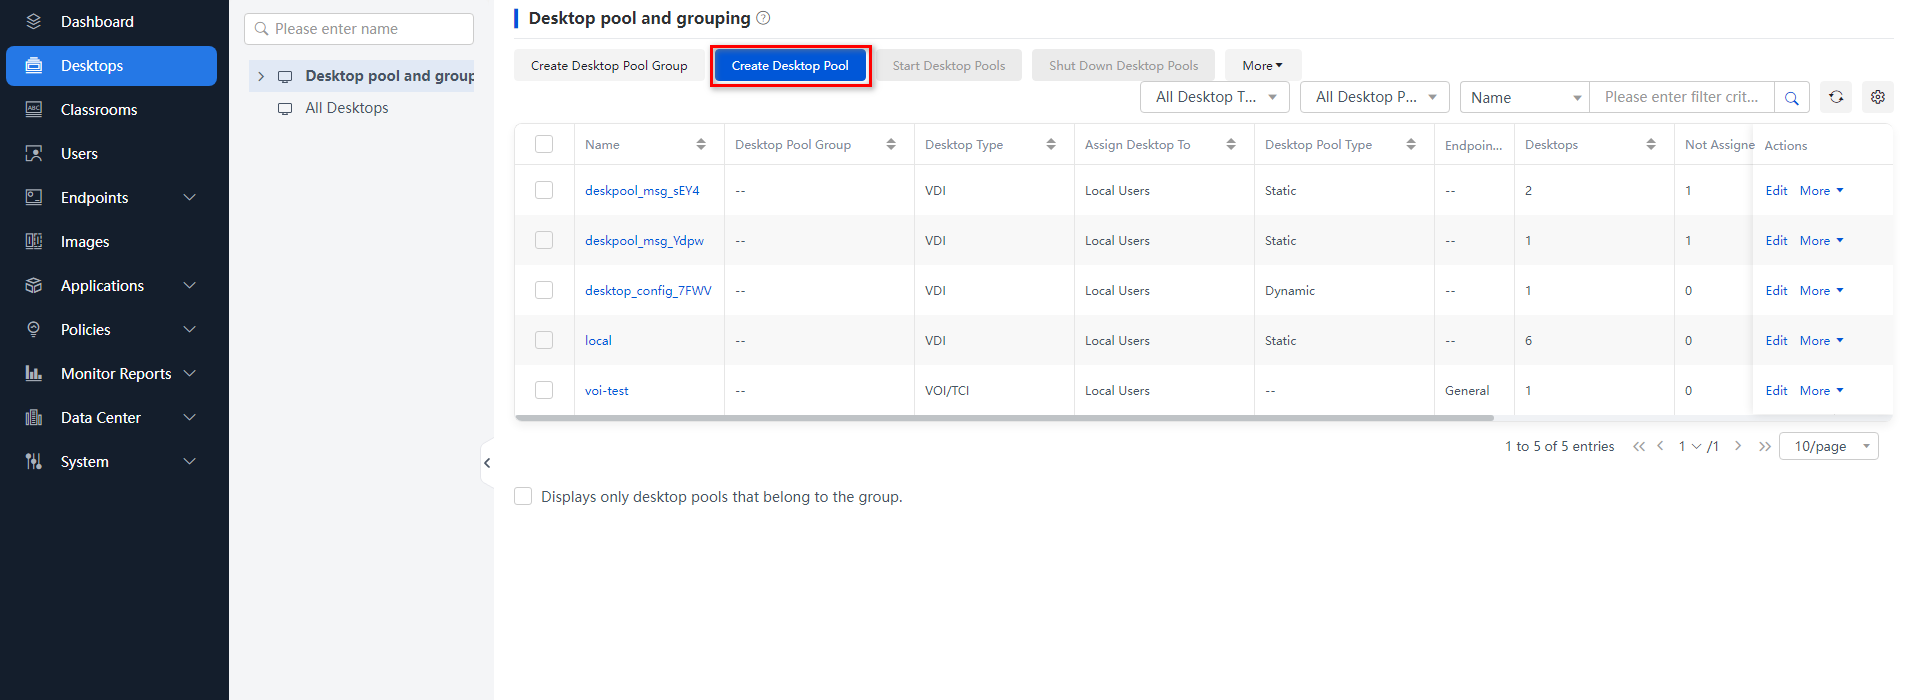
1. On the Desktops page, click Create Desktop Pool.
Figure 56 Creating a desktop pool
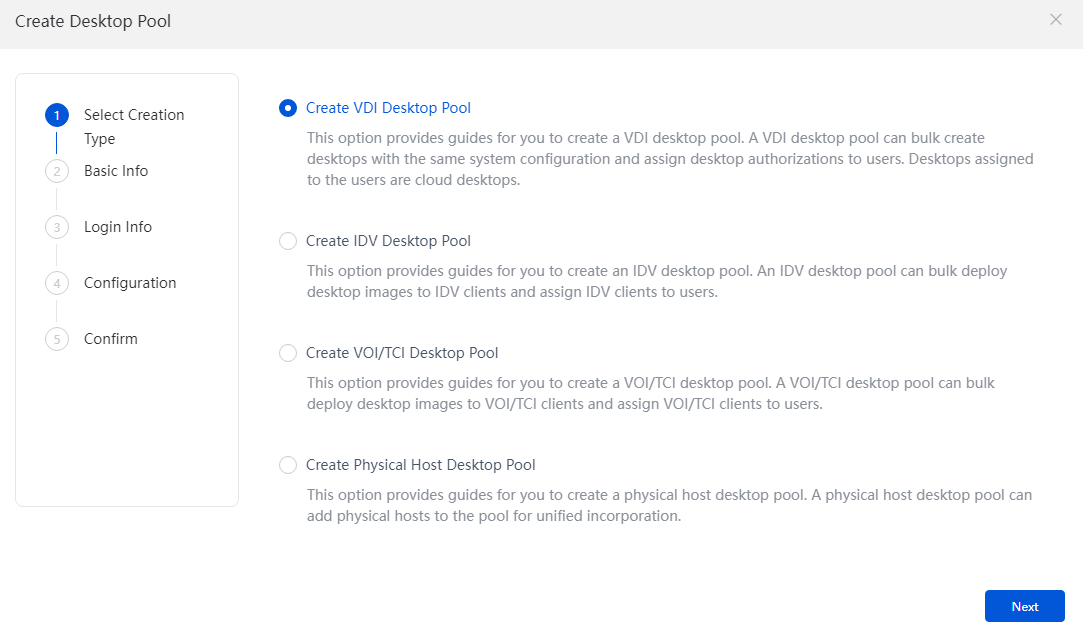
2. Select a creation type, Create VDI Desktop Pool in this example. Click Next.
Figure 57 Selecting a creation type
3. Configure the basic information of the desktop pool, and click Next. In this example, set Name to DeptA, Desktop Pool Type to Shared, and Max Desktops to 20, and Desktop Prefix to DeptA.
Figure 58 Basic information of the desktop pool

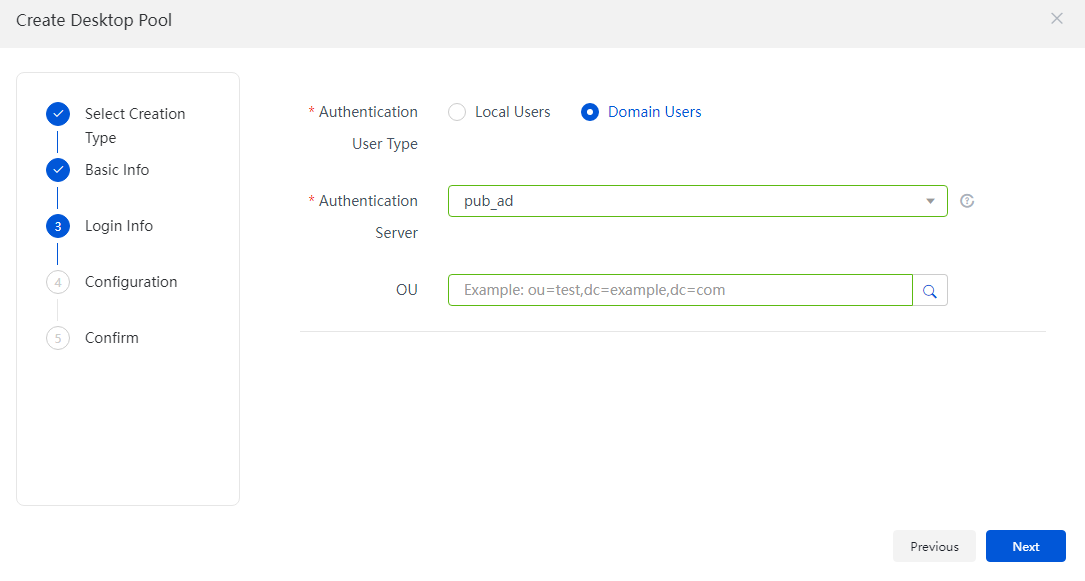
4. Configure the login information. Select an authentication user type, Domain Users in this example. Click Next.
Figure 59 Login information of the desktop pool
5. Add the configuration information of the desktop pool, where Initialization Type must be set to Fast. Then, click Next: Confirm Configuration. In this example, select the desktop image share_A created for DeptA, and configure other parameters based on the actual conditions.
Figure 60 Configuration information of the desktop pool

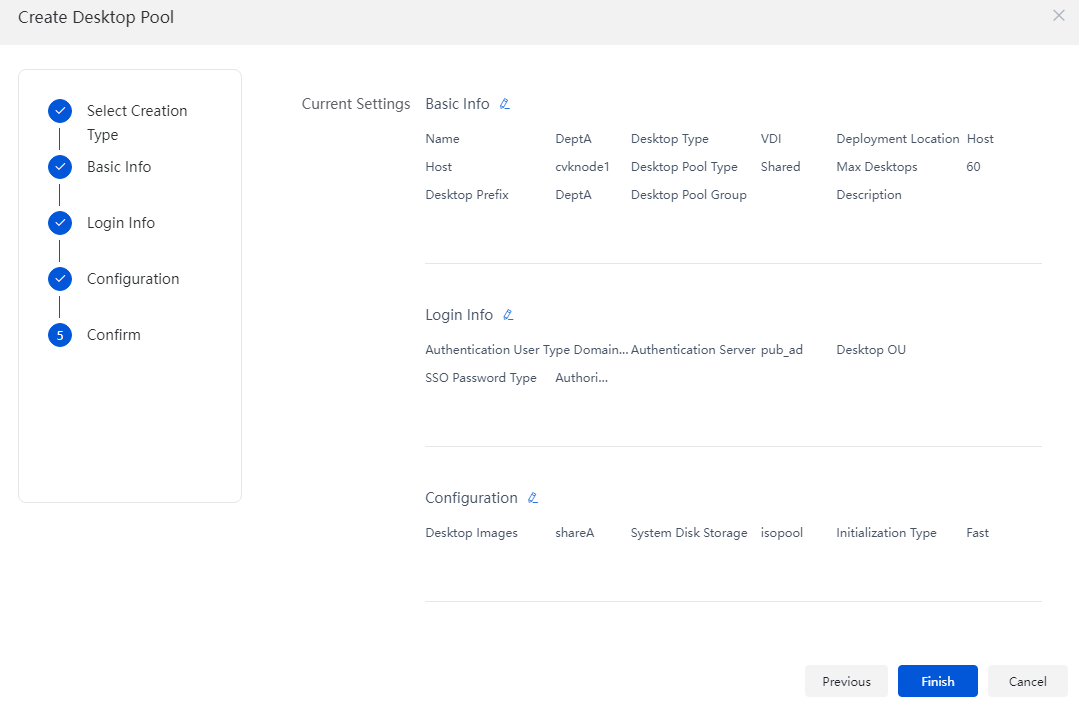
6. Verify the configuration, and then click Finish.
Figure 61 Desktop pool created successfully
Deploying desktops
You can use the created shared desktop pool for batch deployment of desktops. In this example, the number of desktops deployed is 20 (number of department employees).
|
|
NOTE: When the desktop image associated with the desktop pool is deployed in fast mode for the first time, you can deploy only one desktop. In this case, you need to check that the desktop is available and then deploy the remaining desktops. |
1. From the navigation pane, select Desktop Pools. Select a desktop pool, and then click Batch Deploy. After configuring relevant information according to the wizard, click Finish.
Figure 62 Desktop image page
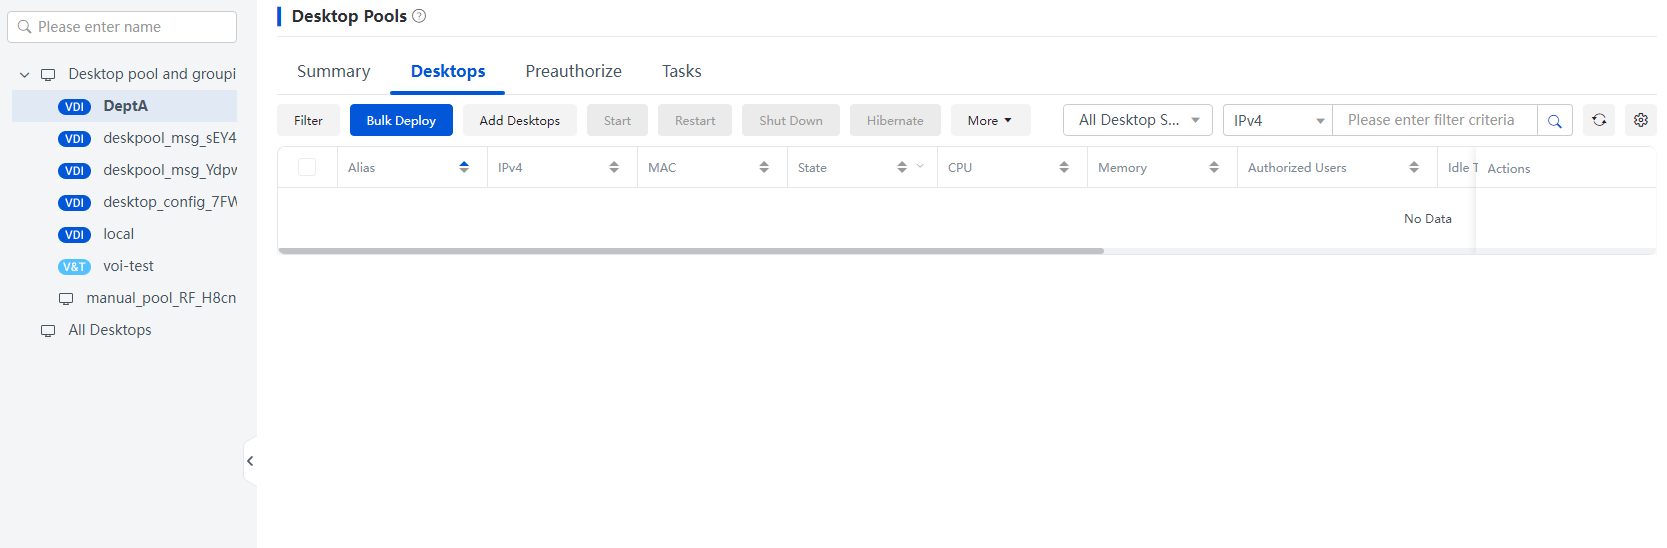
Figure 63 Configuring basic information
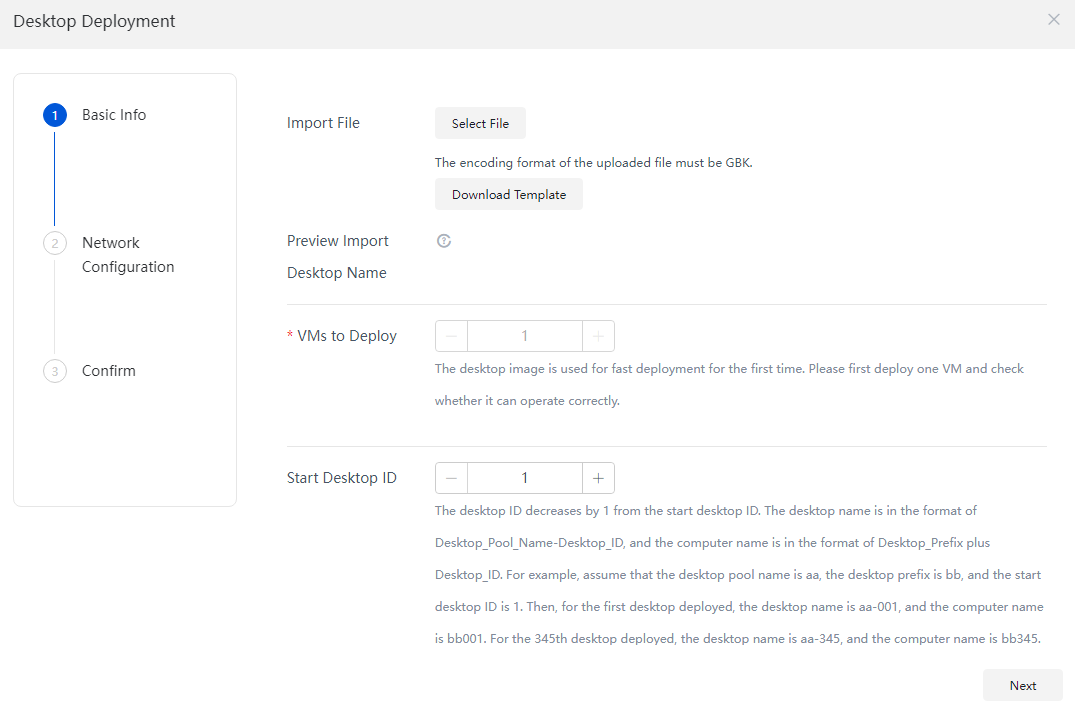
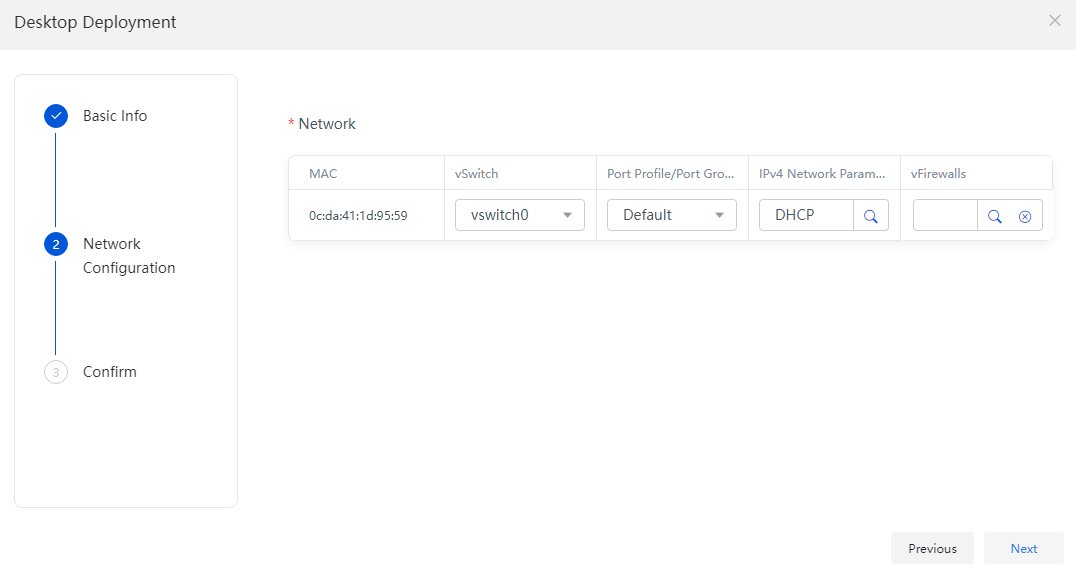
Figure 64 Configuring the network
|
|
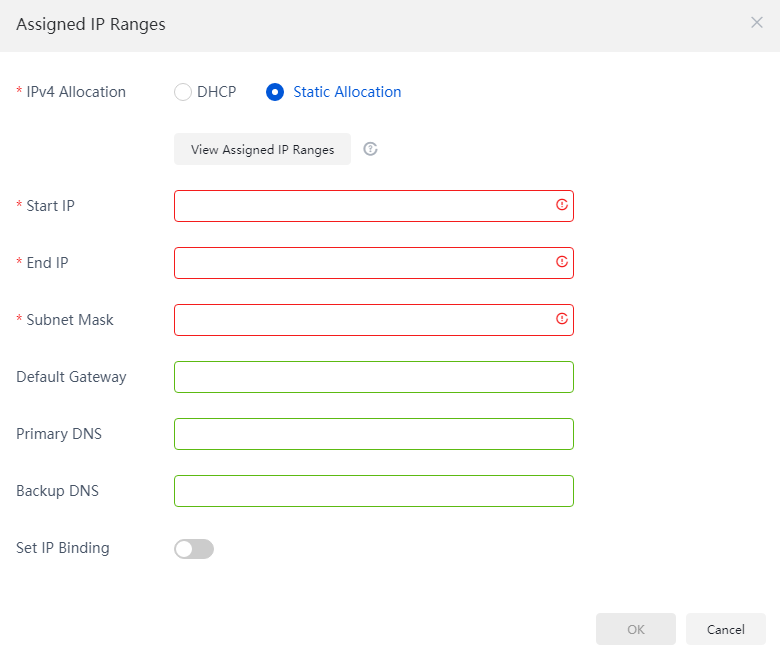
NOTE: As a best practice, configure a static IP address segment for the desktop pool. If the static address segment is not configured, you need to manually configure the static IP address and DNS for each desktop before joining desktops to the domain. Static IP assignment aims to plan the IP address range according to user needs and ensure that the shared desktop can join the domain successfully. In this case, you must configure the DNS address as the IP address of the domain controller. |
Figure 65 Configuring a static IP address segment
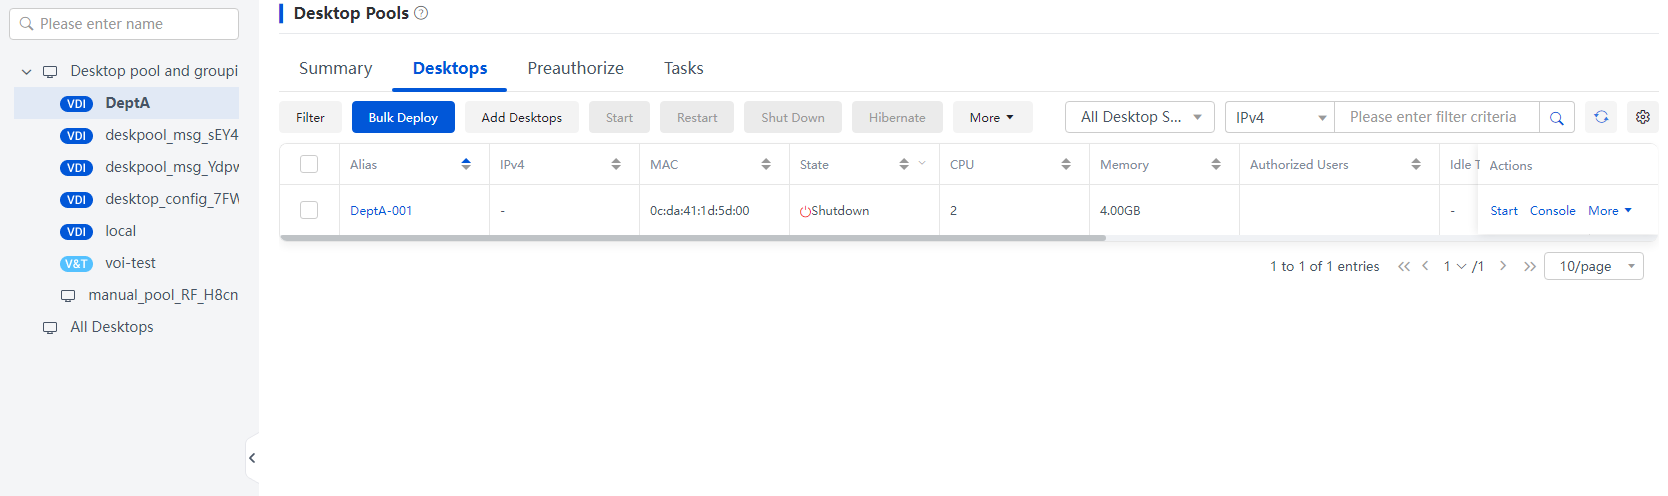
2. The desktop deployment is completed.
Figure 66 Desktop deployment completed
Authorizing a user
To authorize the desktops in the desktop pool of DeptA to the employees in DeptA, select Preauthorize tab above the desktop list, click Select User to select the user to be authorized, and complete the authorization.
|
|
NOTE: You must create and configure users in advance. |
Figure 67 Authorizing a user
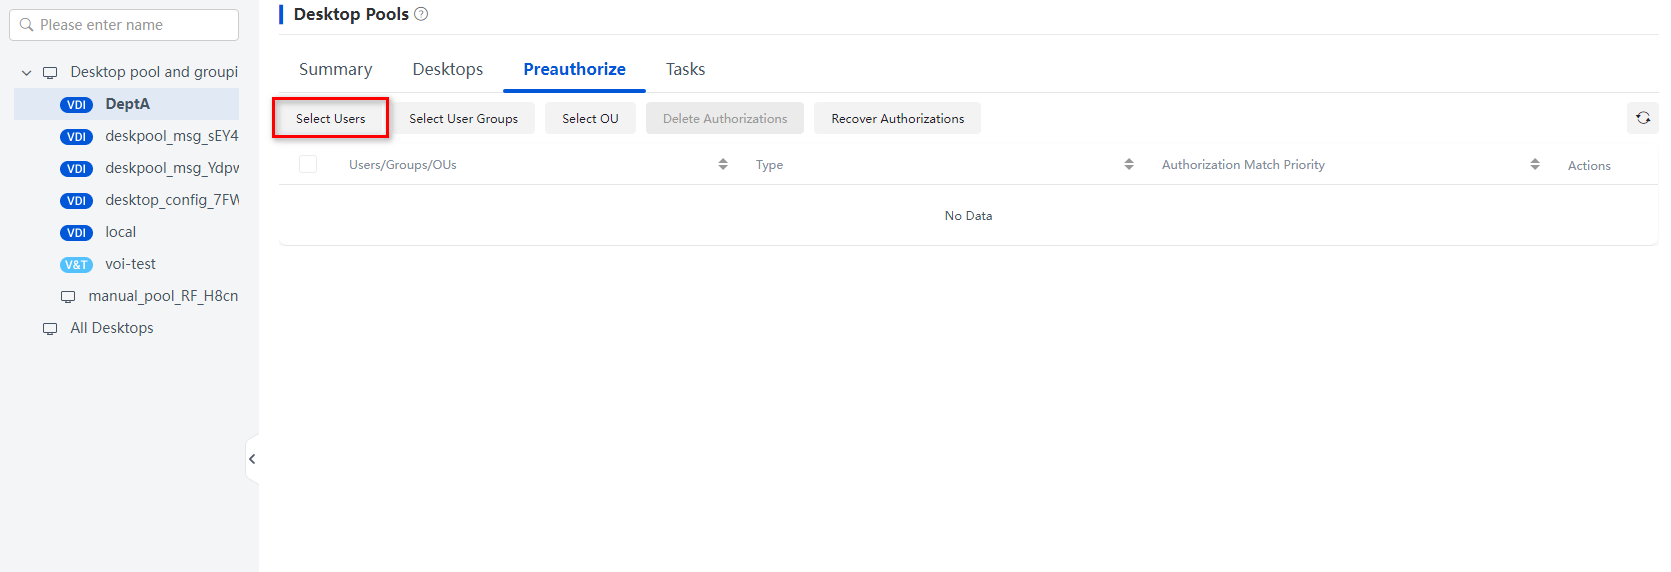
Figure 68 Selecting a user
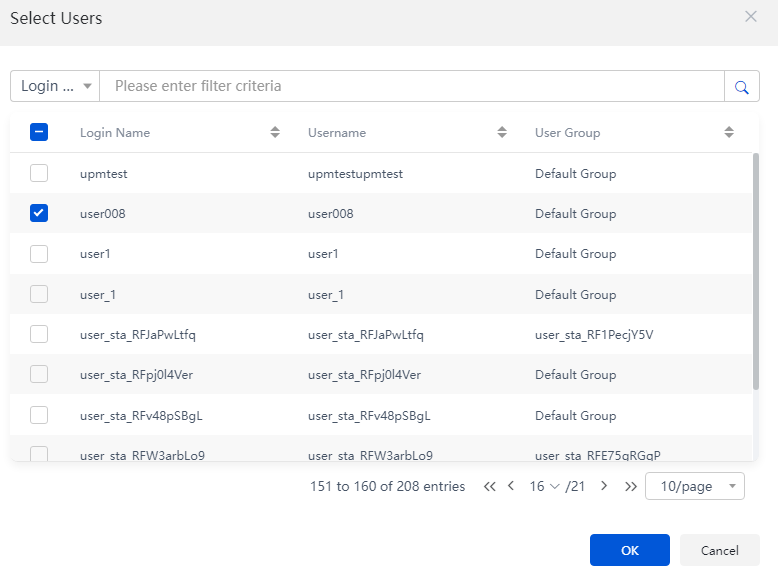
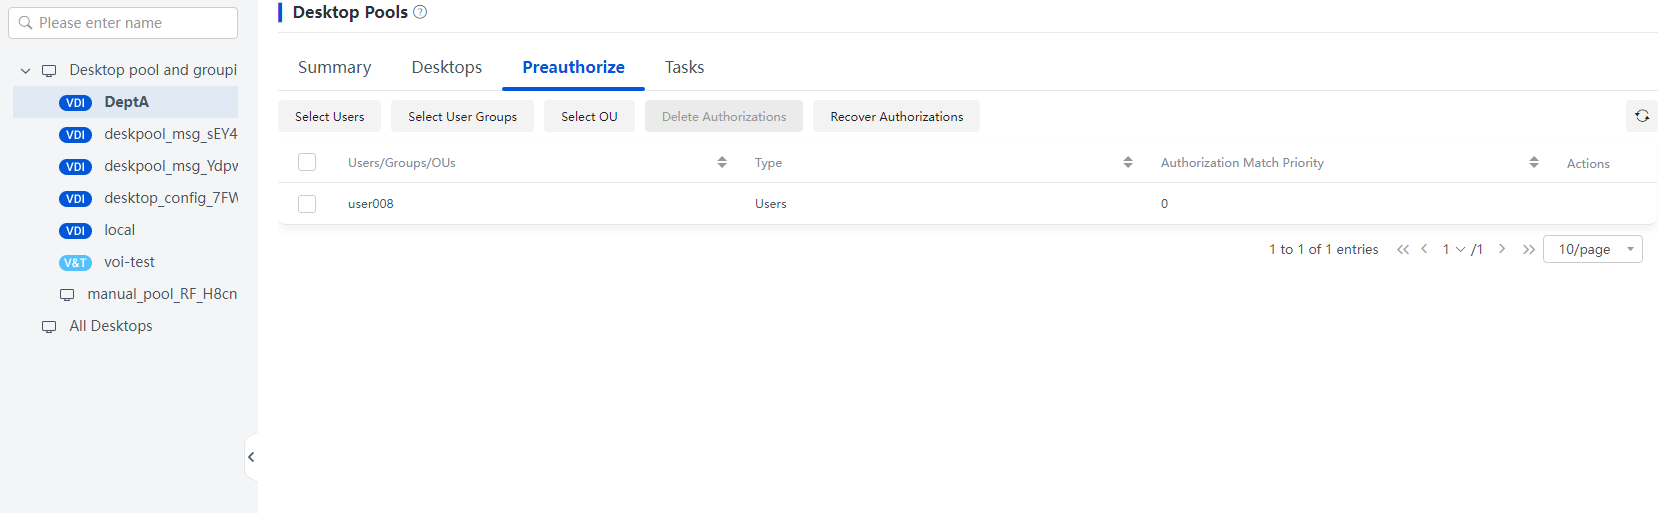
Figure 69 Authorized successfully
Verifying the configuration
Verify that the shared desktop can be accessed by using different accounts.
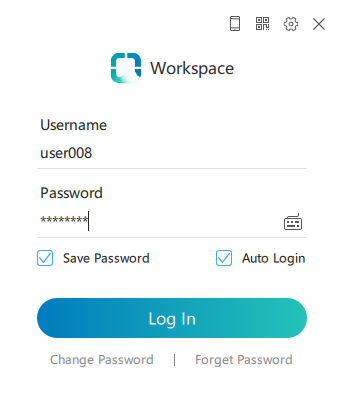
1. The employee user008 enters enters his account and password to log in to the client.
Figure 70 Logging in to the Workspace client (user008)
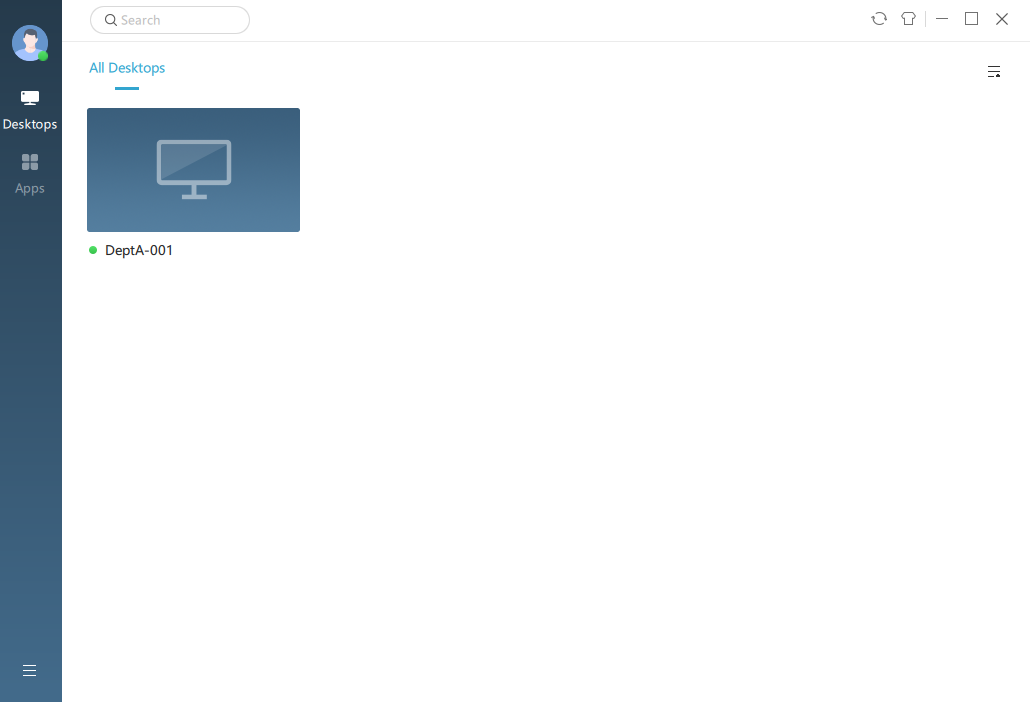
2. After login, user008 can access the desktop list and view the authorized shared desktop DeptA-001.
Figure 71 Desktop list

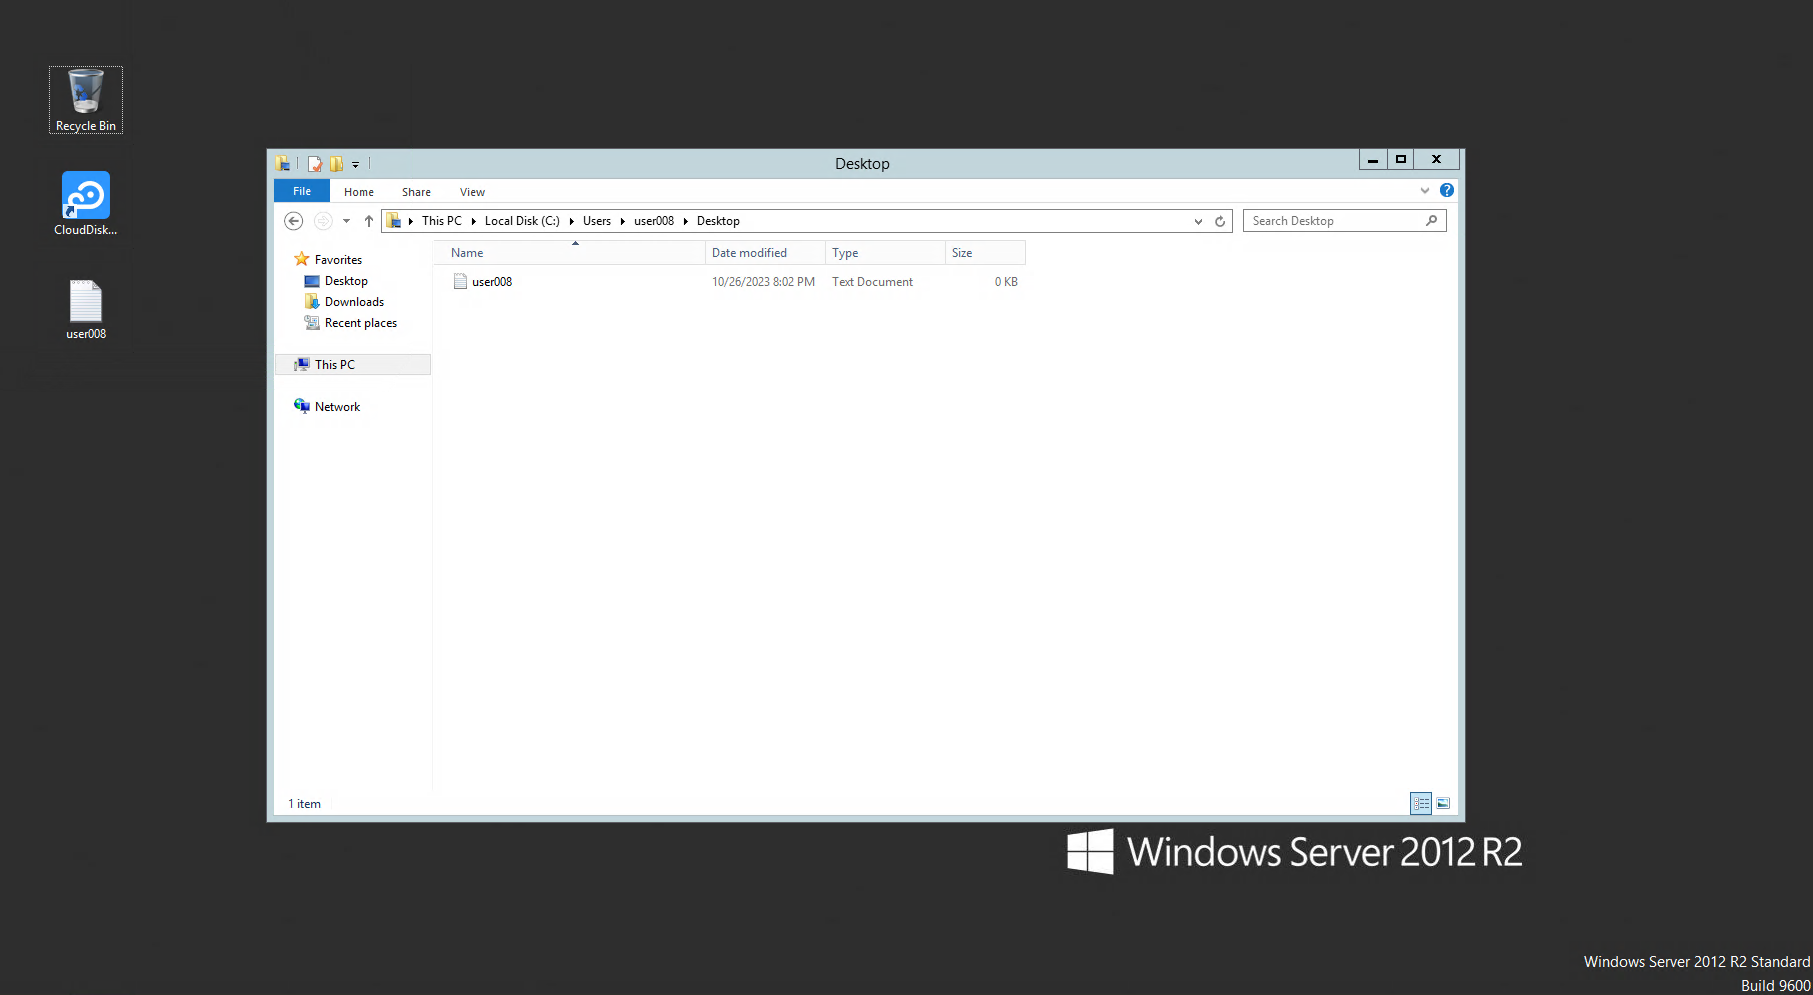
3. After connecting to the shared desktop, user008 can create a file on the desktop. When he opens the C:\user\user008\desktop folder, he can see the new file.
Figure 72 User's personal files
4. The employee user009 enters his account and password to log in to the client.
Figure 73 Logging in to the Workspace client (user009)
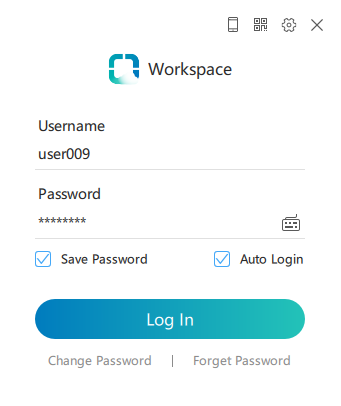
Figure 74 Desktop list
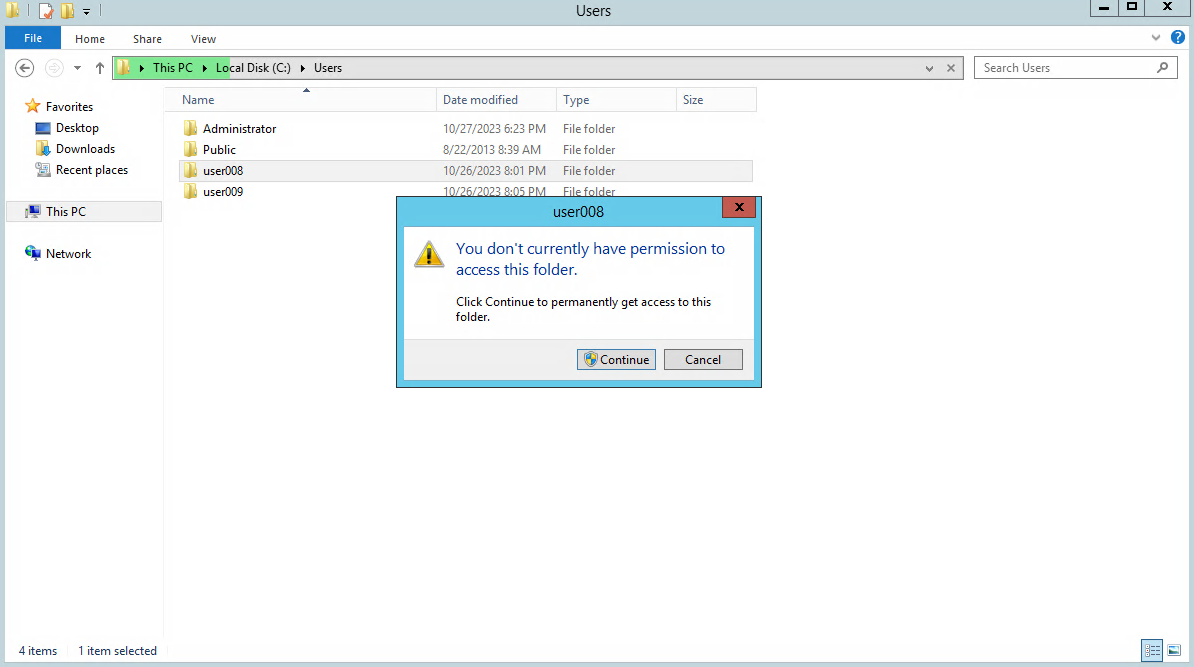
5. After connecting to the shared desktop, user009 opens the C:\user\user008\desktop folder. In this folder, user009 can see the personal data folders of both users user009 and user008, but is not authorized to access the folder of user008.
Figure 75 Personal data folders of different users
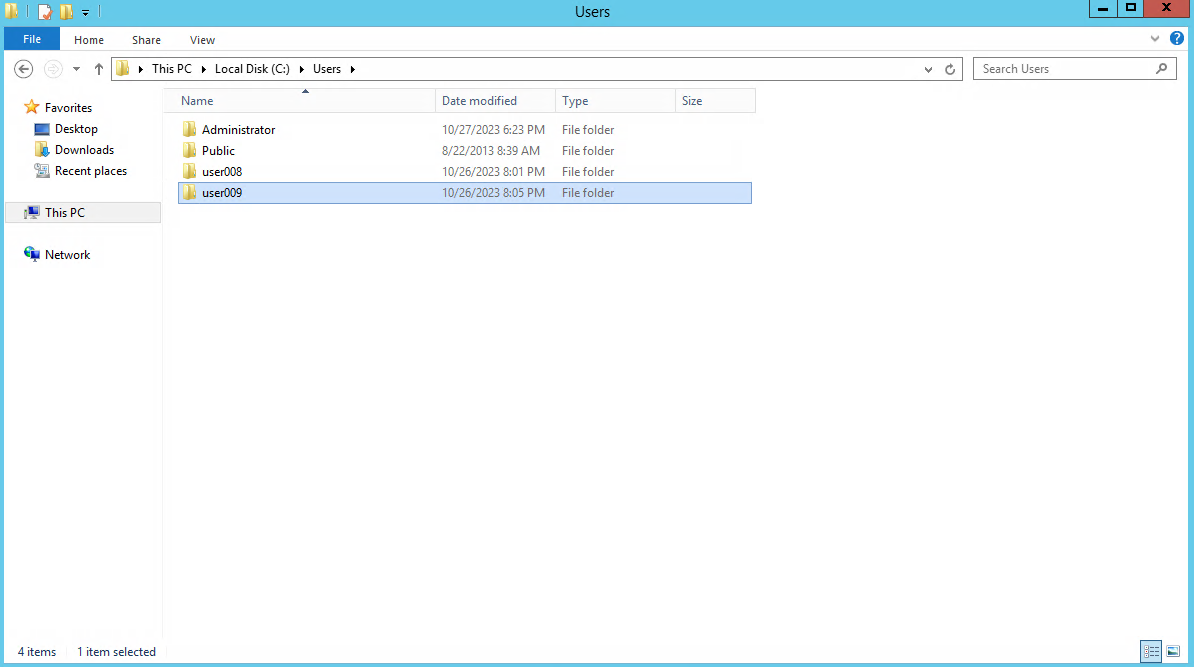
Figure 76 No permission to access folders of other users
Related documentation
|
Document |
Obtaining method |
|
H3C Workspace Cloud Desktop Space Console User Manual |
|
|
H3C Workspace Desktop Management Software Installation and Deployment Guide |
|
|
H3C Workspace Cloud Desktop Client User Manual (Office Scenario) |
