- Table of Contents
-
- H3C HDM Configuration Examples-6W100
- 01-H3C Redfish Configuration Examples
- 02-H3C LDAP Configuration Examples
- 03-H3C IPMI Configuration Examples
- 04-H3C SNMP Configuration Examples
- 05-H3C HDM Mobile Configuration Examples for Remote Access to a Server Through L2TP VPN
- 06-H3C HDM Configuration Examples for Obtaining Event Logs Through the Redfish Interface
- 07-H3C HDM SMTP Configuration Examples
- 08-H3C HDM Zabbix-Based Server Monitoring Configuration Examples
- 09-H3C HDM Network Settings Configuration Examples
- 10-H3C hREST Configuration Examples for Configuring SNMP and Obtaining the CPU Information
- 11-H3C HDM Configuration Management Configuration Examples
- 12-HDM AD Configuration Examples
- 13-H3C HDM SOL Configuration Examples
- 14-HDM Unified Control Configuration Examples
- Related Documents
-
| Title | Size | Download |
|---|---|---|
| 14-HDM Unified Control Configuration Examples | 629.24 KB |
H3C HDM
Unified Control Configuration Examples
Copyright © 2023 New H3C Technologies Co., Ltd. All rights reserved.
No part of this manual may be reproduced or transmitted in any form or by any means without prior written consent of New H3C Technologies Co., Ltd.
Except for the trademarks of New H3C Technologies Co., Ltd., any trademarks that may be mentioned in this document are the property of their respective owners.
The information in this document is subject to change without notice.
Introduction
HDM supports the unified control feature, which can be used to manage up to 10 servers. After adding servers, you can view the device information, and perform operations such as accessing HDM, managing the power supply, connecting to the H5 KVM, and deleting devices. The following information provides examples for configuring the unified control feature of HDM.
Prerequisites
Procedures and information in the examples might be slightly different depending on the software or hardware version of the products.
The configuration was created and verified in a lab environment, and all the servers and software were started with the factory default configuration. If the device has been configured, ensure that the existing configuration does not conflict with the configuration in the following examples.
The following information is provided based on the assumption that you have basic knowledge of the unified control feature.
Applicable scenarios
The following information applies to the scenarios where multiple servers are managed in a unified manner through HDM. The unified control feature can unify the login portal and simplify operations of the O&M staff.
Example: Configuring unified control
Network configuration
As shown in Figure 1, the H3C UniServer R4900 G5 (R4900 G5 for short) and H3C UniServer R4700 G3 (R4700 G3 for short) are connected to the PC client through the dedicated port, and network communication is normal. It is required that the unified control feature be used to add and manage the R4700 G3 server on the HDM Web page of the R4900 G5 server.
· HDM software on R4900 G5:
¡ IP address: 192.168.99.88/16
¡ Administrator account: admin
¡ Password: Password@_
· HDM software on R4700 G3:
¡ IP address: 192.168.2.125/16
¡ Administrator account: admin
¡ Password: Password@_
· PC client:
¡ IP address: 192.168.19.55/16

Analysis
Log in to the HDM Web page of R4900 G5, and use the unified control feature to add the R4700 G3 server. After adding the server, you can view the device information, and perform operations such as accessing HDM, managing the power supply, connecting to the H5 KVM, and deleting devices.
Software versions used
This example was created and verified on HDM 2.98.
Procedures
Logging in to the HDM Web page
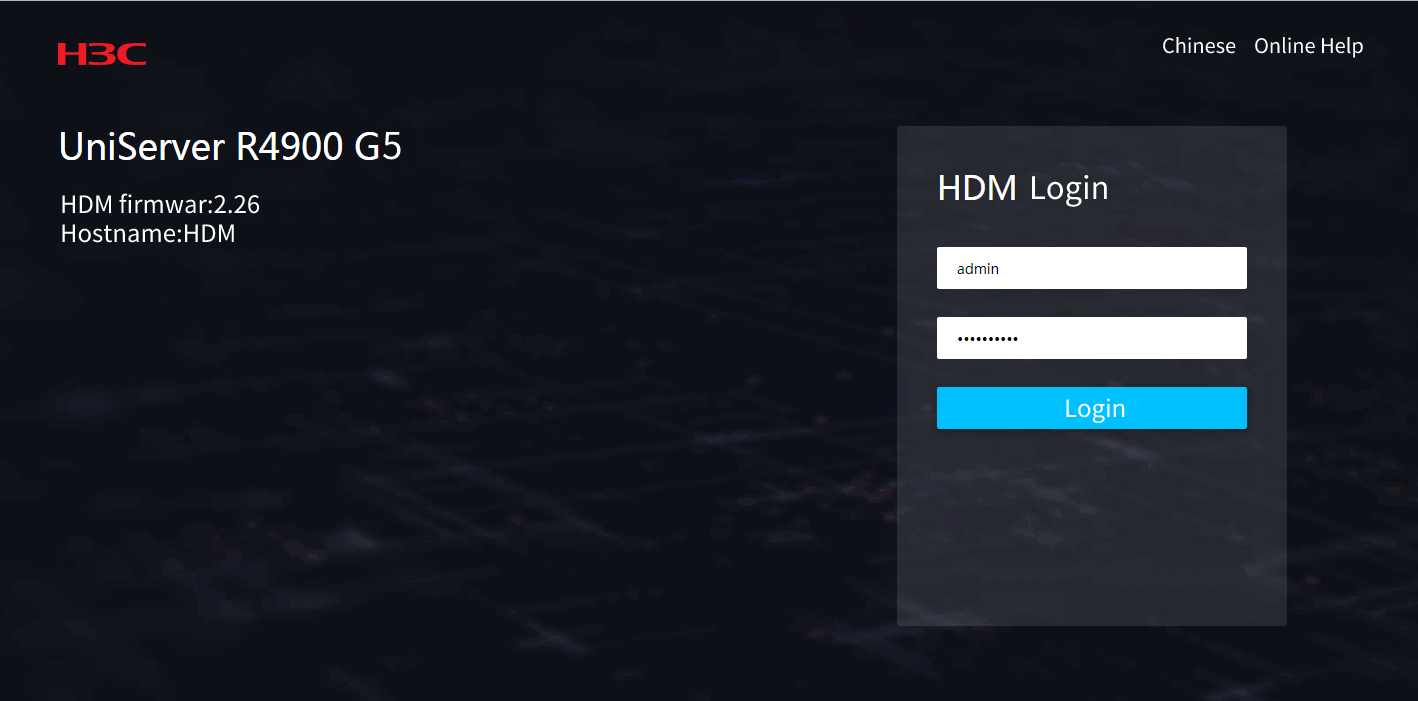
1. Open a browser on a client, and then enter the HDM management IP address 192.168.99.88 to open the HDM login page. On the HDM login page, enter the default username admin and the default password Password@_, and click Login to log in to the HDM Web page, as shown in Figure 2.
Figure 2 Logging in to the HDM Web page
2. Select Unified Control to open the Unified Control page shown in Figure 3.

Adding a server
|
|
NOTE: · Before entering the HDM management IP address or IP address range of the server to be added, ensure that this HDM management IP addresses of the server to be added and the current server are in the same network segment. · When adding devices, the specified IP range can contain a maximum of 255 IP addresses. If the specified IP range contains IP addresses of over 10 devices, the system adds the 10 devices whose information is obtained first. · As a best practice, enter the username and password of an administrator user. If you enter the username of a non-administrator user when adding a device, some functions will be unavailable. |
1. Click Add devices. In the dialog box that opens, enter the HDM management IP address of the R4700 G3 server, and HDM username and password, as shown in Figure 4. In this example, the default username admin and password Password@_ are entered.

2. Click OK, as shown in Figure 5.

Verifying the configuration
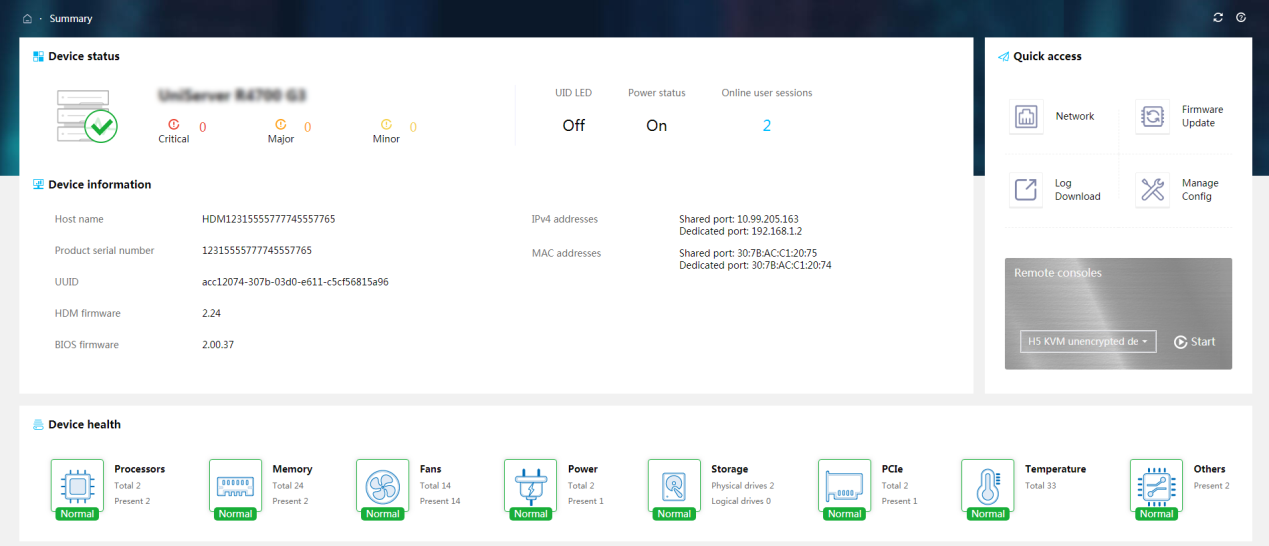
1. After the server is added, you can view the product name, product serial number, health status, power status, and UID LED status of the server, as shown in Figure 6.

2. Click the IP address of the server to navigate to the HDM Web page of the server and perform related operations without password, as shown in Figure 7 and Figure 8.
Figure 7 Navigating to the HDM Web page

3. Select an option in the Power action drop-down list to perform power management operations, as shown in Figure 9.

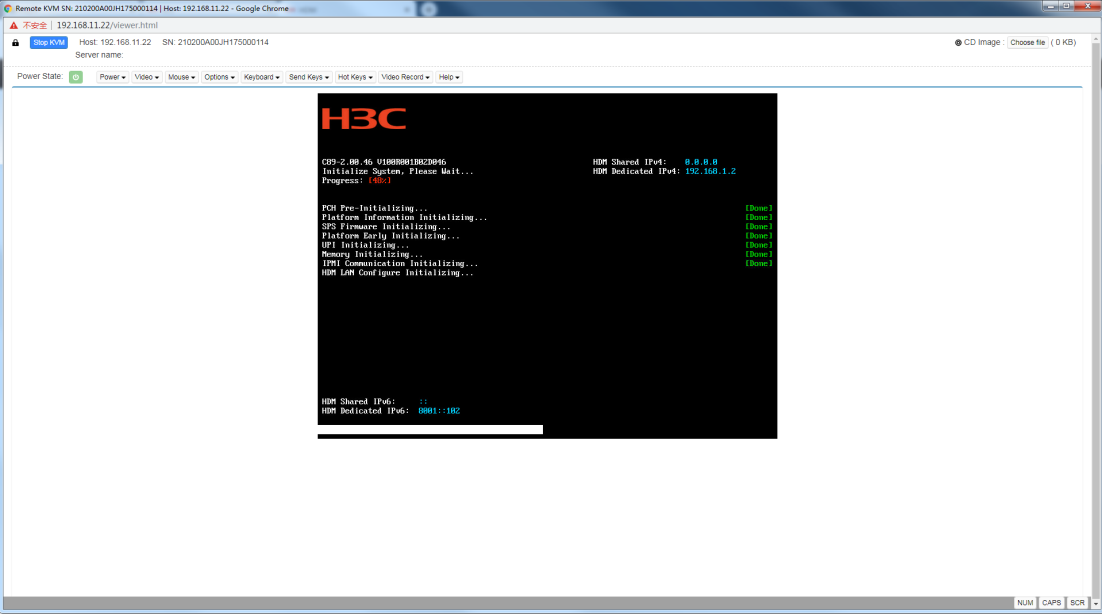
4. Click H5 KVM to access the H5 KVM remote console of the server and perform related operations, as shown in Figure 10.
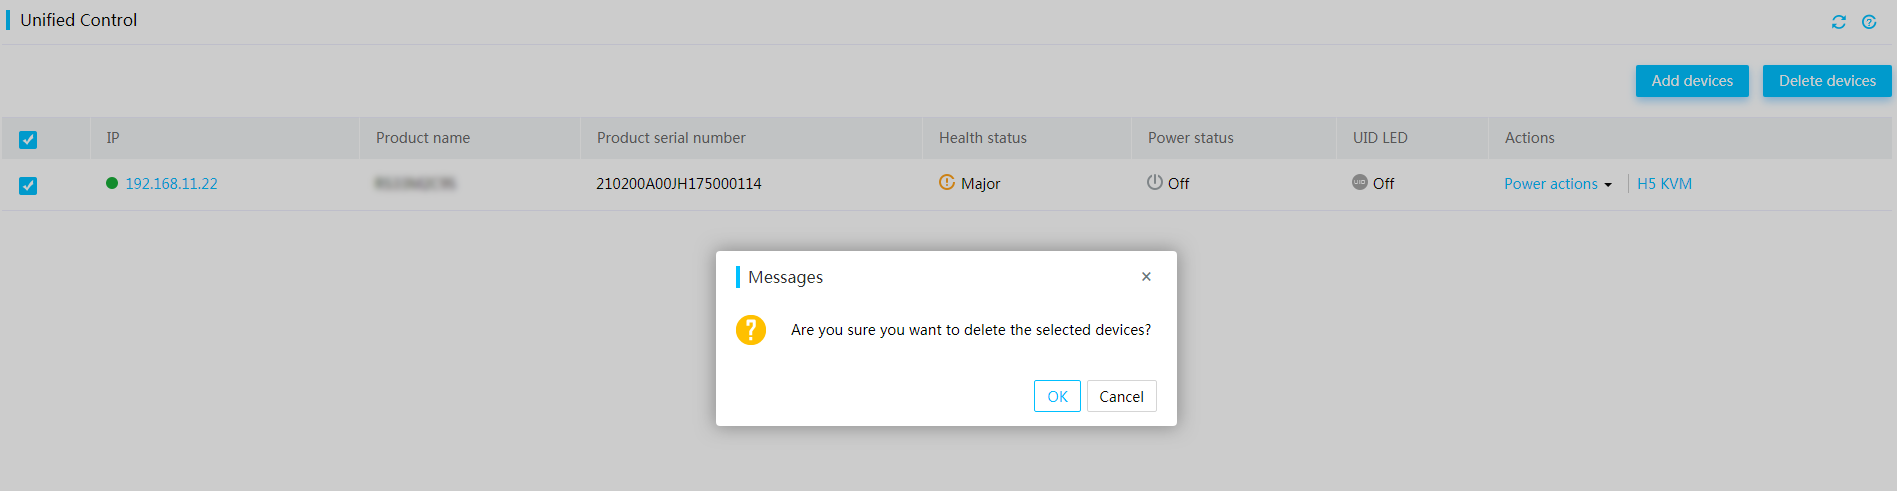
5. Select a server, and click Delete devices. In the dialog box that opens, click OK to delete the selected server, as shown in Figure 11.
Related documentation
· H3C HDM Technology White Paper
· H3C Servers HDM User Guide
