- Table of Contents
- Related Documents
-
| Title | Size | Download |
|---|---|---|
| 01-Text | 4.58 MB |
Contents
Connecting the server to the network
Installing H3C SecCenter CSAP-SA
Obtaining the CSAP-SA image file
Installing CSAP-SA on a physical server
Preparing for CSAP-SA installation
Installing CSAP-SA on an H3C CAS VM
Installing CSAP-SA on a VMware VM
Preparing for installing CSAP-SA
About H3C SecCenter CSAP-SA
H3C SecCenter CSAP Comprehensive Log Audit Platform Server Appliance (CSAP-SA) offers a robust, centralized log management solution.
· It collects massive logs generated by varieties of security devices, network devices, hosts, operating systems, and application systems in real time through proactive and passive means.
· It allows you to store, back up, filter, and audit logs, configure alarm settings, and set actions to be taken for specific situations from a single management interface.
· It provides a range of statistics reports from which the administrators can gain insights into the overall security situation across the network and provide prudent management of logs through their entire life cycles.
Preparing for installation
Hardware requirements
CSAP-SA can be installed on a VM or a physical server. To ensure a successful installation, make sure the physical server or VM to host CSAP-SA meets the hardware requirements described in Table 1 and Table 2, respectively.
Physical server requirements
Table 1 Hardware requirements for a physical server to host CSAP-SA
|
Item |
Minimum requirements |
|
CPU |
8 cores 2.4 GHz or above per core |
|
Memory size |
32 GB |
|
Drive |
1 TB or above, expandable SSDs not supported |
VM requirements
Table 2 Hardware requirements for a VM to host CSAP-SA
|
Item |
Minimum requirements |
|
CPU |
8 cores 2.4 GHz or above per core |
|
Memory size |
32 GB |
|
Storage |
1 TB or above, expandable |
Restrictions and guidelines
To ensure successful installation, follow these restrictions and guidelines:
· If CSAP-SA is deployed on a VM, only one virtual disk is required.
· The physical server to host CSAP-SA or the physical server where the VM hosting CSAP-SA resides must be an x86 server.
· CSAP-SA cannot be deployed on a server if the server is configured with software RAID. To set up RAID, the server must have an independent RAID controller.
· Before deploying CSAP-SA on a server with an independent RAID controller, first create a RAID with all drives used to deploy CSAP-SA. To ensure a successful system boot after CSAP-SA deployment, make sure the server contains only one RAID.
· If the server has multiple drives that meet the capacity requirements for CSAP-SA installation, CSAP-SA is automatically installed on the drive or RAID with the largest capacity.
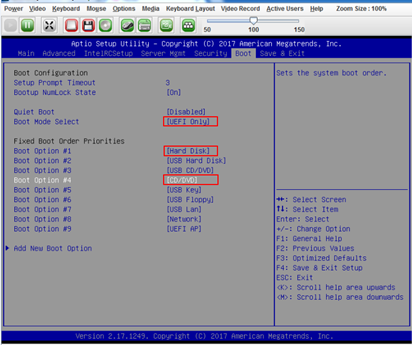
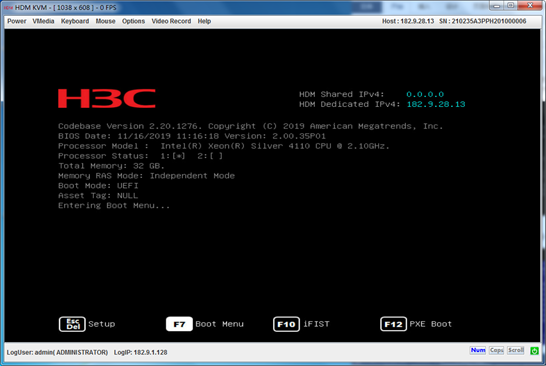
· Set the BIOS boot mode to UEFI on the server. Configure the drive to have higher boot priority than the virtual CD-ROM.
Figure 1 Setting the BIOS boot mode to UEFI and configuring boot order priorities
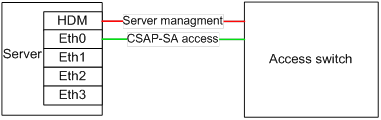
Connecting the server to the network
As shown in Figure 2, use Ethernet cables to connect the HDM and Eth 0 interfaces of the server or the server where the VM resides to an access switch. You can manage the server from the HDM interface and access CSAP-SA by using the IP address of Eth 0.
Installing H3C SecCenter CSAP-SA
This document describes the procedures for installing H3C SecCenter CSAP-SA on an H3C physical server, on an H3C CAS VM, and a VMware VM. For information about installing H3C SecCenter CSAP-SA on a third-party platform, see the operating system installation guide for that third-party platform.
Obtaining the CSAP-SA image file
Obtain a CSAP-SA image file from the H3C official website and copy the file to the configuration terminal. This installation procedure uses the SecCenterCSAP-SA-E1708P01.iso image file as an example.
Installing CSAP-SA on a physical server
Preparing for CSAP-SA installation
· Configure IP addresses for the management interfaces, create an account, and configure BIOS and RAID settings as needed for the server. For more information, see the documents provided with the server.
· Make sure the configuration terminal and the server can reach each other.
Installing CSAP-SA
1. On the configuration terminal, open a Web browser, and enter the HDM interface IP address of the server in the address bar. On the Web interface of the server, click Remote Control > Remote Console. Then, click KVM to enter the JViewer page.
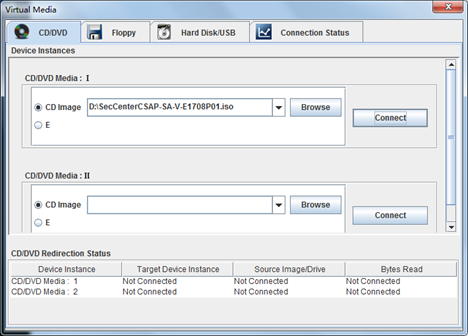
2. Click Virtual Media from the menu bar. In the window that opens, click Browse and select the SecCenterCSAP-SA-V-E1708P01.iso image file. Then, click Connect CD/DVD.
Figure 3 Importing the image package
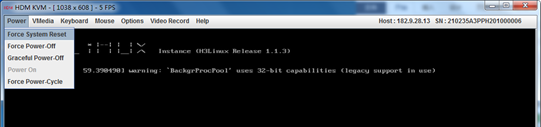
3. Click Power from the menu bar, and select Force Power Cycle to reboot the server.
Figure 4 Rebooting the server
4. When the following page is displayed, press F7 immediately to enter the Boot Menu. The key used to enter the Boot Menu varies by server model.
Figure 5 Entering the Boot Menu
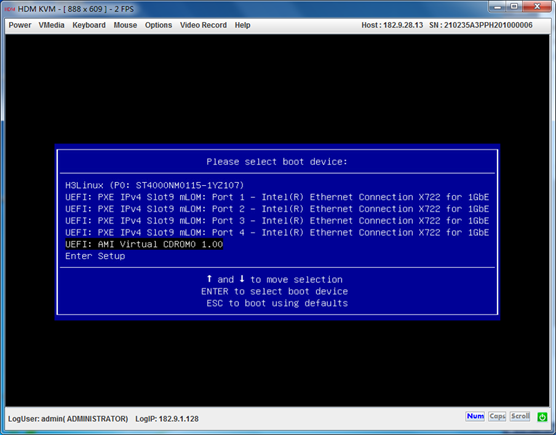
5. When the following page is displayed, select the first virtual CDROM as the boot device, and then press Enter.
Figure 6 Selecting the boot device
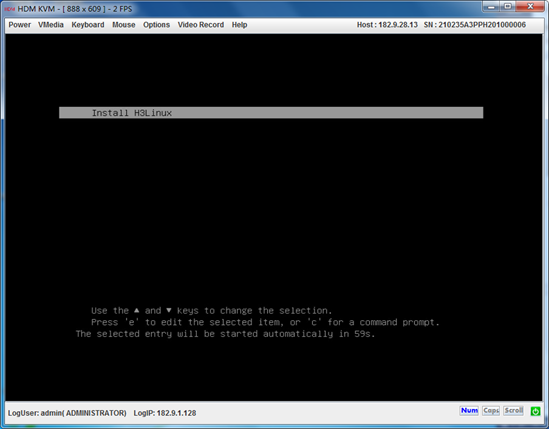
6. Select Install H3Linux and press Enter.
Figure 7 Installing H3Linux
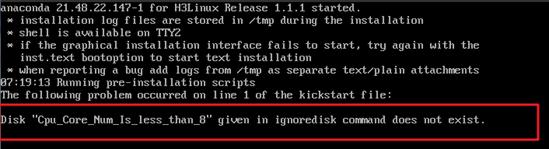
The installation process terminates if the hardware resources are insufficient. You are required to check the hardware resources and add hardware resources to make sure the resources meet the installation requirements. Then, reinstall CSAP-SA.
The following resource issues might exist:
¡ Cpu_Core_Num_Is_less_than_8—The number of CPU cores is less than eight.
¡ Memory_Is_less_than_32G—The memory size is less than 32 GB.
¡ Cannot_Find_Available_Disk—No disk meets the installation requirements. To install CSAP-SA on a disk, the disk size must be larger than 1 TB.
Figure 8 Error message for insufficient CPU cores
7. From the INSTALLATION SUMMARY page, configure the keyboard and network and host name settings. You can return to the INSTALLATION SUMMARY page from each step by clicking Done.
|
|
IMPORTANT: To ensure successful installation, configure the parameters strictly as described in the following steps. Retain the default values for other unspecified parameters. |
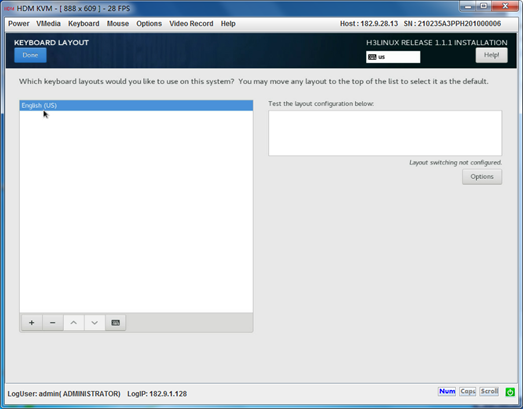
a. Click KEYBOARD and select a keyboard layout, as shown in Figure 9 and 错误!未找到引用源。. Then click Done.
Figure 9 Configuring the keyword
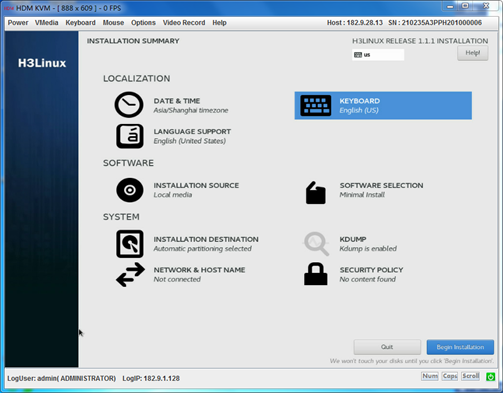
Figure 10 Selecting a keyboard layout
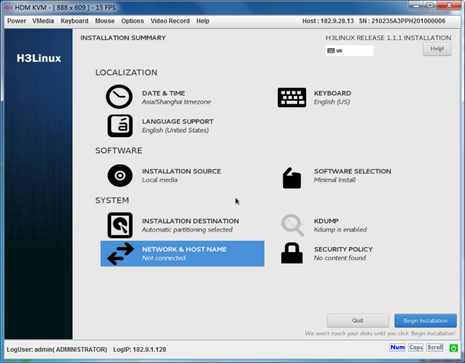
c. Configure the network and host name.
# Click NETWORK & HOST NAME.
Figure 11 Configuring the network and host name
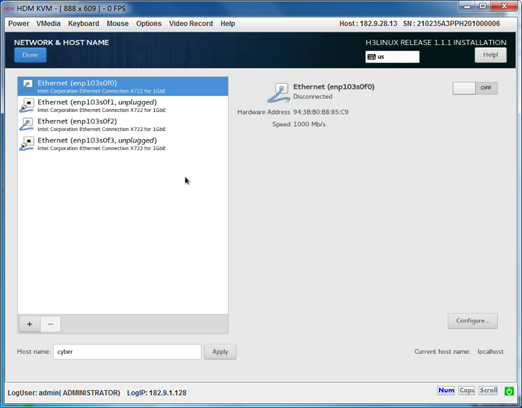
# Select the NIC to be used, configure the host name, and then click Apply. Then, click Configure to configure network settings.
Figure 12 Configuring the host name
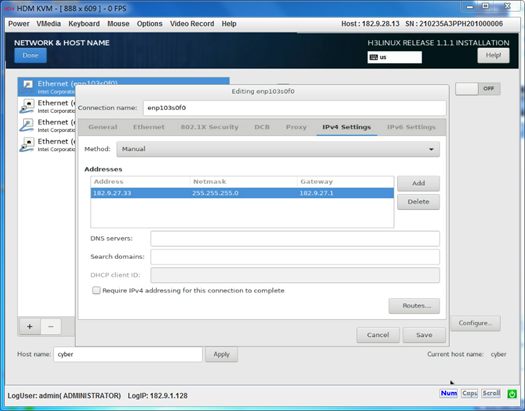
# Configure an IPv4 address for the NIC and save the configuration. Only IPv4 addresses are supported in the current software version. To ensure successful installation or successful login after installation, configure an unused IPv4 address and make sure the IPv4 address is valid.
Figure 13 Configuring the network settings
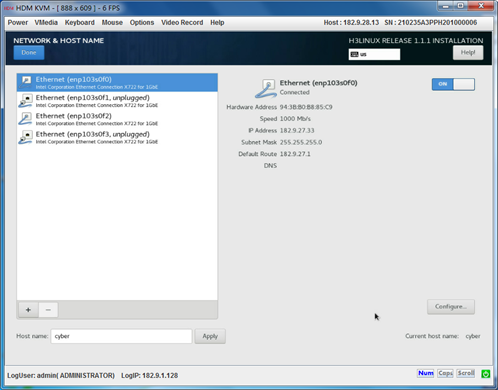
# Enable the Ethernet interface, and then click Done.
Figure 14 Enabling the Ethernet interface
d. Click Begin Installation. During the installation, the server will reboot automatically.
|
|
CAUTION: · To avoid installation anomaly or SSH start failure, do not create users during the installation. · Do not power off the server during the installation. |
Figure 15 Clicking Begin Installation
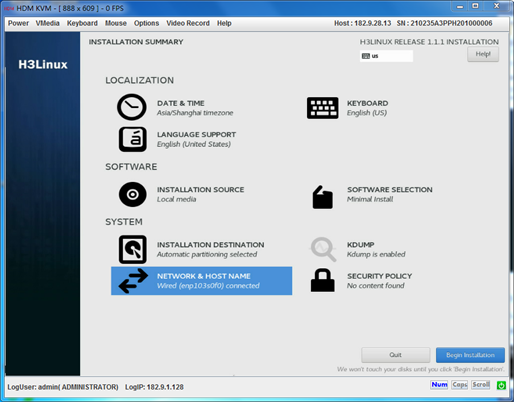
Figure 16 Installation completed

The installation typically takes about 10 to 20 minutes.
If the page as shown in Figure 17 is displayed during the installation and remains for more than 20 minutes, the webpage and the server CLI might be disconnected. To resolve this issue, double-click the webpage or click Refresh to refresh the page.
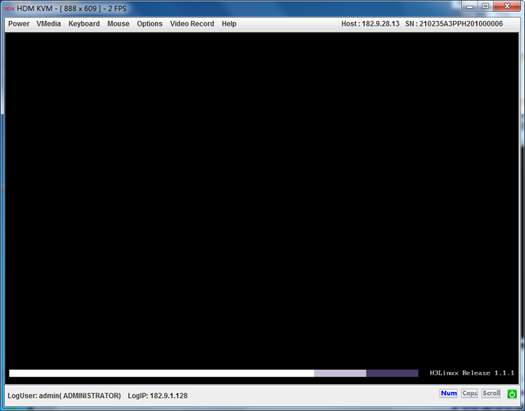
Figure 18 CSAP-SA login page

If you cannot access CSAP-SA after CSAP-SA is installed (the login page is not displayed), perform the following tasks to resolve the issue:
a. Verify the following items:
- The NIC and IP address settings are correct.
- The NIC is enabled as described in the installation procedure and the NIC is in up state.
- The server can access the network correctly and the configuration terminal and the server are reachable to each other.
b. Reinstall CSAP-SA.
Installing CSAP-SA on an H3C CAS VM
To install CSAP-SA on an H3C CAS VM, first add a VM on the H3C CAS CVM and then deploy CSAP-SA on the VM.
Adding a VM
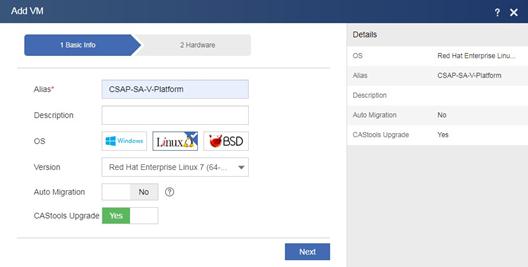
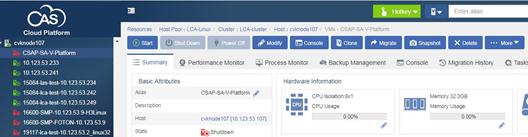
1. Connect to H3C CAS CVM and add a VM. Configure an alias for the VM, select the Linux operating system, and select the 64-bit Red Hat 7 or CentOS 7 system version. Then, click Next to configure hardware information.
Figure 19 Configuring basic information
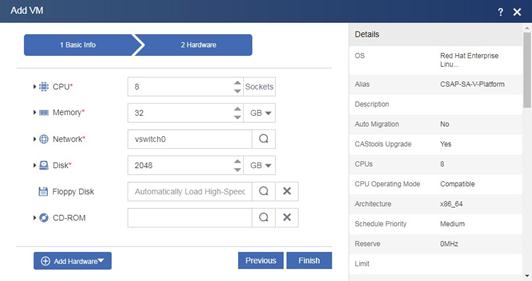
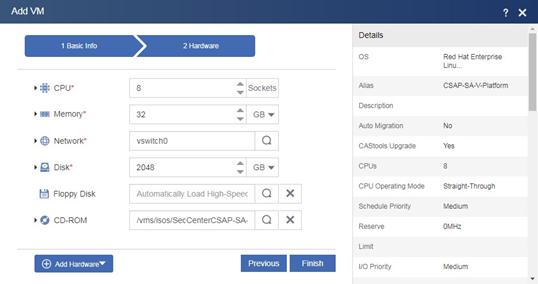
2. Configure hardware information. The minimum hardware requirements are 8 CPU cores, 32 GB memory, and 1024 GB disk space. You can expand the memory and disk space as needed. The disk stores log messages. A log message occupies 0.3 KB storage space in average.
|
|
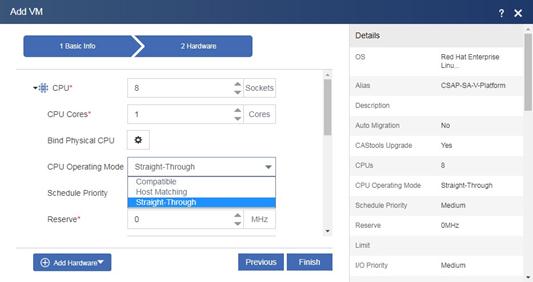
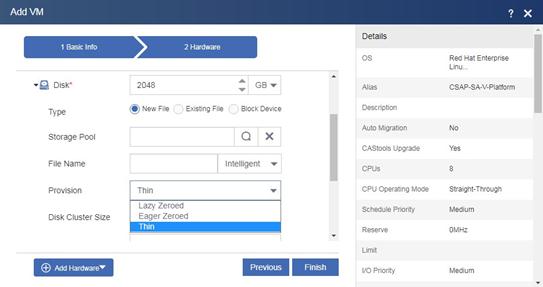
IMPORTANT: · Allocate resources based on the physical host capacity. If the sum of total VM resources exceeds the physical host resources, resources preemption might occur during VM operation and service performance might be degraded. · As a best practice, set the CPU operating mode to Straight-Through and disk provisioning mode to Lazy Zeroed or Eager Zeroed for optimal performance of the VM. |
Figure 20 Configuring hardware information
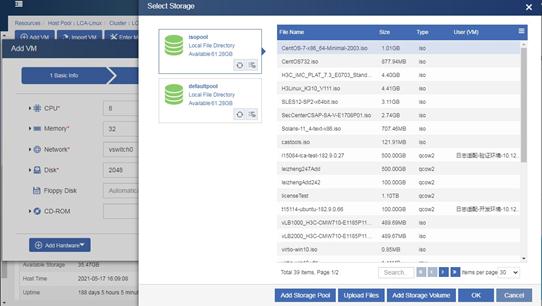
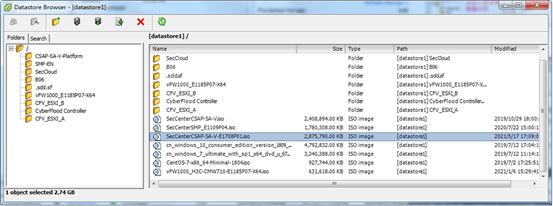
3. Click isopool and select the SecCenterCSAP-SA-V-E1708P01.iso CSAP-SA image file. If the CSAP-SA image file has been uploaded, you can select it directly from the file list and click OK. If the CSAP-SA image file has not been uploaded, first click Upload Files at the bottom of the page and go to the next step to upload the image package.
Figure 21 Selecting the CSAP-SA image file
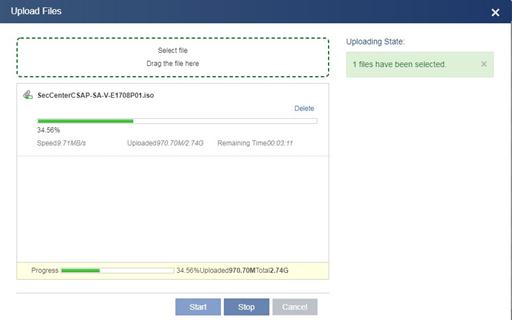
4. Upload the SecCenterCSAP-SA-V-E1708P01.iso image file to the storage pool.
Figure 22 Uploading the image file to the storage pool
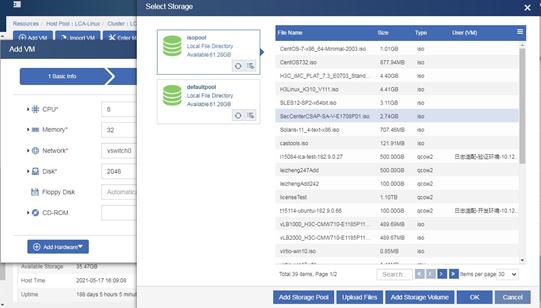
5. Select the SecCenterCSAP-SA-V-E1708P01.iso image file and then click OK.
Figure 23 Selecting the SecCenterCSAP-SA-V-E1708P01.iso image file
6. Click Finish.
Figure 24 Finishing VM creation
Installing CSAP-SA
1. Start the newly created VM, and then click Console to configure CSAP-SA deployment settings.
Figure 25 Starting the VM
2. Install CSAP-SA on the VM in the same way CSAP-SA is installed on a physical server. For more information, see steps 7 and 0 in Installing CSAP-SA."
Installing CSAP-SA on a VMware VM
To install CSAP-SA on a VMware VM, first add a VM on the VMware vSphere virtualization platform and then deploy CSAP-SA on the VM.
Preparing for installing CSAP-SA
Make sure the server where VMware vSphere is deployed has a minimum of 8 CPU cores, 32 GB memory, and 1 TB storage space.
Adding a VM
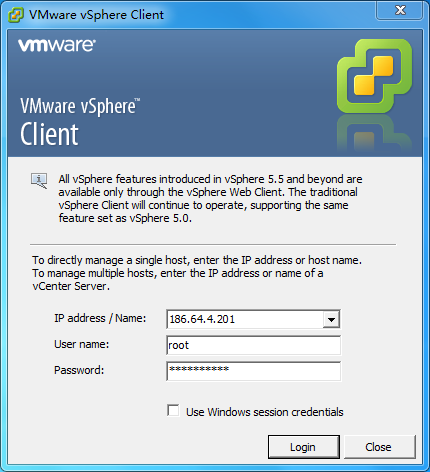
1. Log in to the VMware vSphere Client, enter the IP address, username, and password of the VMware vSphere Client, and then click Login.
Figure 26 VMware vSphere Client login interface
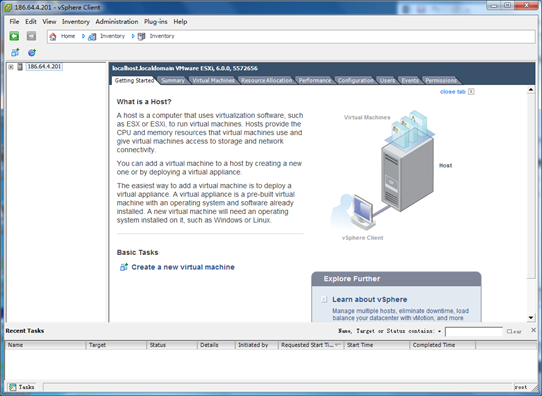
2. On the Getting Started tab, click Create a new virtual machine.
Figure 27 Getting Started tab
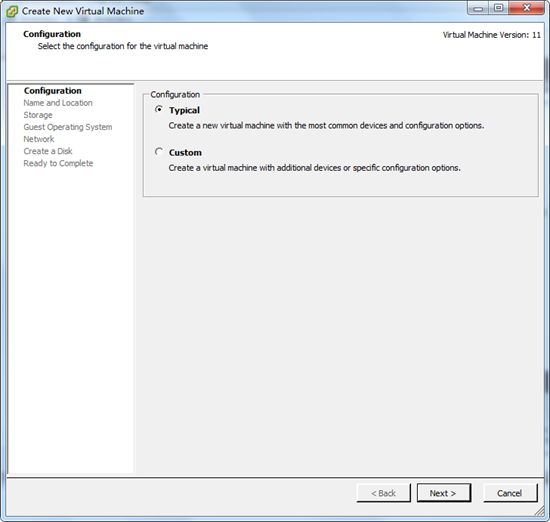
3. Select Typical, and then click Next. By default, Typical is selected.
Figure 28 Selecting the Typical configuration
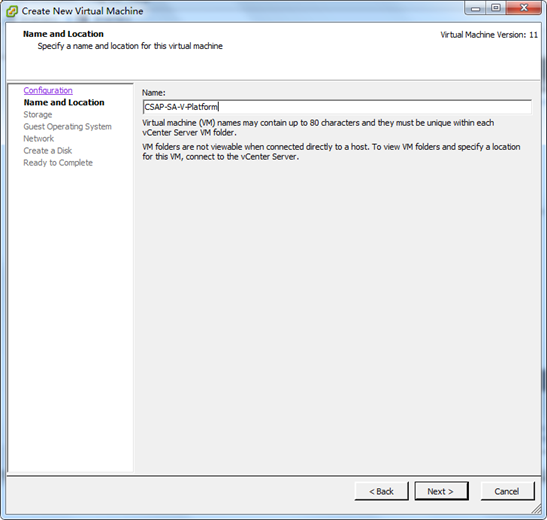
4. Enter a name for the VM. For example, enter name CSAP-SA-V-Platform. Then, click Next.
Figure 29 Configuring a name for the VM
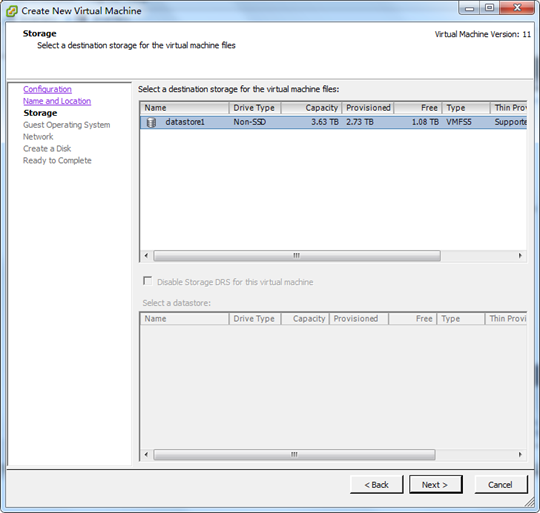
5. Configure storage, and then click Next. In this example, the default setting is used.
Figure 30 Configuring storage
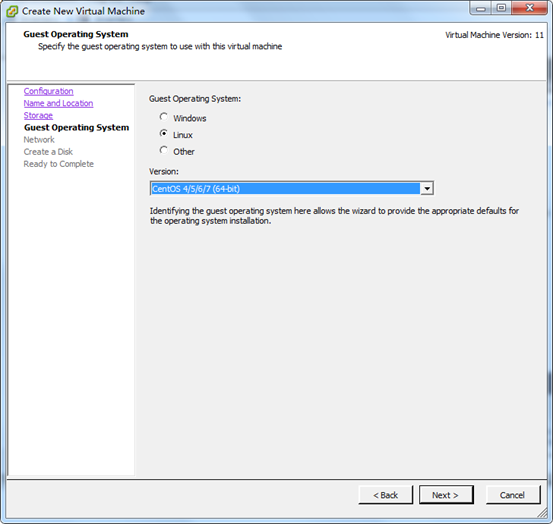
6. Select a guest operating system, and then click Next.
Figure 31 Configuring the operating system
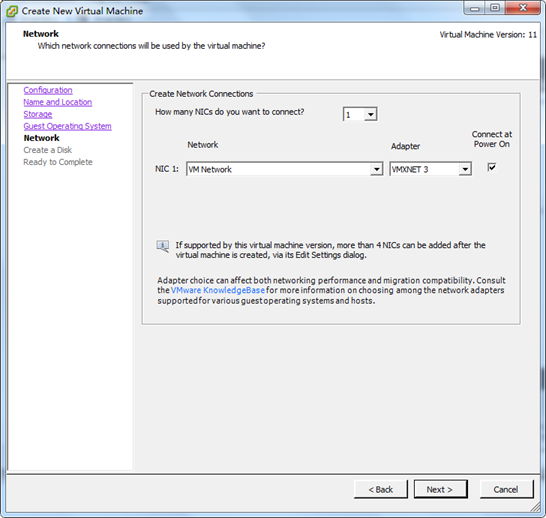
7. Configure the network, and then click Next. In this example, the default setting is used.
Figure 32 Configuring the network
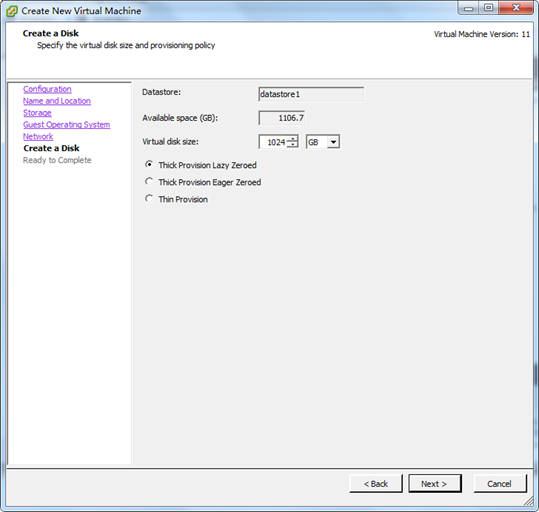
8. Configure disk settings, and then click Next. The virtual disk size cannot be smaller than 1024 GB. Use the default settings for other parameters.
Figure 33 Configuring disk settings
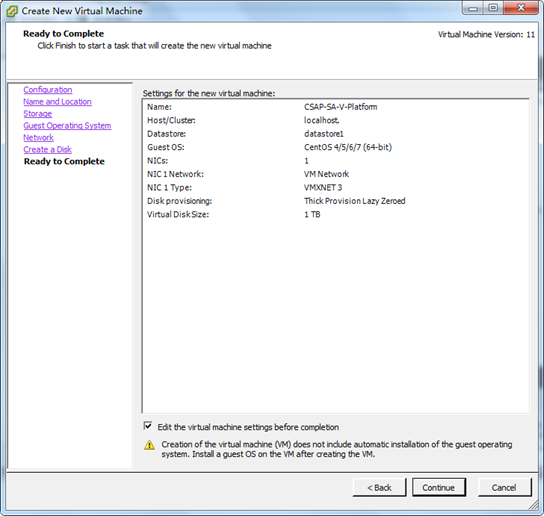
9. Select Edit the virtual machine settings before completion, and then click Continue.
Figure 34 Selecting Edit the virtual machine settings before completion
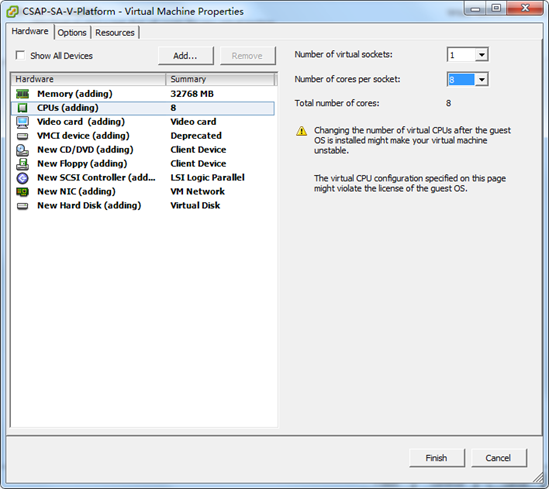
10. Set the memory size to 32 GB and the number of CPU cores to 8, and use the default settings for other parameters. Then, click Finish.
Figure 35 Setting the memory size

Figure 36 Setting the number of CPU cores
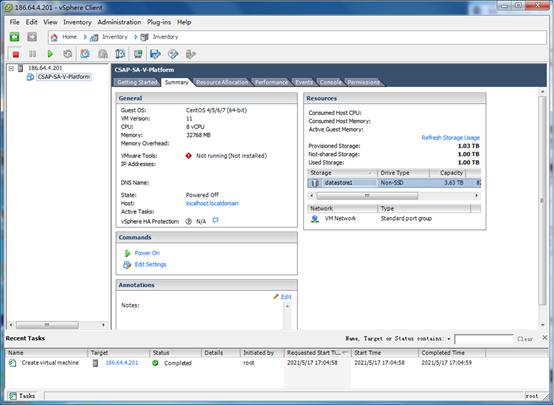
11. Select the newly added VM, and click the Summary tab. Then, right-click the datastore1 storage and click Browse Datastore.
Figure 37 Browsing Datastore
12. Upload the CSAP-SA image file.
Figure 38 Uploading the CSAP-SA image file
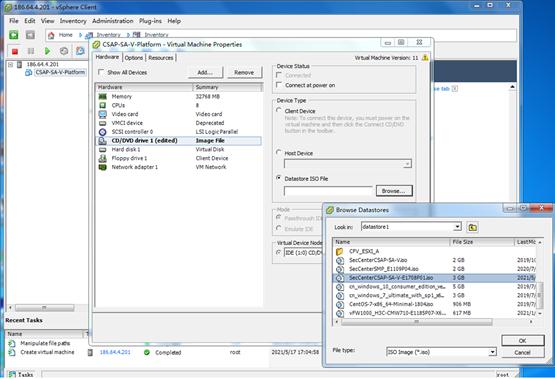
13. After the image file is uploaded, select the VM, CSAP-SA-V-Platform in this example, click Edit Settings, and then click the CD/DVD drive. Then, click Browse in the Datastore ISO File field and select the uploaded CSAP-SA image file. In the Device Status area, select Connect at power on and then click OK.
Figure 39 Selecting a datastore ISO file
Installing CSAP-SA
1. Select the newly created VM and start it.
2. Click the Console tab, and then configure the CSAP-SA deployment settings.
Figure 40 Opening the console

3. Install CSAP-SA on the VM in the same way CSAP-SA is installed on a physical server. For more information, see steps 7 and 0 in "Installing CSAP-SA."
Logging in to CSAP-SA
Registering and activating licenses
After CSAP-SA is installed on a server, you must install the H3C SecCenter CSAP-SA Base Platform Software License to obtain the rights to use the log edit service on CSAP-SA. For more information about applying for the license activation file, see H3C SecCenter CSAP Series License User Guide.
To install the activation file on CSAP-SA to activate the license:
1. On the configuration terminal, open the Chrome browser. Enter https: //10.123.53.234 in the address bar and press Enter to open the login page of CSAP-SA. Then, click Product Registration.
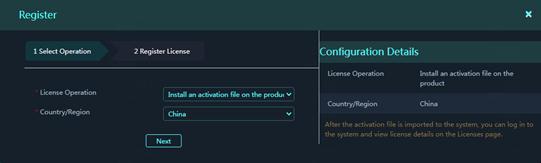
2. On the Select Basic Operations tab, select Register the product with the license file from the License Operation list, and then click Next.
Figure 41 Selecting a license operation
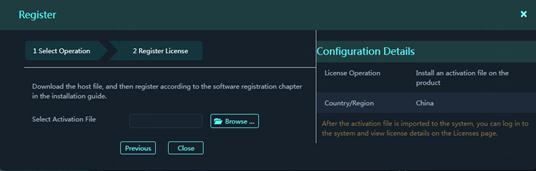
3. Upload the activation file.
Figure 42 Uploading the activation file
Logging in to CSAP-SA for the first time
You can use the IPv4 address configured during the deployment process to log in to CSAP-SA. As a best practice, use the super administrator account. Figure 43 shows the predefined user accounts for login. As a best practice, change the default passwords of the accounts or create a new administrator account as soon as possible after you log in to CSAP-SA.
Figure 43 Predefined account information for login
|
Role |
Username/Password |
Privileges |
|
System administrator |
admin/secCsap@12345 |
View and configure system settings. |
|
Super administrator |
sysAdmin/sysCsap@12345 |
All privileges. The information security administrator can use the super administrator account to perform routine information security management and maintenance. |
|
Service administrator |
buzAdmin/buzCsap@12345 |
View reports of various security services. |
|
Audit administrator |
auditAdmin/auditCsap@12345 |
View operation records of other users and audit the operations. |
To log in to CSAP-SA:
1. On the configuration terminal, open the Chrome browser, enter https: //10.123.53.234 in the address bar, and then press Enter.
2. On the page that opens, enter the username and password and click Login.
The default username and password are admin and admin@admin, respectively.
Figure 44 CSAP-SA login page
[wy1]请中文确认
