- Table of Contents
-
- H3C MSR Routers Configuration Examples(Web)-R6728-6W100
- 00-Preface
- 01-Web login Configuraiton Examples
- 02-Administrator Account Configuration Examples
- 03-Static Routing Configuration Examples
- 04-Cloud Connection Configuration Examples
- 05-Software Upgrade Examples
- 06-Port Mapping Configuration Examples
- 07-IPsec VPN Configuration Examples
- 08-L2TP VPN Configuration Examples
- 09-WLAN AC Configuration Examples
- Related Documents
-
| Title | Size | Download |
|---|---|---|
| 04-Cloud Connection Configuration Examples | 486.17 KB |
Contents
Example: Configuring a cloud connection
Enabling cloud service on the router
Registering a cloud platform account
Introduction
The following information provides an example of establishing a cloud connection for a router.
To monitor, operate, or maintain devices remotely, the administrator can bind devices to H3C Cloudnet by using cloud services on the platform.
H3C Cloudnet is a lightweight multi-service platform that applies to small- and medium-sized enterprise office, business networks and branch chain scenarios. It provides scenario-based solutions such as automatic deployment, device monitoring and management, wireless O&M, and data synchronization and application.
Prerequisites
This document is not restricted to specific software or hardware versions. Procedures and information in the examples might be slightly different depending on the software or hardware version of the device.
The configuration examples were created and verified in a lab environment, and all the devices were started with the factory default configuration. When you are working on a live network, make sure you understand the potential impact of every command on your network.
The following information is provided based on the assumption that you have basic knowledge of cloud connection.
Software version used
This configuration example was created and verified on MSR3610-X1 Release 6728P22.
Preparations
If you are logging in to H3C Cloudnet for the first time, you must register an account. For more information, see H3C Cloudnet Deployment Guide or "Registering a cloud platform account" in this document.
Restrictions and guidelines
MSR series routers can only be bound to H3C Cloudnet.
Example: Configuring a cloud connection
Network configuration
As shown in Figure 1, configure the router to establish a cloud connection with H3C Cloudnet for remote monitoring and O&M.

Procedures
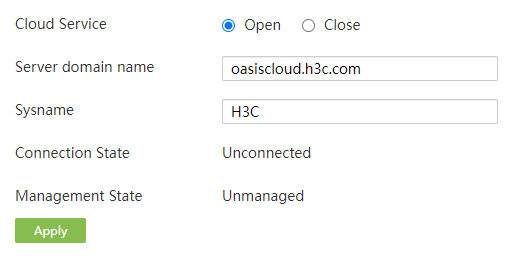
Enabling cloud service on the router
# Enable cloud service on the router from the Web-based management interface.
1. On the Web-based management interface, from the navigation pane, select System Tool > Remote Login.
2. Click the Cloud Service tab.
3. Select Open for Cloud Service. If cloud service is already enabled, skip this step.
4. In the Server domain name field, use the default domain name oasiscloud.h3c.com.
5. In the Sysname field, specify a sysname. The default sysname is H3C.
6. Click Apply.
Figure 2 Enabling cloud service
Registering a cloud platform account
# The cloud server domain name is cloudnet.h3c.com. As a best practice, use the Google, Firefox, or Edge browser to access the cloud platform. To log in to the platform for the first time, perform the following tasks to register an account:
1. Enter https://oasiscloud.h3c.com/ in the browser to access the H3C Cloudnet login page.
2. Click Register.
3. In the Username field, specify a username.
4. In the Email field, enter an e-mail address.
5. In the Password field, specify a password.
6. In the Confirm Password field, enter the specified password again.
7. Select Agree for User Agreement Privacy Policy.
8. Click Complete.
Figure 3 H3C Cloudnet login page
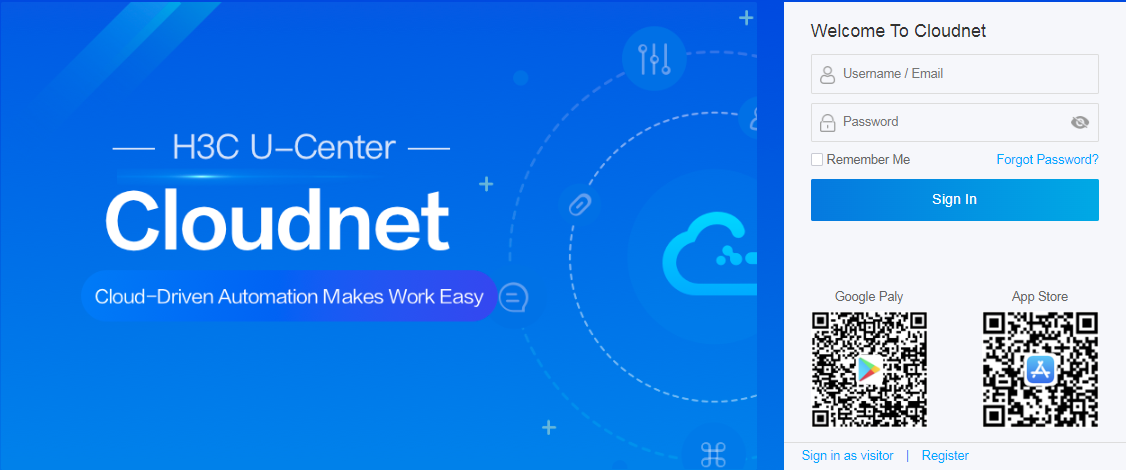
Figure 4 Registering an account

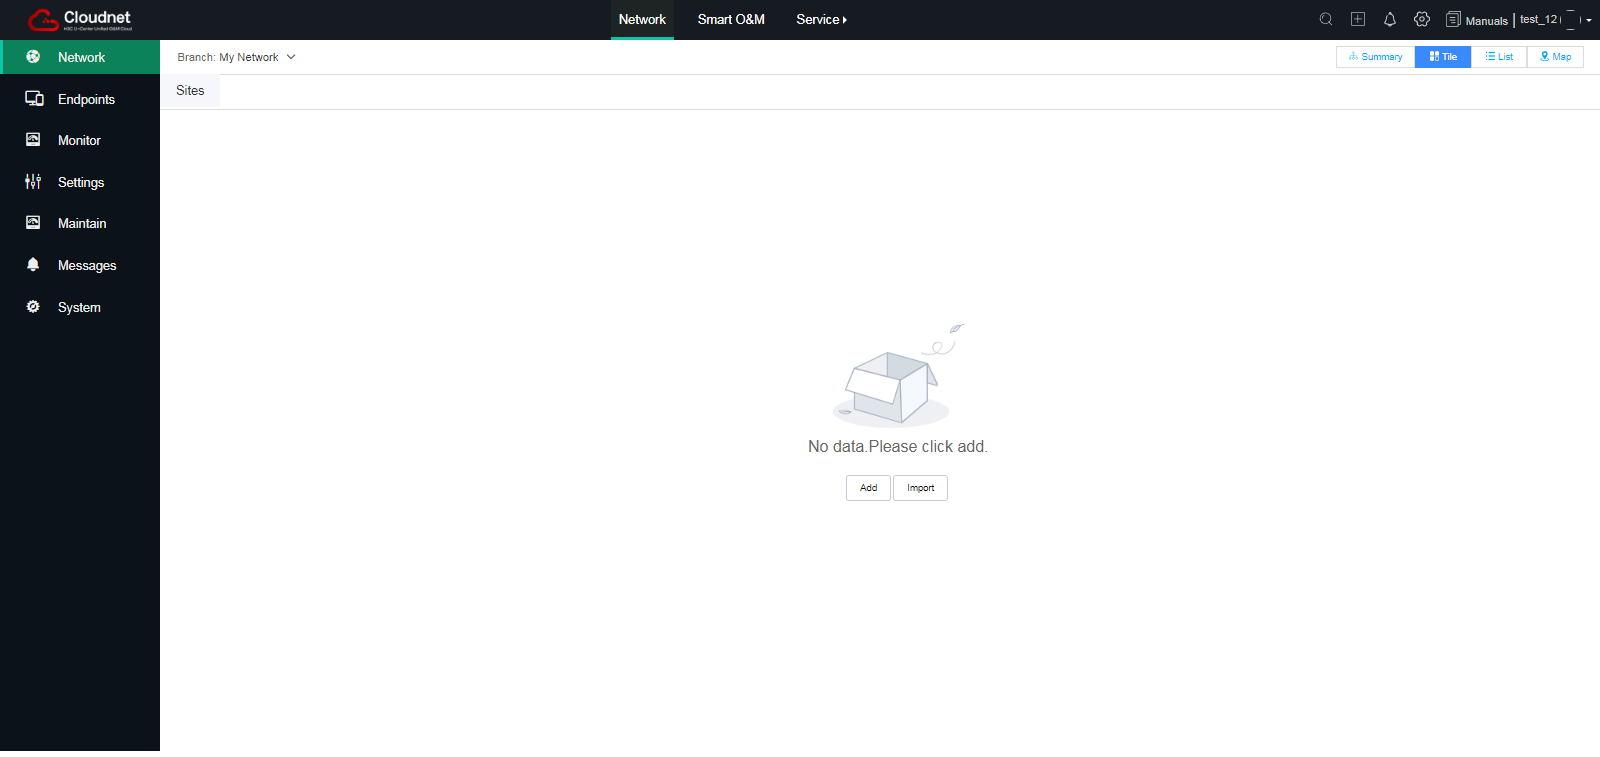
Logging in to H3C Cloudnet
1. Return to H3C Cloudnet login page.
2. Enter the configured username/email and password.
3. Click Sign In.
Figure 5 H3C Cloudnet dashboard
Adding a branch and a site
|
|
NOTE: A site is a virtual container that accommodates network devices of the same product type and device type. A branch is a virtual container that accommodates sites and is divided based on certain plans such as regions and brands. |
# This section adds site Beijing in branch head office as an example.
1. On the top navigation bar, select Network.
2. From the left navigation pane, select Network > Organization.
3. Click Add on the left.
4. On the page that opens, specify head office for Branch Name and click OK.
5. Click Add on the right.
6. On the page that opens, select General for Scenario Type and click Next.
7. Specify Beijing for Site Name, select head office for Branch, and select Others for Industry. You can change the industry as needed. Click Next.
8. Enter the detailed address for the site.
9. Click OK.
Figure 6 Selecting a scenario type
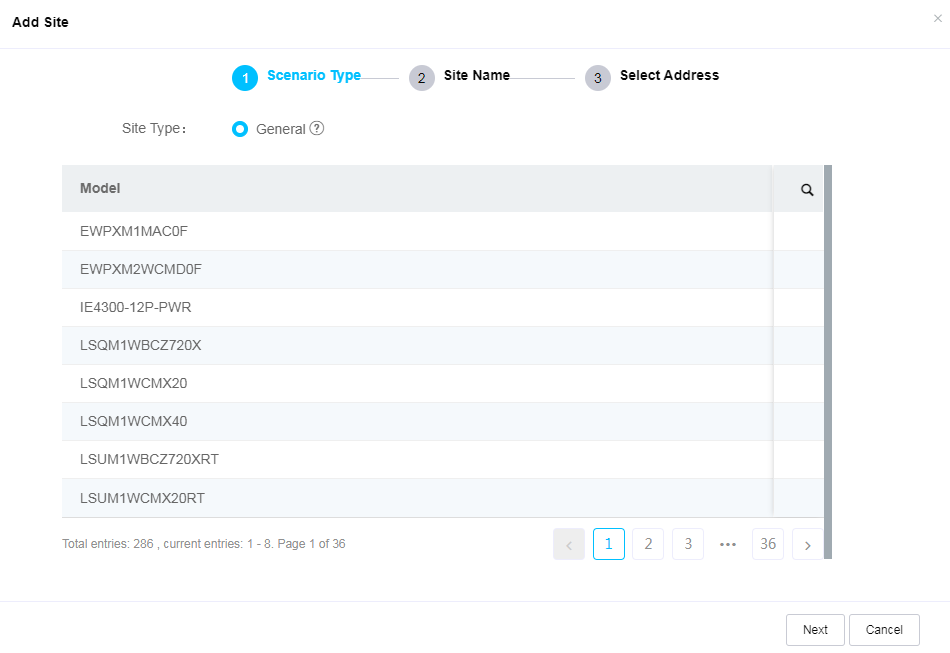
Figure 7 Adding a site

Figure 8 Entering the detailed address for the site

Adding a device into the site
# This section adds an MSR series router to site Beijing as an example. Before adding the router, you must identify the device SN on the System Information page from the Web-based management interface.
1. On the top navigation bar, select Network.
2. From the left navigation pane, select Network > Devices.
3. Click Add Device.
4. Select Beijing for Site.
5. Specify Router for Device Name. You can customize the device name as needed.
6. Enter the device serial number.
7. Select General for IRF Member.
8. Click Add Device.
Figure 9 Adding a device

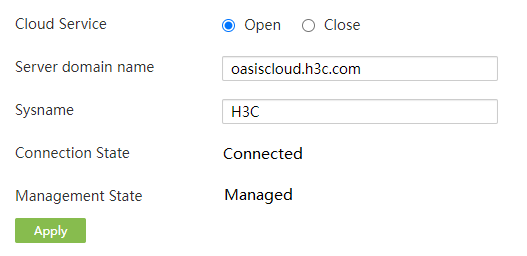
Verifying the configuration
1. Log in to the Web-based management interface for the router, select System Tool > Remote Login.
2. Click the Cloud Service tab. Verify that the cloud connection state is connected and the management state is managed. This indicates that the device is bound to H3C Cloudnet successfully. If the cloud connection is unconnected, verify the configuration or the network connectivity.
Figure 10 Verifying the configuration