- Table of Contents
- Related Documents
-
| Title | Size | Download |
|---|---|---|
| 01-Text | 1.01 MB |
Configuring basic cluster services
Management HA configuration workflow
Creating a management HA group
Logging in to the cluster at management HA VIP
Configuring cluster users and user groups
About cluster users and user groups
Cluster user and user group configuration workflow
(Optional) Editing user permissions
Logging in to the cluster as a common system user
Configuring email notifications
Email notification configuration workflow
Configuring email notification settings
Adding an alarm notification recipient
(Optional) Testing the email address of a recipient
SMS notification configuration workflow
Configuring SMS notification settings
Adding an alarm SMS notification recipient
(Optional) Testing the phone number of a recipient
Configuring SNMP notifications
SNMP notification configuration workflow
Configuring SNMP notification receivers
Adding the storage system to NMS and configuring SNMP parameters
Importing the MIB file of the storage system to NMS
Viewing SNMP notifications on NMS
About multi-cluster management
Multi-cluster management configuration workflow
Configuring a cluster as the primary cluster
Configuring a cluster as a managed cluster
Cluster resource configuration workflow
(Optional) Creating a disk pool
(Optional) Managing disks in a disk pool
(Optional) Creating a protection domain
File storage active-active configuration workflow
Creating an active-active domain
Binding hosts to active-active sites
Enable the active-active mode for a file system
Configuring encryption services
Encryption service configuration workflow
Enabling encryption for the cluster
Enabling encryption for a disk pool
Configuring basic block storage services
About basic block storage services
Basic block storage service configuration workflow
Configuring a block storage service network
Volume clone configuration workflow
Splitting a volume clone from its source volume
Volume copy pair configuration workflow
Starting/Stopping data copy for a copy pair
Configuring volume migration pairs
Volume migration pair configuration workflow
Volume snapshot configuration workflow
Creating a common volume snapshot
(Optional) Restoring a common volume snapshot
(Optional) Creating a writable volume snapshot
(Optional) Mapping writable volume snapshots to a client group
Configuring basic disaster recovery services
About basic disaster recovery services
Basic disaster recovery service configuration workflow
Adding replication nodes to an address pool
Creating an async remote replication pair
Synchronizing/Splitting async remote replication pairs
Configuring disaster recovery primary/secondary switchover
About disaster recovery primary/secondary switchover
Primary/secondary switchover configuration workflow
Splitting async remote replication pairs
Disabling secondary volume protection
Performing a primary/secondary switchover
Enabling secondary volume protection
Synchronizing async remote replication pairs
Configuring consistency groups
Consistency group configuration workflow
Assigning volumes to a consistency group
Creating a consistency group snapshot
(Optional) Restoring a consistency group snapshot
(Optional) Creating a writable consistency group snapshot
(Optional) Mapping writable consistency volume snapshots to a client group
QoS policy configuration workflow
Attaching a QoS policy to volumes
Configuring basic file storage services
About basic file storage services
Basic file storage service configuration workflow
Adding NAS servers to a NAS group
(Optional) Creating local user groups
(Optional) Creating local users
(Optional) Configuring NFS share permissions and authentication
(Optional) Configuring CIFS share permissions and authentication
Configuring the WORM clock and expired file policy
Configuring the WORM attribute for a directory
Configuring tiered file storage
File layout policy configuration workflow
Configuring basic object storage services
About basic object storage services
Basic object storage service configuration workflow
Creating an object gateway HA group
Async replication configuration workflow
Configuring async replication settings
Enabling async replication for a bucket
Configuring lifecycle policies
Lifecycle policy configuration workflow
(Optional) Creating an infrequent storage pool
(Optional) Configuring archive storage settings
Managing the lifecycle of objects
Deploying multiple sites for object storage
Multisite configuration workflow
(Optional) Switching site role to primary
Adding sync sites for a bucket
Adding a sync path for a bucket
(Optional) Configuring the minimum QoS limits
Configuring QoS policy-based control
ONEStor overview
About ONEStor
The product adopts the distributed architecture and unifies dispersed storage servers into a cluster to provide users with massive, undifferentiated, and unified distributed storage services.
The product helps address various challenges imposed on storage by explosive growth of cloud computing, mobile computing, social media, and big data.
Using this document
This document describes some common
features of the storage system and the configuration process and related
concepts of the storage service. For more information about features, configuration
methods, parameter description, and configuration restrictions and guidelines
not described in this document, see the online help. For quick access to online
help, click the ![]() icon on the left of a page title.
icon on the left of a page title.
The information in this document is subject to change over time.
Before using this document to configure the product, perform the following tasks:
· Install the storage software and register the required license. For more information, see the software installation guide for the product.
· Deploy the cluster based on the cluster setup wizard. For more information, see the online help.
|
|
NOTE: The information in this document is subject to change over time. The product interface is subject to change over time. |
Technical support
H3C is dedicated to providing user-friendly products with the best quality. To obtain assistance, contact H3C by email or phone or access documents at the H3C website.
· Email:
¡ China: [email protected]
¡ Hongkong, China: [email protected]
¡ Other countries or regions: [email protected]
· Technical support hotline:
To find contacts for your local area, access the H3C global contacts page at https://www.h3c.com/en/Support/Online_Help/Service_Hotlines/
· Website: http://www.h3c.com
Configuring basic cluster services
Configuring management HA
About management HA
The management HA feature ensures the connectivity of the cluster management. With management HA configured, the management HA group is accessible at a VIP. You can access that VIP to manage the cluster as long as the management HA group has one management node that is operating correctly. Typically, the primary node operates to offer management functionality. When the primary node fails, the backup node automatically takes over.
Management HA configuration workflow
Figure 1 shows the management HA configuration workflow, and Table 1 describes the configuration steps.
Figure 1 Management HA configuration workflow

Table 1 Management HA configuration workflow
|
Procedure |
Description |
|
Create a management HA group, and configure the management HA VIP and primary and backup nodes. |
|
|
N/A |
Creating a management HA group
Prerequisites
· You must install the backup node with the same version of the distributed storage software as the primary node. You can identify the version on the management page.
· Make sure the primary and backup nodes are added to the cluster management network, and the nodes are reachable to each other.
Procedure
1. From the left navigation pane, select Management HA.
2. Click Create.
3. Configure the parameters, and then click OK.
For the parameter description and configuration restrictions and guidelines, see the online help.
Logging in to the cluster at management HA VIP
1. Enter the management HA VIP in the address bar of the browser.
2. (Optional) From the left navigation pane, select Management HA.
The page displays the operating management node.
Configuring cluster users and user groups
About cluster users and user groups
The storage system provides management of administrators to improve the security of storage system access. User (group) management supports creating administrators, editing or resetting user passwords, and locking or unlocking users. You can also assign different permissions to administrators as needed.
Administrators
The storage system provides the following types of administrators:
· Admin—The admin user is the super user account that has the highest permission in the system, which can manage the storage system, and add or delete the permissions of users or user groups. The admin user is created automatically by the system and cannot be deleted.
· Common system user—A common system user is created by the admin user. The permissions of a system user are determined by the permissions of the user group to which the system user belongs.
User groups
The storage system manages users with user groups. The admin user can create user groups with different permissions as needed and add common system users to these user groups for user permission management.
Cluster user and user group configuration workflow
Figure 2 shows the cluster user and user group configuration workflow, and Table 2 describes the configuration steps.
Figure 2 Cluster user and user group configuration workflow
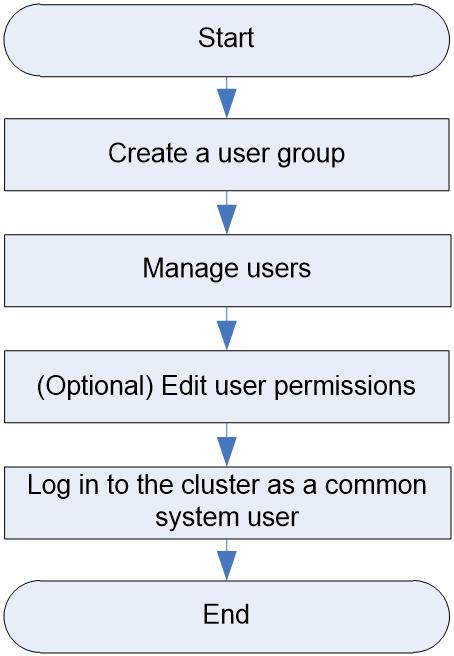
Table 2 Cluster user and user group configuration workflow
|
Procedure |
Description |
|
|
Create a user group and assign permissions to the user group as needed. |
||
|
Create a common system user and add the user to a user group. The permissions of a user are the same as the permissions of the user group. |
||
|
Edit the login password of a common system user or reset the password of a common system user to the default. |
||
|
Lock or unlock a common system user. A locked user cannot log in to the cluster. |
||
|
Edit the permissions of all common system users in a user group in bulk by editing the permissions of the user group. |
||
|
Edit the permissions of a common system user by editing the permissions of the user group to which the user belongs. |
||
|
Log in to the cluster as a common system user. The user can view or configure the settings based on user permissions. |
||
Creating a user group
1. From the left navigation pane, select System.
2. Select User Groups.
3. Click Create.
4. Configure the parameters, and then click OK.
For the parameter description and configuration restrictions and guidelines, see the online help.
Managing users
Creating and adding a user to a user group
1. From the left navigation pane, select System.
2. Select Users.
3. Click Create.
4. Configure the parameters, and then click OK.
For the parameter description and configuration restrictions and guidelines, see the online help.
(Optional) Edit or reset the password of a user
The default password of a common system user is User@123. You can reset the password of a user to the default when the password is lost.
To edit or reset the password:
1. From the left navigation pane, select System.
2. Select Users.
3. Click Change Password in the Actions column for a user.
4. Configure the parameters, and then click OK.
For the parameter description and configuration restrictions and guidelines, see the online help.
(Optional) Locking and unlocking a user
After you lock a user, the user information will not be deleted, but the user cannot log in to the cluster.
To lock or unlock a user:
1. From the left navigation pane, select System.
2. Select Users.
3. Click Lock or Unlock in the Actions column for a user.
For the parameter description and configuration restrictions and guidelines, see the online help.
(Optional) Editing user permissions
The permissions of a common system depend on the permissions of the user group to which the user belongs. You can edit the permissions of a common system user with the following methods:
· Edit the permissions of member users in a user group by editing the permissions of the user group in bulk.
· Edit the permissions of a user by changing the user group of the user.
Editing permissions of a user group
1. From the left navigation pane, select System.
2. Select User Groups.
3. Click Edit Permissions in the Actions column for a user group.
4. Configure the parameters, and then click OK.
For the parameter description and configuration restrictions and guidelines, see the online help.
Changing the user group of a user
1. From the left navigation pane, select System.
2. Select Users.
3. Click Change User Groups in the Actions column for a user. Select a new user group for the user.
4. Configure the parameters, and then click OK.
For the parameter description and configuration restrictions and guidelines, see the online help.
Logging in to the cluster as a common system user
Log in to the cluster by entering the username and password of a common system user on the system login page.
After login, the system user can view or configure the settings allowed by the user permissions.
Configuring email notifications
About email notifications
The system can send alarm notifications through emails to the specified email recipients for administrators to obtain alarm information to perform troubleshooting.
Email notification configuration workflow
Figure 3 shows the email notification configuration workflow, and Table 3 describes the configuration steps.
Figure 3 Email notification configuration workflow
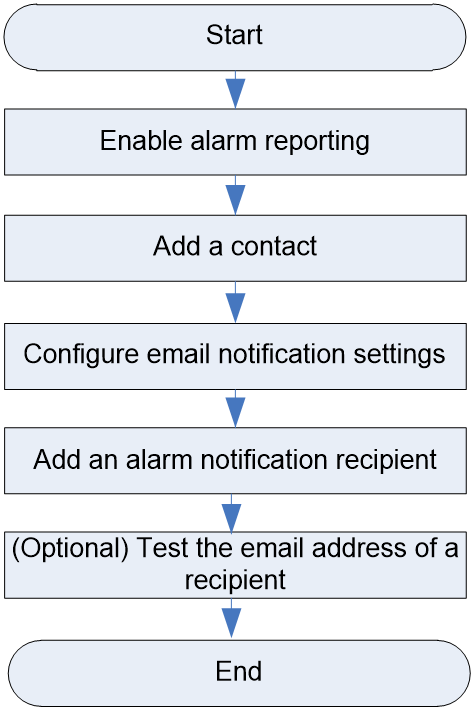
Table 3 Email notification configuration workflow
|
Procedure |
Description |
|
Enable alarm reporting for the cluster to report real-time alarms. |
|
|
An added contact will be displayed in the alarm notification emails. The email recipients can contact to obtain support in case of any questions about the alarms. |
|
|
Enable email notification and configure email notification parameters. |
|
|
After an email recipient is added, the system will send alarms to the specified email address through emails. |
|
|
Test whether a recipient email address can receive alarm emails. |
Enabling alarm reporting
1. From the left navigation pane, select Alarms.
2. Select Alarm Settings > Basic Settings.
3. Click Edit in the Alarm Control pane.
4. In the dialog box that opens, select On, and then click OK.
For the parameter description and configuration restrictions and guidelines, see the online help.
Adding a contact
1. From the left navigation pane, select Alarms.
2. Select Alarm Settings > Contacts.
3. Click Add.
4. Configure the parameters, and then click OK.
For the parameter description and configuration restrictions and guidelines, see the online help.
Configuring email notification settings
1. From the left navigation pane, select Alarms.
2. Select Alarm Settings > Basic Settings.
3. Click Edit in the Email Notification Settings pane.
4. Enable email notification and configure the parameters, and then click OK.
For the parameter description and configuration restrictions and guidelines, see the online help.
Adding an alarm notification recipient
1. From the left navigation pane, select Alarms.
2. Select Alarm Settings > Email Recipients.
3. Click Add.
4. Configure the parameters, and then click OK.
For the parameter description and configuration restrictions and guidelines, see the online help.
(Optional) Testing the email address of a recipient
1. From the left navigation pane, select Alarms.
2. Select Alarm Settings > Email Recipients.
3. Select an email address, and then click Test. In the dialog box that opens, click OK.
Configuring SMS notifications
About SMS notifications
The system can send alarm SMS notifications to the specified phone numbers for administrators to obtain alarm information to perform troubleshooting.
SMS notification configuration workflow
Figure 4 shows the email notifications configuration workflow, and Table 4 describes the configuration steps.
Figure 4 SMS notification configuration workflow
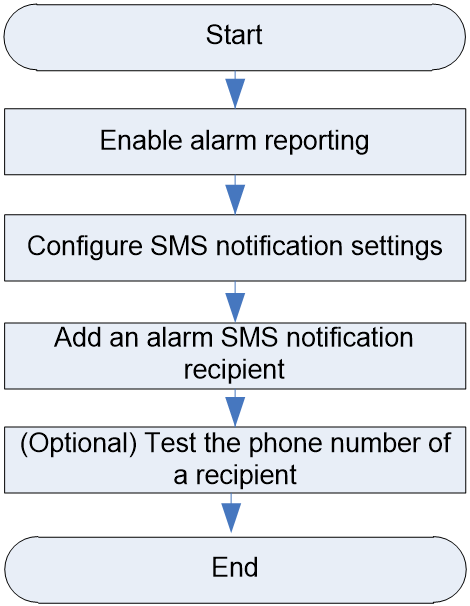
Table 4 SMS notification configuration workflow
|
Procedure |
Description |
|
Enable alarm reporting for the cluster to report real-time alarms. |
|
|
Enable SMS notification and configure SMS notification parameters. |
|
|
After an SMS recipient is added, the system will send alarms to the specified phone number through SMS messages. |
|
|
Test whether a phone number can receive alarm messages. |
Enabling alarm reporting
1. From the left navigation pane, select Alarms.
2. Select Alarm Settings > Basic Settings.
3. Click Edit in the Alarm Control pane.
4. In the dialog box that opens, select On, and then click OK.
For the parameter description and configuration restrictions and guidelines, see the online help.
Configuring SMS notification settings
1. From the left navigation pane, select Alarms.
2. Select Alarm Settings > Basic Settings.
3. Click Edit in the SMS Notification Settings pane.
4. Enable email notification and configure the parameters, and then click OK.
For the parameter description and configuration restrictions and guidelines, see the online help.
Adding an alarm SMS notification recipient
1. From the left navigation pane, select Alarms.
2. Select Alarm Settings > SMS Recipients.
3. Click Add.
4. Configure the parameters, and then click OK.
For the parameter description and configuration restrictions and guidelines, see the online help.
(Optional) Testing the phone number of a recipient
1. From the left navigation pane, select Alarms.
2. Select Alarm Settings > SMS Recipients.
3. Select a phone number, and then click Test.
Configuring SNMP notifications
About SNMP notifications
Simple Network Management Protocol (SNMP) enables network administrators to read and set the variables on managed devices for state monitoring, troubleshooting, statistics collection, and other management purposes.
SNMP framework
As shown in Figure 5, the SNMP framework contains the following elements:
· SNMP manager—Works on a network management system (NMS) to monitor and manage the SNMP-capable devices on the network. It can get and set values of MIB objects on the agent.
· SNMP agent—Works on a managed device to receive and handle requests from the NMS. It sends notifications to the NMS when specific events occur, such as an interface state change.
· Management Information Base (MIB)—Specifies the variables (for example, interface status and CPU usage) maintained by the SNMP agent for the SNMP manager to read and set. Each SNMP has a MIB file. The SNMP manager can generate a MIB for a SNMP agent by compiling the MIB file of that agent. The SNMP manager can then manage the agent by reading and setting the MIB objects of that agent.
Figure 5 Relationship between NMS, agent, and MIB

SNMP versions
OneStor supports SNMPv1, SNMPv2c, and SNMPv3.
· SNMPv1—Uses community names for authentication. To access an SNMP agent, an NMS must use the same community name as the SNMP agent. If the community name used by the NMS differs from the community name set on the agent, the NMS cannot establish an SNMP session to access the agent and will discard the traps from the agent.
· SNMPv2c—Uses community names for authentication. SNMPv2c is an extended version of SNMPv1. It supports more operation types, data types, and error codes.
· SNMPv3—Uses a user-based security model (USM) to secure SNMP communication. You can configure authentication and privacy mechanisms to authenticate and encrypt SNMP packets. This can block illegal users and enhance communication security.
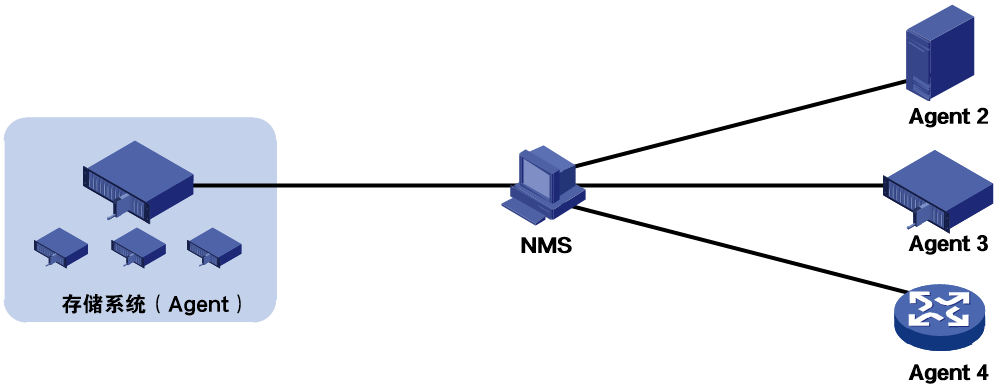
SNMP topology
As shown in Figure 6, after you configure the storage system as an SNMP agent, the NMS can manage the storage system.
SNMP notification configuration workflow
Figure 7 shows the SNMP notification configuration workflow, and Table 5 describes the configuration steps.
Figure 7 SNMP notification configuration workflow
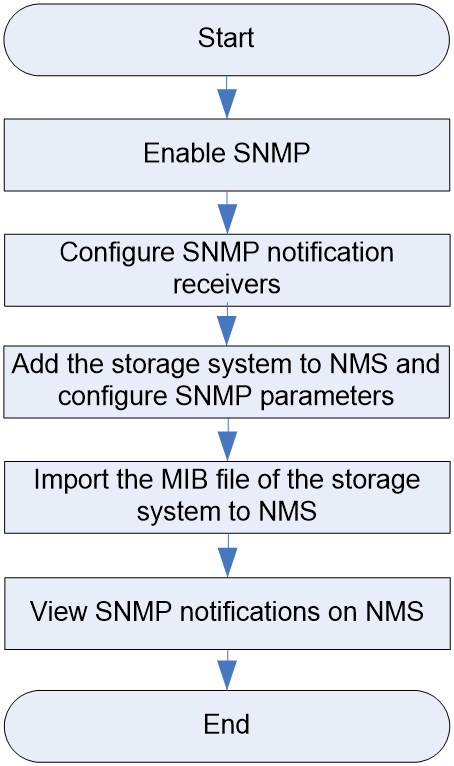
Table 5 SNMP notification configuration workflow
|
Procedure |
Description |
|
|
To configure SNMP settings for the storage system, enable SNMP first. |
||
|
Configure the NMS (SNMP manager) as a notification receiver. The system sends alarms to the notification receiver through SNMP notifications. The notification receiver configuration varies by SNMP version. |
||
|
Adding the storage system to NMS and configuring SNMP parameters |
Add the storage system to the NMS as an SNMP agent. The NMS can then receive SNMP notifications from the storage system. |
|
|
Import the MIB file of the storage system to the NMS. The NMS can then obtain the notification receiver settings of the storage system. |
||
|
After you configure SNMP notification settings, you can view the alarm notifications reported by the storage system to the NMS. |
||
Enabling SNMP
Prerequisites
Plan and configure the SNMP network to ensure that the storage system (SNMP agent) can correctly communicate with the NMS (SNMP manager).
Procedure
1. Log in to the management page of the storage system.
2. From the left navigation pane, select Alarms > SNMP Settings.
3. Enter the management page of a random feature, for example, the USM user management page.
4. Click the SNMP button at the top right corner of the page.
5. In the dialog box that opens, select On, and then click OK.
For the parameter description and configuration restrictions and guidelines, see the online help.
Configuring SNMP notification receivers
Prerequisites
Complete SNMP version planning and SNMP parameter planning. An NMS and an SNMP agent must use the same SNMP version to communicate with each other.
Configuring an SNMPv1 or SNMPv2c notification receiver
1. From the left navigation pane, select Alarms > SNMP Settings > Notification Receivers.
2. Click Create.
3. In the dialog box that opens, select SNMPv1 or SNMPv2c as the SNMP version, and then configure the remaining parameters as needed.
For the parameter description and configuration restrictions and guidelines, see the online help.
Configuring an SNMPv3 notification receiver
1. From the left navigation pane, select Alarms > SNMP Settings > USM Users.
2. To create a USM user, click Create, and then configure the parameters as needed.
For the parameter description and configuration restrictions and guidelines, see the online help.
You can repeat this step to create multiple USM users as needed.
3. From the left navigation pane, select Alarms > SNMP Settings > Notification Receivers.
4. Click Create.
5. In the dialog box that opens, select SNMPv3 as the SNMP version, and then configure the remaining parameters as needed.
For the parameter description and configuration restrictions and guidelines, see the online help.
Adding the storage system to NMS and configuring SNMP parameters
Add the storage system to NMS and configure related SNMP parameters.
For the detailed procedure of this task, see the NMS document or contact the technical support.
For information about the NMSs supported by the storage system, contact the technical support.
Importing the MIB file of the storage system to NMS
1. Contact the technical support to obtain the MIB file of the storage system.
2. Import the MIB file of the storage system to NMS.
For more information about this step, see the NMS document or contact the technical support.
Viewing SNMP notifications on NMS
After you configure SNMP notification settings, you can view the alarm notifications reported by the storage system to the NMS.
For the detailed procedure of this task, see the NMS document or contact the technical support.
Manage multiple clusters
About multi-cluster management
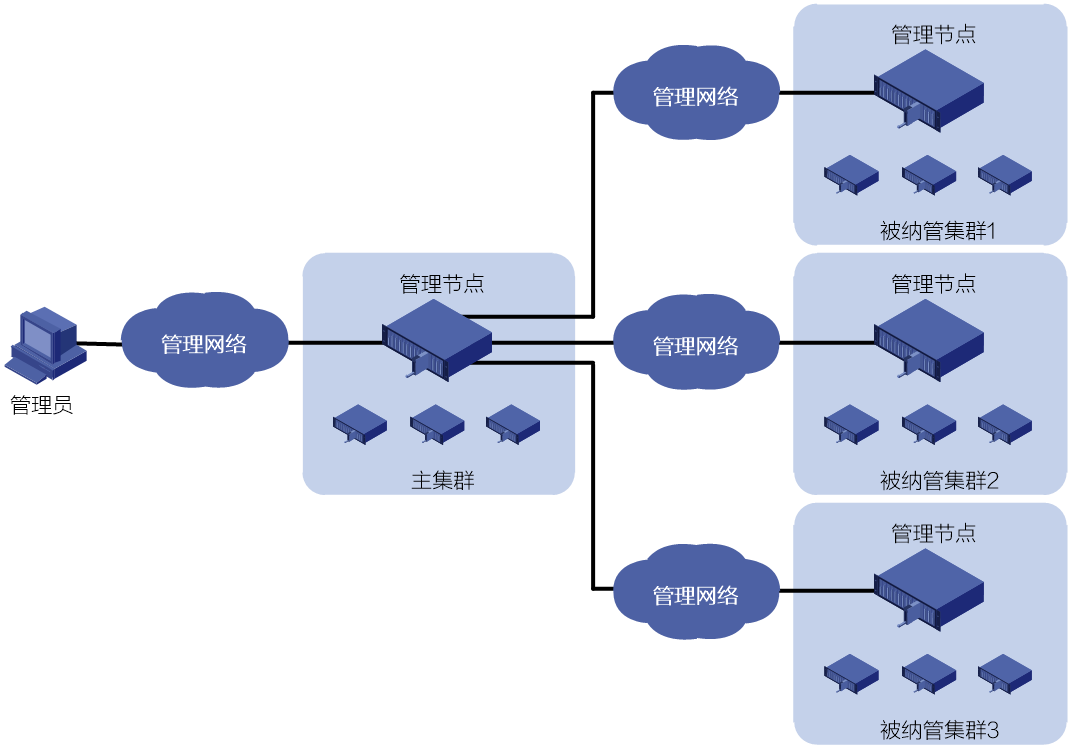
With this feature, the administrator can deploy and manage multiple clusters on one cluster in a unified manner. As shown in Figure 8, when some remote clusters are managed by the primary cluster, the management node of the primary cluster can directly access and manage those clusters. To manage one of the clusters managed by the primary cluster, you can just log in to the management page of the primary cluster.
Figure 8 Multi-cluster management
Primary cluster and managed cluster
A multi-cluster management system consists of a primary cluster and managed clusters.
· Primary cluster—The primary cluster acts as the manager in the multi-cluster management system. It provides an access to unified cluster management. After logging in to the management page of the primary cluster, you can manage both the primary cluster and the managed clusters.
· Managed cluster—After a remote cluster is managed by the primary cluster, you can directly access and manage that cluster on the management page of the primary cluster.
Cluster management account
When you create a cluster management account, follow these guidelines:
· After you create a cluster management account for a cluster, the multi-cluster management capability is enabled for that cluster and you can manage that cluster.
· If you create a cluster management account for a cluster on its management page, the cluster becomes the primary cluster in the multi-cluster management system.
· If you create a remote cluster management account for a cluster on the management page of the primary cluster, the cluster is managed by the primary cluster.
Multi-cluster management configuration workflow
Figure 9 shows the multi-cluster management configuration workflow, and Table 6 describes the configuration steps.
Figure 9 Multi-cluster management configuration workflow
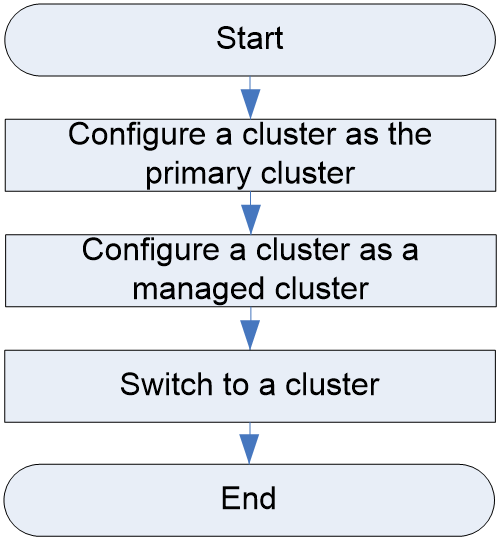
Table 6 Multi-cluster management configuration workflow
|
Procedure |
Description |
|
Configure a cluster management account for the current cluster. This task enables the multi-cluster management capability of the current cluster and configures the cluster as the primary cluster in the multi-cluster management system. |
|
|
Create a cluster management account for a remote cluster on the primary cluster's management page. The cluster is then managed by the primary cluster. You can either add an existing cluster as a managed cluster, or deploy a new cluster and add it as a managed cluster. |
|
|
Switch to the management page of a managed cluster from that of the primary cluster. |
Configuring a cluster as the primary cluster
Prerequisites
Complete network planning and configuration for all clusters. Make sure the management network of the primary cluster can communicate with the management networks of the managed clusters.
Procedure
1. Log in to the management page of the target cluster.
2. From the left navigation pane, select System > Multicluster.
3. Click Create, and then configure the parameters as needed.
For the parameter description and configuration restrictions and guidelines, see the online help.
Configuring a cluster as a managed cluster
Prerequisites
· When you add an existing cluster as a managed cluster for the primary cluster, make sure the target cluster meets the following requirements:
¡ The target cluster is not managed by any other cluster. To manage a cluster that is already managed by another primary cluster, release that cluster from the primary cluster first.
¡ The target cluster uses the same storage software version as the primary cluster.
· When you deploy a new cluster and add it as a managed cluster for the primary cluster, make sure the following conditions exist:
¡ You have completed the basic configuration of the hosts in the new cluster, including RAID controller configuration and operation system installation.
¡ The hosts in the new cluster meet the requirements of cluster deployment.
Procedure
1. Log in to the management page of the primary cluster.
2. From the left navigation pane, select System > Multicluster.
3. Click Create, select a cluster management option, and then perform one of the following tasks:
¡ If you select Manage Current Cluster, enter information about the target cluster.
For the parameter description and configuration restrictions and guidelines, see the online help.
¡ If you select Deploy and Manage New Cluster, deploy a new cluster under the guidance of the setup wizard.
For the parameter description and configuration restrictions and guidelines, see the online help.
Switching to a cluster
Prerequisites
The primary cluster has managed a minimum of one cluster.
Procedure
1. Log in to the management page of the primary cluster.
2. Select the target cluster management account from the cluster list at the top of the page.
Configuring cluster resources
Configuring cluster resource
About cluster resource
The storage system manages storage resources hierarchically through resource management for service data isolation and system reliability to meet the following requirements of users:
· Isolation integration—Provides block storage service, object storage service, and file storage service in a cluster.
· Data isolation—Improves flexibility and diversity of service deployment by isolating different storage services.
· Performance division—Provides different storage features for different services by combination of different disk types.
Node pool
A node pool is a storage area unit. Node pools are isolated to each other and do not affect each other. You can create multiple disk pools in a node pool.
Active-active domain
An active-active domain is a disaster recovery solution that uses the sites in that domain to ensure storage continuity. You can divide hosts in a node pool into two different sites based on their physical location, establishing a disaster recovery relationship between the two sites. During normal operations, the storage system distributes workloads to hosts in both sites according to the specified load balancing policies. When a site fails, the other site takes the place of the faulty site to continue to provide services.
Disk pool
A disk pool is a collection of disks for resource management. The disks in a disk pool might be installed on multiple hosts in a cluster.
Disk pools in a node pool do not affect each other, realizing data isolation between different service data in the node pool.
With different types of disks added, a disk pool can provide different storage performance, realizing performance division between different storage services.
Rack
Racks in the storage system are logical racks and correspond to real racks. You can add hosts to racks or divide fault domains based on racks.
Host
Hosts (nodes) in the cluster are logical hosts in the storage system. They correspond to real hosts. You can manage disks on the hosts, divide fault domains based on the hosts, and assign roles to the hosts for them to provide storage services. The following are types of nodes in the storage system:
· Management node—A host to deploy and manage storage resources in the cluster. You can access the Web management interface of the storage system by entering the IP address of the management node in a browser.
· Storage node—A host that provides services and service data storage in the cluster.
· Monitor node—A host on which the monitor process runs to monitor the cluster and maintain and distribute various information vital to cluster operations.
Protection domain
The cluster stores the replicas or fragments of data in a protection domain. Dividing a protection domain in a node pool can further improve data reliability of the node pool. A protection domain can contain multiple fault domains.
Fault domain
The cluster stores the replicas or fragments of data to different fault domains. The storage system supports the following fault domain levels:
· Rack level—Each rack is a fault domain. The system preferentially distributes replicas or fragments of data across multiple racks in a node pool. The fault domains can cooperate with redundancy policies to avoid data loss when some racks fail.
· Host level—Each host is a fault domain. The system preferentially distributes replicas or fragments of data across multiple hosts in a node pool. The fault domains can cooperate with redundancy policies to avoid data loss when some storage nodes fail.
Cluster resource configuration workflow
Figure 10 shows the cluster resource configuration workflow, and Table 7 describes the configuration steps.
Figure 10 Cluster resource configuration workflow
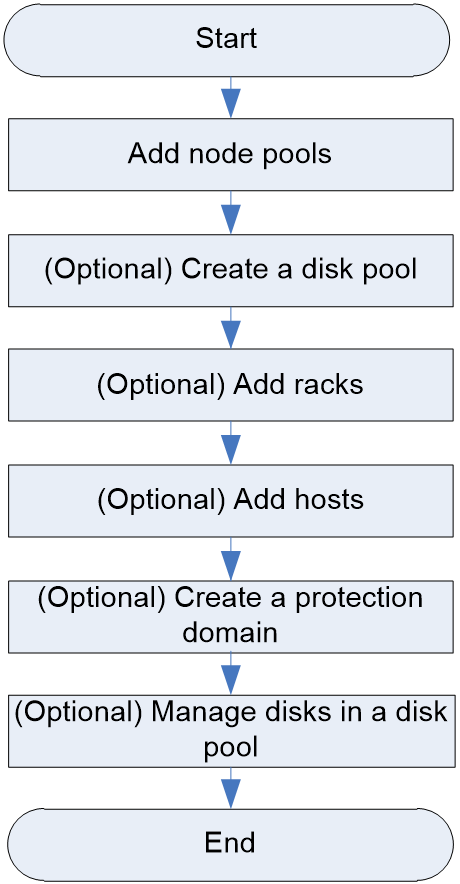
Table 7 Cluster resource configuration workflow
|
Procedure |
Description |
|
|
Add node pools and configure the resources according to the setup wizard, including disk pools, racks, hosts, and disks. |
||
|
Create disk pools for a node pool. |
||
|
Add racks in the cluster. |
||
|
Add storage nodes to a node pool. |
||
|
Add monitor nodes to a node pool. |
||
|
Add disks to or remove disks from a disk pool. The disks might belong to one or multiple storage nodes. |
||
|
Add or remove disks of a storage node to or from a disk pool. |
||
|
Create protection domains in a node pool. |
||
Adding node pools
Prerequisites
Plan services and resources in a node pool in advance, including protection domains, fault domains, disk pool number, service types, host number, disk number and disk types based on service requirements.
Procedure
1. From the left navigation pane, select Resources.
2. Select Node Pools.
3. Click Create.
4. Configure the node pool and its resources according to the setup wizard.
For the parameter description and configuration restrictions and guidelines, see the online help.
(Optional) Creating a disk pool
1. From the left navigation pane, select Resources.
2. Select Disk Pools.
3. Click Create.
4. Configure the parameters, and then click OK.
For the parameter description and configuration restrictions and guidelines, see the online help.
(Optional) Adding racks
1. From the left navigation pane, select Resources.
2. Select Racks.
3. Click Create.
4. Configure the parameters, and then click OK.
For the parameter description and configuration restrictions and guidelines, see the online help.
(Optional) Adding hosts
Adding storage nodes
You can add storage nodes to a node pool one by one or in bulk.
· To add storage nodes one by one:
a. From the left navigation pane, select Hosts.
b. Select Storage Nodes.
c. Click Deploy One Node.
d. Configure the parameters, and then click OK.
For the parameter description and configuration restrictions and guidelines, see the online help.
· To add storage nodes in bulk:
a. From the left navigation pane, select Hosts.
b. Select Storage Nodes.
c. Click Bulk Deploy, and scan the management network for hosts.
d. Configure the parameters, and then click OK.
For the parameter description and configuration restrictions and guidelines, see the online help.
Adding monitor nodes
1. From the left navigation pane, select Hosts.
2. Select Monitor Nodes.
3. Click Create.
4. Configure the parameters, and then click OK.
For the parameter description and configuration restrictions and guidelines, see the online help.
(Optional) Managing disks in a disk pool
The storage system can add disks to or remove disks from a disk pool through one of the following methods:
· Add or remove disks of one or multiple storage nodes to or from the disk pool on the disk pool management page.
· Add or remove disks of a storage node to or from the disk pool on the storage node management page.
Managing disks in a disk pool
The procedure is similar for adding or removing disks. This section adds disks as an example.
To add disks in a disk pool:
1. From the left navigation pane, select Resources.
2. Select Disk Pools.
3. Click Add Disks in the Actions column for the disk pool.
For the parameter description and configuration restrictions and guidelines, see the online help.
Managing disks on a storage node
1. From the left navigation pane, select Hosts.
2. Select Storage Nodes.
3. Click the hostname link to enter the storage node management page.
To add disks to a disk pool:
a. Click Create.
b. Add disks on the storage node to the disk pool.
For the parameter description and configuration restrictions and guidelines, see the online help.
To remove a disk from a disk pool:
c. Click Delete in the Actions column for that disk.
For the parameter description and configuration restrictions and guidelines, see the online help.
(Optional) Creating a protection domain
Prerequisites
Make sure the protection domain feature is enabled on the target node pool. You can configure protection domains only during node pool deployment. For more information, see the online help.
Procedure
1. From the left navigation pane, select Resources.
2. Select Protection Domains.
3. Click Create.
4. Configure the parameters, and then click OK.
For the parameter description and configuration restrictions and guidelines, see the online help.
Configuring active-active
About active-active
You can enable the active-active mode for a node pool and divide hosts in the node pool into two different sites based on their physical location. This establishes disaster recovery between the two sites. During normal operations, the storage system distributes workloads to hosts in both sites according to the specified load balancing policies. When a site fails, the other site takes the place of the faulty site to continue to provide services.
Active-active site
An active-active site consists of hosts at the same physical location in the same node pool. A node pool supports two active-active sites, which form a disaster recovery relationship. During normal operations, the storage system distributes workloads to hosts in both sites according to the specified load balancing policies. When a site fails, the other site takes the place of the faulty site to continue to provide services.
Quorum site
The storage system automatically elects a monitor node from the active-active node pool to act as the quorum site. When a site fails, the quorum site automatically adjusts the cluster data to ensure that the other site can take the place of the faulty site.
File storage active-active configuration workflow
Table 8 describes the configuration steps.
Table 8 File storage active-active configuration workflow
|
Procedure |
Description |
|
Enable the active-active mode and configure active-active settings. You can perform this task in the cluster or node pool setup wizard when deploying a cluster for the first time or creating a node pool. The created active-active domain is automatically bound to the node pool. |
|
|
Bind hosts at different physical locations to different sites of the created active-active domain. You can perform this task when deploying a cluster for the first time or creating a node pool. |
|
|
Enable the active-active mode for a file system. |
Creating an active-active domain
Prerequisites
Determine the associated site for each host based on their physical locations and the service requirements.
Creating an active-active domain
1. Enable the active-active mode and configure active-active settings in the basic information configuration step of the cluster or node pool setup wizard. You can perform this task when deploying a cluster for the first time or creating a node pool. For the parameter description and configuration restrictions and guidelines, see the online help.
2. Enable the active-active mode and configure active-active settings in the active-active configuration step of the cluster or node pool setup wizard. For the parameter description and configuration restrictions and guidelines, see the online help.
Binding hosts to active-active sites
Prerequisites
Determine the associated site for each host in the node pool based on service requirements.
Add hosts to active-active sites
1. Select active-active sites for hosts in the host selection step of the cluster or node pool setup wizard. You can perform this task when deploying a cluster for the first time or creating a node pool. For the parameter description and configuration restrictions and guidelines, see the online help.
2. Configure other parameters as prompted in the cluster or node pool setup wizard. For the parameter description and configuration restrictions and guidelines, see the online help.
Enable the active-active mode for a file system
Prerequisites
· In the file storage node pool setup wizard, enable the active-active mode for the node pool and configure active-active settings.
· Make sure all NAS servers within the same NAS group belong to the same active-active site.
· Make sure all NAS servers in the NAS groups bound to the same load balancer belong to the same active-active site.
Enabling the active-active mode for the file system
1. From the left navigation pane, select File Storage > File System.
2. Click Enable Active-Active in the Actions column for the file system. In the dialog box that opens, click OK. For the parameter description and configuration restrictions and guidelines, see the online help.
Configuring encryption services
About encryption services
The storage system supports encryption services to encrypt data in the cluster to improve data security.
The encryption services in the cluster are configured on a disk pool basis. You can enable or disable data encryption for a disk pool as needed. If encryption is enabled, the data will be encrypted by the encryption server before being stored in a disk in cipher text to ensure data security.
Encryption service configuration workflow
Figure 3 shows the encryption service configuration workflow, and Table 9 describes the configuration steps.
Figure 11 Encryption service configuration workflow
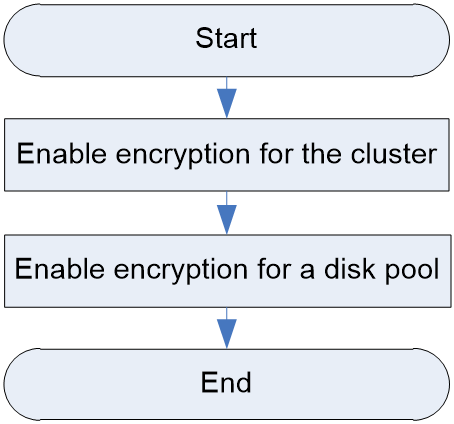
Table 9 Encryption service configuration workflow
|
Procedure |
Description |
|
|
Enable encryption for the cluster and configure the encryption settings in the setup wizard when you deploy the cluster for the first time. |
||
|
Enable encryption for the cluster and configure the encryption settings on the encryption service page. |
||
|
Enabling encryption in the cluster or node pool setup wizard |
Enable encryption during disk pool adding in the cluster or node pool setup wizard. |
|
|
Enable encryption when you create a disk pool. |
||
|
Enable encryption by editing the encryption configuration after a disk pool is created. |
||
Enabling encryption for the cluster
You can enable encryption for the cluster through one of the following methods:
· Enable encryption for the cluster in the setup wizard.
· Enable encryption for the cluster on the encryption service page.
Prerequisites
· Obtain the encryption server-related information in advance, such as IP address and port number.
· Make sure that the cluster and the encryption servers can reach each other.
· Obtain the client certificate file from the encryption service website.
Enable encryption for the cluster on first-time deployment
When you deploy the cluster for the first time, enable encryption for the cluster during basic information setting in the setup wizard.
For the parameter description and configuration restrictions and guidelines, see the online help.
Enable encryption on the encryption service page
1. From the left navigation pane, select Resources.
2. Select Encryption.
3. Click Edit, and then edit the encryption configuration.
For the parameter description and configuration restrictions and guidelines, see the online help.
Enabling encryption for a disk pool
You can enable encryption for a disk pool in one of the following situations:
· Enable encryption when you add disk pools in the cluster or node pool setup wizard.
· Enable encryption when you create a disk pool.
· Enable encryption when you edit the disk pool configuration after the disk pool is created.
Enabling encryption in the cluster or node pool setup wizard
When you deploy the cluster for the first time or add node pools, enable encryption during disk pool adding in the setup wizard.
For the parameter description and configuration restrictions and guidelines, see the online help.
Enabling encryption during disk pool creation
1. From the left navigation pane, select Resources.
2. Select Disk Pools.
3. Click Create.
4. Configure disk pool parameters and enable encryption for the cluster.
For the parameter description and configuration restrictions and guidelines, see the online help.
Editing the encryption configuration of the disk pool
1. From the left navigation pane, select Resources.
2. Select Disk Pools.
3. Click Edit in the Actions column for the disk pool, and then edit the encryption configuration to enable encryption.
For the parameter description and configuration restrictions and guidelines, see the online help.
Configuring block storage
Configuring basic block storage services
About basic block storage services
Block storage virtualizes storage resources (RAID, LVM, or bare disks) into storage volumes and assign the volumes to clients by performing volume mapping. Clients can then identify, mount, and use the volumes as if they were using their native disks.
Storage pool
A disk pool is a logical concept used for storage resource management. To provide storage services by using the storage resources in a disk pool, you must create storage pools in the disk pool.
Storage volume
Storage volumes are virtualized storage resources in storage pools. They enable the system to dynamically adjust storage resources without concerning the performance of the underlying physical storage devices. After creating a storage volume and configuring volume mapping, you can mount the volume on a client as a logical disk.
Block storage service network
Clients can access a cluster for block storage resources via block storage service networks.
Client
For a client to access block storage resources, you must create a logical client in the storage system for it.
Client group
The storage system uses client groups to manage mappings of accessible volumes, writable volume snapshots, and access ports to clients. You can control access to storage resources by mapping volumes, writable volume snapshots, and access ports to different client groups.
iSCSI HA group
To improve block storage service availability, assign the storage nodes to an iSCSI HA group, which is accessible at a virtual IP address (VIP). Each iSCSI HA group contains one primary node and multiple backup nodes. When the primary node fails, one of the backup nodes will take over to provide block storage network access.
Basic block storage service configuration workflow
You can configure basic block storage services by using either of the following methods:
· Configure basic block storage services through the setup wizard. For detailed configuration and restrictions and guidelines, see the online help.
· Configure basic block storage services on a per-function basis.
Figure 4 shows the basic block storage service configuration workflow, and Table 10 describes the configuration steps.
Figure 12 Basic block storage service configuration workflow
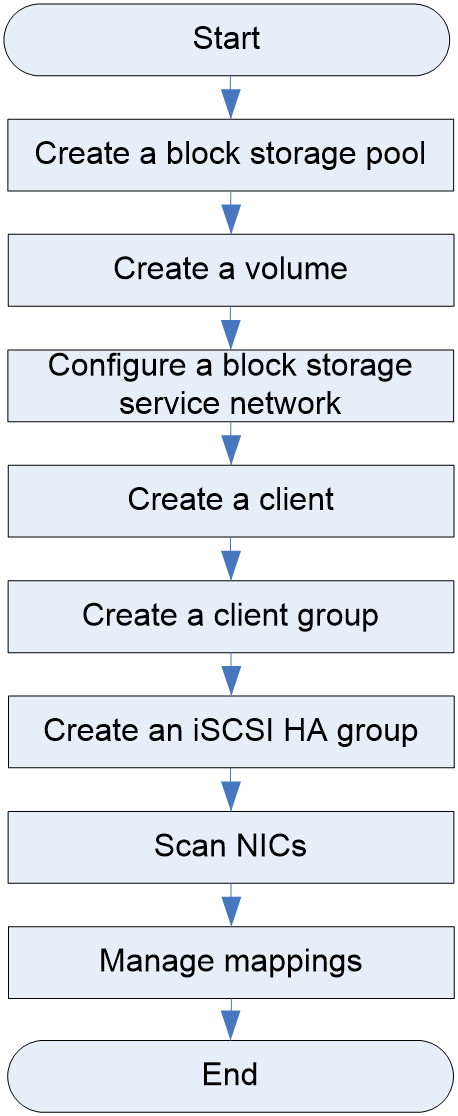
Table 10 Basic block storage service configuration workflow
|
Procedure |
Description |
|
|
Perform this task to create a block storage pool for users to access the block storage resources in the cluster. |
||
|
Perform this task to create a volume and assign storage capacity to it. |
||
|
Perform this task before managing volume mappings. |
||
|
Perform this task to create a logical client that has the same operating system and initiator settings as the physical client. |
||
|
Perform this task to create a client group for mapping management. |
||
|
Perform this task to create an iSCSI HA group. Each iSCSI HA group contains one primary node and multiple backup nodes. When the primary node fails, one of the backup nodes will take over to provide block storage network access. |
||
|
Perform this task to scan accessible ports in a block storage service network. |
||
|
Perform this task to assign clients to client groups so they can access volumes and writable snapshots. |
||
|
Perform this task to assign storage volumes to a client group, so clients in the group can access them. |
||
|
Perform this task to assign writable snapshots to a client group, so clients in the group can access them. |
||
|
Perform this task to assign ports to a client group, so clients in the group can access volumes and writable snapshots through these ports. |
||
Creating a storage pool
Prerequisites
You must deploy a disk pool for block storage before performing this task. For more information about block storage disk pool configuration, see "Configuring cluster resources."
Procedure
1. From the left navigation pane, select Storage Pools.
2. Select Block Storage.
3. Click Create.
4. Configure the parameters, and then click OK.
For the parameter description and configuration restrictions and guidelines, see the online help.
Creating a volume
1. From the left navigation pane, select Block Storage.
2. Select Volume Management > Volumes.
3. Select a node pool, a disk pool, and a storage pool.
4. Click Create.
5. Configure the parameters, and then click OK.
For the parameter description and configuration restrictions and guidelines, see the online help.
Configuring a block storage service network
Restrictions and guidelines
Perform this task based on cluster configuration and service demands.
Procedure
1. From the left navigation pane, select Storage Pools.
2. Select Volume Mappings.
3. Configure the parameters in the dialog box that opens, and then click OK.
This dialog box opens only if volume mappings have never been configured.
For the parameter description and configuration restrictions and guidelines, see the online help.
Creating a client
Prerequisites
Before performing this task, you must perform the following operations:
· Obtain the physical client information, including IP address and the OS and initiator settings.
· Make sure the physical client can access the block storage service network correctly.
· Plan a CHAP account for client authentication to ensure data access security.
Procedure
1. From the left navigation pane, select Block Storage.
2. Select Volume Mappings > Clients.
3. Click Create.
4. Configure the parameters, and then click OK.
For the parameter description and configuration restrictions and guidelines, see the online help.
Creating a client group
1. From the left navigation pane, select Block Storage.
2. Select Volume Mappings > Client Groups.
3. Click Create.
4. Configure the parameters, and then click OK.
For the parameter description and configuration restrictions and guidelines, see the online help.
Creating an iSCSI HA group
Prerequisites
· To avoid client access failures caused by primary-backup switchover, make sure all nodes in an iSCSI HA group are configured with the same reachable routes.
· Make a service-oriented configuration plan for the iSCSI HA group. Items of the plan include primary node, backup nodes, HA VIP, and VRID.
Procedure
1. From the left navigation pane, select Block Storage.
2. Select Volume Mappings > iSCSI HA.
3. Click Create.
4. Configure the parameters, and then click OK.
For the parameter description and configuration restrictions and guidelines, see the online help.
Scanning NICs
1. From the left navigation pane, select Block Storage.
2. Select Volume Mappings > Ports.
3. Select a node pool from the Node Pool list.
4. Select a node from the Node Name list.
5. Click Scan for NICs.
For the parameter description and configuration restrictions and guidelines, see the online help.
Managing mappings
Assigning clients to a client group
1. From the left navigation pane, select Block Storage.
2. Select Volume Mappings > Client Groups.
3. Select a node pool, and then click the name of a client group.
4. Click Add.
5. Select one or multiple available clients.
6. Click OK.
For the parameter description and configuration restrictions and guidelines, see the online help.
Assigning volumes to a client group
1. From the left navigation pane, select Block Storage.
2. Select Volume Mappings > Mappings.
3. Select a node pool, and then click the name of a client group.
4. Click Add.
5. Select one or multiple available volumes.
6. Click OK.
For the parameter description and configuration restrictions and guidelines, see the online help.
(Optional) Assigning snapshots to a client group
1. From the left navigation pane, select Block Storage.
2. Select Volume Mappings > Mappings.
3. Select a node pool, and then click the name of a client group.
4. Click the Snapshots tab.
5. Click Add.
6. Select one or multiple writable snapshots of the volume.
7. Click OK.
For more information about creating a writable volume snapshot, see "Configuring volume snapshots."
For more information about creating a writable consistency group snapshot, see "Configuring consistency groups."
For the parameter description and configuration restrictions and guidelines, see the online help.
Assigning ports to a client group
1. From the left navigation pane, select Block Storage.
2. Select Volume Mappings > Mappings.
3. Select a node pool, and then click the name of a client group.
4. Click the Ports tab.
5. Click Add.
6. Select one or multiple ports.
7. Click OK.
For the parameter description and configuration restrictions and guidelines, see the online help.
Configuring volume clones
About volume clones
A volume clone is an identical but independent physical replica of the source volume. You can create a volume clone from a volume or a common volume snapshot. The volume clone service is applicable to storage services, tests and analysis, or data backup.
Volume clone configuration workflow
Figure 5 shows the volume clone configuration workflow, and Table 11 describes the configuration steps.
Figure 13 Volume clone configuration workflow
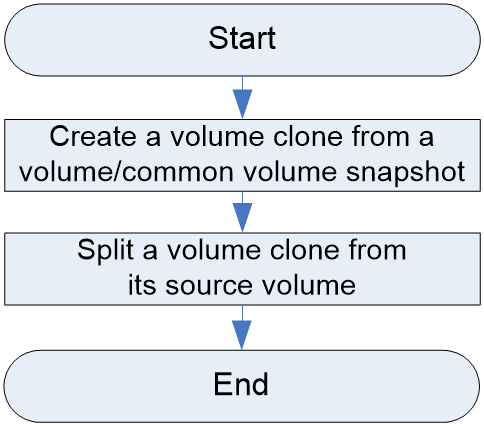
Table 11 Basic block storage service configuration workflow
|
Procedure |
Description |
|
|
Perform this task to create a volume clone from a volume. |
||
|
Perform this task to create a volume clone from a common volume snapshot. |
||
|
Perform this task to split a volume clone from its source volume. Then, the volume clone can operate as a normal storage volume. |
||
Creating a volume clone
Prerequisites
To avoid affecting the cluster services, plan a window time for volume clone creation (a period when the storage volume service and the volume snapshot service are idle).
Creating a volume clone from a volume
1. From the left navigation pane, select Block Storage.
2. Select Volume Management > Volumes.
3. Click More in the Actions column of a volume, and then select Create Volume Clone. In the dialog box that opens, configure parameters for the volume clone, and then click OK.
For the parameter description and configuration restrictions and guidelines, see the online help.
Creating a volume clone from a common volume snapshot
1. From the left navigation pane, select Block Storage > Local Backup > Snapshots.
2. Click More in the Actions column of a snapshot, and then select Create Volume Clone. In the dialog box that opens, configure parameters for the volume clone, and then click OK.
For the parameter description and configuration restrictions and guidelines, see the online help.
Splitting a volume clone from its source volume
Prerequisites
Make sure the services running on the volume clone are stopped.
Procedure
1. From the left navigation pane, select Block Storage.
2. Select Volume Management > Volumes.
3. Click the name of the parent volume.
4. Click Details for the target volume clone. In the dialog box that opens, click Split. In the dialog box that opens, click OK.
For the parameter description and configuration restrictions and guidelines, see the online help.
Configuring volume copy pairs
About volume copy pairs
As shown in Figure 6, data is transmitted directly from the primary volume to the secondary volume in a copy pair without the participation of any application servers.
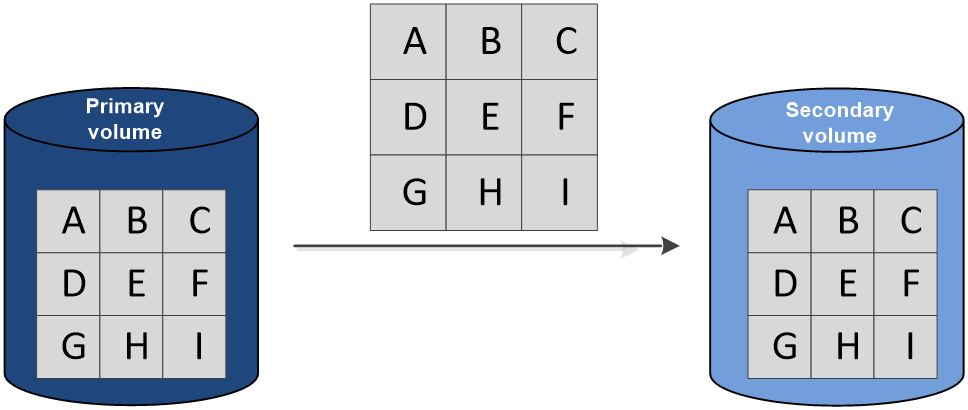
Copy pair
Each copy pair includes a primary volume and a secondary volume. Data is copied from the primary volume to the secondary volume.
Copy pair state
Figure 7 shows different states of a copy pair during the data copy.
Figure 15 Copy pair states

Volume copy pair configuration workflow
Figure 8 shows the volume copy pair configuration workflow, and Table 12 describes the configuration steps.
Figure 16 Volume copy pair configuration workflow
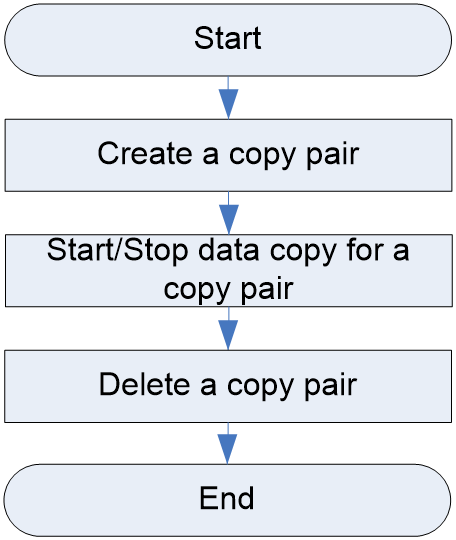
Table 12 Volume copy pair configuration workflow
|
Procedure |
Description |
|
N/A |
|
|
N/A |
|
|
Perform this task to delete a copy pair if data copy is finished. |
Creating a copy pair
Prerequisites
Before you perform this task, perform the following operations in advance:
· Plan an appropriate copy rate for the copy pair.
· Make sure data in the prepared secondary volume is overwritable.
· Make sure no storage service is running on the primary and secondary volumes if you want to start data copy immediately after pair creation.
Procedure
1. From the left navigation pane, select Block Storage.
2. Select Local Backup > Copy Pairs.
3. Click Create.
4. Configure the parameters, and then click OK.
For the parameter description and configuration restrictions and guidelines, see the online help.
Starting/Stopping data copy for a copy pair
Prerequisites
Make sure no storage service is running on the primary and secondary volumes before performing this task.
Starting data copy for a copy pair
1. From the left navigation pane, select Block Storage.
2. Select Local Backup > Copy Pairs.
3. Click More in the Actions column for a copy pair.
4. Select Start.
5. In the dialog box that opens, click OK.
For the parameter description and configuration restrictions and guidelines, see the online help.
Stopping data copy for a copy pair
1. From the left navigation pane, select Block Storage.
2. Select Local Backup > Copy Pairs.
3. Click More in the Actions column for a copy pair.
4. Select Stop.
5. In the dialog box that opens, click OK.
For the parameter description and configuration restrictions and guidelines, see the online help.
Deleting a copy pair
Prerequisites
Make sure all data has been copied from the primary volume to the secondary volume.
Procedure
1. From the left navigation pane, select Block Storage.
2. Select Local Backup > Copy Pairs.
3. To delete copy pairs, perform one of the following tasks:
¡ To delete a copy pair, click Delete in the Actions column for the copy pair.
¡ To delete multiple copy pairs, select copy pairs to be deleted, and click Delete above the list.
4. In the dialog box that opens, click OK.
For the parameter description and configuration restrictions and guidelines, see the online help.
Configuring volume migration pairs
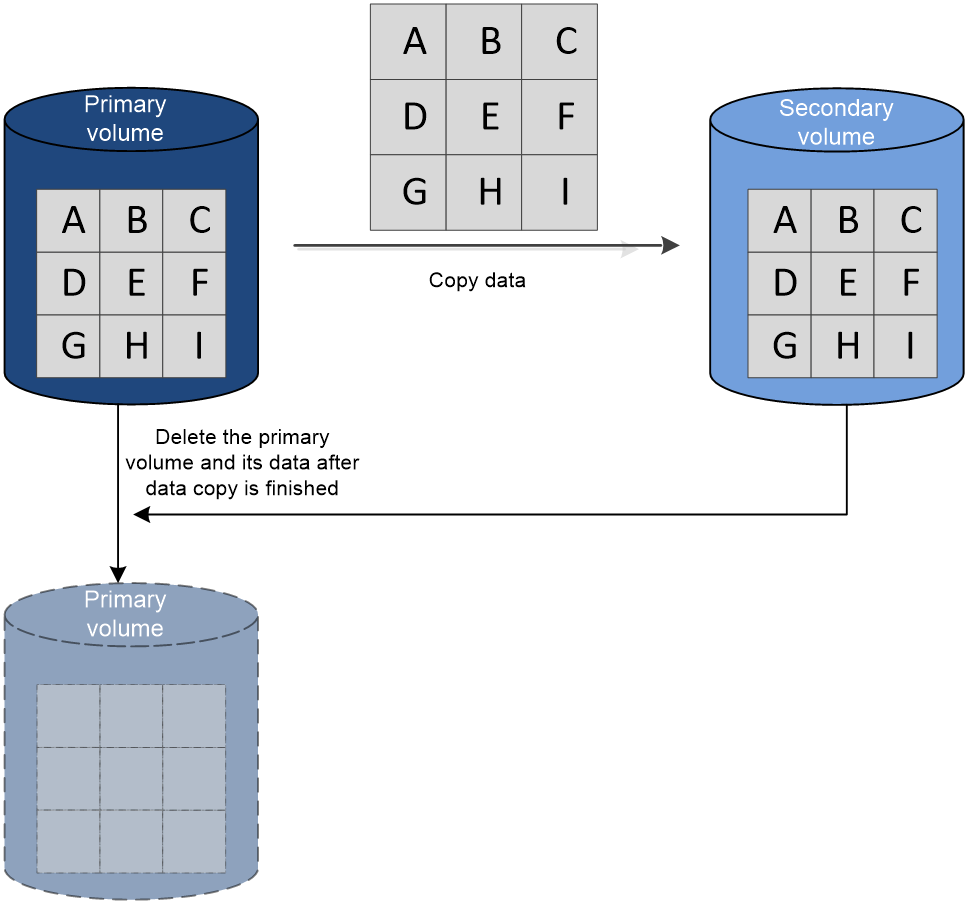
About volume migration pairs
As shown in Figure 9, the volume migration feature copies all data from the primary volume to the secondary volume, and then deletes the primary volume and its data.
Figure 17 Data migration process
Migration pair
Each migration pair includes a primary volume and a secondary volume. Data is migrated from the primary volume to the secondary volume.
Migration pair state
Figure 10 shows different states of a migration pair during the data migration.
Figure 18 Migration pair states

Volume migration pair configuration workflow
Figure 11 shows the volume migration pair configuration workflow, and Table 13 describes the configuration steps.
Figure 19 Volume migration pair configuration workflow
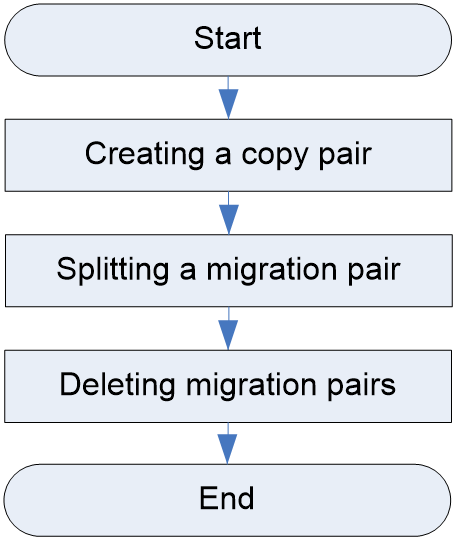
Table 13 Volume migration pair configuration workflow
|
Procedure |
Description |
|
N/A |
|
|
Perform this task after all data has been migrated from the primary volume to the secondary volume, so the secondary volume can be mapped to a client. |
|
|
Perform this task for migration pairs in split state to finish the volume migration. The primary volume and its data will be deleted. |
Creating a migration pair
Prerequisites
Before you perform this task, perform the following operations in advance:
· Plan an appropriate migration rate for the migration pair.
· Make sure data in the prepared secondary volume is overwritable.
· Make sure no storage service is running on the primary and secondary volumes.
Procedure
1. From the left navigation pane, select Block Storage.
2. Select Local Backup > Migration Pairs.
3. Click Create.
4. Configure the parameters, and then click OK.
For the parameter description and configuration restrictions and guidelines, see the online help.
Splitting a migration pair
Prerequisites
All data has been migrated from the primary volume to the secondary volume.
Procedure
1. From the left navigation pane, select Block Storage.
2. Select Local Backup > Migration Pairs.
3. Select a migration pair, and then click Split.
4. In the dialog box that opens, click OK.
For the parameter description and configuration restrictions and guidelines, see the online help.
Deleting migration pairs
Restrictions and guidelines
Perform this task only for migration pairs in split state.
Procedure
1. From the left navigation pane, select Block Storage.
2. Select Local Backup > Migration Pairs.
3. To delete migration pairs, perform one of the following tasks:
¡ To delete a migration pair, click Delete in the Actions column for the migration pair.
¡ To delete multiple migration pairs, select copy pairs to be deleted, and click Delete above the list.
4. In the dialog box that opens, click OK.
5. In the dialog box that opens, enter YES (case sensitive) and then click Yes.
For the parameter description and configuration restrictions and guidelines, see the online help.
Configuring volume snapshots
About volume snapshots
You can take a snapshot of a volume to back up its state at a time point. When a non-physical damage such as application failure or file corruption occurs, you can revert the volume to the state when the snapshot was taken. You can also directly access a snapshot to obtain data without affecting the original data.
A volume snapshot can be one of the following types depending on its creation method:
· Common volume snapshot—Common volume snapshots are read-only snapshots and mainly used for data recovery. Each of them is manually created from a single volume.
· Writable volume snapshot—A writable volume snapshot is created from a common volume snapshot. This type of snapshot is writable to users and mainly used for testing without affecting the original data on the volume.
· Automatic snapshot—An automatic snapshot is automatically created from a volume as scheduled. Such a feature provides constant data protection.
Volume snapshot configuration workflow
Figure 12 shows the volume copy pair configuration workflow, and Table 14 describes the configuration steps.
Figure 20 Volume snapshot configuration workflow
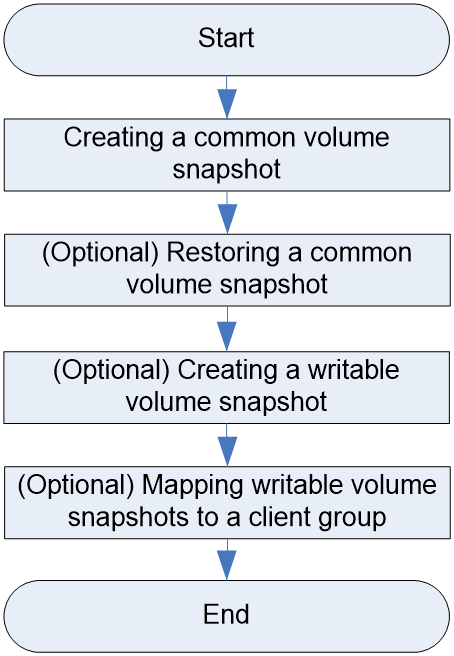
Table 14 Volume snapshot configuration workflow
|
Procedure |
Description |
|
N/A |
|
|
Perform this task to use a common snapshot of a volume to revert the volume to the state when the snapshot was taken. |
|
|
N/A |
|
|
(Optional) Mapping writable volume snapshots to a client group |
Perform this task to make a writable volume snapshot accessible to the clients in a client group. |
Creating a common volume snapshot
Restrictions and guidelines
Perform this task when services on the volume are not heavy, because the volume performance might be degraded during snapshot creation.
Procedure
1. From the left navigation pane, select Block Storage.
2. Select Local Backup > Snapshots.
3. Select a node pool, a disk pool, and a storage pool.
4. Click Create.
5. Configure the parameters, and then click OK.
For the parameter description and configuration restrictions and guidelines, see the online help.
(Optional) Restoring a common volume snapshot
Prerequisites
Make sure you have disconnected all services from that volume and removed the volume from the client group. For more information about these operations, see the online help.
Procedure
1. From the left navigation pane, select Block Storage.
2. Select Local Backup > Snapshots.
3. Select a node pool, a disk pool, and a storage pool.
4. Click Restore in the Actions column of a snapshot.
5. In the warning dialog box that opens, enter YES (case sensitive), and then click Yes.
For the parameter description and configuration restrictions and guidelines, see the online help.
(Optional) Creating a writable volume snapshot
1. From the left navigation pane, select Block Storage.
2. Select Local Backup > Snapshots.
3. Select a node pool, a disk pool, and a storage pool as needed.
4. Click the name of a snapshot.
5. Click Create.
6. Configure the parameters, and then click OK.
For the parameter description and configuration restrictions and guidelines, see the online help.
(Optional) Mapping writable volume snapshots to a client group
1. From the left navigation pane, select Block Storage.
2. Select Local Backup > Snapshots.
3. Select a node pool, a disk pool, and a storage pool as needed.
4. Click the name of a snapshot.
5. Click Map in the Actions column of a writable volume snapshot.
6. In the dialog box that opens, select a client group.
7. Click OK.
For the parameter description and configuration restrictions and guidelines, see the online help.
Configuring basic disaster recovery services
About basic disaster recovery services
The storage system provides disaster recovery (DR) management for block storage. When the local cluster fails, users can quickly restore the business through the data backed up in the remote DR cluster. DR management includes two parts: link management and remote replication.
· Link management—Administrators create and manage the remote replication links between the local cluster and the remote cluster, which is the prerequisite for asynchronous remote replication.
· Remote replication—As the core of the DR system, remote replication enables remote data synchronization and disaster recovery between two geographically dispersed clusters. The remote cluster maintains a set of the data replicas through the links with the local cluster. Once the production cluster fails, the other cluster takes over with the backed up data (unaffected by the outage of the production cluster) to enable disaster recovery.
Replication node
Replication nodes can be used to establish links with remote clusters for data synchronization between local and remote clusters.
Remote device
A remote device is a logical device abstracted from a set of links. It is used to manage links between local and remote clusters.
Asynchronous remote replication pair
An async remote replication pair provides disaster recovery by synchronizing data from the primary volume to the secondary volume.
· Primary Volume—Storage volume that provides the source data in the async remote replication pair.
· Secondary Volume—Storage volume used for disaster recovery and backup of the source data in the async remote replication pair.
Basic disaster recovery service configuration workflow
Figure 13 shows the basic disaster recovery service configuration workflow, and Table 15 describes the configuration steps.
Figure 21 Basic disaster recovery service configuration workflow
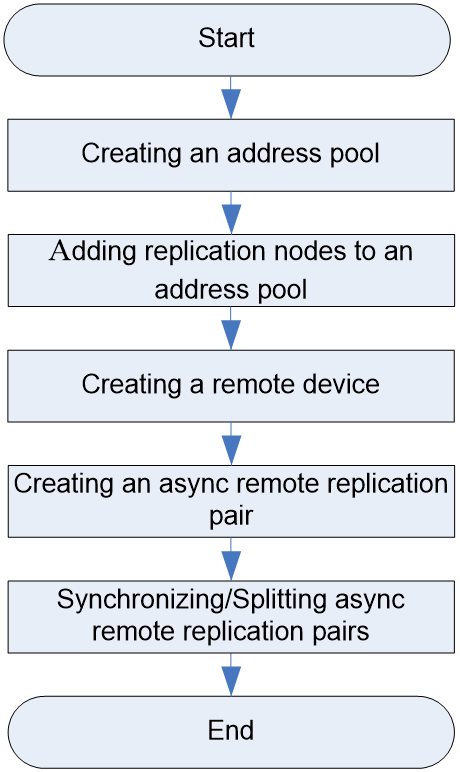
Table 15 Basic disaster recovery service configuration workflow
|
Procedure |
Description |
|
N/A |
|
|
N/A |
|
|
N/A |
|
|
N/A |
|
|
N/A |
Creating an address pool
Restrictions and guidelines
Perform this task based on cluster configuration and service demands.
Procedure
1. From the left navigation pane, select Block Storage.
2. Select Disaster Recovery > Links.
3. Select a node pool.
4. Click Create.
5. Configure the parameters, and then click OK.
For the parameter description and configuration restrictions and guidelines, see the online help.
Adding replication nodes to an address pool
1. From the left navigation pane, select Block Storage.
2. Select Disaster Recovery > Links.
3. Select a node pool.
4. Click the name of the target address pool.
5. Click Add.
6. In the dialog box that opens, select the nodes to add to the address pool.
7. Click OK.
For the parameter description and configuration restrictions and guidelines, see the online help.
Creating a remote device
Prerequisites
Before you perform this task, perform the following operations:
· Obtain information about the remote cluster, including remote IP pool ID, IP address of the remote replication node, remote monitoring port number, remote shared key, and remote shared key tag.
· Make sure the local replication node can communicate correctly with the remote replication node.
Procedure
1. From the left navigation pane, select Block Storage.
2. Select Disaster Recovery > Links.
3. Click the Remote Devices tab.
4. Select a node pool.
5. Click Create.
6. Configure the parameters, and then click OK.
For the parameter description and configuration restrictions and guidelines, see the online help.
Creating an async remote replication pair
Prerequisites
Make sure the data on the secondary volume is overwritable.
Procedure
1. From the left navigation pane, select Block Storage.
2. Select Disaster Recovery > Async Remote Replication.
3. Select a node pool.
4. Click Create.
5. Configure the parameters, and then click OK.
For the parameter description and configuration restrictions and guidelines, see the online help.
Synchronizing/Splitting async remote replication pairs
Synchronizing async remote replication pairs
1. From the left navigation pane, select Block Storage.
2. Select Disaster Recovery > Async Remote Replication.
3. Select a node pool.
4. Click More > Sync in the Actions column for the target replication pair.
5. In the dialog box that opens, click OK.
6. In the warning dialog box that opens, click Yes.
For the parameter description and configuration restrictions and guidelines, see the online help.
Splitting async remote replication pairs
1. From the left navigation pane, select Block Storage.
2. Select Disaster Recovery > Async Remote Replication.
3. Select a node pool.
4. To split async remote replication pairs, perform one of the following tasks:
¡ To split an async remote replication pair, Click More > Split in the Actions column for the replication pair.
¡ To split multiple async remote replication pairs, select async remote replication pairs to be split, and click Split above the list.
5. In the dialog box that opens, click OK.
For the parameter description and configuration restrictions and guidelines, see the online help.
Configuring disaster recovery primary/secondary switchover
About disaster recovery primary/secondary switchover
This operation creates a new replication pair by switching the roles of the primary and secondary volumes in a remote replication pair.
Primary/secondary switchover configuration workflow
Figure 14 shows the primary/secondary switchover configuration workflow, and Table 16 describes the configuration steps.
Figure 22 Primary/secondary switchover configuration workflow

Table 16 Primary/secondary switchover configuration workflow
|
Procedure |
Description |
|
N/A |
|
|
Perform this task to set the secondary volume writable in an async remote replication pair. |
|
|
Perform this task to switch the roles of the primary and secondary volumes in a remote replication pair. |
|
|
Perform this task to set the secondary volume read-only in an async remote replication pair. |
|
|
N/A |
Splitting async remote replication pairs
1. From the left navigation pane, select Block Storage.
2. Select Disaster Recovery > Async Remote Replication.
3. Select a node pool.
4. To split async remote replication pairs, perform one of the following tasks:
¡ To split an async remote replication pair, Click More > Split in the Actions column for the replication pair.
¡ To split multiple async remote replication pairs, select async remote replication pairs to be split, and click Split above the list.
5. In the dialog box that opens, click OK.
For the parameter description and configuration restrictions and guidelines, see the online help.
Disabling secondary volume protection
1. From the left navigation pane, select Block Storage.
2. Select Disaster Recovery > Async Remote Replication.
3. Select a node pool.
4. Click More > Disable Secondary Volume Protection in the Actions column for the target replication pair.
5. In the dialog box that opens, click OK.
6. In the warning dialog box that opens, click Yes.
For the parameter description and configuration restrictions and guidelines, see the online help.
Performing a primary/secondary switchover
Prerequisites
Before you perform a primary/secondary switchover, perform the following operations:
· Disconnect all services from the primary volume.
· Make sure data in the primary volume is overwritable.
Procedure
1. From the left navigation pane, select Block Storage.
2. Select Disaster Recovery > Async Remote Replication.
3. Select a node pool.
4. Click More > Primary/Secondary Switchover in the Actions column for the target replication pair.
5. In the dialog box that opens, click OK.
6. In the warning dialog box that opens, click Yes.
For the parameter description and configuration restrictions and guidelines, see the online help.
Enabling secondary volume protection
1. From the left navigation pane, select Block Storage.
2. Select Disaster Recovery > Async Remote Replication.
3. Select a node pool.
4. Click More > Enable Secondary Volume Protection in the Actions column for the target replication pair.
5. In the dialog box that opens, click OK.
For the parameter description and configuration restrictions and guidelines, see the online help.
Synchronizing async remote replication pairs
1. From the left navigation pane, select Block Storage.
2. Select Disaster Recovery > Async Remote Replication.
3. Select a node pool.
4. Click More > Sync in the Actions column for the target replication pair.
5. In the dialog box that opens, click OK.
6. In the warning dialog box that opens, click Yes.
For the parameter description and configuration restrictions and guidelines, see the online help.
Configuring consistency groups
About consistency groups
The storage system manages multiple volumes in a unified manner through consistency groups to ensure data consistency. This feature is usually applied to applications that span multiple volumes.
Consistency snapshot
A consistency snapshot is created from each volume in a consistency group when you take a snapshot of that consistency group. It is a member of the consistency group snapshot.
Consistency group snapshot
A consistency group snapshot is the parent snapshot of the consistency snapshots taken for the volumes in the consistency group. To ensure data consistency, you can restore a consistency group snapshot to revert all volumes in the group to the state when the snapshot was taken.
Consistency group snapshots are read-only snapshots.
Writable consistency group snapshot
A writable consistency group snapshot is created from a consistency group snapshot. The snapshot is writable to users without affecting the original data on the consistency group volumes.
When you take a writable snapshot for a consistency group, a writable consistency snapshot is created from each volume in the group.
Consistency group configuration workflow
Figure 15 shows the consistency group configuration workflow, and Table 17 describes the configuration steps.
Figure 23 Consistency group configuration workflow

Table 17 Consistency group configuration workflow
|
Procedure |
Description |
|
N/A |
|
|
N/A |
|
|
Perform this task to create a consistency group snapshot for data consistency protection. |
|
|
Perform this task to use a consistency group snapshot to revert the volumes in the consistency group to the state when the snapshot was taken. |
|
|
N/A |
|
|
(Optional) Mapping writable consistency volume snapshots to a client group |
Perform this task to make a writable consistency volume snapshot accessible to the clients in a client group. |
Creating a consistency group
1. From the left navigation pane, select Block Storage.
2. Select Volume Management > Consistency Groups.
3. Select a node pool and a disk pool.
4. Click Create.
5. Configure the parameters, and then click OK.
For the parameter description and configuration restrictions and guidelines, see the online help.
Assigning volumes to a consistency group
1. From the left navigation pane, select Block Storage.
2. Select Volume Management > Consistency Groups.
3. Select a node pool and a disk pool.
4. Click the name of a consistency group.
5. Click Add.
6. In the dialog box that opens, assign volumes to the consistency group.
7. Click OK.
For the parameter description and configuration restrictions and guidelines, see the online help.
Creating a consistency group snapshot
Restrictions and guidelines
Perform this task when services on the volume are not heavy, because the volume performance might be degraded during snapshot creation.
Procedure
1. From the left navigation pane, select Block Storage.
2. Select Local Backup > Snapshots.
3. Click the Consistency Group Snapshots tab.
4. Select a node pool and a disk pool.
5. Click Create.
6. Configure the parameters, and then click OK.
For the parameter description and configuration restrictions and guidelines, see the online help.
(Optional) Restoring a consistency group snapshot
Prerequisites
Before you perform this task, disconnect all services for the consistency group and remove all volumes from the client group mapped to the snapshot. For more information about these operations, see the online help.
Procedure
1. From the left navigation pane, select Block Storage.
2. Select Local Backup > Snapshots.
3. Click the Consistency Group Snapshots tab.
4. Select a node pool, a disk pool, and a consistency group as needed.
5. Click Restore in the Actions column for the target consistency group snapshot.
6. In the warning dialog box that opens, enter YES (case sensitive), and then click Yes.
For the parameter description and configuration restrictions and guidelines, see the online help.
(Optional) Creating a writable consistency group snapshot
1. From the left navigation pane, select Block Storage.
2. Select Local Backup > Snapshots.
3. Click the Consistency Group Snapshots tab.
4. Select a node pool, a disk pool, and a consistency group as needed.
5. Click Create in the Writable Consistency Group Snapshot column for the target consistency group snapshot.
6. Configure the parameters, and then click OK.
For the parameter description and configuration restrictions and guidelines, see the online help.
(Optional) Mapping writable consistency volume snapshots to a client group
1. From the left navigation pane, select Block Storage.
2. Select Local Backup > Snapshots.
3. Click the Consistency Group Snapshots tab.
4. Select a node pool, a disk pool, and a consistency group as needed.
5. Click the name of a consistency group snapshot.
6. Click the Writable Snapshots tab, perform one of the following tasks:
¡ To map a writable snapshot, click Map in the Actions column for the writable snapshot.
¡ To map multiple writable snapshots, select writable snapshots to be mapped, and click Map above the list.
7. In the dialog box that opens, select a client group, and then click Yes.
For the parameter description and configuration restrictions and guidelines, see the online help.
Configuring QoS policies
About QoS policies
You can use QoS policies to control IOPS or bandwidth of a volume to prevent specific volumes from occupying too many resources.
QoS policy configuration workflow
Figure 16 shows the QoS policy configuration workflow, and Table 18 describes the configuration steps.
Figure 24 QoS policy configuration workflow
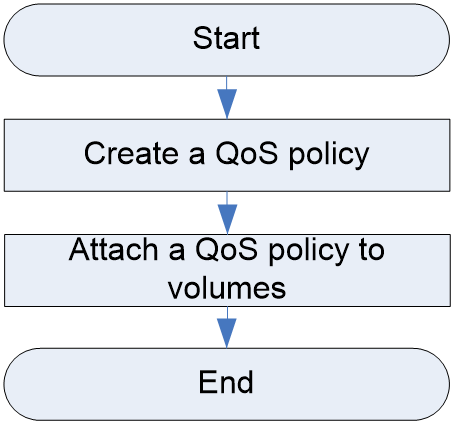
Table 18 QoS policy configuration workflow
|
Procedure |
Description |
|
N/A |
|
|
Perform this task to limit the IOPS or bandwidth of a volume. |
Creating a QoS policy
Restrictions and guidelines
Configure QoS policy parameters based on service requirements to improve the performance of the storage system.
Procedure
1. From the left navigation pane, select Block Storage.
2. Select Volume Management > QoS.
3. Click Create.
4. Configure the parameters, and then click OK.
For the parameter description and configuration restrictions and guidelines, see the online help.
Attaching a QoS policy to volumes
1. From the left navigation pane, select Block Storage.
2. Select Volume Management > Volumes.
3. Select a node pool, a disk pool, and a storage pool.
4. To attach a QoS policy to a single volume:
¡ Click More in the Actions column for the volume, and then select Attach QoS Policy.
¡ In the dialog box that opens, select a QoS policy, and then click OK.
5. To attach a QoS policy to multiple volumes:
¡ Select the volumes, and then click Attach QoS Policy above the volume list.
¡ In the dialog box that opens, select a QoS policy, and then click OK.
For the parameter description and configuration restrictions and guidelines, see the online help.
Configuring file storage
Configuring basic file storage services
About basic file storage services
File storage manages data as files to offer file-based data access, which has the advantage of easy data sharing.
File system
The storage cluster uses the CAPFS file system, which separates data from metadata to improve the storage performance.
Storage pool
A storage pool is a partition of storage capacity assigned from a disk pool to offer a storage service to users.
Storage pools are classified into the following types in file storage:
· Data storage pool—Provides data storage services through NAS servers.
· Metadata storage pool—Stores metadata. Metadata describes the attributes of data. The file system manages metadata through metadata servers.
NAS group
A NAS group is a set of NAS servers that back up each other to provide nonstop services. The NAS servers provide services at virtual dynamic service IP addresses (DIPs).
NAS server
A NAS server provides data access to clients. You can create multiple NAS servers to implement load balancing and improve overall cluster performance. The NAS servers in a NAS group provide services at virtual DIPs. When a server fails, the system automatically selects an available server in the group to provide services at the DIP of the failed server without interrupting services.
Load balancing
When a client accesses the file system at a domain name, the load balancer performs the following task:
1. Obtains information about all NAS servers in the NAS group associated with the domain name from the DNS server.
2. Selects and returns an available DIP according to the load balancing policy.
With a DNS-based load balancing policy, the load balancer evenly distributes service requests across its servers to ease the service load on each server and improve overall system performance. When a server (the primary DNS server or a NAS server) fails, the file system automatically performs IP switching and data migration without interrupting file storage services.
Load balancing policy
File storage supports the following load balancing policies:
· Round-robin—The load balancer selects the first obtained NAS server, returns the DIP of the NAS server to the client, and marks the NAS server as the start NAS server. When the load balancer receives a new request, it starts NAS server selection from the start NAS server.
· CPU usage—The load balancer selects the NAS server with the lowest CPU usage and returns its DIP to the client for service connection. The load balancer refreshes the CPU usage information of NAS servers every five seconds.
· Idle memory—The load balancer selects the NAS server with the lowest memory usage and returns its DIP to the client for service connection.
· Number of online sessions—The load balancer selects the NAS server with fewest online sessions (NFS + CIFS) and returns its DIP to the client for service connection.
· Network throughput—The load balancer selects the NAS server with the lowest network throughput and returns its DIP to the client for service connection.
· Composite load—The load balancer uses multiple metrics to calculate the composite load on each NAS server. The metrics include CPU usage and network throughput, and they are weighted differently, When the load balancer receives a request from a client, it selects a NAS server based on the composite load calculation result and returns the DIP of the NAS server to the client. To ensure that the NAS server selection result is real-time, the load balancer performs composite load calculation every five seconds.
Local file user
A local file user can access the file system and can be added to multiple local user groups.
Local file user group
You can add multiple local file users to a local file user group to perform centralized management.
NAS shares
· NFS share—As one of the mainstream heterogeneous platform sharing protocols, NFS is mainly used in Linux and UNIX environments. NFS controls user access by IP address. You can configure user permissions on the management interface.
· CIFS share—CIFS is a file sharing protocol developed by Microsoft to connect Windows clients to servers. CIFS controls user access by IP address or username and password. You can configure user permissions on the management interface.
· FTP share—FTP is a network protocol for transferring and sharing files between different operating systems. FTP controls user access by username and password. A user can perform operations on the shared directory, such as uploading files, downloading files, and creating new directories, based on the permissions that the user has.
· HTTP share—HTTP is an application layer protocol for distributed, collaborative, and hypermedia information systems.
Authentication mode
· An NFS share supports the following authentication modes:
¡ Anonymous access—All users can access the NFS share without entering a username and password.
¡ LDAP authentication—After you add the NAS servers to an LDAP domain, the NAS servers and NFS clients in the LDAP domain can share the user information in the domain. The storage cluster can authenticate NFS share users based on the user information.
· A CIFS share supports the following authentication modes:
¡ Local authentication—Requires users to provide a username and password to access the share.
¡ AD authentication—Applies to scenarios where an AD server is deployed. Users passing AD authentication can access the share.
¡ LDAP authentication—Authenticate CIFS share users through LDAP servers. Only authenticated users can access CIFS shares.
¡ Anonymous access—All users can access the share without entering a username and password.
Basic file storage service configuration workflow
You can configure basic file storage services in either of the following methods:
· Configure basic file storage services through the setup wizard. For detailed configuration and restrictions and guidelines, see the online help.
· Configure basic file storage services by module. Figure 17 shows the delivery center configuration workflow, and Table 19 describes the configuration steps.
Figure 25 Basic file storage service configuration workflow
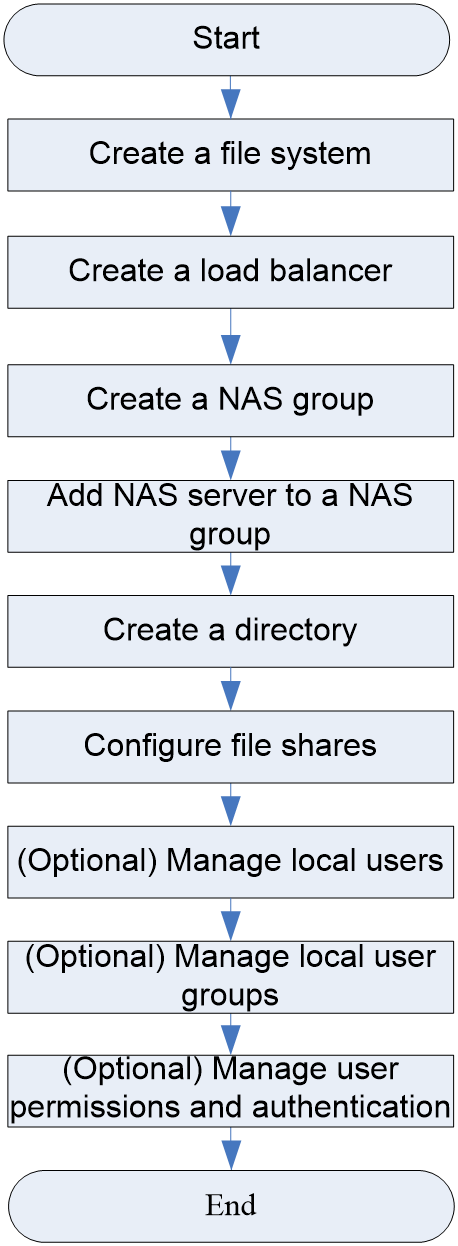
Table 19 Basic file storage service configuration workflow
|
Procedure |
Description |
|
|
Perform this task to create a file system for file storage. |
||
|
Perform this task to create a load balancer. With a DNS-based load balancing policy, the load balancer evenly distributes service requests across its servers to ease the service load on each server. |
||
|
Perform this task to create a NAS group. A NAS group is a group of NAS servers. |
||
|
Perform this task to add NAS servers to a NAS group. |
||
|
Perform this task to create a directory for file storage. |
||
|
Perform this task to create an NFS share for file resource sharing. |
||
|
Perform this task to create a CIFS share for file resource sharing. |
||
|
Perform this task to create an FTP share for file resource sharing. |
||
|
Perform this task to create an HTTP share for file resource sharing. |
||
|
Perform this task to create a local file user group and assign local users to the user group for centralized permission management. |
||
|
Perform this task to create local file user groups in bulk. |
||
|
Perform this task to create a local file user for file system access. |
||
|
Perform this task to create local file users in bulk. |
||
|
(Optional) Configuring NFS share permissions and authentication |
Perform this task to configure NFS share permissions and authentication. |
|
|
(Optional) Configuring CIFS share permissions and authentication |
Perform this task to configure CIFS share permissions and authentication. |
|
Creating a file system
Prerequisites
Deploy file storage disk pools. For more information, see "Configuring cluster resources."
You can deploy file storage disk pools in either of the following methods:
· Deploy a file storage metadata disk pool and a file storage data disk pool to provide resources to the file storage metadata storage pool and file storage data storage pool, respectively.
· Deploy a file storage disk pool to provide resources to both the file storage metadata and file storage data storage pools.
Procedure
1. From the left navigation pane, select File Storage.
2. On the File System page, click Create.
3. Configure the parameters, and then click OK.
For the parameter description and configuration restrictions and guidelines, see the online help.
Creating a load balancer
1. From the left navigation pane, select File Storage.
2. Select NAS > Load Balancers.
3. Click Create.
4. Configure the parameters, and then click OK.
For the parameter description and configuration restrictions and guidelines, see the online help.
Creating a NAS group
Prerequisites
Complete DIP planning.
Procedure
1. From the left navigation pane, select File storage.
2. Select NAS > NAS Groups.
3. Click Create.
4. Configure the parameters, and then click OK.
For the parameter description and configuration restrictions and guidelines, see the online help.
Adding NAS servers to a NAS group
1. From the left navigation pane, select File storage.
2. Select NAS > NAS Groups.
3. Click the name of a NAS group.
4. Click Create.
5. Configure the parameters, and then click OK.
For the parameter description and configuration restrictions and guidelines, see the online help.
Creating a directory
Prerequisites
Complete directory structure and purpose planning.
Procedure
1. From the left navigation pane, select File storage.
2. Select Directories > Directories.
3. Select a directory, and then click Create.
4. Configure the parameters, and then click OK.
For the parameter description and configuration restrictions and guidelines, see the online help.
Creating a file share
Prerequisites
· Select a file share mode as needed.
· Make sure the file share clients and NAS servers can communicate.
Creating an NFS share
1. From the left navigation pane, select File storage.
2. Select NAS > NFS Shares.
3. Click Create.
4. Configure the parameters, and then click OK.
For the parameter description and configuration restrictions and guidelines, see the online help.
Creating a CIFS share
1. From the left navigation pane, select File storage.
2. Select NAS > CIFS Shares.
3. Click Create.
4. Configure the parameters, and then click OK.
5. For the parameter description and configuration restrictions and guidelines, see the online help.
Creating an FTP share
1. From the left navigation pane, select File storage.
2. Select NAS > FTP Shares.
3. Click Create.
4. Configure the parameters, and then click OK.
For the parameter description and configuration restrictions and guidelines, see the online help.
Creating an HTTP share
1. From the left navigation pane, select File storage.
2. Select NAS > HTTP Shares.
3. Click Create.
4. Configure the parameters, and then click OK.
For the parameter description and configuration restrictions and guidelines, see the online help.
(Optional) Creating local user groups
You can create multiple local user groups in bulk by importing local users, or manually configure local user groups one by one.
Creating a local user group
1. From the left navigation pane, select File storage.
2. Select Users > Local User Groups.
3. Click Create.
4. Configure the parameters, and then click OK.
For the parameter description and configuration restrictions and guidelines, see the online help.
Creating multiple local user groups in bulk
When you import multiple local users from a file, the system automatically creates local user groups for the users based on the file.
For information about importing local users, see "Importing multiple local users in bulk."
(Optional) Creating local users
You can import multiple local users from a file or manually configure local users one by one.
Creating a local user
1. From the left navigation pane, select File storage.
2. Select Users > Local Users.
3. Click Create.
4. Configure the parameters, and then click OK.
For the parameter description and configuration restrictions and guidelines, see the online help.
Importing multiple local users in bulk
1. From the left navigation pane, select File storage.
2. Select Users > Local Users.
3. Click Import.
Click the Excel Template link in the dialog box that opens to download the import template, and then enter information about the target local users and local user groups in the template.
4. Click Select File to select the target import template.
5. Click OK.
For the parameter description and configuration restrictions and guidelines, see the online help.
(Optional) Configuring NFS share permissions and authentication
Permitting clients to access an NFS share
1. From the left navigation pane, select File storage.
2. Select NAS > NFS Shares.
3. Click Configure Clients in the Actions column for an NFS share, or click the name of an NFS share.
4. Click Create.
5. Configure the parameters, and then click OK.
For the parameter description and configuration restrictions and guidelines, see the online help.
Joining an LDAP domain
1. From the left navigation pane, select File storage.
2. Select Users > LDAP Domain Settings.
3. Configure the parameters, and then click Join Domain.
For the parameter description and configuration restrictions and guidelines, see the online help.
(Optional) Configuring CIFS share permissions and authentication
Permitting users or user groups to access a CIFS share
1. From the left navigation pane, select File storage.
2. Select NAS > CIFS Shares.
3. Click Permission in the Actions column for a CIFS share, or click the name of a CIFS share.
4. Click Create.
5. Configure the parameters, and then click OK.
For the parameter description and configuration restrictions and guidelines, see the online help.
Configuring local authentication
1. From the left navigation pane, select File storage.
2. Select Users > CIFS Share Authentication.
3. Select Local User Authentication, and then click Apply.
4. In the dialog box that opens, click OK.
For the parameter description and configuration restrictions and guidelines, see the online help.
Configuring AD authentication
1. From the left navigation pane, select File storage.
2. Select Users > CIFS Share Authentication.
3. Select AD Authentication.
4. Configure the parameters, and then click Apply.
For the parameter description and configuration restrictions and guidelines, see the online help.
5. In the dialog box that opens, click OK.
Configuring LDAP authentication
1. From the left navigation pane, select File storage > Users > LDAP Domain Settings.
2. Add the cluster to an LDAP domain.
For the parameter description and configuration restrictions and guidelines, see the online help.
3. From the left navigation pane, select File storage > Users > CIFS Share Authentication.
4. Select LDAP Authentication.
5. Configure the parameters, and then click Apply.
For the parameter description and configuration restrictions and guidelines, see the online help.
6. In the dialog box that opens, click OK.
Configuring anonymous access
1. From the left navigation pane, select File storage.
2. Select Users > CIFS Share Authentication.
3. Select Anonymous Access, and then click Apply.
4. In the dialog box that opens, click OK.
Configuring WORM
About WORM
Write once read many (WORM) ensures data security of the specified files. Files in locked state cannot be edited.
WORM clock
The WORM clock is designed to prevent files becoming expired as a result of system time change.
WORM attributes
When you specify a directory as a WORM root directory, you can configure the WORM attribute for that directory. The WORM attribute includes minimum retention period, maximum retention period, default retention period, and auto-commit timer. New directories and files created in the directory inherit its WORM attribute and settings.
WORM file state switchover
The WORM state machine determines the WORM state of each file according to the current WORM state, WORM attribute, and WORM time. Figure 18 shows the process of WORM protection. For more information, see Table 20.
Figure 26 WORM file state switchover

|
State/Operation |
Description |
|
Not locked |
Files in Not locked state are writable. |
|
Locked |
Files in Locked state are read only. To delete a file in this state, access the File Storage > Directories > Directories page. |
|
Expired |
Files in Expired state can be read and deleted. Whether the files can be edited depends on the expired file policy. |
|
Operation 1: Lock files |
You can lock the files in a WORM directory manually or configure the system to lock these files automatically. · Automatic locking—Set an auto-commit timer. If the files remain unchanged before the auto-commit timer expires, the files will be locked automatically. · Manual locking—Set the files as unwritable or read only. |
|
Operation 2: Operate expired files |
After the retention period expires, the files will expire. You can read or delete these files. Whether you can edit these files depends on the expired file policy. |
|
Operation 3: Extend retention period for expired files |
To relock expired files, extend the retention period. |
|
Operation 4: Edit retention period for locked files |
To extend the retention period for locked files, edit the atime of each locked file. |
Time attributes of a file
The WORM attribute uses the time attributes of a file to determine the WORM state of that file. You can view the time attributes of a file in the operation system, including atime, ctime, and mtime.
· atime—Time when the file was last read or accessed.
· atime(WORM)—The atime of a locked file stands for the time when the file will expire.
· ctime—Time when the file attributes were last modified.
· mtime—Time when the file content was last modified.
Calculation of atime(WORM)
Calculation of atime(WORM) varies by file locking method as follows:
· Automatic locking: atime(WORM) = mtime + autocommit timer + default retention period
· Manual locking: atime(WORM) = current WORM time + default retention period
WORM configuration workflow
Figure 19 shows the WORM configuration workflow, and Table 21 describes the configuration steps.
Figure 27 WORM configuration workflow
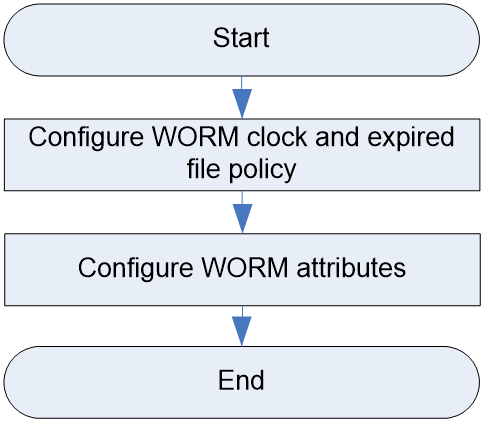
Table 21 WORM configuration workflow
|
Procedure |
Configuring the WORM clock and expired file policy
Prerequisites
Adjust the system clock and plan the expired file policy.
Restrictions and guidelines
· If the WORM clock is not configured, the WORM settings configuration window opens automatically when you open the WORM management page. You can configure WORM settings in the window or configure WORM settings later by click WORM Clock on the page.
· You can configure WORM settings only once. Once submitted, WORM settings cannot be edited.
Procedure
1. From the left navigation pane, select File storage.
2. Select Directories > WORM.
3. Configure the parameters, and then click OK.
For the parameter description and configuration restrictions and guidelines, see the online help.
Configuring the WORM attribute for a directory
Prerequisites
Configure the WORM clock and expired file policy.
Procedure
1. From the left navigation pane, select File storage.
2. Select Directories > WORM.
3. Click Create.
4. Configure the parameters, and then click OK.
For the parameter description and configuration restrictions and guidelines, see the online help.
Configuring tiered file storage
About tiered file storage
The storage system implements tiered file storage through file striping. With tiered storage enabled, the system redistributes and migrates data in data storage pools according to file layout policies to realize intelligent data classification and management.
File striping
File striping refers to the storage technology that divides the contiguous data for a file into multiple data units in the same size and then stores these data units. During the process of tiered storage, the system redistributes and migrates the data units of a file to specific storage pools under the guidance of file layout policies.
After you enable tiered storage, this feature works as follows:
· When you write new data into the storage system, the system stripes the data directly.
· For data that already in the system before you enable tiered storage, the system stripes the data as scheduled.
File layout policy
File layout policies can guide the system to distribute data units to different data storage pools. The system ranks each file layout policy in descending order of priority. After you configure file layout policies, the system matches each file against the policies from top to bottom until a match is found, and then stores or migrates the file to the position specified in the matching policy.
File layout policy configuration workflow
Figure 20 shows the file layout policy configuration workflow, and Table 22 describes the configuration steps.
Figure 28 File layout policy configuration workflow
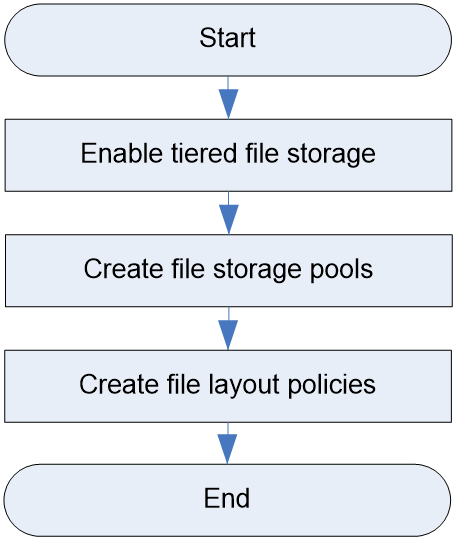
Table 22 File layout policy configuration workflow
|
Procedure |
Enabling tiered file storage
Prerequisites
Get the storage system prepared for implementing tiered file storage, because file striping degrades storage performance.
Procedure
1. From the left navigation pane, select System > Parameters > Advanced.
2. In the tiered storage configuration pane, click Edit.
3. Edit the settings as needed, and then click OK.
For the parameter description and configuration restrictions and guidelines, see the online help.
Creating file storage pools
Prerequisites
Deploy file storage disk pools and finish file layout policy planning.
Procedure
1. From the left navigation pane, select Storage Pools > File Storage.
2. Click Create.
3. Configure the settings as needed, and then click OK.
For the parameter description and configuration restrictions and guidelines, see the online help.
Creating file layout policies
Prerequisites
Make sure a minimum of two data storage pools exist in the storage system.
Procedure
1. From the left navigation pane, select File Storage>File Layout Policies.
2. Click Create.
3. Configure the settings as needed, and then click OK.
For the parameter description and configuration restrictions and guidelines, see the online help.
Configuring object storage
Configuring basic object storage services
About basic object storage services
Object storage is a data storage architecture that manages data as objects. The object storage system stores objects in containers and uses a unique ID to retrieve each object, which reduces the data management cost.
Object
An object is the basic unit of data storage in object storage. It stores both data and metadata.
Object gateway
The storage system provides object storage services through object gateways. Clients can access object storage resources through object gateways.
Storage pool
A storage pool is a partition of storage capacity assigned from a disk pool to offer a storage service to users. When you create object gateways, the system automatically creates object storage metadata and data storage pools.
Storage bucket
A bucket is an object container. Object storage users can access buckets to read and write data.
Tenant
Each tenant has its own buckets and objects, and the storage resources of different tenants are isolated. You can specify an administrator for a tenant to manage its storage resources.
User roles
In the storage system, the following object storage user roles are available:
· Super administrator—The super administrator has the highest permission level and is automatically created by the system and cannot be deleted. The super administrator can configure and manage the storage system, users, and user groups.
· System administrator—A system administrator is created by the super administrator and has all permissions of the user group to which the user belongs.
· Tenant administrator—A tenant administrator is a system administrator specified by the super administrator.
· Object storage user—An object storage user can access the cluster through a client to access object storage resources.
User permissions
· The super administrator can perform the following tasks:
¡ Create and manage basic object storage resources, such as object gateways, object storage HA groups, and load balancers.
¡ Create buckets and use storage resources in the buckets. Buckets created by the super administrator belong to the default tenant.
¡ View and manage all tenants in the cluster.
· A tenant administrator can perform the following tasks:
¡ Create buckets and use storage resources in the buckets. Buckets created by a tenant administrator belong to the tenant of the administrator.
¡ View and manage buckets and object users in the tenant.
· An object storage user can create buckets and use storage resources in the buckets.
Tenant administration portal
To access the tenant administration portal, log in to the storage system with the tenant administrator's username and password. A tenant administrator can view tenant information and manage buckets and users.
Basic object storage service configuration workflow
You can configure basic object storage services by using either of the following methods:
· Configure basic object storage services through the setup wizard. For detailed configuration and restrictions and guidelines, see the online help.
· Configure basic object storage services on a per-function basis.
Figure 21 shows the basic object storage service configuration workflow, and Table 23 describes the configuration steps.
Figure 29 Basic object storage service configuration workflow
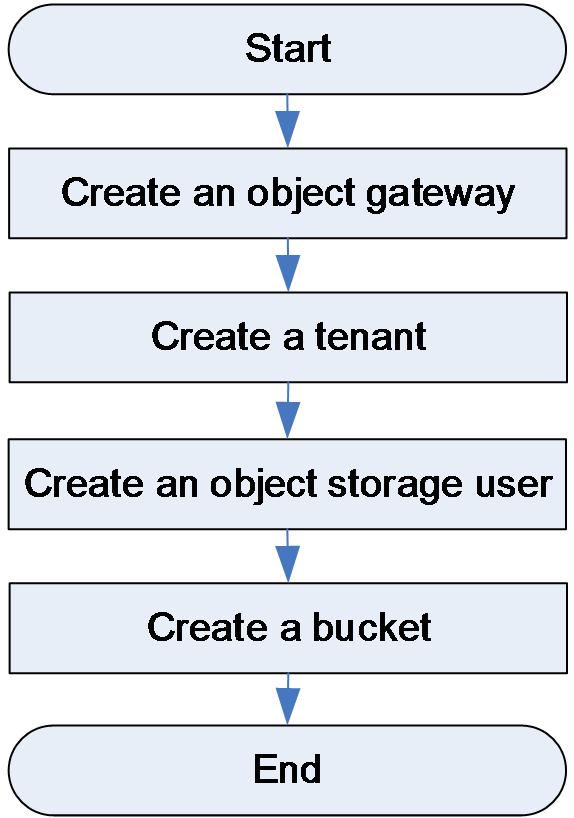
Table 23 Basic object storage service configuration workflow
|
Procedure |
|
|
· Creating a bucket as the super administrator |
|
Creating an object gateway
Prerequisites
Deploy an object storage node pool and object storage disk pools. For more information, see "Configuring cluster resources."
You can deploy object storage disk pools in either of the following methods:
· Deploy an object storage metadata disk pool and an object storage data disk pool. Then, the system will automatically create a storage pool in each of the disk pools when you create object gateways.
· Deploy an object storage disk pool. Then, the system will automatically create an object storage metadata storage pool and an object storage data storage pool in the disk pool when you create object gateways.
Procedure
1. From the left navigation pane, select Object Storage.
2. Select Object Storage > Object Gateways.
3. Click Create.
4. Configure the parameters, and then click OK.
For the parameter description and configuration restrictions and guidelines, see the online help.
Creating an object gateway HA group
Prerequisites
If the node pool is configured with both object storage and file storage services, make sure the names of object gateway HA groups are different from those of NAS groups for file storage services.
Procedure
1. From the left navigation pane, select Object Storage.
2. Select Object Storage > Object Gateway HA Groups.
3. Click Create.
4. Configure the parameters, and then click OK.
For the parameter description and configuration restrictions and guidelines, see the online help.
Creating a tenant
Prerequisites
Create an administrator, so that you can select the administrator as the tenant administrator of the tenant. For more information about creating administrators, see "Managing users."
Procedure
1. From the left navigation pane, select Object Storage.
2. Select Tenants.
3. Click Create.
4. Configure the parameters, and then click OK.
For the parameter description and configuration restrictions and guidelines, see the online help.
Create an object user
Prerequisites
· Log in to the storage system as a tenant administrator.
· Obtain information (such as the email address) about the object user.
Procedure
1. From the left navigation pane, select Object Storage.
2. Select Users.
3. Click Create.
4. Configure the parameters, and then click OK.
For the parameter description and configuration restrictions and guidelines, see the online help.
Creating a bucket
Prerequisites
· The super administrator or a tenant administrator must log in to the storage system before creating buckets.
· An object user must access the storage system through a third-party client before creating buckets.
Creating a bucket as the super administrator
1. From the left navigation pane, select Object Storage.
2. Select Buckets.
3. Click Create.
4. Configure the parameters, and then click OK.
For the parameter description and configuration restrictions and guidelines, see the online help.
Creating a bucket as a tenant administrator
1. From the left navigation pane, select Object Storage.
2. Select Buckets.
3. Click Create.
4. Configure the parameters, and then click OK.
5. For the parameter description and configuration restrictions and guidelines, see the online help.
Creating a bucket as an object user
For more information, see the third-party client documentation.
Configuring async replication
About async replication
Asynchronous replication is a data backup technique for disaster recovery. At the very beginning, this feature has a full replication of local data to a remote cluster. After the initial full replication, the incremental local data will be synchronized to the remote cluster at specific intervals. When the local cluster fails, the remote cluster can take over to provide data services.
Asynchronous replication has two modes:
· Full replication—This method copies all local data to the target. You can use this method to generate multiple data backups for the same piece of data.
· Incremental replication—This method synchronizes only the new local data and the modified local data to the target.
Async replication configuration workflow
Figure 22 shows the async replication configuration workflow, and Table 24 describes the configuration steps.
Figure 30 Async replication configuration workflow
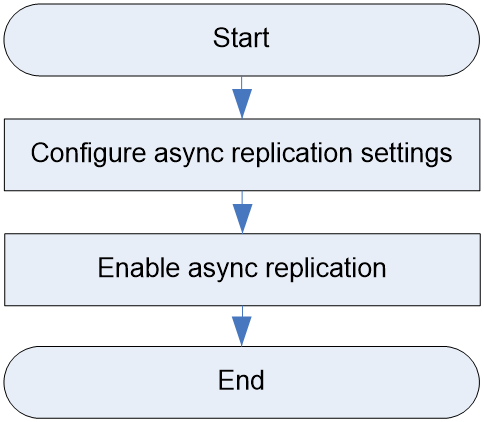
Table 24 Async replication configuration workflow
|
Procedure |
Description |
|
Perform this task to configure async replication settings and establish a link between the local cluster and the remote cluster. |
|
|
Perform this task to enable async replication for buckets. |
Configuring async replication settings
Prerequisites
· Plan and configure networks for the local and remote clusters. Make sure the two clusters can correctly communicate with each other.
· Create object gateway HA groups for the remote cluster.
Procedure
1. From the left navigation pane, select Object Storage.
2. Select Object Storage > Advanced Settings.
3. To configure async replication, click Edit.
4. Enable async replication, configure the parameters, and then click OK.
For the parameter description and configuration restrictions and guidelines, see the online help.
Enabling async replication for a bucket
Prerequisites
Configure async replication settings on the Advanced Settings page.
Procedure
1. From the left navigation pane, select Object Storage.
2. Select Object Storage > Buckets.
3. Select a bucket, and then click More > Async Replication.
4. Select On, and then click OK.
For the parameter description and configuration restrictions and guidelines, see the online help.
Configuring lifecycle policies
About lifecycle policies
Lifecycle policies process object storage data stored at different time points. Using lifecycle policies ensures good use of storage resources. After you configure a lifecycle policy, the storage system matches the policy against object storage data stored at different time points, and then overwrites, deletes, or migrates data according to the lifecycle policy.
Lifecycle policy
The storage system supports the following lifecycle policy features:
· Data overwriting—Old data will be replaced with new data when the specified data overwriting threshold is reached.
· Post-lifecycle deletion—Data will be deleted and cannot be restored any longer when the specified post-lifecycle removal threshold is reached.
· Infrequent storage—Data will be stored in the infrequent storage pool when the specified infrequent storage threshold is reached.
· Archive storage—Data will be stored in the infrequent storage pool when the specified infrequent storage threshold is reached.
Lifecycle policy priority
The expiration time configured for the infrequent storage, archive storage, and post-lifecycle deletion services must meet the following requirement in length: infrequent storage < archive storage < post-lifecycle deletion. For example, you can set the expiration time to 10 days, 20 days, and 30 days for the infrequent storage, archive storage, and post-lifecycle deletion services, respectively. The data will be transferred into the infrequent storage pool in 10 days and into the archive cluster in 20 days. In 30 days, the data will be deleted.
Archive cluster
The archive cluster uses the same distributed system version as the local cluster and can communicate with the local cluster. This cluster is used to store data with low frequency of use. After you configure the archive storage service, data will be archived to the same path in the archive cluster when the specified archive storage threshold is reached.
Infrequent storage pool
An infrequent storage pool is an object storage pool created by an infrequent object storage-data pool and stores data with low frequency of use. After you configure the infrequent storage service, data will be stored in the infrequent storage pool when the specified infrequent storage threshold is reached.
Lifecycle policy configuration workflow
Figure 23 shows the lifecycle policy configuration workflow, and Table 25 describes the configuration steps.
Figure 31 Lifecycle policy configuration workflow
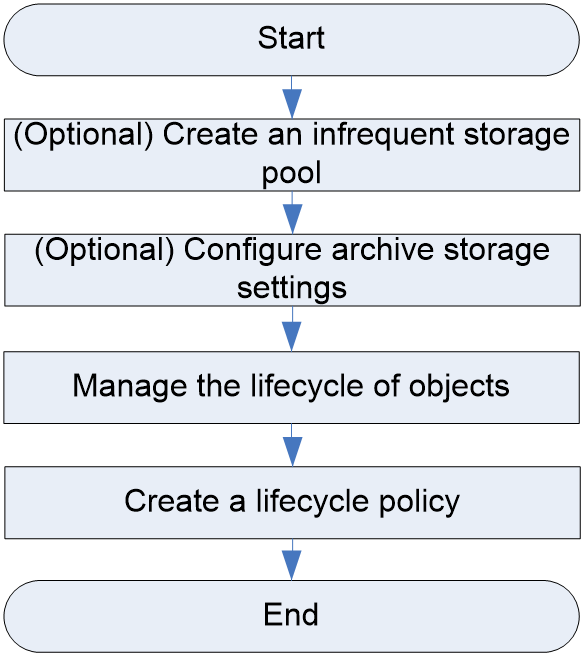
Table 25 Lifecycle policy configuration workflow
|
Procedure |
Description |
|
Perform this task to create an infrequent storage pool to store the data with low frequency of use. You must create an infrequent storage pool before configuring the infrequent storage feature in the lifecycle policy. |
|
|
Perform this task to configure the settings of the archive cluster and establish a link between the local cluster and the archive cluster. You must configure archive storage settings before configuring the archive storage feature in the lifecycle policy. |
|
|
Perform this task to configure the execution time of the lifecycle policy for objects. |
|
|
Perform this task to create a lifecycle policy. After you configure a lifecycle policy, the storage system matches the policy against object storage data stored at different time points, and then overwrites, deletes, or migrates data according to the lifecycle policy. |
(Optional) Creating an infrequent storage pool
|
|
NOTE: You can skip this task if you do not configure the infrequent storage feature in the lifecycle policy. |
Prerequisites
Create an infrequent object storage-data pool. An infrequent storage pool is an object storage pool created by an infrequent object storage-data pool.
Procedure
1. From the left navigation pane, select Storage Pools > Object Storage.
2. Click Create.
3. Configure the parameters, and then click OK.
For the parameter description and configuration restrictions and guidelines, see the online help.
(Optional) Configuring archive storage settings
|
|
NOTE: You can skip this task if you do not configure the archive storage feature in the lifecycle policy. |
Prerequisites
Make a network plan, configure the local cluster and remote cluster, and make sure the two clusters can communicate with each other.
Procedure
1. From the left navigation pane, select Object Storage.
2. Select Object Storage > Advanced Settings.
3. To configure the archive storage settings, click Edit., configure the parameters, and then click OK.
For the parameter description and configuration restrictions and guidelines, see the online help.
Managing the lifecycle of objects
Prerequisites
Plan the execution time of the lifecycle policy for objects.
Procedure
1. From the left navigation pane, select Object Storage.
2. Select Object Storage > Advanced Settings.
3. To configure the lifecycle policy settings, click Edit, configure the parameters, and then click OK.
For the parameter description and configuration restrictions and guidelines, see the online help.
Creating a lifecycle policy
Prerequisites
· If you enable WORM protection for a bucket, data in that bucket will be locked. Make sure no WORM policy is enabled for the target bucket in the local cluster.
· Configure archive storage settings correctly before configuring the archive storage feature in the lifecycle policy. For more information, see “(Optional) Configuring archive storage settings.”
· Create an infrequent storage pool before configuring the infrequent storage feature in the lifecycle policy. For more information, see “(Optional) Creating an infrequent storage pool.”
Procedure
1. From the left navigation pane, select Object Storage > Buckets.
2. Select a bucket, and then click More > Lifecycle Policy.
3. Click Create, configure the parameters, and then click OK.
For the parameter description and configuration restrictions and guidelines, see the online help.
Deploying multiple sites for object storage
About multisite deployment
The multisite feature can protect data against storage exceptions by allowing remote data backup. The multisite group includes a primary site and secondary sites. Only the primary site supports user management and sync policy configuration.
You can configure a sync path between two sites for one-way or two-way data backup. When a site fails, the storage system can continue to provide data services by using the data backup in the other site.
Multisite configuration workflow
Figure 24 shows the multisite replication configuration workflow, and Table 26 describes the configuration steps.
Figure 32 Multisite configuration workflow
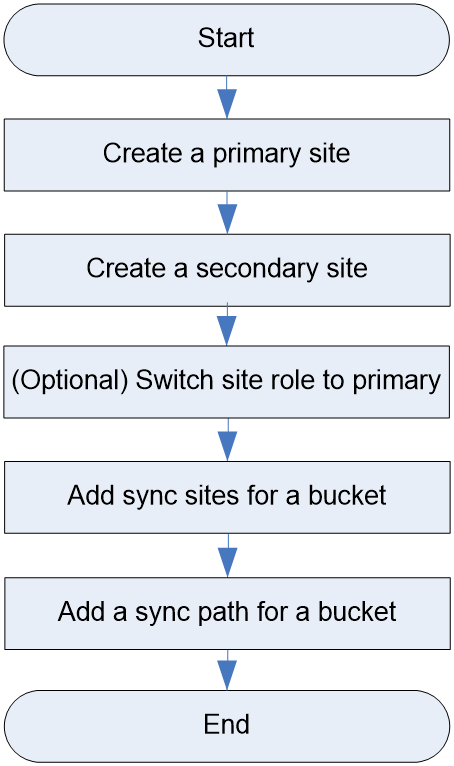
Table 26 Multisite configuration workflow
|
Procedure |
Description |
|
Perform this task to configure a primary site. When the primary site fails, the storage system can continue to provide data services by using the data backup in a secondary site. |
|
|
Perform this task to configure a secondary site and add it to the multisite group. |
|
|
Perform this task to configure a secondary site as the primary site. |
|
|
Perform this task to add sync sites for data synchronization. |
|
|
Perform this task to add sync paths for data synchronization. |
Creating a primary site
Prerequisites
Make a reasonable site planning based on service requirements.
Procedure
1. From the left navigation pane, select Object Storage.
2. Select Object Storage > Object Gateways.
3. Click Create.
4. Select Primary as the site role.
5. Configure the remaining parameters, and then click OK.
For the parameter description and configuration restrictions and guidelines, see the online help.
Creating a secondary site
|
|
NOTE: Before destroying the cluster to which a secondary site belongs, detach that secondary site from the primary site first. If not, some information about the secondary site might remain and the multisite feature then might run abnormally. |
Prerequisites
· Make a reasonable planning of sites, including the primary site and secondary sites.
· Make sure a minimum of one primary site exist.
· Make sure the clusters that the primary site and the secondary site belong can communicate with each other.
Procedure
1. Log in to the cluster management page of the site that will be added as a secondary site.
2. From the left navigation pane, select Object Storage.
3. Select Object Storage > Object Gateways.
4. Click Create.
5. Select Secondary as the site role.
6. Configure the remaining parameters, and then click OK.
For the parameter description and configuration restrictions and guidelines, see the online help.
(Optional) Switching site role to primary
Prerequisites
Make a reasonable planning of sites, including the primary site and secondary sites.
Procedure
1. Log in to the cluster management page of the primary site.
2. From the left navigation pane, select Object Storage.
3. Select Object Storage > Multisite Deployment.
4. Select the desired secondary site, click Switch to Primary, and then click OK.
For the parameter description and configuration restrictions and guidelines, see the online help.
Adding sync sites for a bucket
Prerequisites
Log in to the cluster management page of the primary site.
Procedure
1. From the left navigation pane, select Object Storage > Buckets.
2. Click the name of the desired bucket. You are placed on the sync site management page.
3. Click Add.
4. Select sites as needed, and then click OK.
For the parameter description and configuration restrictions and guidelines, see the online help.
Adding a sync path for a bucket
Prerequisites
Log in to the cluster management page of the primary site.
Procedure
1. From the left navigation pane, select Object Storage > Buckets.
2. Click the name of the desired bucket, click the Sync Paths tab, and then click Add.
3. In the dialog box that opens, configure the parameters as needed, and then click OK.
For the parameter description and configuration restrictions and guidelines, see the online help.
Configuring QoS
About QoS
Quality of Service (QoS) is a security mechanism that employs multiple technologies to provide better network communication services. It is typically applied to services with different network quality requirements, such as video conferencing and services with bulk data.
You can attach IP subnets, users, and buckets to a QoS policy to control the IOPS, bandwidth, or concurrency, which prevents the IP subnets, users, and buckets from consuming too many resources.
QoS configuration workflow
Figure 25 shows the QoS configuration workflow, and Table 27 describes the configuration steps.
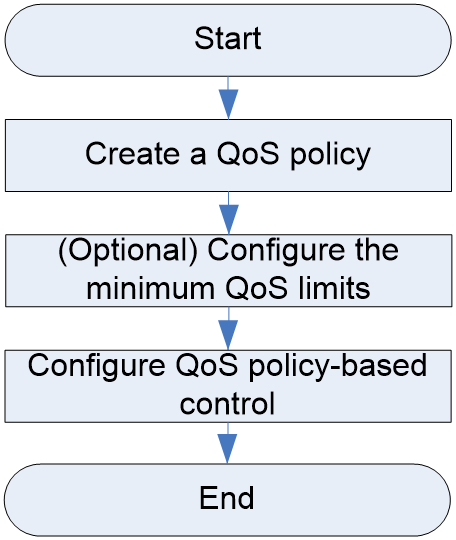
Table 27 QoS configuration workflow
|
Procedure |
Description |
|
|
Perform this task to create a QoS policy. A QoS policy can take effect only after you attach buckets, users, and IP subnets to the QoS policy. |
||
|
Perform this task to configure the minimum limits for the maximum metric values of a QoS policy. |
||
|
Perform this task to attach IP subnets to a QoS policy to control the IOPS, bandwidth, or concurrency of the IP subnets. |
||
|
Perform this task to attach users to a QoS policy to control the IOPS, bandwidth, or concurrency of the users. |
||
|
Perform this task to attach buckets to a QoS policy to control the IOPS, bandwidth, or concurrency of the buckets. |
||
Creating a QoS policy
Prerequisites
Plan the metric type and maximum metric values for a QoS policy based on service requirements.
Procedure
1. From the left navigation pane, select Object Storage.
2. Select Object Storage > QoS Policies.
3. Click Create, configure the parameters, and then click OK.
For the parameter description and configuration restrictions and guidelines, see the online help.
(Optional) Configuring the minimum QoS limits
Prerequisites
Plan the minimum QoS limits for a QoS policy based on service requirements.
Procedure
1. From the left navigation pane, select Object Storage.
2. Select Object Storage > Advanced Settings.
3. To configure the minimum QoS limits, click Edit, configure the parameters, and click OK.
For the parameter description and configuration restrictions and guidelines, see the online help.
Configuring QoS policy-based control
Creating an IP subnet entry for QoS policy-based control
1. From the left navigation pane, select Object Storage.
2. Select Object Storage > QoS Policies.
3. Click the IP Subnets tab.
4. Click Create, configure the parameters, and then click OK.
For the parameter description and configuration restrictions and guidelines, see the online help.
Creating a user entry for QoS policy-based control
1. From the left navigation pane, select Object Storage.
2. Select Object Storage > QoS Policies.
3. Click the Users tab.
4. Click Create, configure the parameters, and then click OK.
For the parameter description and configuration restrictions and guidelines, see the online help.
Configuring QoS policy-based control for buckets
1. From the left navigation pane, select Object Storage.
2. Select Object Storage > Buckets.
3. Select the target buckets, and then click More > QoS Policy.
4. Configure the parameters, and then click OK.
For the parameter description and configuration restrictions and guidelines, see the online help.