- Table of Contents
- Related Documents
-
| Title | Size | Download |
|---|---|---|
| 01-Text | 1.16 MB |
Contents
Analog voice interface commands
cng-on (FXS/FXO/E&M interface view)
default (FXS/FXO/E&M interface view)
description (FXS/FXO/E&M interface view)
echo-canceler delay (FXS/FXO/E&M interface view)
echo-canceler enable (FXS/FXO/E&M interface view)
echo-canceler tail-length (FXS/FXO/E&M interface view)
nlp-on (FXS/FXO/E&M interface view)
receive gain (FXS/FXO/E&M interface view)
shutdown (FXS/FXO/E&M interface view)
transmit gain (FXS/FXO/E&M interface view)
Digital voice interface commands
cng-on (digital voice interface view)
default (digital voice interface view)
description (digital voice interface view)
echo-canceler delay (digital voice interface view)
echo-canceler enable (digital voice interface view)
echo-canceler tail-length (digital voice interface view)
nlp-on (digital interface view)
receive gain (digital voice interface view)
shutdown (digital voice interface view)
transmit gain (digital voice interface view)
substitute (voice entity view, voice interface view)
substitute (dial program view)
display voice ip address trusted list
display voice sip register-status
ip address trusted authenticate
voice-class sip options-keepalive
voice-class sip session refresh
voice-class sip early-offer forced
display voice sip subscribe-state
display voice register pool all brief
voice-class sip options-keepalive
Voice interface commands
The following matrix shows the feature and hardware compatibility:
|
Hardware |
Voice interface compatibility |
|
MSR810/810-W/810-W-DB/810-LM/810-W-LM/810-10-PoE/810-LM-HK/810-W-LM-HK/810-LMS/810-LUS |
No |
|
MSR2600-6-X1/2600-10-X1 |
Yes |
|
MSR 2630 |
Yes |
|
MSR3600-28/3600-51 |
Yes |
|
MSR3600-28-SI/3600-51-SI |
No |
|
MSR3610-X1/3610-X1-DP/3610-X1-DC/3610-X1-DP-DC |
Analog voice interfaces: Yes Digital voice interfaces: No |
|
MSR 3610/3620/3620-DP/3640/3660 |
Yes |
|
MSR5620/5660/5680 |
Yes (not supported on the router installed with an SPU600-X1 card.) |
|
Hardware |
Voice interface compatibility |
|
MSR810-LM-GL |
No |
|
MSR810-W-LM-GL |
No |
|
MSR830-6EI-GL |
No |
|
MSR830-10EI-GL |
No |
|
MSR830-6HI-GL |
No |
|
MSR830-10HI-GL |
No |
|
MSR2600-6-X1-GL |
Yes |
|
MSR3600-28-SI-GL |
No |
Commands and descriptions for centralized devices apply to the following routers:
· MSR810/810-W/810-W-DB/810-LM/810-W-LM/810-10-PoE/810-LM-HK/810-W-LM-HK/810-LMS/810-LUS.
· MSR2600-6-X1/2600-10-X1.
· MSR 2630.
· MSR3600-28/3600-51.
· MSR3600-28-SI/3600-51-SI.
· MSR3610-X1/3610-X1-DP/3610-X1-DC/3610-X1-DP-DC.
· MSR 3610/3620/3620-DP/3640/3660.
· MSR810-LM-GL/810-W-LM-GL/830-6EI-GL/830-10EI-GL/830-6HI-GL/830-10HI-GL/2600-6-X1-GL/3600-28-SI-GL.
Commands and descriptions for distributed devices apply to the following routers:
· MSR5620.
· MSR 5660.
· MSR 5680.
Analog voice interface commands
area
Use area to specify the standard of busy tones for all FXO interfaces.
Use undo area to restore the default.
Syntax
area { custom | europe | north-america }
undo area
Default
All FXO interfaces use the European standard.
Views
Voice view
Predefined user roles
network-admin
Parameters
custom: Specifies custom busy tones.
europe: Specifies the European standard.
north-america: Specifies the North American standard.
Examples
# Specify the North America standard for busy tones for all FXO interfaces.
<Sysname> system-view
[Sysname] voice-setup
[Sysname-voice] area north-america
busytone-detect auto
Use busytone-detect auto to configure automatic busy tone detection for an FXO interfaces.
Syntax
busytone-detect auto index line-number
Views
Voice view
Predefined user roles
network-admin
Parameters
index: Assigns a number to a busy tone type, in the range of 0 to 3. The device can record a maximum of four types of busy tones.
line-number: Specifies an FXO interface.
Usage guidelines
After detecting busy tones by using the busytone-detect auto command, the device automatically performs the following tasks:
· Calculates the busy tone parameters.
· Executes the busytone-detect custom command to record the busy tone parameters.
· Executes the area custom command to make these busy tone parameters take effect.
Examples
# Enable automatic busy tone detection for FXO interface 2/2/1, and assign number 0 to the detected busy tone parameters.
<Sysname> system-view
[Sysname] voice-setup
[Sysname-voice] busytone-detect auto 0 2/2/1
Related commands
area custom
busytone-detect custom
busytone-detect custom
Use busytone-detect custom to configure custom busy tone parameters for all FXO interfaces.
Use undo busytone-detect custom to delete custom busy tone parameters.
Syntax
busytone-detect custom area-number index argu f1 f2 p1 p2 p3 p4 p5 p6 p7
undo busytone-detect custom index
Default
Custom busy tone parameters depend on the area command.
Views
Voice view
Predefined user roles
network-admin
Parameters
area-number: Specifies an area number. This argument is reserved for future use and has a fixed value of 2.
index: Assigns a number to a busy tone type, in the range of 0 to 3. The device can record a maximum of four types of busy tones.
argu: This argument is reserved for future use and has a value range of 0 to 32767.
f1: Frequency 1 in Hz, in the range of 50 to 3600.
f2: Frequency 2 in Hz, in the range of 50 to 3600.
p1: Signal amplitude 1, in the range of 50 to 32767.
p2: Signal amplitude 2, in the range of 50 to 32767.
p3: Duration of a single tone in milliseconds, in the range of 10 to 1000.
p4: Duration error of a single tone in milliseconds, in the range of 0 to 500.
p5: Duration of silence in milliseconds, in the range of 10 to 1000.
p6: Duration error of silence in milliseconds, in the range of 0 to 500.
p7: Absolute difference between p3 and p5 in milliseconds, in the range of 0 to 500.
Usage guidelines
The custom busy tone parameters take effect only after the area custom command is configured.
Examples
# Customize busy tone parameters, and assign number 1 to the busy tone parameters for all FXO interfaces.
<Sysname> system-view
[Sysname] voice-setup
[Sysname-voice] busytone-detect custom 2 1 99 450 450 8000 8000 800 300 500 500 500
Related commands
area
busytone-detect period
Use busytone-detect period to set the number of busy tone detection periods on an FXO interface.
Use undo busytone-detect period to restore the default.
Syntax
busytone-detect period value
undo busytone-detect period
Default
The number of busy tone detection periods is 2 on an FXO interface.
Views
FXO interface view
Predefined user roles
network-admin
Parameters
value: Specifies the number of busy tone detection periods, in the range of 2 to 12. The greater the value, the longer the busy tone detection time.
Usage guidelines
Increasing the number of busy tone detection periods can improve the detection accuracy to reduce the likelihood of false on-hook, but it increases the likelihood of failed on-hook.
Test the new value multiple times to make sure the new value does not cause failed on-hook.
Examples
# Set the number of busy tone detection periods to 3 on FXO interface 2/2/1.
<Sysname> system-view
[Sysname] subscriber-line 2/2/1
[Sysname-subscriber-line2/2/1] busytone-detect period 3
busytone-hookon delay-timer
Use busytone-hookon delay-timer to set the delay time from when an FXO interface detects a busy tone to when the interface goes on-hook.
Use undo busytone-hookon delay-timer to restore the default.
Syntax
busytone-hookon delay-timer value
undo busytone-hookon delay-timer
Default
The delay time is 0 seconds (the FXO interface goes on-hook immediately after detecting a busy tone).
Views
FXO interface view
Predefined user roles
network-admin
Parameters
value: Specifies the delay time in the range of 0 to 30 seconds.
Usage guidelines
An FXO interface goes on-hook when detecting a busy tone. This will cause the user of the IP phone connected to the FXO interface to mistake the on-hook as a line problem because the user cannot hear the busy tones.
To resolve this problem, use this command to configure an on-hook delay so the user of the IP phone can hear the busy tones during the delay time.
Examples
# Set the delay time from when FXO interface 2/2/1 detects a busy tone to when the interface goes on-hook to 3 seconds.
<Sysname> system-view
[Sysname] subscriber-line 2/2/1
[Sysname-subscriber-line2/2/1] busytone-hookon delay-timer 3
calling-name
Use calling-name to configure the calling name on an FXS interface.
Use undo calling-name to restore the default.
Syntax
calling-name text
undo calling-name
Default
No calling name exists on an FXS interface.
Views
FXS interface view
Predefined user roles
network-admin
Parameters
text: Specifies a calling name, a case-sensitive string of 1 to 50 characters.
Usage guidelines
The calling name can be sent only in the multiple-data-message format.
Use this command on the originating device.
Examples
# Configure a calling name of tony for FXS interface 2/1/1.
<Sysname> system-view
[Sysname] subscriber-line 2/1/1
[Sysname-subscriber-line2/1/1] calling-name tony
Related commands
cid display
cid send
cid type
cable
Use cable to configure the cable type for an E&M interface.
Use undo cable to restore the default.
Syntax
cable { 2-wire | 4-wire }
undo cable
Default
The cable type of an E&M interface is 4-wire.
Views
E&M interface view
Predefined user roles
network-admin
Parameters
2-wire: Specifies the 2-wire cable type, which provides full-duplex voice transmission. Each wire carries bidirectional signals.
4-wire: Specifies the 4-wire cable type, which provides simplex voice transmission. Every two wires receive and send signals in one direction.
Usage guidelines
You must configure the same cable type for the E&M interfaces on the originating and terminating devices. Otherwise, only one-way voice communication can be implemented.
Examples
# Configure the cable type as 2-wire for E&M interface 2/3/1.
<Sysname> system-view
[Sysname] subscriber-line 2/3/1
[Sysname-sub scriber-line2/3/1] cable 2-wire
cid display
Use cid display to enable caller identification (CID) on an FXS interface.
Use undo cid display to disable CID on an FXS interface.
Syntax
cid display
undo cid display
Default
CID is enabled on an FXS interface.
Views
FXS interface view
Predefined user roles
network-admin
Usage guidelines
Use this command on the terminating device.
Examples
# Disable CID on FXS interface 2/1/1.
<Sysname> system-view
[Sysname] subscriber-line 2/1/1
[Sysname-subscriber-line2/1/1] undo cid display
Related commands
calling-name
cid receive
Use cid receive to enable CID receiving on an FXO interface.
Use undo cid receive to disable CID receiving on an FXO interface.
Syntax
cid receive
undo cid receive
Default
CID receiving is enabled on an FXO interface.
Views
FXO interface view
Predefined user roles
network-admin
Usage guidelines
CID receiving must be enabled for CID to work correctly.
Examples
# Enable CID receiving on FXO interface 2/2/1.
<Sysname> system-view
[Sysname] subscriber-line 2/2/1
[Sysname-subscriber-line2/2/1] cid receive
cid ring
Use cid ring to set the time for CID detection and the number of rings the FXO interface receives before going off-hook.
Use undo cid ring to restore the default.
Syntax
cid ring { 0 | 1 | 2 } [ times ]
undo cid ring
Default
The FXO interface performs CID detection between the first and the second rings, and it goes off-hook immediately after the CID detection is completed. The cid ring 1 0 command applies.
Views
FXO interface view
Predefined user roles
network-admin
Parameters
0: Detects CID before the rings.
1: Detects CID between the first ring and the second ring.
2: Detects CID between the second ring and the third ring.
times: Specifies the number of rings before the FXO interface goes off-hook after CID detection. The value is in the range of 0 to 5. The greater the value is, the later the FXO line goes off-hook.
Examples
# Configure FXO interface 2/2/1 to detect CID before the rings.
<Sysname> system-view
[Sysname] subscriber-line 2/2/1
[Sysname-subscriber-line2/2/1] cid ring 0
cid send
Use cid send to enable CID sending on an FXS or FXO interface.
Use undo cid send to disable CID sending on an FXS or FXO interface.
Syntax
cid send
undo cid send
Default
CID sending is enabled on an FXS or FXO interface.
Views
FXO interface view
FXS interface view
Predefined user roles
network-admin
Usage guidelines
CID sending must be enabled on CID to work correctly.
Examples
# Enable CID sending on FXS interface 2/1/1.
<Sysname> system-view
[Sysname] subscriber-line 2/1/1
[Sysname-subscriber-line2/1/1] cid send
cid type
Use cid type to configure the CID format on an FXS interface.
Use undo cid type to restore the default.
Syntax
cid type { complex | simple }
undo cid type
Default
An FXS interface uses the multiple data message format (MDMF) to send CID.
Views
FXS interface view
Predefined user roles
network-admin
Parameters
complex: Specifies MDMF.
simple: Specifies single data message format (SDMF).
Usage guidelines
The local and remote ends must use the same CID format if the remote end supports only one CID format.
The calling name in the CID can only be transmitted in MDMF format.
This command takes effect only on the terminating device.
Examples
# Set the CID format to SDMF on FXS interface 2/1/1.
<Sysname> system-view
[Sysname] subscriber-line 2/1/1
[Sysname-subscriber-line2/1/1] cid type simple
Related commands
calling-name
cid display
cid send
cid standard-type
cid standard-type
Use cid standard-type to configure the CID standard on an FXS interface.
Use undo cid standard-type to restore the default.
Syntax
cid standard-type { bellcore | brazil }
undo cid standard-type
Default
An FXS interface uses the Bellcore standard for CID.
Views
FXS interface view
Predefined user roles
network-admin
Parameters
bellcore: Specifies the Bellcore standard that sends CID in frequency shift keying (FSK) mode. This standard applies to most countries and regions, such as China and North America.
brazil: Specifies the Brazil standard that sends CID in dual tone multifrequency (DTMF) mode.
Usage guidelines
This command takes effect on the terminating device, which encapsulates CID by using the specified standard and sends it to the called telephone.
The CID format configured by using the cid type command takes effect only when the bellcore standard is used.
Examples
# Specify the CID standard as brazil on FXS interface 2/1/1.
<Sysname> system-view
[Sysname] subscriber-line 2/1/1
[Sysname-subscriber-line2/1/1] cid standard-type brazil
Related commands
cid type
cptone
Use cptone to specify call progress tones.
Use undo cptone to restore the default.
Syntax
cptone { country-type locale | custom { busy-tone | congestion-tone | dial-tone | ringback-tone | special-dial-tone | waiting-tone } comb freq1 freq2 time1 time2 time3 time4
undo cptone
Default
The call progress tones of China are used.
Views
Voice view
Predefined user roles
network-admin
Parameters
country-type locale: Specifies a country or region in Table 1.
|
Code |
Country/region name |
|
AR |
Argentina |
|
AU |
Australia |
|
AT |
Austria |
|
BE |
Belgium |
|
BR |
Brazil |
|
BG |
Bulgaria |
|
CA |
Canada |
|
CL |
Chile |
|
CN |
China |
|
HR |
Croatia |
|
CU |
Cuba |
|
CY |
Cyprus |
|
CZ |
Czech Republic |
|
DK |
Denmark |
|
EG |
Egypt |
|
FI |
Finland |
|
FR |
France |
|
DE |
Germany |
|
GH |
Ghana |
|
GR |
Greece |
|
HK |
Hong Kong China |
|
HU |
Hungary |
|
IS |
Iceland |
|
IN |
India |
|
ID |
Indonesia |
|
IR |
Iran |
|
IE |
Ireland |
|
IEU |
Ireland (UK style) |
|
IL |
Israel |
|
IT |
Italy |
|
JP |
Japan |
|
JO |
Jordan |
|
KE |
Kenya |
|
KR |
Republic of Korea |
|
LB |
Lebanon |
|
LU |
Luxembourg |
|
MO |
Macau |
|
MY |
Malaysia |
|
MX |
Mexico |
|
NP |
Nepal |
|
NL |
Netherlands |
|
NZ |
New Zealand |
|
NG |
Nigeria |
|
NO |
Norway |
|
PK |
Pakistan |
|
PA |
Panama |
|
PH |
Philippines |
|
PL |
Poland |
|
PT |
Portugal |
|
RU |
Russian Federation |
|
SA |
Saudi Arabia |
|
SG |
Singapore |
|
SK |
Slovakia |
|
SI |
Slovenia |
|
ZA |
South Africa |
|
ES |
Spain |
|
SE |
Sweden |
|
CH |
Switzerland |
|
TH |
Thailand |
|
TR |
Turkey |
|
GB |
United Kingdom |
|
US |
United States |
|
UY |
Uruguay |
|
ZW |
Zimbabwe |
custom: Customizes call progress tones.
busy-tone: Specifies the busy tone.
congestion-tone: Specifies the congestion tone.
dial-tone: Specifies the dial tone.
ringback-tone: Specifies the ringback tone.
special-dial-tone: Specifies the special dial tone.
waiting-tone: Specifies the waiting tone.
comb: Specifies a combination mode value in the range of 0 to 2. The values 0, 1, and 2 represent the superimposition, modulation, and alternation of the two frequencies, respectively.
freq1 and freq2: Specifies the two frequencies in Hz. The frequency range is related to the combination mode. In frequency superimposition or alternation, the two frequencies are in the range of 300 Hz to 3400 Hz. In frequency modulation, the two frequencies are in the range of 0 Hz to 3400 Hz, and the sum and absolute difference of the two frequencies are in the range of 300 Hz to 3400 Hz.
time1: Specifies the make time for the first make-to-break ratio in milliseconds, in the range of 30 to 8192. In the case of continuous play, the value for time1 is 8192, and the values of the following three arguments must be all set to 0.
time2: Specifies the break time for the first make-to-break ratio in milliseconds. The value range is 0 and 30 through 8191. If time1 is set to 0, this argument must be set to 0.
time3: Specifies the make time for the second make-to-break ratio in milliseconds. The value range is 0 and 30 through 8191. If time1 is set to 0, this argument must be set to 0.
time4: Specifies the break time for the second make-to-break ratio in milliseconds. The value range is 0 and 30 to 8191. If time1 is set to 0, this argument must be set to 0.
Usage guidelines
This command takes effect only for the progress tones on the local device.
Examples
# Specify the call progress tones of US.
<Sysname> system-view
[sysname] voice-setup
[sysname-voice] cptone country-type us
# Customize the call progress tones.
<Sysname> system-view
[sysname] voice-setup
[sysname-voice] cptone custom busy-tone 0 425 425 350 350 350 350
cptone tone-type
Use cptone tone-type to set the amplitude of call progress tones.
Use undo cptone tone-type to restore the default.
Syntax
cptone tone-type { all | busy-tone | congestion-tone | dial-tone | ringback-tone | special-dial-tone | waiting-tone } amplitude value
undo cptone tone-type { all | busy-tone | congestion-tone | dial-tone | ringback-tone | special-dial-tone | waiting-tone } amplitude
Default
The amplitude is 1000 for busy tones and congestion tones, 400 for dial tones and special dial tones, and 600 for ringback tones and waiting tones.
Views
Voice view
Predefined user roles
network-admin
Parameters
all: Specifies all types of call progress tones.
busy-tone: Specifies the busy tone.
congestion-tone: Specifies the congestion tone.
dial-tone: Specifies the dial tone.
ringback-tone: Specifies the ringback tone.
special-dial-tone: Specifies the special dial tone.
waiting-tone: Specifies the waiting tone.
amplitude value: Specifies an amplitude in the range of 200 to 1500.
Examples
# Set the amplitude of the busy tone to 1200.
<sysname> system-view
[sysname] voice-setup
[sysname-voice] cptone tone-type busy-tone amplitude 1200
cng-on (FXS/FXO/E&M interface view)
Use cng-on to enable comfortable noise generation (CNG) on an analog voice interface.
Use undo cng-on to disable CNG on an analog voice interface.
Syntax
cng-on
undo cng-on
Default
CNG is enabled on an analog voice interface.
Views
FXO interface view
FXS interface view
Predefined user roles
network-admin
Usage guidelines
CNG generates and fills comfortable background noise into silent gaps during a conversation.
Examples
# Disable CNG on FXS interface 2/1/1.
<Sysname> system-view
[Sysname] subscriber-line 2/1/1
[Sysname-subscriber-line2/1/1] undo cng-on
default (FXS/FXO/E&M interface view)
Use default to restore the default settings on an analog voice interface.
Syntax
default
Views
E&M interface view
FXO interface view
FXS interface view
Predefined user roles
network-admin
Usage guidelines
The default command impacts some services. Make sure you are fully aware of the impacts of this command when you execute it on a live network.
This command might fail to restore the default settings for some commands for reasons such as command dependencies or system restrictions. Use the display this command in interface view to identify these commands. Then use their undo forms or follow the command reference to restore their default settings. If your restoration attempt still fails, follow the error message instructions to resolve the problem.
Examples
# Restore the default settings on FXS interface 2/1/1.
<Sysname> system-view
[Sysname] subscriber-line 2/1/1
[Sysname-subscriber-line2/1/1] default
delay hold
Use delay hold to set the seizure signal duration in delay start mode on an E&M interface.
Use undo delay hold to restore the default.
Syntax
delay hold milliseconds
undo delay hold
Default
The seizure signal duration in delay start mode is 400 milliseconds on an E&M interface.
Views
E&M interface view
Predefined user roles
network-admin
Parameters
milliseconds: Specifies the seizure signal duration in delay start mode, in the range of 100 to 5000 milliseconds.
Examples
# Set the seizure signal duration in delay start mode to 500 milliseconds on E&M interface 2/3/1.
<Sysname> system-view
[Sysname] subscriber-line 2/3/1
[Sysname-subscriber-line2/3/1] signal delay
[Sysname-subscriber-line2/3/1] delay hold 500
signal
delay rising
Use delay rising to set the delay time from when the terminating side detects a seizure signal to when it sends the seizure signal in delay start mode.
Use undo delay rising to restore the default.
Syntax
delay rising milliseconds
undo delay rising
Default
The delay time is 300 milliseconds.
Views
E&M interface view
Predefined user roles
network-admin
Parameters
milliseconds: Specifies the delay time from when the terminating side detects a seizure signal to when it sends the seizure signal in the delay start mode. The value range is 20 to 2000 milliseconds.
Examples
# Set the delay time from when the terminating side detects a seizure signal to when it sends the seizure signal in the delay start mode to 700 milliseconds for E&M interface 2/3/1.
<Sysname> system-view
[Sysname] subscriber-line 2/3/1
[Sysname-subscriber-line2/3/1] signal delay
[Sysname-subscriber-line2/3/1] delay rising 700
signal
delay send-dtmf
Use delay send-dtmf to set a delay before the originating side sends DTMF tones in immediate start mode.
Use undo delay send-dtmf to restore the default.
Syntax
delay send-dtmf milliseconds
undo delay send-dtmf
Default
The delay before the originating side sends DTMF tones in immediate start mode is 300 milliseconds.
Views
E&M interface view
Predefined user roles
network-admin
Parameters
milliseconds: Specifies the delay in the range of 50 to 5000 milliseconds.
Examples
# Set the delay before the originating side sends DTMF tones in immediate start mode to 3000 milliseconds for E&M interface 2/3/1.
<Sysname> system-view
[Sysname] subscriber-line 2/3/1
[Sysname-subscriber-line2/3/1] signal immediate
[Sysname-subscriber-line2/3/1] delay send-dtmf 3000
signal
delay send-wink
Use delay send-wink to set a delay from when the terminating side receives a seizure signal to when it sends a wink signal in wink start mode.
Use undo delay send-wink to restore the default.
Syntax
delay send-wink milliseconds
undo delay send-wink
Default
The delay from when the terminating side receives a seizure signal to when it sends a wink signal is 200 milliseconds in wink start mode.
Views
E&M interface view
Predefined user roles
network-admin
Parameters
milliseconds: Specifies the delay in the range of 100 to 5000 milliseconds.
Examples
# Set the delay from when the terminating side receives a seizure signal to when it sends a wink signal in wink start mode to 700 milliseconds for E&M interface 2/3/1.
<Sysname> system-view
[Sysname] subscriber-line 2/3/1
[Sysname-subscriber-line2/3/1] signal wink
[Sysname-subscriber-line2/3/1] delay send-wink 700
signal
delay start-dial
Use delay start-dial to set the dial delay time on an FXS or FXO interface.
Use undo delay start-dial to restore the default.
Syntax
delay start-dial seconds
undo delay start-dial
Default
The dial delay time for an FXS or FXO interface is 1 second.
Views
FXO interface view
FXS interface view
Predefined user roles
network-admin
Parameters
seconds: Specifies the dial delay time in the range of 0 to 10 seconds.
Examples
# Set the dial delay time to 5 seconds on FXS interface 2/1/1.
<Sysname> system-view
[Sysname] subscriber-line 2/1/1
[Sysname-subscriber-line2/1/1] delay start-dial 5
delay wink-hold
Use delay wink-hold to set the duration for which the terminating side sends wink signals in wink start mode.
Use undo delay wink-hold to restore the default.
Syntax
delay wink-hold milliseconds
undo delay wink-hold
Default
The terminating side sends wink signals for 500 milliseconds in wink start mode.
Views
E&M interface view
Predefined user roles
network-admin
Parameters
milliseconds: Specifies the duration for which the terminating side sends wink signals in wink start mode. The value range is 100 to 3000 milliseconds.
Examples
# Set the duration for which E&M interface 2/3/1 sends wink signals in wink start mode to 700 milliseconds.
<Sysname> system-view
[Sysname] subscriber-line 2/3/1
[Sysname-subscriber-line2/3/1] signal wink
[Sysname-subscriber-line2/3/1] delay wink-hold 700
signal
delay wink-rising
Use delay wink-rising to set the timeout time for the originating side to wait for a wink signal after sending a seizure signal in wink start mode.
Use undo delay wink-rising to restore the default.
Syntax
delay wink-rising milliseconds
undo delay wink-rising
Default
The timeout time for the originating side to wait for a wink signal after sending a seizure signal is 2000 milliseconds in wink start mode.
Views
E&M interface view
Predefined user roles
network-admin
Parameters
milliseconds: Specifies the timeout time in the range of 100 to 5000 milliseconds.
Usage guidelines
If the originating side does not receive a wink signal from the terminating side within the timeout time, the call fails.
Examples
# Set the timeout time to 2000 milliseconds for E&M interface 2/3/1.
[Sysname] subscriber-line 2/3/1
[Sysname-subscriber-line2/3/1] signal wink
[Sysname-subscriber-line2/3/1] delay wink-rising 2000
signal
description (FXS/FXO/E&M interface view)
Use description to configure a description for an analog voice interface.
Use undo description to restore the default.
Syntax
description text
undo description
Default
The description for an analog voice interface is interface name Interface, for example, Subscriber-line2/1/1 Interface.
Views
E&M interface view
FXO interface view
FXS interface view
Predefined user roles
network-admin
Parameters
text: Specifies a description, a case-sensitive string of 1 to 80 characters.
Examples
# Configure a description of pstn for FXS interface 2/1/1.
<Sysname> system-view
[Sysname] subscriber-line 2/1/1
[Sysname-Subscriber-line2/1/1] description pstn
disconnect lcfo
Use disconnect lcfo to configure an FXS interface to send a LCFO signal when the peer goes on-hook.
Use undo disconnect lcfo to restore the default.
Syntax
disconnect lcfo
undo disconnect lcfo
Default
No LCFO signal is sent (a busy tone is played to the connected device).
Views
FXS interface view
Predefined user roles
network-admin
Usage guidelines
You can configure an FXS interface to send a loop current feed open (LCFO) signal to the connected device when the peer goes on-hook. This feature is used mainly in North America.
You can configure the duration of LCFO signals by using the timer disconnect-pulse command.
Examples
# Configure FXS interface 2/1/1 to send an LCFO signal.
<Sysname> system-view
[Sysname] subscriber-line 2/1/1
[Sysname-subscriber-line2/1/1] disconnect lcfo
Related commands
timer disconnect-pulse
display voice subscriber-line
Use display voice subscriber-line to display information about an analog voice interface.
Syntax
display voice subscriber-line line-number
Views
Any view
Predefined user roles
network-admin
network-operator
Parameters
line-number: Specifies an analog voice interface by its number.
Examples
# Display information about analog voice interface 2/3/1.
<Sysname> display voice subscriber-line 2/3/1
Current information: subscriber-line2/3/1
Type: E&M
Status: Up
Call status: Idle
Table 2 Command output
|
Field |
Description |
|
Type |
Type of the voice interface: · FXS. · FXO. · E&M. |
|
Status of the voice interface: · Down. · Up. · Down(Administratively)—The voice interface is shut down by using the shutdown command. |
|
|
Call Status |
· Status for FXS interfaces: ¡ Idle. ¡ Receiving number. ¡ Ringing. ¡ Listening to ringback tone. ¡ Playing busytone. ¡ Talking. ¡ Releasing. · Status for FXO interfaces: ¡ Idle. ¡ Receiving number. ¡ Ringing. ¡ Listening to ringback tone. ¡ Playing busytone ¡ Talking. ¡ Releasing. ¡ Bound and off-hook. ¡ Bound and on-hook. · Status for E&M interfaces: ¡ Idle. ¡ Sending number. ¡ Ringing. ¡ Listening to ringback tone. ¡ Playing busytone. ¡ Talking. ¡ Releasing. |
dtmf amplitude
Use dtmf amplitude to set the amplitude of DTMF tones.
Use undo dtmf amplitude to restore the default.
Syntax
dtmf amplitude value
undo dtmf amplitude
Default
The amplitude of DTMF tones is –9.0 dBm.
Views
Voice view
Predefined user roles
network-admin
Parameters
value: Specifies the amplitude of DTMF tones, in the range of –9.0 to –7.0 dBm.
Examples
# Set the amplitude of DTMF tones as –8.0 dBm.
<Sysname> system-view
[Sysname] voice-setup
[Sysname-voice] dtmf amplitude -8.0
dtmf sensitivity-level
Use dtmf sensitivity-level to set the DTMF tone detection sensitivity level.
Use undo dtmf sensitivity-level to restore the default.
Syntax
dtmf sensitivity-level { high | low | medium [ frequency-tolerance value ] }
undo dtmf sensitivity-level
Default
The DTMF tone detection sensitivity level is low.
Views
FXO interface view
FXS interface view
Predefined user roles
network-admin
Parameters
high: Specifies the DTMF tone detection sensitivity level to high. In this mode, the possibility of missing a true DTMF tone is low, but the possibility of false detection is high.
low: Specifies the DTMF tone detection sensitivity level to low. In this mode, the possibility of false detection is low, but the possibility of missing a true DTMF tone is high.
medium: Specifies the DTMF tone detection sensitivity level to medium.
frequency-tolerance value: Specifies the absolute frequency deviation (in percentage) when the DTMF tone detection sensitivity level is medium. The value range is 1.0 to 5.0, and the default is 2.0. The greater the value, the higher the probability of false detection.
The following matrix shows the medium [ frequency-tolerance value ] option and hardware compatibility:
|
Hardware |
Option compatibility |
|
DSIC-4FXS1FXO |
Yes |
|
HMIM-16FXS |
Yes |
|
HMIM-4FXO |
No |
|
HMIM-8FXS8FXO |
Yes |
|
SIC-1FXO |
No |
|
SIC-2FXO |
No |
|
SIC-2FXS1FXO |
Yes |
Usage guidelines
This command is supported only on the following interface modules:
· DSIC-4FXS1FXO.
· HMIM-16FXS.
· HMIM-4FXO.
· HMIM-8FXS8FXO.
· SIC-1FXO.
· SIC-2FXO.
· SIC-2FXS1FXO.
Examples
# Set the DTMF tone detection sensitivity level to high for FXS interface 2/1/1.
<Sysname> system-view
[Sysname] subscriber-line 2/1/1
[Sysname-subscriber-line2/1/1] dtmf sensitivity-level high
dtmf time
Use dtmf time to set the duration of DTMF tones and the interval between DTMF tones.
Use undo dtmf time to restore the default.
Syntax
dtmf time { interval interval | persist duration }
undo dtmf time { interval | persist }
Default
The duration of DTMF tones and the interval between DTMF tones are both 120 milliseconds.
Views
Voice view
Predefined user roles
network-admin
Parameters
interval interval: Specifies the interval between DTMF tones, in the range of 50 to 500 milliseconds.
persist duration: Specifies the duration of DTMF tones, in the range of 50 to 500 milliseconds.
Examples
# Set the duration of DTMF tones to 200 milliseconds, and the interval between DTMF tones to 300 milliseconds.
<Sysname> system-view
[Sysname] voice-setup
[Sysname-voice] dtmf time persist 200
[Sysname-voice] dtmf time interval 300
dtmf threshold analog
Use dtmf threshold analog to set the threshold parameters for DTMF tone detection.
Use undo dtmf threshold analog to restore the default.
Syntax
dtmf threshold analog index value
undo dtmf threshold analog index
Default
Indexes 0 to 12 correspond to 1400, 458, -9, -9, -9, -9, -3, -12, -12, 30, 300, 3200, and 375, respectively.
Views
E&M interface view
FXO interface view
FXS interface view
Predefined user roles
network-admin
Parameters
index: Specifies an index number in the range of 0 to 12.
value: Specifies a threshold value. The value range varies by index. For more information, see Table 3.
The system determines whether an input DTMF digit is valid according to the energy level of the row and column frequencies and the energy level of their doubled frequencies.
The maximum energy of the input signal in the row frequency group is ROWMAX, and the corresponding doubled frequency energy is ROW2nd. The maximum energy in the column frequency group is COLMAX, and the corresponding doubled frequency energy is COL2nd.
Table 3 Meaning of index numbers
|
Index |
Meaning |
Value range |
Remarks |
|
0 |
Lower limit of (ROWMAX + COLMAX). The input signal is recognized as a DTMF digit if (ROWMAX + COLMAX) > Value for index 0. |
1 to 4999, with a default of 1400 |
The larger the value, the higher the detection specificity and the lower the detection sensitivity. |
|
1 |
Upper limit of the maximum value of ROWMAX or COLMAX, whichever is larger. This limit is used for detecting the inter-digit delay. A detected digit is considered ended only when max (ROWMAX, COLMAX) < Value for index 1. |
1 to 4999, with a default of 458 |
The smaller the value, the higher the detection specificity and the lower the detection sensitivity. |
|
2 |
Lower limit of COLMAX/ROWMAX, where ROWMAX < COLMAX. An input signal is recognized as a DTMF digit only when 10 x (COLMAX/ROWMAX) > Value for index 2. |
–18 to –3 dB, with a default of –9 dB |
The larger the value, the higher the detection specificity and the lower the detection sensitivity. |
|
3 |
Lower limit of ROWMAX/COLMAX when COLMAX ≥ ROWMAX. An input signal is recognized as a DTMF digit only when 10 x (ROWMAX/COLMAX) > Value for index 3. |
–18 to –3 dB, with a default of –9 dB |
The smaller the value, the higher the detection specificity and the lower the detection sensitivity. |
|
4 |
Upper limit of the ratio of the second largest energy level from the row frequency group to ROWMAX. The ratio must be lower than this limit for the input signal to be recognized as a DTMF digit. |
–18 to –3 dB, with a default of –9 dB |
The smaller the value, the higher the detection specificity and the lower the detection sensitivity. |
|
5 |
Upper limit of the ratio of the second largest energy level from the column frequency group to COLMAX. The ratio must be lower than this limit for the input signal to be recognized as a DTMF digit. |
–18 to –3 dB, with a default of –9 dB |
The smaller the value, the higher the detection specificity and the lower the detection sensitivity. |
|
6 |
Upper limit of ROW2nd/ROWMAX. An input signal is recognized as a DTMF digit only when ROW2nd/ROWMAX < Value for index 6. |
–18 to –3 dB, with a default of –3 dB |
The smaller the value, the higher the detection specificity and the lower the detection sensitivity. |
|
7 |
Upper limit of COL2nd/COLMAX. The ratio must be lower than this limit for the input signal to be recognized as a DTMF digit. |
–18 to –3 dB, with a default of –12 dB |
The smaller the value, the higher the detection specificity and the lower the detection sensitivity. |
|
8 |
Upper limit of the ratio of the maximum energy level of two extra specified frequency points to max (ROWMAX, COLMAX). The ratio must be greater than this upper limit for the input signal to be recognized as a DTMF digit. |
–18 to –3 dB, with a default of –12 dB |
The smaller the value, the higher the detection specificity and the lower the detection sensitivity. |
|
9 |
Lower limit of the DTMF tone duration. The duration of DTMF key tone must be larger than this threshold for the input signal to be recognized as a DTMF digit. |
30 to 150 milliseconds, with a default of 30 milliseconds |
The larger the value, the higher the detection specificity and the lower the detection sensitivity. |
|
10 |
Frequency of the first extra frequency point specified for detection. In addition, it must be a frequency 100 Hz greater than or less than the row and column frequency pair. |
300 to 3400 Hz, with a default of 300 Hz |
N/A |
|
11 |
Frequency of the second extra frequency point specified for detection. In addition, it must be a frequency 100 Hz greater than or less than the row and column frequency pair. |
300 to 3400 Hz, with a default of 3200 Hz |
N/A |
|
12 |
Lower limit of the amplitude of the input signal. The average amplitude must be greater than this threshold for the input signal to be recognized as a DTMF digit. |
0 to 700, with a default of 375 |
The larger the value, the higher the detection specificity and the lower the detection sensitivity. |
The dtmf threshold analog command is used to fine tune detection sensitivity and specificity. You can use this command when DTMF tone detection fails. In normal cases, use the default settings for this command.
Examples
# Set the threshold value 40 for index 9 on FXS interface 2/1/1.
<Sysname> system-view
[Sysname] subscriber-line 2/1/1
[Sysname-subscriber-line2/1/1] dtmf threshold analog 9 40
echo-canceler
Use echo-canceler to set echo cancellation parameters.
Use undo echo-canceler to restore the default.
Syntax
echo-canceler { convergence-rate value | max-amplitude value | mix-proportion-ratio value | talk-threshold value }
undo echo-canceler { convergence-rate | max-amplitude | mix-proportion-ratio | talk-threshold }
Default
· The convergence rate of comfort noise amplitude is 0.
· The maximum amplitude of comfort noise is 256.
· The comfort noise mixture proportion control factor is 100.
· The threshold of two-way talk is 1.
Views
Voice view
Predefined user roles
network-admin
Parameters
convergence-rate value: Specifies the convergence rate of comfort noise amplitude, in the range of 0 to 511. The greater the value, the quicker the convergence.
max-amplitude value: Specifies the maximum amplitude of comfort noise, in the range of 0 to 2048. The greater the value, the greater the noise amplitude. The value 0 indicates that the system performs only nonlinear processing and does not add comfort noise.
mix-proportion-ratio value: Specifies the comfort noise mixture proportion control factor, in the range of 0 to 3000. The greater the value, the higher the proportion of noise in the hybrid of noise and voice.
talk-threshold value: Specifies the threshold of two-way talk, in the range of 0 to 2.
Usage guidelines
The echo cancellation parameters take effect only after the echo-canceler enable command is configured. The convergence-rate value and max-amplitude value options take effect only when the cng-on command is configured.
Examples
# Set the convergence rate of comfort noise amplitude to 50.
<Sysname> system-view
[Sysname] voice-setup
[Sysname-voice] echo-canceler convergence-rate 50
Related commands
cng-on
echo-canceler enable
echo-canceler delay (FXS/FXO/E&M interface view)
Use echo-canceler delay to set the echo cancellation delay on an analog voice interface.
Use undo echo-canceler delay to restore the default.
Syntax
echo-canceler delay milliseconds
undo echo-canceler delay
Default
The echo cancellation delay on an analog voice interface is 0 milliseconds.
Views
E&M interface view
FXO interface view
FXS interface view
Predefined user roles
network-admin
Parameters
milliseconds: Specifies the echo cancellation delay in the range of 0 to 64 milliseconds.
Usage guidelines
The echo cancellation delay is the time from when a subscriber speaks to when the subscriber hears the echo.
Examples
# Enable echo cancellation, and set the echo cancellation delay to 24 milliseconds on FXS interface 2/1/1.
<Sysname> system-view
[Sysname] subscriber-line 2/1/1
[Sysname-subscriber-line2/1/1] echo-canceler enable
[Sysname-subscriber-line2/1/1] echo-canceler delay 24
Related commands
echo-canceler enable
echo-canceler tail-length
echo-canceler enable (FXS/FXO/E&M interface view)
Use echo-canceler enable to enable echo cancellation on an analog voice interface.
Use undo echo-canceler enable to disable echo cancellation on an analog voice interface.
Syntax
echo-canceler enable
undo echo-canceler enable
Default
Echo cancellation is enabled on an analog voice interface.
Views
E&M interface view
FXO interface view
FXS interface view
Predefined user roles
network-admin
Examples
# Enable echo cancellation on FXS interface 2/1/1.
<Sysname> system-view
[Sysname] subscriber-line 2/1/1
[Sysname-subscriber-line2/1/1] echo-canceler enable
echo-canceler delay
echo-canceler tail-length
echo-canceler tail-length (FXS/FXO/E&M interface view)
Use echo-canceler tail-length to set the echo cancellation coverage on an analog voice interface.
Use undo echo-canceler tail-length to restore the default.
Syntax
echo-canceler tail-length milliseconds
undo echo-canceler tail-length
Default
The echo cancellation coverage is 128 milliseconds on an analog voice interface.
Views
E&M interface view
FXO interface view
FXS interface view
Predefined user roles
network-admin
Parameters
milliseconds: Specifies the echo cancellation coverage, in milliseconds. For FXS, FXO, and E&M interfaces, the value can only be 128.
Usage guidelines
Increasing the echo cancellation coverage can effectively cancel multipath echoes.
Examples
# Enable echo cancellation, and set the echo cancellation coverage to 32 milliseconds on FXS interface 2/1/1.
<Sysname> system-view
[Sysname] subscriber-line 2/1/1
[Sysname-subscriber-line2/1/1] echo-canceler enable
[Sysname-subscriber-line2/1/1] echo-canceler tail-length 32
Related commands
echo-canceler delay
echo-canceler enable
em log enable
Use em log enable to enable E&M call logging.
Use undo em log enable to disable E&M call logging.
Syntax
em log enable
undo em log enable
Default
E&M call logging is disabled.
Views
Voice view
Predefined user roles
network-admin
Usage guidelines
E&M call logging enables the device to log call events on E&M interfaces and send the log message to the information center. With the information center, you can set log message filtering and output rules, including output destinations. For more information about using the information center, see Network Management and Monitoring Configuration Guide.
Examples
# Enable E&M call logging.
<Sysname> system-view
[Sysname] voice-setup
[Sysname-voice] em log enable
hookoff-mode
Use hookoff-mode to specify an off-hook mode for an FXO interface.
Use undo hookoff-mode to restore the default.
Syntax
hookoff-mode { delay | immediate }
undo hookoff-mode
Default
An FXO interface operates in immediate off-hook mode.
Views
FXO interface view
Predefined user roles
network-admin
Parameters
delay: Specifies the delay off-hook mode.
immediate: Specifies the immediate off-hook mode.
Examples
# Specify the delay off-hook mode for FXO interface 2/2/1.
<Sysname> system-view
[Sysname] subscriber-line 2/2/1
[Sysname-subscriber-line 2/2/1] hookoff-mode delay
hookoff-mode delay bind
Use hookoff-mode delay bind to bind an FXS interface to an FXO interface.
Use undo hookoff-mode delay bind to restore the default.
Syntax
hookoff-mode delay bind fxs-subscriber [ ring-immediately ]
undo hookoff-mode
Default
No FXS interface is bound to an FXO interface.
Views
FXO interface view
Predefined user roles
network-admin
Parameters
fxs-subscriber: Specifies an FXS interface.
ring-immediately: Specifies the immediate ringing mode.
Usage guidelines
The bound FXS and FXO interfaces must be on the same device.
Use the ring-immediately keyword to quicken ringing synchronization between the FXO interface and its bound FXS interface. The called telephones supporting CID will display the calling number after the second ringing tone.
Examples
# Specify the delay off-hook mode for FXO interface 2/2/1 and bind FXS interface 2/1/1 to FXO interface 2/2/1.
<Sysname> system-view
[Sysname] subscriber-line 2/1/1
[Sysname-subscriber-line2/1/1] hookoff-mode delay bind 2/1/1
hookoff-time
Use hookoff-time to enable forced on-hook on an FXO interface.
Use undo hookoff-time to disable forced on-hook on an FXO interface.
Syntax
hookoff-time time
undo hookoff-time
Default
Forced on-hook is disabled on an FXO interface.
Views
FXO interface view
Predefined user roles
network-admin
Parameters
time: Specifies the amount of time from off-hook to forced on-hook, in the range of 60 to 36000 seconds.
Usage guidelines
In some countries, PBXs do not play busy tones, or the busy tones only last for a short period of time. When noise is present on a link, even silence detection-based automatic on-hook (silence-detect threshold) cannot detect the busy tones and fails to release the call after on-hook. To resolve this problem, configure forced on-hook. Forced on-hook disconnects a call when the specified time expires, even if the call is ongoing.
This command takes effect on all FXO interfaces of the card.
Examples
# Enable forced on-hook and set the timer to 500 seconds for FXO interface 2/2/1.
<Sysname> system-view
[Sysname] subscriber-line 2/2/1
[Sysname-subscriber-line2/2/1] hookoff-time 500
Related commands
silence-detect threshold
impedance
Use impedance to set the electrical impedance on an FXO or FXS interface.
Use undo impedance to restore the default.
Syntax
impedance { country-name | r550 | r600 | r650 | r700 | r750 | r800 | r850 | r900 | r950 }
undo impedance
Default
An FXO or FXS interface uses the electrical impedance of China.
Views
FXO interface view
FXS interface view
Predefined user roles
network-admin
Parameters
country-name: Specifies a country. It can be Australia, Austria, Belgium-Long, Belgium-Short, Brazil, China, Czech-Republic, Denmark, ETSI-Harmonized, Finland, France, German-Swiss, Greece, Hungary, India, Italy, Japan, Korea, Mexico, Netherlands, New Zealand, Norway, Portugal, Slovakia, South Africa, Spain, Sweden, U.K., US-Loaded-Line, US-Non-Loaded, or US-Special-Service.
r550: Specifies the 550-ohm real impedance.
r600: Specifies the 600-ohm real impedance.
r650: Specifies the 650-ohm real impedance.
r700: Specifies the 700-ohm real impedance.
r750: Specifies the 750-ohm real impedance.
r800: Specifies the 800-ohm real impedance.
r850: Specifies the 850-ohm real impedance.
r900: Specifies the 900-ohm real impedance.
r950: Specifies the 950-ohm real impedance.
Usage guidelines
Each country corresponds to an impedance value. You can specify an impedance value by specifying a country.
You must configure the same electrical impedance value on the originating and terminating devices.
Examples
# Set the electrical impedance to r600 on FXO interface 2/2/1.
<Sysname> system-view
[Sysname] subscriber-line 2/2/1
[Sysname-subscriber-line2/2/1] impedance r600
monitor enable
Use monitor enable to enable online monitoring on all FXO interfaces.
Use undo monitor enable to disable online monitoring on all FXO interfaces.
Syntax
monitor enable
undo monitor enable
Default
Online monitoring is enabled on all FXO interfaces.
Views
Voice view
Predefined user roles
network-admin
Usage guidelines
When online monitoring is enabled, the device monitors the physical states of all FXO interfaces on the device.
When online monitoring is disabled, the device does not detect the physical states of FXO interfaces. All FXO interfaces are always shown in up state.
Examples
# Disable online monitoring on all FXO interfaces.
<Sysname> system-view
[Sysname] voice-setup
[Sysname-voice] undo monitor enable
nlp-on (FXS/FXO/E&M interface view)
Use nlp-on to enable nonlinear processing on an analog voice interface.
Use undo nlp-on to disable nonlinear processing on an analog voice interface.
Syntax
nlp-on
undo nlp-on
Default
Nonlinear processing is enabled on an analog voice interface.
Views
E&M interface view
FXO interface view
FXS interface view
Predefined user roles
network-admin
Usage guidelines
This command is not supported on the following interface modules:
· DSIC-4FXS1FXO.
· HMIM-16FXS.
· HMIM-8FXS8FXO.
· SIC-2FXS1FXO.
This command takes effect only after the echo-canceler enable command is configured.
Examples
# Disable nonlinear processing on FXO interface 2/2/1.
<Sysname> system-view
[Sysname] subscriber-line 2/2/1
[Sysname-subscriber-line 2/2/1] undo nlp-on
Related commands
echo-canceler enable
open-trunk
Use open-trunk to enable E&M non-signaling mode.
Use undo open-trunk to disable E&M non-signaling mode.
Syntax
open-trunk { caller [ monitor interval ] | called }
undo open-trunk
Default
The E&M non-signaling mode is disabled.
Views
E&M interface view
Predefined user roles
network-admin
Parameters
caller: Enables E&M non-signaling mode on the originating device.
monitor interval: Specifies the monitoring time in the range of 60 to 600 seconds. If the terminating side does not go off-hook within the specified time, the originating side reinitiates a call to the terminating side. The monitoring timer starts immediately after this option is configured.
called: Enables E&M non-signaling mode on the terminating device.
Usage guidelines
You must configure the signal immediate command on the originating and terminating devices before configuring this command.
Configure the open-trunk caller [ monitor interval ] command on the originating device, and configure the open-trunk called command on the terminating device.
For the E&M non-signaling mode to work with PLAR, you must configure the private-line command on the originating device. For more information about PLAR, see Voice Configuration Guide.
Examples
# Enable the E&M non-signaling mode for E&M interface 2/3/1 on the originating device, and specify the monitoring time as 120 seconds.
<Sysname> system-view
[Sysname] subscriber-line 2/3/1
[Sysname-subscriber-line2/3/1] open-trunk caller monitor 120
Related commands
private-line
signal
passthrough
Use passthrough to enable E&M control signals pass-through.
Use undo passthrough to disable E&M control signals pass-through.
Syntax
passthrough
undo passthrough
Default
E&M control signals pass-through is disabled.
Views
E&M interface view
Predefined user roles
network-admin
Usage guidelines
Configure this command on both the originating and terminating devices.
Examples
# Enable E&M control signals pass-through on E&M interface 2/3/1.
<Sysname> system-view
[Sysname] subscriber-line 2/3/1
[Sysname-subscriber-line2/3/1] passthrough
pcm-passthrough
Use pcm-passthrough to enable PCM pass-through.
Use undo pcm-passthrough to disable PCM pass-through.
Syntax
Centralized devices in standalone mode:
pcm-passthrough subslot subslot-number
undo pcm-passthrough subslot subslot-number
Distributed devices in standalone mode/centralized devices in IRF mode:
pcm-passthrough slot slot-number subslot subslot-number
undo pcm-passthrough slot slot-number subslot subslot-number
Distributed devices in IRF mode:
pcm-passthrough chassis chassis-number slot slot-number subslot subslot-number
undo pcm-passthrough chassis chassis-number slot slot-number subslot subslot-number
Default
PCM pass-through is disabled.
Views
Voice view
Predefined user roles
network-admin
Parameters
subslot subslot-number: Specifies a subcard by its subslot number. (Centralized devices in standalone mode.)
slot slot-number subslot subslot-number: Specifies a subcard on an IRF member device. The slot-number argument represents the member ID of the IRF member device. The subslot-number argument represents the subslot number of the subcard. (Centralized devices in IRF mode.)
slot slot-number subslot subslot-number: Specifies a subcard on a card. The slot-number argument represents the slot number of the card. The subslot-number argument represents the subslot number of the subcard. (Distributed devices in standalone mode.)
chassis chassis-number slot slot-number subslot subslot-number: Specifies a subcard of a card on an IRF member device. The chassis-number argument represents the member ID of the IRF member device. The slot-number argument represents the slot number of the card. The subslot-number argument represents the subslot number of the subcard. (Distributed devices in IRF mode.)
Usage guidelines
The following matrix shows the command and hardware compatibility:
|
Hardware |
Command compatibility |
|
MSR810/810-W/810-W-DB/810-LM/810-W-LM/810-10-PoE/810-LM-HK/810-W-LM-HK/810-LMS/810-LUS |
No |
|
MSR2600-6-X1/2600-10-X1 |
No |
|
MSR 2630 |
No |
|
MSR3600-28/3600-51 |
No |
|
MSR3600-28-SI/3600-51-SI |
No |
|
MSR3610-X1/3610-X1-DP/3610-X1-DC/3610-X1-DP-DC |
No |
|
MSR 3610/3620/3640/3660 |
Yes (supported only on routers installed with E&M interface modules.) |
|
MSR5620/5660/5680 |
Yes (supported only on routers installed with E&M interface modules.) |
|
Hardware |
Command compatibility |
|
MSR810-LM-GL |
No |
|
MSR810-W-LM-GL |
No |
|
MSR830-6EI-GL |
No |
|
MSR830-10EI-GL |
No |
|
MSR830-6HI-GL |
No |
|
MSR830-10HI-GL |
No |
|
MSR2600-6-X1-GL |
No |
|
MSR3600-28-SI-GL |
No |
This command is supported only for PCM data that uses G.711 A-Law.
For this command to take effect, you must reboot the specified subcard. To check whether this command takes effect, use the display device verbose command.
Examples
# (Centralized devices in standalone mode.) Enable PCM pass-through for subcard 3.
<Sysname> system-view
[Sysname] voice-setup
[Sysname-voice] pcm-passthrough subslot 3
This command will reboot the card in the specified subslot. Continue? [Y/N]: Y
plc-mode
Use plc-mode to specify a packet loss compensation mode on an FXS or FXO interface.
Use undo plc-mode to restore the default.
Syntax
plc-mode { general | specific }
undo plc-mode
Default
An FXS or FXO interface uses the gateway-specific compensation mode.
Views
FXO interface view
FXS interface view
Predefined user roles
network-admin
Parameters
general: Uses the general compensation mode to reconstruct lost packets. This mode applies to discrete packet loss.
specific: Uses the voice gateway-specific compensation mode to reconstruct lost packets. This mode applies to continuous packet loss.
Examples
# Specify the general compensation mode to reconstruct lost packets on FXS interface 2/1/1.
<Sysname> system-view
[Sysname] subscriber-line 2/1/1
[Sysname-subscriber-line2/1/1] plc-mode general
receive gain (FXS/FXO/E&M interface view)
Use receive gain to set the input gain value on an analog voice interface.
Use undo receive gain to restore the default.
Syntax
receive gain value
undo receive gain
Default
The input gain value on an analog voice interface is 0 dB.
Views
E&M interface view
FXO interface view
FXS interface view
Predefined user roles
network-admin
Parameters
value: Specifies the input gain value in the range of –14.0 to +13.9 dB.
Usage guidelines
When the voice signals on the line attenuate, you can use this command to increase the input gain.
Gain adjustment might lead to call failures. If necessary, do it under the guidance of technical engineers.
Examples
# Set the input gain value to 3.5 dB on FXS interface 2/1/1.
<Sysname> system-view
[Sysname] subscriber-line 2/1/1
[Sysname-subscriber-line2/1/1] receive gain 3.5
transmit gain
ring-detect debounce
Use ring-detect debounce to set the debounce time for ring detection on an FXO interface.
Use undo ring-detect debounce to restore the default.
Syntax
ring-detect debounce value
undo ring-detect debounce
Default
The debounce time for ring detection is 10 milliseconds on an FXO interface.
Views
FXO interface view
Predefined user roles
network-admin
Parameters
value: Specifies the debounce time for ring detection, in the range of 4 to 15 milliseconds.
Usage guidelines
|
|
IMPORTANT: This command is supported only on the HMIM-4FXO, SIC-1FXO, and SIC-2FXO interface modules. |
By setting different debounce times, you can detect ring signals of different frequencies and waveforms.
Do not set the debounce time during a conversation.
Set the debounce time to be no less than 8 milliseconds. Otherwise, line interference might cause false ring tone recognition.
If you configure this command on an FXO interface of a card, the configuration takes effect on all FXO interfaces of the card.
Examples
# Set the debounce time for ring detection as 15 milliseconds on FXO interface 2/2/1.
<sysname> system-view
[sysname] subscriber-line 2/2/1
[sysname-subscriber-line2/2/1] ring-detect debounce 15
ring-detect frequency
Use ring-detect frequency to set the frequency value for ring detection on an FXO interface.
Use undo ring-detect frequency to restore the default.
Syntax
ring-detect frequency value
undo ring-detect frequency
Default
The frequency value for ring detection is 40 Hz on an FXO interface.
Views
FXO interface view
Predefined user roles
network-admin
Parameters
value: Specifies the frequency value for ring detection, in Hz. The value is in the range of 30 to 100 in increments of 10.
Usage guidelines
This command is supported only on the DSIC-4FXS1FXO, HMIM-8FXS8FXO, and SIC-2FXS1FXO interface modules.
Examples
# Set the frequency value for ring detection on FXO interface 2/2/1 to 100 Hz.
<sysname> system-view
[sysname] subscriber-line 2/2/1
[sysname-subscriber-line2/2/1] ring-detect frequency 100
send-busytone enable
Use send-busytone enable to enable busy tone sending on an FXO interface.
Use undo send-busytone enable to disable busy tone sending on an FXO interface.
Syntax
undo send-busytone enable
Default
Busy tone sending is disabled on an FXO interface.
Views
FXO interface view
Predefined user roles
network-admin
Usage guidelines
If the PBX does not send busy tones, you can configure an FXO interface to send busy tones.
Examples
# Enable FXO interface 2/2/1 to send busy tones.
<Sysname> system-view
[Sysname] subscriber-line 2/2/1
[Sysname-subscriber-line2/2/1] send-busytone enable
Related commands
send-busytone time
send-busytone time
Use send-busytone time to set the busy tone duration.
Use undo send-busytone time to restore the default.
Syntax
send-busytone time seconds
undo send-busytone time
Default
The busy tone duration is 3 seconds.
Views
FXO interface view
Predefined user roles
network-admin
Parameters
time seconds: Specifies the busy tone duration in the range of 2 to 15 seconds.
Usage guidelines
The send-busytone time command takes effect only after you configure the send-busytone enable command.
Examples
# Enable busy tone sending on FXO interface 2/2/1, and set the busy tone duration to 5 seconds.
<Sysname> system-view
[Sysname] subscriber-line 2/2/1
[Sysname-subscriber-line2/2/1] send-busytone enable
[Sysname-subscriber-line2/2/1] send-busytone time 5
Related commands
send-busytone enable
shutdown (FXS/FXO/E&M interface view)
Use shutdown to shut down an analog voice interface.
Use undo shutdown to bring up an analog voice interface.
Syntax
shutdown
undo shutdown
Default
An analog voice interface is up.
Views
E&M interface view
FXO interface view
FXS interface view
Predefined user roles
network-admin
Examples
# Shut down FXS interface 2/1/1.
<Sysname> system-view
[Sysname] subscriber-line 2/1/1
[Sysname-subscriber-line2/1/1] shutdown
signal
Use signal to specify a start mode for an E&M interface.
Use undo signal to restore the default.
Syntax
signal { delay | immediate | wink }
undo signal
Default
An E&M interface uses the immediate start mode.
Views
E&M interface view
Predefined user roles
network-admin
Parameters
delay: Specifies delay start mode.
immediate: Specifies immediate start mode.
wink: Specifies wink start mode.
Usage guidelines
You must configure the same start mode on the originating and terminating devices.
Examples
# Specify the delay mode for E&M interface 2/3/1.
<Sysname> system-view
[Sysname] subscriber-line 2/3/1
[Sysname-subscriber-line2/3/1] signal delay
silence-detect threshold
Use silence-detect threshold to configure silence detection-based automatic on-hook.
Use undo silence-detect to restore the default.
Syntax
silence-detect threshold threshold time time-length
undo silence-detect
Default
The silence threshold is 20, and the silence duration for automatic on-hook is 7200 seconds (2 hours).
Views
FXO interface view
Predefined user roles
network-admin
Parameters
threshold: Specifies the silence threshold in the range of 0 to 200. If the amplitude of voice signals from the PBX is smaller than this value, the system regards the voice signals as silence.
time-length: Specifies the silence duration for automatic on-hook, in the range of 2 to 7200 seconds. When the silence duration exceeds the specified duration, the FXO interface performs on-hook automatically.
Usage guidelines
If the device fails to detect busy tones or the PBX does not play busy tones, you can use this command to implement automatic on-hook. When the duration of silence exceeds the configured silence duration, the FXO interface automatically disconnects the call.
Improper configuration of this feature can lead to false on-hook. A good practice is to test multiple sets of parameters and choose the set of parameters that can quickly release the FXO interface after on-hook and does not cause false on-hook.
Examples
# Set the silence threshold to 20 and the silence duration to 100 seconds for FXO interface 2/2/1.
<Sysname> system-view
[Sysname] subscriber-line 2/2/1
[Sysname-subscriber-line2/2/1] silence-detect threshold 20 time 100
slic-gain
Use slic-gain to set the output gain of the subscriber line interface circuit (SLIC) chip on an E&M interface.
Use undo slic-gain to restore the default.
Syntax
slic-gain { 0 | 1 }
undo slic-gain
Default
The output gain of the SLIC chip is 0 (0.8 dB) on an E&M interface.
Views
E&M interface view
Predefined user roles
network-admin
Parameters
0: Specifies the output gain of the SLIC chip to 0.8 dB.
1: Specifies the output gain of the SLIC chip to 2.1 dB.
Examples
# Set the output gain of the SLIC chip to 1 (2.1 dB) on E&M interface 2/3/1.
<Sysname> system-view
[Sysname] subscriber-line 2/3/1
[Sysname-subscriber-line2/3/1] slic-gain 1
subscriber-line
Use subscriber-line to enter voice interface view.
Syntax
subscriber-line line-number
Views
System view
Predefined user roles
network-admin
Parameters
line-number: Specifies a voice interface number.
Examples
# Enter the view of FXS interface 2/1/1.
<Sysname> system-view
[Sysname] subscriber-line 2/1/1
[Sysname-subscriber-line2/1/1]
timer dial-interval
Use timer dial-interval to set the maximum interval for dialing the next digit.
Use undo timer dial-interval to restore the default.
Syntax
timer dial-interval interval
undo timer dial-interval
Default
The maximum interval for dialing the next digit is 10 seconds.
Views
E&M interface view
FXO interface view
FXS interface view
Predefined user roles
network-admin
Parameters
interval: Specifies the maximum interval for dialing the next digit, in the range of 1 to 300 seconds.
Usage guidelines
This timer restarts each time the subscriber dials a digit. If the timer expires before the subscriber dials the next digit, the system prompts the subscriber that the dialing times out.
The maximum interval from off-hook to dialing the first digit is set by the timer first-dial command.
Examples
# Set the maximum interval for dialing the next digit to 5 seconds on FXS interface 2/1/1.
<Sysname> system-view
[Sysname] subscriber-line 2/1/1
[Sysname-subscriber-line2/1/1] timer dial-interval 5
timer disconnect-pulse
Use timer disconnect-pulse to set the LCFO signal duration on an FXS interface.
Use undo timer disconnect-pulse to restore the default.
Syntax
timer disconnect-pulse value
undo timer disconnect-pulse
Default
The LCFO signal duration is 750 milliseconds on an FXS interface.
Views
FXS interface view
Predefined user roles
network-admin
Parameters
value: Specifies the LCFO signal duration in the range of 1 to 1500 milliseconds in increments of 30.
Examples
# Set the LCFO signal duration to 90 milliseconds on FXS interface 2/1/1.
<Sysname> system-view
[Sysname] subscriber-line 2/1/1
[Sysname-subscriber-line2/1/1] timer disconnect-pulse 90
Related commands
disconnect lcfo
timer first-dial
Use timer first-dial to set the timeout time between off-hook and dialing the first digit on an FXS or FXO interface.
Use undo timer first-dial to restore the default.
Syntax
timer first-dial seconds
undo timer first-dial
Default
The timeout time between off-hook and dialing the first digit is 10 seconds on an FXS or FXO interface.
Views
FXO interface view
FXS interface view
Predefined user roles
network-admin
Parameters
seconds: Specifies the timeout time between off-hook and dialing the first digit, in the range of 1 to 300 seconds.
Usage guidelines
If the timer expires before the subscriber dials the first digit, the system prompts the subscriber that the dialing times out.
Examples
# Set the timeout time between off-hook and dialing the first digit to 15 seconds for FXS interface 2/1/1.
<Sysname> system-view
[Sysname] subscriber-line 2/1/1
[Sysname-subscriber-line2/1/1] timer first-dial 15
timer hookflash-detect
Use timer hookflash-detect to set the hookflash time range on an FXS interface.
Use undo timer hookflash-detect to restore the default.
Syntax
timer hookflash-detect hookflash-range
undo timer hookflash-detect
Default
The hookflash time range is 50 to 180 milliseconds on an FXS interface.
Views
FXS interface view
Predefined user roles
network-admin
Parameters
hookflash-range: Specifies the hookflash duration range in the range of 50 to 1200 milliseconds.
Usage guidelines
If an on-hook lasts for a period that falls within the hookflash time range, it is regarded as a hookflash.
Examples
# Set the hookflash time range to 100 to 200 milliseconds for FXS interface 2/1/1.
<Sysname> system-view
[Sysname] subscriber-line 2/1/1
[Sysname-subscriber-line2/1/1] timer hookflash-detect 100-200
timer hookoff-interval
Use timer hookoff-interval to set the interval between on-hook and off-hook on an FXO interface.
Use undo timer hookoff-interval to restore the default.
Syntax
timer hookoff-interval milliseconds
undo timer hookoff-interval
Default
The interval between on-hook and off-hook is 500 milliseconds on an FXO interface.
Views
FXO interface view
Predefined user roles
network-admin
Parameters
milliseconds: Specifies the interval between on-hook and off-hook, in the range of 500 to 4000 milliseconds.
Usage guidelines
The on-hook/off-hook state of the bound FXS and FXO interfaces is consistent. When the FXS interface goes off-hook, the bound FXO interface must perform an on-hook operation before going off-hook. This command configures the interval between the on-hook and off-hook.
Examples
# Set the interval from on-hook to off-hook to 600 milliseconds on FXO interface 2/2/1.
<Sysname> system-view
[Sysname] subscriber-line 2/2/1
[Sysname-subscriber-line2/2/1] timer hookoff-interval 600
hookoff-mode delay bind
timer ring-back
Use timer ring-back to set the maximum duration for playing ringback tones.
Use undo timer ring-back to restore the default.
Syntax
timer ring-back seconds
undo timer ring-back
Default
The maximum duration for playing ringback tones is 60 seconds.
Views
E&M interface view
FXO interface view
FXS interface view
Predefined user roles
network-admin
Parameters
seconds: Specifies the maximum duration for playing ringback tones, in the range of 5 to 120 seconds.
Usage guidelines
If the callee does not answer the call within the maximum duration for playing ringback tones, the system notifies the caller that the call is ended.
Examples
# Set the maximum duration to 8 seconds for playing ringback tones on FXS interface 2/1/1.
<Sysname> system-view
[Sysname] subscriber-line 2/1/1
[Sysname-subscriber-line2/1/1] timer ring-back 8
timer wait-digit
Use timer wait-digit to set the timeout time for the terminating device to wait for the first digit on an E&M interface.
Use undo timer wait-digit to restore the default.
Syntax
timer wait-digit { seconds | infinity }
undo timer wait-digit
Default
The timeout time for an E&M interface on the terminating device to wait for the first digit is 5 seconds.
Views
E&M interface view
Predefined user roles
network-admin
Parameters
seconds: Specifies the timeout time for the terminating device to wait for the first digit, in the range of 3 to 600 seconds.
infinity: Specifies no time limit.
Usage guidelines
If the terminating device does not receive the first digit within the configured timeout time, it plays busy tones.
Examples
# Set the timeout time to 10 seconds for E&M interface 2/3/1 to wait for the first digit.
<Sysname> system-view
[Sysname] subscriber-line 2/3/1
[Sysname-subscriber-line2/3/1] timer wait-digit 10
transmit gain (FXS/FXO/E&M interface view)
Use transmit gain to set the output gain value on an analog voice interface.
Use undo transmit gain to restore the default.
Syntax
transmit gain value
undo transmit gain
Default
The output gain value is 0 dB on an analog voice interface.
Views
E&M interface view
FXO interface view
FXS interface view
Predefined user roles
network-admin
Parameters
value: Specifies the output gain value in the range of –14.0 to +13.9 dB.
Usage guidelines
If the power of output voice signals is larger than the power required by the output line, you can use this command to reduce the output gain.
Output gain adjustment might lead to call failures. Do it under the guidance of technical personnel.
Examples
# Set the output gain value to –6.7 dB on FXS interface 2/1/1.
<Sysname> system-view
[Sysname] subscriber-line 2/1/1
[Sysname-subscriber-line2/1/1] transmit gain -6.7
receive gain
type
Use type to configure the E&M signal type on an E&M interface.
Use undo type to restore the default.
Syntax
type { 1 | 2 | 3 | 5 }
undo type
Default
The E&M signal type on an E&M interface is 5.
Views
E&M interface view
Predefined user roles
network-admin
Parameters
1: Specifies E&M signal type I.
2: Specifies E&M signal type II.
3: Specifies E&M signal type III.
5: Specifies E&M signal type V.
Usage guidelines
You must configure the same E&M signal type on the originating and terminating devices.
Examples
# Configure the signal type as 3 for E&M interface 2/3/1.
<Sysname> system-view
[Sysname] subscriber-line 2/3/1
[Sysname-subscriber-line2/3/1] type 3
Digital voice interface commands
ani
Use ani to configure the terminating side to request calling information (calling category and calling number) from the originating side.
Use undo ani to restore the default.
Syntax
ani { all | ka }
undo ani
Default
The terminating side does not request calling information from the originating side.
Views
R2 CAS view
Predefined user roles
network-admin
Parameters
all: Configures the terminating side to request the calling category and calling number.
ka: Configures the terminating side to request only the calling category.
Examples
# Configure the terminating side to request the calling category and calling number.
[Sysname] controller e1 2/4/1
[Sysname-E1 2/4/1] timeslot-set 0 timeslot-list 1-31 signal r2
[Sysname-E1 2/4/1] cas 0
[Sysname-cas 2/4/1:0] ani all
ani-digit
ani-collected
Use ani-collected to set a range for the number of calling number digits to be collected.
Use undo ani-collected to restore the default.
Syntax
ani-collected min min-value max max-value
undo ani-collected
Default
No restriction is placed on the number of calling number digits to be collected.
Views
R2 CAS view
Predefined user roles
network-admin
Parameters
min min-value: Specifies the minimum number of calling number digits to be collected, in the range of 1 to 31.
max max-value: Specifies the maximum number of calling number digits to be collected, in the range of 1 to 31. This value must be equal to or greater than the minimum number.
Usage guidelines
This command is available only for the MFC mode of R2 signaling.
For this command to take effect, you must first configure the ani all command.
When the terminating side is enabled to request the calling party information from the originating side, one of the following events occurs:
· If the number of calling number digits is less than the minimum number, the terminating side clears the call.
· If the number of calling number digits is greater than the maximum number, the terminating side forwards the call after it collects the maximum number of digits.
· If the number of calling number digits falls in the range of the minimum number to the maximum number, the terminating side collects all calling number digits. Then, it forwards the call.
Examples
# Set the minimum number to 3 and the maximum number to 20 for calling number digits to be collected.
<Sysname> system-view
[Sysname] controller e1 6/0
[Sysname-E1 6/0] cas 1
[Sysname-cas 6/0:1] ani all
[Sysname-cas 6/0:1] ani-collected min 3 max 20
ani-digit
Use ani-digit to set the number of dialed digits that the terminating side collects before requesting calling information.
Use undo ani-digit to restore the default.
Syntax
ani-offset number
undo ani-offset
Default
The number of dialed digits that the terminating side collects before requesting calling information is 1.
Views
R2 CAS view
Predefined user roles
network-admin
Parameters
number: Specifies the number of dialed digits, in the range of 1 to 10.
Usage guidelines
When the number of collected digits is smaller than the specified number, the terminating side waits for the next digit until the timer expires. When the number of collected digits equals or exceeds the specified number, the terminating side requests the calling information.
This command takes effect only after you configure the ani all command.
Examples
# Set the number of collected digits to 3.
<Sysname> system-view
[Sysname] controller e1 2/4/1
[Sysname-E1 2/4/1] timeslot-set 0 timeslot-list 1-31 signal r2
[Sysname-E1 2/4/1] cas 0
[Sysname-cas 2/4/1:0] ani all
[Sysname-cas 2/4/1:0] ani-digit 3
ani
ani-timeout
Use ani-timeout to set the interdigit timeout time in interregister signaling.
Use undo ani-timeout to restore the default.
Syntax
ani-timeout timer-length
undo ani-timeout
Default
The interdigit timeout time in interregister signaling is 3 seconds.
Views
R2 CAS view
Predefined user roles
network-admin
Parameters
timer-length: Specifies the interdigit timeout time in interregister signaling, in the range of 1 to 15 seconds.
Usage guidelines
In interregister signaling, the terminating side starts an interdigit timeout timer after it sends a signal to the originating side. It clears the call if it does not receive a signal from the originating side when the timer expires.
This command is available only for the MFC mode of R2 signaling.
For this command to take effect, you must first configure the ani all command.
Examples
# Set the interdigit timeout time to 5 seconds in interregister signaling.
<Sysname> system-view
[Sysname] controller e1 6/0
[Sysname-E1 6/0] cas 1
[Sysname-cas 6/0:1] ani all
[Sysname-cas 6/0:1] ani-timeout 5
answer enable
Use answer enable to configure the originating side to require the terminating side to send answer signals.
Use undo answer enable to configure the originating side to not require the terminating side to send answer signals.
Syntax
answer enable
undo answer enable
Default
The originating side requires the terminating side to send answer signals.
Views
R2 CAS view
Predefined user roles
network-admin
Usage guidelines
If the originating side does not require the terminating side to send answer signals, it directly establishes a call with the terminating side. If the originating side requires the terminating side to send answer signals, the originating side establishes a call with the terminating side after receiving answer signals.
Examples
# Configure the originating side to not require the terminating side to send answer signals.
<Sysname> system-view
[Sysname] controller e1 2/4/1
[Sysname-E1 2/4/1] timeslot-set 0 timeslot-list 1-31 signal r2
[Sysname-E1 2/4/1] cas 0
[Sysname-cas 2/4/1:0] undo answer enable
callmode
Use callmode to specify a call connection mode.
Use undo callmode to restore the default.
Syntax
callmode { segment | terminal }
undo callmode
Default
The call connection mode is terminal-to-terminal.
Views
R2 CAS view
Predefined user roles
network-admin
Parameters
segment: Specifies the segment-to-segment call connection mode.
terminal: Specifies the terminal-to-terminal call connection mode.
Examples
# Specify the segment-to-segment call connection mode.
<Sysname> system-view
[Sysname] controller e1 2/4/1
[Sysname-E1 2/4/1] timeslot-set 0 timeslot-list 1-31 signal r2
[Sysname-E1 2/4/1] cas 0
[Sysname-cas 2/4/1:0] callmode segment
cas
Use cas to enter R2 CAS view.
Use undo cas to exit R2 CAS view and delete the settings in R2 CAS view.
Syntax
cas ts-set-number
undo cas ts-set-number
Views
E1 interface view
T1 interface view
Predefined user roles
network-admin
Parameters
ts-set-number: Specifies a timeslot set by its number. For an E1 interface, the value range is 0 to 30. For a T1 interface, the value range is 0 to 23.
Usage guidelines
The timeslot set specified in this command must have already been created using the timeslot-set command.
Examples
# Enter the R2 CAS view of timeslot set 5.
<Sysname> system-view
[Sysname] controller e1 2/4/1
[Sysname-E1 2/4/1] timeslot-set 5 timeslot-list 1-31 signal r2
[Sysname-E1 2/4/1] cas 5
[Sysname-cas 2/4/1:5]
timeslot-set
clear-forward-ack enable
Use clear-forward-ack enable to configure the terminating side to send a clear-back signal when the originating side first disconnects the line.
Use undo clear-forward-ack enable to configure the terminating side to not send a clear-back signal when the originating side first disconnects the line.
Syntax
clear-forward-ack enable
undo clear-forward-ack enable
Default
The terminating side does not send a clear-back signal when the originating side first disconnects the line.
Views
R2 CAS view
Predefined user roles
network-admin
Examples
# Configure the terminating side to send a clear-back signal when the originating side first disconnects the line.
<Sysname> system-view
[Sysname] controller e1 2/4/1
[Sysname-E1 2/4/1] timeslot-set 0 timeslot-list 1-31 signal r2
[Sysname-E1 2/4/1] cas 0
[Sysname-cas 2/4/1:0] clear-forward-ack enable
cng-on (digital voice interface view)
Use cng-on to enable CNG on a digital voice interface.
Use undo cng-on to disable CNG on a digital voice interface.
Syntax
cng-on
undo cng-on
Default
CNG is enabled on a digital voice interface.
Views
Digital voice interface view
Predefined user roles
network-admin
Usage guidelines
CNG generates and fills comfortable background noise into silent gaps during a conversation.
Examples
# Disable the CNG feature on digital voice interface 2/4/1:15.
<Sysname> system-view
[Sysname] subscriber-line 2/4/1:15
[Sysname-subscriber-line2/4/1:15] undo cng-on
default (digital voice interface view)
Use default to restore the default settings on a digital voice interface.
Syntax
default
Views
Digital voice interface view
Predefined user roles
network-admin
Usage guidelines
The default command impacts some services. Make sure you are fully aware of the impacts of this command when you execute it on a live network.
This command might fail to restore the default settings for some commands for reasons such as command dependencies or system restrictions. Use the display this command in interface view to identify these commands. Then use their undo forms or follow the command reference to restore their default settings. If your restoration attempt still fails, follow the error message instructions to resolve the problem.
Examples
# Restore the default settings for digital voice interface 2/4/1:15.
[Sysname] subscriber-line 2/4/1:15
[Sysname-subscriber-line2/4/1:15] default
description (digital voice interface view)
Use description to configure a description for a digital voice interface.
Use undo description to restore the default.
Syntax
description text
undo description
Default
The description for a digital voice interface is interface name Interface, for example, Subscriber-line2/4/1 Interface.
Views
Digital voice interface view
Predefined user roles
network-admin
Parameters
text: Specifies a description, a case-sensitive string of 1 to 80 characters.
Examples
# Configure the description as digital for digital voice interface 2/4/1:15.
<Sysname> system-view
[Sysname] subscriber-line 2/4/1:15
[Sysname-Subscriber-line2/4/1:15] description digital
display voice subscriber-line
Use display voice subscriber-line to display information about digital voice interfaces.
Syntax
For E1 and T1 interfaces:
display voice subscriber-line line-number:{ ts-set-number | ts-set-number.sub-timeslot | 15 | 23 }
For BSV interfaces:
display voice subscriber-line line-number.subnumber
Views
Any view
Predefined user roles
network-admin
network-operator
Parameters
line-number: Specifies an E1 or T1 interface by its number.
ts-set-number: Specifies a timeslot set by its number.
sub-timeslot: Specifies a timeslot.
subnumber: Specifies a subinterface by its number (1 or 2).
15: Number for the PRI set created by bundling the timeslots of an E1 interface.
23: Number for the PRI set created by bundling the timeslots of a T1 interface.
Examples
# Display information about voice interface 2/4/1:0 generated on an E1 interface.
<Sysname> display voice subscriber-line 2/4/1:0
Current information subscriber-line2/4/1:0
Type: R2
Status: Up
Call status:
TS 1: Idle
TS 2: Idle
TS 3: Idle
TS 4: Idle
TS 5: Idle
TS 6: Idle
TS 7: Idle
TS 8: Idle
TS 9: Idle
TS 10: Idle
TS 11: Idle
TS 12: Idle
TS 13: Idle
TS 14: Idle
TS 15: Idle
TS 17: Idle
TS 18: Idle
# Display information about voice interface 2/5/1 generated on a BSV interface.
<Sysname> display voice subscriber-line 2/5/1
Current information : subscriber-line2/5/1
Type: ISDN
Status: Up
Call status:
TS 0: Idle
TS 1: Idle
# Display information about a subinterface of voice interface 2/5/1.1 generated on a BSV interface.
<Sysname> display voice subscriber-line 2/5/1.1
Current information : subscriber-line2/5/1.1
Type: ISDN
Status: Up
Call status: Idle
|
Field |
Description |
|
Type |
Signaling type on the voice interface: R2 or ISDN. |
|
Status |
Status of the voice interface: · Down. · Up. · Down(Administratively)—The voice interface has been shut down by using the shutdown command. |
|
TS |
Timeslot in the timeslot set. |
|
Call Status |
· Call status for R2 signaling: ¡ Idle. ¡ Seize. ¡ Seize Ack. ¡ Talking. ¡ Releasing. · Call status for ISDN signaling: ¡ Idle ¡ Call in. ¡ Call out. ¡ Ring. ¡ Ringback tone. ¡ Talking. ¡ Releasing. |
dl-bits
Use dl-bits to configure the ABCD bit pattern for line signals.
Use undo dl-bits to restore the default.
Syntax
dl-bits { answer | blocking | clear-back | clear-forward | idle | release-guard | seizing | seizing-ack } { receive | transmit } ABCD
undo dl-bits { answer | blocking | clear-back | clear-forward | idle | release-guard | seizing | seizing-ack } { receive | transmit }
Default
The defaults are the values of the ITU-T standard, as shown in Table 5.
Table 5 Default values of signals in line signaling
|
Signal |
Default rx-bits ABCD |
Default tx-bits ABCD |
|
answer |
0101 |
0101 |
|
blocking |
1101 |
1101 |
|
clear-back |
1101 |
1101 |
|
clear-forward |
1001 |
1001 |
|
idle |
1001 |
1001 |
|
seizing |
0001 |
0001 |
|
seizing-ack |
1101 |
1101 |
|
release-guard |
1001 |
1001 |
Views
R2 CAS view
Predefined user roles
network-admin
Parameters
answer: Specifies the answer signal.
blocking: Specifies the blocking signal.
clear-back: Specifies the clear-back signal.
clear-forward: Specifies the clear-forward signal.
idle: Specifies the idle signal.
seizing: Specifies the seizure signal.
seizing-ack: Specifies the seizure acknowledgment signal.
release-guard: Specifies the release guard signal.
receive: Applies the signaling setting to received line signals.
transmit: Applies the signaling setting to transmitted line signals.
ABCD: Specifies the ABCD bit pattern of line signals, in the range of 0000 to 1111.
# Set the ABCD bit pattern to 1101 for received idle signals and to 1011 for transmitted idle signals.
[Sysname] controller e1 2/4/1
[Sysname-E1 2/4/1] timeslot-set 0 timeslot-list 1-31 signal r2
[Sysname-E1 2/4/1] cas 0
[Sysname-cas 2/4/1:0] dl-bits idle receive 1101
[Sysname-cas 2/4/1:0] dl-bits idle transmit 1011
dtmf enable
Use dtmf enable to enable DTMF to receive and send numbers.
Use undo dtmf enable to restore the default.
Syntax
undo dtmf enable
Default
MFC is used to receive and send numbers.
Views
R2 CAS view
Predefined user roles
network-admin
Usage guidelines
R2 signaling supports the following modes to send and receive numbers:
· MFC—The originating and terminating sides use interregister signaling to transmit and request number information, including the calling number, line information, and billing. In the exchange process, the terminating side sends responses to the originating side.
· DTMF—The originating side transmits the called number to the terminating side digit by digit. The terminating side does not send any responses for confirmation.
Compared with the MFC mode, the DTMF mode has a faster connection speed but transmits a smaller amount of information.
You must configure the same mode on the originating and terminating devices. Otherwise, the two sides cannot establish any calls.
Examples
# Enable DTMF to receive and send numbers.
[Sysname] controller e1 2/4/1
[Sysname-E1 2/4/1] timeslot-set 0 timeslot-list 1-31 signal r2
[Sysname-E1 2/4/1] cas 0
[Sysname-cas 2/4/1:0] dtmf enable
timer dtmf-delay
echo-canceler delay (digital voice interface view)
Use echo-canceler delay to set the echo cancellation delay on a digital voice interface.
Use undo echo-canceler delay to restore the default.
Syntax
echo-canceler delay milliseconds
undo echo-canceler delay
Default
The echo cancellation delay on a digital voice interface is 0 milliseconds.
Views
Digital voice interface view
Predefined user roles
network-admin
Parameters
milliseconds: Specifies the echo cancellation delay in the range of 0 to 64 milliseconds.
Usage guidelines
The echo cancellation delay is the time from when a subscriber speaks to when the subscriber hears the echo.
Examples
# Enable echo cancellation, and set the echo cancellation delay to 24 milliseconds on digital voice interface 2/4/1:15.
[Sysname] subscriber-line 2/4/1:15
[Sysname-subscriber-line2/4/1:15] echo-canceler enable
[Sysname-subscriber-line2/4/1:15] echo-canceler delay 24
Related commands
echo-canceler enable
echo-canceler tail-length
echo-canceler enable (digital voice interface view)
Use echo-canceler enable to enable echo cancellation on a digital voice interface.
Use undo echo-canceler enable to disable echo cancellation on a digital voice interface.
Syntax
echo-canceler enable
undo echo-canceler enable
Default
Echo cancellation is enabled on a digital voice interface.
Views
Digital voice interface view
Predefined user roles
network-admin
Examples
# Enable echo cancellation on digital voice interface 2/4/1:15.
[Sysname] subscriber-line 2/4/1:15
[Sysname-subscriber-line2/4/1:15] echo-canceler enable
Related commands
echo-canceler delay
echo-canceler tail-length
echo-canceler tail-length (digital voice interface view)
Use echo-canceler tail-length to set the echo cancellation coverage on a digital voice interface.
Use undo echo-canceler tail-length to restore the default.
Syntax
echo-canceler tail-length milliseconds
undo echo-canceler tail-length
Default
The echo cancellation coverage on a digital voice interface is 128 milliseconds.
Views
Digital voice interface view
Predefined user roles
network-admin
Parameters
milliseconds: Specifies the echo cancellation coverage, in milliseconds. The following matrix shows the value ranges for this argument:
|
Hardware |
Value range |
|
SIC-1VE1 SIC-1VT1 |
32, 48, 64, 80, 96, 112, 128 |
|
HMIM-1VE1 HMIM-1VT1 HMIM-2VE1 HMIM-2VT1 RT-SIC-1VE1T1 SIC-1BSV SIC-2BSV |
128 |
Usage guidelines
Increasing the echo cancellation coverage can effectively cancel multipath echoes.
Examples
# Enable echo cancellation, and set the echo cancellation coverage to 32 milliseconds on digital voice interface 2/4/1:15.
<Sysname> system-view
[Sysname] subscriber-line 2/4/1:15
[Sysname-subscriber-line2/4/1:15] echo-canceler enable
[Sysname-subscriber-line2/4/1:15] echo-canceler tail-length 32
Related commands
echo-canceler delay
echo-canceler enable
final-callednum enable
Use final-callednum enable to configure the originating side to send a number terminator to the terminating side after sending the called number.
Use undo final-callednum enable to restore the default.
Syntax
final-callednum enable
undo final-callednum enable
Default
The originating side does not send a number terminator to the terminating side after sending the called number.
Views
R2 CAS view
Predefined user roles
network-admin
Usage guidelines
R2 interregister signaling in some countries requires the originating side to send a number terminator after sending the called number. You can configure the final-callednum enable command to meet the requirement. After the terminating side receives the terminator, it stops requesting the called number.
Examples
# Configure the originating side to send a number terminator to the terminating side after sending the called number.
<Sysname> system-view
[Sysname] controller e1 2/4/1
[Sysname-E1 2/4/1] timeslot-set 0 timeslot-list 1-31 signal r2
[Sysname-E1 2/4/1] cas 0
[Sysname-cas 2/4/1:0] final-callednum enable
group-b enable
Use group-b enable to configure R2 signaling to use Group B signals to complete registers exchange.
Use undo group-b enable to configure R2 signaling to not use Group B signals to complete registers exchange.
Syntax
group-b enable
undo group-b enable
Default
R2 signaling uses Group B signals to complete registers exchange.
Views
R2 CAS view
Predefined user roles
network-admin
Usage guidelines
R2 interregister signaling in some countries does not support Group B signals. You can configure the undo group-b enable command to not use Group B signals.
Examples
# Configure R2 signaling to use Group B signals to complete registers exchange.
<Sysname> system-view
[Sysname] controller e1 2/4/1
[Sysname-E1 2/4/1] timeslot-set 0 timeslot-list 1-31 signal r2
[Sysname-E1 2/4/1] cas 0
[Sysname-cas 2/4/1:0] group-b enable
line
Use line to bind a digital voice interface to a POTS entity.
Use undo line to restore the default.
Syntax
For E1 and T1 interfaces:
line line-number:{ ts-set-number | 15 | 23 }
undo line
For BSV interfaces:
line line-number
undo line
Default
No digital voice interface is bound to a POTS entity.
Views
POTS entity view
Predefined user roles
network-admin
Parameters
line-number: Specifies an E1, T1, or BSV interface by its number.
ts-set-number: Specifies a timeslot set by its number.
15: Number for the PRI set created by bundling the timeslots of an E1 interface.
23: Number for the PRI set created by bundling the timeslots of a T1 interface.
Examples
# Bind a digital voice interface to POTS entity 10.
[Sysname] voice-setup
[Sysname-voice] dial-program
[Sysname-voice-dial] entity 10 pots
[Sysname-voice-dial-entity10] line 2/4/1:1
metering enable
Use metering enable to enable metering signal processing.
Use undo metering enable to disable metering signal processing.
Syntax
metering enable
undo metering enable
Default
Metering signal processing is disabled.
Views
R2 CAS view
Predefined user roles
network-admin
Usage guidelines
If the originating side supports metering signals, you must configure this command on the terminating side. When the terminating side first disconnects a call, it sends a forced release signal instead of a clear-back signal to release the line.
Examples
# Enable metering signal processing.
[Sysname] controller e1 2/4/1
[Sysname-E1 2/4/1] timeslot-set 0 timeslot-list 1-31 signal r2
[Sysname-E1 2/4/1] cas 0
[Sysname-cas 2/4/1:0] metering enable
mode
Use mode to specify the R2 signaling standard.
Use undo mode to restore the default.
Syntax
mode zone-name [ default-standard ]
undo mode
Default
ITU-T R2 signaling is used.
Views
R2 CAS view
Predefined user roles
network-admin
Parameters
zone-name: Specifies a country or region from the following list:
· argentina: Argentina.
· australia: Australia.
· bengal: Bengal.
· brazil: Brazil.
· china: China.
· custom: Custom.
· hongkong: Hong Kong.
· india: India.
· indonesia: Indonesia.
· itu-t: ITU-T.
· korea: Korea.
· malaysia: Malaysia.
· mexico: Mexico.
· newzealand: New Zealand.
· singapore: Singapore.
· thailand: Thailand.
default-standard: Initializes R2 signaling based on the specified R2 signaling standard.
Usage guidelines
The R2 signaling standard varies in different countries and regions. Use this command to specify the R2 signaling standard of a country or region.
If the custom keyword is specified, you can customize signaling exchange procedures and signal values for R2 signaling.
Examples
# Specify the R2 signaling standard of Singapore.
[Sysname] controller e1 2/4/1
[Sysname-E1 2/4/1] timeslot-set 0 timeslot-list 1-31 signal r2
[Sysname-E1 2/4/1] cas 0
[Sysname-cas 2/4/1:0] mode singapore
nlp-on (digital interface view)
Use nlp-on to enable nonlinear processing on a digital voice interface.
Use undo nlp-on to disable nonlinear processing on a digital voice interface.
Syntax
nlp-on
undo nlp-on
Default
Nonlinear processing is enabled for a digital voice interface.
Views
Digital voice interface view
Predefined user roles
network-admin
Usage guidelines
This command is not supported on the following interface modules:
· SIC-2FXS1FXO.
· HMIM-8FXS8FXO.
· DSIC-4FXS1FXO.
· HMIM-16FXS
This command takes effect only after the echo-canceler enable command is configured.
Examples
# Disable nonlinear processing on digital voice interface 2/4/1:15.
<Sysname> system-view
[Sysname] subscriber-line 2/4/1:15
[Sysname-subscriber-line2/4/1:15] undo nlp-on
Related commands
echo-canceler enable
pcm
Use pcm to configure a companding law for PCM on a digital voice interface.
Use undo pcm to restore the default.
Syntax
pcm { a-law | u-law }
undo pcm
Default
The companding law for PCM is a-law for E1 interfaces and μ-law for T1 interfaces.
Views
Digital voice interface view
Predefined user roles
network-admin
Parameters
a-law: Specifies a-law, used in China, Europe, Africa, and South America.
µ-law: Specifies µ-law, used in North America and Japan.
Usage guidelines
Companding laws quantize signals unevenly for the purpose of reducing noise and improving signal-to-noise ratio.
Examples
# Adopt µ-law companding for PCM.
[Sysname] subscriber-line2/4/1:0
[Sysname-subscriber-line2/4/1:0] pcm u-law
re-answer enable
Use re-answer enable to enable reanswer signal processing on the originating side.
Use undo re-answer enable to disable reanswer signal processing on the originating side.
Syntax
re-answer enable
undo re-answer enable
Default
Reanswer signal processing is disabled on the originating side.
Views
R2 CAS view
Predefined user roles
network-admin
Usage guidelines
R2 signaling in some countries must support reanswer processing. When the terminating side sends a clear-back signal, the originating side does not release the line, but maintains the call state. If it receives a reanswer signal from the terminating side within a specified time, it continues the call. Otherwise, it disconnects the call upon timeout.
Examples
# Enable reanswer signal processing on the originating side.
[Sysname] controller e1 2/4/1
[Sysname-E1 2/4/1] timeslot-set 0 timeslot-list 1-31 signal r2
[Sysname-E1 2/4/1] cas 0
[Sysname-cas 2/4/1:0] re-answer enable
receive gain (digital voice interface view)
Use receive gain to set the input gain value on a digital voice interface.
Use undo receive gain to restore the default.
Syntax
receive gain value
undo receive gain
Default
The input gain value on a digital voice interface is 0 dB.
Views
Digital voice interface view
Predefined user roles
network-admin
Parameters
value: Specifies the input gain value in the range of –14.0 to +13.9 dB.
Usage guidelines
When the voice signals on the line attenuate, you can use this command to increase the input gain.
Gain adjustment might lead to call failures. If necessary, do it under the guidance of technical engineers.
Examples
# Set the input gain value to 3.5 dB on digital voice interface 2/4/1:15.
<Sysname> system-view
[Sysname] subscriber-line 2/4/1:15
[Sysname-subscriber-line2/4/1:15] receive gain 3.5
Related commands
transmit gain
register-value
Use register-value to set a register signal value.
Use undo register-value to restore the default.
Syntax
register-value { billingcategory | callcreate-in-groupa | callingcategory | congestion | demand-refused | digit-end | null-number | req-billingcategory | req-callednum-and-switchgroupa | req-callingcategory | req-currentcallednum-in-groupc | req-currentdigit | req-firstcallednum-in-groupc | req-firstcallingnum | req-firstdigit | req-lastfirstdigit | req-lastseconddigit | req-lastthirddigit | req-nextcallednum | req-nextcallingnum | req-switch-groupb | subscriber-abnormal | subscriber-busy | subscriber-charge | subscriber-idle } value
undo register-value { billingcategory | callcreate-in-groupa | callingcategory | congestion | demand-refused | digit-end | null-number | req-billingcategory | req-callednum-and-switchgroupa | req-callingcategory | req-currentcallednum-in-groupc | req-currentdigit | req-firstcallednum-in-groupc | req-firstcallingnum | req-firstdigit | req-lastfirstdigit | req-lastseconddigit | req-lastthirddigit | req-nextcallednum | req-nextcallingnum | req-switch-groupb | subscriber-abnormal |subscriber-busy | subscriber-charge | subscriber-idle }
Default
The register signal values depend on the R2 signaling standard (configured by using the mode command).
Views
R2 CAS view
Predefined user roles
network-admin
Parameters
billingcategory value: Specifies the billing category value in the range of 1 to 16. It configures the KA signal in R2 signaling. The signal provides two types of information for a call connection: billing category (regular, immediate, or toll free) and subscriber level (with or without priority).
callcreate-in-groupa value: Specifies the direct call establishment signal value in the range of 1 to 16.
callingcategory value: Specifies the calling category signal value in the range of 1 to 16. It configures the R2 KD signal. It functions to identify whether break-in and forced-release can be implemented by or on the calling party.
congestion value: Specifies the congestion signal value in the range of 1 to 16.
demand-refused value: Specifies the request-refused signal value in the range of 1 to 16.
digit-end value: Specifies the digit-end signal value in the range of 1 to 16.
null-number value: Specifies the null number signal value in the range of 1 to 16.
req-billingcategory value: Specifies the send billing category signal value in the range of 1 to 16.
req-callednum-and-switchgroupa value: Specifies the send last digit and changeover to Group A signal value in the range of 1 to 16.
req-callingcategory value: Specifies the send calling category signal value in the range of 1 to 16.
req-currentcallednum-in-groupc value: Specifies the send current called number signal in Group C state, in the range of 1 to 16.
req-currentdigit value: Specifies the send current digit signal value in the range of 1 to 16.
req-firstcallednum-in-groupc value: Specifies the send first digit signal value in Group C state, in the range of 1 to 16.
req-firstcallingnum value: Specifies the send calling number signal value in the range of 1 to 16.
req-firstdigit value: Specifies the send first digit signal value in the range of 1 to 16.
req-lastfirstdigit value: Specifies the send last digit signal value in the range of 1 to 16.
req-lastseconddigit value: Specifies the send last second digits signal value in the range of 1 to 16.
req-lastthirddigit value: Specifies the send last three digits signal value in the range of 1 to 16.
req-nextcallednum value: Specifies the send next called number signal value in the range of 1 to 16.
req-nextcallingnum value: Specifies the send next calling number signal value in the range of 1 to 16.
req-switch-groupb value: Specifies the changeover to Group B signal value in the range of 1 to 16.
subscriber-abnormal value: Specifies the subscriber line abnormal signal value in the range of 1 to 16.
subscriber-busy value: Specifies the subscriber line busy signal value in the range of 1 to 16.
subscriber-charge value: Specifies the charge value when the subscriber line is idle, in the range of 1 to 16.
subscriber-idle value: Specifies the subscriber line idle value in the range of 1 to 16. It configures the R2 KB signal used for describing the called subscriber line status, for example, whether the line is idle. Make sure the same KB signal value is used on the two ends of a call. Otherwise, the call cannot be established even if the terminating side is in idle state.
Usage guidelines
The register-value command assigns values to signals requesting responses from the remote end. For example, after you configure the register-value callingcategory command, the terminating side sends the calling category signal with the specified value to the originating side for the calling category.
A signal value of 16 disables the signal feature.
As a best practice, use the default values.
Examples
# Request the originating side to send the calling category by configuring a backward signal (signal value 7).
[Sysname] controller e1 2/4/1
[Sysname-E1 2/4/1] timeslot-set 0 timeslot-list 1-31 signal r2
[Sysname-E1 2/4/1] cas 0
[Sysname-cas 2/4/1:0] register-value req-callingcategory 7
mode
renew
Use renew to configure the C and D signal bits.
Use undo renew to restore the default.
Syntax
renew ABCD
undo renew
Default
The C and D signal bits depend on the R2 signaling standard.
Views
R2 CAS view
Predefined user roles
network-admin
Parameters
ABCD: Values of the A, B, C, and D bits. Each bit can take the value of 0 or 1.
Usage guidelines
R2 signaling uses bits A and B to convey real status information while leaving bits C and D constant. The values of bits C and D are country dependent. For example, they are fixed to 01 in most countries but 11 in some other countries.
Use this command to adapt values of bits C and D to different line signaling coding schemes.
Examples
# Set bits C and D to 11.
[Sysname] controller e1 2/4/1
[Sysname-E1 2/4/1] timeslot-set 0 timeslot-list 1-31 signal r2
[Sysname-E1 2/4/1] cas 0
[Sysname-cas 2/4/1:0] renew 0011
mode
reverse
Use reverse to enable line signal inversion.
Use undo reverse to restore the default.
Default
Line signal inversion is disabled (ABCD takes the value of 0000).
Syntax
reverse ABCD
undo reverse
Views
R2 CAS view
Predefined user roles
network-admin
Parameters
ABCD: Indicates whether corresponding ABCD bits in R2 signaling need inversion. Each argument in this command takes 0 or 1. A value of 1 enables inversion, which inverts 0 to 1 or inverts 1 to 0.
Usage guidelines
Use this command to invert the values of ABCD bits for incoming and outgoing line signals.
Examples
# Invert the values of bits B and D in R2 line signaling.
[Sysname] controller e1 2/4/1
[Sysname-E1 2/4/1] timeslot-set 0 timeslot-list 1-31 signal r2
[Sysname-E1 2/4/1] cas 0
[Sysname-cas 2/4/1:0] reverse 0101
reverse-charge prefix
Use reverse-charge prefix to configure a prefix for reverse charging.
Use undo reverse-charge prefix to restore the default.
Syntax
reverse-charge prefix string
undo reverse-charge prefix
Default
No prefix for reverse charging is configured.
Views
Digital voice interface view
Predefined user roles
network-admin
Parameters
string: Specifies a prefix for reverse charging, a string of 1 to 31 characters. The string can include digits 0 through 9, comma (,), pound sign (#), and asterisk (*).
Usage guidelines
This command enables the router to identify a reverse-charge call by comparing the called number of an incoming call with the specified prefix. If the called number matches the prefix, the router interacts with the PBX device to charge the called party.
Examples
# Configure 9090 as a prefix for reverse charging on digital voice interface 2/4/1:15.
<Sysname> system-view
[Sysname] subscriber-line 2/4/1:15
[Sysname-subscriber-line2/4/1:15] reverse-charge prefix 9090
select-mode
Use select-mode to configure the routing mode.
Use undo select-mode to restore the default.
Syntax
select-mode { max | maxpoll | min | minpoll }
undo select-mode
Default
The timeslot with the smallest number is selected.
Views
R2 CAS view
Predefined user roles
network-admin
Parameters
max: Selects the timeslot with the greatest number from available timeslots.
maxpoll: Selects the timeslot with the greatest number from available timeslots in the first timeslot polling. Subsequent pollings select in descending order timeslots with numbers less than the one selected in the previous polling. For example, if timeslots 31 and 29 are not available, the first polling selects timeslot 30 and the next polling selects timeslot 28.
min: Selects the timeslot with the smallest number from available timeslots.
minpoll: Selects the timeslot with the lowest number from available timeslots in the first timeslot polling. Subsequent pollings select in ascending order timeslots with numbers greater than the one selected in the previous polling. For example, if timeslots 1 and 3 are not available, the first polling selects timeslot 2 and in the next polling selects timeslot 4.
Examples
# Configure the routing mode as maxpoll for timeslot set 0 on interface E1 2/4/1.
<Sysname> system-view
[Sysname] controller e1 2/4/1
[Sysname-E1 2/4/1] timeslot-set 0 timeslot-list 1-31 signal r2
[Sysname-E1 2/4/1] cas 0
[Sysname-cas 2/4/1:0] select-mode maxpoll
seizure-ack enable
Use seizure-ack enable to configure the originating side to require the terminating side to send seizure acknowledgment signals.
Use undo seizure-ack enable to configure the originating side to not require the terminating side to send seizure acknowledgment signals.
Syntax
seizure-ack enable
undo seizure-ack enable
Default
The originating side requires the terminating side to send seizure acknowledgment signals.
Views
R2 CAS view
Predefined user roles
network-admin
Usage guidelines
R2 line signaling in some countries requires the terminating side to not acknowledge received seizure signals. To meet this requirement, execute the undo seizure-ack enable command.
Examples
# Configure the originating side to not require the terminating side to send seizure acknowledgment signals.
[Sysname] controller e1 2/4/1
[Sysname-E1 2/4/1] timeslot-set 0 timeslot-list 1-31 signal r2
[Sysname-E1 2/4/1] cas 0
[Sysname-cas 2/4/1:0] undo seizure-ack enable
send ringbusy enable
Use send ringbusy enable to configure the terminating side to send busy tones to the originating side.
Use undo send ringbusy enable to configure the terminating side to not send busy tones to the originating side.
Syntax
send ringbusy enable
Default
The terminating side sends busy tones to the originating side.
Views
R2 CAS view
Predefined user roles
network-admin
Usage guidelines
If the originating side needs to play busy tones, you can execute the undo send ringbusy enable command on the terminating device.
Examples
# Configure the terminating side to send busy tones to the originating side.
<Sysname> system-view
[Sysname] controller e1 2/4/1
[Sysname-E1 2/4/1] timeslot-set 0 timeslot-list 1-31 signal r2
[Sysname-E1 2/4/1] cas 0
[Sysname-cas 2/4/1:0] send ringbusy enable
Related commands
timer
shutdown (digital voice interface view)
Use shutdown to shut down a digital voice interface.
Use undo shutdown to bring up a digital voice interface.
Syntax
shutdown
undo shutdown
Default
A digital voice interface is up.
Views
Digital voice interface view
Predefined user roles
network-admin
Examples
# Shut down digital voice interface 2/4/1:15.
[Sysname] subscriber-line 2/4/1:15
[Sysname-subscriber-line2/4/1:15] shutdown
special-character
Use special-character to configure a signal code for a special character.
Use undo special-character to remove the signal code for a special character.
Syntax
special-character character number
undo special-character character number
Default
No signal code is configured for a special character.
Views
R2 CAS view
Predefined user roles
network-admin
Parameters
character: Specifies a special character, which can be a pound sign (#), asterisk (*), A, B, C, or D.
number: Specifies a signal code in the range of 11 to 15.
Usage guidelines
R2 signaling in some countries includes special characters such as pound signs (#) and asterisks (*) in Group I forward signals. To code these special characters, execute the special-character command.
Use different codes for different special characters.
Examples
# Configure signal code 11 for the pound sign (#).
<Sysname> system-view
[Sysname] controller e1 2/4/1
[Sysname-E1 2/4/1] timeslot-set 0 timeslot-list 1-31 signal r2
[Sysname-E1 2/4/1] cas 0
[Sysname-cas 2/4/1:0] special-character # 11
subscriber-line
Use subscriber-line to enter digital voice interface view.
Syntax
subscriber-line line-number:{ ts-set-number | 15 | 23 }
Views
System view
Predefined user roles
network-admin
Parameters
line-number: Specifies an E1 or T1 interface by its number.
ts-set-number: Specifies a timeslot set by its number.
15: Number for the PRI set created by bundling the timeslots of an E1 interface.
23: Number for the PRI set created by bundling the timeslots of a T1 interface.
Usage guidelines
Upon creation of a timeslot set on an E1/T1 interface, the system automatically creates a digital voice interface numbered in the form of E1/T1 interface number:timeslot set number.
After you create a PRI group with the pri-set command on an E1 interface, the system automatically creates a voice interface numbered E1 interface-number:15.
After you create a PRI group with the pri-set command on an T1 interface, the system automatically creates a voice interface numbered T1 interface-number:23.
Examples
# Enter the view of digital voice interface 2/4/1:15.
[Sysname] subscriber-line 2/4/1:15
[Sysname-subscriber-line2/4/1:15]
timeslot-set
pri-set
tdm-clock
Use tdm-clock to configure a TDM clock source on an E1 or T1 interface.
Use undo tdm-clock to restore the default.
Syntax
tdm-clock { internal | line [ primary ] }
undo tdm-clock
Default
The TDM clock source for an E1 or T1 interface is the internal TDM clock.
Views
E1 interface view
T1 interface view
Predefined user roles
network-admin
Parameters
internal: Specifies the internal clock of the device as the clock source. The E1 or T1 interface is the master in time synchronization.
line: Specifies the clock on the peer device as the clock source. The E1 or T1 interface is a subordinate in time synchronization.
line primary: Specifies the T1 or E1 interface to preferentially use the clock of the peer device as its clock source.
Usage guidelines
E1 or T1 interfaces must ensure clock synchronization during TDM timeslot interchange to prevent frame slips and bit errors.
When both E1 and T1 interface modules are present on a device, all the E1 or T1 SIC interface modules are a subsystem, and each E1 or T1 HMIM interface module is a subsystem. Each subsystem determines the clock source according to the following rules:
· If the line keyword is specified for all interfaces, the clock on the interface with the lowest number is used. If the interface goes down, the clock on the interface with the second lowest number is used.
· If the line primary keywords are specified for one interface and the line or internal keyword is specified for all other interfaces, the clock on that one interface is used.
· If the line keyword is specified for one interface and the internal keyword for all other interfaces, the clock on that one interface is used.
· The clock source of only one interface can be set to line primary.
The TDM clock sources on the local and peer devices must match. For example, if the clock source is set to line for a subsystem on the local device, the clock source must be set to internal on the peer device, and vice versa.
Examples
# Configure the clock on the peer device as the clock source for interface E1 2/4/1.
<Sysname> system-view
[Sysname] controller e1 2/4/1
[Sysname-E1 2/4/1] tdm-clock line
# Configure the clock on the peer device as the clock source for interface T1 2/4/1.
<Sysname> system-view
[Sysname] controller T1 2/4/1
[Sysname-T1 2/4/1] tdm-clock line
timer
Use timer to set the timeout time for playing ringback or busy tones.
Use undo timer to restore the default.
Syntax
timer { ringback | ringbusy } time
undo timer { ringback | ringbusy }
Default
The timeout time is 60000 milliseconds for playing ringback tones, and 30000 milliseconds for playing busy tones.
Views
R2 CAS view
Predefined user roles
network-admin
Parameters
ringback time: Specifies the timeout time for playing ringback tones, in the range of 1000 to 90000 milliseconds.
ringbusy time: Specifies the timeout time for playing busy tones, in the range of 1000 to 90000 milliseconds.
Usage guidelines
Use this command on the terminating side.
The timer ringbusy command takes effect only after the send ringbusy enable command is configured.
Examples
# Set the timeout time for playing ringback tones to 10000 milliseconds.
[Sysname] controller e1 2/4/1
[Sysname-E1 2/4/1] timeslot-set 0 timeslot-list 1-31 signal r2
[Sysname-E1 2/4/1] cas 0
[Sysname-cas 2/4/1:0] timer ringback 10000
timer dl
Use timer dl to set the timeout time of line signals.
Use undo timer dl to restore the default.
Syntax
timer dl { answer | clear-back | clear-forward | | re-answer | release-guard | seizing } time
undo timer dl { answer | clear-back | clear-forward | | re-answer | release-guard | seizing }
Default
The timeout time is:
· 60000 milliseconds for answer signals.
· 10000 milliseconds for clear-back, clear-forward, and release-guard signals.
· 1000 milliseconds for seizure and reanswer signals.
Views
R2 CAS view
Predefined user roles
network-admin
Parameters
answer time: Specifies the timeout time for waiting for an answer signal, in the range of 100 to 120000 milliseconds.
This option applies to both the terminating side and originating side.
· The terminating side starts this timer after sending a seizure acknowledgment signal. If it does not send an answer signal to the originating side before the timer expires, the terminating side clears the connection.
· The originating side starts this timer after receiving a seizure acknowledgment signal. If it does not receive the answer signal from the terminating side before the timer expires, the originating side clears the connection.
clear-back time: Specifies the timeout time of clear-back signals, in the range of 100 to 60000 milliseconds. The terminating side starts this timer after sending a clear-back signal. If it does not receive a forward signal from the originating side before the timer expires, it clears the connection. This option applies to the terminating side.
clear-forward time: Specifies the timeout time of clear-forward signals, in the range of 100 to 60000 milliseconds. The originating side starts this timer after sending a clear-forward signal. If it does not receive a line signal (for example, clear-back or release guard signal) from the terminating side before the timer expires, it clears the connection. This option applies to the originating side.
re-answer time: Specifies the timeout time of reanswer signals, in the range of 100 to 90000 milliseconds. The originating side starts this timer after receiving a clear-back signal from the terminating side. If it does not receive a reanswer signal from the terminating side before the timer expires, it clears the connection. This option applies to the originating side.
release-guard time: Specifies the timeout time of release guard signals, in the range of 100 to 60000 milliseconds. The originating side starts this timer after sending a clear-forward signal. If it does not receive a release guard signal from the terminating side before the timer expires, it clears the connection. This option applies to the originating side.
seizing time: Specifies the timeout time of seizure signals, in the range of 100 to 5000 milliseconds. The originating side starts this timer after sending a seizure signal. If it does not receive a seizure acknowledgment signal or an answer signal from the terminating side before the timer expires, it clears the connection. This option applies to the originating side.
Examples
# Set the timeout time of seizure signals to 300 milliseconds.
<Sysname> system-view
[Sysname] controller e1 2/4/1
[Sysname-E1 2/4/1] timeslot-set 0 timeslot-list 1-31 signal r2
[Sysname-E1 2/4/1] cas 0
[Sysname-cas 2/4/1:0] timer dl seize 300
timer dtmf-delay
Use timer dtmf-delay to set the delay from when the originating side receives a seizure acknowledgment signal to when it sends DTMF tones.
Use undo timer dtmf-delay to restore the default.
Syntax
timer dtmf-delay time
undo timer dtmf-delay
Default
The delay is 50 milliseconds.
Views
R2 CAS view
Predefined user roles
network-admin
Parameters
time: Specifies the delay before sending DTMF tones, in the range of 50 to 10000 milliseconds.
Usage guidelines
You can configure a delay to send DTMF tones for digit collection on the remote PBX.
This command takes effect only after you configure the dtmf enable command.
Examples
# Set the delay to 800 milliseconds for the originating side to send DTMF tones.
<Sysname> system-view
[Sysname] controller e1 2/4/1
[Sysname-E1 2/4/1] timeslot-set 0 timeslot-list 1-31 signal r2
[Sysname-E1 2/4/1] cas 0
[Sysname-cas 2/4/1:0] dtmf enable
[Sysname-cas 2/4/1:0] timer dtmf-delay 800
Related commands
dtmf enable
timer group-b
Use timer group-b to set the timeout time for Group B signal exchange.
Use undo timer group-b to restore the default.
Syntax
timer group-b time
undo timer group-b
Default
The timeout time for Group B signal exchange is 30000 milliseconds.
Views
R2 CAS view
Predefined user roles
network-admin
Parameters
group-b time: Specifies the timeout time for Group B signal exchange, in the range of 100 to 90000 milliseconds.
Usage guidelines
This command applies to the terminating side.
The terminating side must complete Group B signal exchange within the timeout time. Otherwise, the call cannot be established.
Examples
# Set the timeout time for Group B signal exchange to 10000 milliseconds.
[Sysname] controller e1 2/4/1
[Sysname-E1 2/4/1] timeslot-set 0 timeslot-list 1-31 signal r2
[Sysname-E1 2/4/1] cas 0
[Sysname-cas 2/4/1:0] timer group-b 10000
timer register-pulse
Use timer register-pulse to set the duration of register pulse signals.
Use undo timer register-pulse to restore the default.
Syntax
timer register-pulse time
undo timer register-pulse
Default
The duration of register pulse signals is 150 milliseconds.
Views
R2 CAS view
Predefined user roles
network-admin
Parameters
time: Specifies the duration of register pulse signals, in the range of 50 to 3000 milliseconds.
Examples
# Set the duration of register pulse signals to 300 milliseconds.
[Sysname] controller e1 2/4/1
[Sysname-E1 2/4/1] timeslot-set 0 timeslot-list 1-31 signal r2
[Sysname-E1 2/4/1] cas 0
[Sysname-cas 2/4/1:0] timer register-pulse 300
timeslot-set
Use timeslot-set to create a timeslot set.
Use undo timeslot-set to delete a timeslot set.
Syntax
timeslot-set ts-set-number timeslot-list timeslots-list signal r2
undo timeslot-set ts-set-number
Default
No timeslot sets exist.
Views
E1 interface view
T1 interface view
Predefined user roles
network-admin
Parameters
ts-set-number: Specifies the number of a timeslot set, in the range of 0 to 30.
timeslots-list: Specifies a timeslot list. Timeslots are numbered 1 through 31 for an E1 interface and 1 through 24 for a T1 interface. The timeslot list can contain one or more individual timeslots separated by commas (for example, 1 or 1, 2, 4), a timeslot range (for example, 5-10), or a combination of the two forms (for example, 1-14, 15, 17-31).
signal: Specifies the signaling mode for the timeslot set.
r2: Specifies the timeslot set to use R2 signaling.
Usage guidelines
You must create a timeslot set before you can use the subscriber-line command to enter digital voice interface view and configure voice attributes for the interface.
Examples
# Create timeslot set 5, which contains timeslots 1 through 31 and uses R2 signaling.
<Sysname> system-view
[Sysname] controller e1 2/4/1
[Sysname-E1 2/4/1] timeslot-set 5 timeslot-list 1-31 signal r2
transmit gain (digital voice interface view)
Use transmit gain to set the output gain value on a digital voice interface.
Use undo transmit gain to restore the default.
Syntax
transmit gain value
undo transmit gain
Default
The output gain value on a digital voice interface is 0 dB.
Views
Digital voice interface view
Predefined user roles
network-admin
Parameters
value: Specifies the output gain value in the range of –14.0 to +13.9 dB.
Usage guidelines
If the power of output voice signals is larger than the power required by the output line, you can use this command to reduce the output gain.
Output gain adjustment might lead to call failures. Do it under the guidance of technical personnel.
Examples
# Set the output gain value to –6.7 dB on digital voice interface 2/4/1:15.
<Sysname> system-view
[Sysname] subscriber-line 2/4/1:15
[Sysname-subscriber-line2/4/1:15] transmit gain -6.7
Related commands
receive gain
trunk-direction
Use trunk-direction to configure the trunk direction.
Use undo trunk-direction to restore the default.
Syntax
trunk-direction timeslots timeslots-list { dual | in | out }
undo trunk-direction timeslots timeslots-list
Default
Bidirectional trunking applies.
Views
R2 CAS view
Predefined user roles
network-admin
Parameters
timeslots-list: Specifies a timeslot list. Timeslots are numbered 1 through 31 for an E1 interface and 1 through 24 for a T1 interface. The timeslot list can contain one or more individual timeslots separated by commas (for example, 1 or 1, 2, 4), a timeslot range (for example, 5-10), or a combination of the two forms (for example, 1-14, 15, 17-31).
dual: Specifies the bidirectional trunk, which can receive and originate calls.
in: Specifies the incoming trunk, which can only receive calls.
out: Specifies the outgoing trunk, which can only originate calls.
Usage guidelines
For R2 signaling to operate correctly, the trunk direction must be incoming at one end and must be outgoing at the other end. If both ends are using bidirectional trunking mode, use the select-mode command to tune the routing mode to prevent timeslot contention.
Examples
# Set the trunk direction to bidirectional for timeslot set 0 on interface E1 2/4/1.
<Sysname> system-view
[Sysname] controller e1 2/4/1
[Sysname-E1 2/4/1] timeslot-set 0 timeslot-list 1-31 signal r2
[Sysname-E1 2/4/1] cas 0
[Sysname-cas 2/4/1:0] trunk-direction timeslots 1-31 dual
select-mode
ts
Use ts to maintain timeslots.
Syntax
ts { block | open | query | reset } timeslots timeslots-list
Views
R2 signaling view
Predefined user roles
network-admin
Parameters
block: Blocks the specified timeslots to make them unavailable.
open: Opens the specified timeslots to make them available.
query: Queries the status of the specified timeslots to see whether they are busy, open, or blocked.
reset: Resets the specified timeslots. You must do this if the state of an administratively blocked or opened timeslots cannot recover.
timeslots timeslots-list: Specifies a timeslot list. Timeslots are numbered 1 through 31 for an E1 interface and 1 through 24 for a T1 interface. The timeslot list can contain one or more individual timeslots separated by commas (for example, 1 or 1, 2, 4), a timeslot range (for example, 5-10), or a combination of the two forms (for example, 1-14, 15, 17-31).
Examples
# Reset timeslots 1 through 15 in timeslot set 0.
<Sysname> system-view
[Sysname] controller e1 2/4/1
[Sysname-E1 2/4/1] timeslot-set 0 timeslot-list 1-31 signal r2
[Sysname-E1 2/4/1] cas 0
[Sysname-cas 2/4/1:0] ts reset timeslots 1-15
voice call disc-pi-off
Use voice call disc-pi-off to enable the device to treat DISCONNECT messages with PI 8 as standard DISCONNECT messages.
Use undo voice call disc-pi-off to restore the default.
Syntax
undo voice call disc-pi-off
Default
The device does not disconnect a call when it receives a DISCONNECT message with PI value 8.
Views
Voice view
Predefined user roles
network-admin
Examples
# Enable the device to treat DISCONNECT messages with PI value 8 as standard DISCONNECT messages.
<Sysname> system-view
[Sysname] voice-setup
[Sysname-voice] voice call disc-pi-off
Voice entity commands
The following matrix shows the feature and hardware compatibility:
|
Hardware |
Voice entity compatibility |
|
MSR810/810-W/810-W-DB/810-LM/810-W-LM/810-10-PoE/810-LM-HK/810-W-LM-HK/810-LMS/810-LUS |
No |
|
MSR2600-6-X1/2600-10-X1 |
Yes |
|
MSR 2630 |
Yes |
|
MSR3600-28/3600-51 |
Yes |
|
MSR3600-28-SI/3600-51-SI |
No |
|
MSR3610-X1/3610-X1-DP/3610-X1-DC/3610-X1-DP-DC |
Yes |
|
MSR 3610/3620/3620-DP/3640/3660 |
Yes |
|
MSR5620/5660/5680 |
Yes (not supported on the router installed with an SPU600-X1 card.) |
|
Hardware |
Voice entity compatibility |
|
MSR810-LM-GL |
No |
|
MSR810-W-LM-GL |
No |
|
MSR830-6EI-GL |
No |
|
MSR830-10EI-GL |
No |
|
MSR830-6HI-GL |
No |
|
MSR830-10HI-GL |
No |
|
MSR2600-6-X1-GL |
Yes |
|
MSR3600-28-SI-GL |
No |
answer-address
Use answer-address to configure a calling number string for a voice entity to match incoming calls.
Use undo answer-address to restore the default.
Syntax
answer-address calling-number-string
Default
No calling number string exists.
Views
POTS entity view
VoIP entity view
Predefined user roles
network-admin
Parameters
calling-number-string: Specifies a calling number string of 1 to 31 characters that is in the format of [ + ] { regular-expression [ T ] [ $ ] | T }. The following describe the characters:
· Plus sign (+): If the plus sign (+) is at the beginning of the string, the string indicates an E.164 standard number. For example, +110022 indicates that 110022 is an E.164 standard number.
· Dollar sign ($): Can only be at the end of the string. The number must exactly match the string before the dollar sign. If the string has no dollar sign, the number template matches all numbers starting with the string. For example, the answer-address 20 command matches all numbers starting with 20.
· T: Indicates the timer. The system waits for the subscriber to dial any number until one of the following events occurs:
¡ The number length threshold is exceeded.
¡ The subscriber enters the terminator.
¡ The timer expires.
· regular-expression: Specifies a matching pattern of characters. Table 6 lists the available characters. Brackets ([ ]) or parentheses (( )) each are two characters, and any other symbol is one character.
Table 6 Description of the characters in a regular-expression
|
Character |
Description |
|
|
0-9 |
Digits 0 through 9. |
|
|
Pound sign (#) or asterisk (*) |
Indicates a valid digit. |
|
|
Dot (.) |
Wildcard, which can match any valid digit. For example, 555…. can match any 7-digit number beginning with 555. |
|
|
Exclamation point (!) |
Indicates that the preceding subexpression appears zero or one time. For example, 56!1234 can match 51234 and 561234. |
The subexpression (one digit or digit string) before an exclamation point (!), plus sign (+), or percent sign (%) is used for imprecise matching. The processing of the sign is similar to that of the wildcard dot (.). These signs must follow a valid digit or digit string. |
|
Plus sign (+) |
Indicates that the preceding subexpression appears one or more times. For example, 9876(54)+ can match 987654, 98765454, 9876545454, and so on. |
|
|
Percent sign (%) |
Indicates that the preceding subexpression appears zero or more times. For example, 9876(54)% can match 9876, 987654, 98765454, 9876545454, and so on. |
|
|
Hyphen (-) |
Connects two digits to indicate a range of numbers, for example, [1-9] indicates 1 to 9, inclusive. The hyphen (-) can appear only in brackets ([ ]). |
|
|
Brackets ([ ]) |
Indicates a range. Only numbers 0 through 9 are allowed in the range. For example, [1-36] matches 1, 2, 3, or 6. |
To be used together, brackets([ ]) and parentheses (( )) must be presented in the form of "( [ ] )". The "[ [ ] ]" and "[ ( ) ]" forms are incorrect. |
|
Parentheses (( )) |
Indicates a string of characters. For example, (123) indicates the character string 123. It is usually used together with signs such as exclamation point (!), percent sign (%), and plus sign (+). For example, 408(12)+ can match the character string 40812 or 408121212, but not 408 (that is, the string 12 must appear a minimum of one time). |
|
Usage guidelines
If the configured calling number string for a voice entity matches the calling number of an incoming call, the voice entity becomes the incoming voice entity of the call.
Examples
# Configure the calling number string as 456 for VoIP entity 1 to match incoming calls.
<Sysname> system-view
[Sysname] voice-setup
[Sysname-voice] dial-program
[Sysname-voice-dial] entity 1 voip
[Sysname-voice-dial-entity1] answer-address 456
codec
Use codec to configure a codec for a voice entity.
Use undo codec to restore the default.
Syntax
codec { g711alaw | g711ulaw | g723r53 | g723r63 | g726r16 | g726r24 | g726r32 | g726r40 | g729a | g729br8 | g729r8 } [ bytes payload-size ]
undo codec
Default
No codec exists.
Views
IVR entity view
POTS entity view
VoIP entity view
Predefined user roles
network-admin
Parameters
g711alaw: Specifies the G.711 A-law codec at 64 kbps (without compression), which is typically used in Europe.
g711ulaw: Specifies the G.711 μ-law codec at 64 kbps (without compression), which is typically used in North America and Japan.
g723r53: Specifies the G.723.1 Annex A codec at 5.3 kbps.
g723r63: Specifies the G.723.1 Annex A codec at 6.3 kbps.
g726r16: Specifies the G.726 Annex A codec at 16 kbps. Support for this keyword depends on the line card.
g726r24: Specifies the G.726 Annex A codec at 24 kbps. Support for this keyword depends on the line card.
g726r32: Specifies the G.726 Annex A codec at 32 kbps. Support for this keyword depends on the line card.
g726r40: Specifies the G.726 Annex A codec at 40 kbps. Support for this keyword depends on the line card.
g729a: Specifies the G.729 Annex A codec (a simplified version of G.729) at 8 kbps.
g729br8: Specifies the G.729 Annex B codec at 8 kbps.
g729r8: Specifies the G.729 codec at 8 kbps.
bytes payload-size: Specifies the number of bytes sent per second.
Table 7 Value range and default of payload-size for codecs
|
Codec |
Value range (in bytes) |
Default (in bytes) |
|
g711alaw g711ulaw |
16 to 80 in multiples of 8, 80 to 240 in multiples of 80 |
160 |
|
g723r53 |
20 to 120 in multiples of 20 |
20 |
|
g723r63 |
24 to 144 in multiples of 24 |
24 |
|
g726r16 |
20 to 220 in multiples of 20 |
60 |
|
g726r24 |
30 to 210 in multiples of 30 |
90 |
|
g726r32 |
40 to 200 in multiples of 40 |
120 |
|
g726r40 |
50 to 200 in multiples of 50 |
150 |
|
g729a g729br8 g729r8 |
10 to 180 in multiples of 10 |
30 |
Usage guidelines
A call can be established only when the calling party and the called party use the same codec.
If you execute this command multiple times, the most recent configuration takes effect.
The g711alaw and g711ulaw codecs provide high-quality voice transmission but consume high bandwidth.
The g723r53 and g723r63 codecs provide silence suppression technology and comfortable noise as follows:
· The relatively high speed output is based on multipulse multiquantitative level technology and provides relatively high voice quality.
· The relatively low speed output is based on the Algebraic-Code-Excited Linear-Prediction technology and provides greater flexibility for applications.
The g729r8 and g729a codecs provide a voice quality (nearly toll quality) similar to the 32-kbps adaptive differential pulse code modulation (ADPCM). These two codecs feature low bandwidth, short delay, and medium processing complexity.
Table 8 Voice quality for codecs
|
Codec |
Voice quality |
|
g711alaw g711ulaw |
Excellent |
|
g726r16 g726r24 g726r32 g726r40 |
Good |
|
g729a g729br8 g729r8 |
Good |
|
g723r53 g723r63 |
Average |
Examples
# Configure the codec as G.711 A-law for VoIP entity 10.
<Sysname> system-view
[Sysname] voice-setup
[Sysname-voice] dial-program
[Sysname-voice-dial] entity 10 voip
[Sysname-voice-dial-entity10] codec g711alaw
codec preference
Use codec preference to assign a priority to a codec in a codec template.
Use undo codec preference to delete the priority for a codec.
Syntax
codec preference priority { g711alaw | g711ulaw | g723r53 | g723r63 | g726r16 | g726r24 | g726r32 | g726r40 | g729a | g729br8 | g729r8 } [ bytes payload-size ]
undo codec preference priority
Default
No codecs exist in a codec template.
Views
Codec template view
Predefined user roles
network-admin
Parameters
priority: Specifies the priority of a codec, in the range of 1 to 4. The smaller the value, the higher the priority.
g711alaw: Specifies the G.711 A-law codec at 64 kbps (without compression), which is typically used in Europe.
g711ulaw: Specifies the G.711 μ-law codec at 64 kbps (without compression), which is typically used in North America and Japan.
g723r53: Specifies the G.723.1 Annex A codec at 5.3 kbps.
g723r63: Specifies the G.723.1 Annex A codec at 6.3 kbps.
g726r16: Specifies the G.726 Annex A codec at 16 kbps. Support for this keyword depends on the line card.
g726r24: Specifies the G.726 Annex A codec at 24 kbps. Support for this keyword depends on the line card.
g726r32: Specifies the G.726 Annex A codec at 32 kbps. Support for this keyword depends on the line card.
g726r40: Specifies the G.726 Annex A codec at 40 kbps. Support for this keyword depends on the line card.
g729a: Specifies the G.729 Annex A codec (a simplified version of G.729) at 8 kbps.
g729br8: Specifies the G.729 Annex B codec at 8 kbps.
g729r8: Specifies the G.729 codec at 8 kbps.
bytes payload-size: Specifies the number of bytes sent per second.
Table 9 Value range and default of payload-size for codecs
|
Codec |
Value range (in bytes) |
Default (in bytes) |
|
g711alaw g711ulaw |
16 to 80 in multiples of 8, 80 to 240 in multiples of 80 |
160 |
|
g723r53 |
20 to 120 in multiples of 20 |
20 |
|
g723r63 |
24 to 144 in multiples of 24 |
24 |
|
g726r16 |
20 to 220 in multiples of 20 |
60 |
|
g726r24 |
30 to 210 in multiples of 30 |
90 |
|
g726r32 |
40 to 200 in multiples of 40 |
120 |
|
g726r40 |
50 to 200 in multiples of 50 |
150 |
|
g729a g729br8 g729r8 |
10 to 180 in multiples of 10 |
30 |
Usage guidelines
For information about the codecs, see the codec command.
Examples
# Configure the G.711 A-law codec to have the highest priority 1.
<Sysname> system-view
[Sysname] voice-setup
[Sysname-voice] voice class codec 1
[Sysname-voice-class-codec1] codec preference 1 g711alaw
description
Use description to configure a description for a voice entity.
Use undo description to restore the default.
Syntax
description text
undo description
Default
No description exists for a voice entity.
Views
IVR entity view
POTS entity view
VoIP entity view
Predefined user roles
network-admin
Parameters
text: Specifies a description, a case-sensitive string of 1 to 80 characters.
Examples
# Configure a description of room10 for POTS entity 10.
<Sysname> system-view
[Sysname] voice-setup
[Sysname-voice] dial-program
[Sysname-voice-dial] entity 10 pots
[Sysname-voice-dial-entity10] description room10
display voice call
Use display voice call to display control information for voice calls in progress.
Syntax
display voice call
Views
Any view
Predefined user roles
network-admin
network-operator
Examples
# As shown in Figure 1, after Telephone 2222 (the calling party) establishes a call with Telephone 1111, display control information for voice calls in progress.
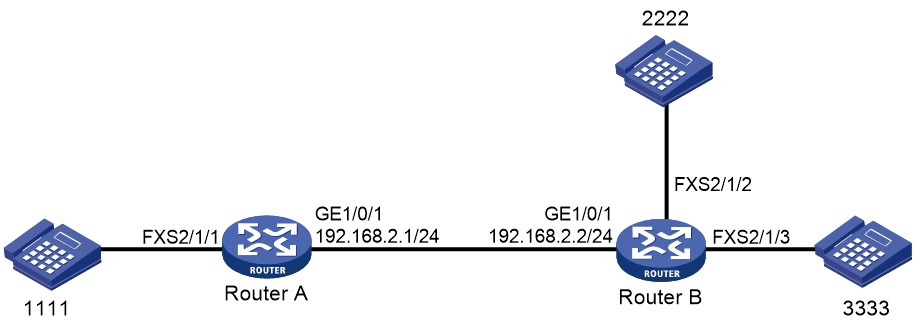
Voice call information:
Call1
CallID : 6
Calling number : 2222
Called number : 1111
Call info-table index : 0
Total call-legs : 2
Leg 1
LegID : 10
Leg type : Call-Leg
Status : Connected
Call reference ID : 3
Signal protocol : LGS
Voice line : 2/1/2
Leg 2
LegID : 11
Leg type : Call-Leg
Status : Connected
Call reference ID : 4
Signal protocol : SIP
Target SIP address : 192.168.2.1:5060
# As shown in Figure 1, after Telephone 1111 (the calling party) establishes a call with Telephone 2222 and then Telephone 2222 presses hookflash to place the call on hold, display control information for voice calls in progress.
Voice call information:
Call1
CallID : 7
Calling number : 1111
Called number : 2222
Call info-table index : 0
Total call-legs : 2
Leg 1
LegID : 17
Leg type : Call-Leg
Status : Connected
Call reference ID : 7
Signal protocol : SIP
Target SIP address : 192.168.2.1:5060
Leg 2
LegID : 18
Leg type : Call-Leg
Status : Connected
Call reference ID : 14
Signal protocol : LGS
Voice line : 2/1/2
Number of services : 1
Service name : CH
Table 10 Command output
|
Field |
Description |
|
A call ID in the range of 0 to 999 uniquely identifies a call. |
|
|
Total number of call legs, in the range of 0 to 3. |
|
|
A leg ID in the range of 0 to 2999 uniquely identifies a leg. |
|
|
Leg type: · Call Leg—Call leg. A voice call consists of two call legs: an inbound call leg and an outbound call leg. · Temp Leg—Temporary leg. This leg type exists on a device operating as a SIP trunk device. · MOH Leg—Music on hold leg. |
|
|
Leg status: · Call leg status: ¡ Finding-route—The leg is waiting for a route lookup response. ¡ Incoming_ACK—The leg received a call. ¡ Outgoing_ACK—The leg sent out a call. ¡ Connected—A call was connected. · MOH leg status: ¡ Waiting-music-response—The leg is waiting for a response from the MOH server. ¡ MOH_connected—The leg established a connection with the MOH server. This field displays -NA- for temporary legs, because temporary legs have no status. |
|
|
Control block ID for the leg. |
|
|
Signaling type for the leg: · R2. · IVA. |
|
|
Voice interface used by the leg. |
|
|
Number of services on the leg. |
|
|
Service name: · CH—Call hold. · CW—Call waiting. · MCH—Multiparty call hold. · MOH—Music on hold. · CT—Call transfer for SIP-to-SIP calls. · CF—Call forwarding for SIP-to-SIP calls. · CB—Call backup. · CFO—Call forwarding originator. · CTO—Call transfer originator. · CTR—Call transfer recipient. · CTT—Call transfer target. · Conference—Three-party conference. |
display voice call-info
Use display voice call-info to display information about calls in progress.
Syntax
display voice call-info { tag | all }
Views
Any view
Predefined user roles
network-admin
network-operator
Parameters
tag: Specifies a call in progress by its number in the range of 0 to 2147483647.
all: Specifies all calls in progress.
Examples
# Display information about all calls in progress.
<Sysname> display voice call-info all
Call tag 0
Caller number : 5000
Called number : 1000
Call direction : From packet switch
Voice interface index : 0x00000000
Voice entity currently used : 1
Voice entities offered : 1
Table 11 Command output
|
Field |
Description |
|
Call direction |
· From packet switch—The call is initiated from the IP side. · From circuit switch—The call is initiated from the PSTN side. |
|
Voice interface index |
Index of the voice interface that initiates the call. |
|
Voice entities offered |
Number of voice entities that can be used for the call. |
display voice entity
Use display voice entity to display the configuration of voice entities.
Syntax
display voice entity { entity-tag | all | ivr | pots | voip }
Views
Any view
Predefined user roles
network-admin
network-operator
Parameters
entity-tag: Specifies a voice entity by its number in the range of 1 to 2147483647.
all: Specifies all voice entities.
ivr: Specifies IVR entities.
pots: Specifies POTS entities.
voip: Specifies VoIP entities.
Examples
# Display the configuration of all voice entities.
<Sysname> display voice entity all
POTS 9999
Current state: Up
Description: entity9999
Priority level: 0
Match template: 9999
Voice line: 2/2/1
Dial prefix: Not configured
Send number: All
Max connections: 50
Codec: g723r53; bytes: 80; vad: Disabled
Caller permit: 1
Caller group: permit group 1
Substitute called: 9999
Substitute calling: 9999
DTMF relay: Outband-NTE
RTP payload-type for NTE: 113
Playout mode: adaptive
Playout initial delay: 30 ms
Playout minimum delay: 10 ms
Playout maximum delay: 160 ms
IP media DSCP: ef
IP signaling DSCP: ef
Register number: Enabled
Call-forwarding no-reply number: 5555
Call-forwarding on-busy number: 6666
Call-forwarding unavailable number: 7777
Call-forwarding unconditional number: 8888
Authentication info:
Username: 1000
Password: ******
Realm: abc.com
VoIP 8888
Current state: Up
Description: Not configured
Priority level: 0
Match template: 8888
Target SIP address: 1.1.1.1
Max connections: 10
Caller permit: 1
Caller group: permit group 1
Substitute called: 9999
Substitute calling: 9999
DTMF relay: Outband-SIP
Playout mode: adaptive
Playout initial delay: 30 ms
Playout minimum delay: 10 ms
Playout maximum delay: 160 ms
IP media DSCP: ef
Codec transparent: Disabled
Media flow-around: Enabled
Voice class SIP early-offer forced: Disabled
Voice class SIP URI scheme: Global
Voice class SIP bind media source-interface: GigabitEthernet2/1/1
Voice class SIP bind control source-interface: GigabitEthernet2/1/1
Voice class SIP keepalive state: Available
Voice class SIP keepalive up-interval: 60 s
Voice class SIP keepalive down-interval: 30 s
Voice class SIP keepalive retry: 5
Fax protocol: standard-t38; ls-redundancy: 0; hs-redundancy: 0
Fax cng-switch: Disabled
Fax level: -15
Fax local-train threshold: 10
Fax nsf: 0x000000
Fax rate: Voice
Fax train-mode: PPP
Fax ecm: Disabled
Table 12 Command output
|
Field |
Description |
|
VoIP entity-number |
Voice entity type and number. The voice entity type can be VoIP, POTS, or IVR. |
|
Match template |
Number template of the voice entity. |
|
Target SIP address |
Call destination IP address of the voice entity. |
|
Voice line |
Voice interface bound to the voice entity. |
|
Send number |
Number sending mode: · All—Sends all digits of a called number. · Truncate—Sends a truncated called number. · number—Number of digits (that are extracted from the end of a number) to be sent. |
|
bytes: 80 |
Number of bytes sent per second. |
|
Caller permit |
Calling number permitted to originate calls to the voice entity. |
|
Caller group |
Subscriber group bound to the voice entity. |
|
Substitute called |
Number substitution rule list bound to the voice entity and applied to the called number. |
|
Substitute calling |
Number substitution rule list bound to the voice entity and applied to the calling number. |
|
DTMF relay |
· Outband-SIP—DTMF tones are transmitted in SIP packets. · Outband-NTE—DTMF tones are transmitted in RTP packets compliant with RFC 2833. · Inband-voice—DTMF tones are transmitted in RTP packets. |
|
Playout mode |
Playout delay mode: · adaptive. · fixed. |
|
Playout initial delay |
Initial playout delay time. |
|
Playout minimum delay |
Minimum playout delay time. |
|
Playout maximum delay |
Maximum playout delay time. |
|
IP media DSCP |
DSCP value of IP packets carrying streaming media. |
|
Codec transparent |
State of transparent transmission of codecs: Enabled or Disabled. |
|
Media flow-around |
State of the media flow-around feature: Enabled or Disabled. |
|
Voice class SIP early-offer forced |
State of DO-EO conversion: Enabled or Disabled. |
|
URL scheme used for SIP calls: · Global—The SIP scheme is used globally. · SIP—The voice entity uses the SIP scheme. · SIPS—The voice entity uses the SIPS scheme. |
|
|
Voice class SIP bind media |
Source interface of outgoing media streams. |
|
Voice class SIP bind control |
Source interface of outgoing SIP messages. |
|
Voice class codec |
Codec template bound to the voice entity. |
|
Call-forwarding no-reply number |
Destination number to which incoming calls will be forwarded when the voice interface is not answered within a period of time. |
|
Call-forwarding on-busy number |
Destination number to which incoming calls will be forwarded when the voice interface is busy. |
|
Call-forwarding unavailable number |
Destination number to which incoming calls will be forwarded when the voice interface is shut down by executing the shutdown command. |
|
Call-forwarding unconditional number |
Destination number to which incoming calls will be forwarded, whether or not the voice interface is available. |
|
Voice class SIP keepalive state |
Status of the VoIP entity: · Available. · Unavailable. |
|
Voice class SIP keepalive up-interval |
Interval for the local end to send OPTIONS messages before marking the voice entity unavailable. |
|
Voice class SIP keepalive down-interval |
Interval for the local end to send OPTIONS messages before marking the voice entity available. |
|
Voice class SIP keepalive retry |
Number of keepalives sent before the status of the voice entity is changed. |
|
CNG fax switchover status: · Enabled. · Disabled. |
|
|
Transmit energy level. |
|
|
Threshold percentage of local training. |
|
|
NSF code for nonstandard capabilities negotiation. |
|
|
Maximum fax rate for rate training. |
|
|
Rate training mode: · Local—Local training. · PPP—Point-to-point training. |
|
|
Error Correction Mode status: Enabled or Disabled. |
dsp-image
Use dsp-image to set the type of the DSP image.
Syntax
dsp-image { ms | general }
Default
The DSP image is a general version.
Views
Voice view
Predefined user roles
Parameters
ms: Specifies a Microsoft-verified version. This version can meet the voice quality requirements of Microsoft but does not support the G723 codec.
general: Specifies a general version.
Usage guidelines
After you execute this command, you must reboot the router to apply the new configuration.
When the device interoperates with Microsoft Lync Server, you must use the Microsoft-verified version. In other situations, use the general version.
Examples
# Configure the DSP image as a Microsoft-verified version.
[Sysname] voice-setup
[Sysname-voice] dsp-image ms
entity
Use entity to create a voice entity and enter its view, or enter the view of an existing voice entity.
Use undo entity to delete a voice entity.
Syntax
entity entity-number [ ivr | pots | voip ]
undo entity { entity-number | all | ivr | pots | voip }
Default
No voice entities exist.
Views
Voice dial program view
Predefined user roles
network-admin
Parameters
entity-number: Specifies the number of a voice entity, in the range of 1 to 2147483647.
all: Specifies all voice entities.
ivr: Specifies an IVR entity.
pots: Specifies a POTS entity.
voip: Specifies a VoIP entity.
Usage guidelines
If you create a new voice entity, you must specify the voice entity type. If you enter the view of an existing voice entity, you can optionally specify the voice entity type.
The device supports a maximum of 1000 voice entities.
Examples
# Create POTS entity 10 and enter POTS entity view.
<Sysname> system-view
[Sysname] voice-setup
[Sysname-voice] dial-program
[Sysname-voice-dial] entity 10 pots
incoming called-number
Use incoming called-number to configure a called number string for a voice entity to match incoming calls.
Use undo incoming called-number to restore the default.
Syntax
incoming called-number called-number-string
Default
No called number string exists.
Views
POTS entity view
VoIP entity view
Predefined user roles
network-admin
Parameters
called-number-string: Specifies a called number string of 1 to 31 characters that is in the format of [ + ] { regular-expression [ T ] [ $ ] | T }. The following describe the characters:
· Plus sign (+): If the plus sign (+) is at the beginning of the string, the string indicates an E.164 standard number. For example, +110022 indicates that 110022 is an E.164 standard number.
· Dollar sign ($): Can only be at the end of the string. The number must exactly match the string before the dollar sign. If the string has no dollar sign, the number template matches all numbers starting with the string. For example, the incoming called-number 20 command matches all numbers starting with 20.
· T: Indicates the timer. The system waits for the subscriber to dial any number until one of the following events occurs:
¡ The number length threshold is exceeded.
¡ The subscriber enters the terminator.
¡ The timer expires.
· regular-expression: Specifies a matching pattern of characters. Table 13 lists the available characters.
Table 13 Description of the characters in a regular-expression
|
Character |
Description |
|
|
0-9 |
Digits 0 through 9. |
|
|
Pound sign (#) or asterisk (*) |
Indicates a valid digit. |
|
|
Dot (.) |
Wildcard, which can match any valid digit. For example, 555…. can match any 7-digit numbers beginning with 555. |
|
|
Exclamation point (!) |
Indicates that the preceding subexpression appears zero or one time. For example, 56!1234 can match 51234 and 561234. |
The subexpression (one digit or digit string) before an exclamation point (!), plus sign (+), or percent sign (%) is used for imprecise matching. The processing of the sign is similar to that of the wildcard dot (.). These signs must follow a valid digit or digit string. |
|
Plus sign (+) |
Indicates that the preceding subexpression appears one or more times. For example, 9876(54)+ can match 987654, 98765454, 9876545454, and so on. |
|
|
Percent sign (%) |
Indicates that the preceding subexpression appears zero or more times. For example, 9876(54)% can match 9876, 987654, 98765454, 9876545454, and so on. |
|
|
Hyphen (-) |
Connects two digits to indicate a range of numbers, for example, [1-9] indicates 1 to 9, inclusive. The hyphen (-) can appear only in brackets ([ ]). |
|
|
Brackets ([ ]) |
Indicates a range. Only numbers 0 through 9 are allowed in the range. For example, [1-36] matches 1, 2, 3, or 6. |
To be used together, brackets([ ]) and parentheses (( )) must be presented in the form of "( [ ] )". The "[ [ ] ]" and "[ ( ) ]" forms are incorrect. |
|
Parentheses (( )) |
Indicates a string of characters. For example, (123) indicates a character string of 123. It is usually used together with signs such as exclamation point (!), percent sign (%), and plus sign (+). For example, 408(12)+ can match the character string 40812 or 408121212, but not 408. In this pattern, 408 must be followed by one string of 12 at a minimum. |
|
Usage guidelines
If the configured called number string for a voice entity matches the called number of an incoming call, the voice entity becomes the incoming voice entity of the call.
Examples
# Configure the called number string as 456 for VoIP entity 1 to match incoming calls.
<Sysname> system-view
[Sysname] voice-setup
[Sysname-voice] dial-program
[Sysname-voice-dial] entity 1 voip
[Sysname-voice-dial-entity1] incoming called-number 456
ip qos dscp
Use ip qos dscp to set the DSCP value for IP packets carrying media streams.
Use undo ip qos dscp to restore the default.
Syntax
ip qos dscp { dscp-value | dscp-value-set } media
undo ip qos dscp { dscp-value | dscp-value-set } media
Default
The DSCP value for IP packets is ef (101110), the global default value.
Views
IVR entity view
POTS entity view
VoIP entity view
Predefined user roles
network-admin
Parameters
dscp-value: Specifies a DSCP value in the range of 0 to 63.
dscp-value-set: DSCP value, which can be the keyword af11, af12, af13, af21, af22, af23, af31, af32, af33, af41, af42, af43, cs1, cs2, cs3, cs4, cs5, cs6, cs7, or ef.
Table 14 DSCP values
|
Keyword |
DSCP value in binary |
DSCP value in decimal |
|
af11 |
001010 |
10 |
|
af12 |
001100 |
12 |
|
af13 |
001110 |
14 |
|
af21 |
010010 |
18 |
|
af22 |
010100 |
20 |
|
af23 |
010110 |
22 |
|
af31 |
011010 |
26 |
|
af32 |
011100 |
28 |
|
af33 |
011110 |
30 |
|
af41 |
100010 |
34 |
|
af42 |
100100 |
36 |
|
af43 |
100110 |
38 |
|
cs1 |
001000 |
8 |
|
cs2 |
010000 |
16 |
|
cs3 |
011000 |
24 |
|
cs4 |
100000 |
32 |
|
cs5 |
101000 |
40 |
|
cs6 |
110000 |
48 |
|
cs7 |
111000 |
56 |
|
ef |
101110 |
46 |
Usage guidelines
You can set the DSCP value for IP packets carrying media streams both globally (in SIP view) and for a specific voice entity (in POTS/VoIP entity view). The configuration in POTS/VoIP entity view takes precedence over the global configuration. A voice entity uses the global configuration only when the ip qos dscp command is not configured in POTS/VoIP entity view.
Examples
# Configure DSCP value af41 for IP packets carrying media streams.
<Sysname> system-view
[Sysname] voice-setup
[Sysname-voice] dial-program
[Sysname-voice-dial] entity 10 pots
[Sysname-voice-dial-entity10] ip qos dscp af41 media
Related commands
ip qos dscp (SIP view)
line
Use line to bind a voice interface to a POTS entity.
Use undo line to restore the default.
Syntax
line line-number
undo line
Default
No voice interface is bound to a POTS entity.
Views
POTS entity view
Predefined user roles
network-admin
Parameters
line-number: Specifies a voice interface by its number.
Examples
# Bind voice interface 1/0 to POTS entity 10.
<Sysname> system-view
[Sysname] voice-setup
[Sysname-voice] dial-program
[Sysname-voice-dial] entity 10 pots
[Sysname-voice-dial-entity10] line 1/0
match-template
Use match-template to configure the number template for a voice entity.
Use undo match-template to restore the default.
Syntax
match-template match-string
undo match-template
Default
No number template exists.
Views
IVR entity view
POTS entity view
VoIP entity view
Predefined user roles
network-admin
Parameters
match-string: Specifies a number template, a string of 1 to 31 characters that is in the format of [ + ] { string [ T ] [ $ ] | T }. The following describe the characters:
· Plus sign (+): If the plus sign (+) is at the beginning of the string, the string indicates an E.164 standard number. For example, +110022 indicates that 110022 is an E.164 standard number.
If a number starts with the plus sign (+), note the following when you use it on a trunk:
¡ The E&M, R2, and LGS signaling methods use DTMF transmission. Because the plus sign (+) does not have a DTMF tone, the number cannot be transmitted to the called side successfully.
¡ Because the DSS1 signaling uses ISDN transmission, this problem does not exist.
¡ You should avoid using a number that cannot be identified by the signaling itself. Otherwise, the call will fail.
· Dollar sign ($): Can only be at the end of the string. The number must exactly match the string before the dollar sign. If the string has no dollar sign, the number template matches all numbers starting with the string. For example, the match-template 20 command matches all numbers starting with 20.
· T: Indicates the timer. The system waits for the subscriber to dial any number until one of the following conditions occurs:
¡ The number length threshold is exceeded.
¡ The subscriber enters the terminator.
¡ The timer expires.
· string: Specifies a matching pattern of characters. Table 15 lists the available characters.
Table 15 Description of the characters in a string
|
Character |
Description |
|
|
0-9 |
Digits 0 through 9. |
|
|
Pound sign (#) or asterisk (*) |
Indicates a valid digit. |
|
|
Dot (.) |
Wildcard, which can match any valid digit. For example, 555…. can match any 7-digit numbers beginning with 555. |
|
|
Exclamation point (!) |
Indicates that the preceding subexpression appears zero or one time. For example, 56!1234 can match 51234 and 561234. |
The subexpression (one digit or digit string) before an exclamation point (!), plus sign (+), or percent sign (%) is used for imprecise matching. The processing of the sign is similar to that of the wildcard dot (.). These signs must follow a valid digit or digit string. |
|
Plus sign (+) |
Indicates that the preceding subexpression appears one or more times. For example, 9876(54)+ can match 987654, 98765454, 9876545454, and so on. |
|
|
Percent sign (%) |
Indicates that the preceding subexpression appears zero or more times. For example, 9876(54)% can match 9876, 987654, 98765454, 9876545454, and so on. |
|
|
Hyphen (-) |
Connects two digits to indicate a range of numbers, for example, [1-9] indicates 1 to 9, inclusive. The hyphen (-) can appear only in brackets ([ ]). |
|
|
Brackets ([ ]) |
Indicates a range. Only numbers 0 through 9 are allowed in the range. For example, [1-36] matches 1, 2, 3, or 6. |
To be used together, brackets([ ]) and parentheses (( )) must be presented in the form of "( [ ] )". The "[ [ ] ]" and "[ ( ) ]" forms are incorrect. |
|
Parentheses (( )) |
Indicates a string of characters. For example, (123) indicates a character string of 123. It is usually used together with signs such as exclamation point (!), percent sign (%), and plus sign (+). For example, 408(12)+ can match the character string 40812 or 408121212, but not 408. In this pattern, 408 must be followed by one string of 12 at a minimum. |
|
Usage guidelines
For a local POTS entity, this command defines a local number template to be bound to the local voice interface.
For a trunk POTS entity or a VoIP entity, this command defines a called number template.
Examples
# Configure the number template as 1000 for POTS entity 1000.
<Sysname> system-view
[Sysname] voice-setup
[Sysname-voice] dial-program
[Sysname-voice-dial] entity 1000 pots
[Sysname-voice-dial-entity1000] match-template 1000
# Configure the number template as 2000 for VoIP entity 2000.
<Sysname> system-view
[Sysname] voice-setup
[Sysname-voice] dial-program
[Sysname-voice-dial] entity 2000 voip
[Sysname-voice-dial-entity2000] match-template 2000
outband nte
Use outband nte to enable NTE mode for out-of-band DTMF signaling.
Use undo outband to restore the default.
Syntax
outband nte
undo outband
Default
Inband DTMF signaling is used.
Views
IVR entity view
POTS entity view
VoIP entity view
Predefined user roles
network-admin
Usage guidelines
As a best practice, configure the outband nte command and the same payload type value on the originating and terminating devices to avoid DTMF tone transmission failure.
Examples
# Enable NTE mode for out-of-band DTMF signaling.
<Sysname> system-view
[Sysname] voice-setup
[Sysname-voice] dial-program
[Sysname-voice-dial] entity 10 voip
[Sysname-voice-dial-entity10] outband nte
rtp payload-type nte
playout delay
Use playout delay to set the playout delay time for voice packets.
Use undo playout delay to restore the default.
Syntax
playout-delay { initial milliseconds | maximum milliseconds | minimum milliseconds }
undo playout-delay { initial | maximum | minimum }
Default
The initial playout delay time for voice packets is 30 milliseconds. The maximum playout delay time is 160 milliseconds. The minimum playout delay time is 10 milliseconds.
Views
POTS entity view
VoIP entity view
Predefined user roles
Parameters
initial milliseconds: Specifies the initial playout delay time in adaptive mode or the fixed playout delay time in fixed mode. The value range for milliseconds is 5 to 300 milliseconds.
maximum milliseconds: (Adaptive mode only) Specifies the maximum playout delay time for voice packets. The value range is 60 to 300 milliseconds.
minimum milliseconds: (Adaptive mode only) Specifies the minimum playout delay time for voice packets. The value range is 0 to 40 milliseconds.
Examples
# Configure the playout delay mode as adaptive, and set the minimum playout delay time to 30 milliseconds.
[Sysname] voice-setup
[Sysname-voice] dial-program
[Sysname-voice-dial] entity 10 voip
[Sysname-voice-dial-entity10] playout-delay mode adaptive
[Sysname-voice-dial-entity10] playout-delay minimum 30
playout delay mode
Use playout delay mode to configure the playout delay mode for voice packets.
Use undo playout delay mode to restore the default.
Syntax
playout-delay mode { adaptive | fixed }
undo playout-delay mode
Default
The playout delay mode for voice packets is fixed.
Views
POTS entity view
VoIP entity view
Predefined user roles
network-admin
Parameters
adaptive: Specifies the playout delay mode as adaptive. In adaptive mode, the buffer size is adjusted based on network conditions.
fixed: Specifies the playout delay mode as fixed. In fixed mode, the buffer size is fixed.
Usage guidelines
In an ideal voice network environment, the delay of each voice packet (time for each voice packet to travel from the sender to the receiver) is fixed. That is, the jitter is 0. In an actual voice network, the delay might vary from packet to packet.
To smoothly play out voice packets received with different delay times, the receiver can buffer the voice packets for a period of time (playout delay time). By configuring playout delay, you can prevent delay variation (jitter) from affecting voice quality.
Examples
# Configure the playout delay mode as adaptive.
[Sysname] voice-setup
[Sysname-voice] dial-program
[Sysname-voice-dial] entity 10 voip
[Sysname-voice-dial-entity10] playout-delay mode adaptive
rtp payload-type nte
Use rtp payload-type nte to set the NTE payload type value in RTP packets.
Use undo rtp payload-type nte to restore the default.
Syntax
rtp payload-type nte value
undo rtp payload-type nte
Default
The NTE payload type value in RTP packets is 101.
Views
IVR entity view
POTS entity view
VoIP entity view
Predefined user roles
network-admin
Parameters
value: Specifies the value of the NTE payload type in RTP packets, in the range of 96 to 127. The value 98 is reserved for identifying nonstandard T38 fax packets.
Usage guidelines
As a best practice, configure the outband nte command and the same payload type value on the originating and terminating devices to avoid DTMF tone transmission failure.
When the device is connected to a device from another vendor, you cannot set the payload type field to any value forbidden by that device. Otherwise, NTE negotiation might fail.
Examples
# Set the NTE payload value of RTP packets to 102 for VoIP entity 10.
<Sysname> system-view
[Sysname] voice-setup
[Sysname-voice] dial-program
[Sysname-voice-dial] entity 10 voip
[Sysname-voice-dial-entity10] outband nte
[Sysname-voice-dial-entity10] rtp payload-type nte 102
Related commands
outband nte
rtp-detect timeout
Use rtp-detect timeout to set the RTP timeout period.
Use undo rtp-detect timeout to restore the default.
Syntax
rtp-detect timeout value
undo rtp-detect timeout
Default
The RTP timeout period is 120 seconds.
Views
Voice view
Predefined user roles
network-admin
Parameters
value: Specifies the RTP timeout period in the range of 2 to 300 seconds.
Usage guidelines
This command enables the device to disconnect a call if it does not receive RTP traffic during the set timeout period.
Examples
# Set the RTP timeout period to 60 seconds.
<Sysname> system-view
[Sysname] voice-setup
[Sysname-voice] rtp-detect timeout 60
send-ring
Use send-ring to configure the originating side to play ringback tones.
Use undo send-ring to restore the default.
Syntax
send-ring
undo send-ring
Default
The originating side cannot play ringback tones.
Views
POTS entity view
VoIP entity view
Predefined user roles
network-admin
Usage guidelines
If the terminating side of a call cannot play ringback tones, configure the POTS or VoIP entity on the originating side to play ringback tones.
This feature does not take effect on a POTS entity if the POTS entity is bound to an FXS or FXO interface.
Examples
# Configure the originating side to play ringback tones.
<Sysname> system-view
[Sysname] voice-setup
[Sysname-voice] dial-program
[Sysname-voice-dial] entity 1 voip
[Sysname-voice-dial-entity1] send-ring
shutdown
Use shutdown to shut down a voice entity.
Use undo shutdown to bring up a voice entity.
Syntax
shutdown
undo shutdown
Default
A voice entity is up.
Views
IVR entity view
POTS entity view
VoIP entity view
Predefined user roles
network-admin
Examples
# Shut down POTS entity 10.
<Sysname> system-view
[Sysname] voice-setup
[Sysname-voice] dial-program
[Sysname-voice-dial] entity 10 pots
[Sysname-voice-dial-entity10] shutdown
sip log enable
Use sip log enable to enable SIP logging.
Use undo sip log enable to disable SIP logging.
Syntax
sip log enable
undo sip log enable
Default
SIP logging is disabled.
Views
Voice view
Predefined user roles
network-admin
Usage guidelines
SIP logging enables the device to log SIP call events and send the log message to the information center. With the information center, you can set log message filtering and output rules, including output destinations. For more information about using the information center, see Network Management and Monitoring Configuration Guide.
Examples
# Enable SIP logging.
<Sysname> system-view
[Sysname] voice-setup
[Sysname-voice] sip log enable
vad-on
Use vad-on to enable VAD.
Use undo vad-on to disable VAD.
Syntax
vad-on [ g711 | g723r53 | g723r63 | g729a | g729r8 ] *
undo vad-on [ g711 | g723r53 | g723r63 | g729a | g729r8 ] *
Default
VAD is disabled.
Views
IVR entity view
POTS entity view
VoIP entity view
Predefined user roles
network-admin
Parameters
g711: Enables VAD for the G.711 codec. This keyword is supported only on the following interface modules:
· DSIC-4FXS1FXO-H3.
· HMIM-1VE1.
· HMIM-1VT1.
· HMIM-2VE1.
· HMIM-2VT1.
· RT-SIC-1VE1T1.
· SIC-1BSV-H3.
· SIC-1VE1-H3.
· SIC-1VT1-H3.
· SIC-2BSV-H3.
· SIC-2FXS1FXO-H3.
g723r53: Enables VAD for the G.723.1 Annex A codec at 5.3 kbps.
g723r63: Enables VAD for the G.723.1 Annex A codec at 6.3 kbps.
g729a: Enables VAD for the G.729 Annex A codec at 8 kbps.
g729r8: Enables VAD for the G.729 codec at 8 kbps.
Usage guidelines
If you execute the vad-on or undo vad-on command without specifying a codec, VAD is enabled or disabled for all codecs.
Make sure the DSP image on the device is a Microsoft-verified version. To set the DSP image type, use the dsp-image ms command.
The G.726 codec does not support VAD. The G.729br8 codec always supports VAD.
Examples
# Enable VAD for the G.723.1 Annex A codec on POTS entity 10.
<Sysname> system-view
[Sysname] voice-setup
[Sysname-voice] dial-program
[Sysname-voice-dial] entity 10 pots
[Sysname-voice-dial-entity10] vad-on g723r53
voice class codec
Use voice class codec to create a codec template and enter its view, or enter the view of an existing codec template.
Use undo voice class codec to delete a codec template.
Syntax
voice class codec tag
undo voice class codec tag
Default
No codec templates exist.
Views
Voice view
Predefined user roles
network-admin
Parameters
tag: Specifies the number of the codec template, in the range of 1 to 2147483647.
Usage guidelines
The device supports a maximum of 16 codec templates.
Examples
# Create codec template 1.
<Sysname> system-view
[Sysname] voice-setup
[Sysname-voice] voice class codec 1
[Sysname-voice-class-codec1]
voice-class codec
Use voice-class codec to bind a codec template to a voice entity.
Use undo voice-class codec to restore the default.
Syntax
voice-class codec tag
undo voice-class codec
Default
No codec template is bound to a voice entity.
Views
POTS entity view
VoIP entity view
IVR entity view
Predefined user roles
network-admin
Parameters
tag: Specifies a codec template by its number in the range of 1 to 2147483647.
Usage guidelines
You can bind a nonexistent codec template to a voice entity. The codec template takes effect only after you assign priorities to the codecs in the template by using the codec preference command.
A call can be established only when the calling party and the called party use the same codec.
Only one codec template can be bound to a voice entity. If you configure the voice-class codec command multiple times, the most recent configuration takes effect.
Examples
# Bind codec template 1 to VoIP entity 10.
<Sysname> system-view
[Sysname] voice-setup
[Sysname-voice] dial-program
[Sysname-voice-dial] entity 10 voip
[Sysname-voice-dial-entity10] voice-class codec 1
Related commands
codec preference
voice class codec
voice-setup
Use voice-setup to enter voice view and enable voice services.
Use undo voice-setup to disable voice services, delete all voice settings, and exit voice view.
Syntax
voice-setup
undo voice-setup
Default
Voice services are disabled.
Views
System view
Predefined user roles
network-admin
Examples
# Enter voice view and enable voice services.
<Sysname> system-view
[Sysname] voice-setup
vqa dsp-buffer maximum-time
|
|
NOTE: This command takes effect only on E&M interface modules. |
Use vqa dsp-buffer maximum-time to set the maximum duration of DSP-buffered data.
Use undo vqa dsp-buffer maximum-time to restore the default.
Syntax
vqa dsp-buffer maximum-time time
undo vqa dsp-buffer maximum-time
Default
The maximum duration of DSP-buffered data is 270 milliseconds.
Views
Voice view
Predefined user roles
network-admin
Parameters
time: Specifies the maximum duration of DSP-buffered data, in milliseconds. The value range for this argument is 0 and 10 to 480. If you set the maximum duration of DSP-buffered data to 0 milliseconds, the device does not clear the DSP buffer.
Usage guidelines
The following matrix shows the command and hardware compatibility:
|
Hardware |
Command compatibility |
|
MSR810/810-W/810-W-DB/810-LM/810-W-LM/810-10-PoE/810-LM-HK/810-W-LM-HK/810-LMS/810-LUS |
No |
|
MSR2600-6-X1/2600-10-X1 |
Yes |
|
MSR 2630 |
No |
|
MSR3600-28/3600-51 |
Yes |
|
MSR3600-28-SI/3600-51-SI |
No |
|
MSR3610-X1/3610-X1-DP/3610-X1-DC/3610-X1-DP-DC |
Yes |
|
MSR 3610/3620/3620-DP/3640/3660 |
Yes |
|
MSR5620/5660/5680 |
Yes (not supported on the router installed with an SPU600-X1 card.) |
|
Hardware |
Command compatibility |
|
MSR810-LM-GL |
No |
|
MSR810-W-LM-GL |
No |
|
MSR830-6EI-GL |
No |
|
MSR830-10EI-GL |
No |
|
MSR830-6HI-GL |
No |
|
MSR830-10HI-GL |
No |
|
MSR2600-6-X1-GL |
Yes |
|
MSR3600-28-SI-GL |
No |
VoIP voice data is buffered in the DSP buffer if a network latency or jitter exists. When the maximum duration of DSP-buffered data is reached, the device clears the DSP buffer to improve the quality of VoIP calls. You can use this command to adjust the maximum duration of DSP-buffered data.
When PCM pass-through is enabled, the set maximum duration of DSP-buffered data takes effect.
When PCM pass-through is disabled, one of the following rules applies:
· If the set maximum duration of DSP-buffered data is in the range of 10 to 179 milliseconds, the default value (270 milliseconds) takes effect.
· If the set maximum duration of DSP-buffered data is 0 or in the range of 180 to 480 milliseconds, the set value takes effect.
For more information about PCM pass-through, see voice interface configuration in Voice Configuration Guide.
Examples
# Set the maximum duration of DSP-buffered data to 300 milliseconds.
<Sysname> system-view
[Sysname] voice-setup
[Sysname-voice] vqa dsp-buffer maximum-time 300
Related commands
pcm-passthrough
Dial program commands
The following matrix shows the feature and hardware compatibility:
|
Hardware |
Dial program compatibility |
|
MSR810/810-W/810-W-DB/810-LM/810-W-LM/810-10-PoE/810-LM-HK/810-W-LM-HK/810-LMS/810-LUS |
No |
|
MSR2600-6-X1/2600-10-X1 |
Yes |
|
MSR 2630 |
Yes |
|
MSR3600-28/3600-51 |
Yes |
|
MSR3600-28-SI/3600-51-SI |
No |
|
MSR3610-X1/3610-X1-DP/3610-X1-DC/3610-X1-DP-DC |
Yes |
|
MSR 3610/3620/3620-DP/3640/3660 |
Yes |
|
MSR5620/5660/5680 |
Yes (not supported on the router installed with an SPU600-X1 card.) |
|
Hardware |
Dial program compatibility |
|
MSR810-LM-GL |
No |
|
MSR810-W-LM-GL |
No |
|
MSR830-6EI-GL |
No |
|
MSR830-10EI-GL |
No |
|
MSR830-6HI-GL |
No |
|
MSR830-10HI-GL |
No |
|
MSR2600-6-X1-GL |
Yes |
|
MSR3600-28-SI-GL |
No |
caller-group
Use caller-group to configure a voice entity to permit or deny calls from numbers in a subscriber group.
Use undo caller-group to remove the configuration.
Syntax
caller-group { deny | permit } group-id
undo caller-group { { deny | permit } group-id | all }
Default
A voice entity permits all calling numbers.
Views
IVR entity view
POTS entity view
VoIP entity view
Predefined user roles
network-admin
Parameters
deny: Denies calls from numbers in a subscriber group.
permit: Permits calls from numbers in a subscriber group.
group-id: Specifies a subscriber group by its ID in the range of 1 to 2147483647.
all: Specifies all subscriber groups.
Examples
# Configure VoIP entity 1 to permit calls from numbers in subscriber group 1.
<Sysname> system-view
[Sysname] voice-setup
[Sysname-voice] dial-program
[Sysname-voice-dial] entity 1 voip
[Sysname-voice-dial-entity1] caller-group permit 1
subscriber-group
caller-permit
Use caller-permit to configure a voice entity to permit one or more calling numbers.
Use undo caller-permit to remove the configuration.
Syntax
caller-permit caller-string
undo caller-permit { caller-string | all }
Default
A voice entity permits all calling numbers.
Views
IVR entity view
POTS entity view
VoIP entity view
Predefined user roles
network-admin
Parameters
all: Specifies all the configured calling numbers.
caller-string: Specifies a string of 1 to 31 characters in the format of { [ + ] string [ $ ] }| $. The voice entity uses the string to match calling numbers. The following describes the symbols in the format:
· Plus sign (+): If the plus sign (+) is at the beginning of the string, the string indicates an E.164 standard number. For example, +110022 indicates that 110022 is an E.164 standard number.
· Dollar sign ($): Can only be used at the end of the string. The calling number must exactly match the portion of the string before the dollar sign. When the string contains only a dollar sign ($), the permitted calling number is null. If the string has no dollar sign, the calling numbers starting with the string are permitted. For example, the caller-permit 20 command permits all calling numbers starting with 20.
· string: Consists of characters that can include digits 0 through 9, and pound sign (#), asterisk (*), dot (.), exclamation point (!), plus sign (+), percent sign (%), brackets ([ ]), parentheses (()), and hyphen (-). Brackets ([ ]) or parentheses (( )) each are two characters, and any other symbol is one character.
Table 16 Description of characters in a string
|
Description |
||
|
0-9 |
Digits 0 through 9. |
|
|
Pound sign (#) or asterisk (*) |
Indicates a valid digit. |
|
|
Dot (.) |
Wildcard, which can match any valid digit. For example, 555…. can match any 7-digit number beginning with 555. |
|
|
Exclamation point (!) |
Indicates that the preceding subexpression appears zero or one time. For example, 56!1234 can match 51234 and 561234. |
The subexpression (one digit or digit string) before an exclamation point (!), plus sign (+), or percent sign (%) is used for imprecise match. The processing of the sign is similar to that of the wildcard dot (.). These signs must follow a valid digit or digit string. |
|
Plus sign (+) |
Indicates that the preceding subexpression appears one or more times. For example, 9876(54)+ can match 987654, 98765454, 9876545454, and so on. |
|
|
Percent sign (%) |
Indicates that the preceding subexpression appears zero or more times. For example, 9876(54)% can match 9876, 987654, 98765454, 9876545454, and so on. |
|
|
Hyphen (-) |
Connects two digits to indicate a range of numbers, for example, [1-9] indicates 1 to 9 inclusive. The hyphen (-) can appear only in brackets ([ ]). |
|
|
Brackets ([ ]) |
Indicates a range. Only numbers 0 through 9 are allowed in the range. For example, [1-36] matches 1, 2, 3, or 6. |
To be used together, brackets([ ]) and parentheses (( )) must be present in the form of "( [ ] )". The "[ [ ] ]" and "[ ( ) ]" forms are incorrect. |
|
Parentheses (( )) |
Indicates a string of characters. For example, (123) indicates the character string 123. It is usually used together with signs such as exclamation point (!), percent sign (%), and plus sign (+). For example, 408(12)+ can match the character string 40812 or 408121212, but not 408 (that is, the string 12 must appear a minimum of one time). |
|
Usage guidelines
You can configure a maximum of 32 permitted calling numbers for a voice entity.
Examples
# Configure VoIP entity 2 to permit calls from number 1000 and from numbers starting with 20.
[Sysname] voice-setup
[Sysname-voice] dial-program
[Sysname-voice-dial] entity 2 voip
[Sysname-voice-dial-entity2] caller-permit 1000$
[Sysname-voice-dial-entity2] caller-permit 20
description
Use description to configure a description for a subscriber group.
Use undo description to restore the default.
Syntax
description text
undo description
Default
No description is configured for a subscriber group.
Views
Subscriber group view
Predefined user roles
network-admin
Parameters
text: Specifies a description, a case-sensitive string of 1 to 80 characters.
Examples
# Configure a description of international for subscriber group 10.
<Sysname> system-view
[Sysname] voice-setup
[Sysname-voice] dial-program
[Sysname-voice-dial] subscriber-group 10
[Sysname-voice-dial-group10] description international
dial-prefix
Use dial-prefix to configure a dial prefix for a POTS entity.
Use undo dial-prefix to restore the default.
Syntax
dial-prefix string
undo dial-prefix
Default
No dial prefix is configured for a POTS entity.
Views
POTS entity view
Predefined user roles
network-admin
Parameters
string: Specifies a dial prefix, a string of 1 to 31 characters. Valid characters are digits 0 through 9, comma (,), pound sign (#), and asterisk (*).
Table 17 Description of characters in the string argument
|
Character |
Description |
|
0-9 |
Digits 0 through 9. |
|
Comma (,) |
One comma represents a pause of 500 milliseconds and it can be positioned anywhere in a number. |
|
Pound sign (#) or asterisk (*) |
Indicates a valid digit. |
Usage guidelines
After you configure a dial prefix, the router adds the prefix before each called number. If the called number exceeds 31 digits, the router sends only the first 31 digits.
Examples
# Specify a dial prefix of 0 for POTS entity 3.
<Sysname> system-view
[Sysname] voice-setup
[Sysname-voice] dial-program
[Sysname-voice-dial] entity 3 pots
[Sysname-voice-dial-entity3] dial-prefix 0
match-template
dial-program
Use dial-program to enter dial program view.
Use undo dial-program to remove all the settings from dial program view.
Syntax
Views
Voice view
Predefined user roles
network-admin
Examples
# Enter dial program view.
<Sysname> system-view
[Sysname] voice-setup
[Sysname-voice] dial-program
dot-match
Use dot-match to configure a dot match rule.
Use undo dot-match to restore the default.
Syntax
dot-match { end-only | left-right | right-left }
undo dot-match
Default
The dot match rule is end-only.
Views
Number-substitute view
Predefined user roles
network-admin
Parameters
end-only: Matches the digits that correspond to the ending dots (.) in the input template.
left-right: Matches from left to right the digits that correspond to the dots in the input template. The number of matching digits is the number of dots in the output template.
right-left: Matches from right to left the digits that correspond to the dots in the input template. The number of matching digits is the number of dots in the output template.
|
|
NOTE: The input and output templates are configured using the rule command. |
Usage guidelines
The dots here are virtual match digits. Virtual match digits refer to those matching the variable part such as dot (.), plus sign (+), percent sign (%), exclamation point (!), and brackets ([]) in a regular expression. For example, when 1255 is matched with the regular expression 1[234]55, the virtual match digit is 2, when matched with the regular expression 125+, the virtual match digit is 5, and matched with the regular expression 1..5, the virtual match digits are 25.
Examples
# Set the dot match rule to right-left for number substitution rule list 20.
<Sysname> system-view
[Sysname] voice-setup
[Sysname-voice] dial-program
[Sysname-voice-dial] number-substitute 20
[Sysname-voice-dial-substitute20] dot-match right-left
rule
entity hunt
Use entity hunt to configure a voice entity selection order.
Use undo entity hunt to restore the default.
Syntax
entity hunt hunt-number
undo entity hunt
Default
The hunt-number is 0.
Views
Dial program view
Predefined user roles
network-admin
Parameters
hunt-number: Specifies a hunt number in the range of 0 to 7. A hunt number corresponds to a voice entity selection order that includes selection rules.
0: Specifies longest match, voice entity priority, random selection.
1: Specifies longest match, voice entity priority, least recent use.
2: Specifies voice entity priority, longest match, random selection.
3: Specifies voice entity priority, longest match, least recent use.
4: Specifies least recent use, longest match, voice entity priority.
5: Specifies least recent use, voice entity priority, longest match.
6: Specifies random selection.
7: Specifies least recent use.
|
Selection rule |
Description |
|
Longest match |
Selects the voice entity that matches (from left to right) the most digits of the dialed number. |
|
Voice entity priority |
Selects the voice entity with the highest priority (configured by using the priority command). |
|
Random selection |
Selects a voice entity in a random manner. |
|
Least recent use |
Selects the voice entity that has waited for the longest time since being last selected. |
Usage guidelines
If the first rule matches multiple voice entities, the second rule applies, and so on.
Examples
# Specify the voice entity selection order determined by hunt number 3.
[Sysname] voice-setup
[Sysname-voice] dial-program
[Sysname-voice-dial] entity hunt 3
Related commands
priority
first-rule
Use first-rule to configure the preferred number substitution rule.
Use undo first-rule to restore the default.
Syntax
first-rule id
undo first-rule
Default
No preferred number substitution rule exists.
Views
Number-substitute view
Predefined user roles
network-admin
Parameters
id: Specifies the preferred number substitution rule by its ID in the range of 0 to 31.
Usage guidelines
The system first uses the preferred number substitution rule to match the number. If the match fails or the preferred number substitution rule is not configured, the system uses other rules in the order of sequence numbers.
Examples
# Specify rule 4 in number substitution list 20 as the preferred number substitution rule.
<Sysname> system-view
[Sysname] voice-setup
[Sysname-voice] dial-program
[Sysname-voice-dial] number-substitute 20
[Sysname-voice-dial-substitute20] rule 4 663 3
[Sysname-voice-dial-substitute20] first-rule 4
rule
match-template
Use match-template to configure a calling number match template for a subscriber group.
Use undo match-template to delete calling number match templates for a subscriber group.
Syntax
match-template match-string
undo match-template { match-string | all }
Default
No calling number match templates are configured for a subscriber group.
Views
Subscriber group view
Predefined user roles
network-admin
Parameters
all: Specifies all calling number match templates.
match-string: Specifies a calling number match string of 1 to 31 characters in the format of { [ + ] string [ $ ] }| $. The following describes the characters in the format:
· Plus sign (+): If the plus sign (+) is at the beginning of the string, the string indicates an E.164 standard number. For example, +110022 indicates that 110022 is an E.164 standard number.
· Dollar sign ($): Can only be used at the end of the string. The calling number must exactly match the portion of the string before the dollar sign. When the string contains only a dollar sign ($), the permitted calling number is null. If the string has no dollar sign, the calling numbers starting with the string are permitted. For example, the match-template 20 command permits all calling numbers starting with 20.
· string: Consists of characters that can include digits 0 through 9, and pound sign (#), asterisk (*), dot (.), exclamation point (!), plus sign (+), percent sign (%), brackets ([ ]), parentheses (()), and hyphen (-). Brackets ([ ]) or parentheses (( )) each are two characters, and any other symbol is one character.
Table 19 Description of characters in a string
|
Character |
Description |
|
|
0-9 |
Digits 0 through 9. |
|
|
Pound sign (#) or asterisk (*) |
Indicates a valid digit. |
|
|
Dot (.) |
Wildcard, which can match any valid digit. For example, 555…. can match any 7-digit number beginning with 555. |
|
|
Exclamation point (!) |
Indicates that the preceding subexpression appears zero or one time. For example, 56!1234 can match 51234 and 561234. |
The subexpression (one digit or digit string) before an exclamation point (!), plus sign (+), or percent sign (%) is used for imprecise match. The processing of the sign is similar to that of the wildcard dot (.). These signs must follow a valid digit or digit string. |
|
Plus sign (+) |
Indicates that the preceding subexpression appears one or more times. For example, 9876(54)+ can match 987654, 98765454, 9876545454, and so on. |
|
|
Percent sign (%) |
Indicates that the preceding subexpression appears zero or more times. For example, 9876(54)% can match 9876, 987654, 98765454, 9876545454, and so on. |
|
|
Hyphen (-) |
Connects two digits to indicate a range of numbers, for example, [1-9] indicates 1 to 9, inclusive. The hyphen (-) can appear only in brackets ([ ]). |
|
|
Brackets ([ ]) |
Indicates a range. Only numbers 0 through 9 are allowed in the range. For example, [1-36] matches 1, 2, 3, or 6. |
To be used together, brackets([ ]) and parentheses (( )) must be present in the form of "( [ ] )". The "[ [ ] ]" and "[ ( ) ]" forms are incorrect. |
|
Parentheses (( )) |
Indicates a string of characters. For example, (123) indicates the character string 123. It is usually used together with signs such as exclamation point (!), percent sign (%), and plus sign (+). For example, 408(12)+ can match the character string 40812 or 408121212, but not 408 (the string 12 must appear a minimum of one time). |
|
Examples
# Configure the calling number match template 1… for subscriber group 2 to match 4-digit calling numbers starting with 1.
[Sysname] voice-setup
[Sysname-voice] dial-program
[Sysname-voice-dial] subscriber-group 2
[Sysname-voice-dial-group2] match-template 1…
max-conn
Use max-conn to set the maximum number of calls allowed by a voice entity.
Use undo max-conn to restore the default.
Syntax
max-conn max-number
undo max-conn
Default
The number of calls allowed by a voice entity is not limited.
Views
IVR entity view
POTS entity view
VoIP entity view
Predefined user roles
network-admin
Parameters
max-number: Specifies the maximum number of calls allowed by a voice entity, in the range of 0 to 120.
Examples
# Set the maximum number of calls allowed by VoIP entity 10 to 5.
[Sysname] voice-setup
[Sysname-voice] dial-program
[Sysname-voice-dial] entity 10 voip
[Sysname-voice-dial-entity10] max-conn 5
number-match
Use number-match to configure a global number match mode.
Use undo number-match to restore the default.
Syntax
number-match { longest | shortest }
undo number-match
Default
Shortest match is used.
Views
Dial program view
Predefined user roles
network-admin
Parameters
longest: Specifies longest match.
shortest: Specifies shortest match.
Examples
# Specify longest match.
<Sysname> system-view
[Sysname] voice-setup
[Sysname-voice] dial-program
[Sysname-voice-dial] number-match longest
terminator
number-substitute
Use number-substitute to create a number substitution rule list and enter its view, or enter the view of an existing number substitution rule list.
Use undo number-substitute to delete number substitution rule lists.
Syntax
number-substitute list-number
undo number-substitute { list-number | all }
Default
No number substitution rule lists exist.
Views
Dial program view
Predefined user roles
network-admin
Parameters
list-number: Specifies an ID for the number substitution rule list, in the range of 1 to 2147483647.
all: Specifies all number substitution rule lists.
Examples
#Create a number substitution rule list and enter number-substitute view.
<Sysname> system-view
[Sysname] voice-setup
[Sysname-voice] dial-program
[Sysname-voice-dial] number-substitute 1
[Sysname-voice-dial-substitute1]
priority
Use priority to set a priority for a voice entity.
Use undo priority to restore the default priority for a voice entity.
Syntax
priority priority
undo priority
Default
The priority for a voice entity is 0.
Views
IVR entity view
POTS entity view
VoIP entity view
Predefined user roles
network-admin
Parameters
priority: Specifies a priority in the range of 0 to 10. The smaller the value, the higher the priority.
Usage guidelines
If a number matches multiple voice entities, the router selects the voice entity with the highest priority.
Examples
# Set the priority to 5 for POTS entity 10.
<Sysname> system-view
[Sysname] voice-setup
[Sysname-voice] dial-program
[Sysname-voice-dial] entity 10 pots
[Sysname-voice-dial-entity10] priority 5
private-line
Use private-line to configure private line auto ring-down (PLAR).
Use undo private-line to disable PLAR.
Syntax
private-line string
undo private-line
Default
PLAR is disabled.
Views
FXS/FXO/E&M interface view
Digital voice interface view
Predefined user roles
network-admin
Parameters
string: Specifies the called number, which is a string of 1 to 31 characters that can include digits 0 through 9, asterisk (*), and pound sign (#).
Usage guidelines
PLAR enables the subscriber line to automatically call the specified called number when the phone goes off-hook.
Examples
# Enable PLAR for the called number 1000.
[Sysname] subscriber-line2/1/1
[Sysname-subscriber-line2/1/1] private-line 1000
rule
Use rule to configure a number substitution rule.
Use undo rule to remove number substitution rules.
Syntax
undo rule { id | all }
Default
No number substitution rules exist.
Views
Number-substitute view
Predefined user roles
network-admin
Parameters
all: Deletes all number substitution rules.
id: Specifies an ID for the substitution rule, in the range of 0 to 31.
input-template: Configures an input template of 1 to 31 characters in the format of [ ^ ] [ + ] string [ $ ]. The following describes the signs in the format:
· Caret (^): Indicates the match begins with the first character of the string.
· Plus sign (+): If the plus sign (+) is at the beginning of the string, the string indicates an E.164 standard number.
· Dollar sign ($): Indicates that the last digit of a number must match the last character of the string.
· string: Consists of characters that can include digits 0 through 9, and pound sign (#), asterisk (*), dot (.), exclamation point (!), and percent sign (%).
Table 20 Description of characters in a string
|
Character |
Meaning |
|
|
0-9 |
Digits from 0 through 9. |
|
|
Pound sign (#) or asterisk (*) |
Indicates a valid digit. |
|
|
Dot (.) |
Wildcard, which can match any valid digit. For example, 555…. can match any 7-digit number beginning with 555. |
|
|
Exclamation point (!) |
Indicates that the preceding subexpression appears zero or one time. For example, 56!1234 can match 51234 and 561234. |
These signs must follow a valid digit or digit string. |
|
Percent sign (%) |
Indicates that the preceding subexpression appears zero or more times. For example, 9876(54)% can match 9876, 987654, 98765454, 9876545454, and so on. |
|
output-template: Configures an output template, which is a string of 1 to 31 characters that can include digits 0 through 9, pound sign (#), asterisk (*), plus sign (+) and dot (.). The first character can be a plus sign (+). Table 20 describes these characters.
number-type: Specifies input and output number types.
input-template-type: Specifies an input number type. Table 21 describes the values for this argument.
|
Number type |
Description |
|
abbreviated |
Abbreviated number. |
|
any |
Any number. |
|
international |
International number. |
|
national |
National number that is not in the local network. |
|
network |
Service network number. |
|
reserved |
Reserved number. |
|
subscriber |
Local network number. |
|
unknown |
Number of an unknown type. |
output-template-type: Specifies an output number type. Table 22 describes the values for this argument.
|
Number type |
Description |
|
abbreviated |
Abbreviated number. |
|
international |
International number. |
|
national |
National number that is not in the local network. |
|
network |
Service network number. |
|
reserved |
Reserved number. |
|
subscriber |
Local network number. |
|
unknown |
Number of an unknown type. |
numbering-plan: Specifies input and output numbering plans.
input-numbering-plan: Specifies an input numbering plan. Table 23 describes the values for this argument.
Table 23 Input numbering plans
|
Numbering plan |
Description |
|
any |
Any numbering plan. |
|
data |
Data numbering plan. |
|
isdn |
ISDN telephone numbering plan. |
|
national |
National numbering plan. |
|
private |
Private numbering plan. |
|
reserved |
Reserved numbering plan. |
|
telex |
Telex numbering plan. |
|
unknown |
Unknown numbering plan. |
output-numbering-plan: Specifies an output numbering plan. Table 24 describes the values for this argument.
Table 24 Output numbering plans
|
Numbering plan |
Description |
|
data |
Data numbering plan. |
|
isdn |
ISDN telephone numbering plan. |
|
national |
National numbering plan. |
|
private |
Private numbering plan. |
|
reserved |
Reserved numbering plan. |
|
telex |
Telex numbering plan. |
|
unknown |
Unknown numbering plan. |
Usage guidelines
The following describes the functions of dots in the input-template and output-template arguments:
· Dots in the output-template argument are invalid if the dot match rule is end-only.
If you set the dot match rule to end-only by using the dot-match command, the dots in the output-template argument are invalid. The digits matching the dots at the end of the input template are added to the end of the output number.
For example, suppose you configure the following commands on the calling router where number substitution has been configured for called numbers:
[Sysname] voice-setup
[Sysname-voice] dial-program
[Sysname-voice-dial] number-substitute 1
[Sysname-voice-dial-substitute1] dot-match end-only
[Sysname-voice-dial-substitute1] rule 0 ^..10...$ ...267410.
If you dial the number 9810765, the number that matches the input template is 765, and the output number is 267410765.
· Extra dots in the output-template argument are discarded.
If you set the dot match rule to right-left or left-right by using the dot-match command, and the output template has more dots than the input template, all digits matching the dots in the input template replace the corresponding dots in the output template from left to right, and the remaining dots in the output template are discarded.
For example, suppose you configure the following commands on the calling router where number substitution has been configured for called numbers:
[Sysname] voice-setup
[Sysname-voice] dial-program
[Sysname-voice-dial] number-substitute 1
[Sysname-voice-dial-substitute1] dot-match right-left
[Sysname-voice-dial-substitute1] rule 0 ^..10...$ ..267410..
If you dial the number 9810765, the number that matches the input template is 8765, and the output number is 8726741065.
Examples
# Configure a number substitution rule for number substitution rule list 1. The input template is ^..01...$, and the output template is ...1.
[Sysname] voice-setup
[Sysname-voice] dial-program
[Sysname-voice-dial] number-substitute 1
[Sysname-voice-dial-substitute1] rule 0 ^..01...$ ...1
substitute (Voice dial-program view)
substitute (Voice entity view/Voice subscriber-line view)
send-number
Use send-number to configure the number sending mode.
Use undo send-number to restore the default.
Syntax
send-number { digit-number | all | truncate }
undo send-number
Default
The truncate mode is used.
Views
POTS entity view
Predefined user roles
network-admin
Parameters
digit-number: Specifies the number of digits (extracted from the end of a number) to be sent, in the range of 0 to 31. It must be no greater than the total number of digits in the called number.
all: Sends all the digits of a called number.
truncate: Sends a truncated called number. When the match-template command configured on the voice entity contains dots (.), only the digits that match the dots are sent.
Examples
# Configure POTS entity 10 to send all the digits of called numbers.
[Sysname] voice-setup
[Sysname-voice] dial-program
[Sysname-voice-dial] entity 10 pots
[Sysname-voice-dial-entity10] send-number all
match-template
subscriber-group
Use subscriber-group to create a subscriber group and enter its view, or enter the view of an existing subscriber group.
Use undo subscriber-group to delete subscriber groups.
Syntax
undo subscriber-group { group-id | all }
Default
No subscriber groups exist.
Views
Dial program view
Predefined user roles
network-admin
Parameters
group-id: Specifies a subscriber group ID in the range of 1 to 2147483647.
all: Specifies all subscriber groups.
Usage guidelines
You can create a maximum of 10 subscriber groups.
Examples
# Create subscriber group 1 and enter its view.
<Sysname> system-view
[Sysname] voice-setup
[Sysname-voice] dial-program
[Sysname-voice-dial] subscriber-group 1
[Sysname-voice-dial-group1]
substitute (voice entity view, voice interface view)
Use substitute to apply a number substitution rule list to the calling or called numbers on a voice entity or a voice interface.
Use undo substitute to remove the application.
Syntax
substitute { called | calling } list-number
undo substitute { called | calling }
Default
No number substitution rule list is applied to a voice entity (the voice entity does not perform number substitution).
Views
POTS/VoIP/IVR entity view
Voice interface view
Predefined user roles
network-admin
Parameters
called: Applies the number substitution rule to called numbers.
calling: Applies the number substitution rule to calling numbers.
list-number: Specifies a number substitution rule list by its number in the range of 1 to 2147483647.
Examples
# Apply number substitution rule list 6 to called numbers on POTS entity 10.
[Sysname] voice-setup
[Sysname-voice] dial-program
[Sysname-voice-dial] entity 10 pots
[Sysname-voice-dial-entity10] substitute called 6
# Apply number substitution rule list 6 to called numbers on voice interface 2/1/1.
[Sysname] voice-setup
[Sysname-voice] subscriber-line2/1/1
[Sysname-voice-line2/1/1] substitute called 6
number-substitute
rule
substitute (dial program view)
Use substitute to apply a number substitution rule list to the calling or called numbers of incoming or outgoing calls.
Use undo substitute to remove the application.
Syntax
substitute { incoming-call | outgoing-call } { called | calling } list-number
undo substitute { incoming-call | outgoing-call } { called | calling } { list-number | all }
Default
No number substitution rule list is applied (no number substitution is performed).
Views
Dial program view
Predefined user roles
network-admin
Parameters
incoming-call: Applies the number substitution rule list to incoming calls.
outgoing-call: Applies the number substitution rule list to outgoing calls.
called: Applies the number substitution rule list to called numbers.
calling: Applies the number substitution rule list to calling numbers.
all: Specifies all number substitution rule lists.
list-number: Specifies a number substitution rule list by its number in the range of 1 to 2147483647.
Usage guidelines
You can apply a maximum of 32 number substitution rule lists.
Examples
# Apply number substitution rule list 5 to the called numbers of incoming calls.
<Sysname> system-view
[Sysname] voice-setup
[Sysname-voice] dial-program
[Sysname-voice-dial] substitute incoming-call called 5
# Apply number substitution rule lists 5, 6, and 8 to the called numbers of outgoing calls.
<Sysname> system-view
[Sysname] voice-setup
[Sysname-voice] dial-program
[Sysname-voice-dial] substitute outgoing-call called 5
[Sysname-voice-dial] substitute outgoing-call called 6
[Sysname-voice-dial] substitute outgoing-call called 8
number-substitute
rule
terminator
Use terminator to configure a dial terminator.
Use undo terminator to restore the default.
Syntax
terminator character
undo terminator
Default
No dial terminator is configured.
Views
Dial program view
Predefined user roles
network-admin
Parameters
character: Specifies a dial terminator, a single character that can be a digit, pound sign (#), or asterisk (*).
Usage guidelines
The dial terminator identifies the end of a number. The device immediately places a call upon receiving the dial terminator.
Do not configure a character included in a called number as a dial terminator.
Examples
# Specify the pound sign (#) as the dial terminator.
<Sysname> system-view
[Sysname] voice-setup
[Sysname-voice] dial-program
[Sysname-voice-dial] terminator #
SIP commands
The following matrix shows the feature and hardware compatibility:
|
Hardware |
SIP compatibility |
|
MSR810/810-W/810-W-DB/810-LM/810-W-LM/810-10-PoE/810-LM-HK/810-W-LM-HK/810-LMS/810-LUS |
No |
|
MSR2600-6-X1/2600-10-X1 |
Yes |
|
MSR 2630 |
Yes |
|
MSR3600-28/3600-51 |
Yes |
|
MSR3600-28-SI/3600-51-SI |
No |
|
MSR3610-X1/3610-X1-DP/3610-X1-DC/3610-X1-DP-DC |
Yes |
|
MSR 3610/3620/3620-DP/3640/3660 |
Yes |
|
MSR5620/5660/5680 |
Yes (not supported on the router installed with an SPU600-X1 card.) |
.
|
Hardware |
SIP compatibility |
|
MSR810-LM-GL |
No |
|
MSR810-W-LM-GL |
No |
|
MSR830-6EI-GL |
No |
|
MSR830-10EI-GL |
No |
|
MSR830-6HI-GL |
No |
|
MSR830-10HI-GL |
No |
|
MSR2600-6-X1-GL |
Yes |
|
MSR3600-28-SI-GL |
No |
address sip
Use address sip to configure a call destination IP address for a VoIP entity.
Use undo address sip to restore the default.
Syntax
address sip { dns domain-name port port-number | ip ip-address [ port port-number ] | proxy }
undo address sip { dns | ip | proxy }
Default
No call destination IP address exists.
Views
VoIP entity view
Predefined user roles
network-admin
Parameters
dns domain-name: Specifies the destination domain name, which consists of case-insensitive character strings separated by a dot (for example, aabbcc.com). Each separated string contains no more than 63 characters. A domain name can include letters, digits, hyphens (-), and underscores (_), and has a maximum length of 253 characters.
port port-number: Specifies a destination port by its port number in the range of 1 to 65535. If the ip keyword is specified, the default port number is 5060 for TCP and UDP and 5061 for TLS. If the dns keyword is specified, the destination port number must be configured.
ip ip-address: Specifies the destination IP address.
proxy: Contacts the SIP proxy server to obtain the destination IP address.
Examples
# Configure the call destination IP address as 3.3.3.3 for VoIP entity 10.
<Sysname> system-view
[Sysname] voice-setup
[Sysname-voice] dial-program
[Sysname-voice-dial] entity 10 voip
[Sysname-voice-dial-entity10] address sip ip 3.3.3.3
asserted-id
Use asserted-id to add the P-Asserted-Identity or P-Preferred-Identity header field into outgoing SIP messages.
Use undo asserted-id to restore the default.
Syntax
Default
Outgoing SIP messages do not carry the P-Asserted-Identity or P-Preferred-Identity header field in outgoing SIP messages.
Views
SIP view
Predefined user roles
network-admin
Parameters
pai: Adds the P-Asserted-Identity header field into outgoing SIP messages.
ppi: Adds the P-Preferred-Identity header field into outgoing SIP messages.
Examples
# Add the P-Asserted-Identity header field into outgoing SIP messages.
[Sysname] voice-setup
[Sysname-voice] sip
[Sysname-voice-sip] asserted-id pai
bind
Use bind to configure global source interface binding for outbound SIP messages or media packets.
Use undo bind to restore the default.
Syntax
bind { control | media } source-interface interface-type interface-number
Default
The egress interface is used as the source interface of outbound SIP messages or media packets.
Views
SIP view
Predefined user roles
network-admin
Parameters
control: Specifies outbound SIP messages.
media: Specifies outbound media packets.
source-interface interface-type interface-number: Uses the specified source interface as the source interface of outbound SIP messages or media packets. The specified interface must be a Layer 3 Ethernet interface, VLAN interface, loopback interface, or dialer interface.
Usage guidelines
The following table describes how source interface binding works in different conditions:
|
Condition |
Result |
|
Configure a new source interface when ongoing calls exist. |
· The new source interface takes effect for new SIP media sessions but does not take effect for existing SIP media sessions. · The new source interface immediately takes effect for all SIP signaling sessions. |
|
The bound source interface is shut down. |
The source interface binding does not take effect, and the default setting is restored. |
|
The IP address of the bound source interface or the bound source interface is removed. |
|
|
The physical or link layer state of the bound interface is down. |
|
|
The bound source interface obtains a new IP address from the DHCP or PPPoE server. |
The new IP address is used as the source IP address. |
|
Configure a new source interface during SIP registration. |
The new source interface takes effect for new registrations. |
You can configure source interface binding both globally (by using the bind command in SIP view) and for a specific VoIP entity (by using the voice-class sip bind command in VoIP entity view). The configuration in VoIP entity view takes precedence over the global configuration. A VoIP entity uses the global configuration only when source interface binding is not configured in VoIP entity view.
If the specified source interface does not have an IP address or its IP address is invalid, the device uses the default configuration.
Examples
# Specify Dialer 0 as the source interface for outbound SIP messages.
[Sysname] voice-setup
[Sysname-voice] sip
[Sysname-voice-sip] bind control source-interface dialer 0
Related commands
voice-class sip bind
crypto
Use crypto to configure SSL policies to be used by TLS.
Use undo crypto to delete SSL policies used by TLS.
Syntax
crypto { ssl-client-policy client-policy-name | ssl-server-policy server-policy-name }
undo crypto { server-policy | client-policy }
Default
No SSL policies for TLS exist.
Views
SIP view
Predefined user roles
network-admin
Parameters
ssl-client-policy client-policy-name: Specifies an SSL client policy by its name, a case-insensitive string of 1 to 31 characters.
ssl-server-policy server-policy-name: Specifies an SSL server policy by its name, a case-insensitive string of 1 to 31 characters.
Usage guidelines
To enable the device to receive TLS requests, specify the SSL client and server policies to be used by TLS and then enable the TLS listening port by using the transport command.
You must disable the TLS listening port before you can use a new SSL server policy or modify the configuration of the existing SSL server policy.
If you use a new SSL client policy or modify the configuration of the existing SSL client policy, the new policy applies only to new TLS connections. Existing TLS connections still use the original SSL client policy.
Examples
# Configure TLS to use the SSL server policy named Server1 and the SSL client policy named Server2.
[Sysname] voice-setup
[Sysname-voice] sip
[Sysname-voice-sip] crypto ssl-server-policy Server1
[Sysname-voice-sip] crypto ssl-client-policy Server2
Related commands
transport
display voice ip address trusted list
Use display voice ip address trusted list to display trusted node list information.
Syntax
display voice ip address trusted list
Views
Any view
Predefined user roles
network-admin
network-operator
Usage guidelines
This command displays trusted nodes configured by the ip command and call destination IP addresses configured by the address sip command.
Examples
# Display trusted node list information.
<Sysname> display voice ip address trusted list
IP address trusted authentication: Enabled
VoIP entity IP addresses:
Entity tag State SIP IP address
---------- ----- --------------
20 Up 192.168.4.110
53232 Down 192.168.4.210
55555 Up 192.168.4.210
9613 Up 192.168.4.125
IP address trusted list:
192.168.4.0 255.255.255.0
192.168.5.120 255.255.255.255
Table 25 Command output
|
Field |
Description |
|
Whether IP address trusted authentication is enabled: · Enabled. · Disabled. |
|
|
Trusted IP addresses for VoIP entities. |
|
|
Tag of a VoIP entity. |
|
|
Status of a VoIP entity: · Up. · Down. |
|
|
Call destination IP address of a VoIP entity. |
|
|
List of trusted nodes. |
Related commands
ip address trusted authenticate
display voice sip call
Use display voice sip call to display information about SIP calls.
Syntax
display voice sip call
Views
Any view
Predefined user roles
network-admin
network-operator
Examples
# Display information about SIP calls.
<Sysname> display voice sip call
SIP UAC Call Information
Call 1
Call ID: [email protected]
Call status: Connected
Calling number: 77201
Called number: 30
Control block ID: 8
Local IP address: 200.1.1.36: 5060
Remote IP address: 200.1.1.30: 5060
Media stream
Media status: Send and receive
Negotiated codec: g729r8
Codec payload type: 18
Codec payload size: 30
Codec transparent: Disabled
Media mode: Flow-through
Negotiated DTMF-relay: Inband-voice
Local IP address: 200.1.1.36: 16316
Remote IP address: 200.1.1.30: 16642
Number of SIP UAC calls: 1
Table 26 Command output
|
Field |
Description |
|
Call status |
Call status: · Originating. · Answering. · Connected. · Releasing. |
|
Local IP address |
Source IP address and port number for SIP messages. |
|
Remote IP address |
Destination IP address and port number for SIP messages. |
|
Negotiated codec |
Negotiated codec: · g711alaw. · g711ulaw. · g723r53. · g723r63. · g726r16. · g726r24. · g726r32. · g726r40. · g729a. · g729br8. · g729r8. This field displays N/A if codec negotiation fails or no codec is used. |
|
Media status |
Media status: |
|
Media mode |
Whether media flow around is enabled: · Flow-around—Enabled. · Flow-through—Disabled. |
|
Negotiated DTMF-relay |
Negotiated type of DTMF signaling: · Inband-voice—Inband DTMF signaling. · Outband-SIP—SIP mode for out-of-band DTMF signaling. · Outband-NTE—NTE mode for out-of-band DTMF signaling. |
|
Number of SIP calls initiated by the device that acts as a UAC. |
|
|
Number of SIP calls initiated by the device that acts as a UAS. |
display voice sip connection
Use display voice sip connection to display information about SIP connections, including established connections and connections that are being established.
Syntax
display voice sip connection { tcp | tls }
Views
Any view
Predefined user roles
network-admin
network-operator
Parameters
tcp: Specifies TCP connections.
tls: Specifies TLS connections.
Examples
# Display information about TCP connections.
<Sysname> display voice sip connection tcp
Conn-Id Local-IP Local-Port Remote-IP Remote-Port Conn-State
----------------------------------------------------------------------------------
569 100.1.1.84 1593 100.1.1.100 5060 Established
570 100.1.1.84 1594 100.1.1.101 5060 Established
571 100.1.1.84 1595 100.1.1.81 5060 Established
572 192.168.0.82 1596 192.168.0.81 5060 Established
# Display information about TLS connections.
<Sysname> display voice sip connection tls
Conn-Id Local-IP Local-Port Remote-IP Remote-Port Conn-State
----------------------------------------------------------------------------------
73 192.168.0.202 1086 192.168.0.132 5061 Established
Table 27 Command output
|
Field |
Description |
|
Connection ID. |
|
|
Connection state: · Connecting. · Established. |
Related commands
reset voice sip connection
display voice sip map
Use display voice sip map to display mappings between PSTN causes and SIP status.
Syntax
display voice sip map { pstn-sip | sip-pstn }
Views
Any view
Predefined user roles
network-admin
network-operator
Parameters
pstn-sip: Displays PSTN cause-to-SIP status mappings.
sip-pstn: Displays SIP status-to-PSTN cause mappings.
Examples
# Display PSTN cause-to-SIP status mappings.
<Sysname> display voice sip map pstn-sip
The PSTN Cause to SIP Status code mapping table:
Index PSTN-Cause SIP-Status Default
---------------------------------------------------
1 1 400* 404
2 2 400* 404
3 3 404 404
4 16 --- ---
5 17 486 486
6 18 408 408
7 19 480 480
8 20 480 480
9 21 403 403
10 22 410 410
11 23 410 410
12 25 500 500
13 26 404 404
14 27 502 502
15 28 484 484
16 29 501 501
17 31 480 480
18 34 503 503
19 38 503 503
20 41 503 503
21 42 503 503
22 47 503 503
23 55 403 403
24 57 403 403
25 58 503 503
26 63 500 500
27 65 488 488
28 70 488 488
29 79 501 501
30 87 403 403
31 88 503 503
32 102 504 504
33 111 500 500
34 127 500 500
Table 28 Command output
|
Field |
Description |
|
PSTN-Cause |
PSTN cause code. |
|
SIP-Status |
SIP status code. If the configured SIP status code is different from the default, it is highlighted with an asterisk. |
|
Default |
Default SIP status code. |
# Display SIP status-to-PSTN cause mappings.
<Sysname> display voice sip map sip-pstn
The SIP Status code to PSTN Cause mapping table:
Index SIP-Status PSTN-Cause Default
---------------------------------------------------
1 400 41 41
2 401 21 21
3 402 21 21
4 403 21 21
5 404 1 1
6 405 63 63
7 406 79 79
8 407 21 21
9 408 102 102
10 410 22 22
11 413 127 127
12 414 127 127
13 415 79 79
14 416 127 127
15 420 127 127
16 421 127 127
17 423 127 127
18 480 18 18
19 481 41 41
20 482 25 25
21 483 25 25
22 484 28 28
23 485 1 1
24 486 17 17
25 487 127 127
26 488 127 127
27 500 41 41
28 501 79 79
29 502 38 38
30 503 41 41
31 504 102 102
32 505 127 127
33 513 127 127
34 600 17 17
35 603 21 21
36 604 1 1
37 606 58 58
Table 29 Command output
|
Field |
Description |
|
SIP-Status |
SIP status code. |
|
PSTN-Cause |
PSTN cause code. If the configured PSTN cause code is different from the default, it is highlighted with an asterisk. |
|
Default |
Default PSTN cause code. |
display voice sip register-status
Use display voice sip register-status to display SIP UA registration status information.
Syntax
display voice sip register-status
Views
Any view
Predefined user roles
network-admin
network-operator
Examples
# Display SIP UA registration status information.
<Sysname> display voice sip register-status
Number Entity Registrar Server Expires Status
--------------------------------------------------------------------------------
98 98 192.168.4.240:5060 N/A Offline
1000 0 192.168.4.240:5060 2877 Online
Table 30 Command output
|
Field |
Description |
|
Number |
Phone number. |
|
Entity |
Entity number. This field displays 0 if a SIP trunk account is configured by using the credentials command. |
|
Registrar Server |
Address of the registrar. |
|
Expires |
Aging time for the phone number, in seconds. This field displays N/A if the phone number is registering or fails to register. |
|
Status |
State of the phone number: · Offline. · Online. · Login. · Logout. · DNS-in—DNS query is being performed before the number is registered. · DNS-out—DNS query is being performed before the number is deregistered. |
ip
Use ip to specify a trusted node.
Use undo ip to delete trusted nodes.
Syntax
Default
No trusted nodes exist.
Views
Trusted node list view
Predefined user roles
network-admin
Parameters
ipv4-address: Specifies a trusted node by its IPv4 address.
mask: Specifies the mask of the IPv4 address. If you do not specify a mask, the 32-bit mask is used.
Examples
# Specify the devices on subnet 1.1.1.0/24 as trusted nodes.
<Sysname> system-view
[Sysname] voice-setup
[Sysname-voice] sip-server
[Sysname-voice-server] trusted-point ipv4 100.1.1.125
ip address trusted authenticate
Use ip address trusted authenticate to enable IP address trusted authentication.
Use undo ip address trusted authenticate to disable IP address trusted authentication.
Syntax
ip address trusted authenticate
undo ip address trusted authenticate
Default
IP address trusted authentication is disabled. All nodes are regarded as trusted, and the device accepts calls from any nodes.
View
SIP view
Predefined user roles
network-admin
Usage guidelines
After you enable this feature, the device accepts calls only from trusted nodes.
As a best practice, configure the proxy server, registrars, the DNS server, and the MWI server as trusted nodes after you enable this feature.
Examples
# Enable IP address trusted authentication.
<Sysname> system-view
[Sysname] voice-setup
[Sysname-voice] sip
[Sysname-voice-sip] ip address trusted authenticate
ip address trusted list
Use ip address trusted list to enter trusted node list view.
Use undo ip address trusted list to restore the default.
Syntax
Default
No trusted node list exists.
Views
SIP view
Predefined user roles
network-admin
Examples
# Enter trusted node list view
[Sysname] voice-setup
[Sysname-voice] sip
[Sysname-voice-sip] ip address trusted list
[Sysname-voice-sip-iptrust-list]
ip qos dscp
Use ip qos dscp to set the global DSCP value for IP packets carrying media streams or signaling.
Use undo ip qos dscp to restore the default.
Syntax
ip qos dscp { dscp-value | dscp-value-set } { media | signaling }
undo ip qos dscp { dscp-value | dscp-value-set } { media | signaling }
Default
The DSCP value for IP packets is ef (101110).
Views
SIP view
Predefined user roles
network-admin
Parameters
dscp-value: Specifies a DSCP value in the range of 0 to 63.
dscp-value-set: Specifies a DSCP value, which can be the keyword af11, af12, af13, af21, af22, af23, af31, af32, af33, af41, af42, af43, cs1, cs2, cs3, cs4, cs5, cs6, cs7, or ef.
media: Applies the DSCP value to IP packets carrying media streams.
signaling: Applies the DSCP value to IP packets carrying signaling.
Table 31 DSCP values
|
Keyword |
DSCP value in binary |
DSCP value in decimal |
|
af11 |
001010 |
10 |
|
af12 |
001100 |
12 |
|
af13 |
001110 |
14 |
|
af21 |
010010 |
18 |
|
af22 |
010100 |
20 |
|
af23 |
010110 |
22 |
|
af31 |
011010 |
26 |
|
af32 |
011100 |
28 |
|
af33 |
011110 |
30 |
|
af41 |
100010 |
34 |
|
af42 |
100100 |
36 |
|
af43 |
100110 |
38 |
|
cs1 |
001000 |
8 |
|
cs2 |
010000 |
16 |
|
cs3 |
011000 |
24 |
|
cs4 |
100000 |
32 |
|
cs5 |
101000 |
40 |
|
cs6 |
110000 |
48 |
|
cs7 |
111000 |
56 |
|
ef |
101110 |
46 |
Usage guidelines
You can configure the ip qos dscp command both globally (in SIP view) and for a specific POTS/VoIP entity (in POTS/VoIP entity view). The configuration in POTS/VoIP entity view takes precedence over the global configuration. A POTS/VoIP entity uses the global configuration only when the ip qos dscp command is not configured in POTS/VoIP entity view.
Examples
# Set the global DSCP value to af41 for IP packets carrying signaling.
<Sysname> system-view
[Sysname] voice-setup
[Sysname-voice] sip
[Sysname-voice-sip] ip qos dscp af41 signaling
Related commands
ip qos dscp (VoIP/POTS entity view)
min-se
Use min-se to set the maximum and minimum session expiration timers.
Use undo min-se to restore the default.
Syntax
min-se time [ session-expires interval ]
Default
Both the maximum and minimum session expiration timers are 1800 seconds.
Views
SIP view
Predefined user roles
network-admin
Parameters
time: Specifies the minimum session expiration time in the range of 90 to 65535 seconds. The minimum session expiration time cannot be larger than the maximum session expiration time.
session-expires interval: Specifies the maximum session expiration time in the range of 90 to 65535 seconds. The default maximum session expiration time equals the minimum session expiration time.
Usage guidelines
You can use this command to set the values of the Min-SE and Session-Expires header fields on a UAC. If you execute this command on a UAS, only the Min-SE header field is set because the UAS copies the Session-Expires header field from the request to the response.
Examples
# Set the minimum session expiration time to 1000 seconds and the maximum session expiration time to 2000 seconds.
[Sysname] voice-setup
[Sysname-voice] sip
[Sysname-voice-sip] min-se 1000 session-expires 2000
Related commands
options-ping
Use options-ping to globally enable in-dialog keepalive.
Use undo options-ping to globally disable in-dialog keepalive.
Syntax
Default
In-dialog keepalive is disabled globally.
View
SIP view
Predefined use roles
network-admin
Parameters
seconds: Specifies the global interval for sending OPTIONS messages during a session, in the range of 60 to 1200 seconds.
Usage guidelines
This command enables the device to periodically send OPTIONS messages at the specified interval to monitor the status of the remote SIP UA during a session. It does not take effect when the session refresh negotiation succeeds before a call is established.
If you disable this feature, the device does not send OPTIONS messages after a call is established.
For a VoIP entity, the entity-specific in-dialog keepalive interval takes priority over the global in-dialog keepalive interval set in SIP view.
Example
# Globally enable in-dialog keepalive and set the interval to 60 seconds for sending OPTIONS messages during a session.
<Sysname> system-view
[Sysname] voice-setup
[Sysname-voice] sip
[Sysname-voice-sip] options-ping 60
Related commands
outband sip
Use outband sip to enable out-of-band DTMF signaling.
Use undo outband sip to restore the default.
Syntax
outband sip
undo outband
Default
Inband DTMF signaling is enabled.
Views
POTS entity view
VoIP entity view
Predefined user roles
network-admin
Usage guidelines
If you use out-of-band DTMF signaling, configure the outband sip command on both the calling and called devices.
Examples
# Enable out-of-band DTMF signaling for VoIP entity 10.
[Sysname] voice-setup
[Sysname-voice] dial-program
[Sysname-voice-dial] entity 10 pots
[Sysname-voice-dial-entity10] outband sip
privacy
Use privacy to add the Privacy header field to outgoing INVITE requests.
Use undo privacy to restore the default.
Syntax
privacy
undo privacy
Default
INVITE requests do not include the Privacy header field.
Views
SIP view
Predefined user roles
network-admin
Examples
# Add the Privacy header field to INVITE requests.
<Sysname> system-view
[Sysname] voice-setup
[Sysname-voice] sip
[Sysname-voice-sip] privacy
proxy
Use proxy to specify a proxy server.
Use undo proxy to restore the default.
Syntax
proxy { dns domain-name port port-number | ip ip-address [ port port-number ] }
Default
No proxy servers are specified.
Views
SIP view
Predefined user roles
network-admin
Parameters
dns domain-name: Specifies the domain name of the proxy server, which consists of case-insensitive character strings separated by a dot (for example, aabbcc.com). Each separated string contains no more than 63 characters. A domain name can include letters, digits, hyphens (-), and underscores (_), and has a maximum length of 253 characters.
ip ip-address: Specifies the IPv4 address of the proxy server.
port port-number: Specifies the port number of the proxy server, in the range of 1 to 65535. If the ip keyword is specified, the default port number is 5060. If the dns keyword is specified, the destination port number must be configured.
Examples
# Specify the proxy server with IP address 169.54.5.10 and port number 1120.
<Sysname> system-view
[Sysname] voice-setup
[Sysname-voice] sip
[Sysname-voice-sip] proxy ipv4 169.54.5.10 port 1120
# Specify the proxy server with domain name abc.com and port number 1100.
<Sysname> system-view
[Sysname] voice-setup
[Sysname-voice] sip
[Sysname-voice-sip] proxy dns abc.com port 1100
register-number
Use register-number to configure a POTS entity to register the phone number with the registrar.
Use undo register-number to configure a POTS entity to deregister the phone number with the registrar.
Syntax
Default
After you complete the SIP registration configuration, a POTS entity registers the phone number with the registrar.
Views
POTS entity view
Predefined user roles
network-admin
Usage guidelines
A registrar cannot store multiple entries for one phone number. Therefore, if multiple POTS entities on a device have the same phone number, only one POTS entity can register that number with the registrar.
Examples
# Configure POTS entity 10 to deregister the phone number with the registrar.
[Sysname] voice-setup
[Sysname-voice] dial-program
[Sysname-voice-dial] entity 10 pots
[Sysname-voice-dial-entity10] match-template 1000
[Sysname-voice-dial-entity10] line 2/1/1
[Sysname-voice-dial-entity10] undo register-number
Related commands
registrar
Use registrar to specify a registrar.
Use undo registrar to remove the configuration of a registrar and to notify the registrar to deregister the SIP UA.
Syntax
registrar registrar-index { dns domain-name port port-number | ip ip-address [ port port-number ] } [ expires seconds ] [ refresh-ratio ratio-percentage ] [ scheme { sip | sips } ] [ tcp [ tls ] ]
undo registrar registrar-index
Default
No registrars are specified.
Views
SIP view
Predefined user roles
network-admin
Parameters
registrar-index: Specifies the index for a registrar, in the range of 1 to 6.
dns domain-name: Specifies a registrar by its domain name, which consists of case-insensitive character strings separated by dots (for example, aabbcc.com). Each separated string contains no more than 63 characters. A domain name can include letters, digits, hyphens (-), and underscores (_), and has a maximum length of 253 characters.
ip ip-address: Specifies a registrar by its IP address.
port port-number: Specifies the port number of a registrar, in the range of 1 to 65535. If the ip keyword is specified, the default port number is 5060 for TCP and UDP and 5061 for TLS. If the dns keyword is specified, the port number must be configured.
expires seconds: Specifies the registration expiration time in the range of 60 to 65535 seconds. The default the registration expiration time is 3600 seconds.
refresh-ratio ratio-percentage: Specifies the refresh percentage in the range of 50 to 100. The default refresh percentage is 80%.
tcp: Uses TCP as the transport protocol. By default, UDP is used.
tls: Uses TLS as the transport protocol.
scheme: Specifies a URL scheme.
sip: Specifies SIP as the URL scheme. By default, SIP is used.
sips: Specifies SIPS as the URL scheme.
Usage guidelines
When the registration time reaches the registration expiration time multiplied by the refresh percentage, a voice entity or SIP trunk re-registers the number with the registrar to avoid expiration.
If you use TLS as the transport protocol for registration, the port number specified in this command must be the same as the one configured on the registrar.
Examples
# Configure a registrar with IP address 169.54.5.10 and port number 1120, and set the registration expiration time to 120 seconds.
[Sysname] voice-setup
[Sysname-voice] sip
[Sysname-voice-sip] registrar 1 ip 169.54.5.10 port 1120 expires 120
# Configure a registrar with domain name cc.news.com and port number 1100, and set the registration expiration time to 520 seconds.
[Sysname] voice-setup
[Sysname-voice] sip
[Sysname-voice-sip] registrar 2 dns cc.news.com port 1100 expires 520
Related commands
display voice sip register-status
transport
rel1xx
Use rel1xx to configure reliable provisional responses.
Use undo rel1xx to restore the default.
Syntax
rel1xx { disable | require value | supported value }
undo rel1xx
Default
SIP messages carry the Supported: value header field (the rel1xx supported 100rel command applies).
Views
SIP view
Predefined user roles
network-admin
Parameters
disable: Disables reliable provisional responses.
require value: Enables reliable provisional responses by adding the Required: value header field to outgoing SIP messages. The value range for value is 1 to 49.
supported value: Enables reliable provisional responses by adding the Supported: value header field to outgoing SIP messages. The value range for value is 1 to 49.
Usage guidelines
To implement reliable provisional responses, enable this feature and configure the same value for the value argument on both the UAC and UAS.
Examples
# Enable the device to send SIP messages with the Supported: 100rel header field.
<Sysname> system-view
[Sysname] voice-setup
[Sysname-voice] sip
[Sysname-voice-sip] rel1xx require 100rel
remote-party-id
Use remote-party-id to add the Remote-Party-ID header field to outgoing INVITE requests.
Use remote-party-id to not add the Remote-Party-ID header field to outgoing INVITE requests.
Syntax
remote-party-id
undo remote-party-id
Default
Outgoing INVITE requests include the Remote-Party-ID header field.
Views
SIP view
Predefined user roles
network-admin
Examples
# Add the Remote-Party-ID header field to INVITE requests.
<Sysname> system-view
[Sysname] voice-setup
[Sysname-voice] sip
[Sysname-voice-sip] remote-party-id
reset voice sip connection
Use reset voice sip connection to disconnect a SIP connection, either an established connection or a connection that is being established.
Syntax
reset voice sip connection { tcp | tls } id conn-id
Views
User view
Predefined user roles
network-admin
Parameters
tcp: Specifies TCP connections.
tls: Specifies TLS connections.
id conn-id: Specifies a connection by its connection ID in the range of 0 to 2147483647. You can use the display voice sip connection command to determine connection IDs.
Examples
# Disconnect the TCP connection with a connection ID of 1.
<Sysname> reset voice sip connection tcp id 1
Related commands
display voice sip connection
retry invite
Use retry invite to set the maximum number of INVITE request retries.
Use undo retry invite to restore the default.
Syntax
retry invite times
undo retry invite
Default
The maximum number of INVITE request retries is 6.
Views
SIP view
Predefined user roles
network-admin
Parameters
times: Specifies the maximum number of INVITE request retries, in the range of 1 to 10.
Usage guidelines
The originating device starts an INVITE retry timer when sending an INVITE request. If no 100 response arrives when the timer expires, the originating device retransmits the INVITE request. If no 100 response arrives when the maximum number of INVITE retries is reached, the originating device clears the call.
Examples
# Set the maximum number of INVITE request retries to 5.
<Sysname> system-view
[Sysname] voice-setup
[Sysname-voice] sip
[Sysname-voice-sip] retry invite 5
Related commands
timers trying
session refresh
Use session refresh to enable SIP session refresh globally.
Use undo session refresh to disable SIP session refresh globally.
Syntax
Default
SIP session refresh is globally disabled if the device acts as a UAC, and is globally enabled if the device acts as a UAS.
Views
SIP view
Predefined user roles
network-admin
Usage guidelines
Use this command on a UAC.
Examples
# Globally enable SIP session refresh.
[Sysname] voice-setup
[Sysname-voice] sip
[Sysname-voice-sip] session refresh
Related commands
session transport
Use session transport to specify a transport protocol for outgoing SIP calls.
Use undo session transport to restore the default.
Syntax
session transport { tcp [ tls ] | udp }
undo session transport
Default
The global transport protocol for outgoing SIP calls is UDP. The transport protocol for outgoing SIP calls on a VoIP entity is the same as the global default.
Views
SIP view
VoIP entity view
Predefined user roles
network-admin
Parameters
udp: Specifies UDP as the transport protocol.
tcp: Specifies TCP as the transport protocol.
tls: Specifies TLS as the transport protocol.
Usage guidelines
You can configure the transport protocol both globally (in SIP view) and for a specific VoIP entity (in VoIP entity view). The configuration in VoIP entity view takes precedence over the global configuration. A VoIP entity uses the global configuration only when no transport protocol is configured in VoIP entity view.
Configure the same transport protocol on the called and calling devices. For example, if you configure the session transport tcp command on the calling device, you must configure the transport tcp command on the called device.
You must configure the SSL client and server policies by using the crypto command before you can use TLS to initiate SIP calls.
Examples
# Specify TLS as the global transport protocol for outgoing SIP calls.
<Sysname> system-view
[Sysname] voice-setup
[Sysname-voice] sip
[Sysname-voice-sip] session transport tcp tls
Related commands
crypto
transport
set pstn-cause
Use set pstn-cause to configure a PSTN cause-to-SIP status mapping.
Use undo set pstn-cause to restore the default.
Syntax
set pstn-cause pstn-cause sip-status sip-status
undo set pstn-cause pstn-cause
Default
Table 32 Default PSTN cause-to-SIP status mappings
|
PSTN cause code |
PSTN cause description |
SIP status code |
SIP status description |
|
1 |
Unallocated (unassigned) number! |
404 |
Not Found. |
|
2 |
No route to specified transit network! |
404 |
Not Found. |
|
3 |
No route to destination! |
404 |
Not Found. |
|
16 |
Normal clearing! |
N/A |
BYE or CANCEL. |
|
17 |
User busy! |
486 |
Busy here. |
|
18 |
No user responding! |
408 |
Request Timeout. |
|
19 |
No answer from user! |
480 |
Temporarily unavailable. |
|
20 |
Subscriber absent! |
480 |
Temporarily unavailable. |
|
21 |
Call rejected! |
403 |
Forbidden. |
|
22 |
Number changed! |
410 |
Gone. |
|
23 |
Redirection to new destination! |
410 |
Gone. |
|
25 |
Exchange routing error! |
500 |
Server internal error. |
|
26 |
Non-selected user clearing! |
404 |
Not Found. |
|
27 |
Destination out of order! |
502 |
Bad Gateway. |
|
28 |
Invalid number format (address incomplete)! |
484 |
Address incomplete. |
|
29 |
Facility rejected! |
501 |
Not implemented. |
|
31 |
Normal, unspecified! |
480 |
Temporarily unavailable. |
|
34 |
No circuit/channel available! |
503 |
Service unavailable. |
|
38 |
Network out of order! |
503 |
Service unavailable. |
|
41 |
Temporary failure! |
503 |
Service unavailable. |
|
42 |
Switching equipment congestion! |
503 |
Service unavailable. |
|
47 |
Resource unavailable, unspecified! |
503 |
Service unavailable. |
|
55 |
Incoming class barred within Closed User Group (CUG)! |
403 |
Forbidden. |
|
57 |
Bearer capability not authorized! |
403 |
Forbidden. |
|
58 |
Bearer capability not presently available! |
503 |
Service unavailable. |
|
63 |
Service or option not available, unspecified! |
500 |
Server internal error. |
|
65 |
Bearer capability not implemented! |
488 |
Not Acceptable Here. |
|
70 |
Only restricted digital information bearer capability is available! |
488 |
Not Acceptable Here. |
|
79 |
Service or option not implemented, unspecified! |
501 |
Not implemented. |
|
87 |
User not member of Closed User Group (CUG)! |
403 |
Forbidden. |
|
88 |
Incompatible destination! |
503 |
Service unavailable. |
|
102 |
Recovery on timer expiry! |
504 |
Gateway timeout. |
|
111 |
Protocol error, unspecified! |
500 |
Server internal error. |
|
127 |
Interworking, unspecified! |
500 |
Server internal error. |
Views
SIP view
Predefined user roles
network-admin
Parameters
pstn-code: Specifies a PSTN cause code in Table 32. The PSTN cause code 16 is invalid.
sip-code: Specifies a SIP status code in Table 32.
Examples
# Map the PSTN cause code 17 to the SIP status code 408.
[Sysname] voice-setup
[Sysname-voice] sip
[Sysname-voice-sip] set pstn-cause 17 sip-status 408
set sip-status
Use set sip-status to configure a SIP status-to-PSTN cause mapping.
Use undo set sip-status to restore the default.
Syntax
set sip-status sip-status pstn-cause pstn-cause
undo set sip-status sip-status
Default
Table 33 Default SIP status-to-PSTN cause mappings
|
SIP status code |
SIP status description |
PSTN cause code |
PSTN cause description |
|
400 |
Bad Request. |
41 |
Temporary failure! |
|
401 |
Unauthorized. |
21 |
Call rejected! |
|
402 |
Payment required. |
21 |
Call rejected! |
|
403 |
Forbidden. |
21 |
Call rejected! |
|
404 |
Not found. |
1 |
Unallocated (unassigned) number! |
|
405 |
Method not allowed. |
63 |
Service or option not available, unspecified! |
|
406 |
Not acceptable. |
79 |
Service or option not implemented, unspecified! |
|
407 |
Proxy authentication required. |
21 |
Call rejected! |
|
408 |
Request timeout. |
102 |
Recovery on timer expiry! |
|
410 |
Gone. |
22 |
Number changed! |
|
413 |
Request Entity too long. |
127 |
Interworking, unspecified! |
|
414 |
Request-URI too long. |
127 |
Interworking, unspecified! |
|
415 |
Unsupported media type. |
79 |
Service or option not implemented, unspecified! |
|
416 |
Unsupported URI Scheme. |
127 |
Interworking, unspecified! |
|
420 |
Bad extension. |
127 |
Interworking, unspecified! |
|
421 |
Extension Required. |
127 |
Interworking, unspecified! |
|
423 |
Interval Too Brief. |
127 |
Interworking, unspecified! |
|
480 |
Temporarily unavailable. |
18 |
No user responding! |
|
481 |
Call/Transaction Does not Exist. |
41 |
Temporary failure! |
|
482 |
Loop Detected. |
25 |
Exchange routing error! |
|
483 |
Too many hops. |
25 |
Exchange routing error! |
|
484 |
Address incomplete. |
28 |
Invalid number format (address incomplete)! |
|
485 |
Ambiguous. |
1 |
Unallocated (unassigned) number! |
|
486 |
Busy here. |
17 |
User busy! |
|
487 |
Request Terminated. |
127 |
Interworking, unspecified! |
|
488 |
Not Acceptable here. |
127 |
Interworking, unspecified! |
|
500 |
Server internal error. |
41 |
Temporary failure! |
|
501 |
Not implemented. |
79 |
Service or option not implemented, unspecified! |
|
502 |
Bad gateway. |
38 |
Network out of order! |
|
503 |
Service unavailable. |
41 |
Temporary failure! |
|
504 |
Server time-out. |
102 |
Recovery on timer expiry! |
|
505 |
Version Not Supported. |
127 |
Interworking, unspecified! |
|
513 |
Message Too Large. |
127 |
Interworking, unspecified! |
|
600 |
Busy everywhere. |
17 |
User busy! |
|
603 |
Decline. |
21 |
Call rejected! |
|
604 |
Does not exist anywhere. |
1 |
Unallocated (unassigned) number! |
|
606 |
Not acceptable. |
58 |
Bearer capability not presently available! |
Views
SIP view
Predefined user roles
network-admin
Parameters
sip-code: Specifies a SIP status code in Table 33.
pstn-code: Specifies a PSTN cause code in Table 33.
Examples
# Map the SIP status code 486 to the PSTN cause code 18.
[Sysname] voice-setup
[Sysname-voice] sip
[Sysname-voice-sip] set sip-status 486 pstn-cause 18
signaling forward rawmsg
Use signaling forward rawmsg to enable QSIG tunneling over SIP-T.
Use undo signaling forward rawmsg to disable QSIG tunneling over SIP-T.
Syntax
signaling forward rawmsg
undo signaling forward rawmsg
Default
QSIG tunneling over SIP-T is disabled.
Views
VoIP entity view
Predefined user roles
network-admin
Usage guidelines
This command enables sending QSIG signaling in SIP messages. In the SIP messages, the Content-type field is application/qsig, and the message body is the QSIG signaling received from the ISDN side.
The device does not support QSIG tunneling over SIP-T when the ISDN network uses overlap sending.
The SIP server might fail to interpret SIP messages carrying QSIG signaling. As a best practice, do not enable QSIG tunneling over SIP-T on a network where the device communicates with the SIP server.
Examples
# Enable QSIG tunneling over SIP-T.
[Sysname] voice-setup
[Sysname-voice] dial-program
[Sysname-voice-dial] entity 10 voip
[Sysname-voice-dial-entity10] signaling forward rawmsg
sip
Use sip to enter SIP view.
Use undo sip to remove the settings from SIP view.
Syntax
sip
undo sip
Views
Voice view
Predefined user roles
network-admin
Examples
# Enter SIP view.
<Sysname> system-view
[Sysname] voice-setup
[Sysname-voice] sip
[Sysname-voice-sip]
sip-compatible
Use sip-compatible to configure SIP compatibility with a third-party device.
Use undo sip-compatible to restore the default.
Syntax
sip-compatible { cause-code | early-media | t38 | x-param }
undo sip-compatible { cause-code | early-media | t38 | x-param }
Default
SIP compatibility is not configured.
Views
SIP view
Predefined user roles
network-admin
Parameters
cause-code: Configures SIP compatibility for SIP cause code interaction. With this keyword specified, the router uses Cause 27 instead of Cause 38 as the cause code for disconnecting a call.
early-media: Configures SIP compatibility for early media channels. With this keyword specified, the device does not disconnect the established early media channel upon receiving an 18X message without SDP from the terminating side.
t38: Configures SIP compatibility for standard T.38 fax. With this keyword specified, the router excludes :0 from the following SDP parameters in the originated re-INVITE messages:
· T38FaxTranscodingJBIG.
· T38FaxTranscodingMMR.
· T38FaxFillBitRemoval.
This keyword is required when the router interoperates with a third-party softswitch device to exchange T.38 fax messages.
x-param: Configures SIP compatibility for fax pass-through and modem pass-through. With this keyword specified, the router adds SDP description information for fax pass-through and modem pass-through to outgoing re-INVITE messages. This keyword is required when the router interoperates with a third-party softswitch device to perform fax pass-through and modem pass-through.
Usage guidelines
If some SIP implementations of a third-party device are special, you can configure SIP compatibility for the device to interoperate with the third-party device.
You can execute this command multiple times to specify multiple parameters.
Examples
# Configure SIP compatibility for standard T.38 fax.
<Sysname> system-view
[Sysname] voice-setup
[Sysname-voice] sip
[Sysname-voice-sip] sip-compatible t38
sip domain
Use sip-domain to configure a SIP domain name for the device.
Use undo sip-domain to restore the default.
Syntax
sip-domain domain-name
undo sip-domain
Default
No SIP domain name is configured. The device populates the Contact header field of an outgoing SIP packet with the IP address of the outgoing interface.
Views
SIP view
Predefined user roles
network-admin
Parameters
domain-name: Specifies the SIP domain name, a case-insensitive string of 1 to 31 characters. Valid characters are letters, digits, underscore (_), hyphen (-), and dot (.).
Usage guidelines
To populate the Contact header field of outgoing SIP packets with the SIP domain name, use this command.
Examples
# Configure the SIP domain name as abc.com.
<Sysname> system-view
[Sysname] voice-setup
[Sysname-voice] sip
[Sysname-voice-sip] sip-domain abc.com
srtp
Use srtp to configure SRTP as the media stream protocol for SIP calls.
Use undo srtp to restore the default.
Syntax
srtp [ fallback ]
undo srtp
Default
The global media stream protocol for SIP calls is RTP. The media stream protocol for SIP calls on a VoIP entity is the same as the global default.
Views
SIP view
VoIP entity view
Predefined user roles
network-admin
Parameters
fallback: Supports fallback to RTP if the peer does not support SRTP.
Usage guidelines
The differences between the srtp and srtp fallback commands are as follows:
· If the srtp command is configured, the following conditions exist:
¡ The device includes crypto and RTP/SAVP parameters in outgoing INVITE requests and disconnects the call after receiving a 488 response.
¡ The device can accept only calls using SRTP.
· If the srtp fallback command is configured, the following conditions exist:
¡ The device includes crypto and RTP/SAVP parameters in outgoing INVITE requests and retransmits INVITE requests with RTP/AVP parameters after receiving a 488 response.
¡ The device can accept calls using SRTP or RTP. SRTP is preferred for media stream protocol negotiation. If the negotiation fails, RTP is used.
You can configure the srtp command globally (in SIP view) and for a specific VoIP entity (in VoIP entity view). The configuration in VoIP entity view takes precedence over the global configuration. A VoIP entity uses the global configuration only when the srtp command is not configured in VoIP entity view.
Examples
# Configure SRTP as the media stream protocol for SIP calls.
<Sysname> system-view
[Sysname] voice-setup
[Sysname-voice] sip
[Sysname-voice-sip] srtp
timers connection aging
Use timers connection aging to set the aging time for TCP or TLS connections.
Use undo timers connection aging to restore the default.
Syntax
timers connection aging { tcp tcp-age-time | tls tls-age-time }
undo timers connection aging { tcp | tls }
Default
The aging time for TCP connections is 5 minutes. The aging time for TLS connections is 30 minutes.
Views
SIP view
Predefined user roles
network-admin
Parameters
tcp tcp-age-time: Specifies the amount of idle time that elapses before a TCP connection is removed. The value range for tcp-age-time is 5 to 30 minutes.
tls tls-age-time: Specifies the amount of idle time that elapses before a TLS connection is removed. The value range for tls-age-time is 30 to 180 minutes.
Examples
# Set the aging time to 6 minutes for TCP connections and 60 minutes for TLS connections.
<Sysname> system-view
[Sysname] voice-setup
[Sysname-voice] sip
[Sysname-voice-sip] timers connection aging tcp 6
[Sysname-voice-sip] timers connection aging tls 60
timers options
Use timers options to set the interval for sending out-of-dialog OPTIONS messages.
Use undo timers options to restore the default.
Syntax
Default
The interval for sending out-of-dialog OPTIONS messages is 500 milliseconds.
Views
SIP view
Predefined user roles
network-admin
Parameters
value: Specifies the interval for sending out-of-dialog OPTIONS messages, in the range of 100 to 1000 milliseconds.
Usage guidelines
This command takes effect only when the out-of-dialog keepalive feature has been enabled by using the voice-class sip options-keepalive command. For more information about the interval, see the usage guidelines for the voice-class sip options-keepalive command.
Examples
# Set the interval to 600 milliseconds for sending out-of-dialog OPTIONS messages.
<Sysname> system-view
[Sysname] voice-setup
[Sysname-voice] sip
[Sysname-voice-sip] timer registration expires 600
Related commands
voice-class sip options-keepalive
timers trying
Use timers trying to set the INVITE retry timer.
Use undo timers trying to restore the default.
Syntax
timers trying timer-length
undo timers trying
Default
The INVITE retry timer is 500 milliseconds.
Views
SIP view
Predefined user roles
network-admin
Parameters
timer-length: Specifies the INVITE retry timer value in the range of 100 to 1000 milliseconds.
Usage guidelines
The INVITE retry timer defines the amount of time to wait for a 100 response to an INVITE request. The originating device starts an INVITE retry timer when sending an INVITE request. If it does not receive a 100 response when the timer expires, it retransmits the INVITE request.
Examples
# Set the INVITE retry timer to 600 milliseconds.
<Sysname> system-view
[Sysname] voice-setup
[Sysname-voice] sip
[Sysname-voice-sip] timers trying 600
Related commands
retry invite
transport
Use transport to enable the listening port for a transport protocol.
Use undo transport to disable the listening port for a transport protocol.
Syntax
transport { tcp [ tls ] | udp }
undo transport { tcp [ tls ] | udp }
Default
The UDP and TCP listening ports are enabled. The TLS listening port is disabled.
Views
SIP view
Predefined user roles
network-admin
Parameters
udp: Enables the UDP listening port (port 5060).
tcp: Enables the TCP listening port (port 5060).
tls: Enables the TLS listening port (port 5061).
Usage guidelines
You can use this command multiple times to enable multiple listening ports.
For the device to receive calls and initiate registrations or subscriptions, configure this command to enable the corresponding listening port.
You must configure the SSL client and server policies by using the crypto command before you can enable the TLS listening port.
The undo transport command removes established connections.
Examples
# Enable the TLS listening port.
<Sysname> system-view
[Sysname] voice-setup
[Sysname-voice] sip
[Sysname-voice-sip] transport tcp tls
Related commands
crypto
mwi
registrar
url
Use url to configure a global URL scheme for outgoing SIP calls.
Use undo url to restore the default.
Syntax
url { sip | sips }
undo url
Default
The SIP scheme is used.
Views
SIP view
Predefined user roles
network-admin
Parameters
sip: Specifies the SIP scheme.
sips: Specifies the SIPS scheme.
Usage guidelines
You can configure the URL scheme both globally (by using the url command in SIP view) and for a specific VoIP entity (by using the voice-class sip url command in VoIP entity view). The configuration in VoIP entity view takes precedence over the global configuration. A VoIP entity uses the global configuration only when no URL scheme is configured in VoIP entity view.
Examples
# Specify SIPS as the global URL scheme.
<Sysname> system-view
[Sysname] voice-setup
[Sysname-voice] sip
[Sysname-voice-sip] url sips
Related commands
voice-class sip url (in VoIP entity view)
user
Use user to configure SIP credentials.
Use undo user to delete SIP credentials.
Syntax
user username password { cipher | simple } string [ realm realm ]
undo user [ username password { cipher | simple } string [ realm realm ] ]
Default
No SIP credentials exist.
Views
SIP view
POTS entity view
Predefined user roles
network-admin
Parameters
username: Specifies a username, a case-sensitive string of 1 to 63 characters.
cipher: Specifies a password in encrypted form.
simple: Specifies a password in plaintext form. For security purposes, the password specified in plaintext form will be stored in encrypted form.
string: Specifies the password. Its plaintext form is a case-sensitive string of 1 to 16 characters. Its encrypted form is a case-sensitive string of 1 to 53 characters.
realm realm: Specifies a realm, a case-sensitive string of 1 to 50 characters. If you do not specify a realm, the credentials can be used to respond to any registrars.
Usage guidelines
A SIP UA can register with a maximum of six registrars, and it uses the domain name in the 401/407 response from a registrar to identify the credentials to be sent to the registrar.
You can configure only one username with the user command in SIP view or voice entity view. The username can contain 12 credentials bindings. A binding that does not include a domain name can be used to respond to a 401/407 response that does not match any domain name-included binding. The following example configures four credentials bindings:
[Sysname-voice-dial-entity100] user 1000 password simple 1000 realm server1
[Sysname-voice-dial-entity100] user 1000 password simple 1000 realm server2
[Sysname-voice-dial-entity100] user 1000 password simple 2000 realm server3
[Sysname-voice-dial-entity100] user 1000 password simple 3000
The first three bindings each contain a domain name, and the last binding contains no domain name. If the SIP UA receives a 401/407 response that includes a domain name server2, the SIP UA responds with the username 1000 and password 1000. If the SIP UA receives a 401/407 response that includes a domain name server4, the SIP UA responds with the username 1000 and password 3000 because no credentials binding contains the domain name server4.
Examples
# Configure global SIP credentials that include username abcd and plaintext password 1234.
<Sysname> system-view
[Sysname] voice-setup
[Sysname-voice] sip
[Sysname-voice-sip] user abcd password simple 1234
# Configure SIP credentials that include username abcd, plaintext password 1234, and realm abc for POTS entity 100.
[Sysname] voice-setup
[Sysname-voice] dial-program
[Sysname-voice-dial] entity 100 pots
[Sysname-voice-dial-entity100] user abcd password simple 1234 realm abc
Related commands
voice-class sip bind
Use voice-class sip bind to configure source interface binding for outgoing SIP messages or media packets on a VoIP entity.
Use undo voice-class sip bind to restore the default.
Syntax
voice-class sip bind { control | media } source-interface interface-type interface-number
undo voice-class sip bind { control | media }
Default
The default global source interface is used.
Views
VoIP entity view
Predefined user roles
network-admin
Parameters
control: Specifies outbound SIP messages.
media: Specifies outbound media packets.
source-interface interface-type interface-number: Specifies a source interface whose IP address is used as the source address of outbound SIP messages or media packets. The specified interface must be a Layer 3 Ethernet interface or dialer interface.
Usage guidelines
For information about how source interface binding works in different conditions, see the usage guidelines for the bind command.
You can configure source interface binding both globally (by using the bind command in SIP view) and for a specific VoIP entity (by using the voice-class sip bind command in VoIP entity view). The configuration in VoIP entity view takes precedence over the global configuration. A VoIP entity uses the global configuration only when source interface binding is not configured in VoIP entity view.
Examples
# Specify Dialer 0 as the source interface for outbound SIP messages on VoIP entity 10.
<Sysname> system-view
[Sysname] voice-setup
[Sysname-voice] dial-program
[Sysname-voice-dial] entity 10 voip
[Sysname-voice-dial-entity10] voice-class sip bind control source-interface dialer 0
Related commands
bind
voice-class sip options-keepalive
Use voice-class sip options-keepalive to enable out-of-dialog keepalive for a VoIP entity and optionally set the out-of-dialog keepalive parameters.
Use undo voice-class sip options-keepalive to disable out-of-dialog keepalive for a VoIP entity.
Syntax
undo voice-class sip options-keepalive
Default
Out-of-dialog keepalive is disabled for a VoIP entity.
Views
VoIP entity view
Predefined user roles
network-admin
Parameters
up-interval interval: Specifies the interval for sending out-of-dialog OPTIONS packets when the VoIP entity is available, in the range of 5 to 1200 seconds. The default value is 60 seconds.
down-interval interval: Specifies the interval for sending out-of-dialog OPTIONS packets when the VoIP entity is not available, in the range of 5 to 1200 seconds. The default value is 30 seconds.
retry retries: Specifies the number of retries to change the state for the VoIP entity.
Usage guidelines
After you enable the out-of-dialog keepalive feature for a VoIP entity, the UA sends OPTIONS packets at the up-interval. If the UA receives a response within the up-interval, it considers the VoIP entity to be available. If the UA receives no response within the up-interval, or receives an error response, it sends OPTIONS packets at the timers options interval. (Error responses include 408, 499, and 5XX responses except for 500, 501, 502, 503, 504, and 513 responses.) If the UA still receives no responses after the maximum number of retries is reached, it considers the VoIP entity to be unavailable.
Then, the UA sends OPTIONS packets at the down-interval. If the UA receives a response within the down-interval, it sends OPTIONS packets at the timers options interval. If the UA still can receive responses after the number of retries is reached, it considers the VoIP entity to be available.
The keepalive feature does not take effect for a VoIP entity that has been shut down by using the shutdown command.
Examples
# Enable out-of-dialog keepalive for VoIP entity 10, and set the up-interval to 50 seconds, the down-interval to 20 seconds, and the number of retries to 2.
[Sysname] voice-setup
[Sysname-voice] dial-program
[Sysname-voice-dial] entity 10 voip
[Sysname-voice-dial-entity10] voice-class sip options-keepalive up-interval 50 down-interval 20 retry 2
Related commands
voice-class sip options-ping
Use voice-class sip options-ping to enable in-dialog keepalive for a VoIP entity.
Use voice-class sip options-ping to disable in-dialog keepalive for a VoIP entity.
Syntax
voice-class sip options-ping { global | seconds }
undo voice-class sip options-ping
Default
A VoIP entity uses the global configuration for in-dialog keepalive.
Views
VoIP entity view
Predefined user roles
network-admin
Parameters
global: Applies the global configuration for in-dialog keepalive to the VoIP entity.
seconds: Specifies the interval for sending OPTIONS messages during a session, in the range of 60 to 1200 seconds.
Usage guidelines
For a VoIP entity, the entity-specific in-dialog keepalive interval takes priority over the global in-dialog keepalive interval set in SIP view.
Examples
# Enable in-dialog keepalive for VoIP entity 1 and set the interval to 60 seconds for sending OPTIONS messages during a session.
<Sysname> system-view
[Sysname] voice-setup
[Sysname-voice] dial-program
[Sysname-voice-dial] entity 1 voip
[Sysname-voice-dial-entity1] voice-class sip options-ping 60
# Apply the global configuration for in-dialog keepalive to VoIP entity 1.
<Sysname> system-view
[Sysname] voice-setup
[Sysname-voice] dial-program
[Sysname-voice-dial] entity 1 voip
[Sysname-voice-dial-entity1] voice-class sip options-ping global
Related commands
options-ping
voice-class sip session refresh
Use voice-class sip session refresh to enable SIP session refresh for a VoIP entity.
Use undo voice-class sip session refresh to disable SIP session refresh for a VoIP entity.
Syntax
voice-class sip session refresh [ global ]
undo voice-class sip session refresh
Default
A VoIP entity uses the global configuration for SIP session refresh.
Views
VoIP entity view
Predefined user roles
network-admin
Parameters
global: Applies the global configuration for SIP session refresh to the VoIP entity.
Usage guidelines
The configuration for SIP session refresh made in VoIP entity view takes priority over that made in SIP view.
Examples
# Enable SIP session refresh for VoIP entity 1.
<Sysname> system-view
[Sysname] voice-setup
[Sysname-voice] dial-program
[Sysname-voice-dial] entity 1 voip
[Sysname-voice-dial-entity1] voice-class sip session refresh
# Apply the global configuration for SIP session refresh to VoIP entity 1.
<Sysname> system-view
[Sysname] voice-setup
[Sysname-voice] dial-program
[Sysname-voice-dial] entity 1 voip
[Sysname-voice-dial-entity1] voice-class sip session refresh global
Related commands
min-se
session refresh
voice-class sip url
Use voice-class sip url to configure a URL scheme for outgoing SIP calls on a VoIP entity.
Use undo voice-class sip url to restore the default.
Syntax
voice-class sip url { sip | sips }
undo voice-class sip url
Default
The default global URL scheme (SIP scheme) is used.
Views
VoIP entity view
Predefined user roles
network-admin
Parameters
sip: Specifies the SIP scheme.
sips: Specifies the SIPS scheme.
Usage guidelines
You can configure the URL scheme both globally (by using the url command in SIP view) and for a specific VoIP entity (by using the voice-class sip url command in VoIP entity view). The configuration in VoIP entity view takes precedence over the global configuration. A VoIP entity uses the global configuration only when no URL scheme is configured in VoIP entity view.
Examples
# Specify the SIP scheme for outgoing SIP calls on VoIP entity 1000.
<Sysname> system-view
[Sysname] voice-setup
[Sysname-voice] dial-program
[Sysname-voice-dial] entity 1000 voip
[Sysname-voice-dial-entity1000] voice-class sip url sips
Related commands
url
vpn-instance
Use vpn-instance to associate a VPN instance with SIP.
Use undo vpn-instance to remove the association.
Syntax
vpn-instance vpn-instance-name
undo vpn-instance
Default
No VPN instance is associated with SIP.
Views
SIP view
Predefined user roles
network-admin
Parameters
vpn-instance-name: Specifies an MPLS L3VPN instance by its name, a case-sensitive string of 1 to 31 characters.
Usage guidelines
The VPN instance to be associated with SIP must be already created.
You cannot associate a VPN instance or remove the association when a SIP service is being used.
Examples
# Associate the VPN instance vpn-voice with SIP.
<Sysname> system-view
[Sysname] voice-setup
[Sysname-voice] sip
[Sysname-voice-sip] vpn-instance vpn-voice
Related commands
ip binding vpn-instance (MPLS Command Reference)
ip vpn-instance (MPLS Command Reference)
SIP trunk commands
The following matrix shows the feature and hardware compatibility:
|
Hardware |
SIP trunk compatibility |
|
MSR810/810-W/810-W-DB/810-LM/810-W-LM/810-10-PoE/810-LM-HK/810-W-LM-HK/810-LMS/810-LUS |
No |
|
MSR2600-6-X1/2600-10-X1 |
Yes |
|
MSR 2630 |
Yes |
|
MSR3600-28/3600-51 |
Yes |
|
MSR3600-28-SI/3600-51-SI |
No |
|
MSR3610-X1/3610-X1-DP/3610-X1-DC/3610-X1-DP-DC |
Yes |
|
MSR 3610/3620/3620-DP/3640/3660 |
Yes |
|
MSR5620/5660/5680 |
Yes (not supported on the router installed with an SPU600-X1 card.) |
|
Hardware |
SIP trunk compatibility |
|
MSR810-LM-GL |
No |
|
MSR810-W-LM-GL |
No |
|
MSR830-6EI-GL |
No |
|
MSR830-10EI-GL |
No |
|
MSR830-6HI-GL |
No |
|
MSR830-10HI-GL |
No |
|
MSR2600-6-X1-GL |
Yes |
|
MSR3600-28-SI-GL |
No |
allow-connections sip to sip
Use allow-connections sip to sip to enable SIP-to-SIP calling.
Use undo allow-connections sip to sip to disable SIP-to-SIP calling.
Syntax
undo allow-connections sip to sip
Default
SIP-to-SIP calling is disabled.
Views
Voice view
Predefined user roles
network-admin
Usage guidelines
After you enable SIP-to-SIP calling, the device works as a SIP trunk device. As a best practice, do not use a SIP trunk device as a SIP UA.
Examples
# Enable SIP-to-SIP calling.
[Sysname] voice-setup
[Sysname-voice] allow-connections sip to sip
codec transparent
Use codec transparent to enable codec transparent transmission.
Use undo codec transparent to disable codec transparent transmission.
Syntax
codec transparent
undo codec transparent
Default
Codec transparent transmission is disabled. The SIP trunk device is involved in the media negotiation between the calling and called parties.
Views
VoIP entity view
Predefined user roles
network-admin
Usage guidelines
If the SIP trunk device does not support any codecs on the calling and called parties, you can enable codec transparent transmission. The SIP trunk device transparently forwards codec capability sets between the two parties without intervening codec negotiation.
Examples
# Enable codec transparent transmission for VoIP entity 1.
[Sysname] voice-setup
[Sysname-voice] dial-program
[Sysname-voice-dial] entity 1 voip
[Sysname-voice-dial-entity1] codec transparent
credentials
Use credentials to create a SIP trunk account.
Use undo credentials to delete a SIP trunk account.
Syntax
credentials number number username username password { cipher | simple } string realm realm
Default
No SIP trunk accounts exist.
Views
SIP view
Predefined user roles
network-admin
Parameters
number: Specifies a number for the SIP trunk account, a case-sensitive string of 4 to 31 characters.
username: Specifies a username, a case-sensitive string of 1 to 63 characters.
cipher: Specifies a password in encrypted form.
simple: Specifies a password in plaintext form. For security purposes, the password specified in plaintext form will be stored in encrypted form.
string: Specifies the password. Its plaintext form is a case-sensitive string of 1 to 16 characters. Its encrypted form is a case-sensitive string of 1 to 53 characters.
realm realm: Specifies a realm, a case-sensitive string of 1 to 50 characters.
Usage guidelines
A SIP trunk account contains a phone number, credentials, and realms assigned by the service provider. SIP can send a REGISTER request for the phone number to a maximum of six registrars specified by using the registrar command. SIP uses the realm value in 401/407 responses from the registrars to identify the matching credentials. You can configure a maximum of 12 realms for a phone number, and a maximum of 128 SIP trunk accounts on the device.
Examples
# Configure a SIP trunk account for phone number 1000 that uses the following:
· Username 1000 and password 1000 for realm server1.
· Username 2000 and password 2000 for realm server2.
· Username 3000 and password 3000 for realm server3.
[Sysname] voice-setup
[Sysname-voice] sip
[Sysname-voice-sip] credentials number 1000 username 1000 password simple 1000 realm server1
[Sysname-voice-sip] credentials number 1000 username 2000 password simple 2000 realm server2
[Sysname-voice-sip] credentials number 1000 username 3000 password simple 3000 realm server3
Related commands
registrar
media flow-around
Use media flow-around to enable media flow-around.
Use undo media flow-around to disable media flow-around.
Syntax
media flow-around
undo media flow-around
Default
Media flow-around is disabled. Media packets are relayed by the SIP trunk, and the SIP trunk device changes the media address of a media packet to its own address before forwarding the media packet.
Views
VoIP entity view
Predefined user roles
network-admin
Usage guidelines
This feature enables the SIP trunk device to directly forward media packets between SIP endpoints, without changing the media address for the media packets. Use this feature to improve forwarding performance.
Examples
# Enable media flow-around for VoIP entity 1.
<Sysname> system-view
[Sysname] voice-setup
[Sysname-voice] dial-program
[Sysname-voice-dial] entity 1 voip
[Sysname-voice-dial-entity1] media flow-around
voice-class sip early-offer forced
Use voice-class sip early-offer forced to enable delayed offer to early offer (DO-EO) conversion.
Use undo voice-class sip early-offer forced to disable DO-EO conversion
Syntax
voice-class sip early-offer forced
undo voice-class sip early-offer forced
Default
DO-EO conversion is disabled.
Views
VoIP entity view
Predefined user roles
network-admin
Usage guidelines
An INVITE request with SDP Offer is an early offer, and an INVITE request without SDP Offer is a delayed offer. Some service providers mandate early offer calls for charge security. To meet this requirement, enable DO-EO conversion on the SIP trunk device.
This command does not take effect if codec transparent transmission or media flow-around is enabled.
Examples
# Enable DO-EO conversion on the SIP trunk device.
[Sysname] voice-setup
[Sysname-voice] dial-program
[Sysname-voice-dial] entity 1 voip
[Sysname-voice-dial-entity1] voice-class sip early-offer forced
Related commands
codec transparent
media flow-around
Call service commands
The following matrix shows the feature and hardware compatibility:
|
Hardware |
Call service compatibility |
|
MSR810/810-W/810-W-DB/810-LM/810-W-LM/810-10-PoE/810-LM-HK/810-W-LM-HK/810-LMS/810-LUS |
No |
|
MSR2600-6-X1/2600-10-X1 |
Yes |
|
MSR 2630 |
Yes |
|
MSR3600-28/3600-51 |
Yes |
|
MSR3600-28-SI/3600-51-SI |
No |
|
MSR3610-X1/3610-X1-DP/3610-X1-DC/3610-X1-DP-DC |
Yes |
|
MSR 3610/3620/3620-DP/3640/3660 |
Yes |
|
MSR5620/5660/5680 |
Yes (not supported on the router installed with an SPU600-X1 card.) |
|
Hardware |
Call service compatibility |
|
MSR810-LM-GL |
No |
|
MSR810-W-LM-GL |
No |
|
MSR830-6EI-GL |
No |
|
MSR830-10EI-GL |
No |
|
MSR830-6HI-GL |
No |
|
MSR830-10HI-GL |
No |
|
MSR2600-6-X1-GL |
Yes |
|
MSR3600-28-SI-GL |
No |
call-forwarding
Use call-forwarding to configure call forwarding.
Use undo call-forwarding to delete a call forwarding setting.
Syntax
call-forwarding { on-busy | no-reply | unavailable | unconditional } number number
undo call-forwarding { on-busy | no-reply | unavailable | unconditional }
Default
Call forwarding is disabled.
Views
POTS entity view
Predefined user roles
network-admin
Parameters
on-busy: Enables call forwarding busy.
no-reply: Enables call forwarding no reply.
unavailable: Enables call forwarding unavailable.
unconditional: Enables call forwarding unconditional.
number number: Specifies a forward-to number, a string of 1 to 31 digits, 0 through 9.
Usage guidelines
The unconditional, unavailable, on-busy, and no-reply call forwarding types can be configured at the same time. They have a descending order of priority.
Before configuring call forwarding, make sure the initiator can reach the final recipient.
This command takes effect only when an FXS interface is bound to the POTS entity.
You need to correctly plan forward-to numbers to avoid incorrect numbers and circular calls.
A call can be forwarded a maximum of five times.
Examples
# Enable call forwarding no reply and set the forward-to number to 12345678.
<Sysname> system-view
[Sysname] voice-setup
[Sysname-voice] dial-program
[Sysname-voice-dial] entity 10 pots
[Sysname-voice-dial-entity10] call-forwarding no-reply number 12345678
# Enable call forwarding busy and set the forward-to number to 12345678.
<Sysname> system-view
[Sysname] voice-setup
[Sysname-voice] dial-program
[Sysname-voice-dial] entity 10 pots
[Sysname-voice-dial-entity10] call-forwarding on-busy number 12345678
# Enable call forwarding unavailable and set the forward-to number to 12345678.
<Sysname> system-view
[Sysname] voice-setup
[Sysname-voice] dial-program
[Sysname-voice-dial] entity 10 pots
[Sysname-voice-dial-entity10] call-forwarding unavailable number 12345678
# Enable call forwarding unconditional and set the forward-to number to 12345678.
<Sysname> system-view
[Sysname] voice-setup
[Sysname-voice] dial-program
[Sysname-voice-dial] entity 10 pots
[Sysname-voice-dial-entity10] call-forwarding unconditional number 12345678
call-hold-format
Use call-hold-format to specify a call hold mode.
Use undo call-hold-format to restore the default.
Syntax
call-hold-format { inactive | sendonly [ moh-number string ] }
undo call-hold-format
Default
The silent mode is used for call hold.
Views
Voice view
Predefined user roles
network-admin
Parameters
inactive: Specifies the silent mode. In this mode, the holding party signals the held party to close the transmit and receive media channels of the held party.
sendonly: Specifies the unidirectional playing mode to play tones or music on hold. In this mode, the holding party opens its transmit media channel and closes its receive media channel.
moh-number string: Specifies an access service number for playing music on hold by a third-party music server, a string of 1 to 31 digits (0 through 9).
Examples
# Specify the unidirectional playing mode for call hold.
<Sysname> system-view
[Sysname] voice-setup
[Sysname-voice] call-hold-format sendonly
display voice mwi
Use display voice mwi to display MWI information for phone numbers with subscription.
Syntax
display voice mwi { all | number number }
Views
Any view
Predefined user roles
Parameters
all: Specifies all phone numbers with subscription.
number number: Specifies a phone number with subscription, a string of 1 to 31 characters that can contain digits 0 through 9 and the plus sign (+).
Examples
# Display MWI information for all phone numbers with subscription.
<Sysname> display voice mwi all
Message Waiting Indication Information:
--------------------------------------------------------------------
MWI type: Solicited
MWI server: 192.168.4.8 port: 5060
MWI expires: 200
---------------------------------------------------------------------
Number: 1515
Messages-Waiting: Yes
Voicemail: 1/3(1/2)
Total: 4(3)
Table 34 Command output
|
Field |
Description |
|
MWI type |
MWI type: Unsolicited or Solicited. |
|
MWI server |
Voice mailbox server, represented by IP address plus port number or domain name. |
|
Expiration time for the subscription. |
|
|
Message waiting identifier: · Yes—There are waiting messages on the voice mail server. · No—There is no waiting message on the voice mail server. |
|
|
Voicemail |
Number of new messages/number of old messages (number of new urgent messages/ number of old urgent messages). As shown in the above example, Voicemail: 1/3(1/2) indicates that there are 1 new message, 3 old messages, 1 new urgent message, and 2 old urgent messages in the mailbox. |
|
Total |
Total number of normal messages (total number of urgent messages). As shown in the above example, Total: 4(3) indicates that there are 4 normal messages and 3 urgent messages in the mailbox. |
display voice sip subscribe-state
Use display voice sip subscribe-state to display the subscription information for phone numbers.
Syntax
display voice sip subscribe-state
Views
Any view
Predefined user roles
network-admin
network-operator
Usage guidelines
You can use this command only when solicited MWI is used.
Examples
# Display subscription information for phone numbers.
<Sysname> display voice sip subscribe-state
Number Server Address Expires Status
--------------------------------------------------------------------------
2233 192.168.4.8:5060 146 online
Table 35 Command output
|
Field |
Description |
|
Phone number. |
|
|
Voice mailbox server, represented by IP address plus port number or domain name. |
|
|
Expiration time for the subscription. |
|
|
Subscription state of the phone number: · Offline—The subscription fails. · Online—The subscription succeeds. · Logging in—The subscription is in progress. · Logging out—The subscription is being cancelled. |
mwi
Use mwi to enable MWI for an FXS interface.
Use undo mwi to disable MWI for an FXS interface.
Syntax
mwi
undo mwi
Default
MWI is disabled for an FXS interface.
Views
FXS interface view
Predefined user roles
Usage guidelines
A voice entity bound to an FXS interface can send SUBSCRIBE messages only after you enable MWI for the FXS interface.
Examples
# Enable MWI for FXS interface 2/1/1.
[Sysname] subscriber-line 2/1/1
[Sysname-subscriber-line2/1/1] mwi
mwi-server
Use mwi-server to specify a voice mail server.
Use undo mwi-server to restore the default.
Syntax
mwi-server { dns domain-name | ip ip-address } [ port port-number ] [ expires seconds ] [ transport { tcp [ tls ] | udp } ] [ scheme { sip | sips } ] [ unsolicited ]
undo mwi-server
Default
No voice mail server is specified.
Views
SIP view
Predefined user roles
Parameters
dns domain-name: Specifies the domain name of the voice mailbox server, which consists of dot-separated strings (for example, aabbcc.com). Each separated string contains no more than 63 characters. A domain name can include case-insensitive letters, digits, hyphens (-), underscores (_), and dots (.), and has a maximum length of 255 characters.
ip ip-address: Specifies the IP address of the voice mailbox server.
port port-number: Specifies the port number of the voice mailbox server, in the range of 1 to 65535. If you specify the ip ip-address option, the default port number is 5060 for UDP and TCP and 5061 for TLS. If you specify the dns domain-name option, you must specify a port number.
expires seconds: Specifies the expiration time of the subscription, in the range of 10 to 72000 seconds. The default is 3600 seconds.
transport: Specifies the transport protocol used for sending SUBSCRIBE messages.
tcp: Specifies TCP as the transport protocol.
tls: Specifies TLS as the transport protocol.
udp: Specifies UDP as the transport protocol. By default, UDP is used
scheme: Specifies a URL scheme to be used during subscription.
sip: Specifies SIP as the URL scheme. By default, SIP is used.
sips: Specifies SIPS as the URL scheme.
unsolicited: Indicates that the SIP UA has subscribed to the voice mail server during registration and can receive NOTIFY messages from the server without sending SUBSCRIBE messages. By default, the SIP UA needs to subscribe to the voice mail server by sending SUBSCRIBE messages before it can receive NOTIFY messages from the server.
Usage guidelines
If TLS is specified as the transport protocol, the port number specified in the mwi-server command must be consistent with the port number configured on the voice mail server.
Examples
# Specify the voice mailbox server with IP address 100.1.1.101 and port number 5060, and set the subscription expiration time to 7200 seconds.
[Sysname] voice-setup
[Sysname-voice] sip
[Sysname-voice-sip] mwi-server ip 100.1.1.101 port 5060 expires 7200
Fax over IP commands
The following matrix shows the feature and hardware compatibility:
|
Hardware |
FoIP compatibility |
|
MSR810/810-W/810-W-DB/810-LM/810-W-LM/810-10-PoE/810-LM-HK/810-W-LM-HK/810-LMS/810-LUS |
No |
|
MSR2600-6-X1/2600-10-X1 |
Yes |
|
MSR 2630 |
Yes |
|
MSR3600-28/3600-51 |
Yes |
|
MSR3600-28-SI/3600-51-SI |
No |
|
MSR3610-X1/3610-X1-DP/3610-X1-DC/3610-X1-DP-DC |
Yes |
|
MSR 3610/3620/3620-DP/3640/3660 |
Yes |
|
MSR5620/5660/5680 |
Yes (not supported on the router installed with an SPU600-X1 card.) |
|
Hardware |
FoIP compatibility |
|
MSR810-LM-GL |
No |
|
MSR810-W-LM-GL |
No |
|
MSR830-6EI-GL |
No |
|
MSR830-10EI-GL |
No |
|
MSR830-6HI-GL |
No |
|
MSR830-10HI-GL |
No |
|
MSR2600-6-X1-GL |
Yes |
|
MSR3600-28-SI-GL |
No |
fax cng-switch enable
Use fax cng-switch enable to enable CNG fax switchover for a voice entity.
Use undo fax cng-switch enable to disable CNG fax switchover for a voice entity.
Syntax
fax cng-switch enable
undo fax cng-switch enable
Default
CNG fax switchover is disabled for a voice entity.
Views
POTS entity view
VoIP entity view
Predefined user roles
Examples
# Enable CNG fax switchover for POTS entity 100.
<Sysname> system-view
[Sysname] voice-setup
[Sysname-voice] dial-program
[Sysname-voice-dial] entity 100 pots
[Sysname-voice-dial-entity100] fax cng-switch enable
fax ecm
Use fax ecm to enable ECM for a voice entity.
Use undo fax ecm to restore the default.
Syntax
fax ecm
undo fax ecm
Default
ECM is disabled for a voice entity.
Views
POTS entity view
VoIP entity view
Predefined user roles
network-admin
Usage guidelines
To use ECM, make sure the calling and called fax machines support ECM.
Use the fax ecm command on both calling and called devices.
Examples
# Enable ECM for POTS entity 4.
[Sysname] voice-setup
[Sysname-voice] dial-program
[Sysname-voice-dial] entity 4 pots
[Sysname-voice-dial-entity4] fax ecm
fax level
Use fax level to set the transmit energy level.
Use undo fax level to restore the default.
Syntax
fax level level
undo fax level
Default
The transmit energy level is –15 dBm.
Views
POTS entity view
VoIP entity view
Predefined user roles
network-admin
Parameters
level: Specifies transmit energy level (the transmit energy level attenuation value) in dBm, in the range of –60 to –3. The greater the level value, the higher the energy. The smaller the level value, the greater the attenuation.
Usage guidelines
As a best practice, use the default transmit energy level. Use this command if you cannot establish fax calls when all settings are correct.
Examples
# Set the transmit energy level to –20 dBm for POTS entity 4.
[Sysname] voice-setup
[Sysname-voice] dial-program
[Sysname-voice-dial] entity 4 pots
[Sysname-voice-dial-entity4] fax level -20
fax local-train threshold
Use fax local-train threshold to set the local training threshold.
Use undo fax local-train threshold to restore the default.
Syntax
fax local-train threshold threshold
undo fax local-train threshold
Default
The local training threshold is 10.
Views
POTS entity view
VoIP entity view
Predefined user roles
network-admin
Parameters
threshold: Specifies the local training threshold in percentage, in the range of 0 to 100.
Usage guidelines
If the threshold value is exceeded during rate training, the rate training failed.
The threshold configured with the fax local-train threshold command is valid only when the local training mode is used.
Examples
# Set the local training threshold to 20 for POTS entity 10.
<Sysname> system-view
[Sysname] voice-setup
[Sysname-voice] dial-program
[Sysname-voice-dial] entity 10 pots
[Sysname-voice-dial-entity10] fax local-train threshold 20
Related commands
fax train-mode
fax nsf
Use fax nsf to configure an NSF code for nonstandard capabilities negotiation.
Use undo fax nsf to restore the default.
Syntax
fax nsf value
undo fax nsf
Default
The NSF code for nonstandard capabilities negotiation is 264833.
Views
POTS entity view
VoIP entity view
Predefined user roles
network-admin
Parameters
value: Specifies an NSF code in hexadecimal format (2-digit country code plus 4-digit manufacturer code), in the range of 0 to 0xFFFFFF. The country code must be T.35-compliant. The value 000000 specifies standard capabilities negotiation.
Examples
# Configure an NSF code of 264834 for nonstandard capabilities negotiation for POTS entity 10.
[Sysname] voice-setup
[Sysname-voice] dial-program
[Sysname-voice-dial] entity 10 pots
[Sysname-voice-dial-entity10] fax nsf 264834
fax protocol
Use fax protocol to configure the standard T.38 protocol or fax pass-through for a voice entity.
Use undo fax protocol to restore default.
Syntax
fax protocol { pass-through { g711alaw | g711ulaw } | standard-t38 [ ls-redundancy number [ hs-redundancy number ] ] }
undo fax protocol
Default
The standard T.38 protocol is used.
Views
POTS entity view
VoIP entity view
Predefined user roles
network-admin
Parameters
pass-through: Enables fax pass-through. The codec used for fax pass-through must be a codec specified for the voice entity.
g711alaw: Specifies the G.711 A-law codec for fax pass-through.
g711ulaw: Specifies the G.711 μ-law codec for fax pass-through.
standard-t38: Enables the standard T.38 protocol.
ls-redundancy number: Specifies the number of redundant packets to be sent for low-speed transmission. The value range for number is 0 to 5, and the default is 0.
hs-redundancy number: Specifies the number of redundant packets to be sent for high-speed transmission. The value range for number is 0 to 2, and the default is 0.
Usage guidelines
To ensure successful transmission when you use the standard T.38 protocol under poor network conditions, configure the device to send redundant packets.
You only need to configure this command on the calling device. The called device automatically matches the protocol configured on the calling device.
Examples
# Configure the standard T.38 protocol, and set the number of redundant packets to be sent for low-speed transmission to 4.
[Sysname] voice-setup
[Sysname-voice] dial-program
[Sysname-voice-dial] entity 10 pots
[Sysname-voice-dial-entity10] fax protocol standard-t38 ls-redundancy 4
# Enable fax pass-through and specify the G.711 A-law codec for fax pass-through.
[Sysname] voice-setup
[Sysname-voice] dial-program
[Sysname-voice-dial] entity 10 pots
[Sysname-voice-dial-entity10] fax protocol pass-through g711alaw
fax rate
Use fax rate to set the maximum fax rate for rate training.
Use undo fax rate to restore the default.
Syntax
fax rate { 2400 | 4800 | 7200 | 9600 | 12000 | 14400 | disable | voice }
undo fax rate
Default
The maximum fax rate for rate training depends on the codec used.
Views
POTS entity view
VoIP entity view
Predefined user roles
network-admin
Parameters
2400: Specifies 2400 bps.
4800: Specifies 4800 bps.
7200: Specifies 7200 bps.
9600: Specifies 9600 bps.
12000: Specifies 12000 bps.
14400: Specifies 14400 bps.
disable: Disables the fax feature.
voice: Determines the maximum fax rate for rate training according to the codec used.
· If G.711 is used, the maximum fax rate is 14400 bps, and the corresponding modem standard is V.17.
· If G.723.1 Annex A is used, the maximum fax rate is 4800 bps, and the corresponding modem standard is V.27.
· If G.726 is used, the maximum fax rate is 14400 bps, and the corresponding modem standard is V.17.
· If G.729 is used, the maximum fax rate is to 7200 bps, and the corresponding modem standard is V.29.
Usage guidelines
If you set the rate to a value other than disable and voice, the maximum rate is first used during rate training. If the negotiation fails, the next lower supported rate is used.
Examples
# Set the maximum fax rate for rate training to 9600 bps for POTS entity 4.
[Sysname] voice-setup
[Sysname-voice] dial-program
[Sysname-voice-dial] entity 4 pots
[Sysname-voice-dial-entity4] fax rate 9600
fax train-mode
Use fax train-mode to specify a rate training mode.
Use undo fax train-mode to restore the default.
Syntax
fax train-mode { local | ppp }
undo fax train-mode
Default
Point-to-point training is used.
Views
POTS entity view
VoIP entity view
Predefined user roles
network-admin
Parameters
local: Uses the local training mode.
ppp: Uses the point-to-point training mode.
Examples
# Specify local training mode for POTS entity 10.
<Sysname> system-view
[Sysname] voice-setup
[Sysname-voice] dial-program
[Sysname-voice-dial] entity 10 pots
[Sysname-voice-dial-entity10] fax train-mode local
Related commands
fax local-train threshold
modem passthrough
Use modem passthrough to configure a codec and a switching mode for modem pass-through.
Use undo modem passthrough to restore the default.
Syntax
modem passthrough { nse [ payload-type number ] | protocol } codec { g711alaw | g711ulaw }
undo modem passthrough
Default
Modem pass-through is not used.
Views
POTS entity view
VoIP entity view
Predefined user roles
network-admin
Parameters
nse: Uses the named signaling event (NSE) mode to switch to modem pass-through.
payload-type number: Specifies the value for the NSE payload type, in the range of 98 to 120. The default is 100.
protocol: Uses SIP to switch to modem pass-through.
codec: Specifies a codec used for modem pass-through. The codec used for modem pass-through must be a codec specified for the voice entity.
g711alaw: Specifies the G.711 A-law codec.
g711ulaw: Specifies the G.711 μ-law codec.
Usage guidelines
Configure the same codec and switching mode on the calling and called devices.
Configure the same payload type value for NSE on the calling and called devices.
The NSE mode disables VAD and echo cancellation.
Examples
# Use SIP to switch to modem pass-through and specify the G.711 A-law codec for modem pass-through.
[Sysname] voice-setup
[Sysname-voice] dial-program
[Sysname-voice-dial] entity 550 voip
[Sysname-voice-dial-entity550] modem passthrough protocol codec g711alaw
# Use NSE to switch to modem pass-through and specify the G.711 A-law codec for modem pass-through.
[Sysname] voice-setup
[Sysname-voice] dial-program
[Sysname-voice-dial] entity 550 voip
[Sysname-voice-dial-entity550] modem passthrough nse codec g711alaw
SRST commands
The following matrix shows the feature and hardware compatibility:
|
Hardware |
SRST compatibility |
|
MSR810/810-W/810-W-DB/810-LM/810-W-LM/810-10-PoE/810-LM-HK/810-W-LM-HK/810-LMS/810-LUS |
No |
|
MSR2600-6-X1/2600-10-X1 |
Yes |
|
MSR 2630 |
Yes |
|
MSR3600-28/3600-51 |
Yes |
|
MSR3600-28-SI/3600-51-SI |
No |
|
MSR3610-X1/3610-X1-DP/3610-X1-DC/3610-X1-DP-DC |
Yes |
|
MSR 3610/3620/3620-DP/3640/3660 |
Yes |
|
MSR5620/5660/5680 |
Yes (not supported on the router installed with an SPU600-X1 card.) |
|
Hardware |
SRST compatibility |
|
MSR810-LM-GL |
No |
|
MSR810-W-LM-GL |
No |
|
MSR830-6EI-GL |
No |
|
MSR830-10EI-GL |
No |
|
MSR830-6HI-GL |
No |
|
MSR830-10HI-GL |
No |
|
MSR2600-6-X1-GL |
Yes |
|
MSR3600-28-SI-GL |
No |
Basic SRST commands
authenticate realm
Use authenticate realm to configure the realm name carried in 401 responses.
Use undo address sip to restore the default.
Syntax
Default
No realm name is carried in 401 responses.
Views
Global register pool view
Predefined user roles
network-admin
Parameters
string: Specifies the realm name carried in 401 responses, a case-sensitive string of 1 to 50 characters.
Usage guidelines
During registration, SIP UAs select credentials based on the realm name carried in 401 responses.
This command does not take effect on a survivable voice server.
Examples
# Configure the realm name carried in 401 responses as server1.
[Sysname] voice-setup
[Sysname-voice] voice register global
[Sysname-voice-register-global] authenticate realm server1
Related commands
authenticate register
Use authenticate register to enable SIP register authentication globally.
Use undo authenticate register to disable SIP register authentication globally.
Syntax
Default
SIP register authentication is disabled globally.
Views
Global register pool view
Predefined user roles
Usage guidelines
This command does not take effect on a survivable voice server.
Examples
# Enable SIP register authentication globally.
[Sysname] voice-setup
[Sysname-voice] voice register global
[Sysname-voice-register-global] authenticate register
Related commands
caller-group
Use caller-group to bind a subscriber group to a register pool.
Use undo caller-group to remove a subscriber group from a register pool.
Syntax
caller-group { deny | permit } group-id
undo caller-group { { deny | permit } group-id | all }
Default
No subscriber group is bound to a register pool.
Views
Register pool view
Predefined user roles
Parameters
deny: Denies calls from numbers in the subscriber group.
permit: Permits calls from numbers in the subscriber group.
group-id: Specifies a subscribe group ID in the range of 1 to 2147483647.
all: Specifies all subscribe groups.
Usage guidelines
You can bind only one subscriber group to a register pool. If you execute the command multiple times, the most recent configuration takes effect.
Examples
# Bind subscriber group 1 to register pool 100 to permit calls from numbers in the subscribe group.
[Sysname] voice-setup
[Sysname-voice] voice register pool 100
[Sysname-voice-register-pool100] caller-group permit 1
Related commands
codec
Use codec to configure a codec for a register pool.
Use undo codec to delete the configured codec.
Syntax
codec { g711alaw | g711ulaw | g723r53 | g723r63 | g726r16 | g726r24 | g726r32 | g726r40 | g729a | g729br8 | g729r8 } [ bytes payload-size ]
Default
Views
Register pool view
Predefined user roles
Parameters
g711ulaw: Specifies the G.711 μ-law codec at 64 kbps (without compression), which is typically used in North America and Japan.
g723r53: Specifies the G.723.1 Annex A codec at 5.3 kbps.
g723r63: Specifies the G.723.1 Annex A codec at 6.3 kbps.
g726r16: Specifies the G.726 Annex A codec at 16 kbps.
g726r24: Specifies the G.726 Annex A codec at 24 kbps.
g726r32: Specifies the G.726 Annex A codec at 32 kbps.
g726r40: Specifies the G.726 Annex A codec at 40 kbps.
g729a: Specifies the G.729 Annex A codec (a simplified version of G.729) at 8 kbps.
g729br8: Specifies the G.729 Annex B codec at 8 kbps.
g729r8: Specifies the G.729 codec at 8 kbps.
bytes payload-size: Specifies the number of bytes sent per second.
Table 36 Value range and default of payload-size for codecs
|
Codec |
Value range (in bytes) |
Default (in bytes) |
|
g711alaw g711ulaw |
80 to 240 in multiples of 80 |
160 |
|
g723r53 |
20 to 120 in multiples of 20 |
20 |
|
g723r63 |
24 to 144 in multiples of 24 |
24 |
|
g726r16 |
20 to 220 in multiples of 20 |
60 |
|
g726r24 |
30 to 210 in multiples of 30 |
90 |
|
g726r32 |
40 to 200 in multiples of 40 |
120 |
|
g726r40 |
50 to 200 in multiples of 50 |
150 |
|
g729a g729br8 g729r8 |
10 to 180 in multiples of 10 |
30 |
Usage guidelines
The g726r16, g726r24, g726r32 and g726r40 codecs are not supported on the following transceiver modules:
· DSIC-4FXS1FXO.
· HMIM-1VE1.
· HMIM-1VT1.
· HMIM-2VE1.
· HMIM-2VT1.
· MIM-16FXS.
· MIM-8FXS8FXO.
· SIC-1BSV.
· SIC-1VE1.
· SIC-1VT1.
· SIC-2BSV.
· SIC-2FXS1FXO.
To establish a call, you must make sure the calling party and the called party use the same codec.
If you execute this command multiple times, the most recent configuration takes effect.
The g711alaw and g711ulaw codecs provide high-quality voice transmission but consume high bandwidth.
The g723r53 and g723r63 codecs provide silence suppression technology and comfortable noise. The g723r63 codec is based on multipulse multiquantitative level technology and provides relatively high voice quality. The g723r53 codec is based on the Algebraic-Code-Excited Linear-Prediction technology and provides greater flexibility for applications.
The g729r8 and g729a codecs provide a voice quality (nearly toll quality) similar to the 32-kbps adaptive differential pulse code modulation (ADPCM). These two codecs feature low bandwidth, short delay, and medium processing complexity.
Table 37 Voice quality for codecs
|
Codec |
Voice quality |
|
g711alaw g711ulaw |
Excellent |
|
g726r16 g726r24 g726r32 g726r40 |
Good |
|
g729a g729br8 g729r8 |
Good |
|
g723r53 g723r63 |
Average |
Examples
# Configure the G.711 A-law codec for register pool 100.
[Sysname] voice-setup
[Sysname-voice] voice register pool 100
[Sysname-voice-register-pool100] codec g711alaw
display voice register entity
Syntax
display voice register entity { all | pool tag }
Views
Any view
Predefined user roles
Parameters
pool tag: Specifies a register pool by its tag in the range of 1 to 200.
all: Specifies all register pools.
Examples
# Display information about dynamic VoIP entities created in register pool 2.
<Sysname> display voice register entity pool 2
Entities created dynamically on register pool 2:
entity 40003 voip
match-template 2000$
address sip ip 192.168.4.101 port 10003
session transport udp
priority 1
entity 40004 voip
match-template 2000$
address sip ip 10.1.1.2 port 5060 : VoIP entity available
session transport global
Table 38 Command output
|
Description |
|
|
VoIP entity created dynamically in the register pool. Dynamic VoIP entities are numbered from 40001. If a number greater than 40000 is used by a statically configured POTS or VoIP entity, the number is skipped. |
|
|
Transport protocol for SIP calling: TCP, TLS, or UDP. |
|
|
Priority for the dynamic VoIP entity. This field is displayed for dynamic VoIP entities with call destinations as SIP UAs. |
|
|
Status of the standalone voice server: available or unavailable. |
display voice register pool all brief
Syntax
display voice sip register pool all brief
Views
Any view
Predefined user roles
Examples
# Display registration information for all register pools.
<Sysname> display voice register pool all brief
Pool ID IP Address Ln DN Number State
-------------------------------------------------------------------------------------
1 192.168.4.100 192.168.4.100 1 1 1000$ Registered
2 2000 Unregistered
2 192.168.4.101 192.168.4.101 1 2000$ Registered
Table 39 Command output
|
Description |
|
|
Tag of a register pool. |
|
|
Address configured by the id command. It is used by the SIP registrar to authenticate SIP UAs. |
|
|
IP address of the SIP UA. |
|
|
Tag of the register number template. |
|
|
Tag of the Directory Number (DN) that is applied to the register pool. |
|
|
Phone number in the register pool. This field displays a phone number ending with a dollar sign ($) if the SIP UA has successfully registered. This field displays a number template if the SIP UA fails to register. |
|
|
Registration state: unregistered or registered. |
id
Use id to configure SIP UAs that can register based on address.
Use undo id to restore the default.
Syntax
id { ip ip-address | network network [ mask { mask-length | mask } ] | mac mac-address }
Default
Views
Register pool view
Predefined user roles
Parameters
ip ip-address: Specifies a SIP UA by its IP address.
network network: Specifies SIP UAs on an IP subnet.
mac mac-address: Specifies a SIP UA by its MAC address in the format of H-H-H.
Usage guidelines
Examples
# In register pool 100, permit the SIP UA with MAC address 1cbd-b9e3-b2e4 to register.
[Sysname] voice-setup
[Sysname-voice] voice register pool 100
[Sysname-voice-register-pool100] id mac 1cbd-b9e3-b2e4
Related commands
max-dn
Use max-dn to set the maximum number of directory numbers (DNs).
Use undo max-dn to restore the default.
Syntax
Default
The maximum number of DNs is 0, and you cannot create DNs.
Views
Global register pool view
Predefined user roles
Parameters
max-dn: Specifies the maximum number of DNs, in the range of 1 to 200.
Usage guidelines
After phone numbers in DNs successfully register and dynamic VoIP entities are created, you can increase or decrease the maximum number of DNs. To decrease the maximum number of DNs, you must first delete DNs whose tags are greater than the expected maximum number. To delete a DN, use the undo voice register dn command.
Examples
# Set the maximum number of DNs to 100.
[Sysname] voice-setup
[Sysname-voice] voice register global
[Sysname-voice-register-global] max-dn 100
Related commands
max-pool
Use max-pool to set the maximum number of register pools.
Use undo max-pool to restore the default.
Syntax
Default
The maximum number of register pools is 0, and you cannot create register pools.
Views
Global register pool view
Predefined user roles
Parameters
max-pool: Specifies the maximum number of register pools, in the range of 1 to 200.
Usage guidelines
Examples
# Set the maximum number of register pools to 100.
[Sysname] voice-setup
[Sysname-voice] voice register global
[Sysname-voice-register-global] max-pool 100
Related commands
mode
Use mode to configure the device as a voice server and specify an operating mode.
Use undo mode to restore the default.
Syntax
Default
The device does not act as a voice server.
Views
Global register pool view
Predefined user roles
Parameters
alone: Specifies the standalone mode.
alive: Specifies the survivable mode.
Usage guidelines
After you change the operating mode of the voice server, the system deletes all registration information of SIP UAs.
Examples
# Configure the device to operate as a voice server in standalone mode.
[Sysname] voice-setup
[Sysname-voice] voice register global
[Sysname-voice-register-global] mode alone
number (DN view)
Use number to configure a register number template for a DN.
Use undo number to restore the default.
Syntax
Default
No register number template is configured for a DN.
Views
Predefined user roles
Parameters
Usage guidelines
You can configure only one register number template for a DN.
Examples
# Configure the register number template as 1000 for DN 100.
[Sysname] voice-setup
[Sysname-voice] voice register dn 100
[Sysname-voice-register-dn100] number 1000
number (register pool view)
Use number to configure a register number template for a register pool.
Use undo number to delete a register number template from a register pool.
Syntax
number tag { number | dn dn-tag }
Default
No register number template is configured for a register pool.
Views
Register pool view
Predefined user roles
Parameters
tag: Specifies a tag for a group of numbers that can register, in the range of 1 to 10.
dn dn-tag: Specifies an existing DN by its DN tag in the range of 1 to 200. The command permits all numbers in the DN to register.
Usage guidelines
This command deletes existing dynamic VoIP entities that are created based on addresses and do not match the register number template in the register pool.
You can configure a maximum of 10 groups of numbers that can register for a register pool.
Examples
# In register pool 100, permit SIP UAs whose numbers begin with 1000 to register.
[Sysname] voice-setup
[Sysname-voice] voice register pool 100
[Sysname-voice-register-pool100] number 1000
Related commands
outband
Use outband to enable out-of-band DTMF signaling.
Use undo outband to restore the default.
Syntax
Default
Inband DTMF signaling is used.
Views
Register pool view
Predefined user roles
Parameters
nte: Enables NTE mode of out-of-band DTMF signaling.
sip: Enables SIP mode of out-of-band DTMF signaling.
Examples
# Enable NTE mode of out-of-band DTMF signaling for register pool 100.
[Sysname] voice-setup
[Sysname-voice] voice register pool 10
[Sysname-voice-register-pool10] outband nte
priority
Use priority to set the priority for dynamic VoIP entities with call destinations as SIP UAs.
Use undo priority to restore the default.
Syntax
priority priority
Default
The priority of dynamic VoIP entities with call destinations as SIP UAs is 0.
Views
Register pool view
Predefined user roles
Parameters
Examples
[Sysname] voice-setup
[Sysname-voice] voice register dn 100
[Sysname-voice-register-dn100] number 1000
[Sysname-voice-register-dn100] priority 5
# In register pool 10, set the priority to 6 for dynamic VoIP entities with call destinations as SIP UAs, and set the register number template to 2000.
[Sysname] voice-setup
[Sysname-voice] voice register pool 10
[Sysname-voice-register-pool10] priority 6
[Sysname-voice-register-pool10] number 2000
Related commands
proxy
Use proxy to specify remote voice servers and optionally enable keepalive.
Use undo proxy to restore the default.
Syntax
Default
No remote voice servers are specified.
Views
Register pool view
Predefined user roles
Parameters
ip ip1: Specifies the IP address of the master remote voice server.
monitor probe sip: Enables keepalive.
ip2: Specifies the IP address of the backup remote voice server.
Usage guidelines
This command takes effect only on a survivable voice server.
If you enable keepalive, the keepalive parameters use the settings configured by using the voice-class sip options-keepalive command. Dynamic VoIP entities with call destinations as remote voice servers return the availability of the servers.
Examples
# Specify a remote proxy server with IP address 1.1.1.1 and enable keepalive.
[Sysname] voice-setup
[Sysname-voice] voice register pool 100
[Sysname-voice-register-pool100] proxy ip 1.1.1.1 monitor probe sip
Related commands
voice-class sip options-keepalive
registrar server
Use undo registrar server to disable the SIP registrar.
Syntax
registrar server [ expires { max max | min min } * ]
Default
The SIP registrar is disabled.
Views
Predefined user roles
Parameters
expires: Specifies the global registration expiration time.
max: Specifies the global maximum registration expiration time in the range of 120 to 86400 seconds. The default is 3600 seconds.
Usage guidelines
Examples
[Sysname] voice-setup
[Sysname-voice] sip
[Sysname-voice-sip] registrar server expires max 3000 min 100
Related commands
registration-timer
Use registration-timer to set the registration expiration time for a register pool.
Use undo registration-timer to restore the default.
Syntax
registration-timer max max min min
Default
The global registration expiration time applies.
Views
Register pool view
Predefined user roles
Parameters
max: Specifies the maximum registration expiration time in the range of 120 to 86400 seconds.
min: Specifies the minimum registration expiration time in the range of 60 to 3600 seconds.
Usage guidelines
Examples
[Sysname] voice-setup
[Sysname-voice] voice register pool 100
[Sysname-voice-register-pool100] registration-timer max 2000 min 300
Related commands
substitute
Use substitute to apply a number substitution rule list to a register pool.
Use undo substitute to remove the substitution rule list from a register pool.
Syntax
substitute { called | calling } list-number
undo substitute { called | calling }
Default
No number substitution rule is applied to a register pool (number substitution is not performed).
Views
Register pool view
Predefined user roles
Parameters
called: Applies the substitution rule list to called numbers.
calling: Applies the substitution rule list to calling numbers.
list-number: Specifies a number substitution rule list by its ID in the range of 1 to 2147483647.
Usage guidelines
You can apply a nonexistent substitution rule list to a register pool. The substitution rule list takes effect only after you perform the following tasks:
1. Create the substitution rule list by using the number-substitute command.
2. Create a number substitution rule by using the rule command.
You can apply only one substitution rule list to a register pool. If you execute this command multiple times, the most recent configuration takes effect.
Examples
# Apply substitution rule list 6 to called numbers in register pool 100.
[Sysname] voice-setup
[Sysname-voice] voice register pool 100
[Sysname-voice-register-pool100] substitute called 6
Related commands
username
Use username to configure SIP credentials for a register pool.
Use undo username to remove the configuration.
Syntax
username username password { cipher | simple } string
undo username
Default
No SIP credentials exist, and SIP UAs are not authenticated.
Views
Register pool view
Predefined user roles
Parameters
username: Specifies a username, a case-sensitive string of 1 to 63 characters.
cipher: Specifies a password in encrypted form.
simple: Specifies a password in plaintext form. For security purposes, the password specified in plaintext form will be stored in encrypted form.
Usage guidelines
This command does not take effect on a survivable voice server.
This configuration is not synchronized to dynamic VoIP entities in the register pool.
Examples
[Sysname] voice-setup
[Sysname-voice] voice register pool 100
[Sysname-voice-register-pool100] username abcd password simple 1234
Related commands
voice register dn
Use voice register dn to create a DN and enter its view, or enter the view of an existing DN.
Use undo voice register dn to delete a DN.
Syntax
Default
Views
Predefined user roles
Parameters
dn-tag: Specifies a DN by its tag in the range of 1 to 200.
Usage guidelines
DNs allow you to make configurations specific to SIP UAs with matching phone numbers. Dynamic VoIP entities created for these numbers inherit the configurations in the DN rather than those in the register pool.
For example, dynamic VoIP entities are created for IP phones on the subnet 10.1.1.0 in a register pool. The priority of the dynamic VoIP entities in the register pool is 3. To change the priority only for the dynamic VoIP entities created for number 1000 to 1, perform the following tasks:
1. Create a DN.
2. Configure the register number template for the DN as 1000.
3. Set the priority of dynamic VoIP entities in the DN to 1.
4. Apply the DN to the register pool.
Examples
# Create DN 100 and enter its view.
[Sysname] voice-setup
[Sysname-voice] voice register dn 100
[Sysname-voice-register-dn100]
Related commands
voice register global
Use voice register global to create a global register pool and enter its view, or enter the view of the existing global register pool.
Use undo voice register global to restore the default.
Syntax
Default
No global register pool exists.
Views
Predefined user roles
Usage guidelines
The undo form of this command deletes existing DNs, register pools, and dynamic VoIP entities, and deregisters SIP UAs.
Examples
# Create a global register pool view and enter its view.
[Sysname] voice-setup
[Sysname-voice] voice register global
[Sysname-voice-register-global]
voice register pool
Use undo voice register pool to delete a register pool.
Syntax
undo voice register pool pool-tag
Default
Views
Predefined user roles
Parameters
pool-tag: Specifies a register pool by its tag in the range of 1 to 200.
Usage guidelines
A register pool contains registration requirements that define which SIP UAs can register and also maintains registration information of SIP UAs. If a SIP UA meets the registration requirements, it can successfully register with the voice server, and dynamic VoIP entities are created.
The undo form of this command deletes all existing dynamic VoIP entities in the register pool.
Examples
# Create register pool 100 and enter its view.
[Sysname] voice-setup
[Sysname-voice] voice register pool 100
[Sysname-voice-register-pool100]
Related commands
voice-class codec
Use voice-class codec to apply a codec template to a register pool.
Use undo voice-class codec to restore the default.
Syntax
Default
No codec template is applied to a register pool.
Views
Register pool view
Predefined user roles
Parameters
tag: Specifies a codec template by its tag in the range of 1 to 2147483647.
Usage guidelines
To establish a call, you must make sure the calling party and the called party use the same codec.
You can apply a nonexistent codec template to a register pool. The codec template takes effect only after you assign priorities to codes in the template by using the codec preference command.
You can apply only one codec template to a register pool. If you configure the command multiple times, the most recent configuration takes effect.
Examples
# Apply codec template 1 to register pool 100.
[Sysname] voice-setup
[Sysname-voice] voice register pool 100
[Sysname-voice-register-pool100] voice-class codec 1
Related commands
voice-class sip options-keepalive
Use voice-class sip options-keepalive to configure keepalive parameters.
Use undo voice-class sip options-keepalive to restore the default.
Syntax
undo voice-class sip options-keepalive
Default
The up-interval is 60 seconds, the down-interval is 30 seconds, and the retry is 5 times.
Views
Register pool view
Predefined user roles
Parameters
Usage guidelines
After you enable keepalive by using the proxy command, the local survivable voice server sends OPTIONS packets at the up-interval. If the local survivable voice server receives a response within the up-interval, it marks the remote standalone voice server as available. If the local survivable voice server receives no response within the up-interval, or receives an error response, it sends OPTIONS packets at the timers options interval. (Error responses include 408, 499, and 5XX responses except for 500, 501, 502, 503, 504, and 513 responses.) If the local survivable voice server still receives no responses after the maximum number of retries is reached, it marks the remote standalone voice server as unavailable.
Then, the local survivable voice server sends OPTIONS packets at the down-interval. If the local survivable voice server receives a response within the down-interval, it sends OPTIONS packets at the timers options interval. If the local survivable voice server still can receive responses after the number of retries is reached, it marks the remote standalone voice server as available.
Examples
[Sysname] voice-setup
[Sysname-voice] voice register pool 100
[Sysname-voice-register-pool100] voice-class sip options-keepalive up-interval 50 down-interval 20 retry 2
Related commands
SRST call service commands
after-hours block pattern
Use undo after-hours block pattern to disable call blocking.
Syntax
after-hours block pattern pattern-tag pattern [ 7-24 ]
undo after-hours block pattern pattern-tag
Default
Call blocking is disabled.
Views
Predefined user roles
Parameters
pattern-tag: Specifies the tag of a number pattern, in the range of 1 to 100.
pattern: Specifies a number template for called numbers, a string of 1 to 31 characters. Table 40 shows the characters that can be included in the string and their descriptions.
Table 40 Descriptions of characters
|
Character |
Description |
|
|
0-9 |
Digits 0 through 9. |
|
|
Pound sign (#) or asterisk (*) |
Indicates a valid digit. |
|
|
Dot (.) |
Wildcard, which can match any valid digit. For example, 555…. can match any 7-digit numbers beginning with 555. |
|
|
Exclamation point (!) |
Indicates that the preceding subexpression appears zero or one time. For example, 56!1234 can match 51234 and 561234. |
The subexpression (one digit or digit string) before an exclamation point (!), plus sign (+), or percent sign (%) is used for imprecise match. The processing of the sign is similar to that of the wildcard dot (.). These signs must follow a valid digit or digit string. |
|
Plus sign (+) |
Indicates that the preceding subexpression appears one or more times. For example, 9876(54)+ can match 987654, 98765454, 9876545454, and so on. |
|
|
Percent sign (%) |
Indicates that the preceding subexpression appears zero or more times. For example, 9876(54)% can match 9876, 987654, 98765454, 9876545454, and so on. |
|
|
Hyphen (-) |
Connects two digits to indicate a range of numbers, for example, [1-9] indicates 1 to 9 inclusive. The hyphen (-) can appear only in brackets ([ ]). |
|
|
Brackets ([ ]) |
Indicates a range. Only numbers 0 through 9 are allowed in the range. For example, [1-36] matches 1, 2, 3, or 6. |
To be used together, brackets ([ ]) and parentheses (( )) must be present in the form of "( [ ] )". The "[ [ ] ]" and "[ ( ) ]" forms are incorrect. |
|
Parentheses (( )) |
Indicates a string of characters. For example, (123) indicates a character string of 123. It is usually used together with signs such as exclamation point (!), percent sign (%), and plus sign (+). For example, 408(12)+ can match the character string 40812 or 408121212, but not 408. In this pattern, 408 must be followed by one string of 12 at a minimum. |
|
7-24: Enables call blocking 7 days a week, 24 hours a day. If you do not specify this keyword, this command blocks incoming calls during the time period specified by using the after-hours day or after-hours date command.
Usage guidelines
If a number matches multiple number templates, only the template with the smallest tag applies.
In a register pool, call blocking takes priority over DND, and DND takes priority over call forwarding.
Examples
# Enable call blocking for number 1000 for 7 days a week, 24 hours a day.
[Sysname] voice-setup
[Sysname-voice] after-hours block pattern 1 1000 7-24
Related commands
after-hours date
Use after-hours date to define a time period for call blocking based on the month and date.
Use undo after-hours date to delete the time period for call blocking based on the month and date.
Syntax
after-hours date month date start-time stop-time
undo after-hours date month date
Default
No timer period for call blocking is defined based on the month and date.
Views
Predefined user roles
Parameters
date: Specifies a date of the month, in the range of 1 to 31.
Usage guidelines
This command takes effect only when call blocking is enabled.
If you execute this command multiple times for the same day of the same month, the most recent configuration takes effect.
If you specify 00:00 for both the start time and end time, call blocking is enabled for 24 hours of the specified date.
If the end time is less than the start time, call blocking lasts to the end time of the day after the specified date.
If you also configure the after-hours day command, the time period for call blocking is the union of time periods specified in the two commands.
Examples
# Define the time period for call blocking as 8:00 to 20:00 on 1st, April.
[Sysname] voice-setup
[Sysname-voice] after-hours date apr 1 08:00 20:00
Related commands
after-hours day
Use after-hours day to define a time period for call blocking based on the day of the week.
Use undo after-hours day to delete the time period for call blocking based on the day of the week.
Syntax
after-hours day day start-time stop-time
Default
No time period for call blocking is defined based on the day of the week.
Views
Predefined user roles
Parameters
start-time: Specifies the start time for call blocking, in the format of hh:mm (24-hour clock). The value 24:00 is invalid.
stop-time: Specifies the end time for call blocking, in the format of hh:mm in (24-hour clock). The value 24:00 is invalid. If you specify 00:00, the system uses the value 23:59.
Usage guidelines
This command takes effect only when call blocking is enabled.
If you execute this command multiple times for the same day of the week, the most recent configuration takes effect.
If you specify 00:00 for both the start time and end time, call blocking is enabled for 24 hours of the specified day.
If the end time is less than the start time, call blocking lasts to the end time of the day after the specified day.
If you also configure the after-hours date command, the time period for call blocking is the union of time periods specified in the two commands.
Examples
# Define the time period for call blocking as 8:00 to 20:00 on Monday.
[Sysname] voice-setup
[Sysname-voice] after-hours day mon 08:00 20:00
Related commands
after-hours exempt
Use after-hours exempt to exempt numbers from call blocking.
Use undo after-hours to cancel the exemption from call blocking.
Syntax
Default
Call blocking applies to all numbers in a DN or register pool.
Views
Register pool view
Predefined user roles
Usage guidelines
Examples
# Exempt number 1000 from call blocking.
[Sysname] voice-setup
[Sysname-voice] voice register dn 1
[Sysname-voice-register-dn1] after-hours exempt
[Sysname-voice-register-dn1] number 1000$
Related commands
call-forward b2bua
Use call-forward b2bua to enable call forwarding.
Use undo call-forward b2bua to disable call forwarding.
Syntax
call-forward b2bua { all number | busy number | noan number [ timeout seconds ] }
undo call-forward b2bua { all | busy | noan }
DN view:
undo call-forward b2bua { all | busy | noan | unregistered }
Default
Views
Register pool view
Predefined user roles
Parameters
all: Enables call forwarding unconditional.
busy: Enables call forwarding busy.
noan: Enables call forwarding no reply.
unregistered: Enables call forwarding unregistered.
timeout: Triggers call forwarding no reply.
Usage guidelines
For a dynamic VoIP entity, call forwarding unconditional takes priority over call forwarding busy, and call forwarding busy takes priority over call forwarding no reply. Call forwarding unregister does not coexist with the three types of call forwarding.
You need to correctly plan forward-to numbers to avoid circular calls.
To avoid call forwarding loops, you can configure a maximum of five forward-to numbers for a call.
In a register pool, call blocking takes priority over DND, and DND takes priority over call forwarding.
Examples
# Enable call forwarding busy for number 5000 and set the forward-to number to 8000.
[Sysname] voice-setup
[Sysname-voice] voice register dn 3
[Sysname-voice-register-dn3] number 5000$
[Sysname-voice-register-dn3] call-forward b2bua busy 8000
# Enable call forwarding unregistered for number 3000 and set the forward-to number to 2000.
[Sysname] voice-setup
[Sysname-voice] voice register dn 3
[Sysname-voice-register-dn3] number 3000$
[Sysname-voice-register-dn3] call-forward unregistered 2000
display voice fac
Use display voice fac to display Feature Access Codes (FACs).
Syntax
Views
Any view
Predefined user roles
Usage guidelines
You can execute this command on a voice server or a voice gateway.
Examples
Standard FACs enabled in gateway mode
callfwd all *57*
callfwd all cancel #57#
callfwd busy *40*
callfwd busy cancel #40#
callfwd noan *41*
callfwd noan cancel #41#
# Display FACs on a voice server.
Standard FACs enabled in server mode
pickup direct *80*
pickup local *81*
pickup group *82*
callfwd all *57*
callfwd all cancel #57#
callfwd busy *40*
callfwd busy cancel #40#
callfwd noan *41*
callfwd noan cancel #41#
callfwd unregistered *44*
callfwd unregistered cancel #44#
dnd *70*
dnd cancel #70#
Table 41 Command output
|
Description |
|
|
· all—Enables call forwarding unconditional. · all-cancel—Disables call forwarding unconditional. · busy—Enables call forwarding busy. · busy-cancel—Disables call forwarding busy. · noan—Enables call forwarding no reply. · noan-cancel—Disables call forwarding no reply. · unregistered—Enables call forwarding unregistered. · unregistered-cancel—Disables call forwarding unregistered. |
|
|
· direct—Enables direct call pickup. · local—Enables local group pickup. · group—Enables group pickup. |
dnd
Use dnd to enable Do Not Disturb (DND).
Syntax
Default
Views
Register pool view
Predefined user roles
Usage guidelines
In a register pool, call blocking takes priority over DND, and DND takes priority over call forwarding.
Examples
# Enable DND for register pool 1.
[Sysname] voice-setup
[Sysname-voice] voice register pool 1
[Sysname-voice-register-pool1] dnd
fac custom
Use fac custom to create and enable a custom FAC.
Use undo fac custom to remove the configuration.
Syntax
undo fac custom { alias id | callfwd { all | all-cancel | busy | busy-cancel | noan | noan-cancel | unregistered | unregistered-cancel } | dnd | pickup { direct | group | local } }
Default
FACs are disabled.
Views
Voice view
Predefined user roles
Parameters
alias id: Creates an alias for a custom FAC. The value range for the id argument is 0 to 9.
custom-string: Specifies a new custom FAC, which is a string of 1 to 10 characters that can include digits 0 through 9, asterisk (*), and pound sign (#).
pickup: Enables call pickup FAC.
direct: Enables direct call pickup FAC.
group: Enables group pickup FAC.
local: Enables local group pickup FAC.
callfwd: Enables call forwarding FAC.
all: Enables call forwarding unconditional FAC.
all-cancel: Disables call forwarding unconditional FAC.
busy: Enables call forwarding busy FAC.
busy-cancel: Disables call forwarding busy FAC.
noan: Enables call forwarding no reply FAC.
noan-cancel: Disables call forwarding no reply FAC.
unregistered: Enables call forwarding unregistered FAC.
unregistered-cancel: Disables call forwarding unregistered FAC.
Usage guidelines
You can configure custom FACs on a gateway or a voice server. However, on a gateway, you can configure custom FACs only for call forwarding services (excluding call forwarding unregistered and call forwarding unavailable).
As a best practice, assign a unique FAC for each call service. If you configure the same FAC for different call services, some call services cannot be enabled or disabled.
Examples
# Configure the custom FAC for call forwarding unconditional as 1234.
[Sysname] voice-setup
[Sysname-voice] fac custom callfwd all 1234
Related commands
fac standard
Use fac standard to enable standard FACs.
Use undo fac standard to disable standard FACs.
Syntax
Default
Views
Predefined user roles
Usage guidelines
You can enable standard FACs on a gateway or a voice service. However, on a gateway, only standard FACs for call forwarding (excluding call forwarding unregistered and call forwarding unavailable) are supported.
Examples
[Sysname] voice-setup
[Sysname-voice] fac standard
Related commands
fac terminator
Use fac terminator to configure the terminator for custom FACs.
Use undo fac terminator to restore the default.
Syntax
fac terminator character
Default
The terminator for custom FACs is a pound sign (#).
Views
Predefined user roles
Parameters
Usage guidelines
You can configure this command only on a gateway configured with custom FACs.
Examples
# Configure an asterisk (*) as the terminator for custom FACs.
[Sysname] voice-setup
[Sysname-voice] fac terminator *
Related commands
moh file
Use moh file to specify an MOH resource file.
Use undo moh file to restore the default.
Syntax
Default
No MOH resource file is specified.
Views
Global register pool view
Predefined user roles
Parameters
filename: Specifies the name of an MOH resource file.
Usage guidelines
Only WAV files with G.711 μ-law or G.711 A-law codec are supported.
Examples
# Specify the cfa0:/g711u/moh.wav file as the MOH resource file.
[Sysname] voice-setup
[Sysname-voice] voice register global
[Sysname-voice-register-global] moh file cfa0:/g711u/moh.wav
Related commands
multicast moh
Use multicast moh to configure the MOH multicast address.
Use undo multicast moh ip to restore the default.
Syntax
multicast moh ip multicast-address port port-number route address-list
Default
No MOH multicast address is configured.
Views
Global register pool view
Predefined user roles
Parameters
port port-number: Specifies the MOH destination port, in the range of 2000 to 65535.
Examples
[Sysname] voice-setup
[Sysname-voice] voice register global
[Sysname-voice-register-global] multicast moh ip 239.1.1.1 port 2009 route 192.168.4.16
Related commands
mwi
Use mwi to enable MWI for a DN.
Use undo mwi to disable MWI for a DN.
Syntax
Default
MWI is disabled.
Views
DN view
Predefined user roles
Examples
# Enable MWI for DN100.
[Sysname] voice-setup
[Sysname-voice] voice register dn 100
[Sysname-voice-register-dn100] number 1000$
[Sysname-voice-register-dn100] mwi
Related commands
pickup-call any-group
Use pickup-call any-group to enable the GPickUp softkey for group pickup.
Use undo pickup-call any-group to disable the GPickUp softkey for group pickup.
Syntax
Default
The GPickUp softkey for group pickup is disabled.
Views
DN view
Predefined user roles
Usage guidelines
Examples
# Enable the GPickUp softkey for number 1000 in DN 1 to implement group pickup.
[Sysname] voice-setup
[Sysname-voice] voice register dn 1
[Sysname-voice-register-dn1] number 1000$
[Sysname-voice-register-dn1] pickup-call any-group
pickup-group
Use pickup-group to assign a DN to a pickup group.
Use undo pickup-group to restore the default.
Syntax
Default
A DN does not belong to any pickup group.
Views
DN view
Predefined user roles
Parameters
Examples
# Assign number 1000 in DN 100 to pickup group 25.
[Sysname] voice-setup
[Sysname-voice] voice register dn 100
[Sysname-voice-register-dn100] number 1000$
[Sysname-voice-register-dn100] pickup-group 25
Customizable IVR commands
The following matrix shows the feature and hardware compatibility:
|
Hardware |
Customizable IVR compatibility |
|
MSR810/810-W/810-W-DB/810-LM/810-W-LM/810-10-PoE/810-LM-HK/810-W-LM-HK/810-LMS/810-LUS |
No |
|
MSR2600-6-X1/2600-10-X1 |
Yes |
|
MSR 2630 |
Yes |
|
MSR3600-28/3600-51 |
Yes |
|
MSR3600-28-SI/3600-51-SI |
No |
|
MSR3610-X1/3610-X1-DP/3610-X1-DC/3610-X1-DP-DC |
Yes |
|
MSR 3610/3620/3620-DP/3640/3660 |
Yes |
|
MSR5620/5660/5680 |
Yes (not supported on the router installed with an SPU600-X1 card.) |
|
Hardware |
Customizable IVR compatibility |
|
MSR810-LM-GL |
No |
|
MSR810-W-LM-GL |
No |
|
MSR830-6EI-GL |
No |
|
MSR830-10EI-GL |
No |
|
MSR830-6HI-GL |
No |
|
MSR830-10HI-GL |
No |
|
MSR2600-6-X1-GL |
Yes |
|
MSR3600-28-SI-GL |
No |
call-normal
Use call-normal to configure the number match mode for normal secondary calls.
Use undo call-normal to restore the default.
Syntax
call-normal { length number-length | matching | terminator character }
undo call-normal
Default
No number match mode for normal secondary calls exists.
Views
Call node view
Predefined user roles
network-admin
Parameters
length number-length: Specifies the length of called numbers to be matched, in the range of 1 to 31.
matching: Specifies the longest match.
terminator character: Specifies a terminator, a single character that can be a digit 0 through 9, pound sign (#), or asterisk (*).
Usage guidelines
Do not configure a character included in a called number as a terminator.
Examples
# Configure node 1 to match 7-digit called numbers for normal secondary calls.
<Sysname> system-view
[Sysname] voice-setup
[Sysname-voice] ivr-system
[Sysname-voice-ivr] node 1 call
[Sysname-voice-ivr-node1] call-normal length 7
description
Use description to configure a description for a node.
Use undo description to restore the default.
Syntax
description text
undo description
Default
No description exists.
Views
Call node view
Jump node view
Service node view
Predefined user roles
network-admin
Parameters
text: Specifies a description, a case-sensitive string of 1 to 80 characters.
Examples
# Configure a description of first-node for a Jump node.
<Sysname> system-view
[Sysname] voice-setup
[Sysname-voice] ivr-system
[Sysname-voice-ivr] node 1 jump
[Sysname-voice-ivr-node1] description first-node
dial-prefix
Use dial-prefix to configure a dial prefix for a call node.
Use undo dial-prefix to restore the default.
Syntax
dial-prefix string
undo dial-prefix
Default
No dial prefix exists.
Views
Call node view
Predefined user roles
network-admin
Parameters
string: Specifies a dial prefix, a string of 1 to 31 characters. Valid characters are digits 0 through 9, pound sign (#), and asterisk (*).
Table 42 Description of characters in the string argument
|
Character |
Description |
|
0-9 |
Digits 0 through 9. |
|
Pound sign (#) or asterisk (*) |
Indicates a valid digit. |
Usage guidelines
After you configure a dial prefix, the device adds the prefix before each called number. If the called number plus the added prefix exceed 31 digits, the device sends only the first 31 digits.
Examples
# Specify 021 as the dial prefix for call node 1.
<Sysname> system-view
[Sysname] voice-setup
[Sysname-voice] ivr-system
[Sysname-voice-ivr] node 1 call
[Sysname-voice-dial-node1] dial-prefix 021
display voice ivr call-info
Use display voice ivr call-info to display IVR call information.
Syntax
display voice ivr call-info
Views
Any view
Predefined user roles
network-admin
network-operator
Examples
# Display IVR call information.
<Sysname> display voice ivr call-info
Index Called-Number Caller-Number Entity Node-Id Status
-------------------------------------------------------------------------
1 101 100 101 1 PLAY MEDIA
2 406 200 201 3 WAIT INPUT
3 606 300 301 6 CALL
4 806 400 401 9 IDLE
Table 43 Command output
|
Field |
Description |
|
Index |
Index of the call information. |
|
Entity |
IVR entity number for the called number. |
|
Node-Id |
ID of the node that is being executed. |
|
Status |
Current status: · IDLE—The node is idle. · PLAY MEDIA—The node is playing a media file. · WAIT INPUT—The node is waiting for user input. · CALL—The node is calling a number. |
display voice media-play
Use display voice media-play to display playing information.
Syntax
display voice media-play
Views
Any view
Predefined user roles
network-admin
network-operator
Examples
# Display playing information.
<Sysname> display voice media-play
Index Codec Media-Id Play-Times Status Type
--------------------------------------------------------------------------
1 g729r8 1001 3 play PSTN:1/0
2 g711alaw 1002 2 stop IP:100.1.1.1
3 g711ulaw 1003 2 stop IP:100.1.1.1
4 g723r53 1004 2 stop IP:100.1.1.1
Table 44 Command output
|
Description |
|
|
Index |
Index of the playing information. |
|
Codec |
Codec type of the played media file: · g729r8. · g711alaw. · g711ulaw. · g723r53. |
|
Media-Id |
ID of the played media file. |
|
Play-Times |
Number of times that the media file is to be played. |
|
Status |
Current status of the media file: · play—The media file is being played. · stop—The media file is not played. |
|
Type |
Current call type: · PSTN—The call is from the PSTN side. In the above example, PSTN:1/0 indicates that the call came in from the voice interface 1/0. · IP—The call is from the IP side. |
display voice media-source
Use display voice media-source to display media file information.
Syntax
display voice media-source
Views
Any view
Predefined user roles
network-admin
network-operator
Examples
# Display media file information.
<Sysname> display voice media-source
Codec Media-Id source Size (Bytes) Read-Num Cache-Num
--------------------------------------------------------------------------
g729r8 1000 cfa0:/wav/g7 69304 1 1
29r8/0.wav
Table 45 Command output
|
Field |
Description |
|
Codec |
Codec type of the media file. |
|
Media-Id |
ID of the media file. |
|
Source |
Name and location of the media file. |
|
Size (Bytes) |
Size of the media file in bytes. |
|
Read-Number |
Number of the read control block for the media file. |
|
Cache-Number |
Number of the cache for the media file. |
global-input-error
Use global-input-error to configure a global policy for handling input errors.
Use undo global-input-error to restore the default.
Syntax
global-input-error { media-play media-id [ play-times ] | repeat repeat-times } *
undo global-input-error
Default
The system does not play voice prompts for input errors and terminates the call after three times of input errors.
Views
IVR management view
Predefined user roles
network-admin
Parameters
media-play media-id: Specifies a media file by its ID in the range of 0 to 2147483647. A node plays the specified media file when an input error occurs.
play-times: Specifies the number of times for playing the media file, in the range of 1 to 255. The default is 1.
repeat repeat-times: Specifies the maximum number of input errors allowed, in the range of 0 to 255. The default is 3. After an input error occurs, the system executes the node again. When the maximum number of input errors are reached, the system terminates the call.
Examples
# Configure a global policy for handling input errors as follows:
· The media file with ID 10002 is played after an input error occurs.
· The media file is played twice.
· The call is terminated after five times of input errors.
<Sysname> system-view
[Sysname] voice-setup
[Sysname-voice] ivr-system
[Sysname-voice-ivr] global-input-error media-play 10002 2 repeat 5
Related commands
input-error
global-timeout
Use global-timeout to configure a global policy for handling input timeouts.
Use undo global-timeout to restore the default.
Syntax
global-timeout { expires seconds| media-play media-id [ play-times ] | repeat repeat-times } *
undo global-timeout
Default
The timeout time is 10 seconds. The system does not play voice prompts for input timeouts and terminates the call after three times of input timeouts.
Views
IVR management view
Predefined user roles
network-admin
Parameters
expires seconds: Specifies the timeout time in the range of 1 to 255 seconds.
media-play media-id: Specifies a media file to be played after an input timeout occurs. The media-id argument represents the ID of the media file, in the range of 0 to 2147483647.
play-times: Specifies the number of times for playing the media file, in the range of 1 to 255. The default is 1.
repeat repeat-times: Specifies the maximum number of input timeouts allowed, in the range of 0 to 255. After an input timeout occurs, the system executes the node again. When the maximum number of input timeouts are reached, the system terminates the call.
Examples
# Configure a global policy for handling input timeouts as follows:
· The timeout time is 20 seconds.
· The media file with ID 100001 is played.
· The media file is played once.
· The call is terminated after two times of input timeouts.
<Sysname> system-view
[Sysname] voice-setup
[Sysname-voice] ivr-system
[Sysname-voice-ivr] global-timeout expires 20 media-play 100001 1 repeat 2
Related commands
timeout
input extension
Use input extension to configure an extension secondary call for a node.
Use undo input to delete the configuration of an extension secondary call.
Syntax
input number extension extension-number
undo input number
Default
No extension secondary calls exist.
Views
Call node view
Predefined user roles
network-admin
Parameters
number: Specifies an input number, a string of 1 to 31 characters that can include digits 0 through 9, pound sign (#), and asterisk (*).
extension-number: Specifies the extension number, a string of 1 to 31 characters that can include digits 0 through 9, pound sign (#), and asterisk (*).
Usage guidelines
You can configure a maximum of 10 extension secondary calls for a call node.
Examples
# Configure node 1 to execute an extension secondary call to the number 5000 when the subscriber dials the number 0.
<Sysname> system-view
[Sysname] voice-setup
[Sysname-voice] ivr-system
[Sysname-voice-ivr] node 1 call
[Sysname-voice-ivr-node1] extension 0 call 5000
input-error
Use input-error to configure an input error handling policy for a node.
Use undo input-error to restore the default.
Syntax
input-error { end-call | goto-pre-node | goto-node node-id } [ media-play media-id [ play-times ] | repeat repeat-times ] *
undo input-error
Default
The global input error handling policy is used.
Views
Call node view
Jump node view
Predefined user roles
network-admin
Parameters
end-call: Terminates the call when the maximum number of input errors are reached.
goto-pre-node: Returns to the previous node when the maximum number of input errors are reached.
goto-node node-id: Jumps to a node specified by its ID when the maximum number of input errors are reached. The value range for the node-id argument is 1 to 256.
media-play media-id: Plays a media file specified by its ID when an input error occurs. The value range for the media-id argument is 0 to 2147483647.
play-times: Specifies the number of times for playing a media file, in the range of 1 to 255. The default is 1.
repeat repeat-times: Specifies the maximum number of input errors allowed. After an input error occurs, the system executes the node again. When the maximum number of input errors are reached, the system executes the configured action. The value range for the repeat-times argument is 0 to 255, and the default is 3.
Examples
# Configure an input error handling policy for Jump node 1 as follows:
· The media file with ID 10002 is played when an input error occurs.
· The media file is played twice.
· The call is terminated after five times of input errors.
<Sysname> system-view
[Sysname] voice-setup
[Sysname-voice] ivr-system
[Sysname-voice-ivr] node 1 jump
[Sysname-voice-ivr-node1] input-error end-call media-play 10002 2 repeat 5
ivr-root
Use ivr-root to specify the root node (the first node to be executed) of an IVR entity.
Use undo ivr-root to restore the default.
Syntax
ivr-root node-id
undo ivr-root
Default
No root node is configured for an IVR voice entity.
Views
IVR entity view
Predefined user roles
network-admin
Parameters
node-id: Specifies the ID of the root node, in the range 1 to 256.
Examples
# Specify node 1 as the root node of IVR entity 100.
<Sysname> system-view
[Sysname] voice-setup
[Sysname-voice] dial-program
[Sysname-voice-dial] entity 100 ivr
[Sysname-voice-dial-entity100] ivr-root 1
ivr-system
Use ivr-system to enter IVR management view.
Use undo ivr-system to delete all IVR settings in IVR management view and exit the view.
Syntax
ivr-system
undo ivr-system
Default
No IVR management view exists.
Views
Voice view
Predefined user roles
network-admin
Examples
# Enter IVR management view.
<Sysname> system-view
[Sysname] voice-setup
[Sysname-voice] ivr-system
[Sysname-voice-ivr]
media-file
Use media-file to enter media resource management view.
Syntax
media-file { g711alaw | g711ulaw | g723r53 | g729r8 }
Views
Voice view
Predefined user roles
network-admin
Parameters
g711alaw: Enters g711alaw codec view.
g711ulaw: Enters g711ulaw codec view.
g723r53: Enters g723r53 codec view.
g729r8: Enters g729r8 codec view.
Examples
# Enter g729r8 codec view.
<Sysname> system-view
[Sysname] voice-setup
[Sysname-voice] media-file g729r8
[Sysname-voice-media-g729r8]
media-play
Use media-play to specify the media file to be played when a node is waiting for user input.
Use undo media-play to restore the default.
Syntax
media-play media-id [ play-times ] [ force ]
undo media-play
Default
No media file is played when a node is waiting for user input.
Views
Call node view
Jump node view
Predefined user roles
network-admin
Parameters
media-id: Specifies a media file by its ID in the range of 0 to 2147483647.
play-times: Specifies the number of times for playing the media file, in the range of 1 to 255. The default is 1.
force: Specifies that user input is valid only after the play of the media file ends. If you do not specify this keyword, user input is valid when the media file is played.
Examples
# Configure jump node 1 to play media file 10000 three times when waiting for user input and to accept user input after the play of the media file ends.
<Sysname> system-view
[Sysname] voice-setup
[Sysname-voice] ivr-system
[Sysname-voice-ivr] node 1 jump
[Sysname-voice-ivr-node1] media-play 10000 3 force
node
Use node to create an IVR node and enter its view, or enter the view of an existing IVR node.
Use undo node to delete IVR nodes.
Syntax
node node-id [ call | jump | service ]
undo node { node-id | all }
Default
No IVR nodes exist.
Views
IVR management view
Predefined user roles
network-admin
Parameters
node-id: Specifies the node ID in the range 1 to 256.
call: Creates a call node, which executes a secondary call after the subscriber enters a number.
jump: Creates a jump node, which jumps to another node according to user input.
service: Creates a service node, which executes various operations, such as executing an immediate secondary call, jumping, terminating a call, and playing a media file.
all: Specifies all types of nodes.
Examples
# Create Jump node 1 and enter its view.
<Sysname> system-view
[Sysname] voice-setup
[Sysname-voice] ivr-system
[Sysname-voice-ivr] node 1 jump
[Sysname-voice-ivr-node1]
operation
Use operation to configure an operation for a service node.
Use undo operation to delete the configuration of the operation for a service node.
Syntax
operation number { call-immediate call-number | end-call | goto-node node-id | goto-pre-node | media-play media-id [ play-times ] }
undo operation number
Default
No operations exist.
Views
Service node view
Predefined user roles
network-admin
Parameters
number: Specifies the number of the configured operation, in the range 1 to 3.
call-immediate call-number: Executes an immediate secondary call. The call-number argument represents the extension number of the secondary call and can include digits 0 through 9, pound sign (#), and asterisk (*).
end-call: Terminates a call.
goto-node node-id: Jumps to a node specified by its ID in the range of 1 to 256.
goto-pre-node: Returns to the previous node.
media-play media-id: Plays a media file specified by its ID in the range of 0 to 2147483647.
play-times: Specifies the number of times for playing the media file, in the range of 1 to 255. The default is 1.
Examples
# Configure service node 1 to end a call.
<Sysname> system-view
[Sysname] voice-setup
[Sysname-voice] ivr-system
[Sysname-voice-ivr] node 1 service
[Sysname-voice-ivr-node1] operation 1 end-call
select-rule
select-rule
Use select-rule to specify the execution order of configured operations for a service node.
Use undo select-rule to restore the default.
Syntax
select-rule 1st-operation 2nd-operation 3rd-operation
undo select-rule
Default
The execution order is select-rule 1 2 3.
Views
Service node view
Predefined user roles
network-admin
Parameters
1st-operation: Specifies the number of the operation to be executed first, in the range of 1 to 3.
2nd-operation: Specifies the number of the operation to be executed secondly, in the range of 1 to 3. The value for this argument cannot be the same as the value for 1st-operation.
3rd-operation: Specifies the number of the operation to be executed thirdly, in the range of 1 to 3. The value for this argument cannot be the same as the values for 1st-operation and 2nd-operation.
Usage guidelines
After a service node jumps to another node, returns to the previous node, or terminates a call, it does not execute the remaining operations.
Examples
# Specify the execution order of configured operations for node 1 as 1 > 3 > 2.
<Sysname> system-view
[Sysname] voice-setup
[Sysname-voice] ivr-system
[Sysname-voice-ivr] node 1 service
[Sysname-voice-ivr-node1] select-rule 1 3 2
operation
set-media
Use set-media to specify an ID for a media file.
Use undo set-media to delete IDs for media files.
Syntax
set-media media-id file filename
undo set-media { media-id | all }
Default
No ID is specified for a media file.
Views
Media resource management view
Predefined user roles
network-admin
Parameters
media-id: Specifies an ID in the range 0 to 2147483647.
file filename: Specifies a media file by its name.
all: Specifies all media file IDs.
Examples
# Specify ID 10001 for the media file cfa0:/g729/ring.wav.
<Sysname> system-view
[Sysname] voice-setup
[Sysname-voice] media-file g729r8
[Sysname-voice-media-g729r8] set-media 10001 file cfa0:/g729/ring.wav
timeout
Use timeout to configure an input timeout handling policy for a node.
Use undo timeout to restore the default.
Syntax
timeout { end-call | goto-pre-node | goto-node node-id } [ expires seconds | media-play media-id [ play-times ] | repeat repeat-times ] *
undo timeout
Default
The global input timeout handling policy is used.
Views
Call node view
Jump node view
Predefined user roles
network-admin
Parameters
expires seconds: Specifies the timeout time in the range of 1 to 255 seconds. The default is 10 seconds.
end-call: Terminates a call when the maximum number of input timeouts are reached.
goto-pre-node: Returns to the previous node when the maximum number of input timeouts are reached.
goto-node node-id: Jumps to a node specified by its ID when the maximum number of input timeouts are reached. The value range for the node-id argument is 1 to 256.
media-play media-id: Plays a media file specified by its ID when an input timeout occurs. The value range for the media-id argument is 0 to 2147483647.
play-times: Specifies the number of times for playing a media file, in the range of 1 to 255. The default is 1.
repeat repeat-times: Specifies the maximum number of input timeouts allowed. After an input timeout occurs, the system executes the node again. When the maximum number of input timeouts are reached, the system executes the configured action. The value range for the repeat-times argument is 0 to 255, and the default is 3.
Examples
# Configure Jump node to terminate a call after three times of input timeouts.
<Sysname> system-view
[Sysname] voice-setup
[Sysname-voice] ivr-system
[Sysname-voice-ivr] node 1 jump
[Sysname-voice-ivr-node1] timeout end-call repeat 3
user-input
Use user-input to configure a jump operation for an input character.
Use undo user-input to delete the jump operation for an input character.
Syntax
user-input character { end-call | goto-node node-id | goto-pre-node }
undo user-input character
Default
No jump operation is configured for a character.
Views
Jump node view
Predefined user roles
network-admin
Parameters
character: Specifies a character, which can be any of digits 0 through 9, pound sign (#), or asterisk (*).
end-call: Terminates a call.
goto-node node-id: Jumps to a node specified by its ID in the range of 1 to 256.
goto-pre-node: Returns to the previous node.
Usage guidelines
You can configure a maximum of 12 jump operations for a jump node.
Examples
# Configure the node to terminate the call if the subscriber presses 0.
<Sysname> system-view
[Sysname] voice-setup
[Sysname-voice] ivr-system
[Sysname-voice-ivr] node 1 jump
[Sysname-voice-ivr-node1] user-input 0 end-call
address sip,135
after-hours block pattern,214
after-hours date,216
after-hours day,217
after-hours exempt,218
allow-connections sip to sip,176
ani,49
ani-collected,50
ani-digit,51
ani-timeout,51
answer enable,52
answer-address,85
area,1
asserted-id,136
authenticate realm,194
authenticate register,195
bind,136
busytone-detect auto,2
busytone-detect custom,3
busytone-detect period,4
busytone-hookon delay-timer,4
cable,6
caller-group,115
caller-group,195
caller-permit,116
call-forward b2bua,218
call-forwarding,180
call-hold-format,181
calling-name,5
callmode,53
call-normal,228
cas,53
cid display,6
cid receive,7
cid ring,7
cid send,8
cid standard-type,9
cid type,8
clear-forward-ack enable,54
cng-on (digital voice interface view),55
cng-on (FXS/FXO/E&M interface view),14
codec,196
codec,87
codec preference,89
codec transparent,176
cptone,10
cptone tone-type,13
credentials,177
crypto,137
default (digital voice interface view),55
default (FXS/FXO/E&M interface view),14
delay hold,15
delay rising,16
delay send-dtmf,16
delay send-wink,17
delay start-dial,17
delay wink-hold,18
delay wink-rising,19
description,117
description,229
description,90
description (digital voice interface view),56
description (FXS/FXO/E&M interface view),19
dial-prefix,118
dial-prefix,229
dial-program,119
disconnect lcfo,20
display voice call,91
display voice call-info,93
display voice entity,94
display voice fac,220
display voice ip address trusted list,138
display voice ivr call-info,230
display voice media-play,231
display voice media-source,232
display voice mwi,182
display voice register entity,198
display voice register pool all brief,199
display voice sip call,139
display voice sip connection,141
display voice sip map,142
display voice sip register-status,144
display voice sip subscribe-state,183
display voice subscriber-line,21
display voice subscriber-line,56
dl-bits,58
dnd,221
dot-match,119
dsp-image,98
dtmf amplitude,22
dtmf enable,59
dtmf sensitivity-level,22
dtmf threshold analog,24
dtmf time,24
echo-canceler,26
echo-canceler delay (digital voice interface view),60
echo-canceler delay (FXS/FXO/E&M interface view),27
echo-canceler enable (digital voice interface view),61
echo-canceler enable (FXS/FXO/E&M interface view),28
echo-canceler tail-length (digital voice interface view),61
echo-canceler tail-length (FXS/FXO/E&M interface view),28
em log enable,29
entity,98
entity hunt,120
fac custom,222
fac standard,223
fac terminator,224
fax cng-switch enable,186
fax ecm,186
fax level,187
fax local-train threshold,188
fax nsf,189
fax protocol,189
fax rate,190
fax train-mode,191
final-callednum enable,62
first-rule,121
global-input-error,232
global-timeout,233
group-b enable,63
hookoff-mode,30
hookoff-mode delay bind,30
hookoff-time,31
id,200
impedance,32
incoming called-number,99
input extension,234
input-error,235
ip,145
ip address trusted authenticate,146
ip address trusted list,146
ip qos dscp,147
ip qos dscp,101
ivr-root,236
ivr-system,236
line,63
line,102
match-template,103
match-template,122
max-conn,123
max-dn,201
max-pool,202
media flow-around,178
media-file,237
media-play,237
metering enable,64
min-se,148
mode,202
mode,65
modem passthrough,192
moh file,224
monitor enable,33
multicast moh,225
mwi,184
mwi,226
mwi-server,184
nlp-on (digital interface view),66
nlp-on (FXS/FXO/E&M interface view),33
node,238
number (DN view),203
number (register pool view),204
number-match,124
number-substitute,125
open-trunk,34
operation,238
options-ping,149
outband,205
outband nte,105
outband sip,150
passthrough,35
pcm,67
pcm-passthrough,35
pickup-call any-group,226
pickup-group,227
playout delay,105
playout delay mode,106
plc-mode,37
priority,205
priority,125
privacy,150
private-line,126
proxy,206
proxy,151
re-answer enable,67
receive gain (digital voice interface view),68
receive gain (FXS/FXO/E&M interface view),37
register-number,152
register-value,68
registrar,152
registrar server,207
registration-timer,208
rel1xx,154
remote-party-id,154
renew,70
reset voice sip connection,155
retry invite,155
reverse,71
reverse-charge prefix,72
ring-detect debounce,38
ring-detect frequency,39
rtp payload-type nte,107
rtp-detect timeout,108
rule,127
seizure-ack enable,73
select-mode,72
select-rule,239
send ringbusy enable,74
send-busytone enable,39
send-busytone time,40
send-number,130
send-ring,108
session refresh,156
session transport,157
set pstn-cause,158
set sip-status,159
set-media,240
shutdown,109
shutdown (digital voice interface view),74
shutdown (FXS/FXO/E&M interface view),40
signal,41
signaling forward rawmsg,161
silence-detect threshold,42
sip,162
sip domain,163
sip log enable,109
sip-compatible,162
slic-gain,42
special-character,75
srtp,164
subscriber-group,131
subscriber-line,43
subscriber-line,75
substitute,208
substitute (dial program view),132
substitute (voice entity view, voice interface view),131
tdm-clock,76
terminator,133
timeout,241
timer,77
timer dial-interval,43
timer disconnect-pulse,44
timer dl,78
timer dtmf-delay,79
timer first-dial,45
timer group-b,80
timer hookflash-detect,45
timer hookoff-interval,46
timer register-pulse,81
timer ring-back,46
timer wait-digit,47
timers connection aging,165
timers options,165
timers trying,166
timeslot-set,81
transmit gain (digital voice interface view),82
transmit gain (FXS/FXO/E&M interface view),48
transport,167
trunk-direction,83
ts,83
type,48
url,168
user,168
user-input,241
username,209
vad-on,110
voice call disc-pi-off,84
voice class codec,111
voice register dn,210
voice register global,211
voice register pool,212
voice-class codec,212
voice-class codec,112
voice-class sip bind,170
voice-class sip early-offer forced,179
voice-class sip options-keepalive,213
voice-class sip options-keepalive,171
voice-class sip options-ping,172
voice-class sip session refresh,172
voice-class sip url,173
voice-setup,112
vpn-instance,174
vqa dsp-buffer maximum-time,113