- Table of Contents
- Related Documents
-
| Title | Size | Download |
|---|---|---|
| 01-Text | 1.21 MB |
About the System Center plug-in
Setting up the base environment
Obtaining the installation package
Changing the plug-in port number
Viewing the plug-in running status and version number
Installing, configuring, and exporting the certificate
Generating an SCVMM certificate
About the System Center plug-in
Data center infrastructure and applications are increasingly virtualized, and cloud computing has been widely used by organizations to control costs, simplify operations, and improve organizational flexibility. System Center can provide organizations with flexible, cost-effective data center services and drive organizations to leverage the benefits of cloud computing. In the System Center environment, System Center Virtual Machine Manager (SCVMM) uses comprehensive network, storage, computing, and security solutions to deploy and manage virtualized, software-defined data centers.
The System Center plug-in is installed on the SCVMM server side as a Windows service and used for interoperation with the SeerEngine-DC controller. It provides the following functionalities:
· Establishes a connection between the controller and SCVMM.
· Allows the controller to manage resources such as logical switches, uplink port profiles, logical networks, network sites, VM networks, and VM subnets on SCVMM.
· Allows the controller to control deployment of SCVMM-related services.
· Provides an interface from which you can view the running status and version information of the plug-in.
Preparing for installation
Software requirements
Table 1 describes the software requirements for installing the System Center plug-in.
|
Software |
Version |
|
Windows Server operating system |
2012, 2016, or 2019 |
|
SCVMM software package |
2012, 2016, or 2019 |
Installing the plug-in
Setting up the base environment
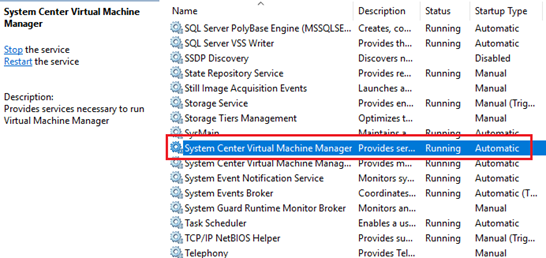
1. The correct operation of the System Center plug-in depends on the SCVMM service. Before installing the System Center plug-in package, you must first install the SCVMM package and make sure the System Center Virtual Machine Manager Service is in the Running status in the Windows service list.
Figure 1 SCVMM service
2. The System Center plug-in uses an HTTPS port. For the plug-in to connect to the controller, you must install an available trusted certificate in the Windows system installed with the plug-in. For the installation procedure, see "Installing, configuring, and exporting the certificate." The plug-in port in the C:\SystemCenterAgent\config\ directory must be consistent with that set for the certificate.
|
|
IMPORTANT: To prevent installation failure because of insufficient permission, use a domain administrator account to install the plug-in in the Windows system. |
Obtaining the installation package
The System Center plug-in package is provided with the controller installation package, and the 2012, 2016 and 2019 versions of plug-in packages are all provided.
Copy the required version of the System Center plug-in package (*SystemCenterAgent*.zip) to any directory in the Windows system installed with the SCVMM service. Alternatively, you can upload the package to the installation directory through FTP, TFTP, or SCP.
|
|
CAUTION: To avoid package damage, select binary mode when using FTP to transfer the package. |
Installing the plug-in
1. Before installation, make sure the plug-in package, SCVMM, and operating system are consistent in version.
2. Decompress the required version of System Center plug-in package and access the install_software file directory, as shown in Figure 2.
Figure 2 install_software file directory

The install_software file directory contains the following file folders and files:
¡ InstallUtil—Program file for Windows batch processing
¡ Release—File that contains resources and dependencies required for correct operation of the plug-in.
¡ Install—Windows batch file for installing the plug-in.
¡ Uninstall—Windows batch file for uninstalling the plug-in.
|
|
CAUTION: Do not delete or modify the files in the directory. |
3. Right-click the install.bat file and select to run as administrator.
Figure 3 Installing the plug-in
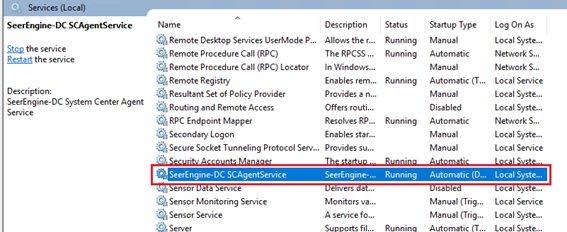
4. View the running status of the plug-in from the Windows service list.
Figure 4 Plug-in service
|
|
NOTE: The plug-in will start automatically after installation and supports automatic start upon a system reboot. |
5. Verify that a SystemCenterAgent file folder has been generated in the root directory of drive C.
Figure 5 SystemCenterAgent file folder
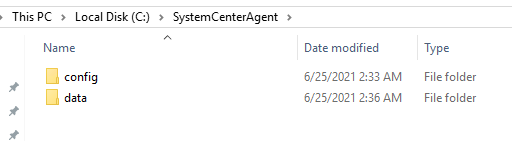
The SystemCenterAgent file folder contains the following file folders:
¡ Config—Contains a config.txt file which saves the plug-in port number.
¡ Data—Records the plug-in logs.
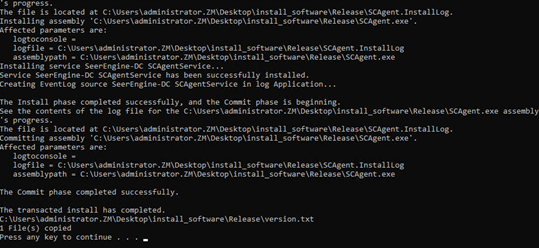
6. Access the SystemCenterAgent\data\logs file which records the installation and running processes of the plug-in and verify the installation of the plug-in. If log messages as Figure 6 have been generated, the plug-in has started and provided services successfully.

Changing the plug-in port number
1. Access the C:\SystemCenterAgent\config\ directory and open the config.txt file.
Figure 7 config.txt file
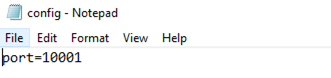
2. Edit the port value to be consistent with that set for the certificate.
3. Restart the plug-in service for the new port to take effect.
4. View the logs in the data file folder. If logs as follows have been generated, the new port takes effect.
Figure 8 Log information

Viewing the plug-in running status and version number
To obtain the running status and version number of the plug-in, enter https://IP address of the server where the plug-in is installed: plug-in port number/system_center_agent your browser, for example, https://192.168.1.1:10001/system_center_agent. You will get a result as follows: {"status":"running","version":" SeerEngine_DC-E6102_SystemCenterAgent2016"}.
Uninstalling the plug-in
1. Right-click the uninstall.bat file and select to run as administrator.
Figure 9 Uninstalling the plug-in
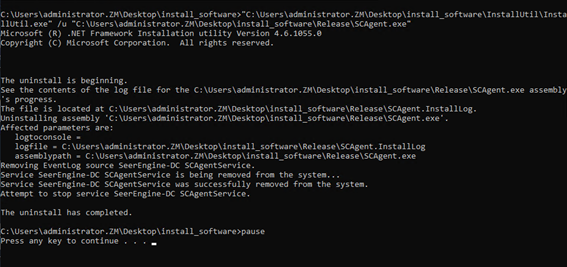
2. Verify that the plug-in service has been removed from the Windows service list.
Upgrading the plug-in
1. Uninstall the old version of the plug-in. For the uninstallation method, see "Uninstalling the plug-in."
2. Obtain the new version of the plug-in package.
3. Install the new version of the plug-in. For the installation method, see "Installing the plug-in."
4. (Optional.) The upgrade retains the port number and log file of the original plug-in. To change the port number, see "Changing the plug-in port number."
Installing, configuring, and exporting the certificate
Installing the certificate
1. Generate an SCVMM certificate. For the procedure, see "Generating an SCVMM ."
2. Transfer the p12 file to a directory on drive C of the system. Then double-click the file for importing the certificate.
Figure 10 Certificate import wizard
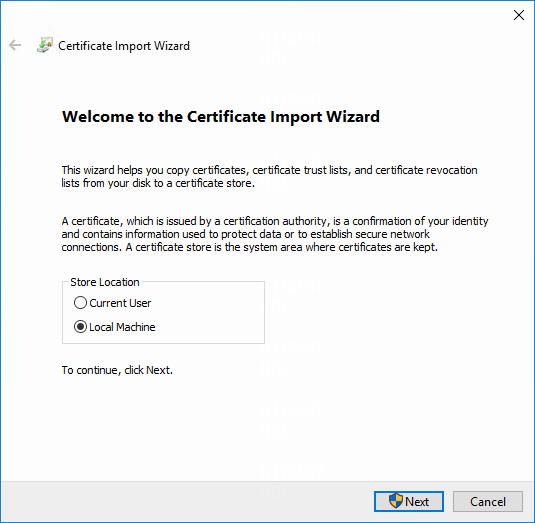
3. Select Local Machine and then click Next.
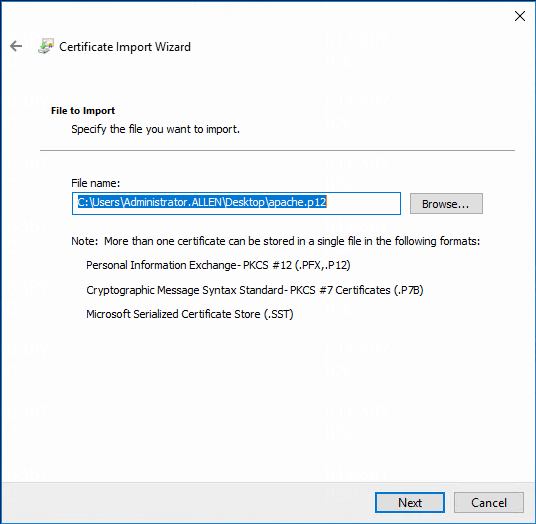
4. Verify that the p12 certificate name is correct, and then click Next.
Figure 11 Selecting the p12 certificate to import
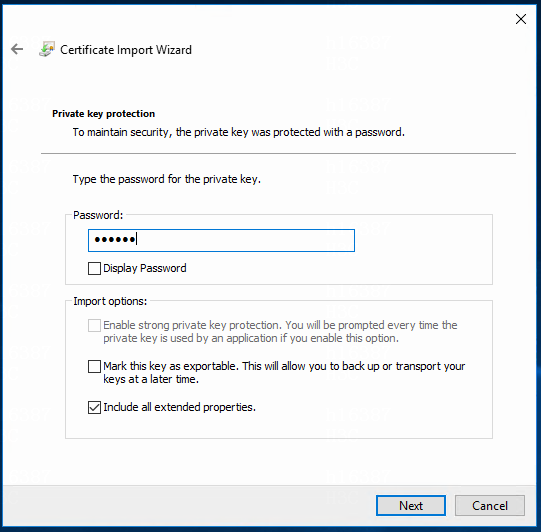
5. Enter the password set during the process for generating the p12 certificate file, and then click Next.
Figure 12 Entering the import password
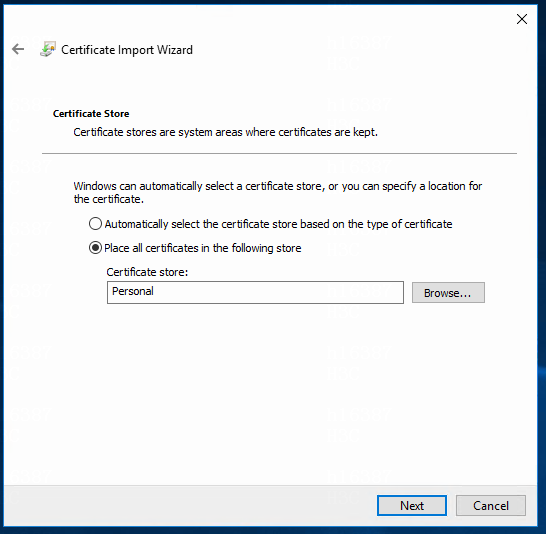
6. Select Place all certificates in the following store, and then click Browse and select Personal. Then click Next.
Figure 13 Selecting the certificate store
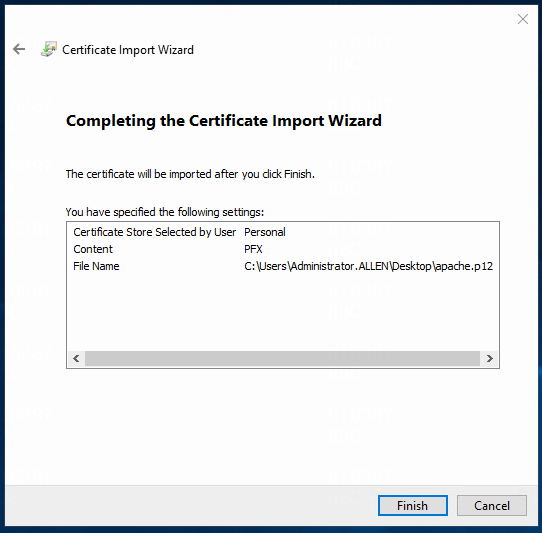
7. Verify that the information is correct, and then click Finish.
Figure 14 Importing the certificate
Configuring the certificate
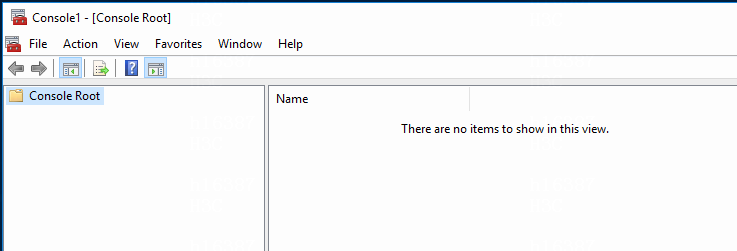
1. Open the control panel of the system. Enter mmc in the input box and then press Enter.
The Console Root window opens.
Figure 15 Console Root window
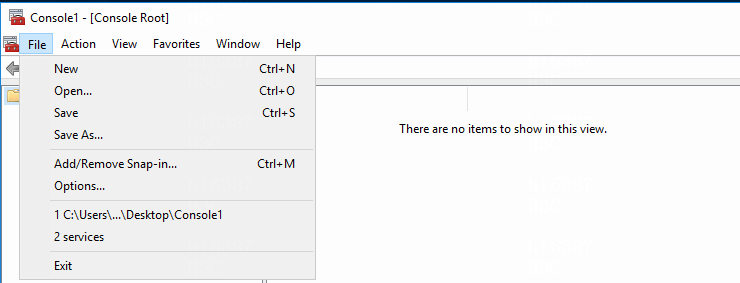
2. Select File > Add/Remove Snap-in.
Figure 16 Adding or removing snap-ins
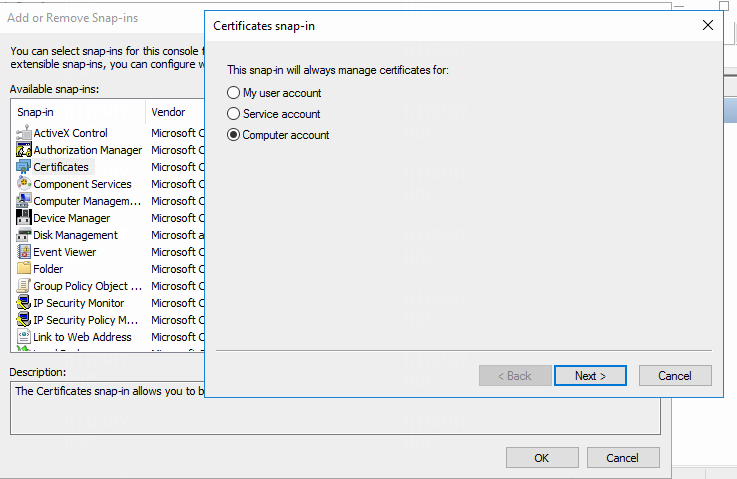
3. Double-click Certificates. In the dialog box that opens, select Computer account and then click Next.
Figure 17 Certificates snap-in
4. Click Finish.
5. Click Close.
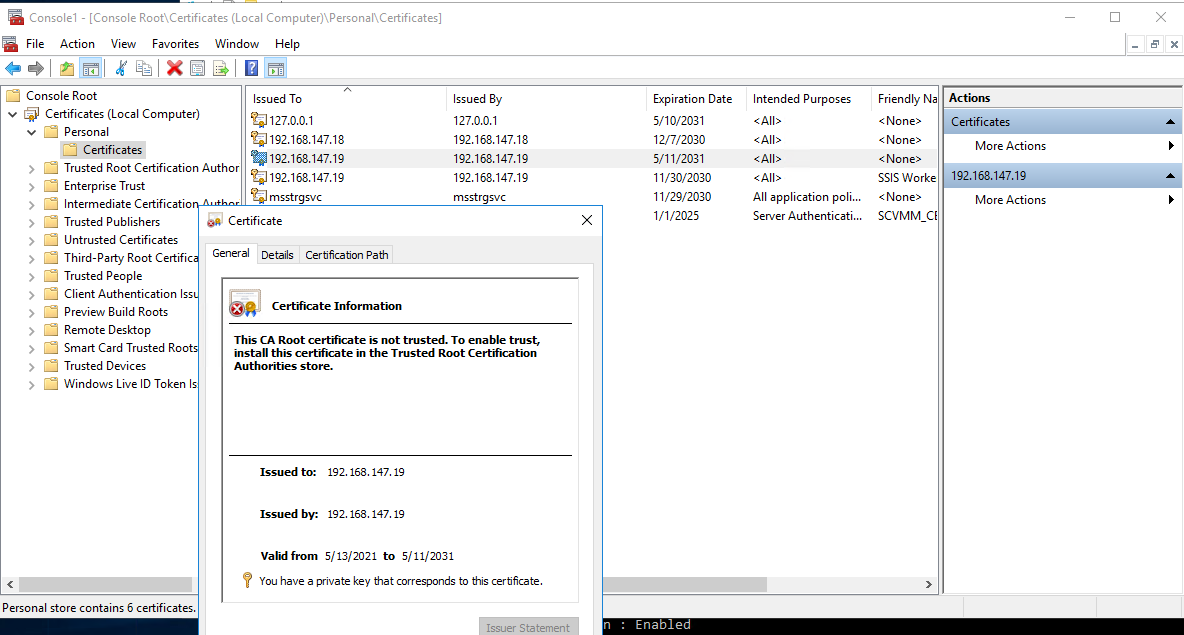
6. Verify that the certificate has been imported to Console Root.
Figure 18 Certificate imported to Console Root
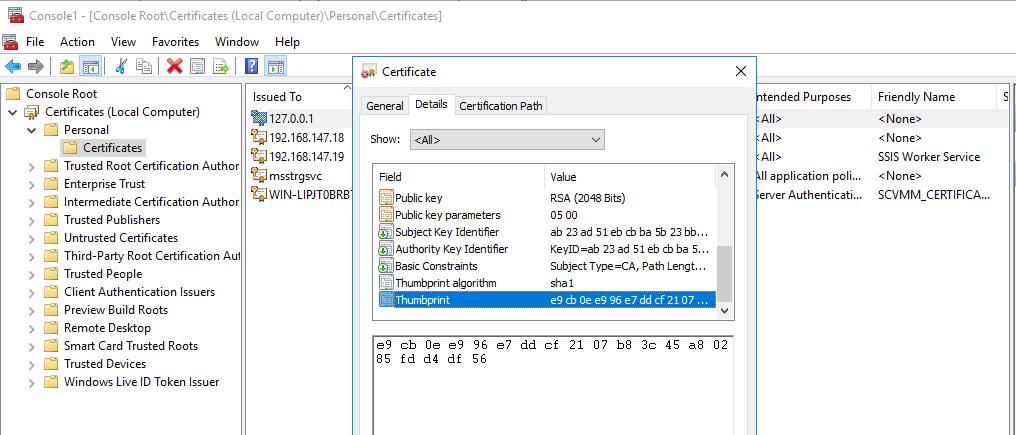
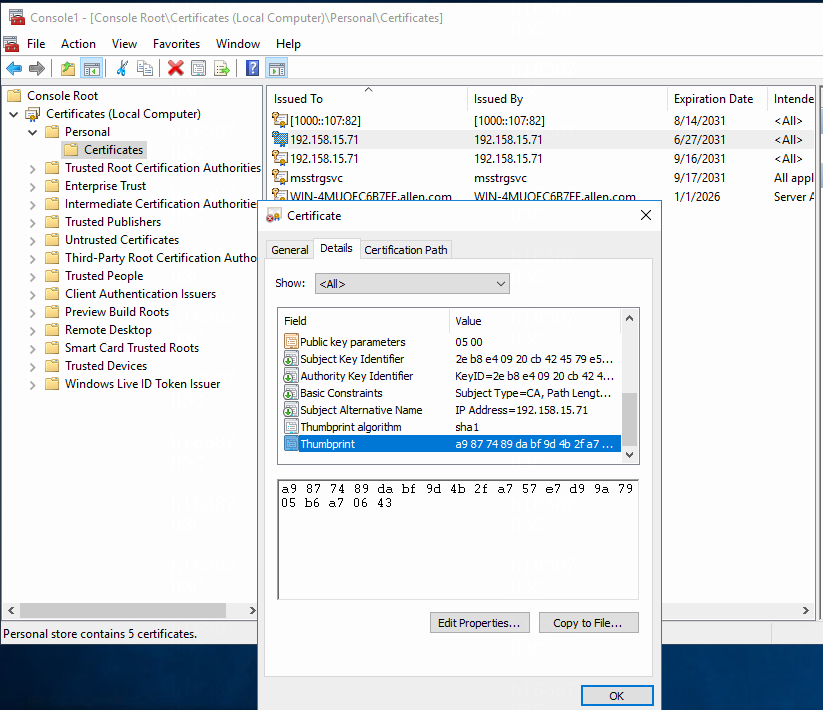
7. Double-click Certificates, and select the Details tab. Then click Thumbprint, copy the thumbprint and remove the spaces, and then record the spaces-remove value as the cerhash value (for example, certhash=ec91a787024cc07c197cc313f92834eb87ea1ea5).
Figure 19 Certificate thumbprint
8. Open a command prompt as administrator, and then enter the netsh http add sslcert ipport=192.168.147.19:10002 certhash=ec91a787024cc07c197cc313f92834eb87ea1ea5 appid={11111111-2222-3333-4444-555555555555} command.
¡ ipport—System IP address and the plug-in port number. For an IPv6 address, use square brackets to enclose the address, for example, ipport=[1000::107:82]:10002.
¡ certhash—Thumbprint serial number.
¡ appid—A UUID in correct format. The UUID must not be different than the existing ones.
Figure 20 Entering the command for binding the IP address and port number to the certificate

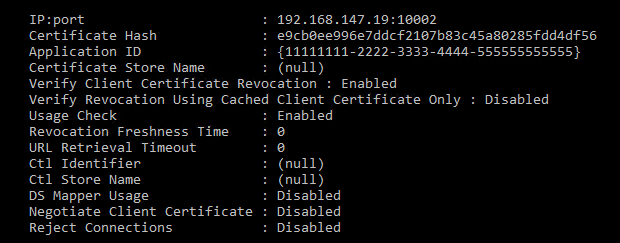
9. Execute the netsh http show sslcert command to view the IP address and port number bounded to the certificate.
Figure 21 Viewing the IP address and port number bound to the certificate
|
|
NOTE: To unbind the IP address and port from the certificate, use the netsh http delete sslcert ipport=192.168.147.19:10002 command. |
Exporting the certificate
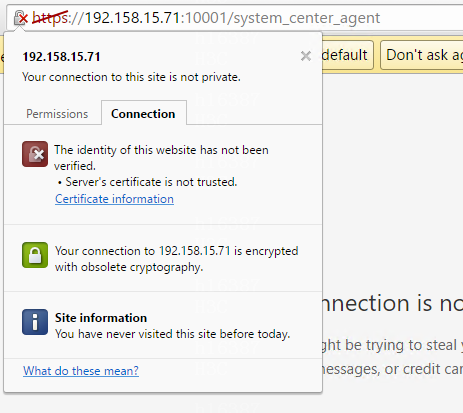
1. Enter the plug-in URL (such as the path to
obtain the version number) in your browser (Google Chrome or IE), click the ![]() button
in the upper left corner, and then click Certificate
Information.
button
in the upper left corner, and then click Certificate
Information.
Figure 22 Entering the plug-in URL
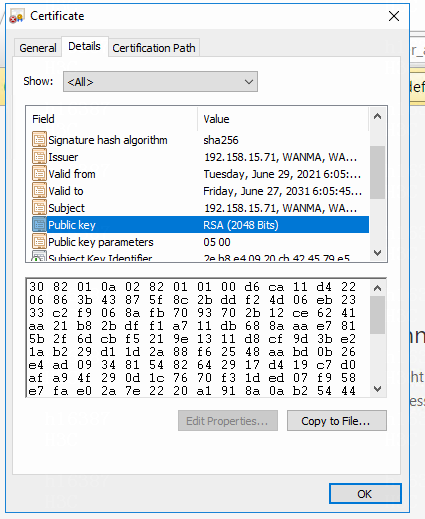
2. In the Certificate window that opens, select the Details tab. Then select Public key, and click Copy to File.
Figure 23 Selecting the public key
3. In the Certificate Export Wizard window that opens, click Next.
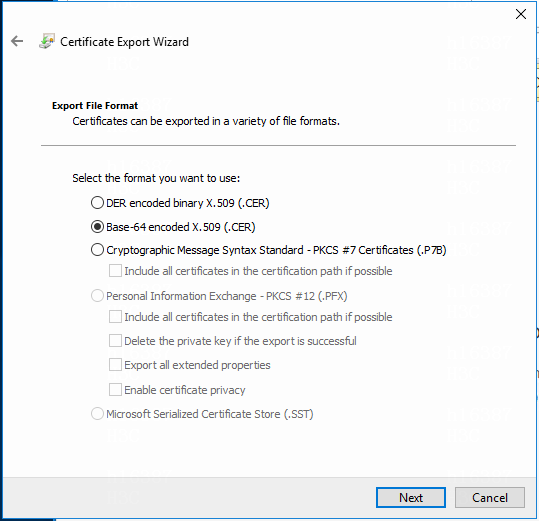
4. Select the Base64 encoded X.509 (.CER) file format, and then click Next.
Figure 24 Selecting the file export format
5. Specify the name of the file you want to export, and then click Next.
Figure 25 Exporting the certificate file
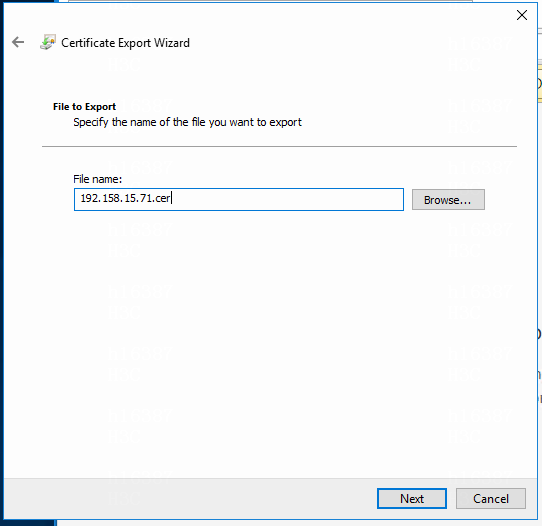
Figure 26 Completing the certificate export
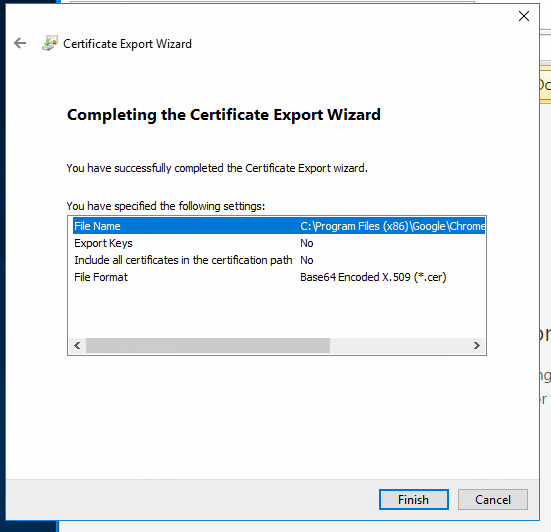
6. Verify that the settings are correct and then click Finish.
7. Upload the certificate from the certificate management module of the controller.
8. Access the Automation > Cloud and Virtualization Interoperation > Microsoft > System Center Management page on the controller and then click Add. In the dialog box that opens, configure System Center-related settings, select the uploaded certificate, and then click Apply.
9. After System Center connects to the controller, the controller establishes connection with the System Center plug-in by using this certificate.
FAQs
Q: After the plug-in is installed, a log message is displayed that the plug-in port fails to start. What should I do?
A: To resolve the issue:
1. Verify that the SCVMM service the plug-in depends on is in Running status.
2. Restart the plug-in service.
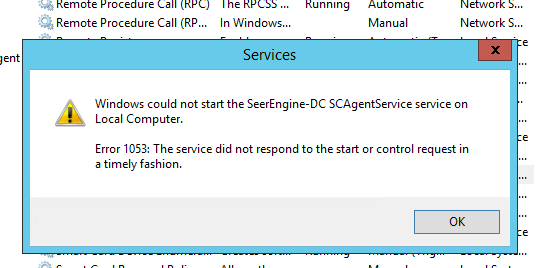
Q: A timeout message is displayed after I right-click the plug-in service and select Start to start the service. What should I do?
A: The timer for a start of a Windows service is 30 seconds. If a service fails to start within 30 seconds, a timeout message is displayed. Startup of the System Center plug-in depends on the PowerShell service of the system. Some settings will be added at the first startup of the plug-in, resulting in comparatively long startup time. If a timeout occurs at the first startup, click Start again.
Figure 27 Plug-in start timeout
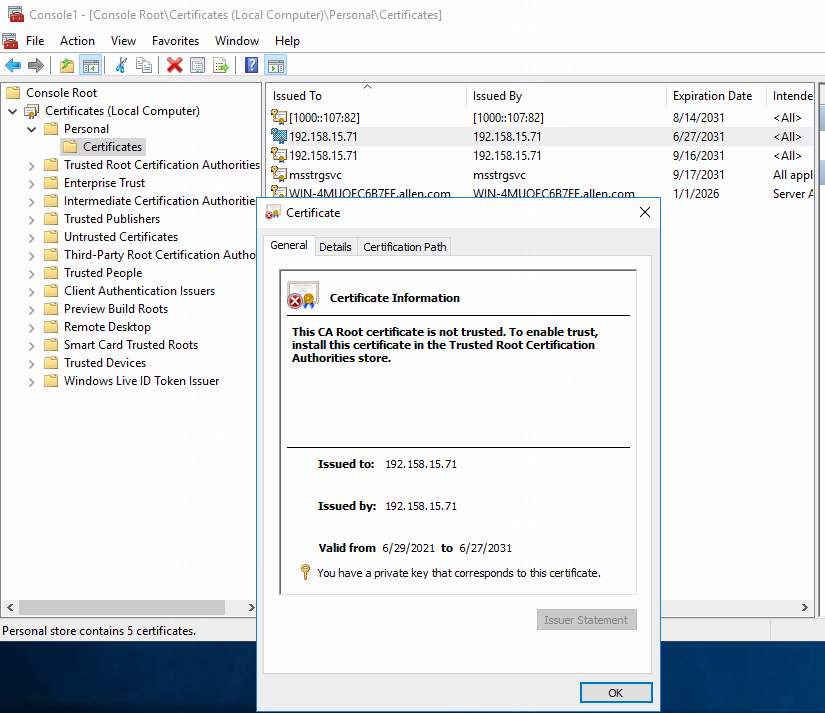
Q: When I try to manage System Center from the SeerEngine-DC controller after the plug-in is installed, the system prompts a connection failure because of "Connection reset" or "Connection refused". What should I do?
A: Enter the netsh http show sslcert command in the command prompt of the System Center system and verify whether the IP address or port has been bound to the certificate thumbprint. If not bound, see "Installing, configuring, and exporting the certificate" to bind the IP address and port to the certificate thumbprint.
Figure 28 Plug-in connection failure
![]()
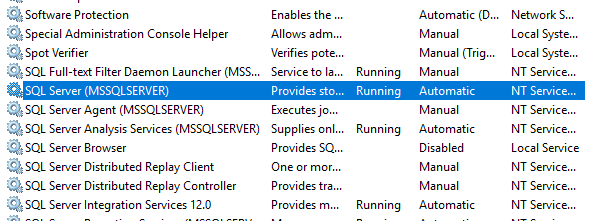
Q: The plug-in service status remains Running after the domain server is shut down or migrated. However, the system prompts a getAllVmPorts failure when the controller calls the plug-in port and a plug-in port start failure when the plug-in is restarted. What should I do?
A: Make sure the domain server is running correctly, and then reboot the SQL Server service of the system where the plug-in resides.
Figure 29 SQL Server service
Q: A plug-in version not matching the server operating system version fails to be installed or started, or gets stuck at VMM module loading. And the plug-in cannot be uninstalled because its service status is Disabled. What should I do?
A: Restart the operating system on which the plug-in runs and then reinstall the correct version of plug-in.
Q: The installation, operation, and restart of the plug-in all rely on the SCVMM service. What should I do if the plug-in fails to run correctly because of an SCVMM service failure?
A: Restart the SCVMM service first, and then restart the plug-in service.
Appendix
Generating an SCVMM certificate
1. Log in to any Linux environment by using SSH.
2. Copy and access the OpenSSL configuration file.
[root@localhost ~] mv /etc/pki/tls/openssl.cnf ./
3. Create a node and specify domain names and IP addresses for the node. The following example uses the *.org.example.com and *.abc.com domain names and 127.0.0.1 and 2.0.12.10 IP addresses.
[root@/etc/pki/tls/] vi openssl.cnf
copy_extensions = copy
req_extensions = v3_req
subjectAltName = @alt_names
[alt_names]
DNS.1 = *.org.example.com
DNS.2 = *.abc.com
IP.1 = 127.0.0.1
IP.2 = 2.0.12.10
4. Generate a CA root certificate.
a. Generate a CA key file.
[root@/etc/pki/tls/] cd /root
[root@localhost ~] openssl genrsa -out ca.key 2048
b. Use the configuration file to generate a self-signed CA certificate.
The server IP address is 192.168.147.19 in the following example.
[root@localhost ~] openssl req -x509 -new -nodes -key ca.key -sha256 -days 3650 -subj "/C=CN/ST=HANGZHOU/L=HANGZHOU/O=WANMA/OU=WANMA/CN=192.168.147.19" -config /etc/pki/tls/openssl.cnf -extensions v3_req -out ca.pem
5. Generate a server-side certificate.
a. Generate a server-side key file.
[root@localhost ~] openssl genrsa -out server.key 2048
b. Generate a signature request.
[root@localhost ~] openssl req -new -key ./server.key -subj "/C=CN/ST=HANGZHOU/L=HANGZHOU/O=WANMA/OU=WANMA/CN=192.168.147.19" -config /etc/pki/tls/openssl.cnf -extensions v3_req -out server.csr
c. Use the CA certificate to sign the server-side certificate.
[root@localhost ~] openssl x509 -req -in ./server.csr -CA ca.pem -CAkey ca.key -CAcreateserial -extfile /etc/pki/tls/openssl.cnf -extensions v3_req -days 3650 -sha256 -out server.pem
6. Generate a client-side certificate.
a. Generate a client-side key file.
[root@localhost ~] openssl genrsa -out client.key 2048
b. Generate a signature request.
[root@localhost ~] openssl req -new -key ./client.key -subj "/C=CN/ST=HANGZHOU/L=HANGZHOU/O=WANMA/OU=WANMA/CN=192.168.147.19" -reqexts SAN -config <(cat /etc/pki/tls/openssl.cnf <(printf "\n[SAN]\nsubjectAltName=DNS:rhvm.zj.com,IP:192.168.147.19")) -out client.csr
c. Use the CA certificate to sign the client-side certificate.
[root@localhost ~] openssl x509 -req -in ./client.csr -CA ca.pem -CAkey ca.key -CAcreateserial -extensions SAN -extfile <(cat /etc/pki/tls/openssl.cnf <(printf "\n[SAN]\nsubjectAltName=DNS:rhvm.zj.com,IP:192.168.147.19")) -days 3650 -sha256 -out client.pem
7. Generate a P12 file.
a. Generate a P12 file and specify the validity period and file format for the certificate.
[root@localhost ~] openssl req -x509 -days 3650 -key server.key -in server.csr > server.crt
b. View the signature file. If the CA value is TRUE, the P12 certificate file is generated successfully.
[root@localhost ~] openssl x509 -noout -text -in server.crt
c. Convert the file to a p12 certificate file. The password entered will be used as the private key for certificate import.
[root@localhost ~] openssl pkcs12 -export -clcerts -in server.crt -inkey server.key -out apache.p12
Enter Export Password:123456
Verifying - Enter Export Password:123456