- Table of Contents
- Related Documents
-
| Title | Size | Download |
|---|---|---|
| 01-Text | 603.75 KB |
Contents
Installing the activation file on the license server
Backing up and restoring SeerEngine-SDWAN components
Introduction
This document describes the procedure for installing SeerEngine-SDWAN, which acts as the WAN controller for service automation and intelligent traffic engineering in a core network or branch network scenario.
SeerEngine-SDWAN runs on the Unified Platform. Before you deploy SeerEngine-SDWAN, you must install the Unified Platform first.
Preparing for installation
Hardware requirements
SeerEngine-SDWAN can be deployed on a single server or on a cluster of three or more servers and can be deployed on a physical server or on a VM. Table 1 describes the hardware requirements for installing SeerEngine-SDWAN on a physical server.
Table 1 Hardware requirements for standalone deployment (managing a maximum of 200 resources)
|
Item |
Requirements |
|
CPU |
x86-64 (Intel Xeon v3) 12 cores 2.0 GHz or above |
|
Memory |
94 GB or above |
|
Drive |
The drives must be configured in RAID 1, 5, or 10. The storage controller must have a 1GB cache, support power fail protection, and have a supercapacitor in place. · Drive configuration option 1: ¡ System drive: SSDs configured in RAID that provide a minimum total drive size of 2.0 TB. ¡ etcd drive: SSDs configured in RAID that provide a minimum total drive size of 50 GB. (Installation path: /var/lib/etcd.) · Drive configuration option 2: ¡ System drive: 7.2K RPM or above HDDs configured in RAID that provide a minimum total drive size of 2.0 TB. ¡ etcd drive: 7.2K RPM or above HDDs configured in RAID that provide a minimum total drive size of 50 GB. (Installation path: /var/lib/etcd.) |
|
NIC |
Non-redundancy mode: 1 × 1 Gbps or above Ethernet ports Redundancy mode: 2 × 1 Gbps Linux bonding interfaces (mode2 or mode4 is recommended) |
Table 2 Hardware requirements for standalone deployment (managing a maximum of 2000 resources)
|
Item |
Requirements |
|
CPU |
x86-64 (Intel Xeon v3) 16 cores 2.0 GHz or above |
|
Memory |
126 GB or above |
|
Drive |
The drives must be configured in RAID 1, 5, or 10. The storage controller must have a 1GB cache, support power fail protection, and have a supercapacitor in place. · Drive configuration option 1: ¡ System drive: SSDs configured in RAID that provide a minimum total drive size of 2.4 TB. ¡ etcd drive: SSDs configured in RAID that provide a minimum total drive size of 50 GB. (Installation path: /var/lib/etcd.) · Drive configuration option 2: ¡ System drive: 7.2K RPM or above HDDs configured in RAID that provide a minimum total drive size of 2.4 TB. ¡ etcd drive: 7.2K RPM or above HDDs configured in RAID that provide a minimum total drive size of 50 GB. (Installation path: /var/lib/etcd.) |
|
NIC |
Non-redundancy mode: 1 × 1 Gbps or above Ethernet ports Redundancy mode: 2 × 1 Gbps Linux bonding interfaces (mode2 or mode4 is recommended) |
Table 3 Hardware requirements for cluster deployment (managing a maximum of 200 resources)
|
Item |
Requirements |
|
CPU |
x86-64 (Intel Xeon v3) 12 cores 2.0 GHz or above |
|
Memory |
88 GB or above |
|
Drive |
The drives must be configured in RAID 1, 5, or 10. The storage controller must have a 1GB cache, support power fail protection, and have a supercapacitor in place. · Drive configuration option 1: ¡ System drive:SSDs configured in RAID that provide a minimum total drive size of 2.0 TB. ¡ etcd drive: SSDs configured in RAID that provide a minimum total drive size of 50 GB. (Installation path: /var/lib/etcd.) · Drive configuration option 2: ¡ System drive: 7.2K RPM or above HDDs configured in RAID that provide a minimum total drive size of 2.0 TB. ¡ etcd drive: 7.2K RPM or above HDDs configured in RAID that provide a minimum total drive size of 50 GB. (Installation path: /var/lib/etcd.) |
|
NIC |
Non-redundancy mode: 1 × 1 Gbps or above Ethernet ports Redundancy mode: 2 × 1 Gbps Linux bonding interfaces (mode2 or mode4 is recommended) |
Table 4 Hardware requirements for cluster deployment (managing a maximum of 2000 resources)
|
Item |
Requirements |
|
CPU |
x86-64 (Intel Xeon v3) 16 cores 2.0 GHz or above |
|
Memory |
120 GB or above |
|
Drive |
The drives must be configured in RAID 1, 5, or 10. The storage controller must have a 1GB cache, support power fail protection, and have a supercapacitor in place. · Drive configuration option 1: ¡ System drive:SSDs configured in RAID that provide a minimum total drive size of 2.4 TB. ¡ etcd drive: SSDs configured in RAID that provide a minimum total drive size of 50 GB. (Installation path: /var/lib/etcd.) · Drive configuration option 2: ¡ System drive: 7.2K RPM or above HDDs configured in RAID that provide a minimum total drive size of 2.4 TB. ¡ etcd drive: 7.2K RPM or above HDDs configured in RAID that provide a minimum total drive size of 50 GB. (Installation path: /var/lib/etcd.) |
|
NIC |
Non-redundancy mode: 1 × 1 Gbps or above Ethernet ports Redundancy mode: 2 × 1 Gbps Linux bonding interfaces (mode2 or mode4 is recommended) |
To deploy SeerEngine-SDWAN on a VM, make sure that VM uses VMware ESXi 6.7.0 or a higher version or H3C_CAS-E0706 or a higher version.
If superthreading is enabled, the minimum number of vCPU cores required is twice the number of CPU cores required for deployment on a physical server. If superthreading is disabled, the minimum requirements for the number of vCPU cores, memory size, and drive configuration are the same as those for deployment on a physical server.
To deploy SeerEngine-SDWAN on a VMware VM, you must enable promiscuous mode and forged transmits on the host attached to the VM.
Software requirements
SeerEngine-SDWAN runs on the Unified Platform as a component. Before deploying SeerEngine-SDWAN, first install the Unified Platform.
The following installation packages must be deployed when you deploy the Unified Platform:
· common_PLAT_GlusterFS_2.0
· general_PLAT_portal_2.0
· general_PLAT_kernel_2.0
The following installation packages are deployed automatically when you deploy SeerEngine-SDWAN components:
· general_PLAT_kernel-base_2.0
· general_PLAT_websocket_2.0
· general_PLAT_Dashboard_2.0
· general_PLAT_widget_2.0
To deploy the general_PLAT_network_2.0 package, deploy SeerEngine-SDWAN components first.
Table 5 Installation packages
|
Installation package |
Description |
Remarks |
|
common_PLAT_GlusterFS_2.0_<version>.zip |
Provides local shared storage functionalities. |
Required |
|
general_PLAT_portal_2.0_<version>.zip |
Provides portal, unified authentication, user management, service gateway, and help center functionalities. |
Required |
|
general_PLAT_kernel_2.0_<version>.zip |
Provides access control, resource identification, license, configuration center, resource group, and log functionalities. |
Required |
|
general_PLAT_kernel-base_2.0_<version>.zip |
Provides alarm, access parameter template, monitoring template, report, email, and SMS forwarding functionalities. |
Required |
|
general_PLAT_websocket_2.0_<version>.zip |
Provides the southbound Websocket function. |
Required |
|
general_PLAT_Dashboard_2.0_<version>.zip |
Provides the dashboard framework. |
Required |
|
general_PLAT_widget_2.0_<version>.zip |
Provides dashboard widget management. |
Required |
|
general_PLAT_network_2.0_<version>.zip |
Provides basic management of network resources, network performance, network topology, and iCC. Install this application if you are to check match of the software versions with the solution. |
Optional |
Client requirements
You can access SeerEngine-SDWAN from a Web browser without installing any client. As a best practice, use Google Chrome 70 or a later version.
Pre-installation checklist
Table 6 Pre-installation checklist
|
Item |
Requirements |
|
|
Server |
Hardware |
The CPU, memory, disk, and NIC requirements for installing SeerEngine-SDWAN are met. |
|
Software |
The system time settings are configured correctly. As a best practice, configure NTP on each node and specify the same time source for all the nodes. |
|
|
Client |
Google Chrome 70 or a later version is installed on the client. |
|
Partitioning the system drive
Before installing SeerEngine-SDWAN, partition the system drive as described in Table 7.
Table 7 Drive partition settings
|
Mount point |
Minimum capacity |
Boot mode |
Remarks |
|
2*2.4TB, RAID 1 |
|||
|
/var/lib/docker |
500 GiB |
BIOS/UEFI |
Expansion is allowed when the drive space is sufficient. |
|
/boot |
1 GiB |
BIOS/UEFI |
N/A |
|
swap |
1 GiB |
BIOS/UEFI |
N/A |
|
/var/lib/ssdata |
500GiB |
BIOS /UEFI |
Expansion is allowed when the drive space is sufficient. |
|
/ |
700 GiB |
BIOS /UEFI |
Expansion is allowed when the drive space is sufficient. |
|
/boot/efi |
0.2 GiB |
UEFI |
N/A |
|
GFS |
500 GiB |
N/A |
You must perform a manual partitioning. To deploy other components except for the Unified Platform and SDWAN controller, determine the capacity required and then expand the drive. |
|
2*50GB, RAID 1 |
|||
|
/var/lib/etcd |
50 GiB |
BIOS /UEFI |
You must mount a separate drive. |
Deploying SeerEngine-SDWAN
This chapter describes the procedure for deploying SeerEngine-SDWAN as a component from the Unified Platform. After successful deployment, SeerEngine-SDWAN runs as a containerized application on the host where the Unified Platform is installed.
To install SeerEngine-SDWAN:
1. Log in to the Unified Platform.
See H3C Unified Platform Deployment Guide for the operation procedure.
2. On the top navigation bar, click System.
3. Click Deployment.
4. Click Install.
5. Click Upload to upload the component installation package, and then click Next.
Figure 1 Uploading the component installation package
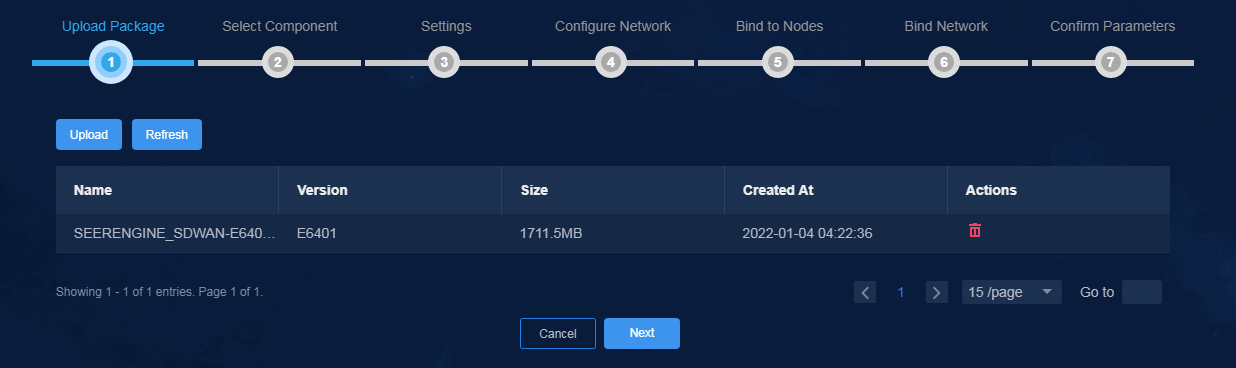
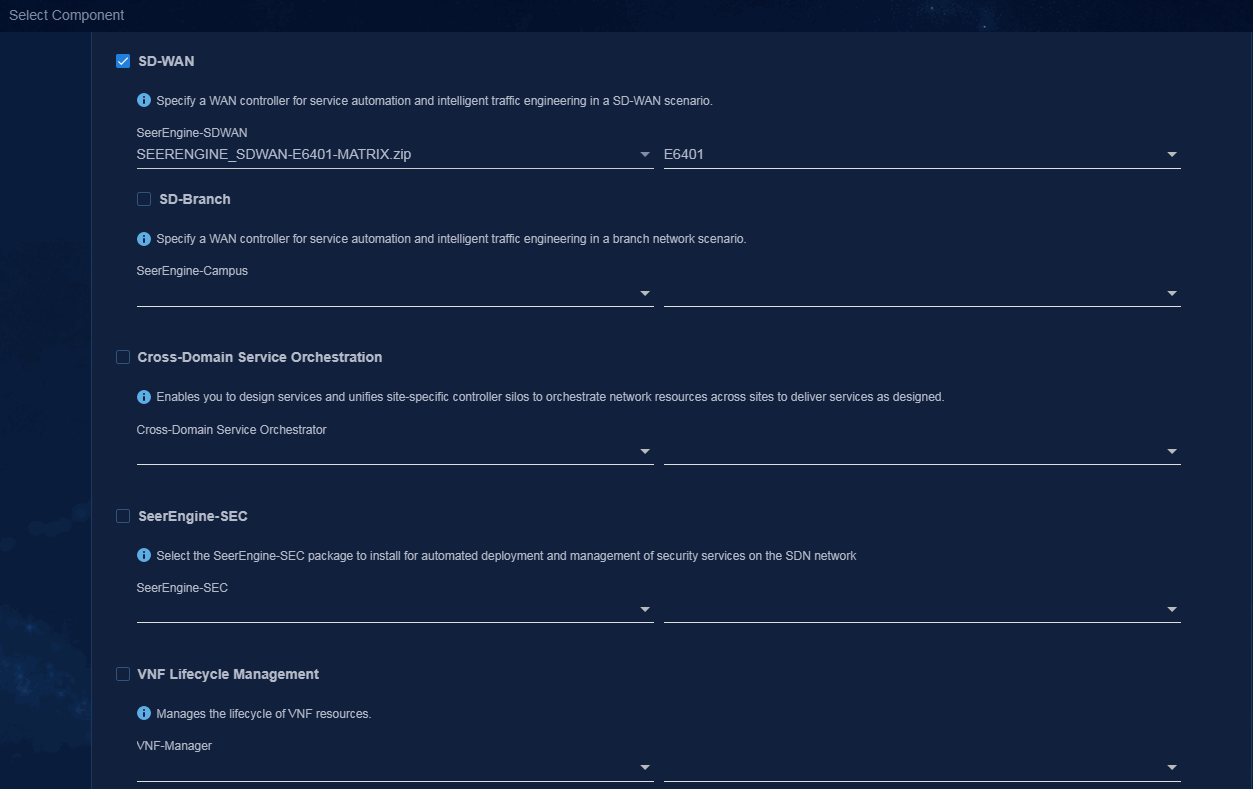
6. Select the component to be installed (SD-WAN in this example) and the component version, and then click Next.
Figure 2 Selecting the component to install
7. Retain default parameter settings and click Next.
Figure 3 Configuring parameters

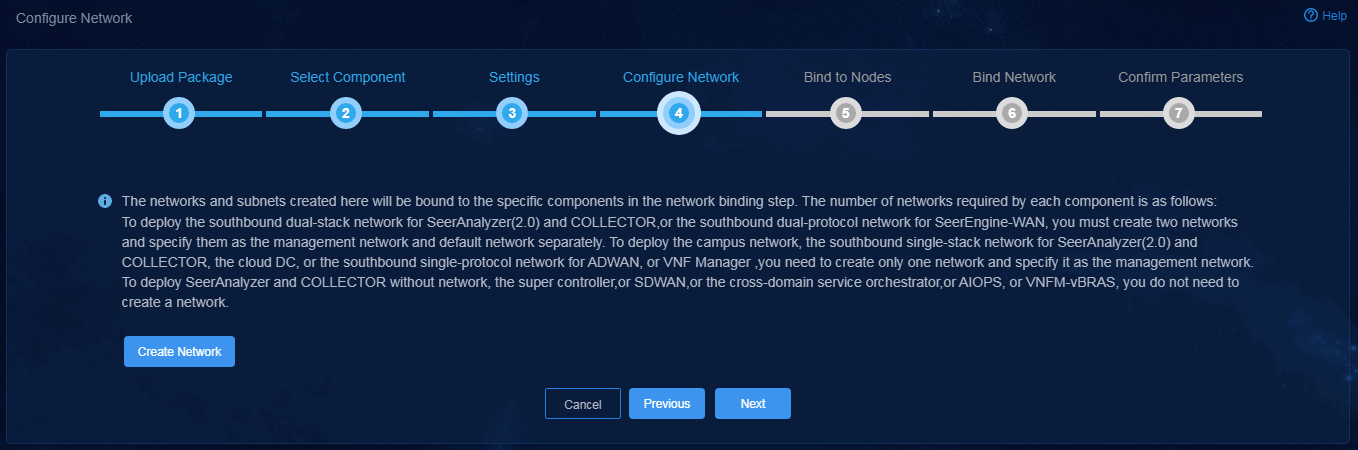
8. Create a network and add a subnet to the network. You do not need to create a network when you install SeerEngine-SDWAN.
Figure 4 Configuring network settings
9. Skip node binding and click Next.
Figure 5 Binding to nodes

10. Bind networks and subnets to SeerEngine-SDWAN, and then click Next.
Figure 6 Binding networks and subnets to components

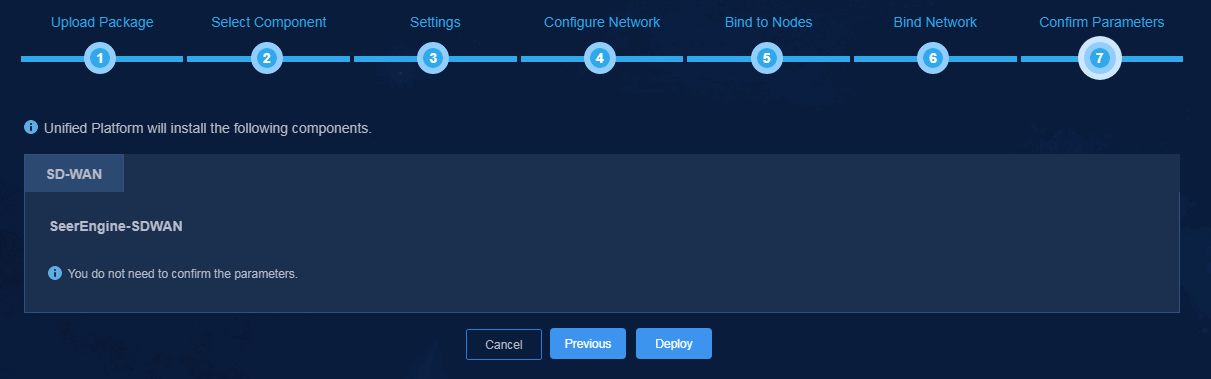
11. Confirm parameters and then click Deploy.
Figure 7 Confirming network parameters
12. To view detailed
information about a component, click
the ![]() icon to the left of a component, and then click
icon to the left of a component, and then click ![]() in
the Actions column for that component.
in
the Actions column for that component.
Figure 8 Expanding component information

13. After deployment, click Home on the top navigation bar to access the SeerEngine-SDWAN home page.
Figure 9 SeerEngine-SDWAN home page

Registering SeerEngine-SDWAN
Installing the activation file on the license server
For the activation file request and installation procedure, see H3C Software Products Remote Licensing Guide.
Obtaining licenses
1. Log in to the SeerEngine-SDWAN controller.
2. From the navigation pane, select System > License.
3. Configure the parameters for the license server as described in Table 8.
Table 8 License server parameters
|
Item |
Description |
|
IP address |
Specify the IP address configured on the license server used for internal communication in the cluster. |
|
Port number |
Specify the service port number of the license server. The default value is 5555. |
|
Username |
Specify the client username configured on the license server. |
|
Password |
Specify the client password configured on the license server. |
4. Click Connect to connect the controller to the license server.
The controller will automatically obtain licensing information after connecting to the license server.
Backing up and restoring SeerEngine-SDWAN components
For more information, see H3C Unified Platform Deployment Guide.
Upgrading the controller
|
|
CAUTION: During the upgrade process, do not perform configuration backup or restoration operations. |
The controller can be upgraded on the Unified Platform with the configuration retained.
To upgrade the controller:
1. Log in to the Unified Platform. Click System > Deployment.
Figure 10 Deployment page (1)

2. Click the left chevron button ![]() for the controller to
expand controller information, and then click the upgrade icon
for the controller to
expand controller information, and then click the upgrade icon ![]() .
.
Figure 11 Deployment page (2)

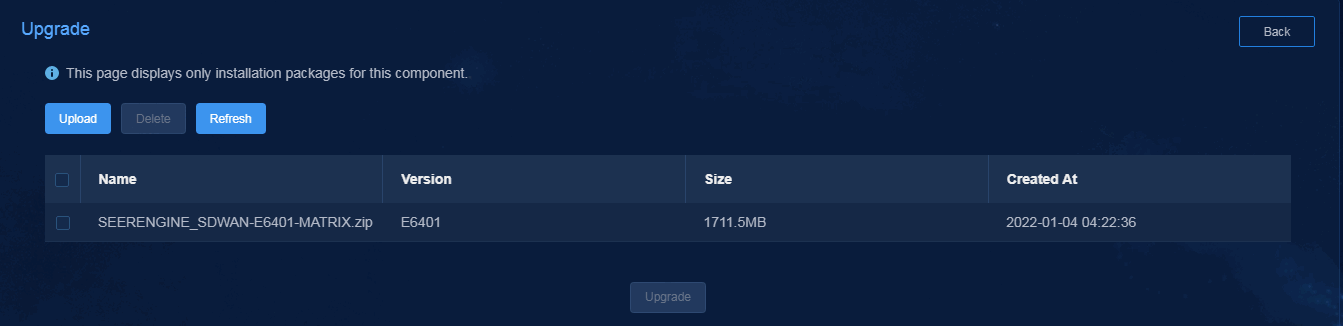
3. Select the uploaded installation package, and then click Upgrade.
Figure 12 Deployment page (3)
4. View the upgrade progress.
Figure 13 Upgrade progress
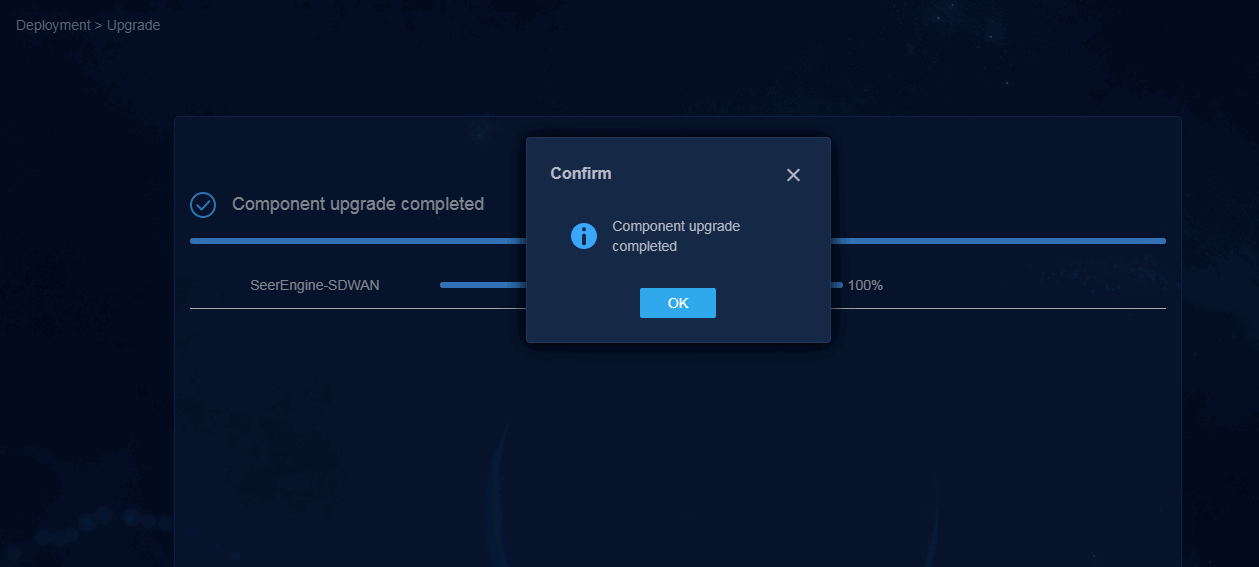
5. Click OK.
Uninstalling the controller
1. Log in to the Unified Platform. Click System > Deployment.
2. Click the ![]() icon to the left of the controller name and then
click Uninstall.
icon to the left of the controller name and then
click Uninstall.
Figure 14 Uninstalling the controller
