- Table of Contents
- Related Documents
-
| Title | Size | Download |
|---|---|---|
| 03-Web-Based Configuration Cautions and Guidelines | 1.25 MB |
Deleting an administrator user account
Modifying the password of a user account
Saving the running configuration
Restoring the factory defaults
Deleting a file or file folder
Upgrading startup software images
Changing the member ID of an IRF member device
Changing the IRF bridge MAC persistent time
Compressing the license storage
Restoring the default settings of an interface
Changing the link mode of an Ethernet interface
Binding interfaces to a VRF instance
Deleting all dynamic ARP entries
Deleting all IPv4 static routes
Deleting all IPv6 static routes
Modifying the IGMP version of an interface
Disabling the HTTP or HTTPS service
Upgrading the startup software or configuration file for members or SmartMC groups
Introduction
This guide contains important information that if not understood or followed can result in undesirable situations, including:
· Unexpected shutdown or reboot of devices or cards.
· Service anomalies or interruption.
· Loss of data, configuration, or important files.
· User login failure or unexpected logoff.
Only trained and qualified personnel are allowed to do the configuration tasks described in this guide.
Before you configure your device, read the information in this document carefully.
Device
Maintenance
Deleting an administrator user account
Consequences
After an administrator user account is deleted, users cannot log in to the device with that user account.
Procedure
1. From the navigation pane, select Device > Maintenance > Administrators.
2. Delete an administrator user account on the following page:

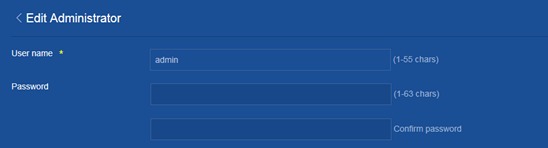
Modifying the password of a user account
Consequences
If you modify the password of a user account, users that do not know the new password cannot log in to the device with the user account.
Recommendation
After you modify the password of a user account, record the new password and notify users that use the user account of the new password.
Procedure
1. From the navigation pane, select Device > Maintenance > Administrators.
2. Click the Details icon for a user account.
3. Enter a password and confirm the password on the following page:
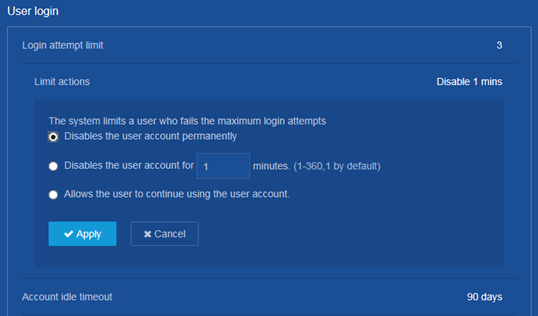
Disabling a user account permanently after the maximum number of consecutive login attempts is reached
Consequences
With password control enabled, this operation prevents a user from using its IP address to access the device after the maximum number of consecutive login attempts is reached.
Procedure
1. From the navigation pane, select Device > Maintenance > Administrators.
2. Click the Password control icon at the upper right corner of the page.
3. Click Enable Password Control.
4. Select Disables the user account permanently in the User login area on the following page:
Saving the running configuration
Consequences
Saving the running configuration might overwrite the settings in an existing configuration file.
Recommendation
Perform this operation according to the system prompt.
Procedure
1. From the navigation pane, select Device > Maintenance > Configuration.
2. Click Save Running Configuration on the following page:

Importing configuration
Consequences
This operation rolls back the running configuration to the configuration in the specified configuration file. The configuration before the rollback is lost.
This operation might cause service interruption.
Procedure
1. From the navigation pane, select Device > Maintenance > Configuration.
2. Click Import Configuration on the following page:
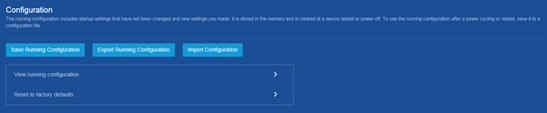
Restoring the factory defaults
Consequences
This operation deletes next-startup configuration files from the device and restores the device configuration to the factory defaults.
Procedure
1. From the navigation pane, select Device > Maintenance > Configuration.
2. Click the ![]() icon
next to Reset to factory
defaults.
icon
next to Reset to factory
defaults.
3. Click Reset on the following page:

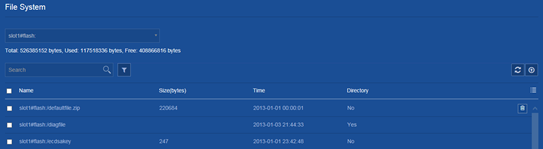
Deleting a file or file folder
Consequences
Deleted files and file folders cannot be recovered.
Procedure
1. From the navigation pane, select Device > Maintenance > File System.
2. Delete a file or file folder on the following page:
Upgrading startup software images
Consequences
This operation might cause service interruption.
Procedure
1. From the navigation pane, select Device > Maintenance > Upgrade.
2. Upgrade startup software images on the following page:

Rebooting the device
Consequences
This operation might cause service interruption.
Procedure
1. From the navigation pane, select Device > Maintenance > Reboot.
2. Reboot the device on the following page:

Virtualization
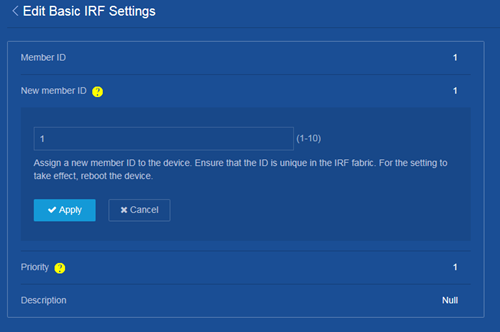
Changing the member ID of an IRF member device
Consequences
On an IRF fabric, an IRF member ID change can invalidate member ID-related settings and cause data loss.
If the new member ID is the same as the member ID of another member device in the IRF fabric, the current device cannot join the IRF fabric after it reboots.
Procedure
1. From the navigation pane, select Device > Virtualization > IRF.
2. Click the ![]() icon
next to Basic settings.
icon
next to Basic settings.
3. Click the Details icon for an IRF member device.
4. Change the member ID of the IRF member device on the following page:
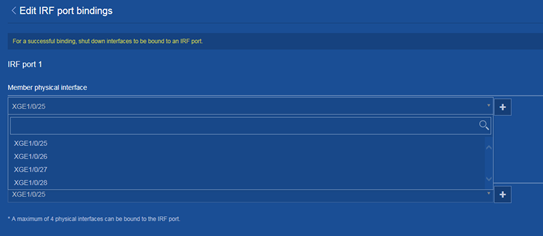
Modifying IRF port bindings
Consequences
This operation might cause IRF split or traffic forwarding issue.
Procedure
1. From the navigation pane, select Device > Virtualization > IRF.
2. Click the ![]() icon
next to IRF port bindings.
icon
next to IRF port bindings.
3. Click the Details icon for an IRF member device.
4. Modify the IRF physical interfaces bound to an IRF port on the following page:
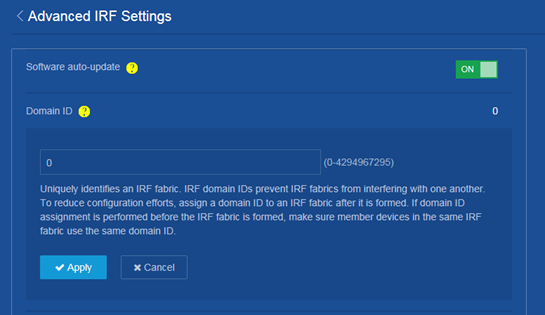
Changing the IRF domain ID
Consequences
This operation might result in IRF domain ID conflict in a network that has multiple IRF fabrics. IRF domain ID conflict can cause MAD to mistakenly place an IRF fabric in Recovery state or cause IRF split.
Procedure
1. From the navigation pane, select Device > Virtualization > IRF.
2. Click the ![]() icon
next to Advanced settings.
icon
next to Advanced settings.
3. Change the IRF domain ID on the following page:
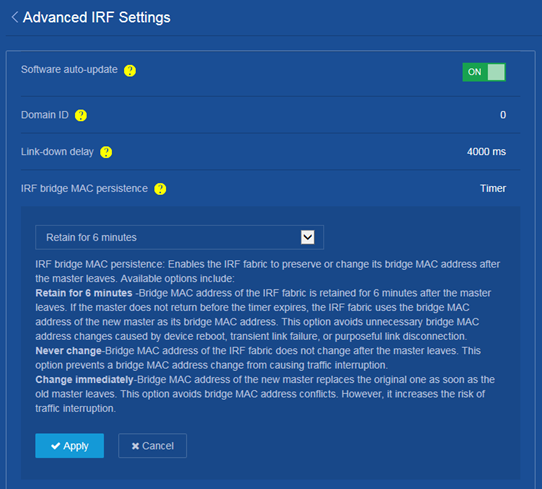
Changing the IRF bridge MAC persistent time
Consequences
This operation might affect traffic forwarding on an IRF fabric.
Procedure
1. From the navigation pane, select Device > Virtualization > IRF.
2. Click the ![]() icon
next to Advanced settings.
icon
next to Advanced settings.
3. Change the IRF bridge MAC persistence setting on the following page:
License management
Uninstall a license
Consequences
Uninstalling a license makes the licensed feature inaccessible.
Procedure
1. From the navigation pane, select Device > License Management > License Management.
2. Uninstall a license on the following page:

Compressing the license storage
Consequences
The compression operation clears expired licenses and uninstalled licenses.
If uninstalled licenses or expired licenses exist on the device, the compression operation will make the DID change. Before performing a compression, make sure all licenses registered with the old DID have been installed and all Uninstall keys of the uninstalled licenses have been backed up. You will be unable to install such licenses or restore such Uninstall keys after the compression.
Procedure
1. From the navigation pane, select Device > License Management > License Management.
2. Click Compress on the following page to compress the license storage:

Network
Interfaces
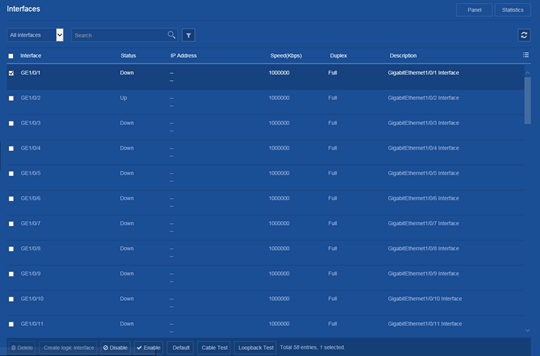
Restoring the default settings of an interface
Consequences
This operation might interrupt ongoing network services. Make sure you are fully aware of the impact of this operation when you perform it on a live network.
Procedure
1. From the navigation pane, select Network > Interfaces > Interfaces.
2. Select one or multiple interfaces and click Default at the bottom of the following page:
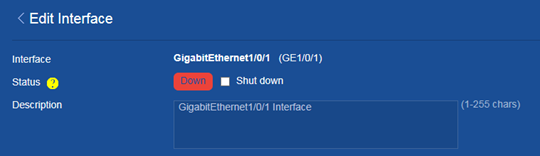
Shutting down an interface
Consequences
Shutting down an interface disconnects the links attached to the interface and might cause communication disruption.
Procedure
1. From the navigation pane, select Network > Interfaces > Interfaces.
2. Click the Details icon for an interface.
3. Shut down the interface on the following page:
Links
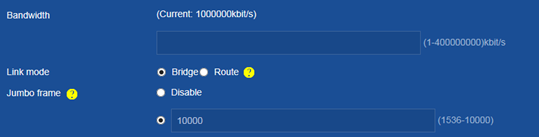
Changing the link mode of an Ethernet interface
Consequences
Changing the link mode of an Ethernet interface restores all parameters on the Ethernet interface to the defaults in the new mode.
Procedure
1. From the navigation pane, select Network > Interfaces > Interfaces.
2. Click the Details icon for an interface.
3. Change the link mode of the interface on the following page:
VRF instances
Binding interfaces to a VRF instance
Consequences
This operation deletes configuration (including IP address and routing protocol settings) from the interfaces bound to a VRF instance.
Procedure
1. From the navigation pane, select Network > VRF > VRF.
2. Click the Add icon, or select an existing VRF and click the Details icon.
3. Bind interfaces to the VRF instance on the following page:
IP
Deleting all dynamic ARP entries
Consequences
This operation clears all dynamic ARP entries on the device. In this situation, the device might fail to forward external traffic to internal users.
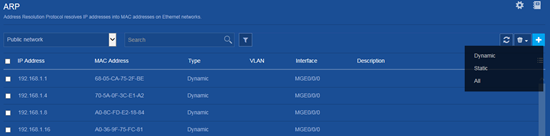
Procedure
1. From the navigation pane, select Network > IP > ARP.
2. Delete all dynamic entries from the device on the following page:
Routing
Deleting all IPv4 static routes
Consequences
Deleting all IPv4 static routes might cause network reachability issues and packet forwarding failures.
Procedure
1. From the navigation pane, select Network > Routing > Static Routing.
2. Click the ![]() icon
next to IPv4 static routing.
icon
next to IPv4 static routing.
3. Delete all IPv4 static routes on the following page:

Deleting all IPv6 static routes
Consequences
Deleting all IPv6 static routes might cause network reachability issues and packet forwarding failures.
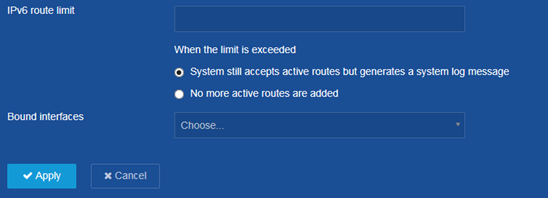
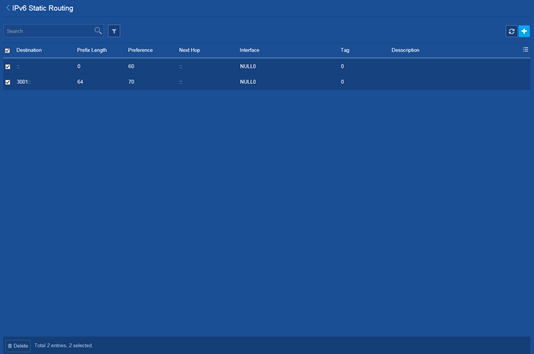
Procedure
1. From the navigation pane, select Network > Routing > Static Routing.
2. Click the ![]() icon
next to IPv6 static routing.
icon
next to IPv6 static routing.
3. Delete all IPv6 static routes on the following page:
Multicast
Modifying the IGMP version of an interface
Consequences
Different versions of IGMP have different packet structures and types. To ensure correct IGMP running, make sure all interfaces within the same subnet run the same version of IGMP.
If you change the IGMP version of an interface to a version different than the other interfaces within the same subnet, IGMP might fail to run correctly.
Procedure
1. From the navigation pane, select Network > Multicast > IGMP.
2. Click the ![]() icon
next to Enable IGMP on interfaces.
icon
next to Enable IGMP on interfaces.
3. Enable IGMP and select the IGMP version for an interface on the following page:

Network services
Disabling the HTTP or HTTPS service
Consequences
If the HTTP or HTTPS service is disabled, users cannot access the device through the Web interface.
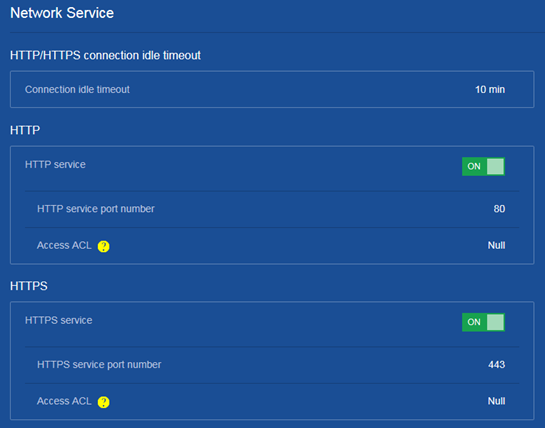
Procedure
1. From the navigation pane, select Network > Service > HTTP/HTTPS.
2. Change the state of the HTTP or HTTPS service from ON to OFF on the following page:
SmartMC
Intelligent O&M
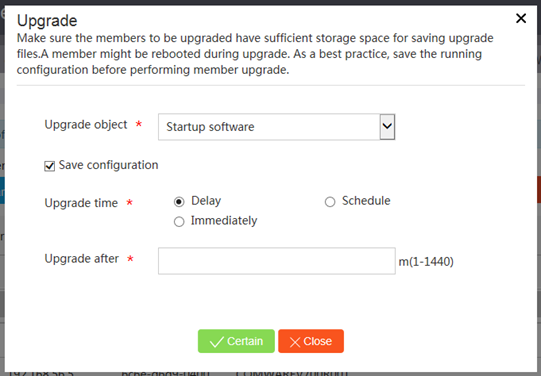
Upgrading the startup software or configuration file for members or SmartMC groups
Consequences
Upgrading the startup software images might interrupt services.
After you upgrade the configuration file of a member, the member will run the configuration in the specified configuration file. The original configuration of the member is lost.
Procedure
1. From the navigation pane, click SmartMC.
2. From the navigation pane on the page that opens, click Intelligent O&M.
3. Click the Upgrade tab.
4. Select one or multiple members or SmartMC groups, and then click Upgrade.
5. Upgrade the startup software or configuration file on the following page: