- Released At: 11-06-2021
- Page Views:
- Downloads:
- Table of Contents
- Related Documents
-
|
|
|
|
|
H3C XG310 GPU Module |
|
User Guide |
|
|
|
|
|
New H3C Technologies Co., Ltd. http://www.h3c.com
Document version: 6W101-20210610 |
Copyright © 2021, New H3C Technologies Co., Ltd. and its licensors. All rights reserved.
No part of this manual may be reproduced or transmitted in any form or by any means without prior written consent of New H3C Technologies Co., Ltd.
Except for the trademarks of New H3C Technologies Co., Ltd., any trademarks that may be mentioned in this document are the property of their respective owners.
The information in this document is subject to change without notice. All contents in this document, including statements, information, and recommendations, are believed to be accurate, but they are presented without warranty of any kind, express or implied. H3C shall not be liable for technical or editorial errors or omissions contained herein.
1 About the GPU module
Overview
|
|
IMPORTANT: The model name of a hardware option in this document might differ slightly from its model name label. A model name label might add a prefix or suffix to the hardware-coded model name for purposes such as identifying the matching server brand or applicable region. For example, the GPU-XG310-32GB-FHFL GPU module model represents GPU module labels including UN-GPU-XG310-32GB-FHFL and UN-GPU-XG310-32GB-FHFL-F, which have different prefixes and suffixes. |
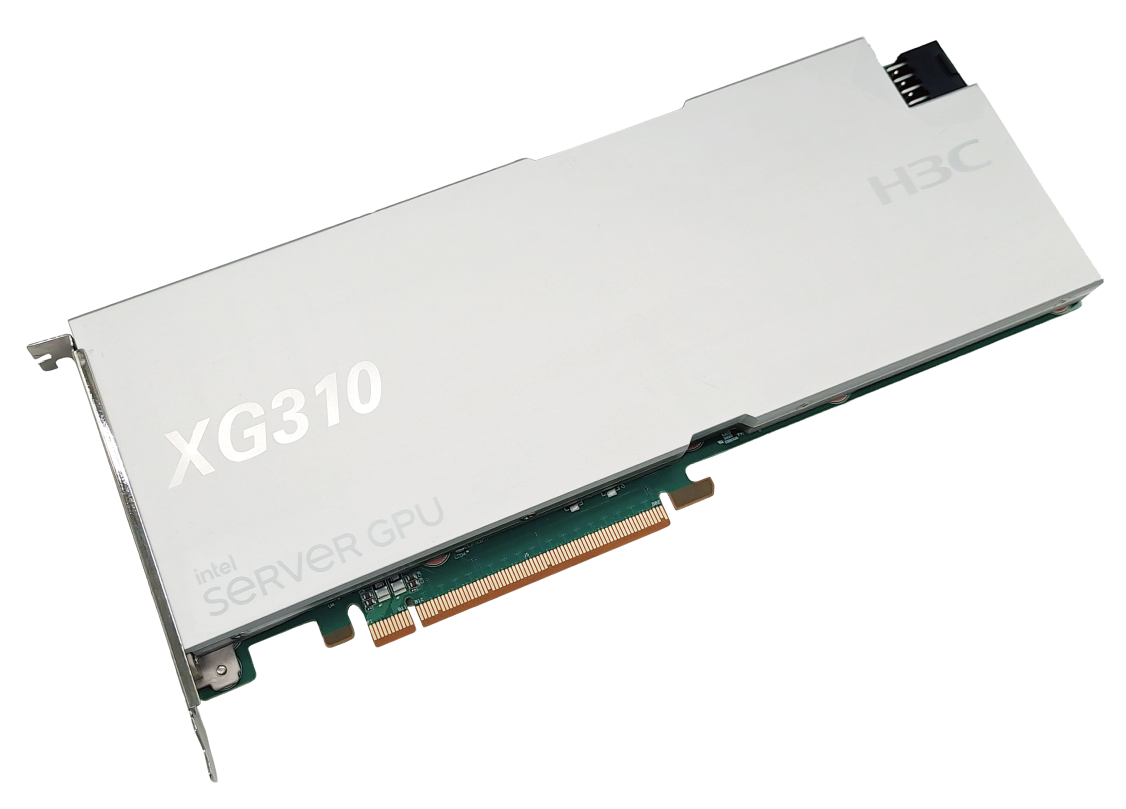
H3C GPU-XG310-32GB-FHFL GPU module (hereinafter referred to as GPU module) uses Intel SG1 GPUs on the Gen12 graphics architecture, delivering increased performance and high energy efficiency. The XG310 has four independent GPUs, allowing the server to call different number of GPUs as needed for image processing and data operations. Each GPU supports a maximum of 96 execution units (EUs). The XG310 is applicable to cloud gaming, virtual desktop, image and video processing, and other scenarios.
In this document, "GPU module" refers to the GPU-XG310-32GB-FHFL module and "GPU" refers to a GPU chip on the GPU-XG310-32GB-FHFL module.
Figure1-1 GPU module
Connectors
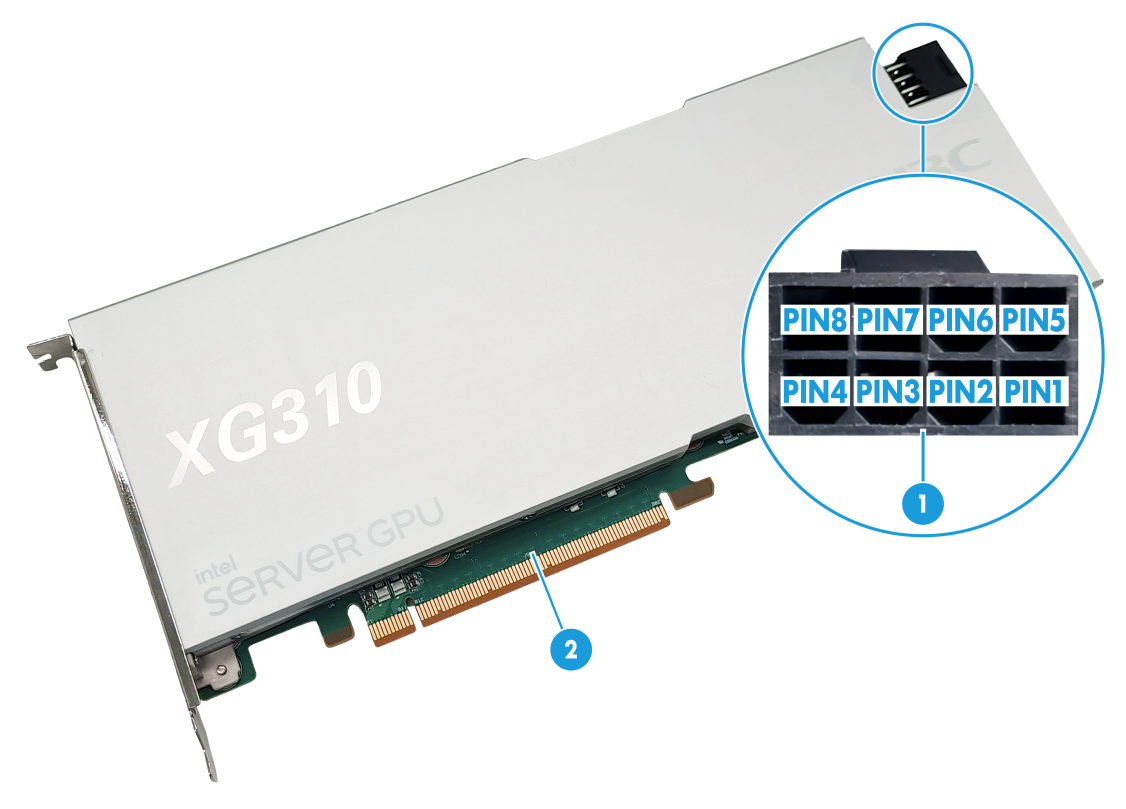
Figure1-2 Connectors
|
(1) Power connector |
(2) PCIe3.0 ×16 connector |
Specifications
Table1-1 Hardware specifications
|
Item |
Specifications |
|
GPU package type |
FCBGA |
|
Number of GPUs |
4 |
|
EUs |
96 EUs per GPU |
|
Video memory type |
LPDDR4x |
|
Video memory size |
· GPU: 8 GB · GPU module: 32 GB |
|
GPU video memory bitwidth |
128 bits |
|
GPU video memory bandwidth |
68.25 GB/s |
|
Video memory operating rate |
4267 MT/s |
|
GPU module operating frequency |
· Boost: 1.1 GHz · Base: 0.9 GHz |
|
Power consumption |
· GPU: 23 W · GPU module: 150 W |
|
Bus type |
PCIe3.0 ×16 |
|
Power connector type |
PCIe 8-pin |
|
Thermal solution |
Passive |
|
Maximum operating temperature |
95°C (203°F) The GPU module operates at reduced frequency if the temperature exceeds 95°C (203°F). |
|
Forced power-off temperature |
130°C (266°F) |
Table1-2 Software specifications
|
Item |
Specifications |
|
Fixed function decode |
Supported (AVC/HEVC/VP9/MPEG-2/JPEG) |
|
Fixed function encode |
Supported (AVC/HEVC/VP9/JPEG) |
|
Programmable encode |
Supported (AVC/HEVC/MPEG-2) |
|
AV1 decode |
Supported |
|
GFX/APIs |
Supported (OpenGL/OpenGL ES) |
|
Virtualization mode |
Only pass-through mode supported |
|
ECC |
Not supported |
|
Compatible operating system |
· Linux: CentOS and Debian. · VMware: Not supported. · Windows: Not supported. |
|
Hypervisor |
KVM |
|
Host OS |
CentOS |
|
Guest OS |
CentOS |
Dimensions
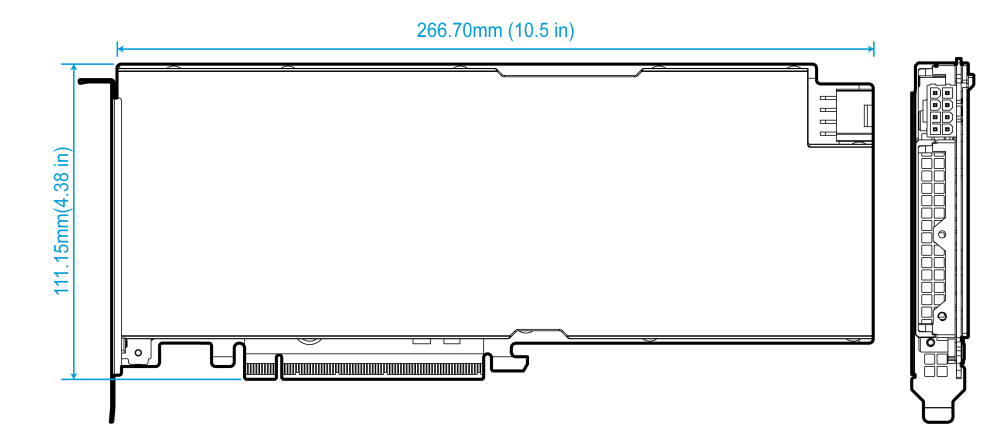
Figure1-3 Dimensions
Environment requirements
Table1-3 Environment requirements
|
Item |
requirements |
|
Temperature |
· Operating temperature: 0°C to 55°C (32°F to 131°F) · Storage temperature: –40°C to +70°C (–40°F to +158°F) |
|
Humidity |
· Operating humidity: 8%RH to 90%RH, noncondensing · Storage humidity: 5%RH to 95%RH, noncondensing |
Cooling requirements
Figure1-4 Airflow through the GPU module
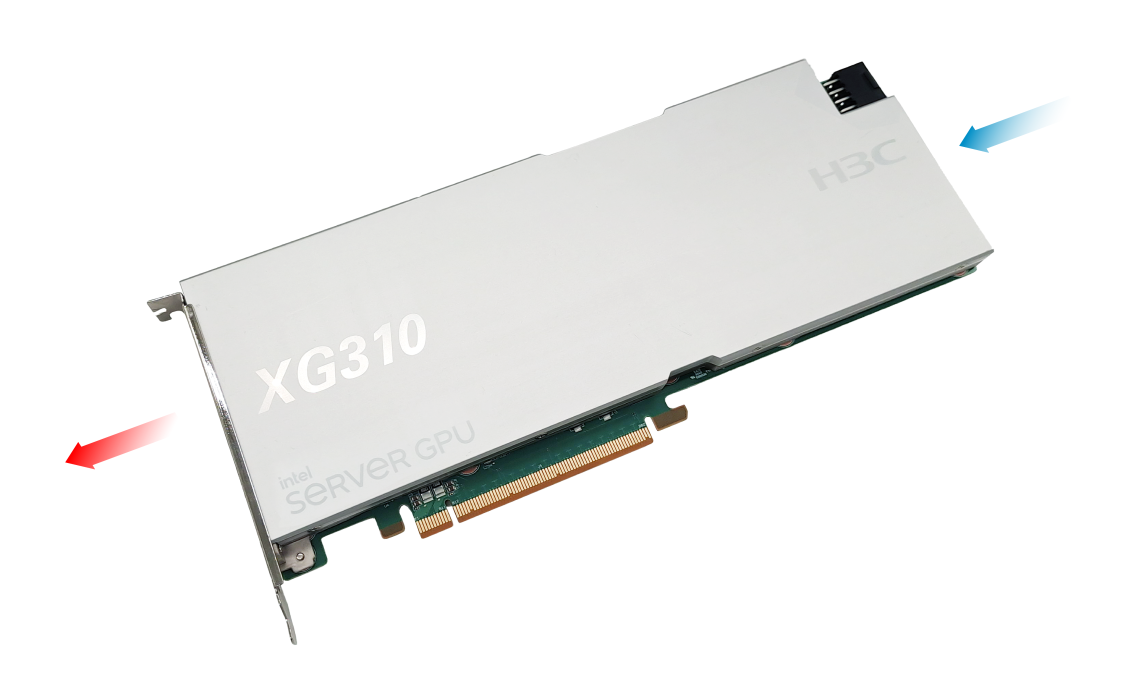
Table1-4 Required air volumes for different inlet temperatures
|
GPU module inlet temperature |
Required air volume |
|
55°C (131°F) |
12 CFM |
|
50°C (122°F) |
10 CFM |
|
45°C (113°F) |
8 CFM |
|
40°C (104°F) |
6 CFM |
2 Compatibility
The XG310 GPU module is developed based on the Intel SG1 chip and can only be used on servers that use Intel CPUs.
3 Installing a GPU module
Attaching a support bracket to the GPU module
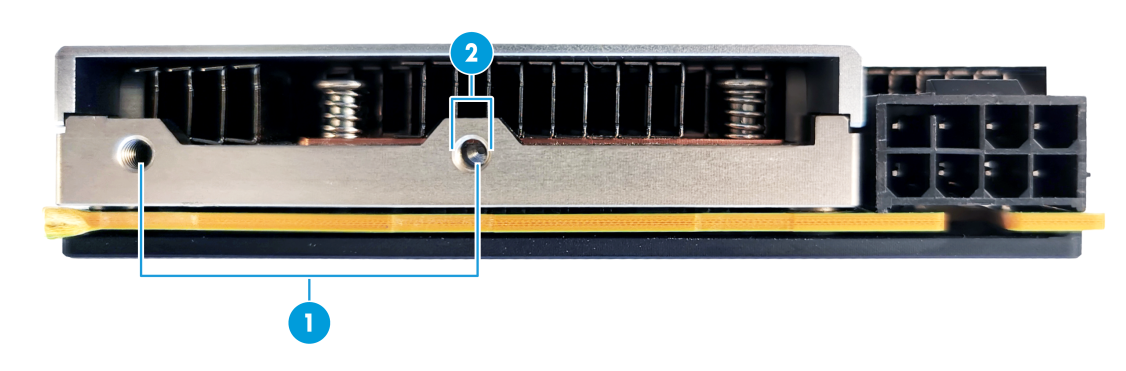
To install the GPU module securely on a server, attach a support bracket to the GPU module as required. See Figure3-1 for the support bracket securing hole specifications.
Figure3-1 Support bracket securing hole specifications
|
(1) Hole distance = 28.5 mm (1.12 in) |
(2) Hole diameter = M3 |
Installing the GPU module on a server
For information about installing the GPU module on a server, see the user guide for the server.
4 Installing drivers and the firmware
Downloading the firmware and drivers
Access https://www.h3c.com/en/Support/Resource_Center/Software_Download/Servers/ to obtain the firmware and drivers for the GPU module and the related installation guides.
Installing drivers
A GPU module can be identified and used only after drivers are installed correctly on it. The following procedure installs drivers for the GPU module on a CentOS 7.4 operating system.
Installing drivers
1. Copy the downloaded driver program to the server and decompress it.
2. Install the kernel and drivers:
a. Execute the ./install-sg1.sh command to start the driver installation.
Figure4-1 Starting the driver installation

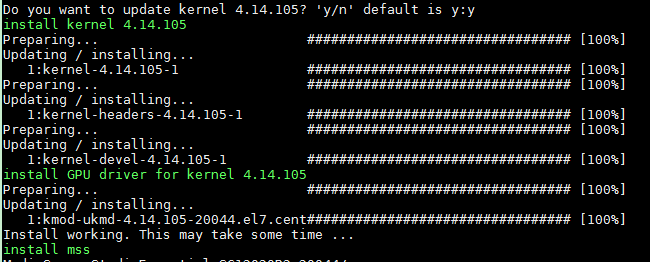
b. Enter y to install the kernel.
Figure4-2 Installing the kernel
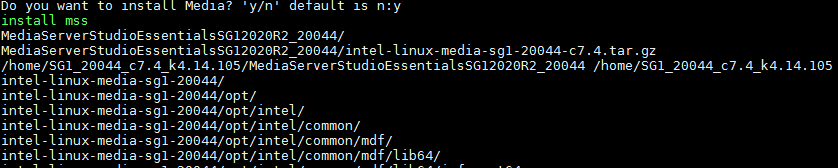
c. Enter y to install the media driver.
Figure4-3 Installing the media driver
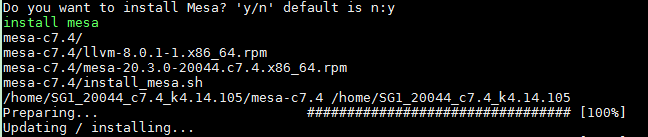
d. Enter y to install the Mesa driver.
Figure4-4 Installing the Mesa driver
3. Modify the system configuration file.
a. Modify the GRUB setting. As shown in Figure4-5, open the /boot/efi/EFI/centos/grubenv file and replace the saved_entry line with saved_entry=CentOS Linux (4.14.105) 7 (Core)..
Figure4-5 Modifying the GRUB setting
![]()
b. Add the kernel option. Open the /boot/efi/EFI/centos/grub.cfg file, add space and modprobe.blacklist=ast to the end of en_US.UTF-8, as shown in Figure4-6.
Figure4-6 Adding the kernel option
![]()
4. Execute the systemctl disable gdm command to disable the GDM service.
5. Execute the reboot command to restart the server.
6. Configure the following settings on the server:
export LD_LIBRARY_PATH=/usr/local/lib:/usr/local/lib64:/usr/local/lib64/dri/:/usr/l
ib64/:/usr/lib64/dri:${LD_LIBRARY_PATH}
export DISPLAY=:0.0
export MESA_LOADER_DRIVER_OVERRIDE=iris
export LD_LIBRARY_PATH=.:/opt/intel/mediasdk/lib64/:${LD_LIBRARY_PATH}
export LIBVA_DRIVER_NAME=iHD
export LIBVA_DRIVERS_PATH=/opt/intel/mediasdk/lib64
7. Execute the /usr/bin/X –sharevts & command to connect the GPUs to the X service.
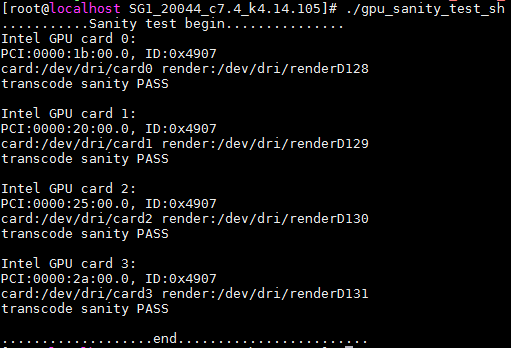
Verifying the installation
1. In the root directory of the driver, execute the ./gpu_sanity_test_sh command to run a sanity test on the four GPUs.
As shown in Figure4-7, all GPUs pass the sanity test.
Figure4-7 Sanity test on GPUs
2. Execute the glxinfo |grep Mesa command to view Mesa driver version information.
Figure4-8 Viewing Mesa driver version information

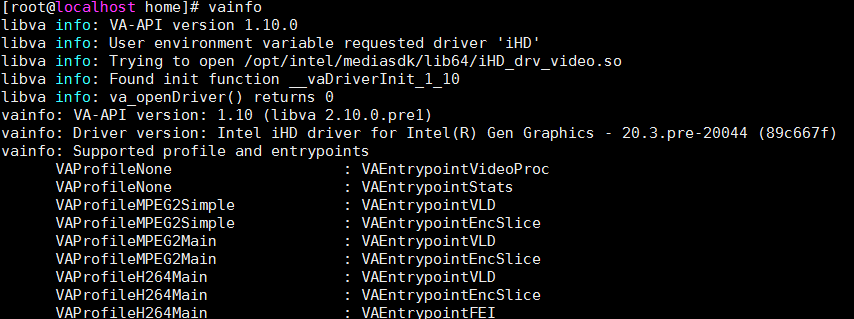
3. Execute the vainfo command to view media driver version information.
Figure4-9 Viewing media driver version information
Viewing GPU module information in the operating system
1. Execute the lspci | grep VGA command to view GPU information.
A GPU module typically has four GPUs. As shown in Figure4-10, four PCI devices, each represented by Device 4907, are identified for a GPU module.
The first PCIe device with bus number 05:00.0 in Figure4-10 is the VGA device provided on the system board.
Figure4-10 Viewing GPUs

2. Execute the lspci | grep 4910 command to view PCI bridges of the GPU module.
Typically, four PCI bridges (Device 4910) are displayed for a GPU module as shown in Figure4-11.
Figure4-11 Viewing PCI bridges

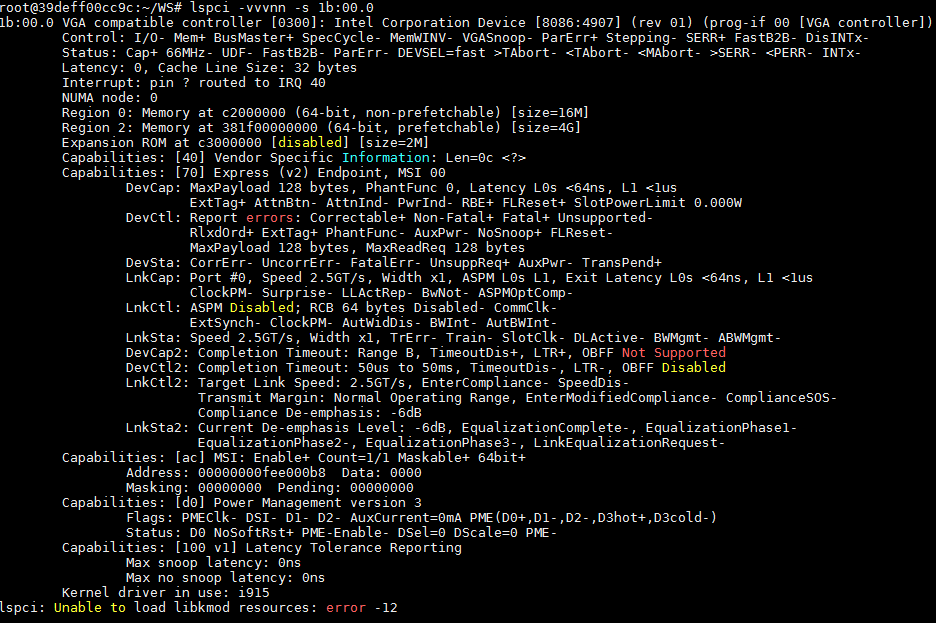
3. Execute the lspci –vvvnn –s bus command to view the detailed PCI information of a GPU.
To obtain the bus number of a GPU, see 1.
Figure4-12 Viewing detailed PCI information about a GPU
4. Execute the lspci –s bus –vv | grep "LnkSta" command to view the link status of a PCI bridge.
To obtain the bus number of a PCI bridge, see 2.
Figure4-13 Viewing the link status of a PCI bridge
![]()
Upgrading the firmware
For better use of the GPU module, upgrade the firmware to the latest version as a best practice. For more information, see the firmware installation guide. To obtain the guide, see "Downloading the firmware and driver."
5 Safety standards and EMC standards
Safety standards
UL 60950-1
UL 62368-1
IEC 60950-1
IEC 62368-1
EN 60950-1
EN 62368-1
GB 4943.1
EMC standards
EN 55024
EN 55032
EN 55035
CISPR 24
CISPR 32
CISPR 35
AS/NZS CISPR 32
FCC Part 15 Subpart B
ICES-003 Issue 7
ANSI C63.4
VCCI-CISPR 32
6 Acronyms
|
Acronym |
Full name |
|
A |
|
|
AVC |
Advanced Video Coding |
|
AV1 |
AOMedia Video 1 |
|
C |
|
|
CFM |
Cubic Feet per Minute |
|
E |
|
|
ECC |
Error Correcting Code |
|
EU |
Execution Unit in the Graphics Processor |
|
G |
|
|
GPU |
Graphics Processing Unit |
|
H |
|
|
HEVC |
High Efficiency Video Coding |
|
M |
|
|
MPEG2 |
Moving Picture Experts Group |
|
S |
|
|
SoC |
System-on-chip |
|
SDK |
Software Development Kit |
|
T |
|
|
TDP |
Thermal Design Power |