- Released At: 13-02-2023
- Page Views:
- Downloads:
- Table of Contents
- Related Documents
-
iMC SSA
Troubleshooting Guide
Document version: 5W100-20230210
Copyright © 2023 New H3C Technologies Co., Ltd. All rights reserved.
No part of this manual may be reproduced or transmitted in any form or by any means without prior written consent of New H3C Technologies Co., Ltd.
Except for the trademarks of New H3C Technologies Co., Ltd., any trademarks that may be mentioned in this document are the property of their respective owners.
The information in this document is subject to change without notice.
No data for some indexes on the dashboard
Cannot select a vendor for a server added through the custom REST collection method
Failure to synchronize event logs on a physical server to the SSA server events
Introduction
This document provides information about troubleshooting common software and hardware issues with the iMC SSA component.
General guidelines
|
|
IMPORTANT: To prevent an issue from causing loss of configuration, save the configuration each time you finish configuring a feature. For configuration recovery, regularly back up the configuration to a remote server. |
When you troubleshoot the iMC SSA component, follow these general guidelines:
· To help identify the cause of the issue, collect system and configuration information, including:
¡ Symptom, time of failure, and configuration.
¡ Installation environment and software running status.
¡ Log messages and diagnostic information.
¡ Steps you have taken and the result.
· Make sure you are familiar with iMC SSA and the programs and systems that iMC SSA depends on.
· If program file replacement or patch installation is required, use the release notes to verify hardware and software compatibility.
Troubleshooting SSA
No data for some indexes on the dashboard
Symptom
On the dashboard, some indexes (for example, NETIO, DISKIO, IOPS, CPU, and memory) obtain no data, as shown in Figure 1.
Figure 1 Incomplete data on the dashboard

Solution
Deleting servers without data on the dashboard
Log in to U-Center, and delete servers without data on the dashboard.
Confirming the virtual resource type
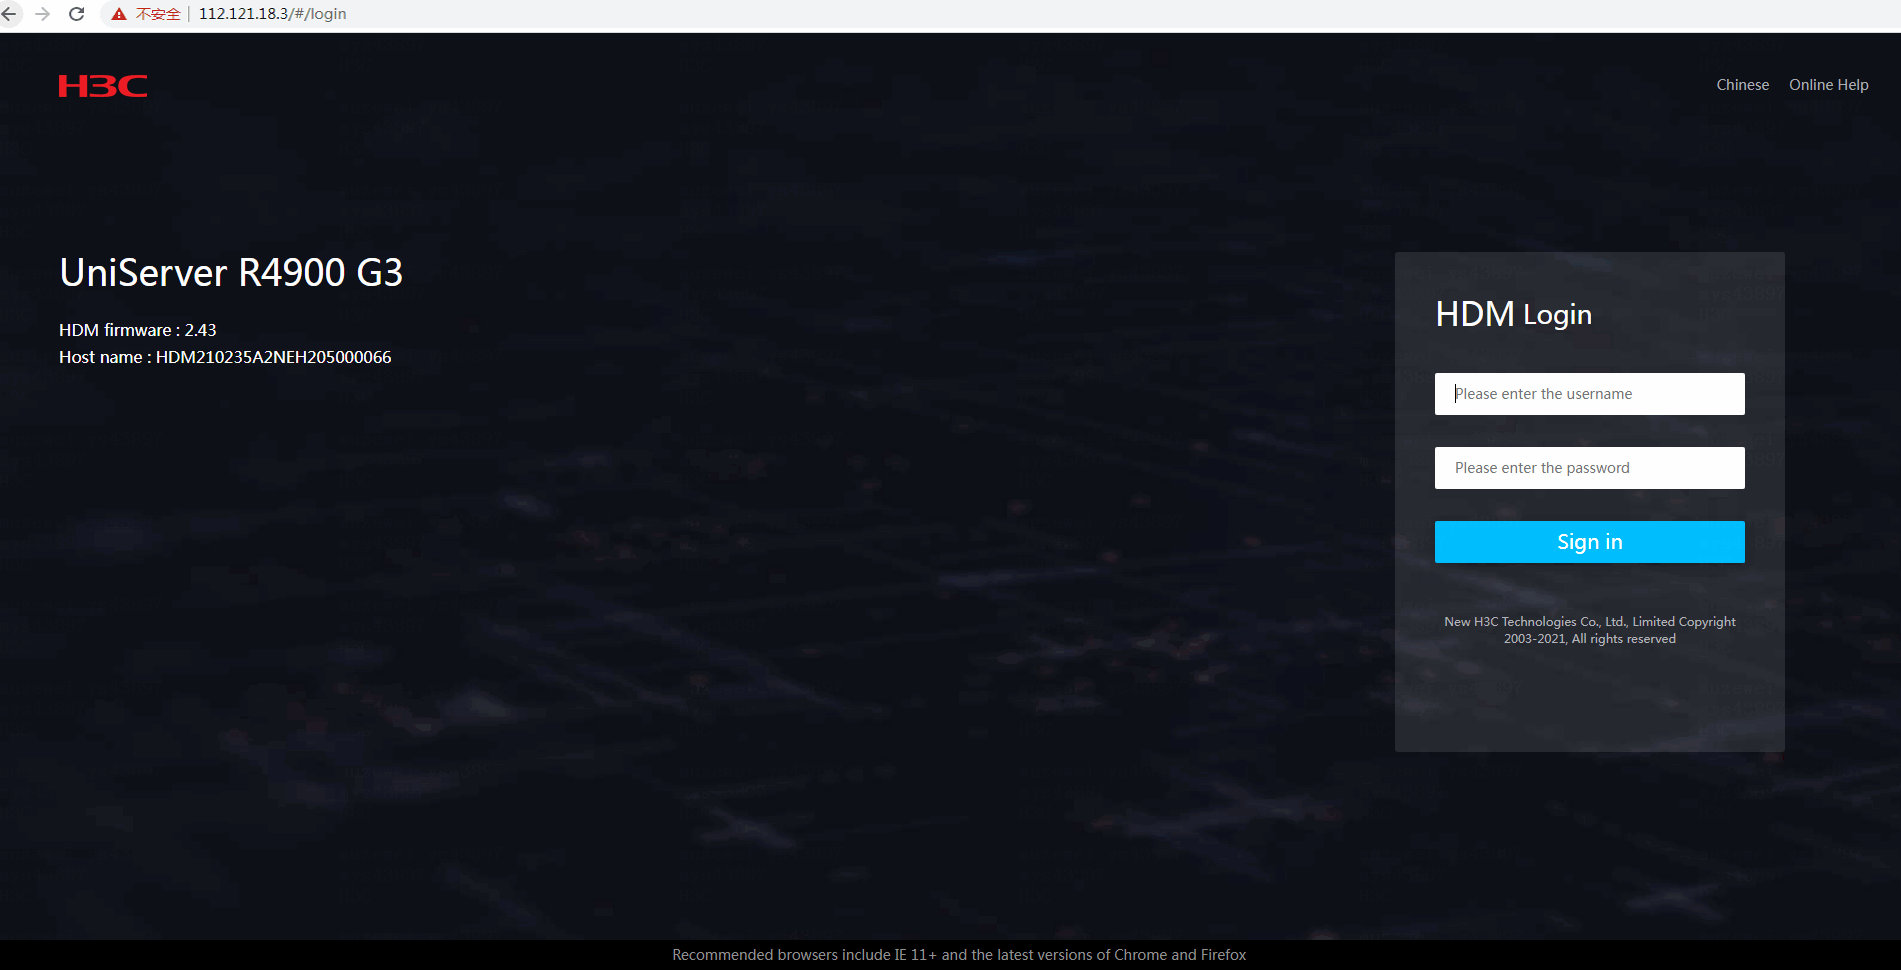
1. Log in to the out-of-band management page of the monitored server, as shown in Figure 2.
Figure 2 Logging in to the out-of-band management page of the server
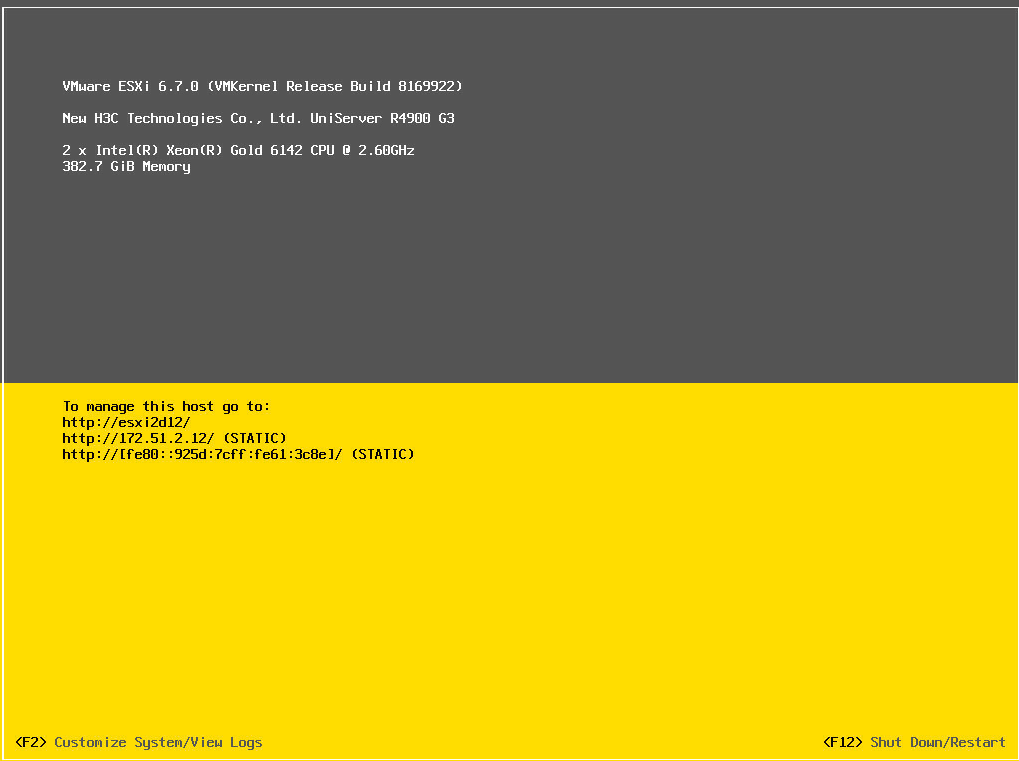
2. Select the remote service, and start the KVM or H5 KVM remote console, as shown in Figure 3.
Figure 3 Starting the remote console

3. Confirm the virtual resource type. Record basic parameters such as the IP, username, and password, as shown in Figure 4.
Figure 4 Recording basic parameters
Adding a virtual resource to VRM for management
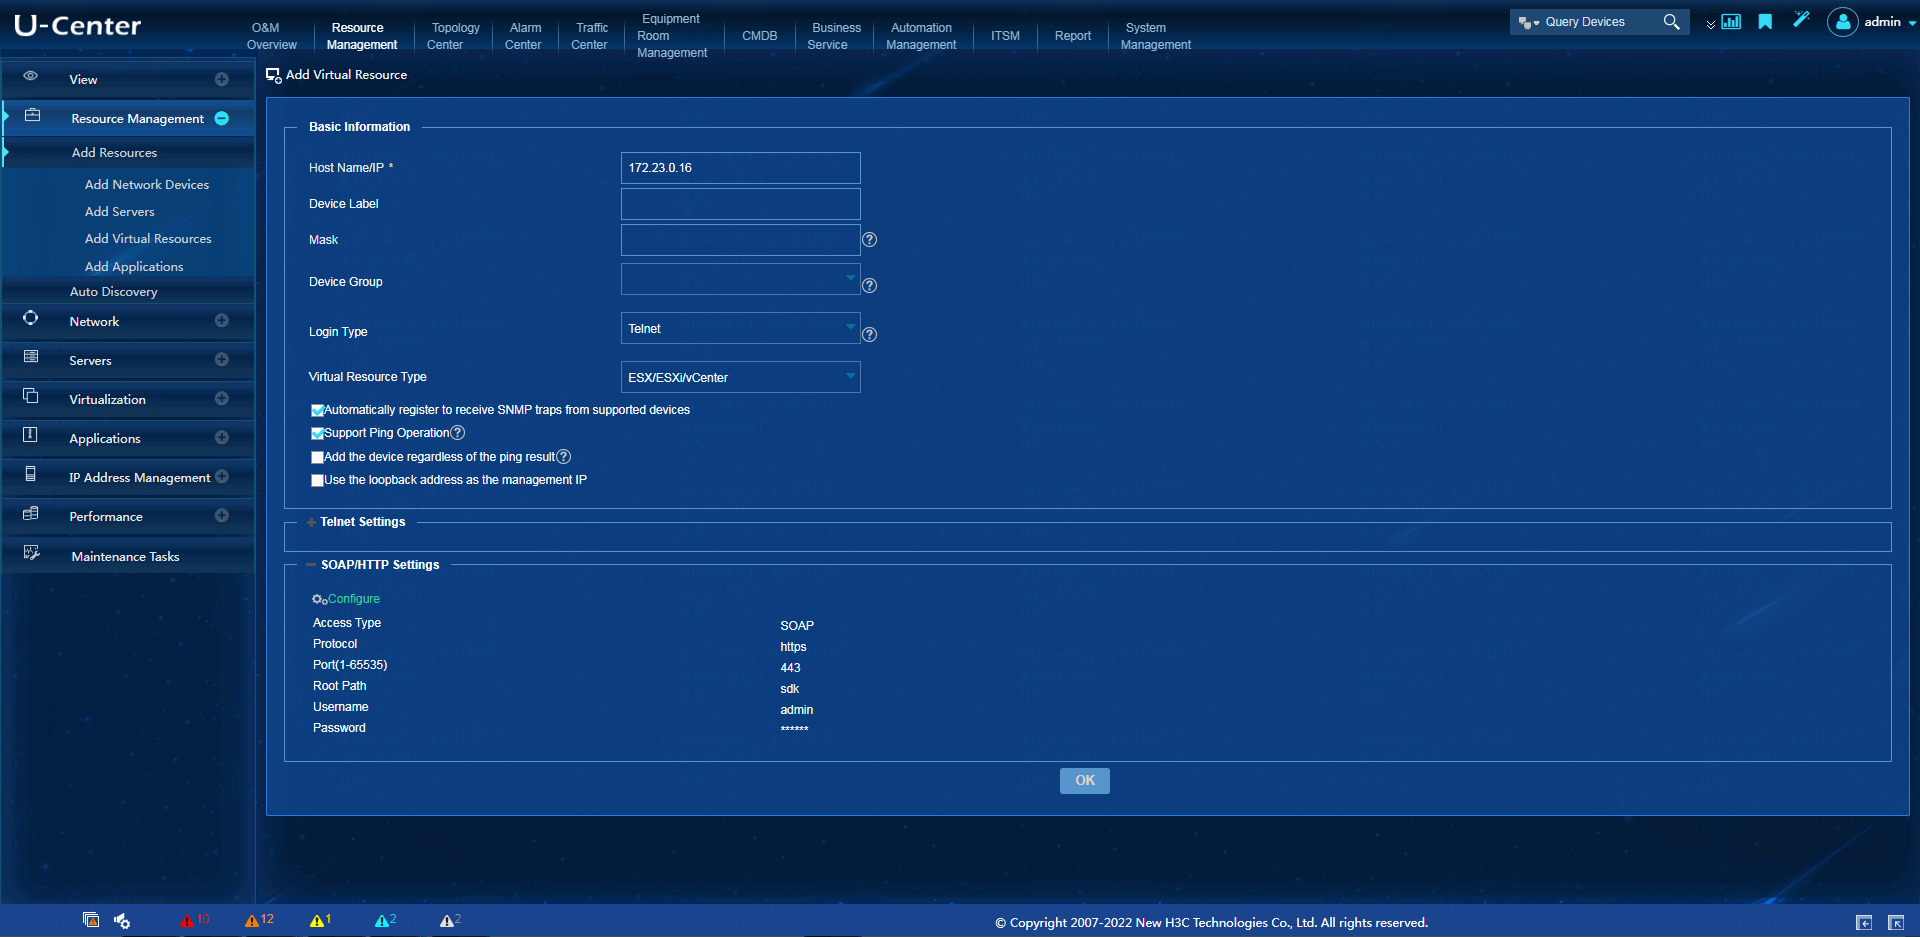
1. Log in to U-Center. On the top navigation bar, click Resource Management. From the navigation pane, select Resource Management > Add Resources > Add Virtual Resources.
2. Enter the IP address of the virtual resource, select the virtual resource type, and configure SOAP and HTTP parameters, as shown in Figure 5.
Figure 5 Adding a virtual resource
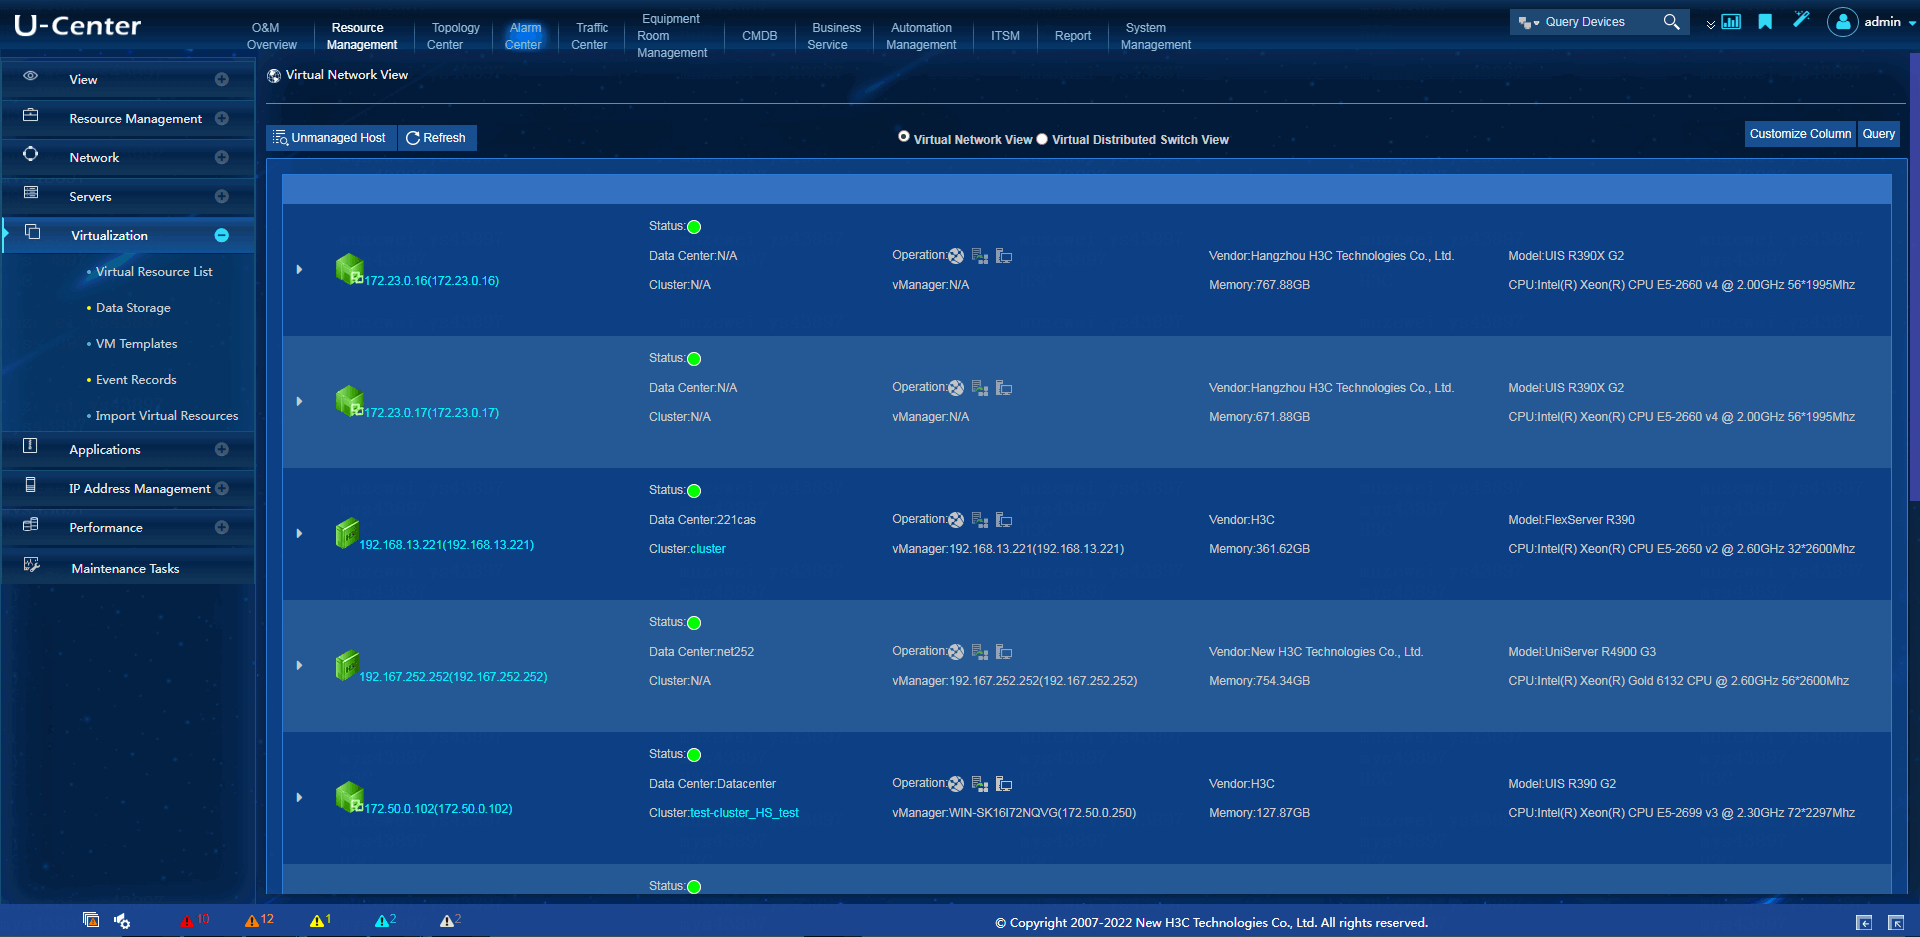
3. From the navigation pane, select Virtualization > Virtual Resource List. Select Virtual Network View, click Unmanaged Host, and add the host.
4. View the virtual resource list, and verify that the virtual resource has been added to VRM successfully, as shown in Figure 6.
Figure 6 Adding a virtual resource successfully
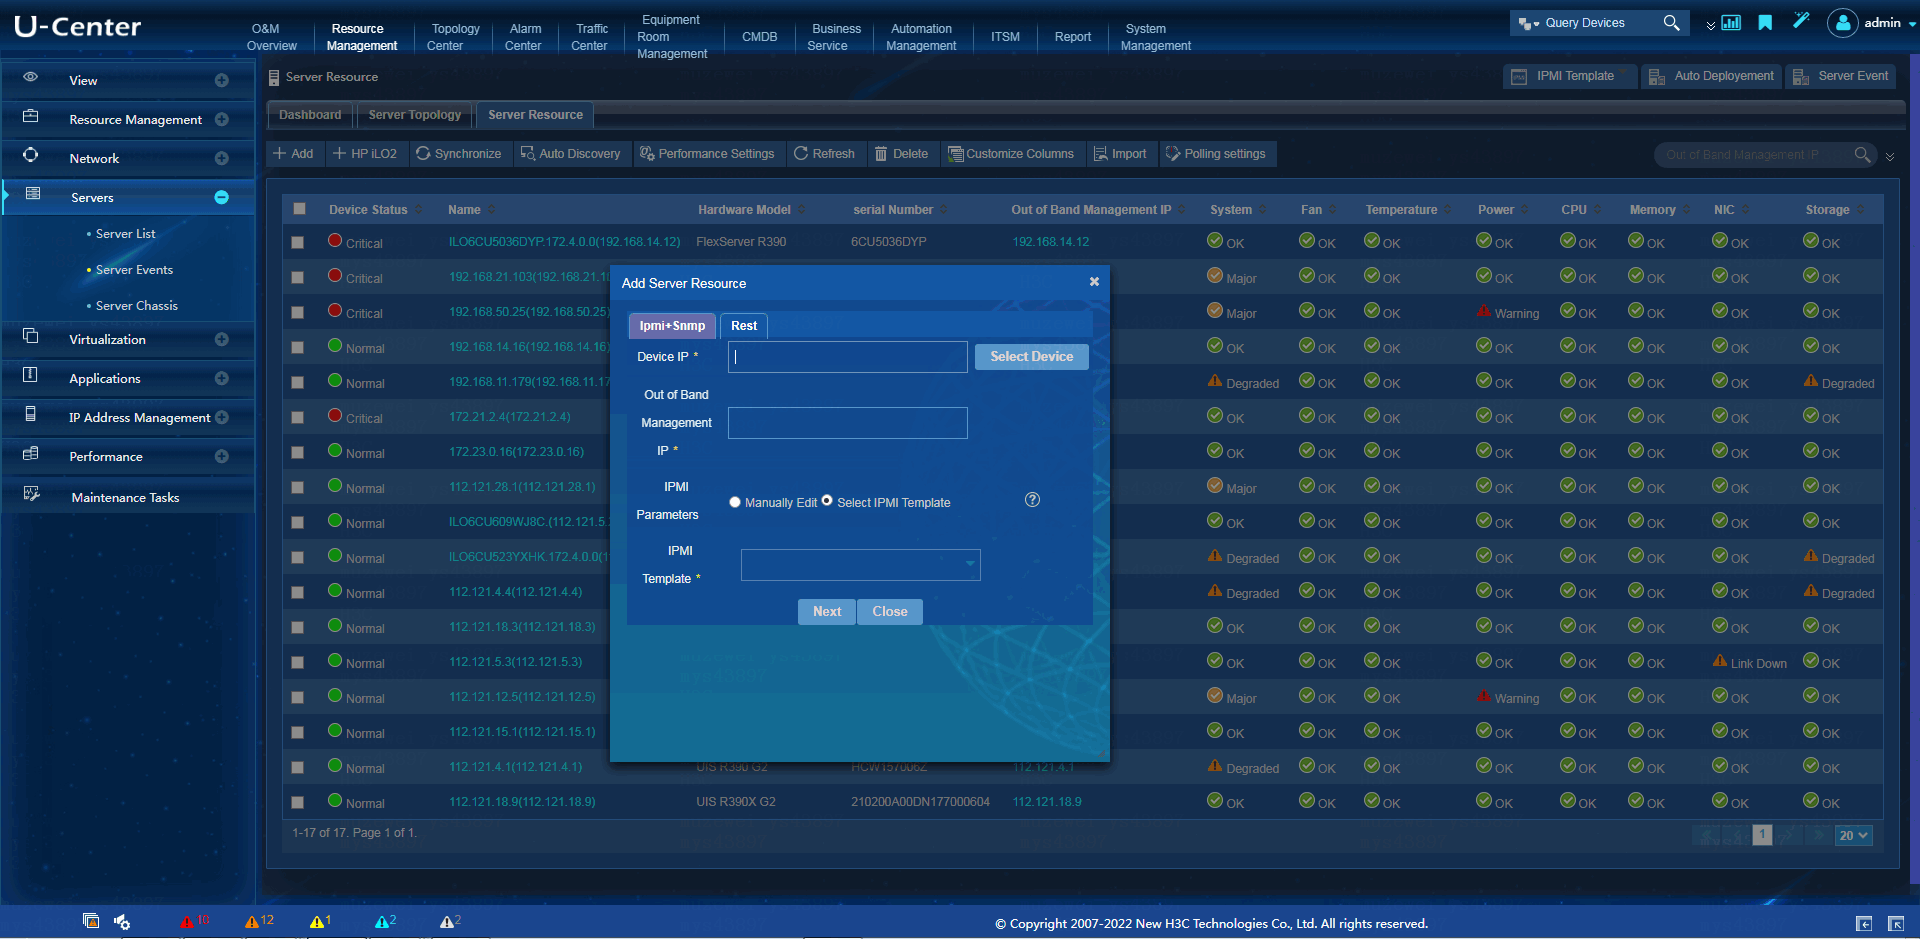
Adding a physical server to SSA for management
From the navigation pane, select Servers > Server List. Click the Server Resource tab. Click Add. On the page that opens, enter the virtual resource IP in the Device IP field, enter the out-of-band management interface IP address of the physical server in the Out of Band Management IP field, and specify IPMI parameters, as shown in Figure 7.
Figure 7 Adding a server resource
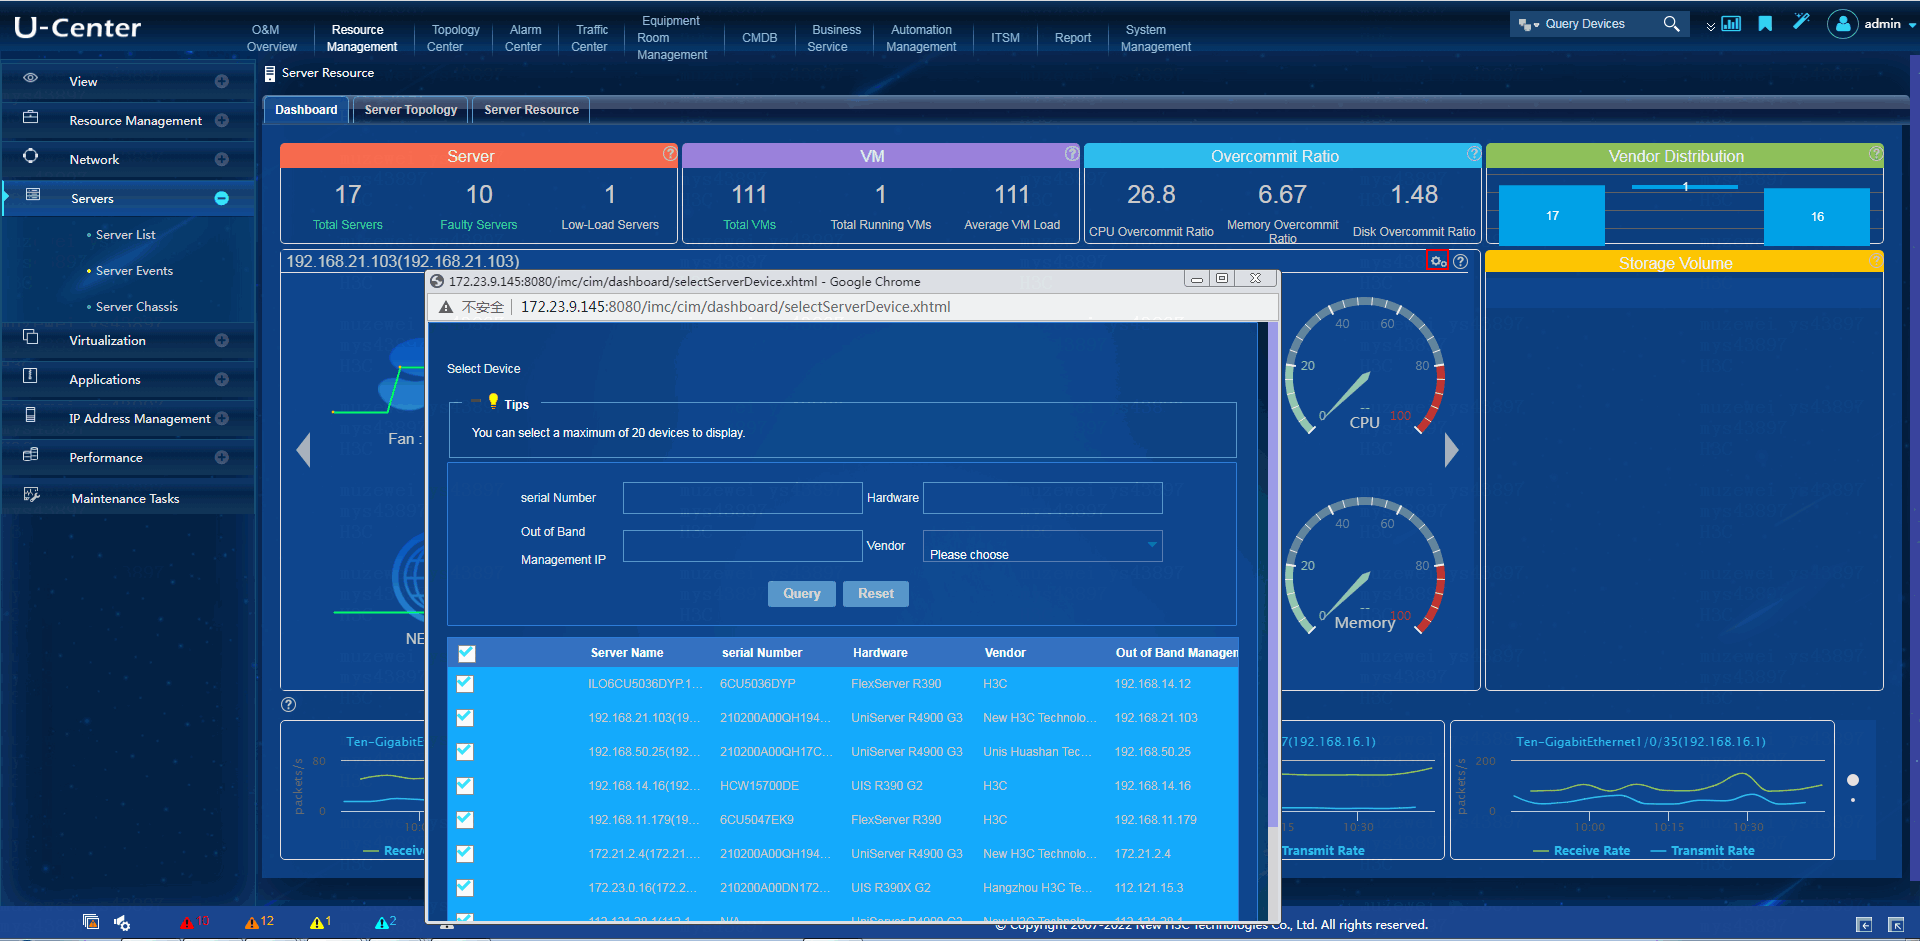
Selecting servers to be displayed on the dashboard
1. From the navigation pane, select Servers > Server List.
Click the Dashboard tab. Click the Select Device ![]() icon. Select the
servers to be displayed on the dashboard, as shown in Figure 8.
icon. Select the
servers to be displayed on the dashboard, as shown in Figure 8.
Figure 8 Selecting the servers to be displayed
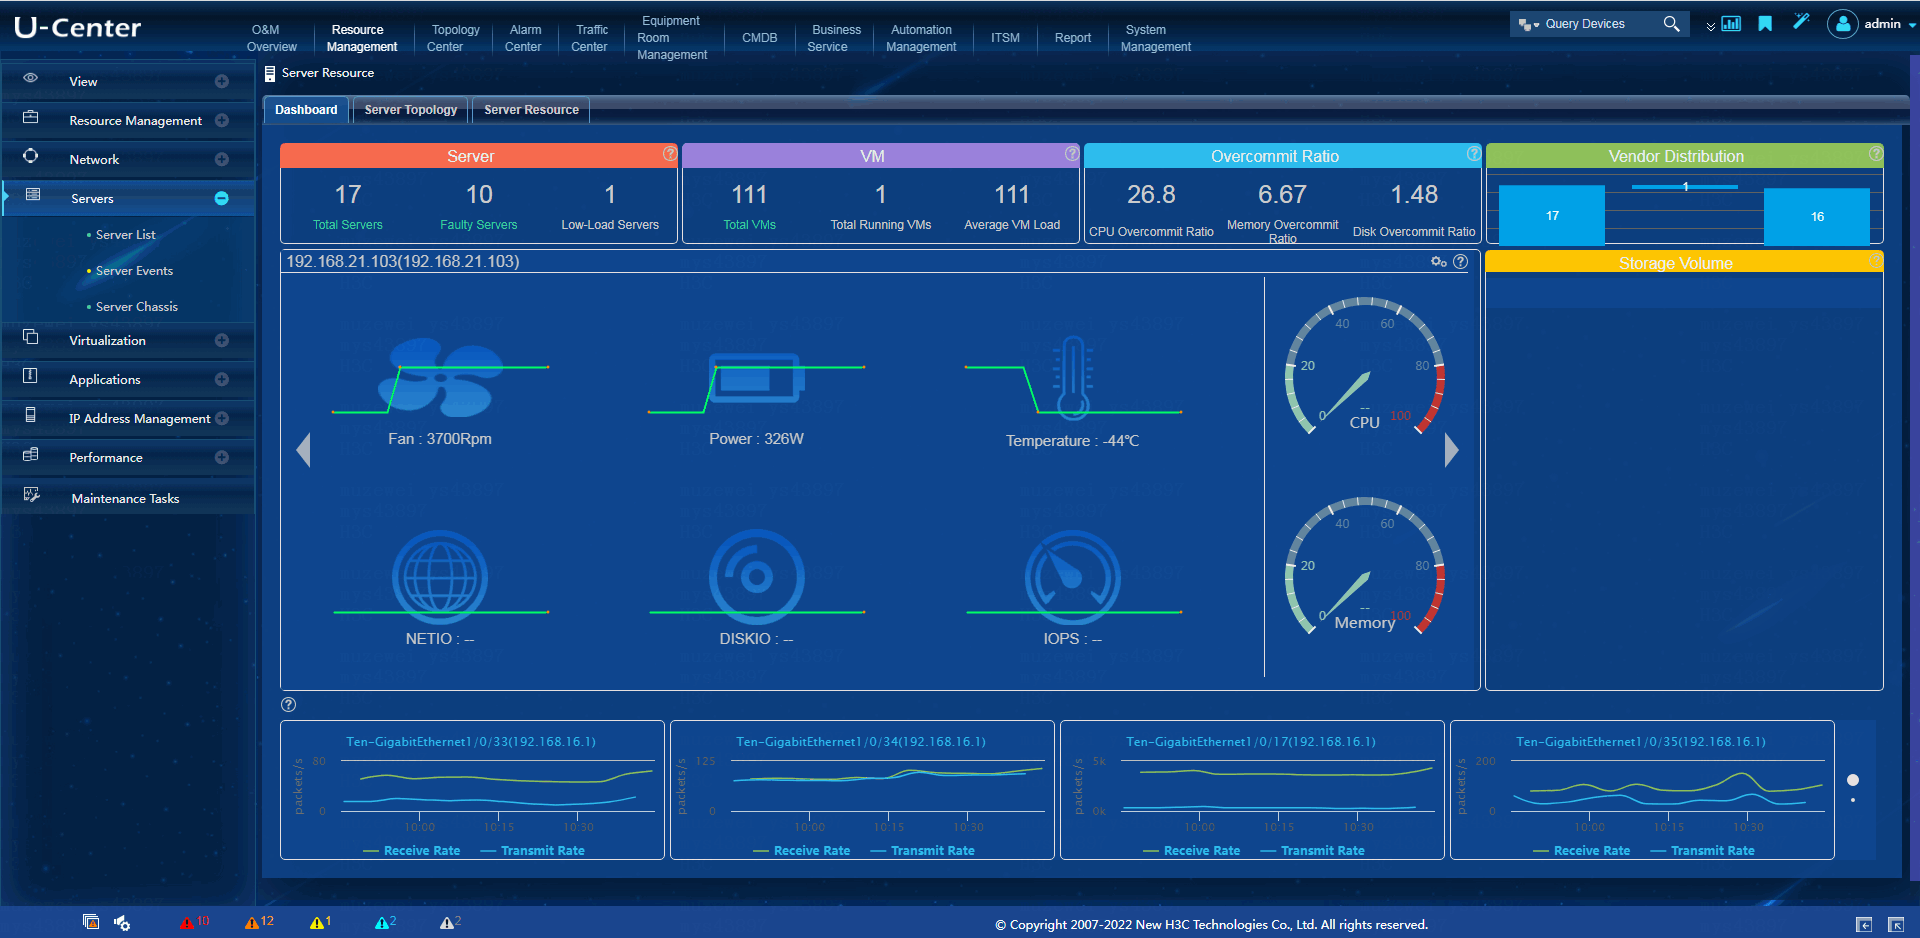
2. On the dashboard, verify that the complete data is displayed, as shown in Figure 9.
Figure 9 Displaying complete server data
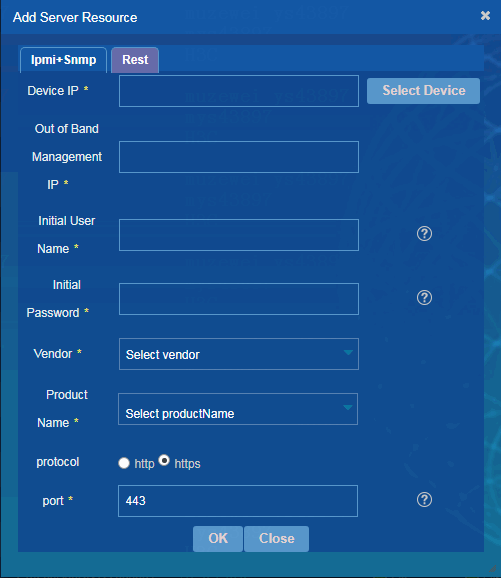
Cannot select a vendor for a server added through the custom REST collection method
Symptom
You cannot select a vendor for a server added through the custom REST collection method, as shown in Figure 10.
Figure 10 Cannot select a vendor
Solution
Adding server collection files and parsing files
1. Log in to the back end of the U-Center server.
2. Open the U-Center installation directory/iMC/client/conf/cim/rest/conf/.
3. According to the server model, put files request.xml and response.xml into the corresponding folder.
For example, if the server is an H3C server, put the files into the iMC/client/conf/cim/rest/conf/H3C/ folder.
4. If the server is parsed by using a python file, put the file into the iMC/client/conf/cim/rest/python/ directory.
Adding a sever model
1. Open the vendor.xml file in the iMC/client/conf/cim/rest/conf/ directory, and add server models according to the vendor.
2. If the predefined vendors do not contain the vendor, add the vendor in the format of <dev vendor="Vendor" type="Server model 1|Server model 2" />.
Canceling the REST collection restrictions according to the vendor
|
|
IMPORTANT: By default, custom REST collection is not enabled. It cannot be disabled once enabled. |
1. Open the vendor.xml file in the iMC/client/conf/cim/rest/conf/ directory, delete the comment symbols according to the vendor, and save the file.
2. Restart the deployment monitoring agent to make the file modification take effect.
Failure to synchronize event logs on a physical server to the SSA server events
Symptom
Event logs on a physical server cannot be synchronized to the SSA server events.
Solution
Comparing the system time of U-Center with that of the physical server
1. Log in to the back end of the U-Center server.
¡ If the server runs a Windows system, you can check the operating system time in the lower right corner of the desktop.
¡ If the server runs a Linux system, open the terminal and execute the date command to view the operating system time.
2. Log in to the Web interface of the server, and view the system time of the physical server.
3. Compare the operating system time with the physical server's system time.
If the operating system time is later than the physical server's system time (for example, the operating system time is 7:00 2022/12/7 and the physical server's system time is 6:50 2022/12/7), the event logs on the physical server will not be synchronized to SSA server events.
Modifying the U-Center server time (make sure the other components are not affected)
1. Log in to the back end of the U-Center server.
¡ If the server runs a Windows system, open the calendar in the lower right corner and modify the system time.
¡ If the server runs a Linux system, open the terminal, and execute the date command to modify the system time. For example, execute the date -s 08/07/22 command to set the date to 2022/08/07 and execute the date -s 14:20:50 command to set the time to 14:20:50.
Make sure the operating system time is earlier than the physical server’s system time. For example, if the physical server's system time is 7:00 2022/12/7, the operating system time must be set to be earlier than 7:00 2022/12/7.
2. Restart the deployment monitoring agent.
