- Released At: 05-07-2024
- Page Views:
- Downloads:
- Table of Contents
- Related Documents
-
|
H3C IMC UAM |
|
Machine Authentication Configuration Examples |
|
|
Software version: IMC UAM 7.2 (E0403)
|
Copyright © 2016 Hangzhou H3C Technologies Co., Ltd. All rights reserved. No part of this manual may be reproduced or transmitted in any form or by any means without prior written consent of Hangzhou H3C Technologies Co., Ltd. The information in this document is subject to change without notice. |
|
Contents
Example: Configuring machine authentication
Configuring the switch as an access device
Enabling 802.1X authentication
Configuring the IEEE 802.1X client
Installing CA certificates on the IMC server
Appendix A Downloading and installing a root certificate
Appendix B Downloading and installing a client certificate on the client
Appendix C Installing a server certificate on the server
Appendix D Saving a client/server certificate locally
Introduction
This document provides a machine authentication example.
The machine authentication function uses the Windows built-in 802.1X client for authentication. It applies to hosts that must pass certificate authentication for network access.
Example: Configuring machine authentication
Network configuration
As shown in Figure 1, a host is located on a company's intranet. It uses machine authentication to access the network. IMC is located at 192.168.40.139 to manage the switch, access rules, and access users. The management IP address of the switch in IMC is 192.168.30.100.

Software versions used
This configuration example was created and verified on the following platforms:
· IMC UAM 7.2 (E0403)
· H3C S5500-28C-SI Comware Software, Version 5.20, Release 2215
· iNode PC 7.2 (E0403)
Configuring UAM
Configuring the switch as an access device
1. Click the User tab.
2. From the navigation tree, select User Access Policy > Access Device Management > Access Device.
The Access Device page opens, as shown in Figure 2.
Figure 2 Accessing the Access Device page
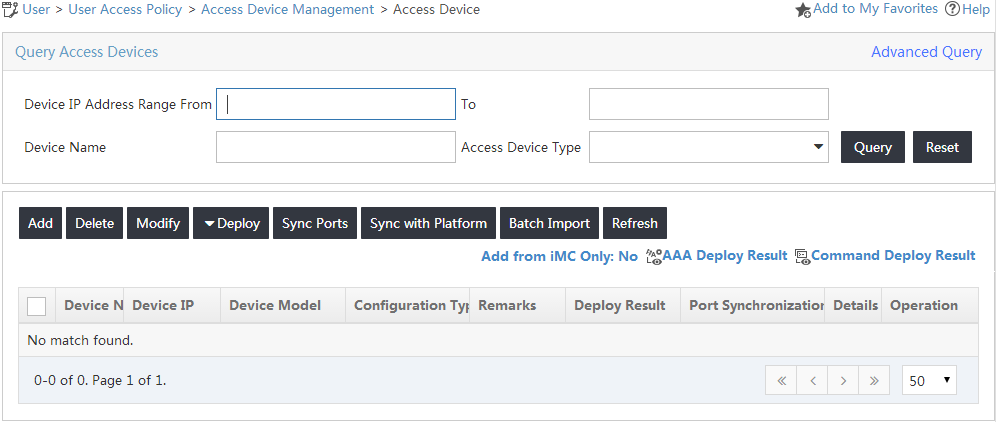
3. On the Access Device List, click Add.
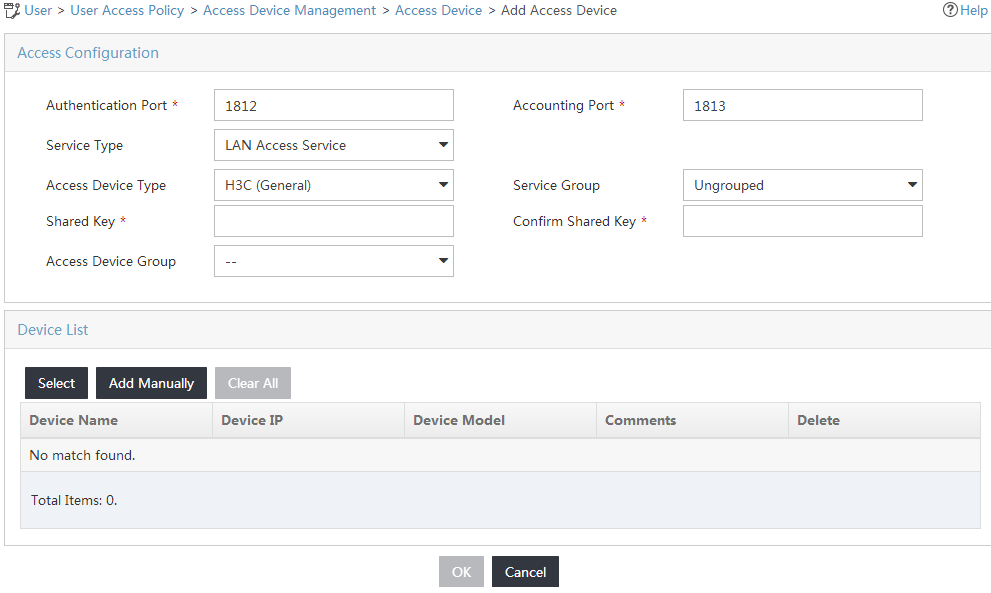
The Add Access Device page opens, as shown in Figure 3.
Figure 3 Adding an access device
4. Add the switch to UAM as an access device.
You can add a device to UAM either manually or by selecting the device from the IMC platform. This example uses the Add Manually option.
To add an access device manually:
a. Click Add Manually.
The Add Access Device Manually page opens.
b. Enter 192.168.30.100 in the Device IP field, as shown in Figure 4.
If the nas-ip command is configured on the device, enter the NAS IP address in the Device IP field. If the command is not configured, enter the IP address or VLAN interface address for the interface connected to UAM in the Device IP field.
Figure 4 Specifying the IP address of the access device
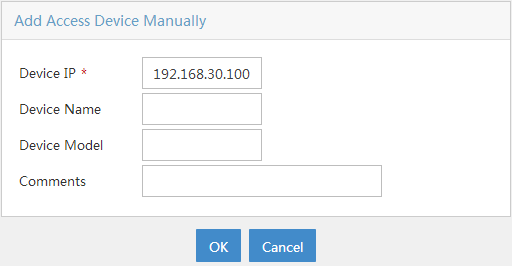
c. Click OK to return to the Add Access Device page.
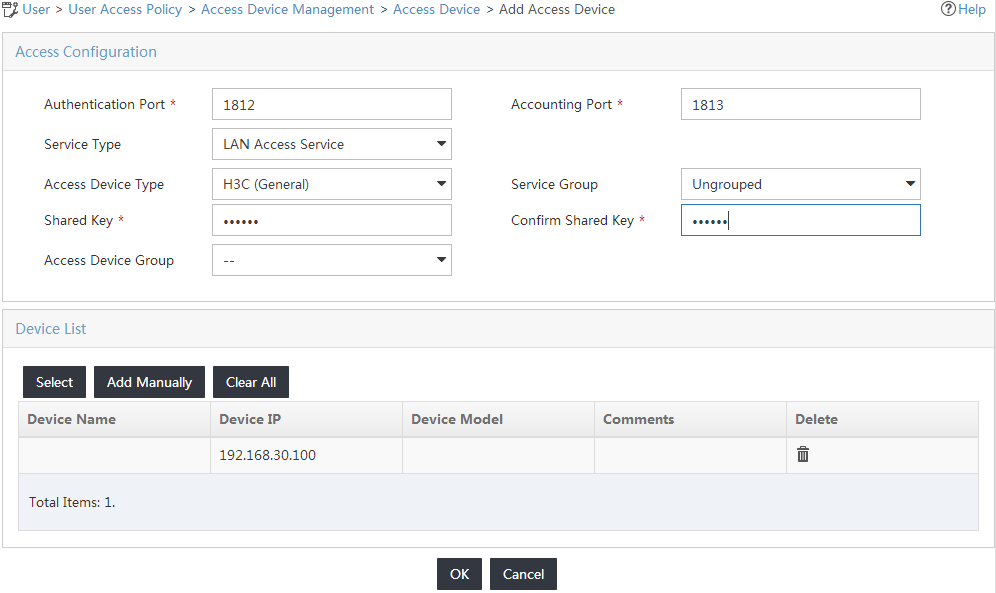
5. Configure access information for the access device, as shown in Figure 5:
a. Enter the authentication port number in the Authentication Port field, and enter the accounting port number in the Accounting Port field. Make sure the values are the same as the port numbers configured on the access device.
This example uses the default authentication and accounting port numbers 1812 and 1813, respectively.
|
|
IMPORTANT: Use UAM for authentication and accounting at the same time. If you use UAM for authentication, you must use it for accounting. |
b. Select LAN Access Service from the Service Type list.
c. Select H3C (General) from the Access Device Type list.
d. Enter a password in the Shared Key and Confirm Shared Key fields.
Make sure the shared key is the same as the shared key configured on the access device.
If Display Access Passwords is set to Plain Text (display password) in system settings, the Confirm Shared Key field does not appear.
e. Use the default values for other parameters.
Figure 5 Configuring the access device
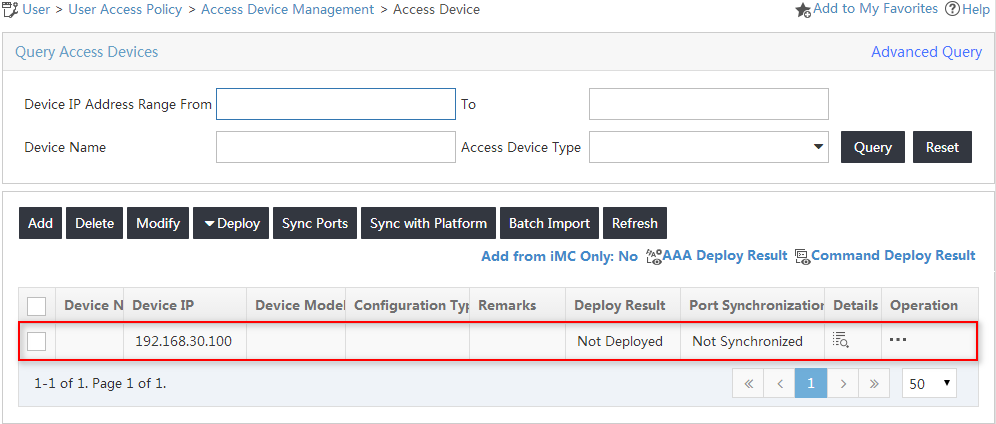
6. Click OK.
On the page that opens, click Back to Access Device List to view the added access device in the access device list, as shown in Figure 6.
Figure 6 Viewing the new access device
Configuring an access policy
1. Click the User tab.
2. From the navigation tree, select User Access Policy > Access Policy.
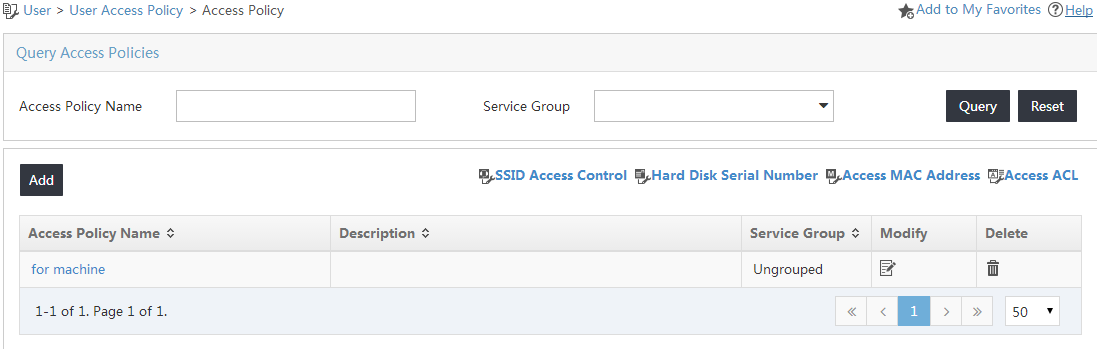
The Access Policy page opens, as shown in Figure 7.
Figure 7 Accessing the Access Policy page
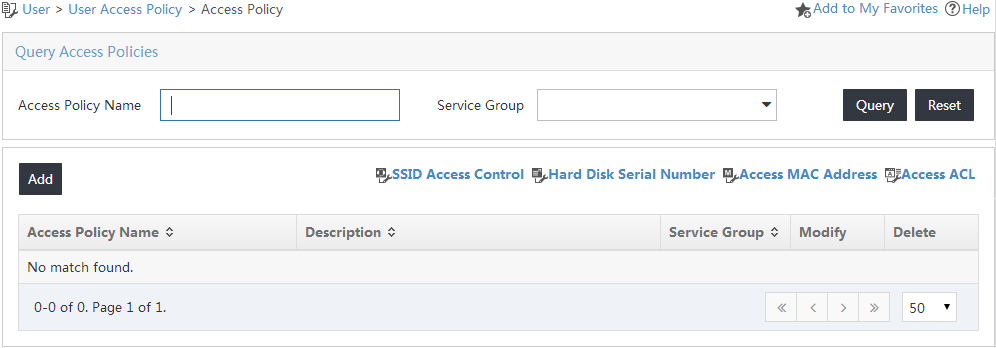
3. On the access policy list, click Add.
The Add Access Policy page opens.
4. Configure the access policy parameters, as shown in Figure 8:
a. Enter for machine in the Access Policy Name field.
b. Select EAP-TLS from the Preferred EAP Type list.
c. Use the default values for other parameters.
Figure 8 Adding an access policy
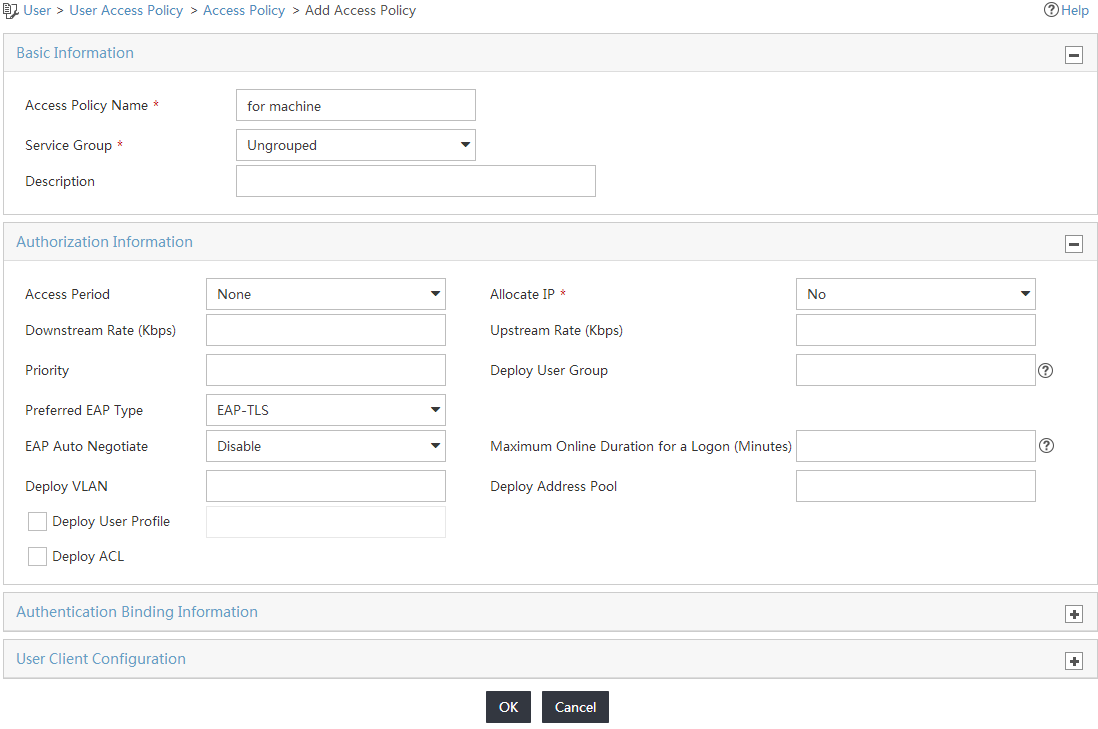
5. Click OK.
The new access policy named for machine is displayed in the access policy list, as shown in Figure 9.
Figure 9 Viewing the new access policy
Configuring an access service
1. Click the User tab.
2. From the navigation tree, select User Access Policy > Access Service.
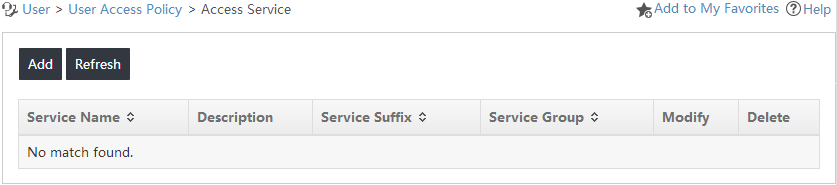
The Access Service page opens, as shown in Figure 10.
Figure 10 Accessing the Access Service page
3. Click Add.
The Add Access Service page opens.
4. Configure the following parameters for the access service, as shown in Figure 11:
a. Enter machine service in the Service Name field.
b. Enter the access service suffix in the Service Suffix field. Table 1 displays how to configure the access service suffix. In this example, the user-name-format without-domain command is configured on the access device to remove domain information from user names. No service suffix needs to be configured.
Figure 11 Configuring the access service
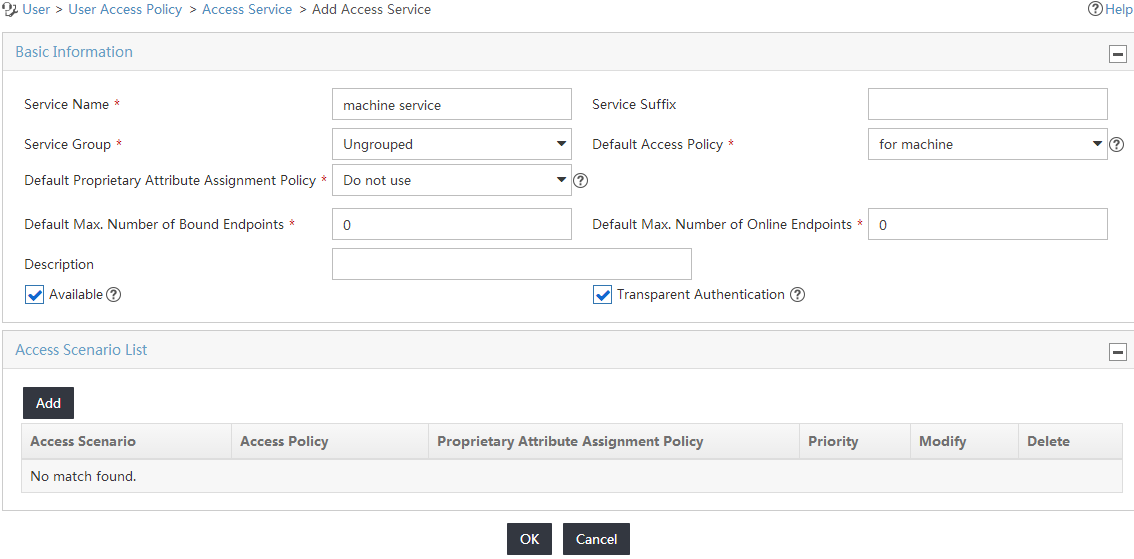
Table 1 RADIUS configurations on the access device and corresponding service suffixes
|
User name |
Domain for authentication |
Username format command on the access device |
Service suffixes in UAM |
|
Complete computer name |
Default domain configured on the access device |
user-name-format with-domain |
Default domain name |
|
user-name-format without-domain |
No suffix |
|
|
NOTE: The commands in Table 1 are available on H3C (General) devices. The commands used on other access devices might vary. For information about commands for other access devices, see their respective command references. |
c. Select for machine from the Default Access Policy list.
d. Use the default values for other parameters.
5. Click OK.
The new access service named machine service is displayed in the access service list, as shown in Figure 12.
Figure 12 Viewing the new access service

Configuring an access user
1. Click the User tab.
2. From the navigation tree, select Access User > All Access Users.
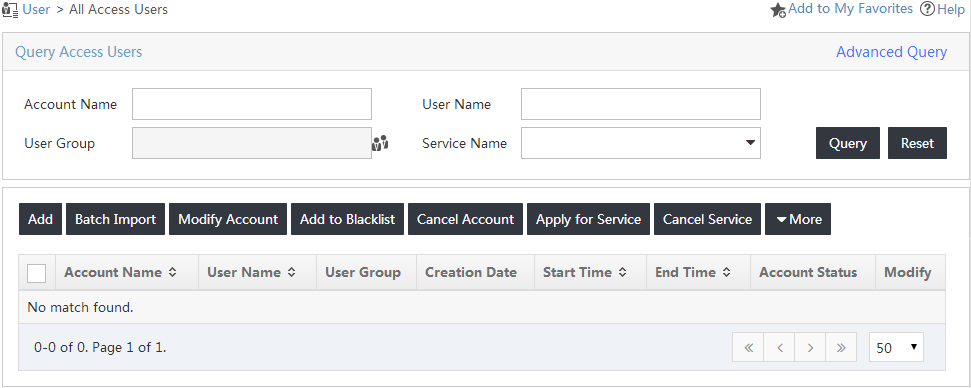
The All Access Users page opens, as shown in Figure 13.
Figure 13 Accessing the access user list
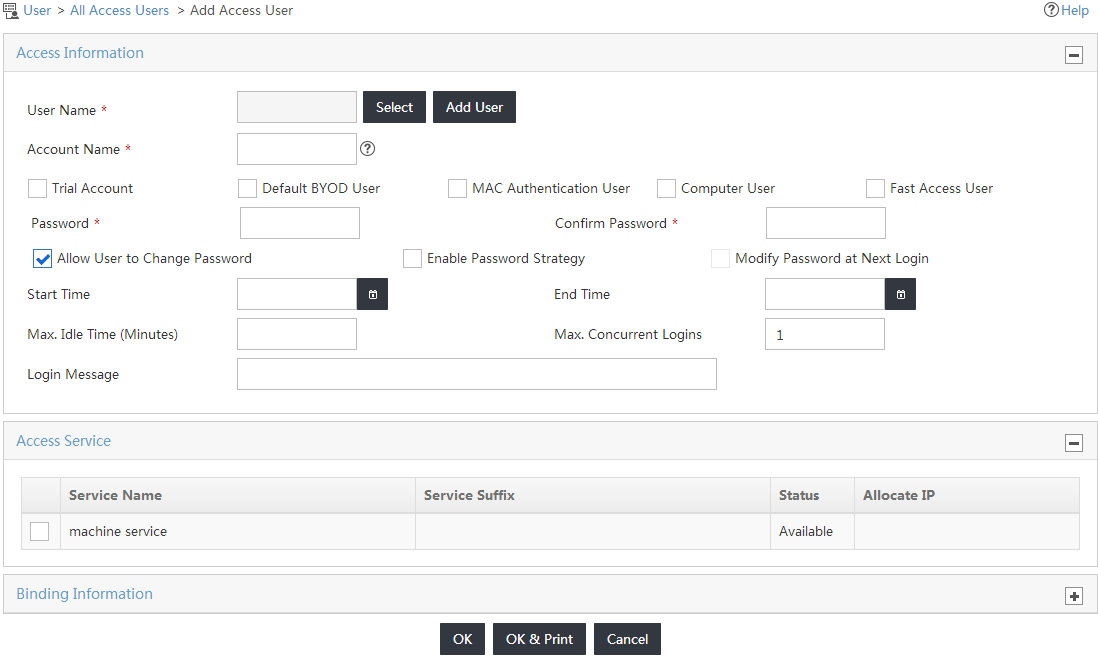
3. On the access user list, click Add.
The Add Access User page opens, as shown in Figure 14.
Figure 14 Accessing the Add Access User page
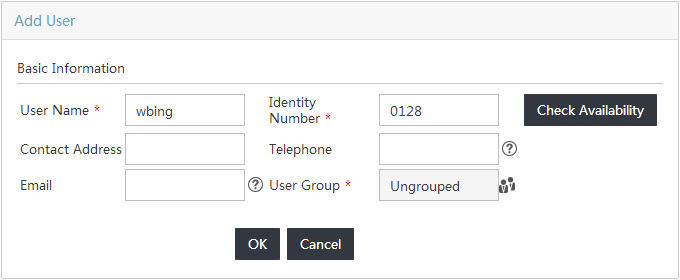
4. In the User Name field, click Select to select an existing user account from the IMC platform, or click Add User to add a new IMC platform user.
This example uses the Add User option.
Configure the following parameters, as shown in Figure 15.
a. Enter wbing in the User Name field.
b. Enter 0128 in the Identity Number field.
c. Use the default values for other parameters.
d. Click OK.
The Add User page closes.
Figure 15 Adding a new IMC platform user
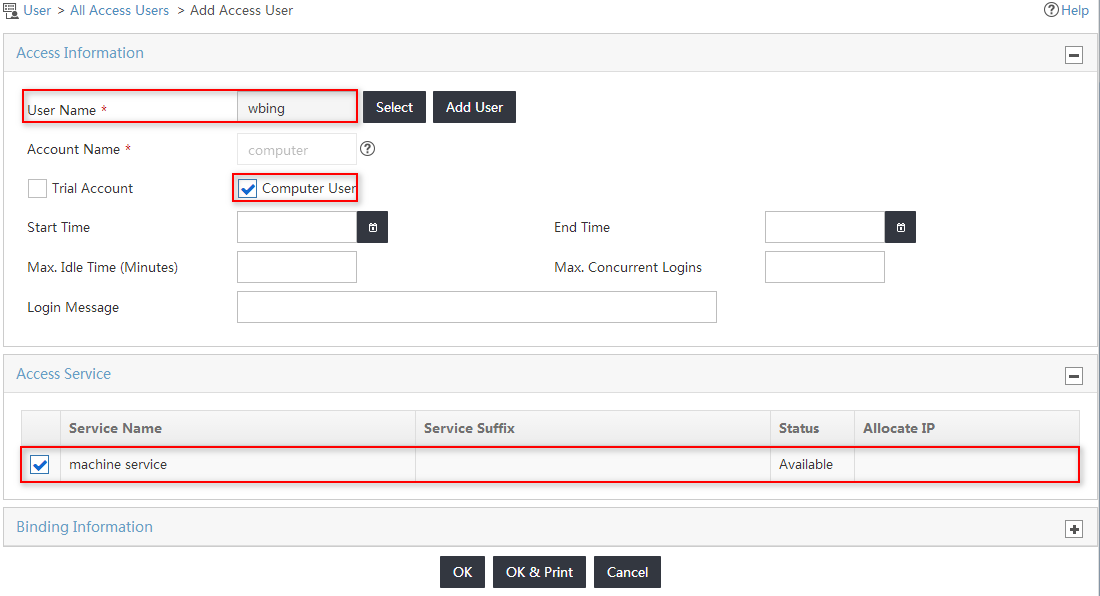
5. On the Add Access User page, configure the following parameters for the access user, as shown in Figure 16:
a. Select Computer User.
The Account Name field is automatically populated with computer.
b. Select the service named machine service from the Access Service list.
c. Use the default values for other parameters.
Figure 16 Configuring an access user
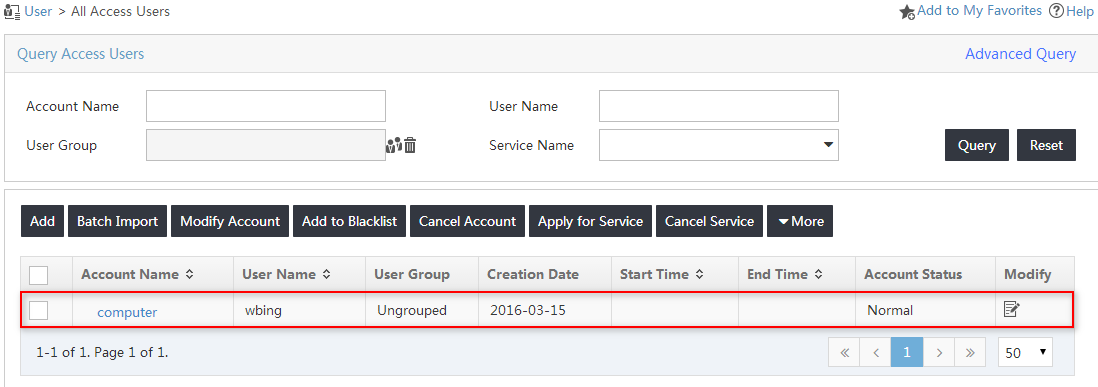
6. Click OK.
The new access user named computer opens in the access user list, as shown in Figure 17.
Figure 17 Viewing the new access user
Configuring a certificate
1. Click the User tab.
2. From the navigation tree, select User Access Policy > Service Parameters > Certificate.
The Certificate page opens, as shown in Figure 18.
Figure 18 Root certificate configuration page
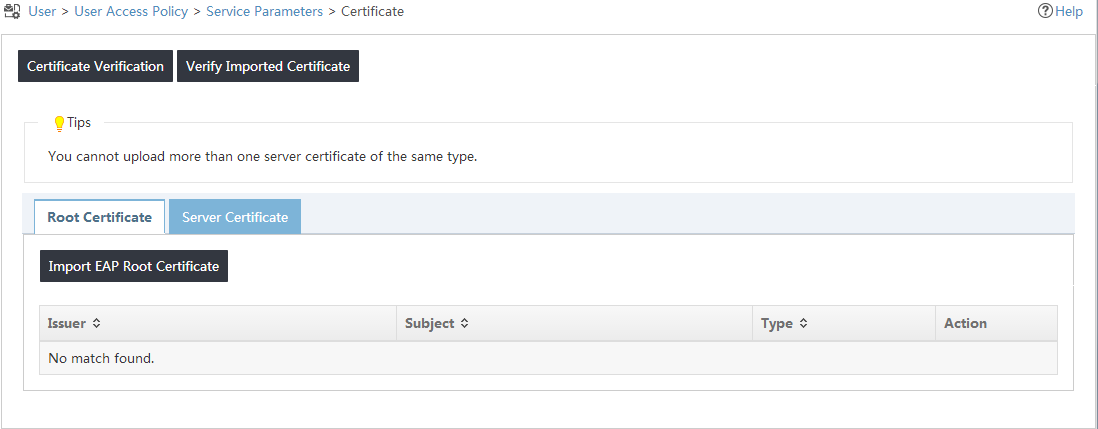
3. Click Import EAP Root Certificate.
The Root Certificate page opens, as shown in Figure 19.
Figure 19 Accessing the Root Certificate page
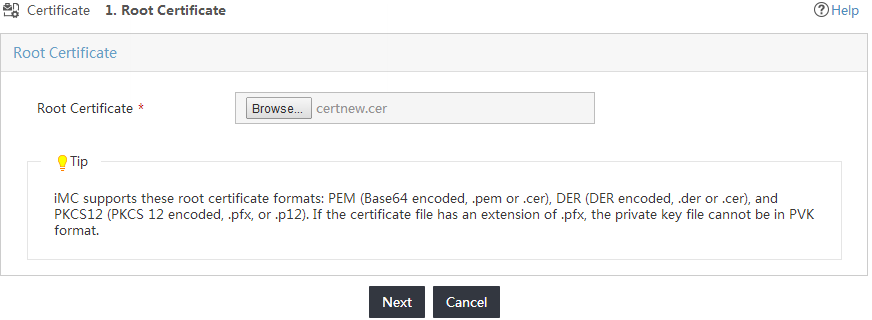
4. Click Browse to select a root certificate file.
5. Click Next.
The CRL page opens, as shown in Figure 20.
Figure 20 Accessing the CRL page
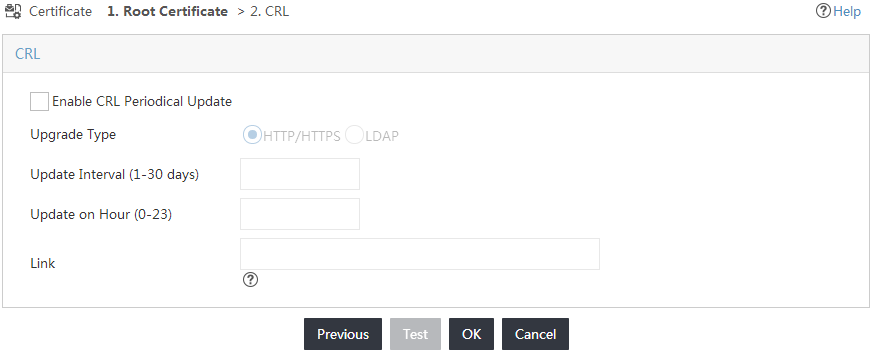
6. Click OK.
The root certificate is imported, as shown in Figure 21.
Figure 21 Viewing the certificate import result
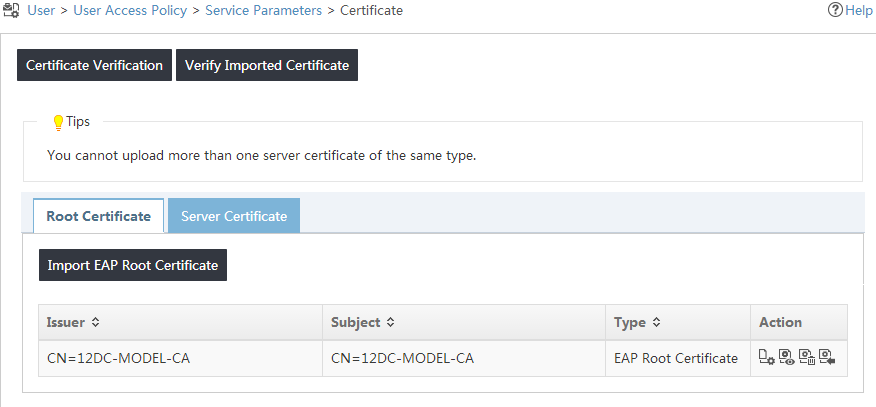
7. Click the Server Certificate tab.
8. Click Import EAP Server Certificate.
The Server Certificate page opens, as shown in Figure 22.
Figure 22 Accessing the Server Certificate page
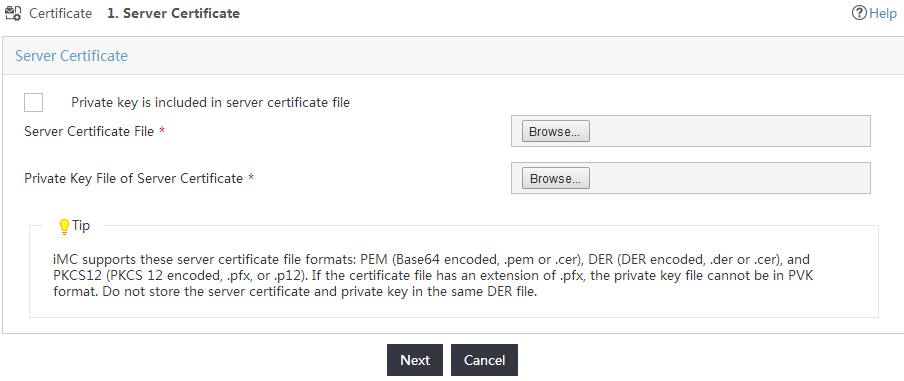
9. Select the server certificate file and private key by using one of the following methods, as shown in Figure 23:
¡ If the private key is not saved in the server certificate file, do not select Private key is included in server certificate file. Click Browse to select the server certificate file and private key separately.
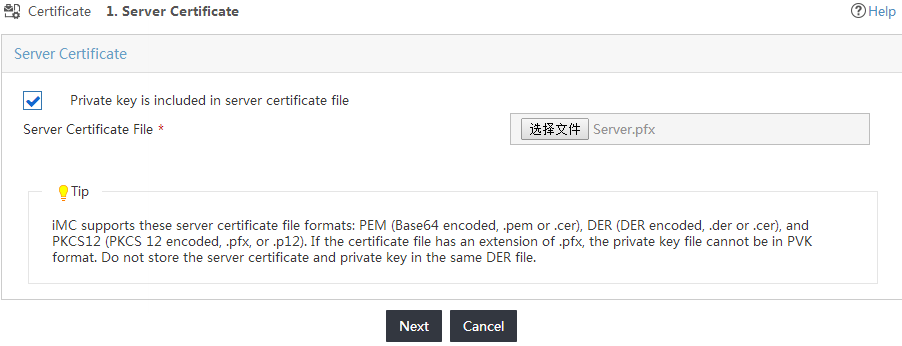
¡ If the private key is saved in the server certificate file, select Private key is included in server certificate file. Click Browse to select the server certificate file. In this example, the private key is saved in the server certificate file.
Figure 23 Selecting the server certificate file
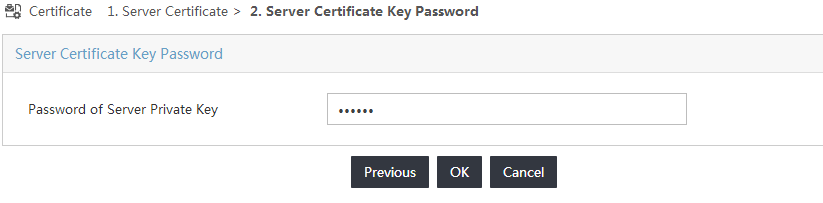
11. On the Server Certificate Key Password page, enter a password for the private key that is configured when the server certificate is imported, as shown in Figure 24.
Figure 24 Entering the password for the private key
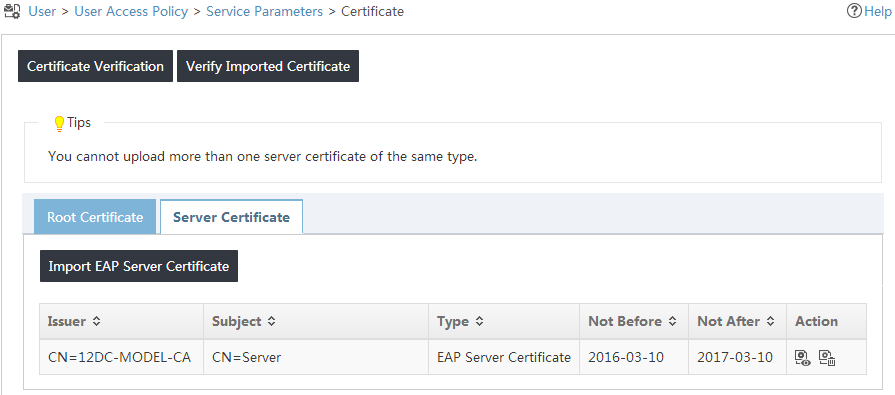
The server certificate is imported, as shown in Figure 25.
Figure 25 Viewing the server certificate import result
Configuring the switch
1. Configure a RADIUS scheme:
# Create a RADIUS scheme named test1.
[H3C]radius scheme test1
New Radius scheme
# Configure an IP address and port number for the RADIUS authentication server. The port number must be the same as the authentication port number configured on IMC. In this example, the authentication port number is the default value 1812.
[H3C-radius-test1]primary authentication 192.168.40.139 1812
# Configure an IP address and port number for the RADIUS accounting server. The port number must be the same as the accounting port number configured on IMC. In this example, the accounting port number is the default value 1813.
[H3C-radius-test1]primary accounting 192.168.40.139 1813
# Configure a shared key to secure RADIUS communication. The key must be the same as the shared key configured on IMC.
[H3C-radius-test1]key authentication test1
[H3C-radius-test1]key accounting test1
# Configure the server type as extended to support H3C extended features.
[H3C-radius-test1]server-type extended
# Configure the switch to remove domain information from the user names to be sent to the RADIUS servers.
[H3C-radius-test1]user-name-format without-domain
[H3C-radius-test1]quit
2. Configure an ISP domain:
# Create an ISP domain named imc.
[H3C]domain imc
# Configure the switch to use the RADIUS scheme test1 for 802.1X users.
[H3C-isp-imc]authentication lan-access radius-scheme test1
[H3C-isp-imc]authorization lan-access radius-scheme test1
[H3C-isp-imc]accounting lan-access radius-scheme test1
[H3C-isp-imc]quit
# Configure the domain imc as the default ISP domain.
[H3C]domain default enable imc
3. Configure 802.1X authentication:
# Enable 802.1X globally and on GigabitEthernet 1/0/23. The 802.1X function takes effect on an interface only after 802.1X is globally enabled.
[H3C]dot1x
802.1x is enabled globally.
[H3C]dot1x interface GigabitEthernet 1/0/23
802.1x is enabled on port GigabitEthernet 1/0/23.
# Configure the switch to relay EAP packets and support all EAP authentication methods for RADIUS communication. To support certificate authentication, you must specify the eap keyword.
[H3C]dot1x authentication-method eap
EAP authentication is enabled
# Disable 802.1X handshake on GigabitEthernet 1/0/23 because the Windows built-in client does not support 802.1X handshake.
[H3C]interface GigabitEthernet 1/0/23
[H3C-GigabitEthernet1/0/23]undo dot1x handshake
[H3C-GigabitEthernet1/0/23]quit
Configuring the 802.1X client
Enabling 802.1X authentication
In Windows XP, 802.1X authentication is enabled by default. Skip this section and go to "Installing CA certificates."
In Windows Vista, Windows 7, and Windows 8, 802.1X authentication is disabled by default. This example describes enabling 802.1X authentication on Windows 7.
1. Select Start > Control Panel > Administrative Tools > Services.
The Services page opens, as shown in Figure 26.
Figure 26 Selecting the service to be configured
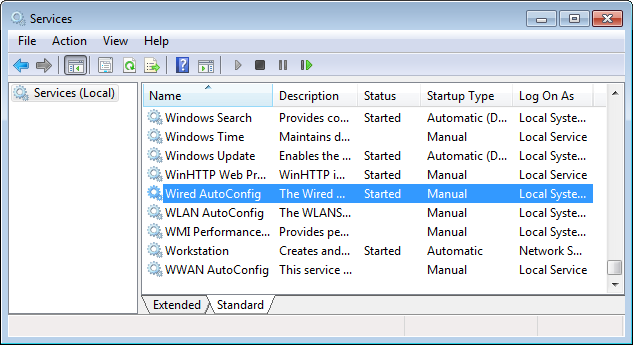
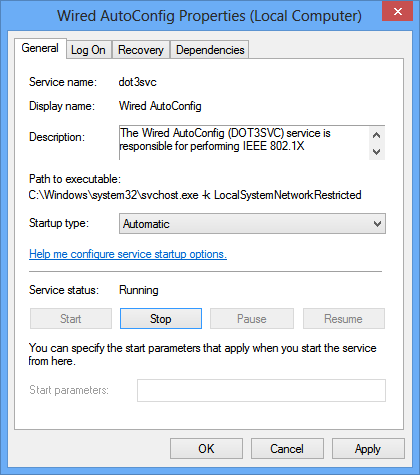
2. Double-click Wired AutoConfig.
3. On the Wired AutoConfig Properties dialog box, configure the following parameters, as shown in Figure 27:
a. Select Automatic from the Startup type list.
b. Click Start in the Service status area.
c. Use the default values for other parameters.
Figure 27 Configuring the Wired AutoConfig properties
Installing CA certificates
Install the root and client certificates on the host. The client certificate name must be the same as the computer name of the host. Otherwise, certificate authentication will fail.
To install the root and client certificates on the host:
1. Request and install the root certificate. For more information, see "Appendix A Downloading and installing a root certificate."
2. Request and install the client certificate. For more information, see "Appendix B Downloading and installing a client certificate on the client."
3. Export the client certificate. For more information, see "Appendix D Saving a client/server certificate locally."
4. Import root and client certificates. For more information, see "Appendix E Importing root and client certificates."
Configuring the IEEE 802.1X client
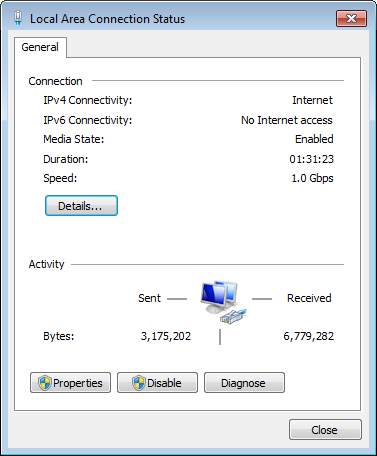
1. Select Start > Control Panel > Network and Sharing Center > Change adapter settings.
2. Double-click Local Area Connection.
The Local Area Connection Status dialog box opens, as shown in Figure 28.
Figure 28 Local Area Connection Status
3. Click Properties.
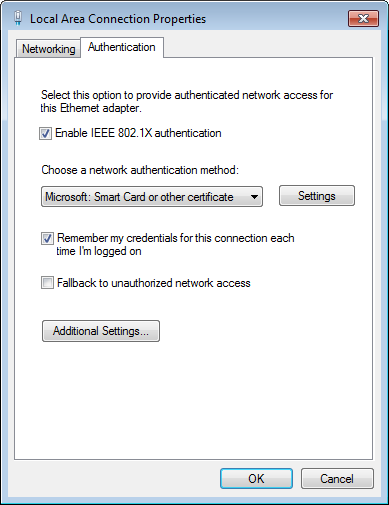
4. In the Local Area Connection Properties dialog box, click the Authentication tab and configure the local area connection properties, as shown in Figure 29:
a. Select Enable IEEE 802.1X authentication.
b. Select Microsoft:Smart Card or other certificate from the Choose a network authentication method list.
c. Select Remember my credentials for this connection each time I’m logged on. After this option is selected, the next access request will be authenticated automatically.
d. Use the default values for other parameters.
Figure 29 Configuring the local area connection properties
5. Click Settings.
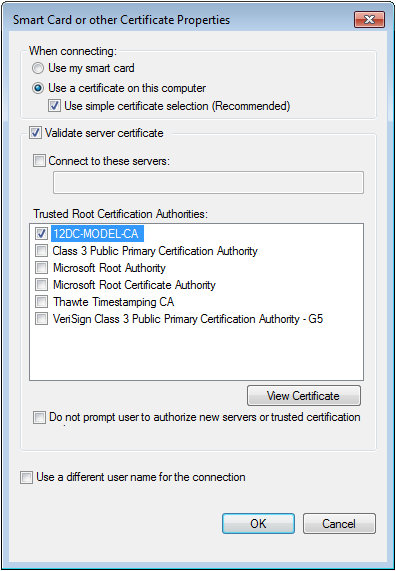
6. In the Smart Card or other Certificate Properties dialog box, select the following options, as shown in Figure 30:
a. Use a certificate on this computer.
b. Use simple certificate selection (Recommended).
c. Validate server certificate.
d. 12DC-MODEL-CA on the Trusted Root Certification Authorities list. This string is the CA server name. After the root and client certificates are installed, the CA server name is displayed on the Trusted Root Certification Authorities list.
e. Use the default values for other parameters.
Figure 30 Configuring the smart card and other certificate properties
7. Click OK to return to the Local Area Connection Properties dialog box.
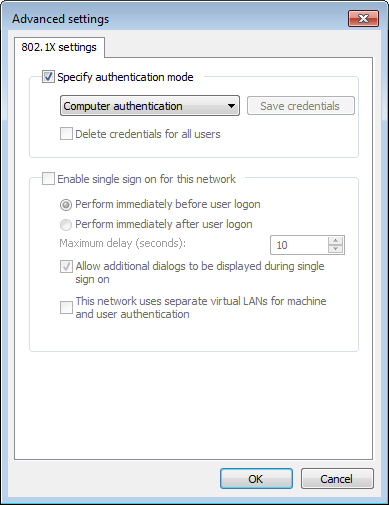
8. Click Additional Settings.
9. In the Advanced settings dialog box, select Specify authentication mode, select Computer authentication, and use the default values for other parameters, as shown in Figure 31.
Figure 31 Configuring the advanced settings
10. Click OK to return to the Local Area Connection Properties dialog box.
11. Click OK.
Verifying the configuration
The endpoint user automatically passes authentication when the host is powered on or connects to an 802.1X network.
2. Click the User tab.
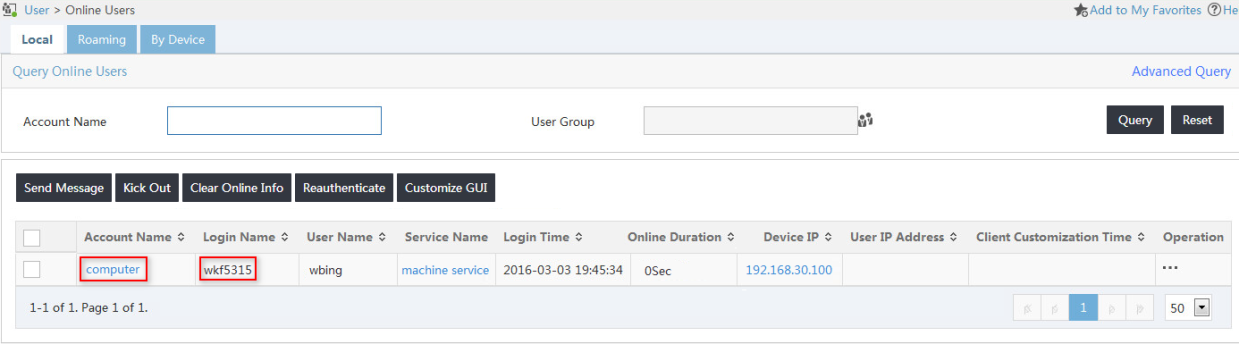
3. From the navigation tree, select Access User > Online Users.
The online user list displays all access users that have passed authentication, as shown in Figure 32. The endpoint user from the host uses the account name computer. The login name is the complete computer name.
Figure 32 Viewing online users
Installing CA certificates on the IMC server
CA certificates to be installed on the certificate server include the root and server certificates. IMC can use the root and server certificates configured on the server only after the certificates are imported to IMC.
To install and use the root and server certificates on the server:
1. Request and install the root and server certificates. See "Appendix A Downloading and installing a root certificate" and "Appendix C Installing a server certificate on the server."
2. Save the server certificate locally. See "Appendix D Saving a client/server certificate locally."
3. Import the root and server certificates to IMC. See "Configuring a certificate."
Appendix A Downloading and installing a root certificate
The download and installation methods for the MySQL server and client are similar.
To download and install the root certificate on the client:
1. In Microsoft Internet Explorer, enter http://192.168.40.133/certsrv in the address bar.
The Microsoft Active Directory Certificate Services page opens, as shown in Figure 33. In this example, 192.168.40.133 is the IP address of the CA server.
Figure 33 Microsoft Active Directory Certificate Services

2. Click Download a CA certificate, certificate chain, or CRL.
3. On the page shown in Figure 34, click Download CA certificate to save the root certificate locally.
Figure 34 Downloading a CA certificate

4. Click Download CA certificate, and then save the root certificate named certnew.cer to a local device.
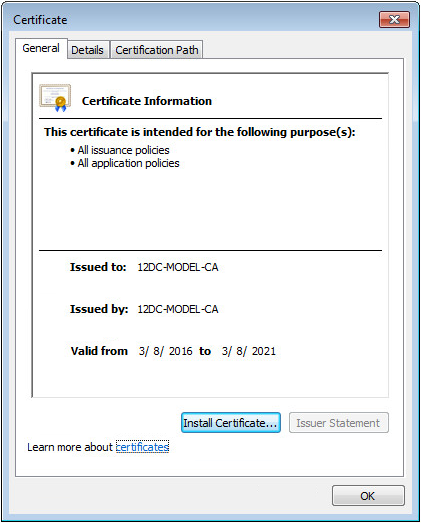
5. Open the root certificate on the local device.
The Certificate dialog box opens, as shown in Figure 35.
The Certificate Import Wizard dialog box opens, as shown in Figure 36.
Figure 36 Certificate Import Wizard

7. Click Next.
The Certificate Store dialog box opens, as shown in Figure 37.
8. Select Place all certificates in the following store and click Browse to select Trusted Root Certificate Authorities. Use the default values for other parameters.

9. Click Next.
The Completing the Certificate Import Wizard dialog box opens, as shown in Figure 38.
Figure 38 Completing the Certificate Import Wizard
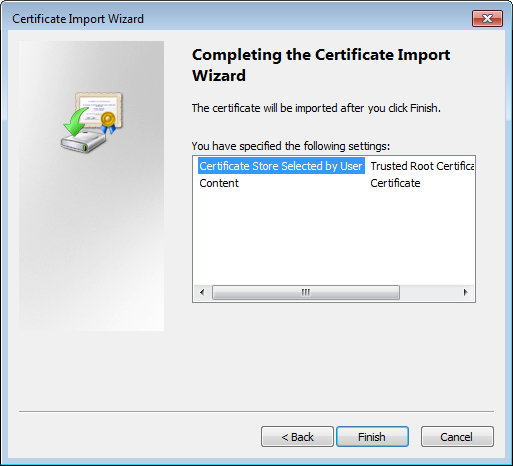
10. Click Finish.
The Security Warning dialog box opens, as shown in Figure 39.
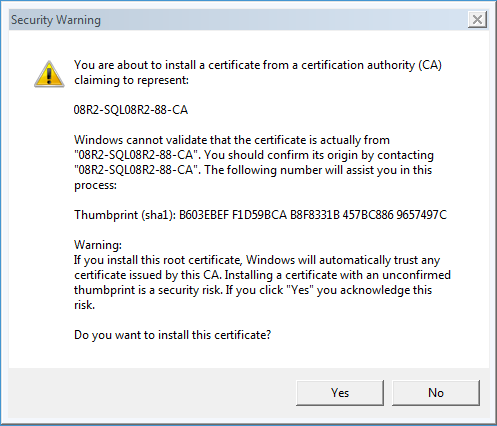
11. Click Yes.
Appendix B Downloading and installing a client certificate on the client
1. In Microsoft Internet Explorer, enter http://192.168.40.133/certsrv in the address bar.
The Microsoft Active Directory Certificate Services page opens, as shown in Figure 40. In this example, 192.168.40.133 is the IP address of the CA server.
Figure 40 Microsoft Active Directory Certificate Services

2. Click Request a certificate.
3. Click Advanced certificate request.
4. Click Create and submit a request to this CA.
5. In the Advanced Certificate Request dialog box, configure the following parameters, as shown in Figure 41:
a. Enter the complete computer name of the host in the Name field.
b. Select Client Authentication Certificate from the Type of Certificate Needed list.
c. Select Mark keys as exportable.
d. Use the default values for other parameters.
Figure 41 Configuring the advanced certificate request

6. Click Submit.
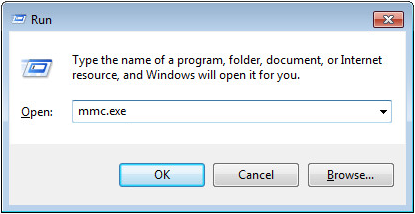
The certificate can be installed only after it is issued by the CA server administrator. For information about issuing a certificate, see "Appendix E Importing root and client certificates
7. Enter mmc.exe in the Run dialog box, as shown in Figure 56.

9. Select File > Add/Remove Snap-in, as shown in Figure 57.
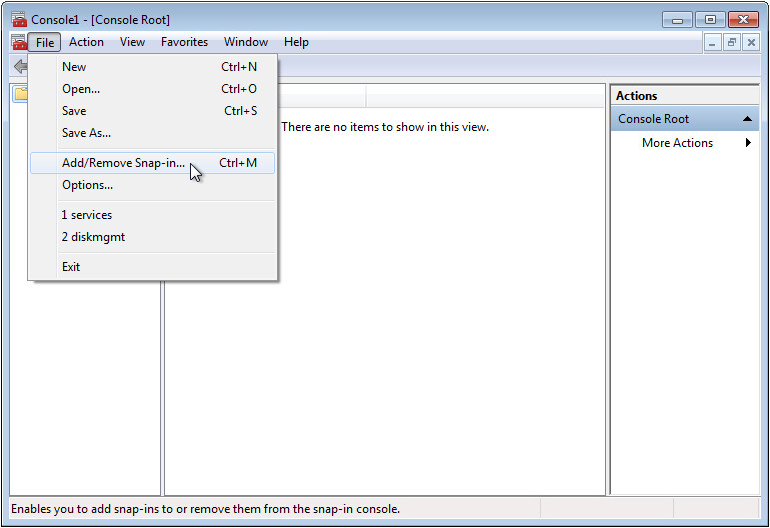
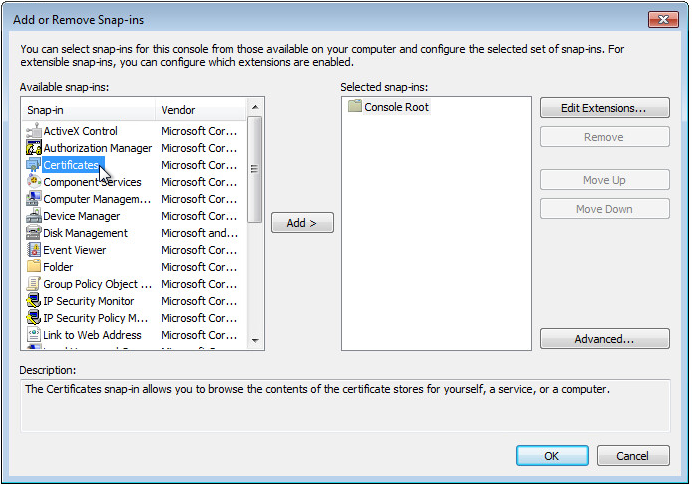
The Add or Remove Snap-ins dialog box opens.
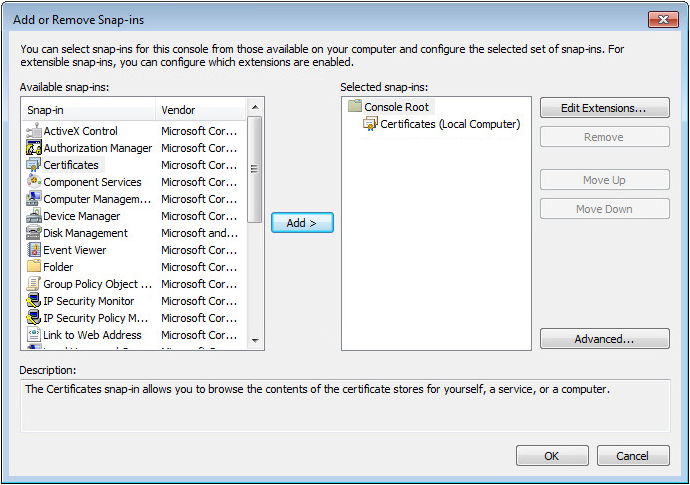
10. In the Available snap-ins area, select Certificates, and then click Add, as shown in Figure 58.
Figure 44 Add or Remove Snap-ins dialog box
The Certificates snap-in dialog box opens.
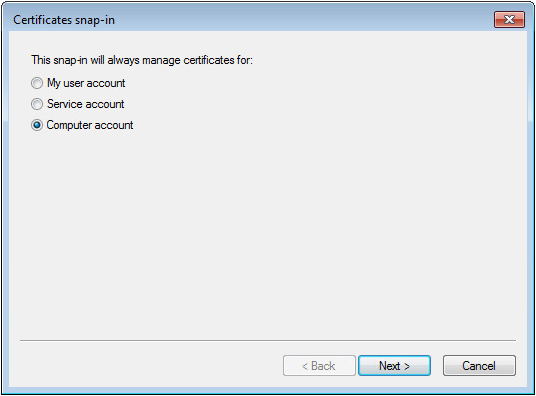
11. Select Computer account, and then click Next, as shown in Figure 59.
Figure 45 Certificates snap-in dialog box

The dialog box for selecting a computer opens.
12. Use the default values for the parameters.
13. Click OK to return to the Add or Remove Snap-ins dialog box, as shown in Figure 60.
Figure 46 Add or Remove Snap-ins dialog box


Appendix F Issuing a certificate." On the Microsoft Active Directory Certificate Services page shown in Figure 40, click View the status of a pending certificate request to check whether the certificate is issued.
Figure 48 indicates that the certificate in this example is not issued.
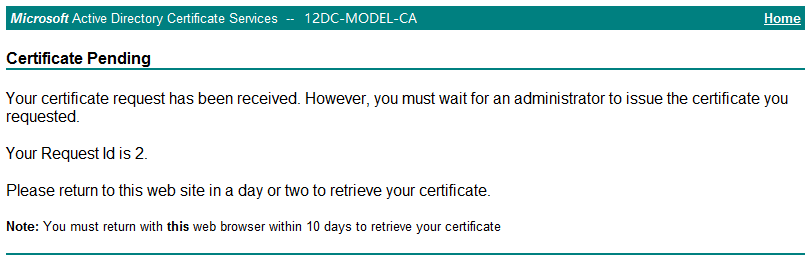
Figure 49 indicates that the certificate has been issued.

18. On the Certificate Issued page, click Install this certificate.
If the prompt Your new certificate has been successfully installed is displayed, the client certificate has been installed.
Appendix C Installing a server certificate on the server
1. In Microsoft Internet Explorer, enter http://192.168.40.133/certsrv in the address bar.
The Microsoft Active Directory Certificate Services page opens, as shown in Figure 50. In this example, 192.168.40.133 is the IP address of the CA server.
Figure 50 Microsoft Active Directory Certificate Services
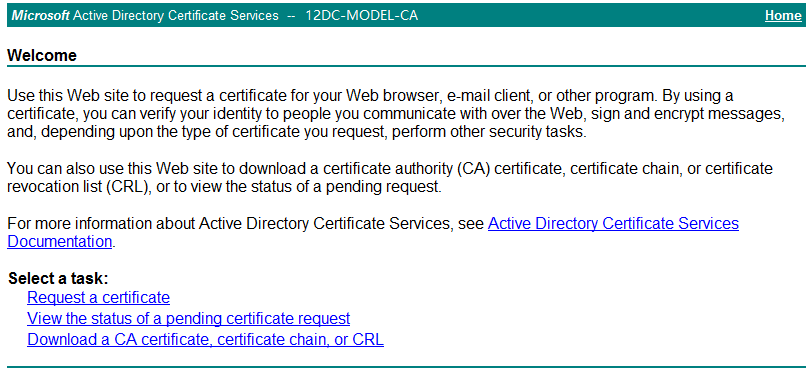
2. Click Request a certificate.
3. Click Advanced certificate request.
4. Click Create and submit a request to this CA.
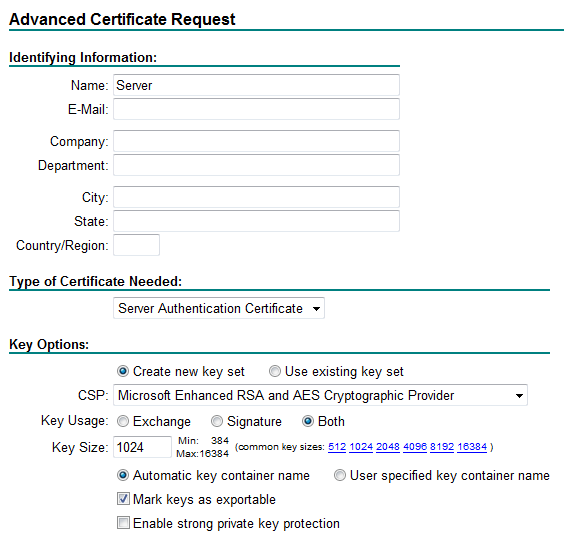
5. In the Advanced Certificate Request dialog box, configure the following parameters, as shown in Figure 51:
a. Enter a server name in the Name field.
b. Select Server Authentication Certificate from the Type of Certificate Request list.
c. Select Mark keys as exportable to make sure the certificate can be exported.
d. Use the default values for other parameters.
Figure 51 Advanced Certificate Request
6. Click Submit.
The certificate can be installed only after it is issued by the CA server administrator. For information about issuing a certificate, see "Appendix F Issuing a certificate." You can click View the status of a pending certificate request in the Microsoft Active Directory Certificate Services page shown in Figure 50 to check whether the certificate is issued.
Figure 52 indicates that the certificate has not been issued.
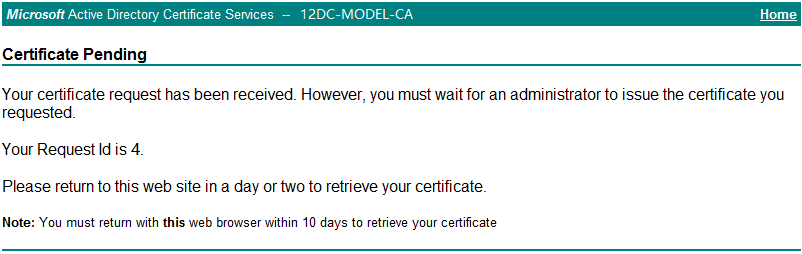
Figure 53 indicates that the certificate has been issued.
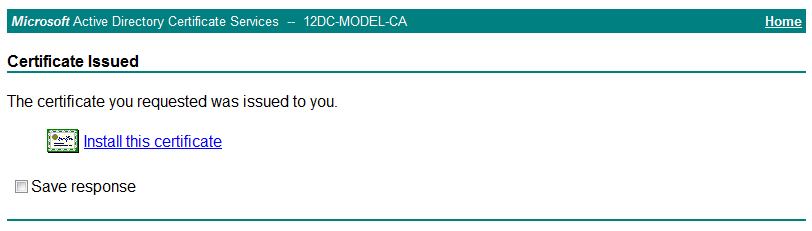
7. On the Certificate Issued page, click Install this certificate.
If the prompt Your new certificate has been successfully installed opens, the server certificate has been installed.
Appendix D Saving a client/server certificate locally
The procedure for exporting the client certificate is the same as that for exporting the server certificate. This example shows how to export the server certificate.
1. On the computer installed with the server certificate, select Start > Control Panel > Network and Internet > Internet Options.
The Internet Options dialog box opens, as shown in Figure 54.
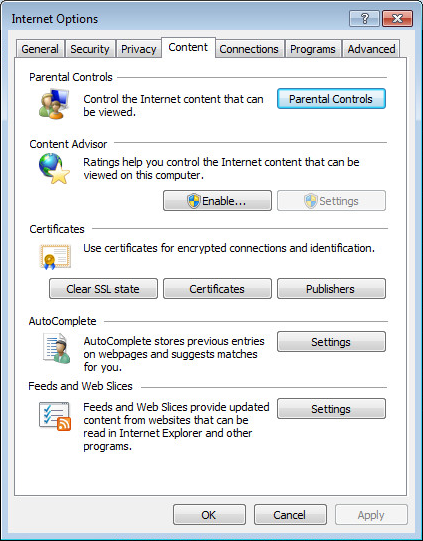
2. Click the Content tab.
3. Click Certificates.
The Certificates dialog box opens, as shown in Figure 55.
Figure 55 Selecting the server certificate
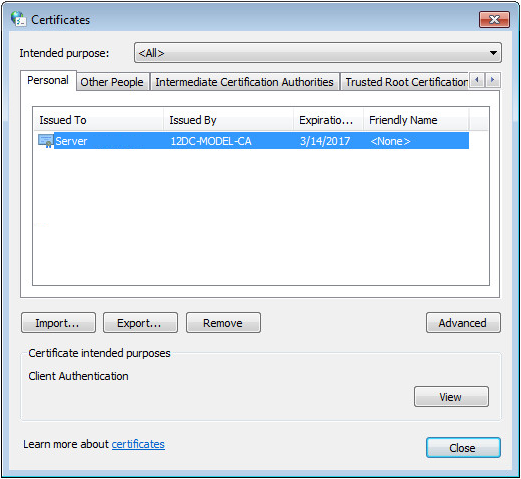
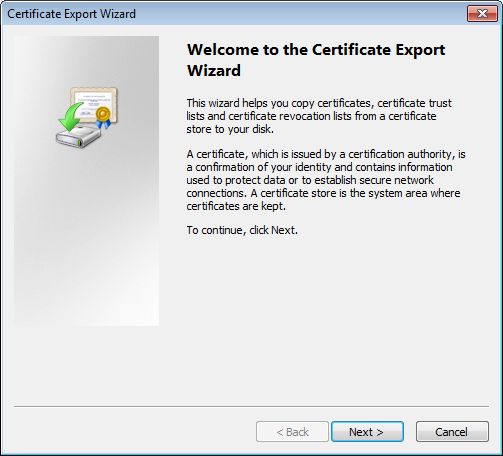
4. On the Personal tab, select the target server certificate, and then click Export.
The Certificate Export Wizard page opens, as shown in Figure 56.
Figure 56 Certificate Export Wizard
The Export Private Key page opens, as shown in Figure 57.
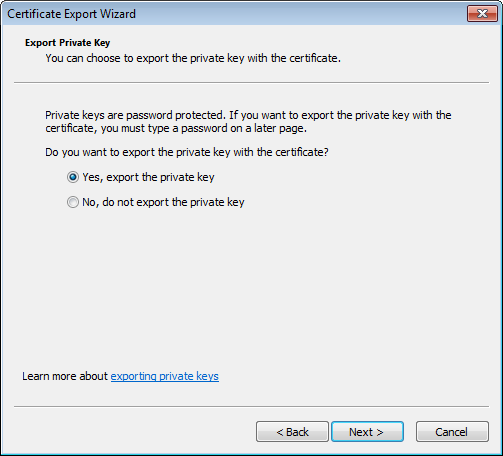
6. Select Yes, export the private key, and then click Next.
The Export File Format page opens, as shown in Figure 58.
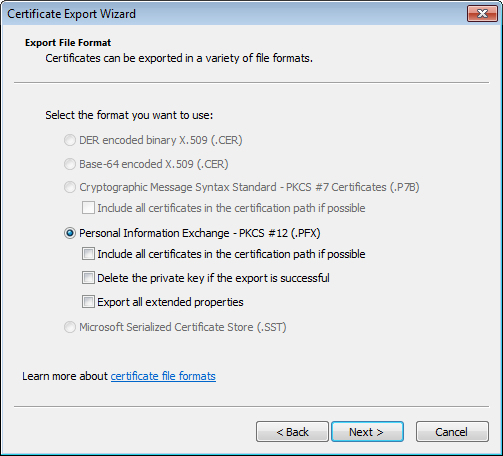
7. Select Personal Information Exchange - PKCS #12 (.PFX), and then click Next.
The Password page opens, as shown in Figure 59.
Figure 59 Setting a password for the certificate
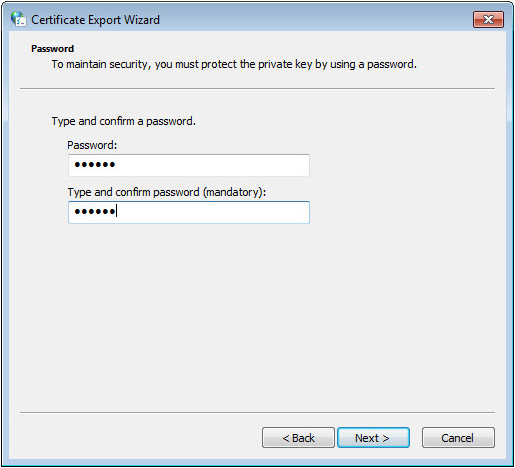
8. Set a password for the certificate, and then click Next.
The File to Export page opens, as shown in Figure 60.
Figure 60 Selecting a local path for storing the certificate
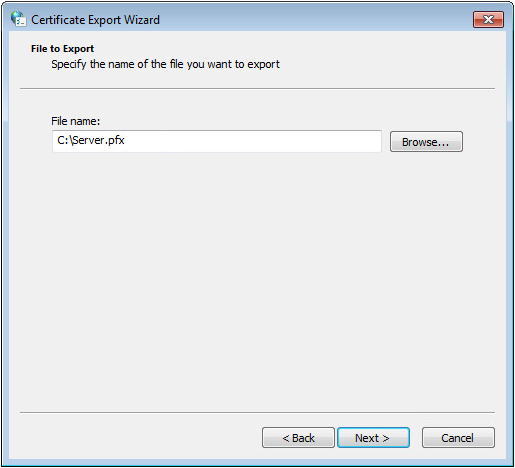
9. Click Browse to select a path for storing the certificate, and then click Next.
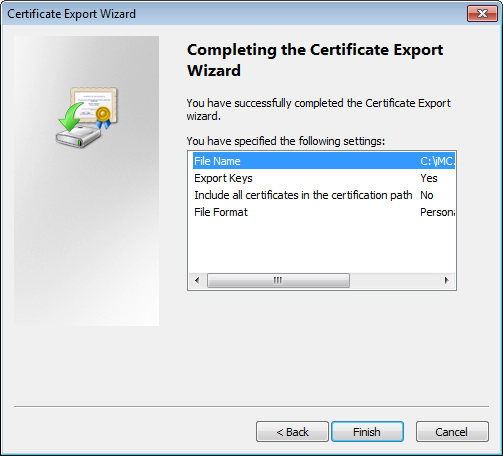
The Completing the Certificate Export Wizard page opens, as shown in Figure 61.
Figure 61 Certificate Export Wizard
Appendix E Importing root and client certificates
The following example describes the root and client certificate importation procedure on the Windows 7 operating system:
1. Enter mmc.exe in the Run dialog box, as shown in Figure 56.
2. Click OK.
The console opens.
3. Select File > Add/Remove Snap-in, as shown in Figure 57.

The Add or Remove Snap-ins dialog box opens.
4. In the Available snap-ins area, select Certificates, and then click Add, as shown in Figure 58.
Figure 64 Add or Remove Snap-ins dialog box

The Certificates snap-in dialog box opens.
5. Select Computer account, and then click Next, as shown in Figure 59.
Figure 65 Certificates snap-in dialog box
The dialog box for selecting a computer opens.
6. Use the default values for the parameters.
7. Click OK to return to the Add or Remove Snap-ins dialog box, as shown in Figure 60.
Figure 66 Add or Remove Snap-ins dialog box
8. Click OK to return to the console dialog box.
9. Right-click Personal, and then select All Tasks > Import from the shortcut menu to import the client certificate, as shown in Figure 61.
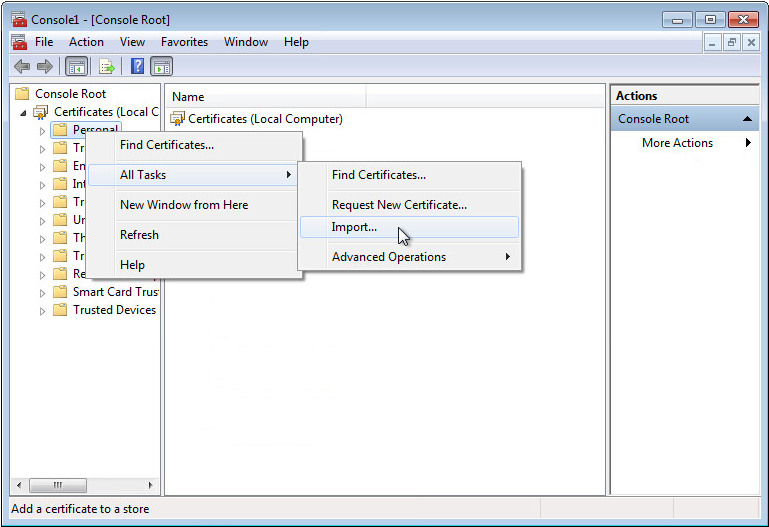
10. Right-click Trusted Root Certification Authorities, and then select All Tasks > Import from the shortcut menu to import the root certificate.
11. Save the console settings.
Appendix F Issuing a certificate
A client or server certificate can be installed only after it is issued by the CA server administrator.
To issue a certificate:
1. On the CA server, select Start > Administrative Tools > Certification Authority.
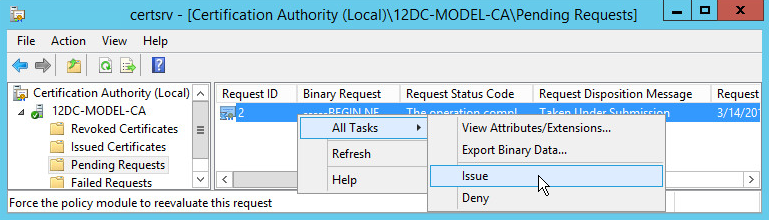
The Certification Authority window opens, as shown in Figure 68. In this example, 12DC-MODEL-CA is the CA server name.
Figure 68 Certification Authority
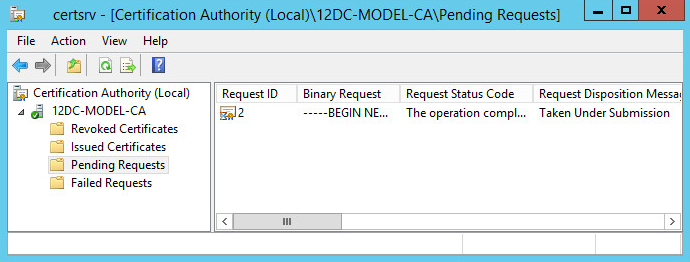
3. Right-click the request of the certificate to be issued, and then select All Tasks > Issue from the shortcut menu to issue the certificate, as shown in Figure 69.
Figure 69 Issuing a certificate