- Table of Contents
-
- 09-L2TP Configuration
- 01-ER G3 Routers L2TP VPN Configuration Examples
- 02-Set Up L2TP VPN Connection by Using Custom iNode Client for Windows
- 03-MER Routers L2TP (LAC-Auto-Initiated Mode) Configuration Examples
- 04-MER Routers L2TP VPN Configuration Examples
- 05-MSR Routers LAC-Auto-Initiated L2TP Tunnel Configuration Examples
- 06-MSR Routers L2TP VPN+RADIUS Server Configuration Examples
- 07-MSR Routers L2TP VPN Configuration Examples (CLI)
- 08-MSR Routers L2TP VPN Configuration Examples
- 09-Setting Up L2TP VPN in macOS
- Related Documents
-
| Title | Size | Download |
|---|---|---|
| 02-Set Up L2TP VPN Connection by Using Custom iNode Client for Windows | 779.85 KB |
Set Up L2TP VPN Connection by Using Custom iNode Client for Windows
Copyright © 2024 New H3C Technologies Co., Ltd. All rights reserved.
No part of this manual may be reproduced or transmitted in any form or by any means without prior written consent of New H3C Technologies Co., Ltd.
Except for the trademarks of New H3C Technologies Co., Ltd., any trademarks that may be mentioned in this document are the property of their respective owners.
The information in this document is subject to change without notice.
Introduction
The following information provides the installation guide for setting up an L2TP VPN connection by using the custom iNode client for Windows.
Prerequisites
The configuration examples were created and verified in a lab environment, and all the devices were started with the factory default configuration. When you are working on a live network, make sure you understand the potential impact of every command on your network.
The following information is provided based on the assumption that you have basic knowledge of IPsec.
Configuration example
Software version used
Restrictions and guidelines
Procedures
Install the iNode management center
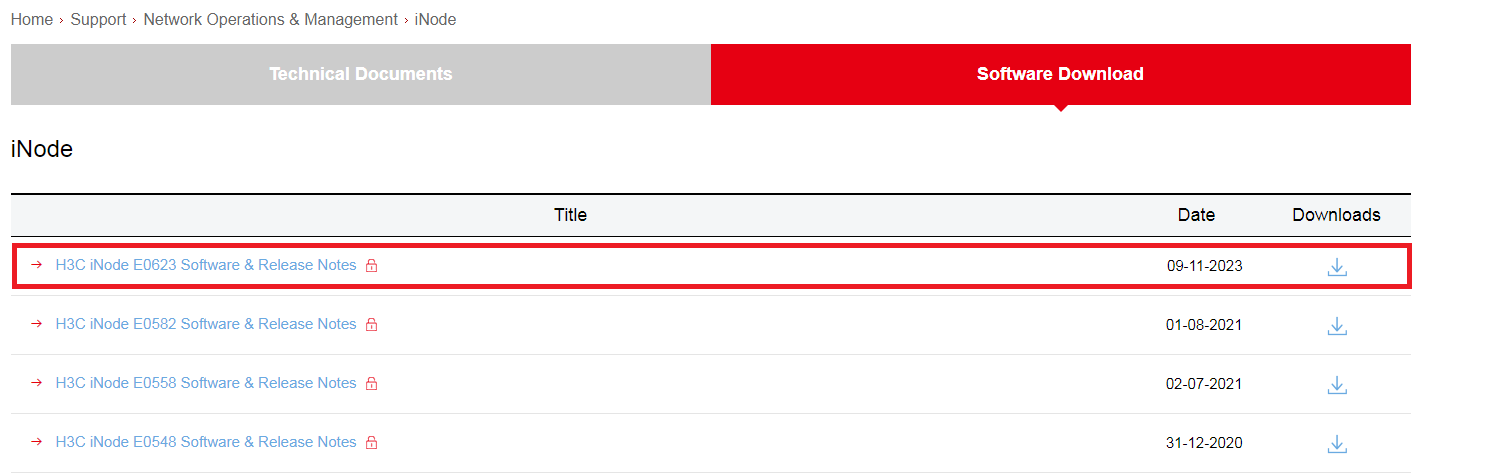
1. Access the iNode management center downloading page on the H3C official website at the following link: https://www.h3c.com/en/Support/Resource_Center/EN/Network_Management/Catalog/H3C_iNode/iNode/
2. Take the iNode E0623 version as an example. After clicking the Software Download tab, select H3C iNode E0623 Software & Release Notes as shown in Figure 1.
Figure 1 Downloading the iNode PC client
3. When the H3C iNode E0623 Software & Release Notes page in Figure 2 opens, select H3C_iNode_PC_7.3_E0623.zip.
Figure 2 H3C iNode E0623 Software & Release Notes

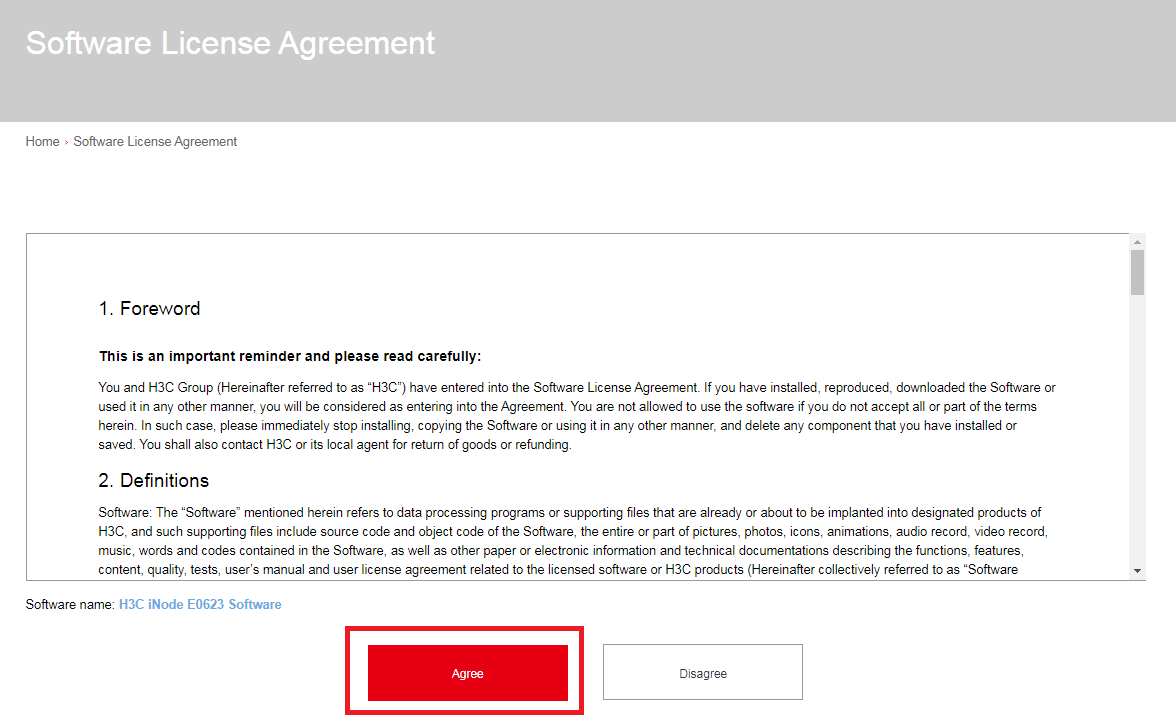
4. Click the H3C_iNode_PC_7.3_E0623.zip downloading link to access the software license agreement page as shown in Figure 3. Read the agreement, and then click the Agree button to start the download.
Figure 3 The New H3C group software license agreement page
5. After downloading the H3C_iNode_PC_7.3_E0623.zip file, unzip the file to generate a folder named iNode. Double-click to open the iNode folder, and then select the Windows folder as shown in Figure 4.
Figure 4 Selecting the Windows folder

6. After opening the Windows folder as shown in Figure 5, run the iNode Management Center for Windows 7.3 (E0623).exe software.
Figure 5 Running the iNode management center installation package
![]()
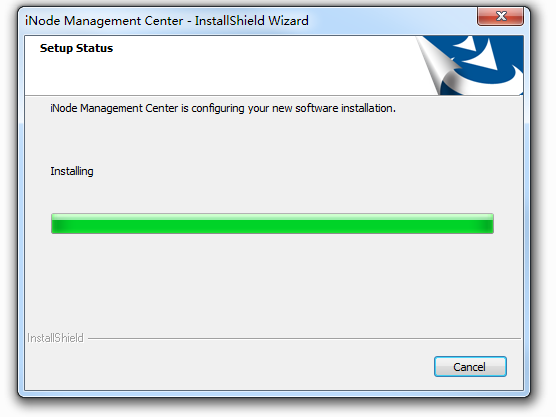
7. Install according to the default options.
Figure 6 Installing the iNode management center software
8. After installing the iNode management center software, click Finish as shown in Figure 7.
Figure 7 iNode management center software installation finished

9. After you install the iNode management center software, an icon named iNode management center will appear on the PC desktop, as shown in Figure 8.
Figure 8 iNode management center

Customize the SSL VPN client
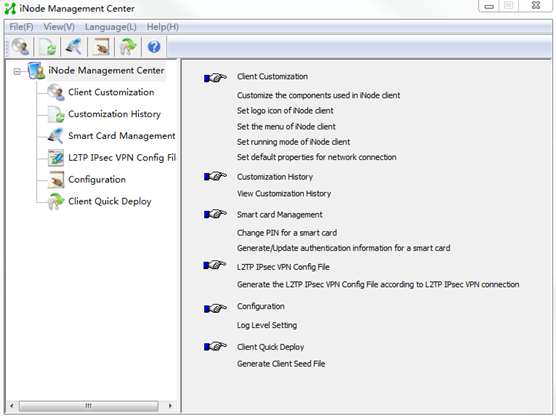
1. Double-click the iNode management center icon on the desktop to open the iNode management center interface as shown in Figure 9.
Figure 9 The iNode management center interface
2. Click the Client Customization tab to open the client customization page as shown in Figure 10.
Figure 10 Client customization interface

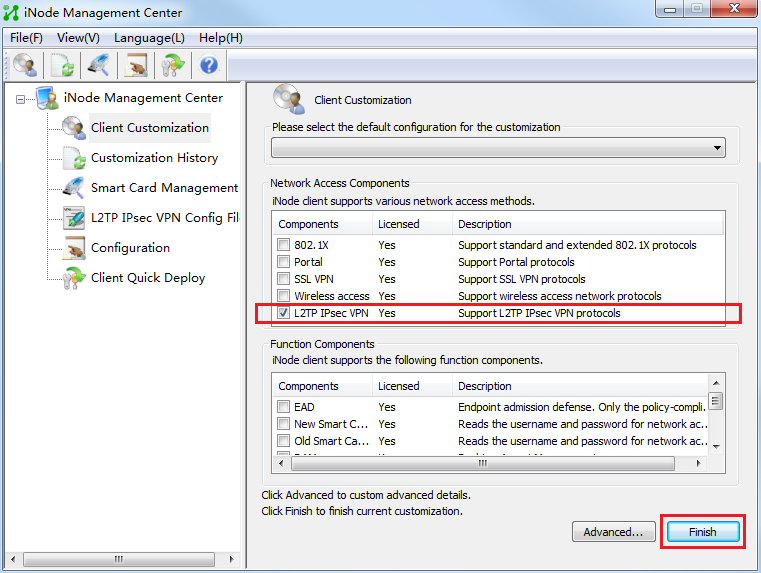
3. As shown in Figure 11, select the L2TP IPsec VPN component in the Network Access Components area, and then click Finish.
Figure 11 Customizing the SSL VPN client
4. After you click Finish, the iNode management center software will display the client customization completed window as shown in Figure 12. You can select options as needed. In the client scenario information area, select the Default Scenario typically. Select Generate customized client setup program.
Figure 12 Selecting to complete client customization

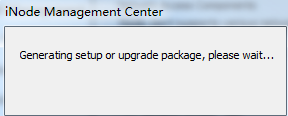
5. After you click OK, the iNode management center software will display a prompt box as shown in Figure 13, and start generating the installation package.
Figure 13 Generating the installation package
6. After client customization is successful, the client customization result page as shown in Figure 14 opens. Follow the prompt messages to click the Find Target... button. The path of the iNodeSetup7.3 (E0623).exe software opens as shown in Figure 15.
Figure 14 Clicking the Find Target button below
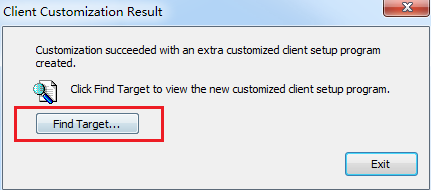
Figure 15 Path of iNodeSetup7.3 (E0623).exe

7. Double-click to run the iNodeSetup7.3 (E0623).exe software and follow the default options for installation.
Figure 16 Installing the iNode client

8. After the iNode client installation is complete, click Finish as shown in Figure 17.
Figure 17 Installing the iNode client

9. After you install the iNode client on the PC, the icon named iNode Intelligent Client will appear on the desktop, as shown in Figure 18.
Figure 18 The iNode intelligent client icon

Configuring the iNode client
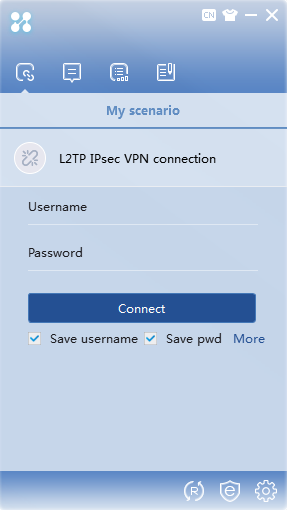
1. Double-click the icon on the PC desktop to run the iNode intelligent client. The interface as shown in Figure 19 opens.
Figure 19 The iNode intelligent client interface
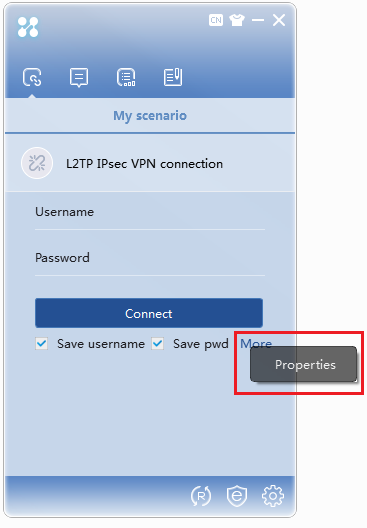
2. As shown in Figure 20, click More, and then select the Properties option to access the IPsec VPN authentication configuration interface.
Figure 20 Property configuration
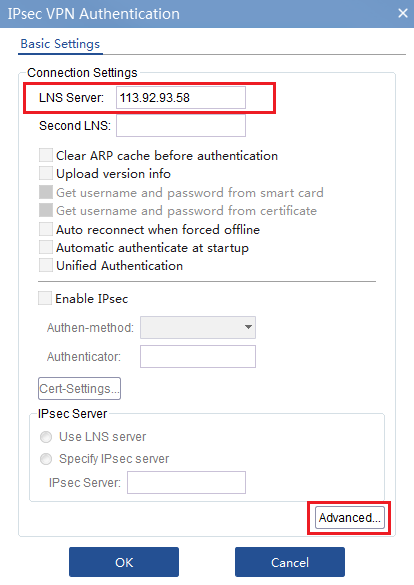
3. As shown in Figure 21, on the Basic Settings tab of the IPsec VPN authentication configuration interface, enter the configured LNS server address, which is 113.92.93.58 in this example. Click Advanced to access the L2TP settings interface.
Figure 21 Basic settings for IPsec VPN authentication
4. As shown in Figure 22, on the L2TP Settings tab, enter the configured tunnel name and select the authentication mode. Use the default settings for the other parameters. In this example, configure the tunnel name as VPN, and the select the authentication method CHAP.
Figure 22 Configuring L2TP settings for IPsec VPN authentication

5. Click the Route Settings tab on the IPsec VPN authentication configuration interface, as shown in Figure 23. On the Route Settings tab, click Add to open the Add Route window. Add the route for the subnet that the PC needs to access. In this example, the PC needs to access subnet 192.168.1.0 with a subnet mask of 255.255.255.0.
Figure 23 Configuring route settings for IPsec VPN authentication


6. After adding the route, click OK to return to the Route Settings tab. Click OK to return to the Basic Settings tab. Click OK to complete and save the IPsec VPN authentication configuration. As shown in Figure 25, enter the configured username and password in the Username and Password fields to complete the L2TP IPsec VPN connection. In this example, the username is admin, and the password is 123456TESTplat&!.
Figure 25 L2TP IPsec VPN connection

Verifying the configuration
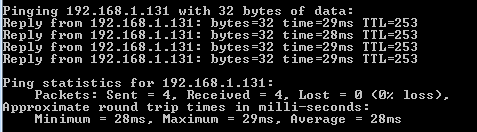
After completing the preceding configuration, ping the internal network host IP address 192.168.1.101 from the PC. As shown in Figure 26, the ping succeeds.
Figure 26 Pinging the internal network host