- Table of Contents
- Related Documents
-
| Title | Size | Download |
|---|---|---|
| 01-MSR Routers Telnet Login Configuration Examples (CLI and Web) | 339.98 KB |
Telnet Login Configuration Examples (CLI and Web)
Copyright © 2024 New H3C Technologies Co., Ltd. All rights reserved.
No part of this manual may be reproduced or transmitted in any form or by any means without prior written consent of New H3C Technologies Co., Ltd.
Except for the trademarks of New H3C Technologies Co., Ltd., any trademarks that may be mentioned in this document are the property of their respective owners.
The information in this document is subject to change without notice.
Contents
Example: Logging in to a device through Telnet (CLI)
Configuring IP addresses for the host and the device
Enabling the Telnet client feature on the host
Enabling the Telnet server and create a user account for the device
Example: Logging in to a device through Telnet (Web)
Configuring IP addresses for the host and the device
Enabling the Telnet client feature on the host
Enabling the Telnet server and create a user account for the device
Introduction
The following information provides examples of logging in to the device through Telnet.
Prerequisites
The configuration examples were created and verified in a lab environment, and all the devices were started with the factory default configuration. When you are working on a live network, make sure you understand the potential impact of every command on your network.
The following information is provided based on the assumption that you have basic knowledge of device login.
Software versions used
These configuration examples were created and verified on R6749P14 of the H3C MSR3610-X1 router. The configuration examples apply to the H3C Comware 7 MSR router series. Operations might vary slightly by product model and software version.
Example: Logging in to a device through Telnet (CLI)
Network configuration
As shown in Figure 1, use a host with IP address 192.168.0.2/24 to log in to the device through Telnet.

Restrictions and guidelines
· Make sure the host and the device can communicate with each other. Enable Telnet service port number 23.
· Enable the Telnet client feature on the host.
· By default, the Telnet server is disabled on the device. You must log in to the device through the console port and enable the Telnet server.
Procedures
Configuring IP addresses for the host and the device
# Configure IP addresses for the host and the device. (Details not shown.)
Enabling the Telnet client feature on the host
# Enable the Telnet client feature on the host. This example uses Windows 7 for illustration.
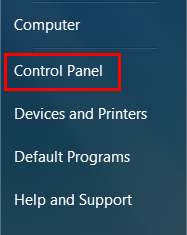
1. Open the Start menu and click Control Panel.
Figure 2 Start menu
2. Click Programs.
Figure 3 Control panel

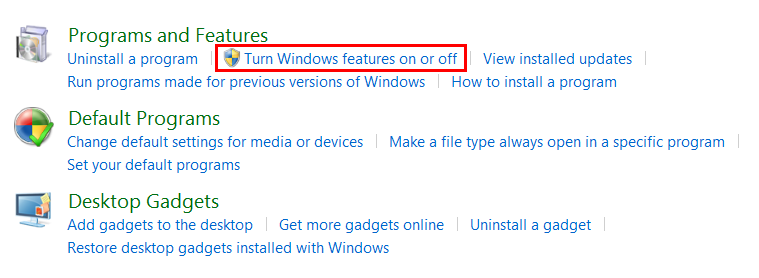
3. Click Turn Windows features on or off.
Figure 4 Program
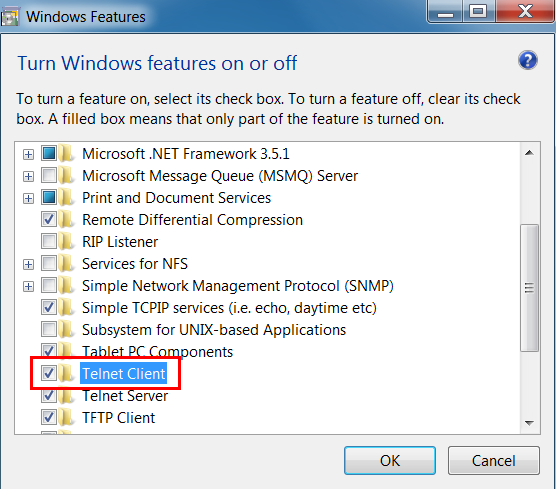
4. Select Telnet Client, and then click OK.
Figure 5 Windows features

Enabling the Telnet server and create a user account for the device
# Log in to the device through the console port, enter system view, and enable the Telnet server.
<Router> system-view
[Router] telnet server enable
# Enable scheme authentication for VTY lines 0 to 63.
[Router] line vty 0 63
[Router-line-vty0-63] authentication-mode scheme
[Router-line-vty0-63] quit
# Create local user userA and configure 123456TESTplat&! as the password. Assign the Telnet service and the user role network-admin to the user. Delete the default user role.
[Router] local-user userA class manage
New local user added.
[Router-luser-manage-userA] authorization-attribute user-role network-admin
[Router-luser-manage-userA] service-type telnet
[Router-luser-manage-userA] password simple 123456TESTplat&!
[Router-luser-manage-userA] undo authorization-attribute user-role network-operator
[Router-luser-manage-userA] quit
Verifying the configuration
After configuration, open the Run dialog box on the host, and then enter cmd to open Command Prompt. Enter telnet 192.168.0.1, and then enter username userA and password 123456TESTplat&! as prompted. The entered password is not displayed. The output shows that you have successfully logged in to the device.
login: userA
Password:
******************************************************************************
* Copyright (c) 2004-2022 New H3C Technologies Co., Ltd. All rights reserved.*
* Without the owner's prior written consent, *
* no decompiling or reverse-engineering shall be allowed. *
******************************************************************************
<Router>
Configuration files
#
interface GigabitEthernet1/0/1
ip address 192.168.0.1 255.255.255.0
#
telnet server enable
#
line vty 0 63
authentication-mode scheme
#
local-user userA class manage
password hash $h$6$I2Sg4Llj1qVUWQZ3$JA6KkU3zfVVRg48MM92X6cVpdiqR2JF887PKi3GQMwn
XXXcsWBuz7GIeJZeeNFMmMBaV7DPkKblnb0sGT2axvg==
service-type telnet
authorization-attribute user-role network-admin
Example: Logging in to a device through Telnet (Web)
Network configuration
As shown in Figure 1, use a host with IP address 192.168.0.2/24 to log in to the device through Telnet.
Figure 6 Network diagram

Restrictions and guidelines
· Make sure the host and the device can communicate with each other. Enable Telnet service port number 23.
· Enable the Telnet client feature on the host.
· By default, the Telnet server is disabled on the device. You must log in to the Web interface of the device and enable the Telnet server.
Procedures
Configuring IP addresses for the host and the device
# Configure IP addresses for the host and the device. (Details not shown.)
Enabling the Telnet client feature on the host
# Enable the Telnet client feature on the host. This example uses Windows 7 for illustration.
1. Open the Start menu and click Control Panel.
Figure 7 Start menu

2. Click Programs.
Figure 8 Control panel

3. Click Turn Windows features on or off.
Figure 9 Program

4. Select Telnet Client, and then click OK.
Figure 10 Windows features
Enabling the Telnet server and create a user account for the device
# Log in to the Web interface of the device and enable the Telnet server.
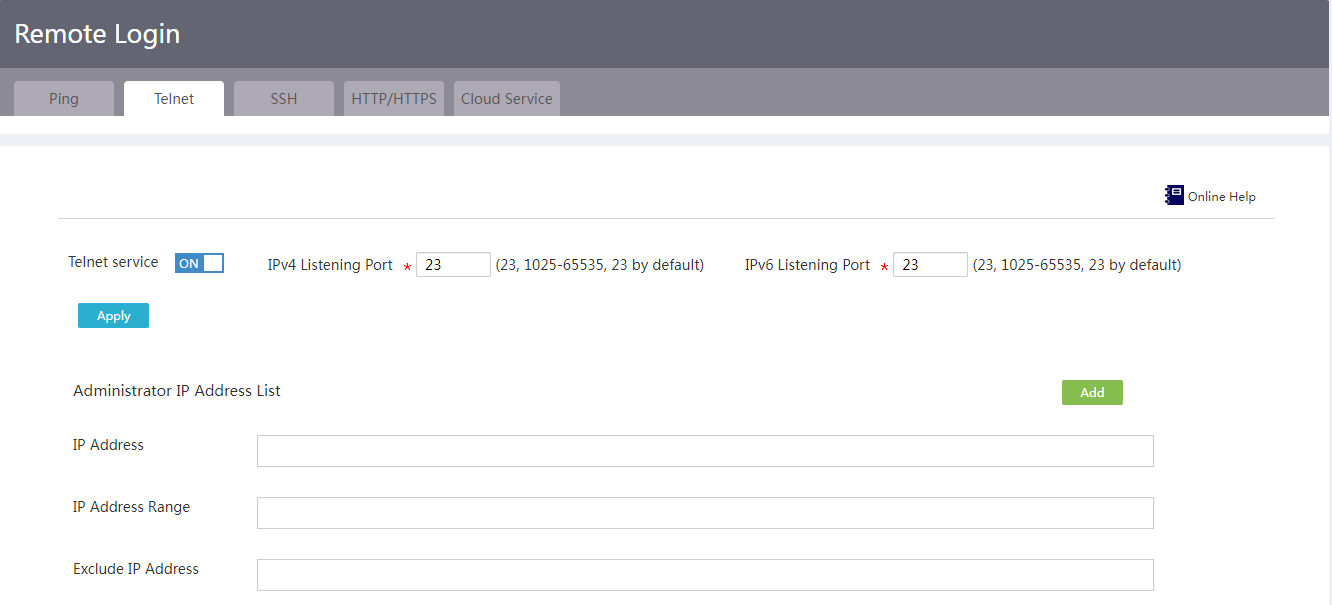
1. From the navigation pane, select System Tools > Remote Login.
2. Click the Telnet tab, enable the Telnet service, and then click Apply.
Figure 11 Remote Login page
3. From the navigation pane, select System Tools > Admin Accounts.
Figure 12 Admin Accounts page

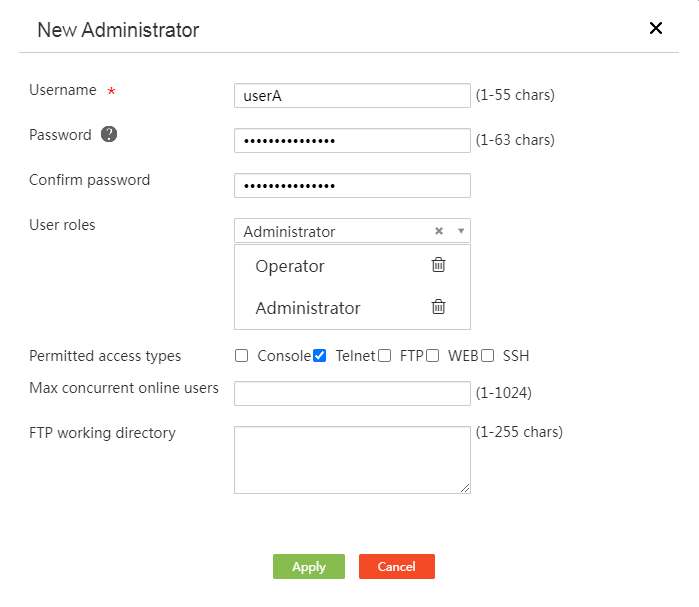
4. Click Add.
5. In the Username field, enter userA.
6. In the Password field, enter 123456TESTplat&!.
7. In the Confirm Password field, enter 123456TESTplat&!.
8. In the User roles field, select Administrator.
9. In the Permitted access types field, select Telnet.
10. Use the default settings for the other parameters. Click Apply.
Figure 13 Add Administrator
Verifying the configuration
After configuration, open the Run dialog box on the host, and then enter cmd to open Command Prompt. Enter telnet 192.168.0.1, and then enter username userA and password 123456TESTplat&! as prompted. The entered password is not displayed. The output shows that you have successfully logged in to the device.
login: userA
Password:
******************************************************************************
* Copyright (c) 2004-2022 New H3C Technologies Co., Ltd. All rights reserved.*
* Without the owner's prior written consent, *
* no decompiling or reverse-engineering shall be allowed. *
******************************************************************************
<Router>
Related documentation
· Fundamentals Configuration Guide in H3C MSR Router Series Comware 7 Configuration Guides
· Fundamentals Command Reference in H3C MSR Router Series Comware 7 Command References
