- Released At: 07-07-2023
- Page Views:
- Downloads:
- Table of Contents
- Related Documents
-
H3C UIS Manager
RBD Storage Configuration Guide
Document version: 5W100-20210910
Copyright © 2021 New H3C Technologies Co., Ltd. All rights reserved.
No part of this manual may be reproduced or transmitted in any form or by any means without prior written consent of New H3C Technologies Co., Ltd.
Except for the trademarks of New H3C Technologies Co., Ltd., any trademarks that may be mentioned in this document are the property of their respective owners.
The information in this document is subject to change without notice.
Contents
Configuring an RBD storage pool
Mounting an RBD storage pool to a host
Mounting an RBD as a VM disk during VM creation
About this document
This document describes how to configure and use RBD storage pools on UIS Manager.
Prerequisites
The configuration examples in this document were created and verified in a lab environment, and all the servers and software were started with the factory default configuration. When you are working on a live environment, make sure you understand the potential impact of every operation on your environment.
Restrictions and guidelines
When you configure RBD storage pools, follow these restrictions and guidelines:
· RBD storage is supported only in UIS E0742P03 or later deployed in HCI mode.
· You cannot perform the following operations for a VM with RBD storage attached:
¡ Live migration by changing storage.
¡ Live migration by changing host and storage.
¡ Live memory snapshot creation.
· RBD storage does not support IPv6.
Configuring RBD storage
Configuring an RBD storage pool
Adding a disk pool
1. On the top navigation bar, click Storage, and then select Storage Management > Disk Pool Management from the left navigation pane.
2. Click Add.
3. Select the thin provisioning mode, configure other parameters as needed, and then click OK.
Figure 1 Creating a disk pool

4. Select the target disk pool and click the ![]() icon.
icon.
5. In the dialog box that opens, assign disks to the disk pool as required.
Figure 2 Assigning disks to the disk pool

Adding an RBD storage pool
1. On the top navigation bar, click Storage, and then select Storage Management > Data Pool Management from the left navigation pane.
2. Click Add.
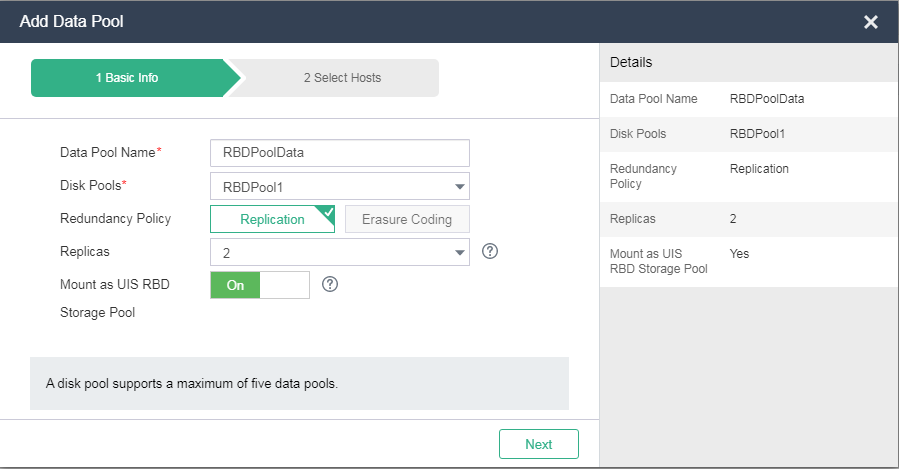
3. Select the thin-provisioned disk pool, mount the data pool as a UIS RBD storage pool, configure other parameters as needed, and then click Next.
Figure 3 Configuring a data pool
4. Select the hosts to be mounted to the RBD storage pool, and then click Finish.
Figure 4 Selecting hosts

Mounting an RBD storage pool to a host
1. On the top navigation bar, click Hosts.
2. Select the target host, and then click the Storage tab.
3. Click Add.
4. Select UIS RBD block storage pool as the type, and select the RBD storage pool you have created.
Figure 5 Adding an RBD storage pool
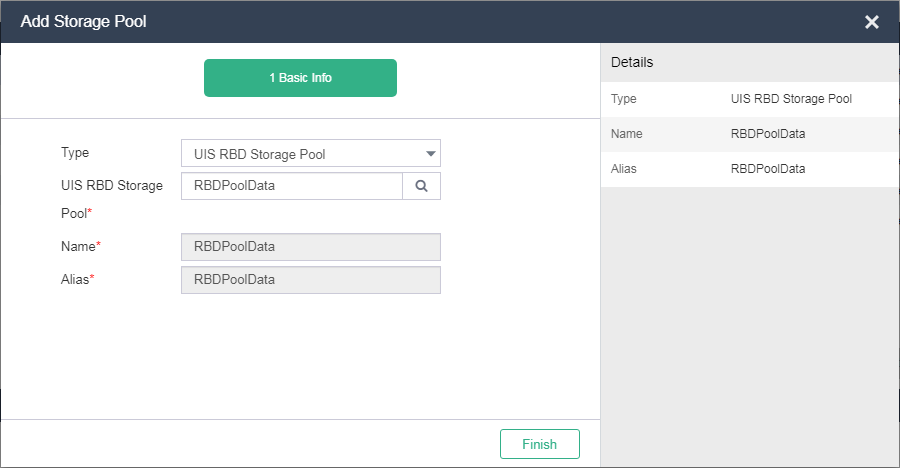
5. Click Finish.
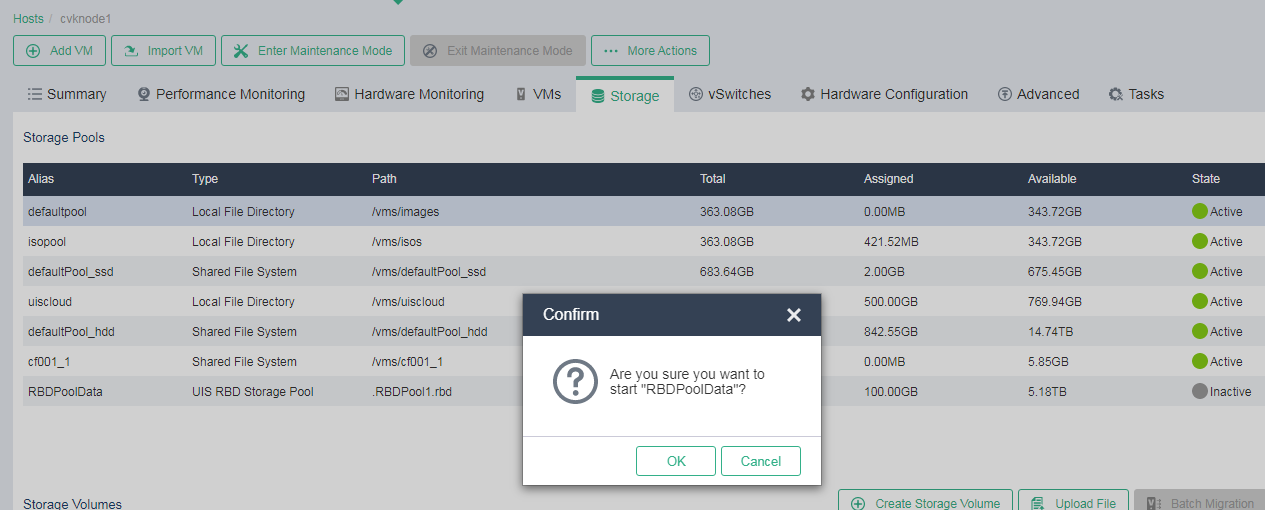
6. In the dialog box that opens, click OK.
Figure 6 Enabling the RBD storage pool
Using an RBD storage pool
Mounting an RBD as a VM disk during VM creation
1. On the top navigation bar, click VMs.
Figure 7 VM list
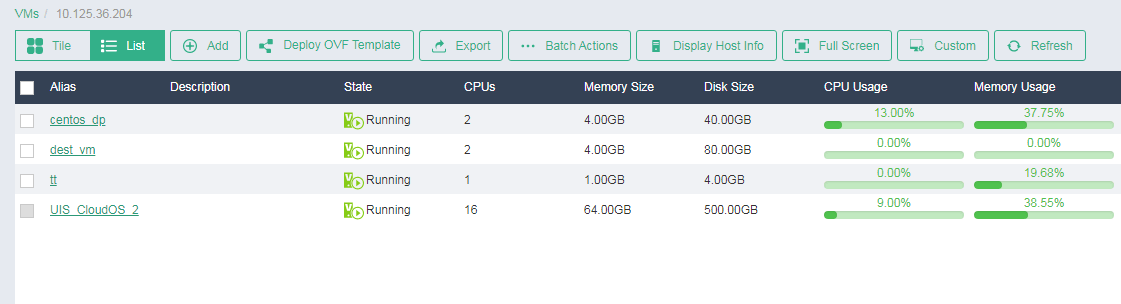
2. Click Add.
3. Configure the basic parameters as needed, and then click Next.
4. Select block device as the disk type, and then select the RBD storage pool you have created.
Figure 8 Configuring a disk

5. Configure other advanced parameters as needed.
6. Click Finish.
Deploying an RBD-attached VM from a VM template
1. On the top navigation bar, click VMs, and then select VM Templates from the left navigation pane.
2. Click the ![]() icon for a VM template.
icon for a VM template.
3. Configure the basic parameters, and then select a host and a cluster for VM deployment.
4. Select the RBD storage pool you have created as the target storage pool.
Figure 9 Selecting the RBD storage pool
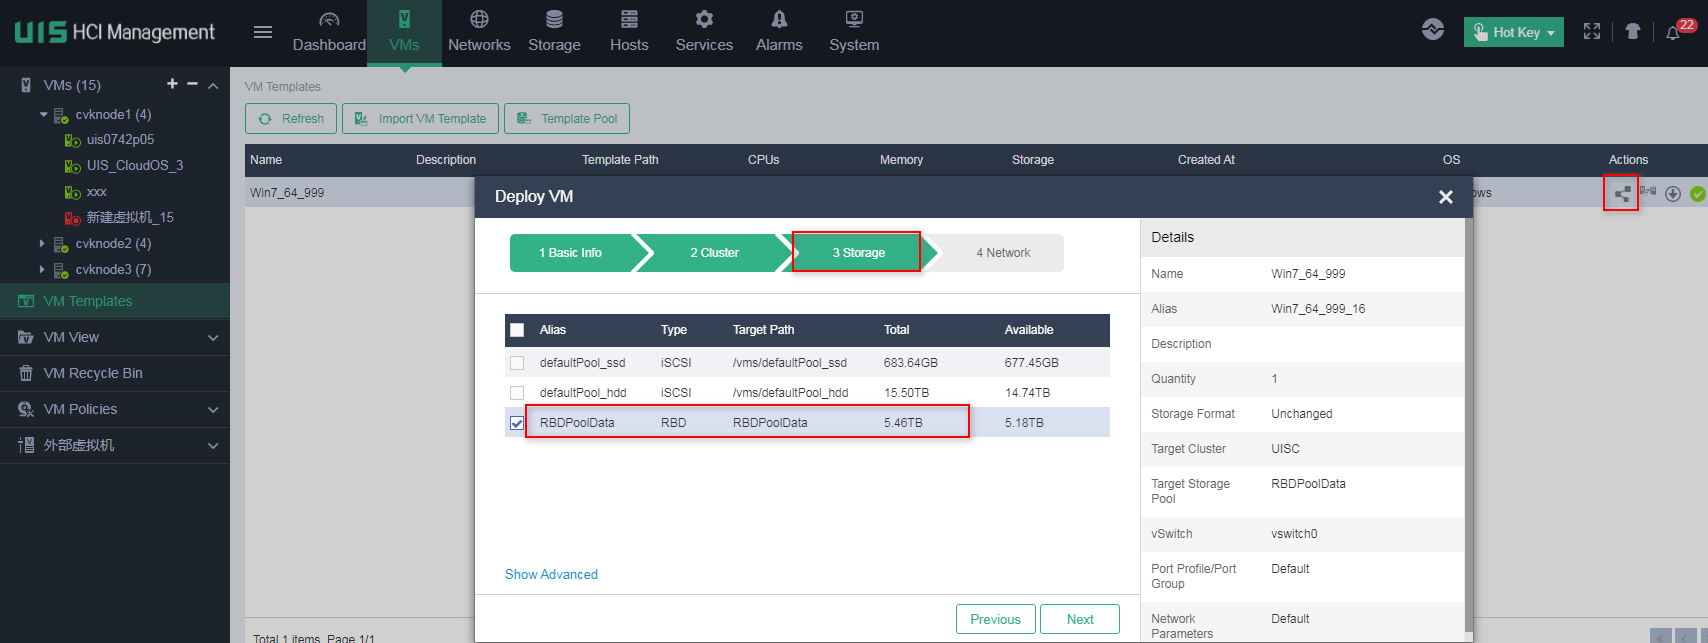
5. Click Next.
6. Configure the network parameters as needed.
7. Click Finish.
Mounting an RBD disk to a VM
1. On the top navigation bar, click VMs.
2. Click a VM alias.
Figure 10 VM summary

3. Click Edit.
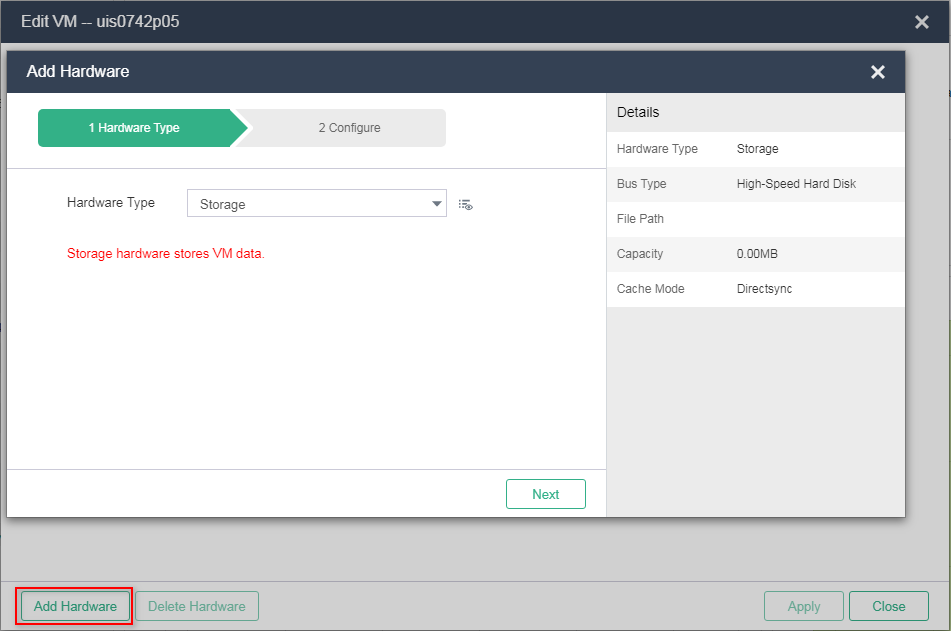
4. Click Add Hardware.
5. Select storage as the hardware type, and then click Next.
Figure 11 Selecting a hardware type
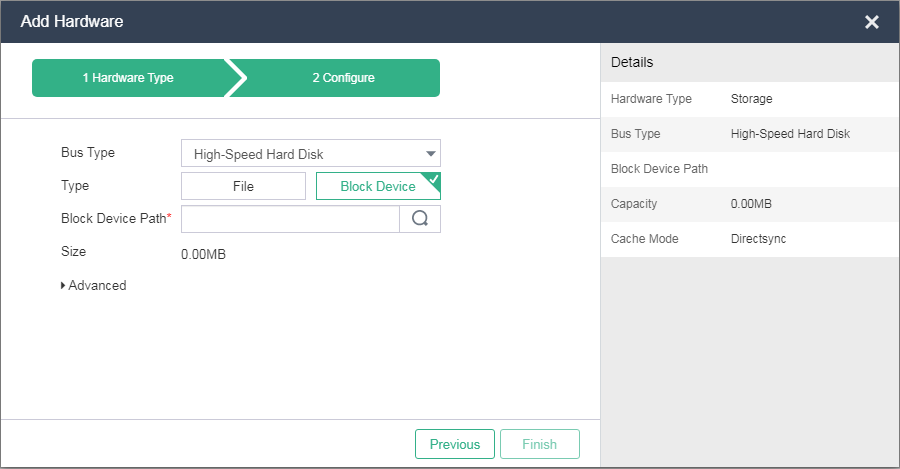
6. Select block device as the type, and click
the ![]() icon.
icon.
Figure 12 Configuring hardware parameters
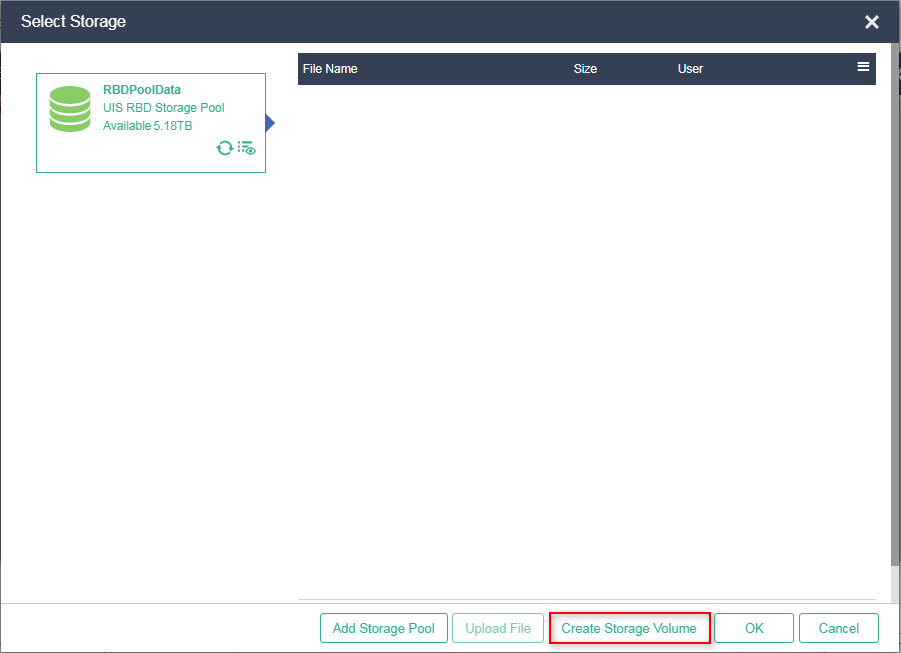
7. Select a block device not in use, and then click OK.
Figure 13 Selecting a block device


Alternatively, you can create a block device by using the following workflow:
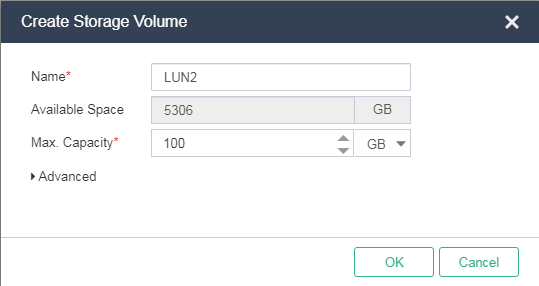
a. Click Create Storage Volume.
Figure 14 Creating a storage volume
a. Specify a capacity for the storage volume, and then click OK.
Figure 15 Specifying a capacity for the storage volume
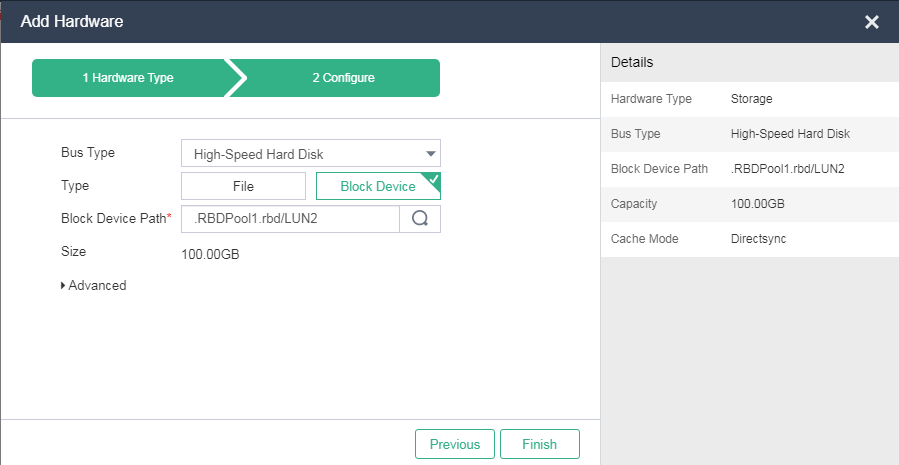
The system automatically selects the new storage volume as the block device.
Figure 16 Block device
8. Click Finish.
