- Released At: 17-04-2025
- Page Views:
- Downloads:
- Table of Contents
- Related Documents
-
1 Network requirements
Install and connect the Aolynk series routers, switches, and APs according to actual network requirements.
· Connect all devices correctly based on the planned network topology.
· Make sure all devices are powered on and the LEDs on the devices indicate that the devices are in normal state.
· Make sure the devices are connected to the network.
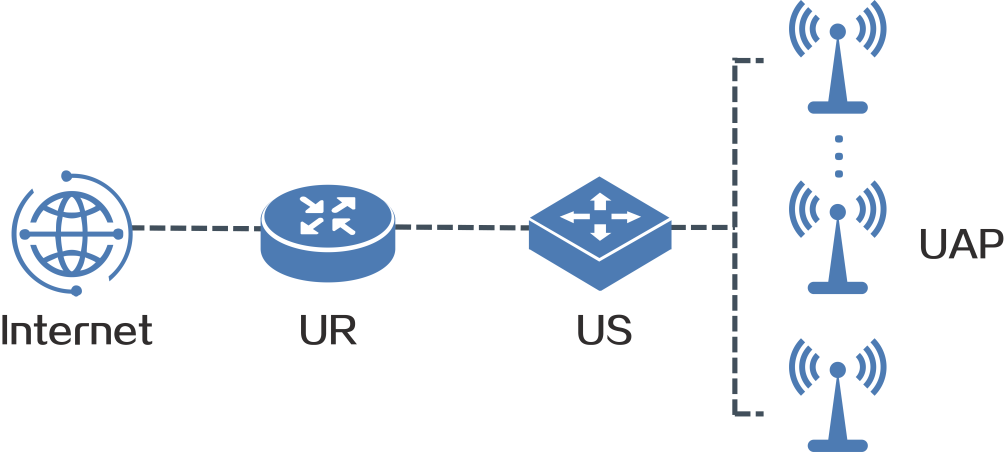
Figure1-1 Network diagram
2 Prerequisites
The device supports performing UWEB deployment through a wired or wireless connection.
· To use a wired connection:
¡ Use a network cable to connect the PC to a LAN port of the router or switch. As a best practice, do not connect to a LAN port on a walljack AP.
¡ The PC can obtain an IP address through DHCP. As a best practice, do not specify a static IP address.
¡ As a best practice, use Chrome 64, Firefox 78, Edge 79, Safari 12, or later browser versions for the deployment.
· To use a wireless connection:
¡ After you power on the device, wait 3 minutes for the Wi-Fi to be ready.
¡ Connect the PC to the Wi-Fi named H3C_QuickNet_xxxx released from the device.
¡ If the PC cannot detect the Wi-Fi service for a long time, restore the devices in the network to factory defaults, and then restart the deployment process.
¡ As a best practice, use Chrome 64, Firefox 78, Edge 79, Safari 12, or later browser versions for the deployment.
3 Procedures
Logging in to UWEB management interface
1. Use a browser to access uweb.h3c.com.
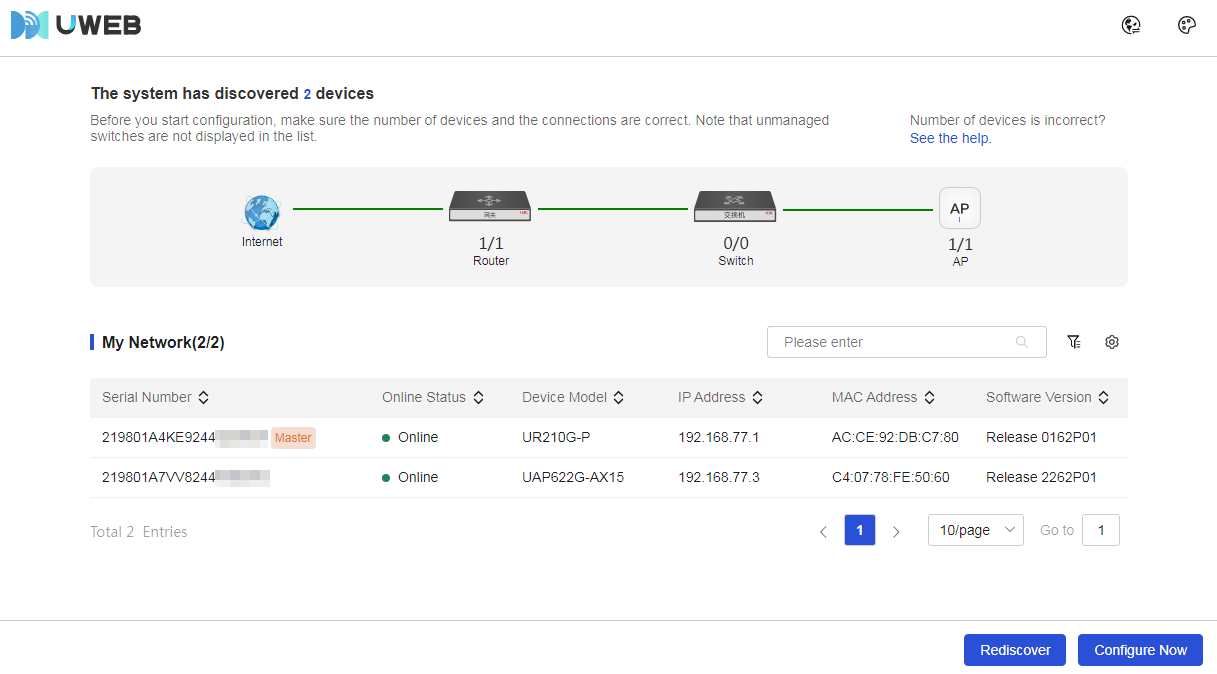
2. Verify if all devices in the network have been discovered. If all devices have been discovered, click Configure Now to enter the configuration page.
Figure3-1 Discovered devices
Creating a project and performing deployment
1. In Project Settings section, specify the project name and password.
2. In the Network Access Settings section, select a gateway device and a WAN port, and select the network access method. Available network access methods include DHCP, Fixed IP, and PPPoE.
3. In the Wi-Fi Settings section, configure the Wi-Fi parameters, such as the encryption mode and enabled radios.
4. In the Time Zone/Region Code section, select the region code and time zone based on the actual location of the device.
Figure3-2 UWEB interface for startup configuration

5. Click Finish Configuration. In the confirmation box that opens, click OK.
Figure3-3 Prompt
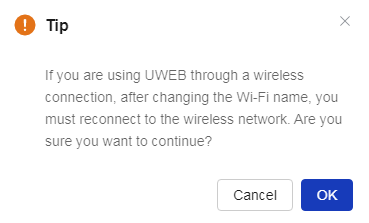
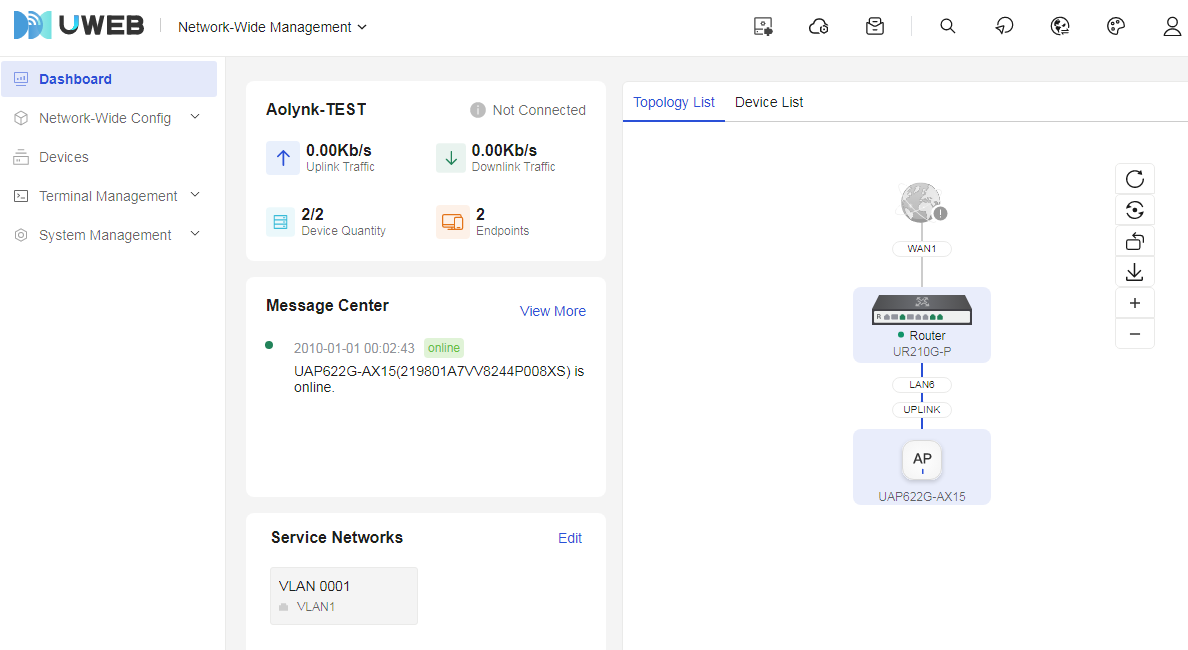
Figure3-4 Network-wide management interface