- Released At: 05-07-2024
- Page Views:
- Downloads:
- Table of Contents
- Related Documents
-
|
H3C IMC UAM |
|
Mute Terminal Authentication Configuration Examples |
|
|
Software version: IMC UAM 7.2 (E0403)
|
Copyright © 2016 Hangzhou H3C Technologies Co., Ltd. All rights reserved. No part of this manual may be reproduced or transmitted in any form or by any means without prior written consent of Hangzhou H3C Technologies Co., Ltd. The information in this document is subject to change without notice. |
|
Contents
Example: Configuring mute terminal authentication
Configuring a mute terminal user configuration profile
Introduction
This document provides examples for authenticating mute terminals to access the network.
Mute terminals, such as IP phones and printers, cannot proactively trigger authentication processes. To access the network, they must use an automatic authentication process that does not require manual intervention.
Example: Configuring mute terminal authentication
Network configuration
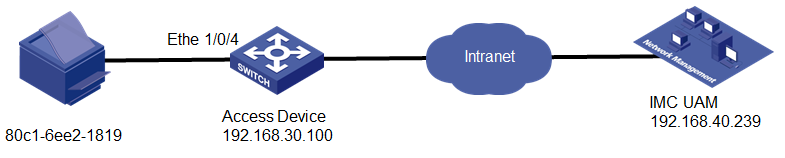
As shown in Figure 1, configure UAM and the access device to provide mute terminal authentication, so the printer in the finance department can access the network automatically.
Software versions used
This configuration example was created and verified on the following platforms:
· IMC PLAT 7.2 (E0403)
· IMC UAM 7.2 (E0403)
· H3C S3600V2-28TP-EI Comware Software, Version 5.20, Release 2103
Restrictions and guidelines
When you configure mute terminal authentication, follow these restrictions and guidelines:
· Make sure the parameters you configure for the access device in UAM, such as the authentication and accounting ports, device vendor, and shared key, are the same as those in the CLI configuration on the switch.
· If you want to select the switch from the resource pool as an access device, make sure it is already added to the IMC Platform, either manually or through auto discovery.
Configuring UAM
Configuring an access device
Add the switch to UAM as an access device:
1. Click the User tab.
2. From the navigation tree, select User Access Policy > Access Device Management > Access Device.
The Access Device configuration page opens, as shown in Figure 2.
Figure 2 Access device configuration page
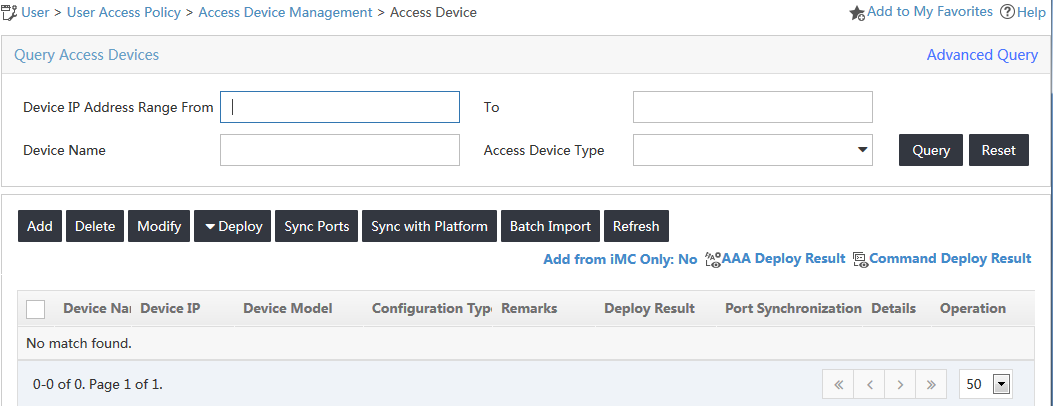
3. In the access device list, click Add.
The Add Access Device page opens.
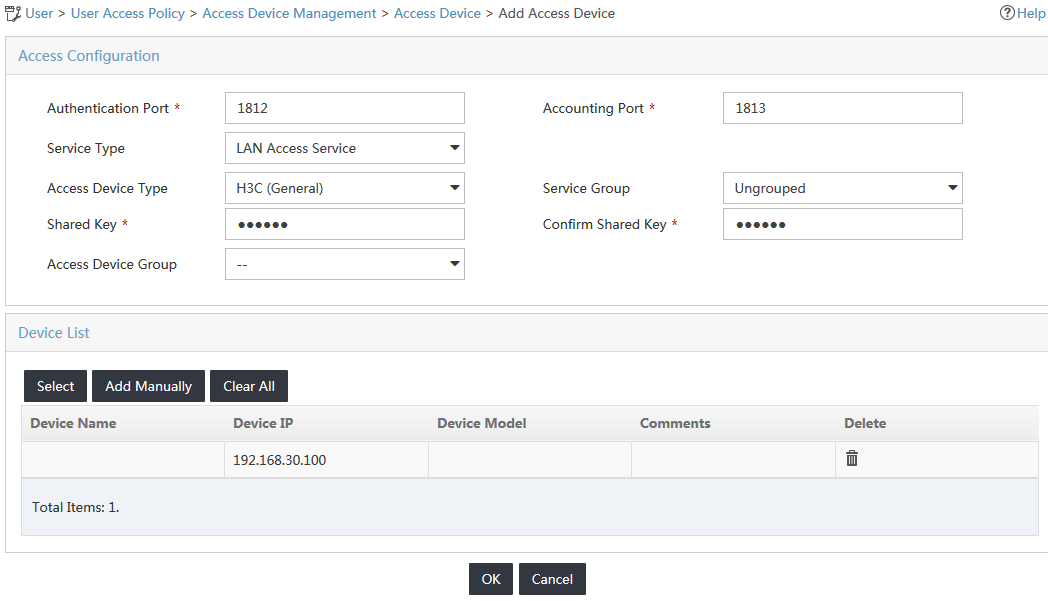
4. Configure access device parameters, as shown in Figure 3:
a. In the Authentication Port field, enter 1812 as the authentication port number to which UAM listens for RADIUS authentication packets.
b. In the accounting port field, enter 1813 as the accounting port number to which UAM listens for RADIUS accounting packets.
c. In the Shared Key field, enter expert as the shared key used by the access device and UAM to authenticate each other.
d. Use the default values for other parameters in the Access Configuration area.
e. In the Device List area, click Select to select the switch from the resource pool, or click Add Manually to add the switch to UAM. (Details not shown.)
Figure 3 Adding an access device
5. Click OK.
Configuring an access policy
1. Click the User tab.
2. From the navigation tree, select User Access Policy > Access Policy.
The Access Policy configuration page opens, as shown in Figure 4.
Figure 4 Access policy configuration page
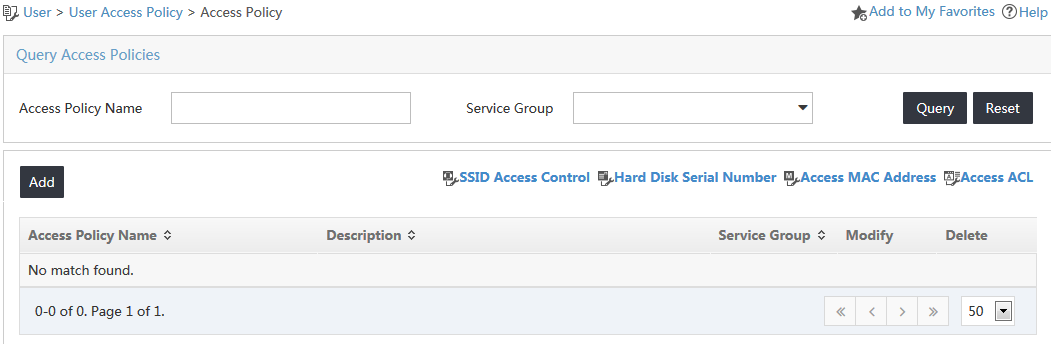
3. In the access policy list, click Add.
The Add Access Policy page opens.
4. Configure the access policy parameters, as shown in Figure 5:
a. In the Access Policy Name field, enter printer access Policy.
b. In the Service Group field, select Ungrouped.
Figure 5 Adding an access policy

5. Click OK.
Configuring an access service
1. Click the User tab.
2. From the navigation tree, select User Access Policy > Access Service.
The Access Service configuration page opens, as shown in Figure 6.
Figure 6 Access service configuration page

3. In the access service list, click Add.
The Add Access Service page opens.
4. Configure access service parameters, as shown in Figure 7:
a. In the Service Name field, enter printer access service.
b. In the Default Access Policy field, select printer access Policy.
c. Use the default values for other parameters in the Basic Information area.
Figure 7 Adding an access service

5. Click OK.
Configuring a mute terminal user configuration profile
1. Click the User tab.
2. From the navigation tree, select Access User > Mute Terminal User.
The Mute Terminal User Configuration Profile page opens, as shown in Figure 8.
Figure 8 Mute terminal user configuration page

3. Click Add.
The Add Mute Terminal User Configuration Profile page opens.
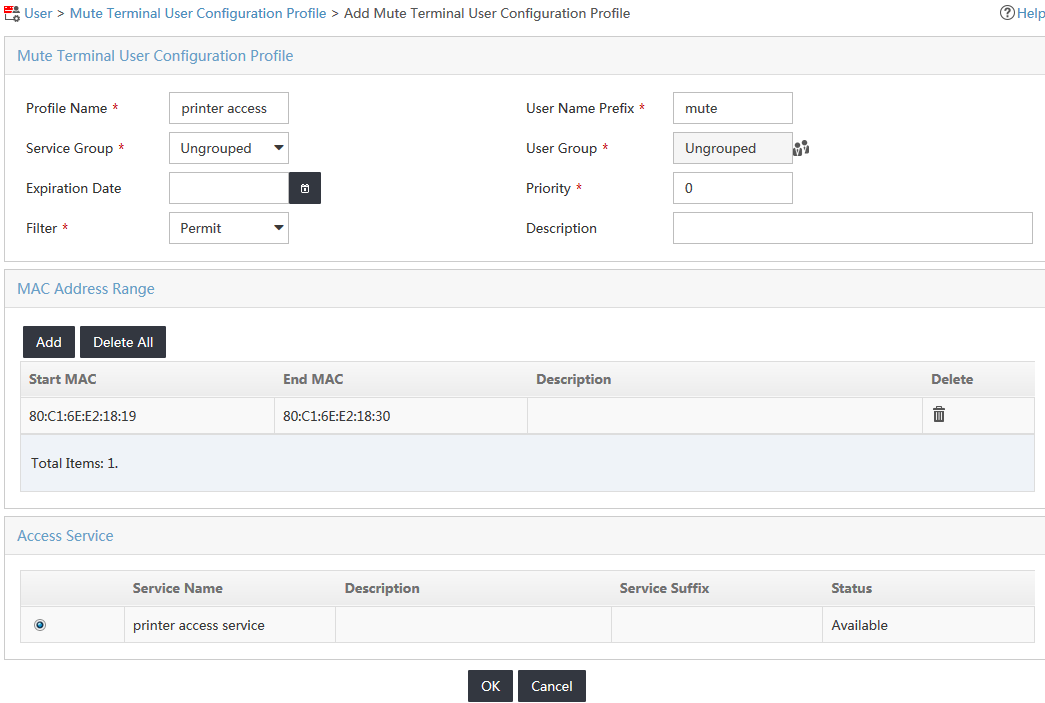
4. Configure mute terminal user configuration profile parameters, as shown in Figure 9:
a. In the Profile Name field, enter printer access.
b. In the User Name Prefix field, enter mute.
c. In the Service Group field, select Ungrouped.
d. In the User Group field, select Ungrouped.
e. In the MAC Address Range area, click Add to add the MAC address range.
f. In the Access Service area, select printer access service.
Figure 9 Adding a mute terminal user configuration profile
5. Click OK.
6. Click Validate to make the configuration take effect immediately.
Configuring the switch
1. Configure a RADIUS scheme:
# Create RADIUS scheme named 2000.
[Device] radius scheme 2000
# Specify the IP address of the UAM server as the primary authentication server and the primary accounting server. Set the port for authentication to 1812, and set the port for accounting to 1813.
[Device-radius-2000] primary authentication 192.168.40.239 1812
[Device-radius-2000] primary accounting 192.168.40.239 1813
# Set the shared key for secure communication with the server to expert.
[Device-radius-2000] key authentication expert
[Device-radius-2000] key accounting expert
# Remove the domain names from usernames to be sent to the RADIUS servers.
[Device-radius-2000] user-name-format without-domain
[Device-radius-2000] quit
2. Configure a domain:
# Create a domain named bbb.
# Configure the device to use the AAA methods in RADIUS scheme 2000 for all types of users in the domain.
[Device-isp-bbb] authentication default radius-scheme 2000
[Device-isp-bbb] authorization default radius-scheme 2000
[Device-isp-bbb] accounting default radius-scheme 2000
[Device-isp-bbb] quit
3. Configure MAC authentication:
# Enable MAC authentication on interface Ethernet 1/0/4.
[Device] interface ethernet 1/0/4
[Device-Ethernet1/0/4] mac-authentication
[Device-Ethernet1/0/4] quit
# Enable MAC authentication globally.
[Device] mac-authentication
# Specify domain bbb as the global MAC authentication domain.
[Device] mac-authentication domain bbb
Verifying the configuration
1. Connect the printer to the switch.
The switch automatically sends the MAC address of the printer as the username and password to UAM for authentication. UAM uses mute terminal authentication to permit the printer to access the network.
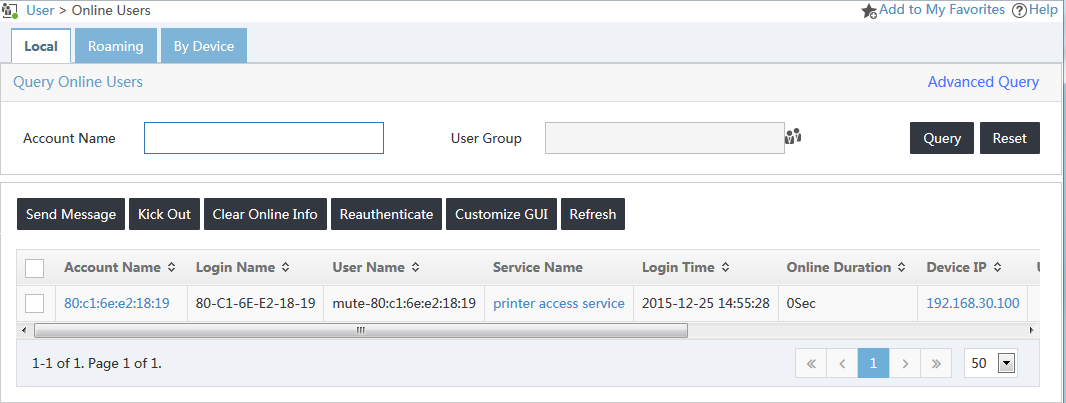
2. View the mute terminal authentication result in UAM.
Figure 10 shows that the mute terminal is online through the connected switch interface.
Related documentation
· HPE IMC User Access Manager Help
· HPE Intelligent Management Center v7.2 User Access Manager Administrator Guide
