- Released At: 09-12-2024
- Page Views:
- Downloads:
- Table of Contents
- Related Documents
-
|
|
|
H3C EIA LDAP-Based 802.1X Authentication |
|
Configuration Examples |
|
|
|
|
Software version: EIA (E6604)
Document version: 5W103-20240226
Copyright © 2024 New H3C Technologies Co., Ltd. All rights reserved.
No part of this manual may be reproduced or transmitted in any form or by any means without prior written consent of New H3C Technologies Co., Ltd.
Except for the trademarks of New H3C Technologies Co., Ltd., any trademarks that may be mentioned in this document are the property of their respective owners.
The information in this document is subject to change without notice.
Contents
Example: Configuring LDAP-based 802.1X authentication
Using the iNode client to initiate authentication
Installing the primary domain controller
Configuring certificate services
Introduction
In a network that already uses an LDAP server to manage users, deploy the EIA authentication system. When EIA receives an authentication request from a user, it forwards the username and password to the LDAP server for validation. EIA allows or denies the user's access to the network based on the validation result from the LDAP server and enforces various policies to control the user's access to the network. LDAP users are stored on both the LDAP server and EIA. The LDAP server is responsible for maintaining user information and EIA periodically synchronizes user information from the LDAP server.
Usage guidelines
Application scenarios
An LDAP server is already deployed in the network for centralized user management. The network requires the EIA authentication system to authenticate users in coordination with the LDAP server.
Prerequisites
The access device supports the 802.1X protocol, and a Windows AD-based LDAP server is available in the network. For information about installing Windows AD, see "Appendix."
Example: Configuring LDAP-based 802.1X authentication
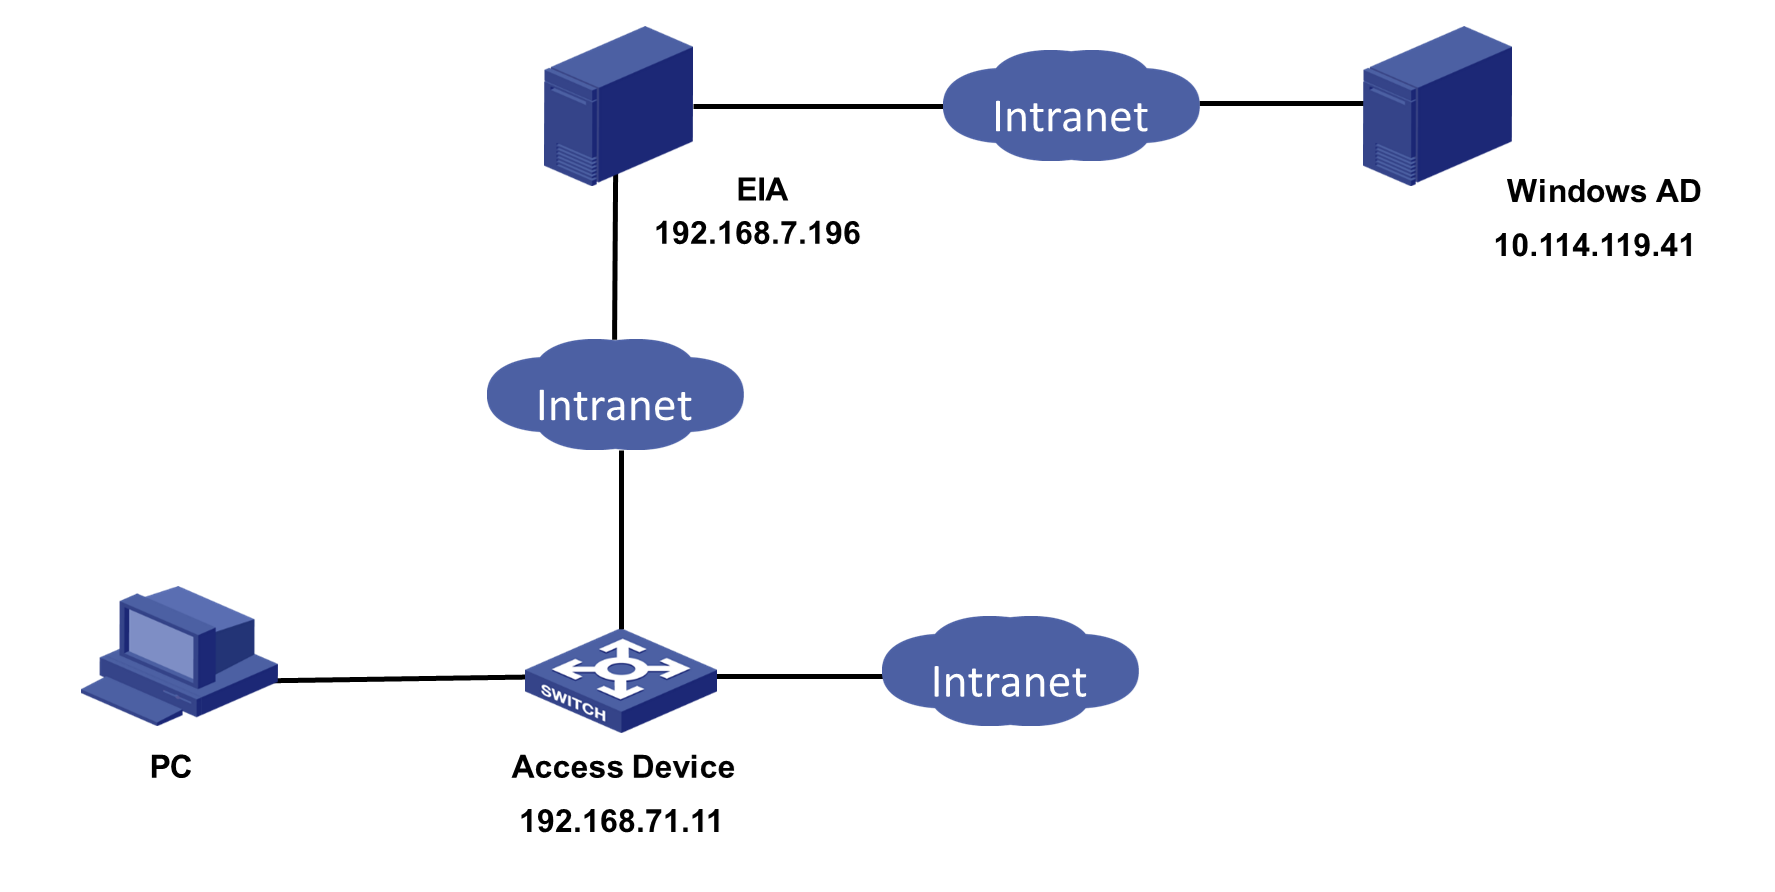
Network configuration
As shown in Figure 1, a company plans to deploy the EIA authentication system on the basis of the original LDAP authentication. When users access the network, they will send authentication requests to the EIA server. The EIA server will then forward the requests to the LDAP server for user identity authentication.
The PC is installed with the Windows operating system and the iNode PC client.
Software versions used
This configuration example was created and verified on the following versions:
· EIA (E6604) on the EIA server.
· H3C S5560-54C-PWR-EI Comware Software, Version 7.1.045, Release 1122P01 on the access device.
· iNode PC 7.3 (E0585) on the iNode client.
Restrictions and guidelines
In a cluster deployment, specify the northbound service virtual IP as the IP address of the EIA server. Do not specify the node IP address of the EIA server.
To identify the northbound service virtual IP of the EIA server in a cluster deployment:
1. Enter https://ip_address:8443/matrix/ui in the address bar of the browser to open the Matrix page. ip_address represents the northbound service virtual IP or node IP address.
2. On the top navigation bar, click DEPLOY. From the navigation pane, select Clusters.
3. Click the Cluster Parameters tab. The northbound service virtual IP is the IP address of the EIA server.
Procedures
Configuring the LDAP server
Figure 2 User data directory
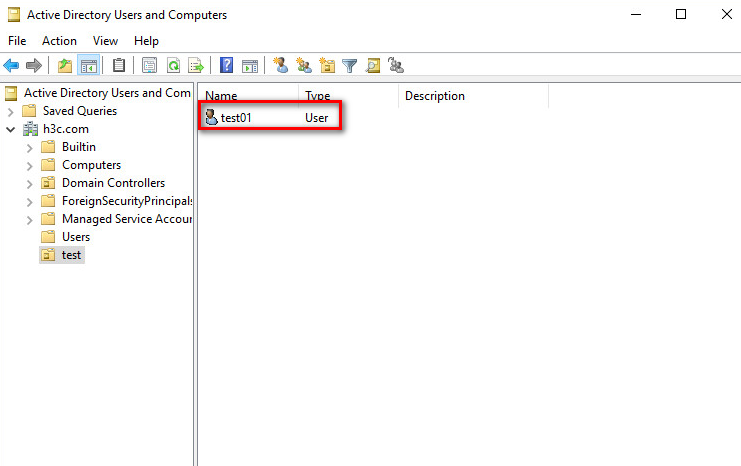
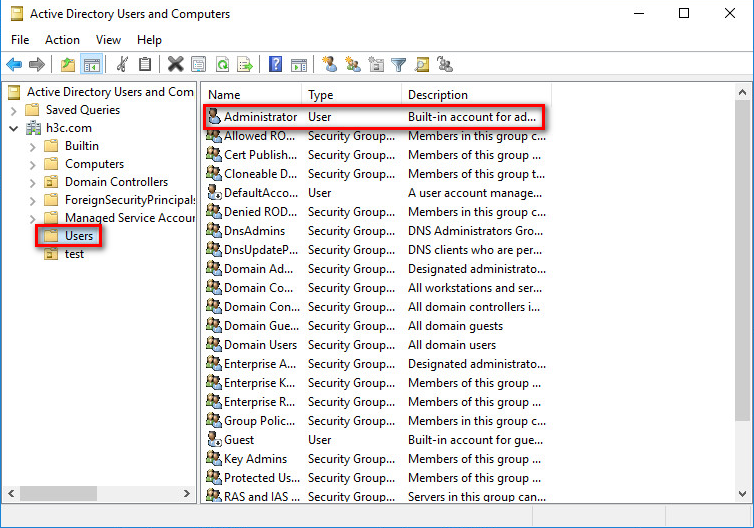
Figure 3 Administrator
3. Obtain the authentication listening port on the LDAP server. By default, the value is 389.
Configuring the EIA server
To configure the EIA server, perform the following tasks:
· Adding an LDAP synchronization policy
Adding an access device
You must add an access device to the EIA server before the EIA server can work with the access device for authentication.
To add an access device:
1. On the top navigation bar, click Automation.
2. From the left navigation pane, select User > Access Service, and then click the Access Device Management tab.
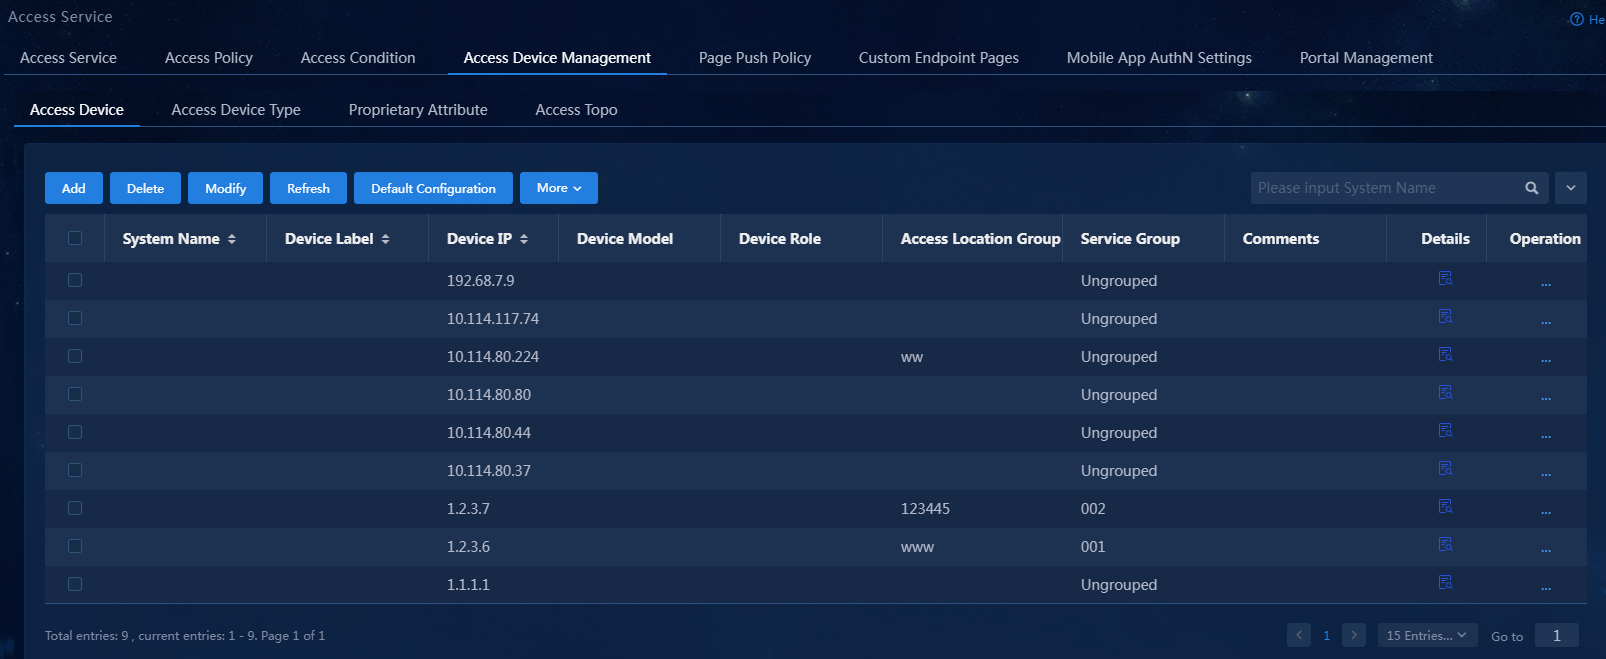
3. On the Access Device tab, click Add.
Figure 5 Adding an access device
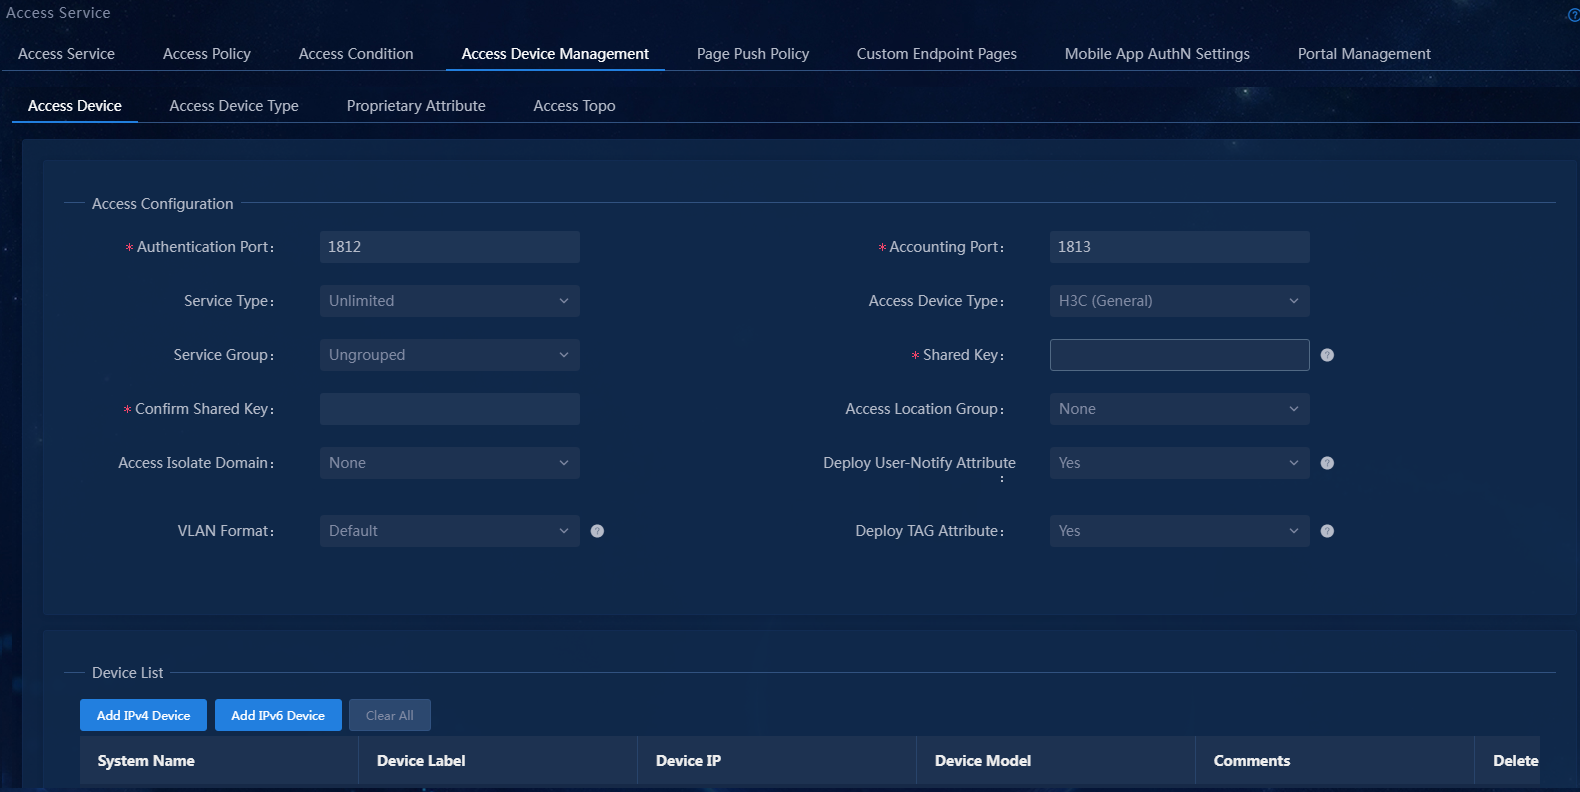
Configure the following access parameters:
¡ Authentication Port/Accounting Port: The configuration must be consistent with that configured on the access device. In this example, the default values 1812 and 1813 are used.
|
|
IMPORTANT: In the current software version, if you use EIA as the authentication server, you must also use EIA as the accounting server. When EIA is used as the authentication server, other servers cannot be used as the accounting server. |
¡ Access Device Type: Select the vendor and type of the access device from the drop-down list. Options include the standard, EIA predefined, and user-defined vendors and types. If the access device supports the standard RADIUS protocol, you can select STANDARD (Standard). Predefined vendors and types include H3C (General), 3COM (General), HUAWEI (General), CISCO (General), RG (General), HP (MSM), HP (Comware), MICROSOFT (General), JUNIPER (General), HP (ProCurve), and ARUBA (General). In this example, H3C (General) is selected.
¡ Service Type: Select a service type for the access device from the drop-down list. Only LAN access and device management services are supported. To use both the LAN access and device management services, select Unlimited.
¡ Shared Key/Confirm Shared Key: Specify a shared key and confirm it. When the access device and EIA cooperate to perform authentication, they use the shared key to validate each other. The shared key specified here must be the same as the shared key specified on the access device. You only need to enter the shared key once if you selected Plaintext for the Displays Key in field in system parameter settings on the Automation > User > Service Parameters > Access Parameters > System Settings page.
¡ Access Location Group: Select an access location group for the access device from the drop-down list. Options include the existing access location groups on EIA and None. Access location group is one of the access conditions used to distinguish endpoint users.
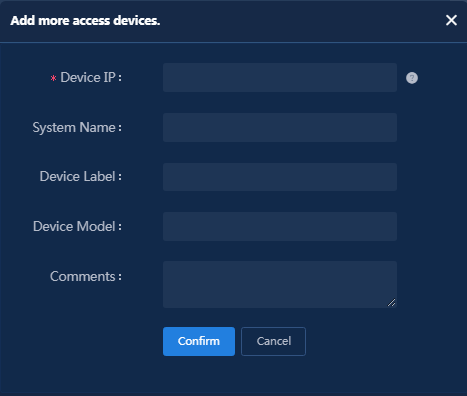
4. In the Device List area, click Add IPv4 Device. The IP address of the access device must meet the following requirements:
¡ If the RADIUS scheme contains a NAS IP specified by using the nas ip command for the access device, specify that IP address on the EIA server.
¡ If the RADIUS scheme does not contain a NAS IP, specify the IP address of the Layer 3 Ethernet interface or VLAN interface that connects the access device to the EIA server.
Enter access device information.
Figure 6 Manually adding an access device
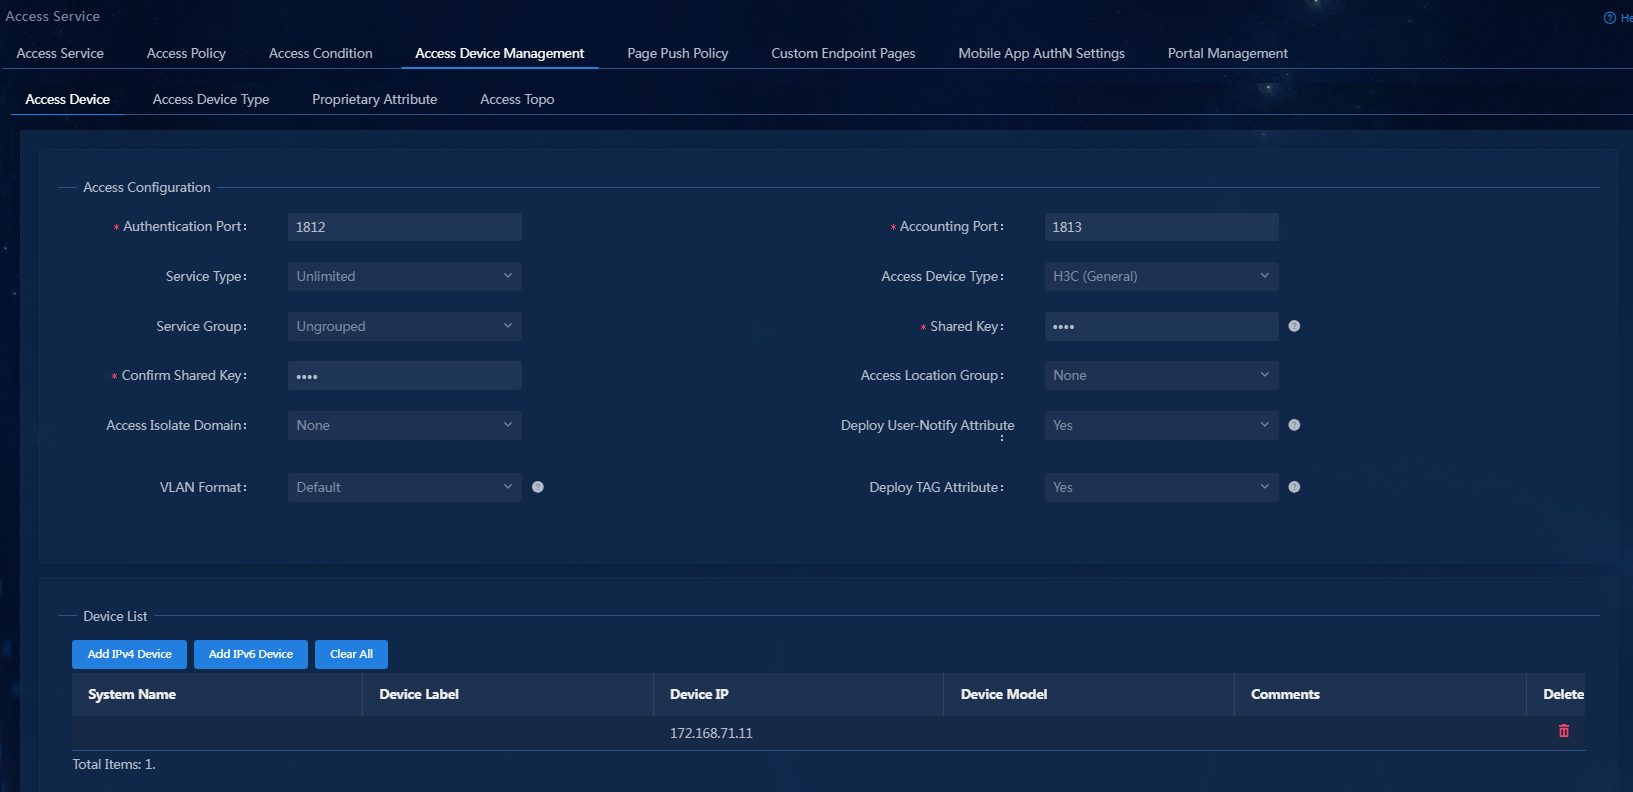
5. Click Confirm. The device information is displayed on the page.
Figure 7 Access device parameter configuration
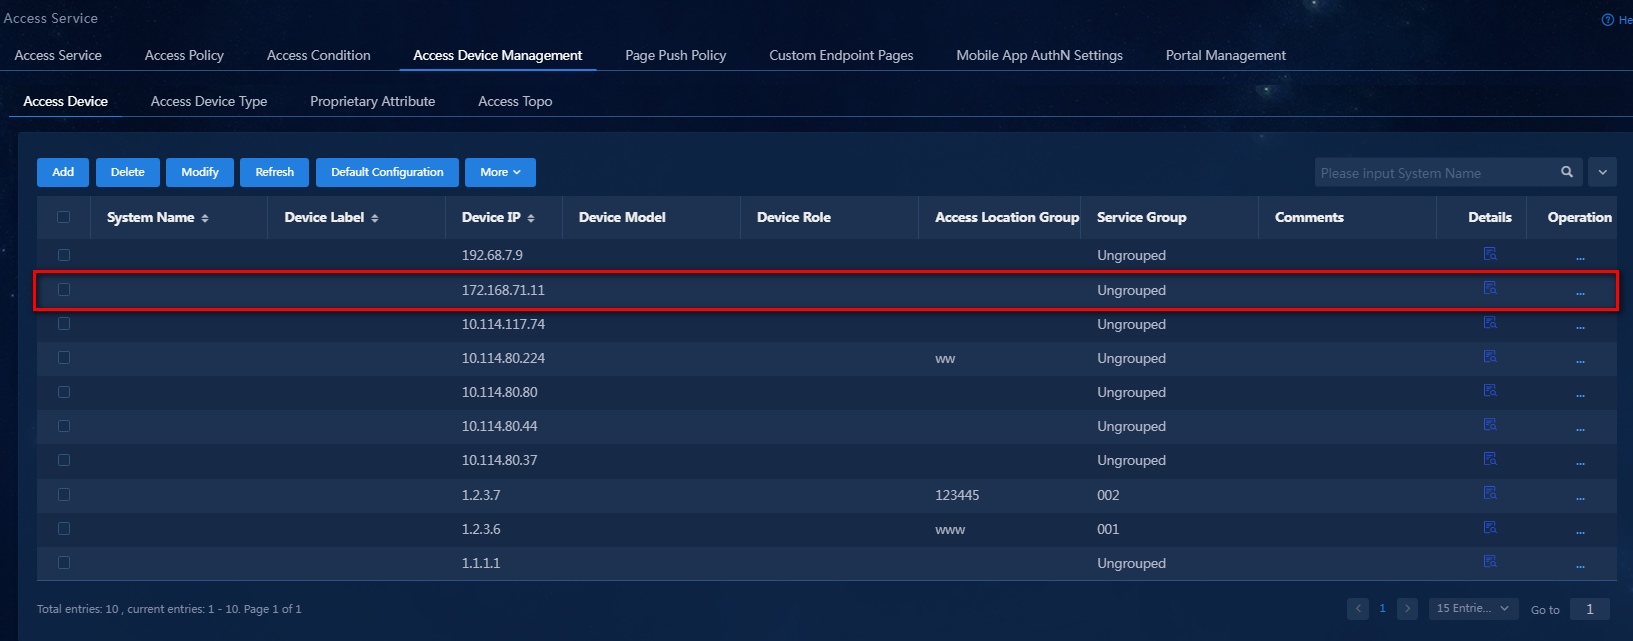
6. Click Confirm. You can view the newly added access device in the device list.
Figure 8 Viewing the newly added access device
Adding an access policy
Configure a simple access policy.
To add an access policy:
1. On the top navigation bar, click Automation.
2. From the left navigation pane, select User > Access Service, and then click the Access Policy tab.
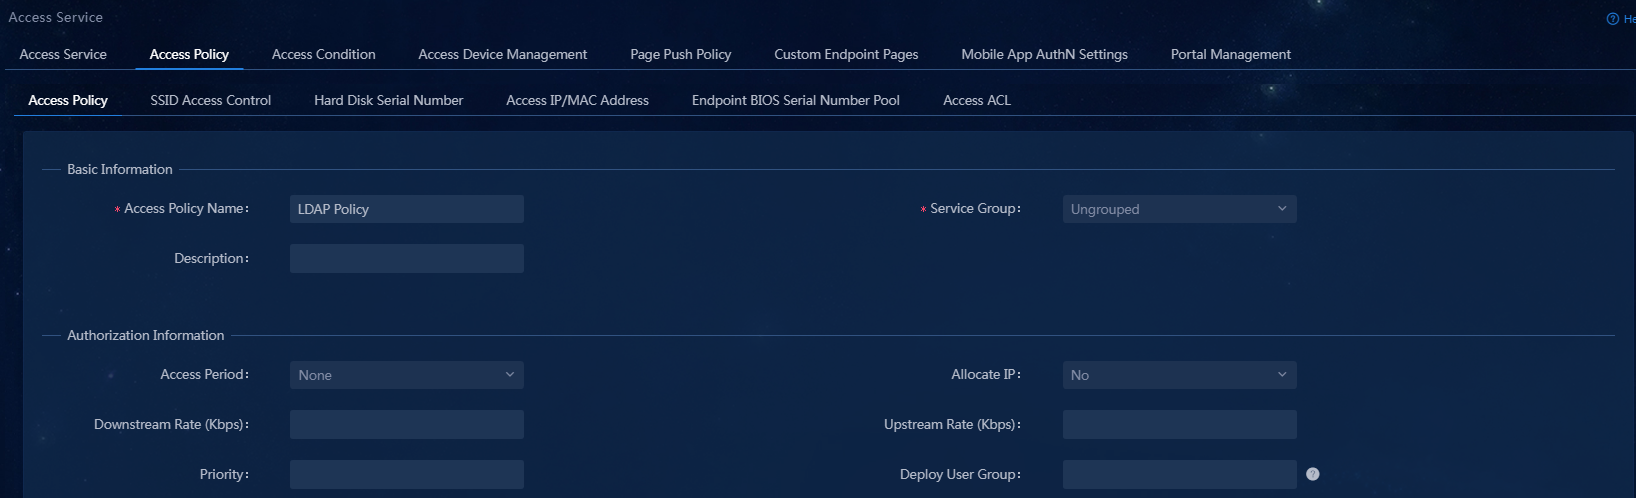
3. Click Add. Enter an access policy name, in this example, LDAP Policy, and use the default values for other parameters.
Figure 10 Adding an access policy
|
|
NOTE: To deploy authorization information, make sure the attributes are supported on the device. For the authentication binding information to take effect, you must configure the corresponding information in the RADIUS attributes on the device. In this example, no authorization attributes are assigned to the access device. You can use the default values. |
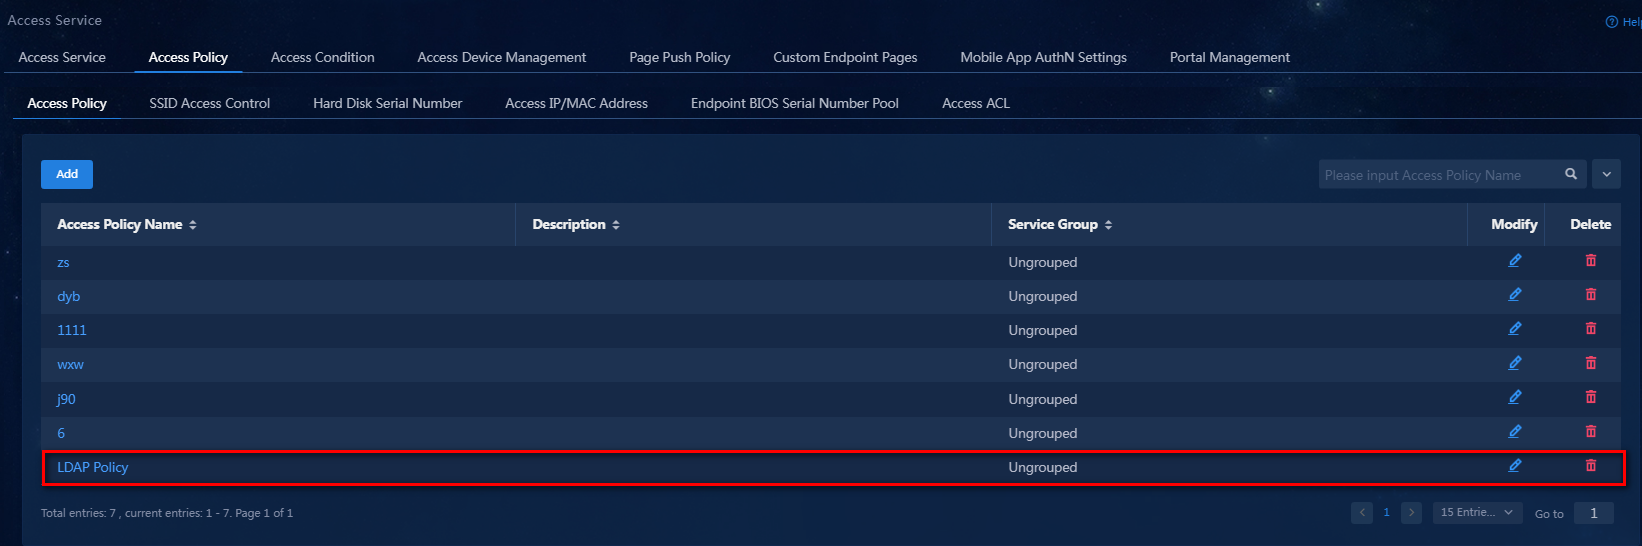
4. Click Confirm. The system returns to the Access Policy page. You can view the newly added access policy in the list.
Figure 11 Viewing the newly added access policy
Adding an access service
An access service is a collection of policies for user authentication and authorization.
To add an access service:
1. On the top navigation bar, click Automation.
2. From the left navigation pane, select User > Access Service.
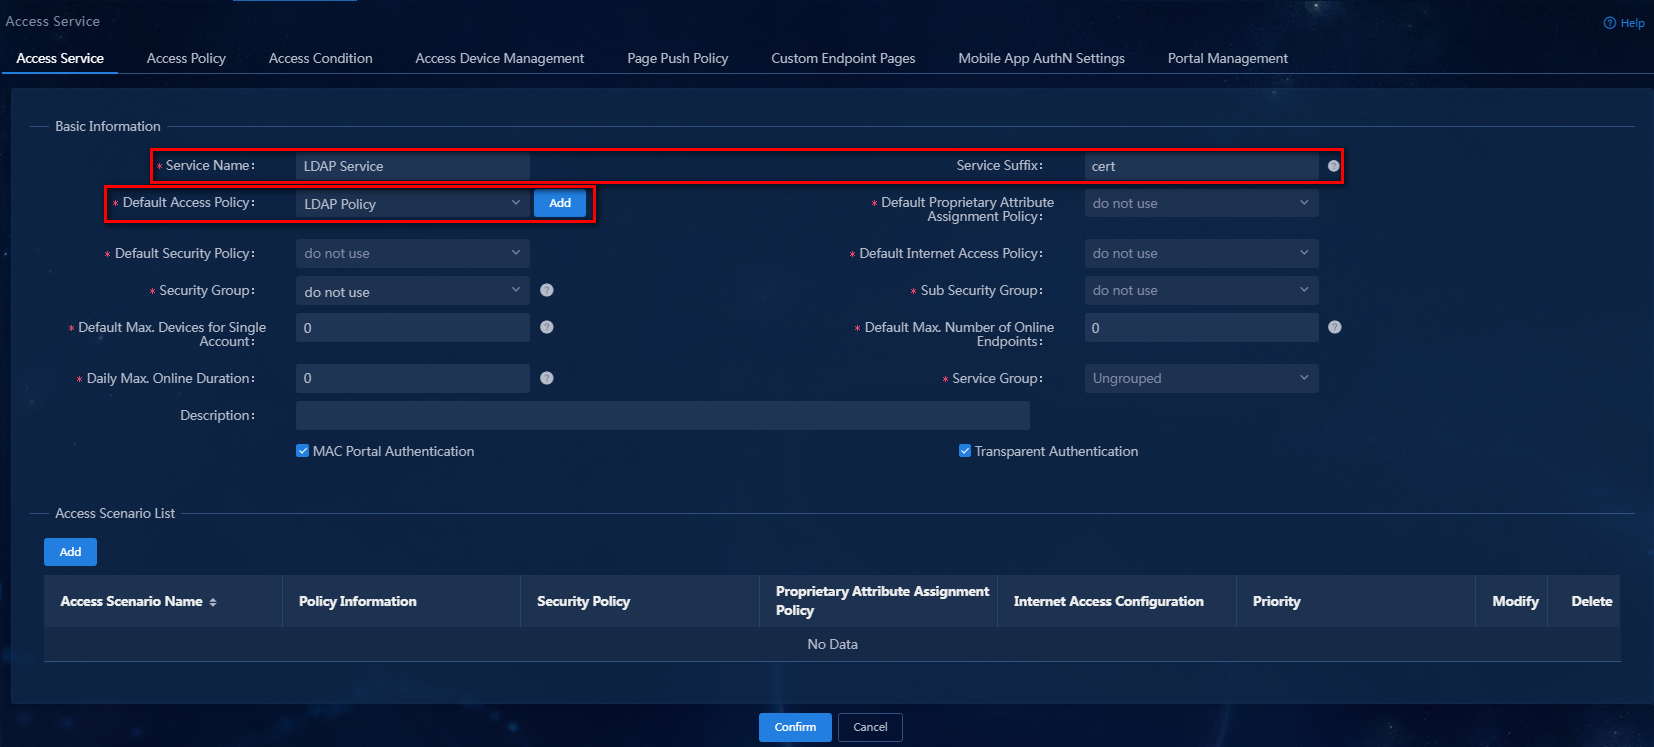
3. Click Add. On the page that opens, configure a service name and service suffix, select the default access policy, and use the default values for other parameters.
Configure the access service parameters as follows:
¡ Service Name: Enter a service name. Make sure the name is unique on the EIA server. In this example, the name is LDAP Service.
¡ Service Suffix: Enter a service suffix, which identifies the name of the domain to be used for user authentication. The service suffix, authentication username, authentication domain, and the device's RADIUS scheme command are closely related to each other. For more information about the matrix of these elements, see Table 1. In this example, the service suffix is cert.
|
Authentication username |
Authentication domain on the device |
RADIUS scheme command on the device |
Service suffix on EIA |
|
X@Y |
Y |
user-name-format with-domain |
Y |
|
user-name-format without-domain |
No suffix |
||
|
X |
[Default domain] Default domain on the device |
user-name-format with-domain |
[Default domain name] |
|
user-name-format without-domain |
No suffix |
¡ Default Access Policy: Specify an access policy as the default access policy. In this example, select LDAP Policy from the drop-down list.
¡ Default Proprietary Attribute Assignment Policy: Specify the default proprietary attribute assignment policy. If a user that uses the service does not match an access device group when the user accesses the network, the system deploys proprietary attributes to the access device according to the configuration of the default proprietary attribute assignment policy.
¡ Default Max. Devices for Single Account: Specify the number of endpoints to be bound to the same user account in access scenarios that are not included in the service. This parameter is available only when the EIP component is deployed.
EIA checks the maximum number of bound endpoint devices for a single account in the following order:
- Matched access scenario: Checks the number of bound endpoint devices against the maximum number limit specified in the scenario. If the number reaches the limit, EIA denies the user authentication.
- Scenarios in all services: Checks the number of bound endpoint devices in scenarios of all assigned services for the account. If the number reaches the value of Max. Device for Single Account specified in user endpoint settings on the Automation > User > Service Parameters > Access Parameters > System Settings page, EIA denies the user authentication.
¡ Default Max. Number of Online Endpoints: Specify the maximum number of online endpoints using the same user account in access scenarios that are not included in the service.
¡ Daily Max. Online Duration: Total duration in a day that an account can access the network by using the service. When the limit is reached, the account is forced offline and is unable to access the network in the day. The value for this parameter can only be an integer in the range of 0 to 1440, in minutes. A value of 0 means not limited.
¡ Description: Enter a description for the access service.
Figure 13 Adding an access service
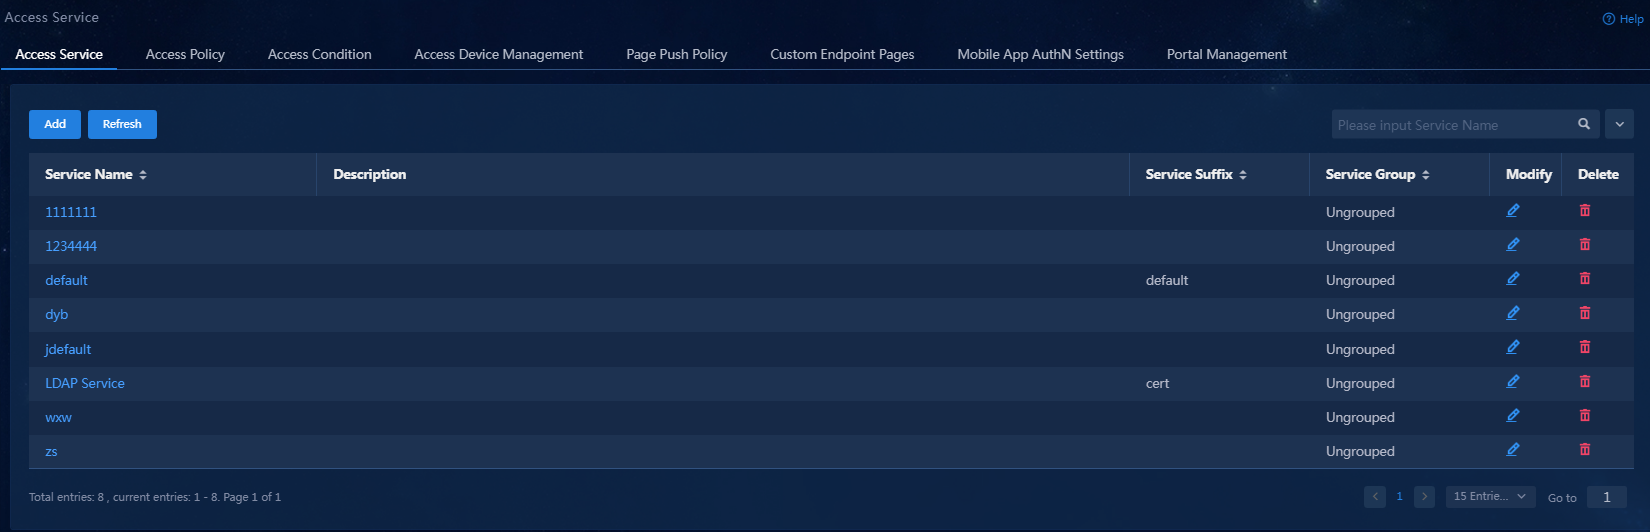
4. Click Confirm. The system returns to the Access Service page. You can view the newly added access service in the list.
Figure 14 Viewing the newly added access service
Adding an LDAP server
Configure an LDAP server on EIA to incorporate the Windows AD LDAP server into EIA. The incorporation enables EIA to retrieve various data from the LDAP server.
To add an LDAP server:
1. On the top navigation bar, click Automation.
2. From the left navigation pane, select User > Service Parameters > LDAP Service.
3. Click Add.
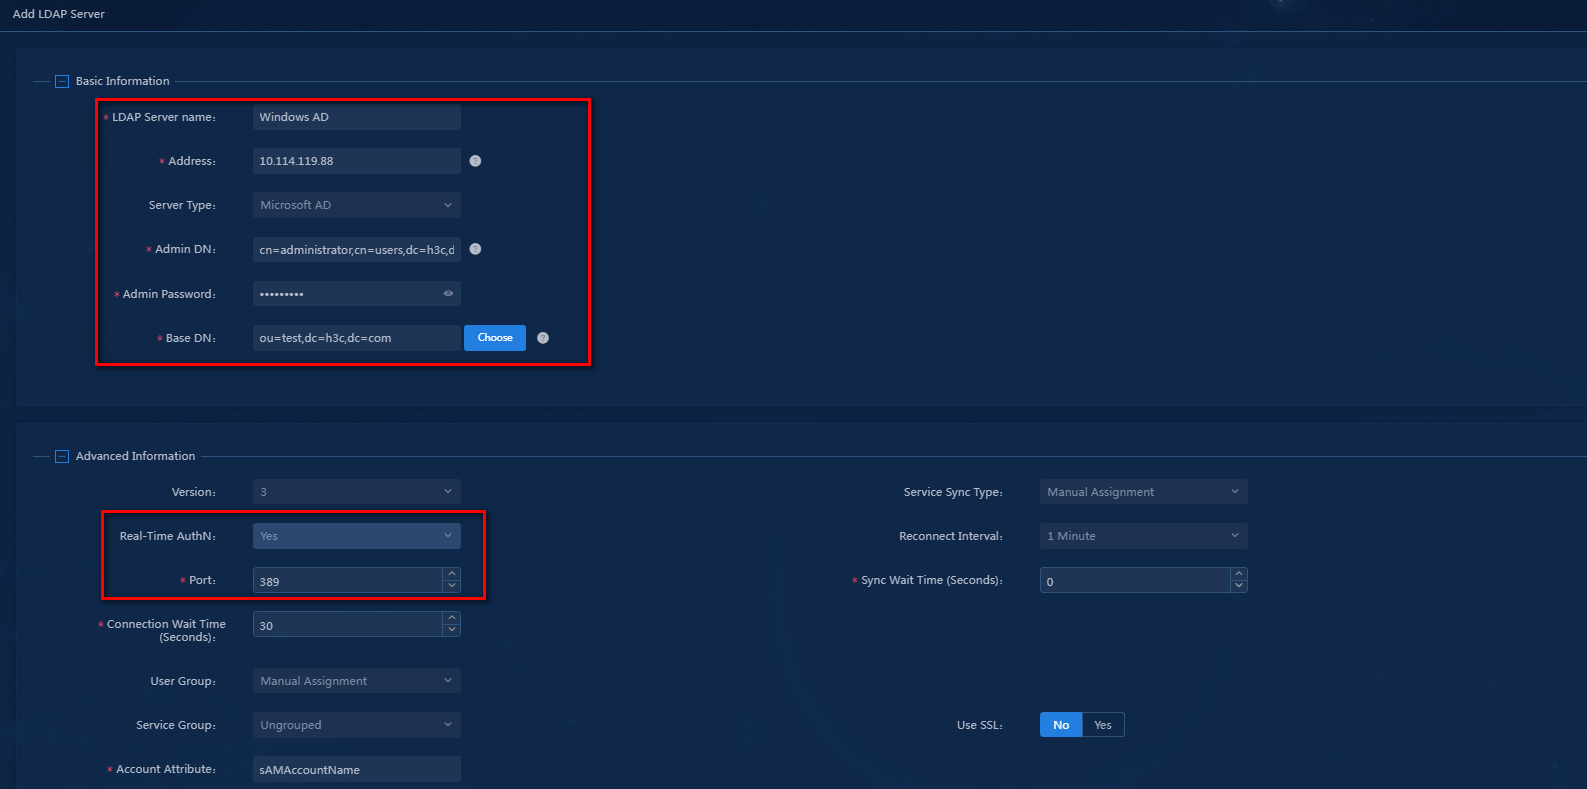
4. Configure the following basic parameters:
¡ LDAP Server Name: Enter a server name. Make sure the name is unique on the EIA server. In this example, the server name is Windows AD.
¡ Address: Enter the IP address of the LDAP server. The combination of this parameter and the base DN must be unique. In this example, the IP address is 10.114.119.41.
¡ Server Type: The LDAP server is a Windows AD server. As a best practice, select Microsoft AD, which is the default value.
¡ Admin DN: Enter the administrator of the LDAP server. You can create an administrator user as needed. The value for this parameter must be an absolute path that can locate the administrator. In the example, enter administrator DN cn=administrator,cn=users,dc=h3c,dc=com.
¡ Admin Password: Enter the administrator password of the LDAP server. In this example, enter the password of the administrator in "Configuring the LDAP server." The system uses the administrator DN and password to establish a connection with the LDAP server.
¡ Base DN: Enter the directory path where user data is stored on the LDAP server. You must enter the absolute path on the LDAP server. In this example, the base DN is ou=test,dc=h3c,dc=com.
5. Click the ![]() icon in front of Advanced Information to configure advanced settings.
icon in front of Advanced Information to configure advanced settings.
¡ Real-time AuthN: When the server type is Microsoft AD, you can set the value only to Yes.
¡ Port: Enter the LDAP server listening port. In this example, use the default value 389.
¡ Use the default values for other parameters.
6. Configure standby server information. In this example, use the default setting.
7. Preview the parameter settings, as shown in Figure 16.
Figure 16 LDAP server settings
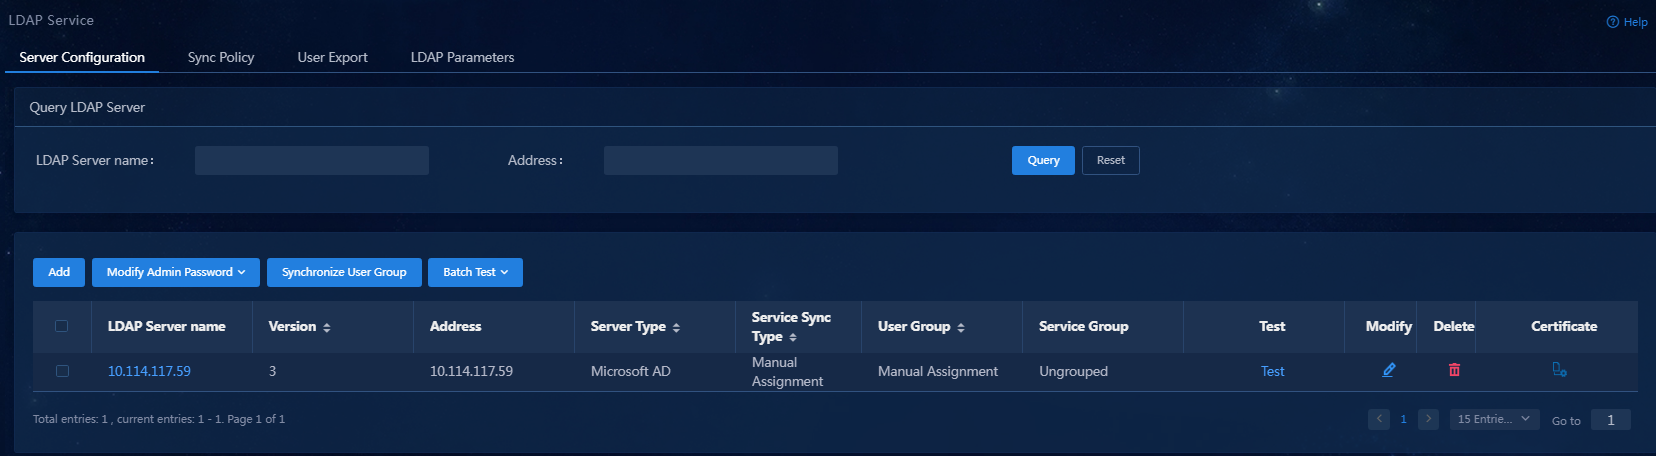
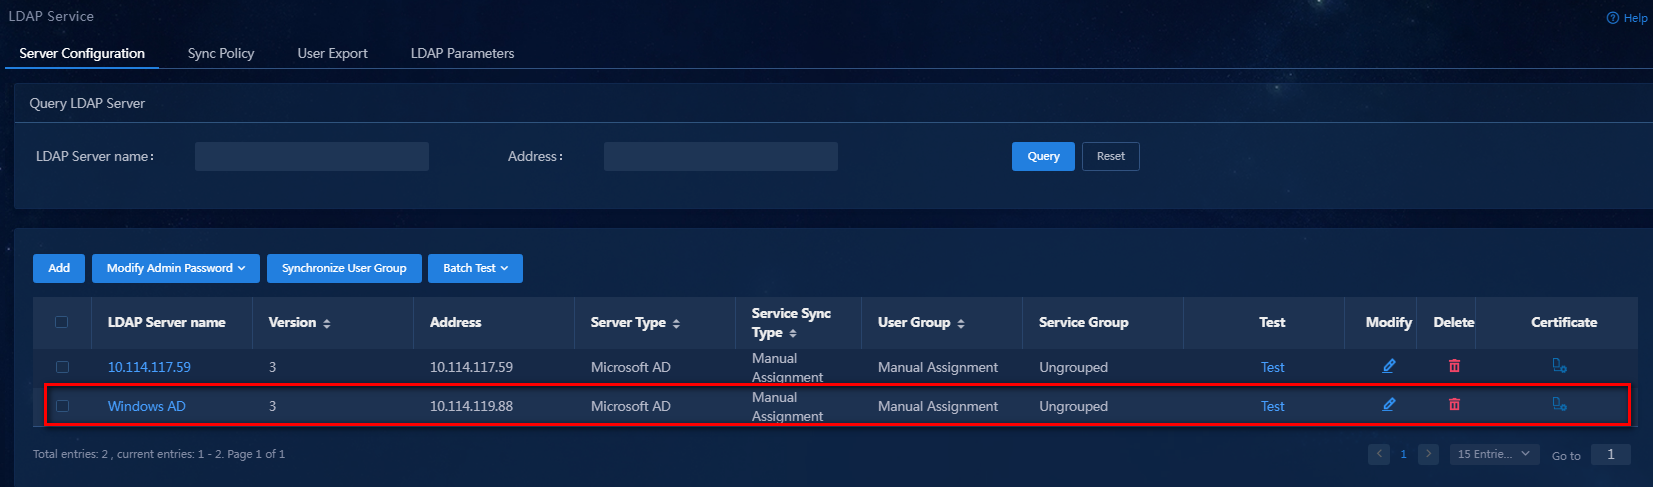
8. Click Confirm. The system returns to the LDAP server list. You can view the newly added server configuration in the list.
Figure 17 Viewing the newly added server configuration
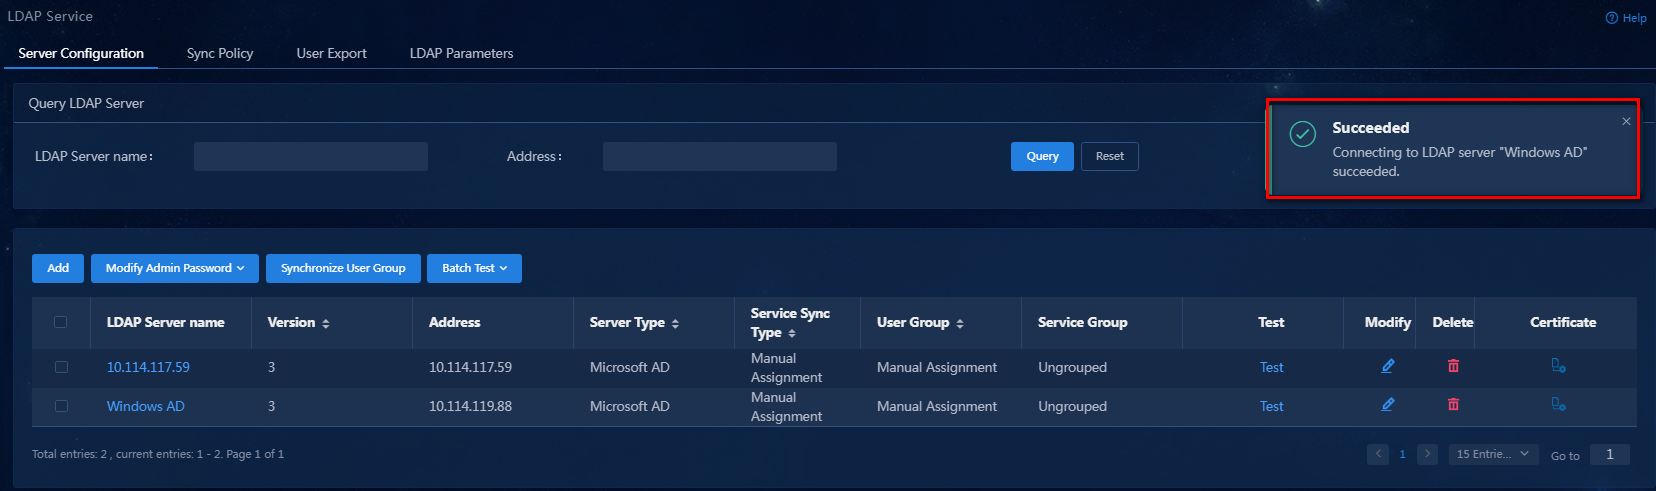
9. Click the Test link for the LDAP server to test the connectivity between EIA and the LDAP server. The test result will be displayed at the top of the page.
Adding an LDAP synchronization policy
Configure a policy for data synchronization between EIA and Windows AD. This policy will allow EIA to manually or periodically synchronize critical data, such as user data, from the LDAP server in order to complete the authentication of access users in cooperation with the LDAP server.
To add an LDAP synchronization policy:
1. On the top navigation bar, click Automation.
2. From the left navigation pane, select User > Service Parameters > LDAP Service, and then click the Sync Policy tab.
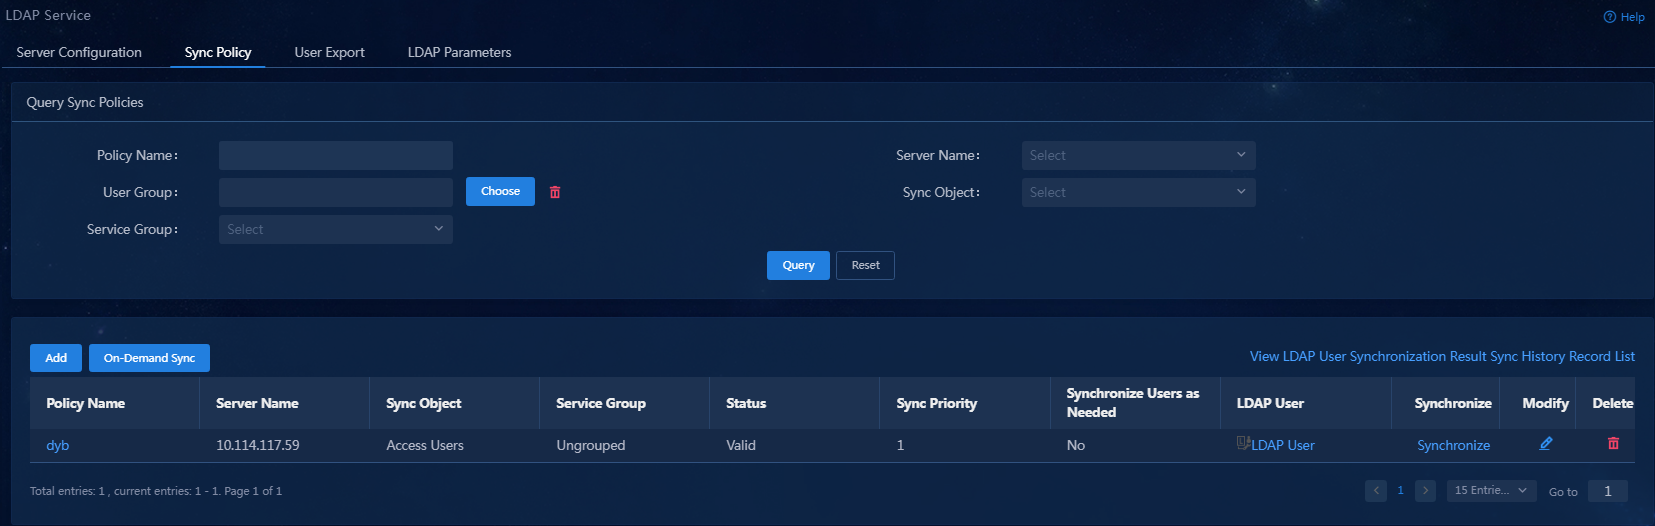
Figure 19 Synchronization policy list
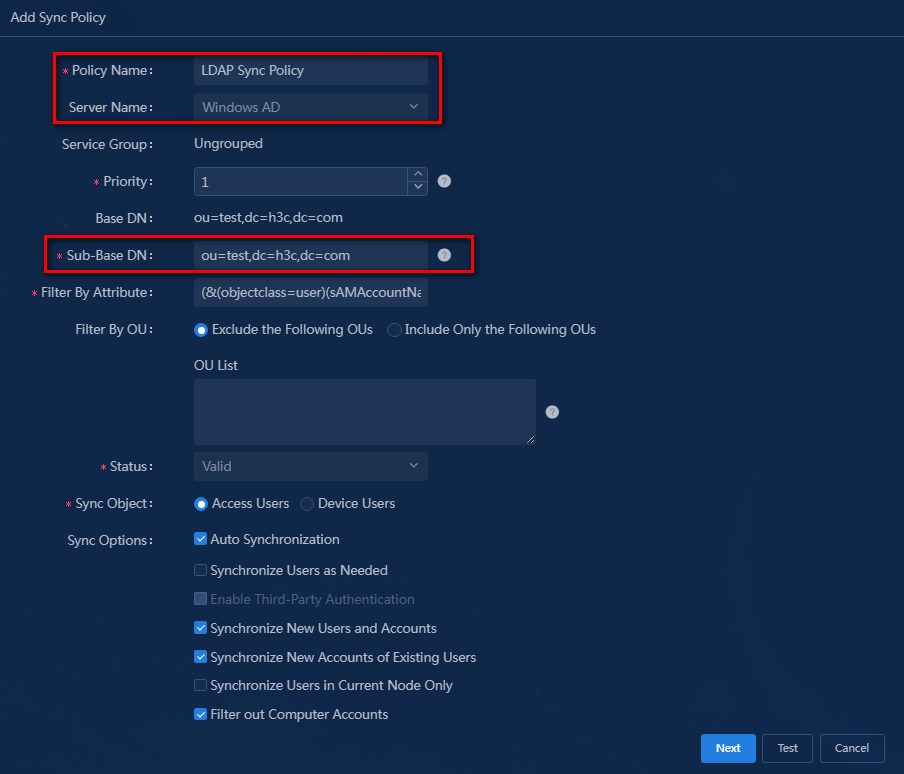
3. Click Add.
Configure basic information for the synchronization policy:
¡ Policy Name: Enter a name for the LDAP synchronization policy, which must be unique on EIA. In this example, the name is LDAP Sync Policy.
¡ Server Name: Select Windows AD from the drop-down list.
¡ Sub-Base DN: Enter the subdirectory path where user data is stored on the LDAP server. The synchronization policy will synchronize the user data in this subdirectory. You must specify the absolute path of the sub-base DN on the LDAP server and the sub-base DN can be the same as the base DN or be a subset of the base DN. In this example, the sub-base DN is ou=test,dc=h3c,dc=com.
¡ Sync Object: In this example, select Access Users.
- To add an LDAP synchronization policy that belongs to access users, you must select Access Users.
- To add an LDAP synchronization policy that belongs to device management users, you must select Device Users.
¡ Sync Options: Select synchronization options. In this example, select Auto Synchronization, Synchronize New Users and Accounts, Synchronize New Accounts of Existing Users, and Filter out Computer Accounts.
- Auto Synchronization: Perform synchronization daily according to the time configured in the LDAP Sync/Backup Task field on the LDAP Parameters page.
- On-Demand Sync: When a user that exists on the LDAP server but not in the EIA system performs access authentication, EIA automatically forwards the authentication request to the LDAP server for validation. If the user passes authentication, EIA will automatically synchronize this user from the LDAP server to the local system. However, if the number of user licenses in use has reached the upper limit, the system cannot synchronize this user, and it will force the user to go offline.
The LDAP on-demand synchronization feature can only synchronize users authenticated through PAP and EAP-MD5, and cannot synchronize users authenticated through CHAP or any certificate authentication. For PEAP or MSCHAPv2 authentication to support the LDAP on-demand synchronization feature, you must specify a default access policy for the service applied to LDAP on-demand synchronization users rather than selecting Access Forbidden. In addition, you must specify the PEAP or MSCHAPv2 authentication method for the default access policy.
When an on-demand synchronization user initiates EAP authentication for the first time (at this point, EIA has not obtained the user's password), EIA examines whether the LDAP temporary user meets the above requirements. If yes, the user will be synchronized as a formal user, regardless of whether it can pass the subsequent authentication process.
- Enable Third-Party Authentication: Perform third-party authentication for LDAP users synchronized by the synchronization policy. To perform LDAP authentication for the users, do not select this option.
- Synchronize New Users and Accounts: If a user exists on the LDAP server but not in the system, the system will add that user when it synchronizes users from the LDAP server and add an access account for that user in the EIA component.
- Synchronize New Accounts of Existing Users: If a user exists on both the LDAP server and the system, but does not have an access account in the EIA component, the system will add an access account for that user in the EIA component when it synchronizes users.
- Synchronize Users in Current Node Only: Synchronize only users under the sub-base DN and do not synchronize users under the subordinate OUs of the sub-base DN. To synchronize all users under the sub-base DN and its subordinate OUs, do not select this option.
- Filter out Computer Accounts: Do not synchronize computer accounts as access users. To synchronize computer accounts as access users, do not select this option.
¡ Use the default values for other parameters.
The parameter settings are as shown in Figure 20.
Figure 20 LDAP synchronization policy
4. Click Next.
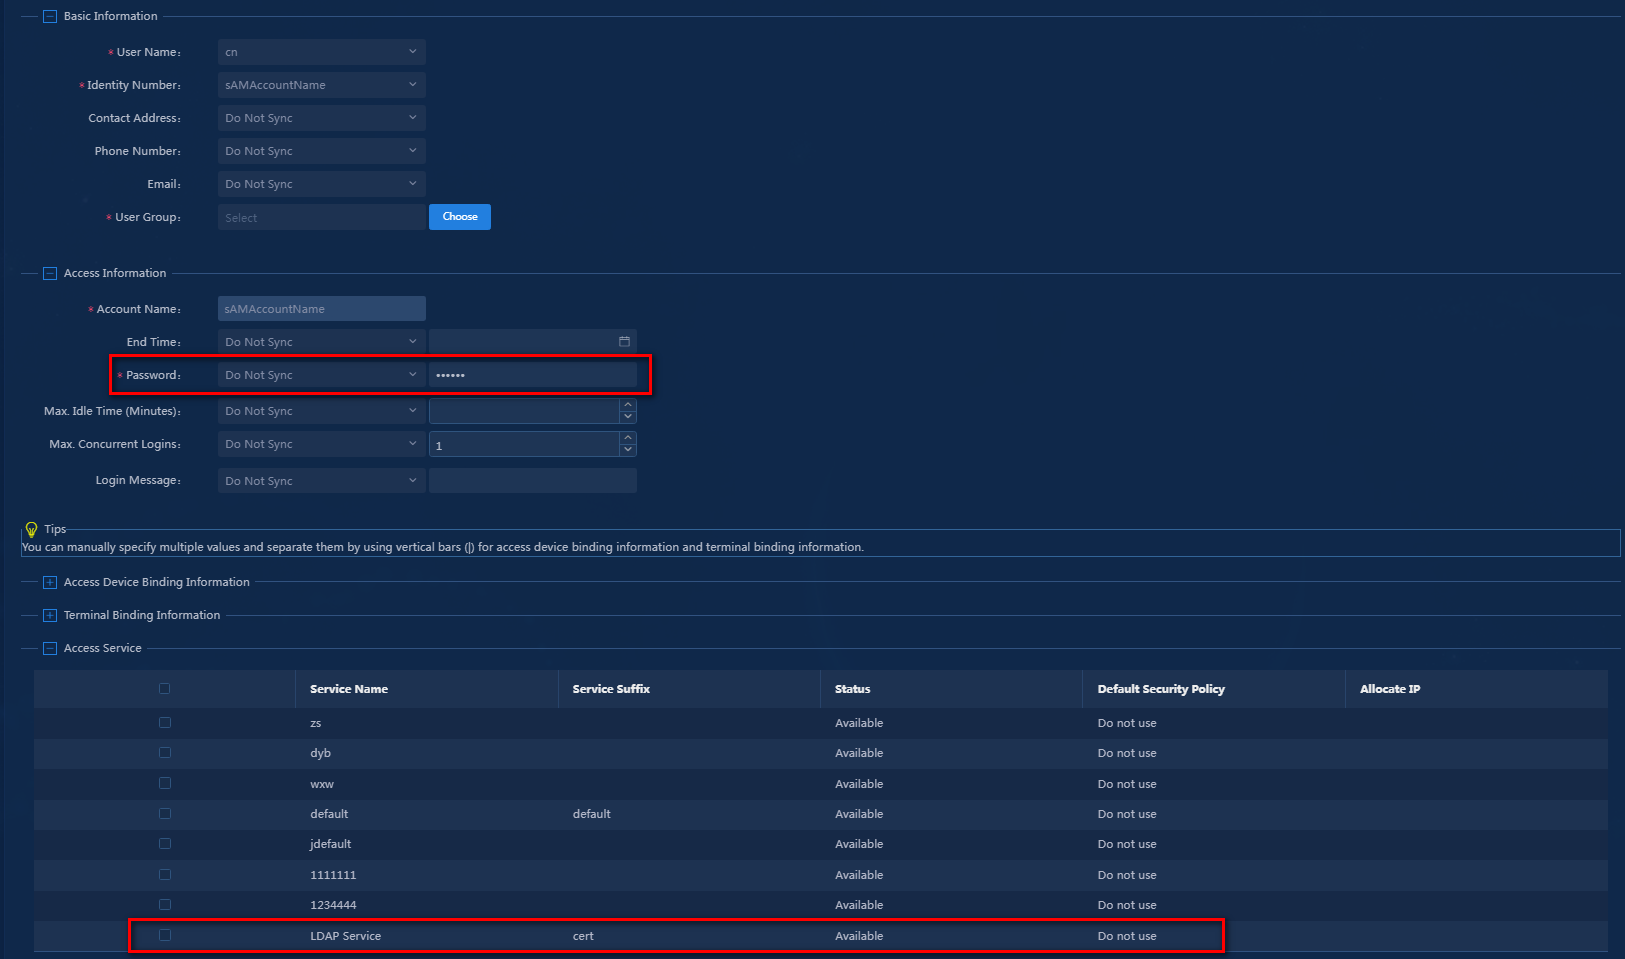
5. Map the parameters of access users to the corresponding attributes of the LDAP service.
¡ Configure the following access information:
- Password: In this example, select Do Not Sync, and manually enter password iMC123. When an LDAP user is unbound from the LDAP server, it can use the password as an access user to pass authentication on the EIA server.
- Use the default values for other parameters.
¡ Select the service named LDAP Service, which is created in "Adding an access service."
The parameter settings are as shown in Figure 21.
Figure 21 Synchronization policy parameters
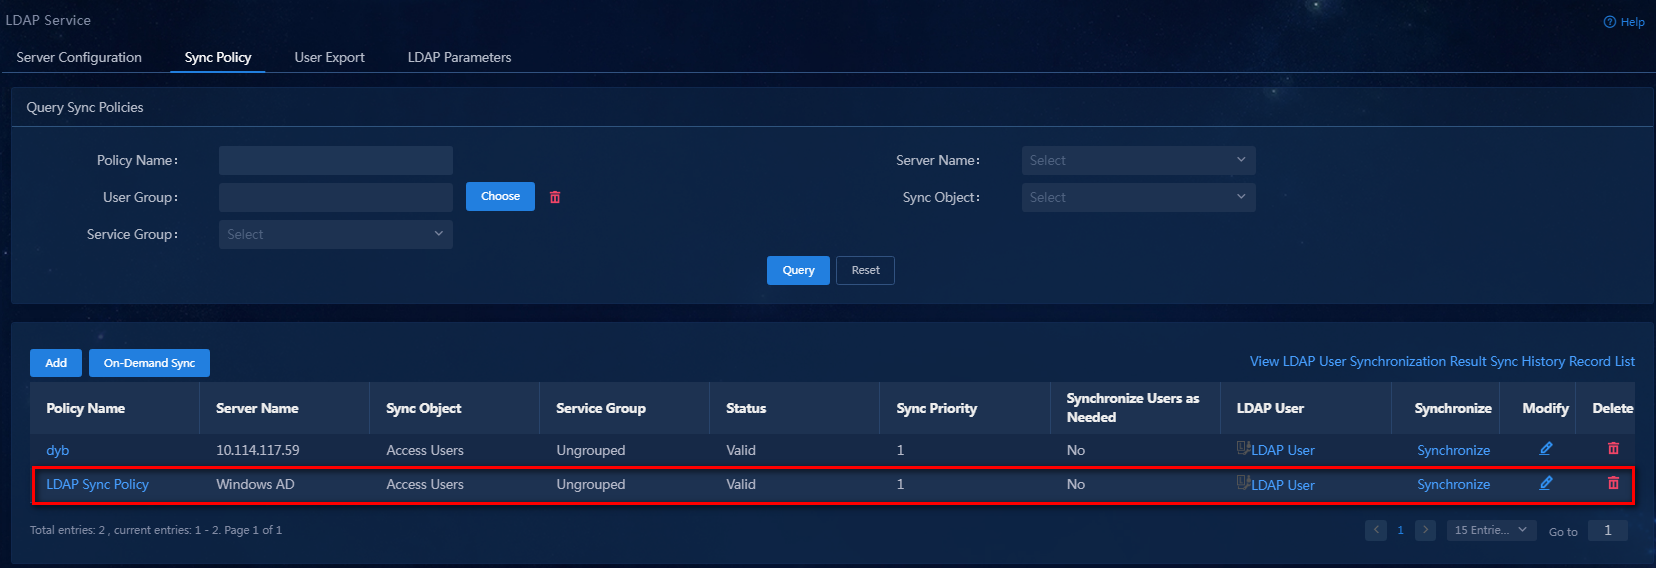
6. Click Confirm. The newly added synchronization policy is displayed in the synchronize policy list.
Figure 22 Viewing the newly added synchronization policy
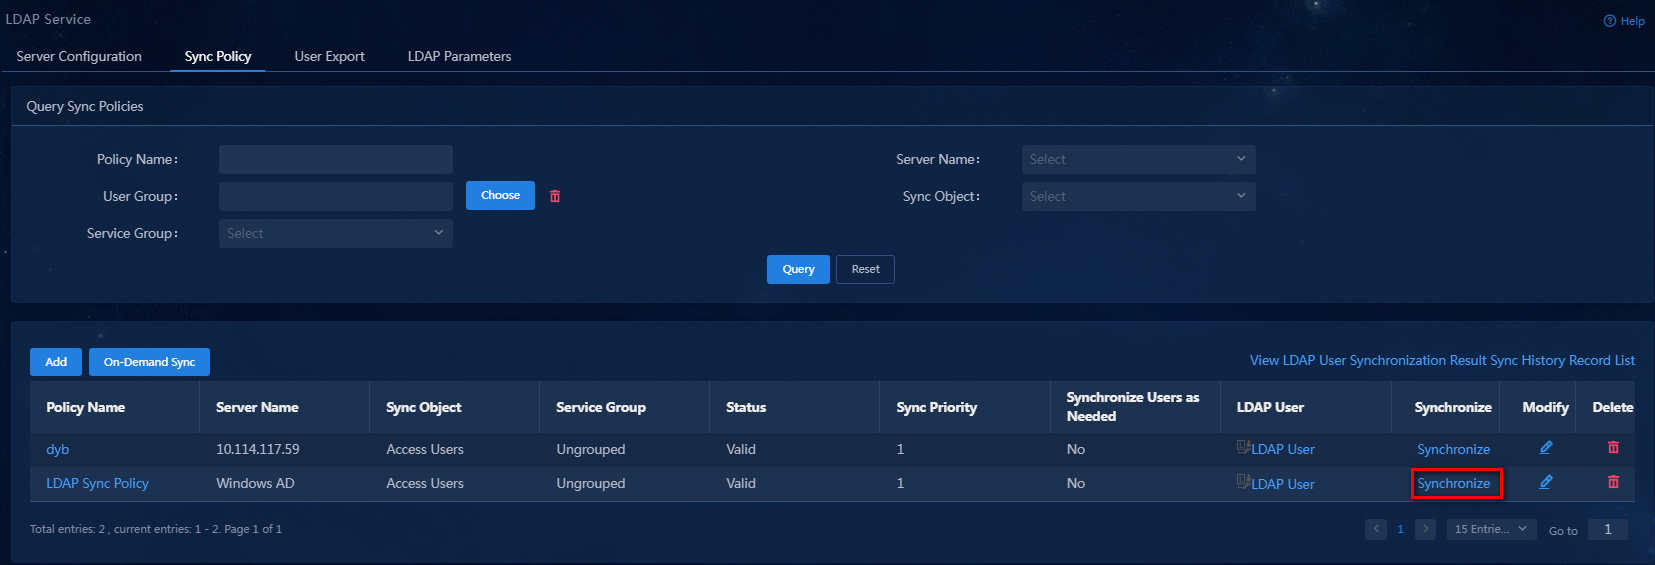
Synchronizing user data
Manually synchronize users from Windows AD to EIA. These users will be saved as access users on EIA.
1. On the top navigation bar, click Automation.
2. From the left navigation pane, select User > Service Parameters > LDAP Service, and then click the Sync Policy tab.
3. Click the Synchronize link for the synchronization policy to synchronize LDAP data.
Figure 23 Synchronizing user data
4. Access the synchronization result dialog box and view the synchronization result.
Figure 24 Synchronizing LDAP users

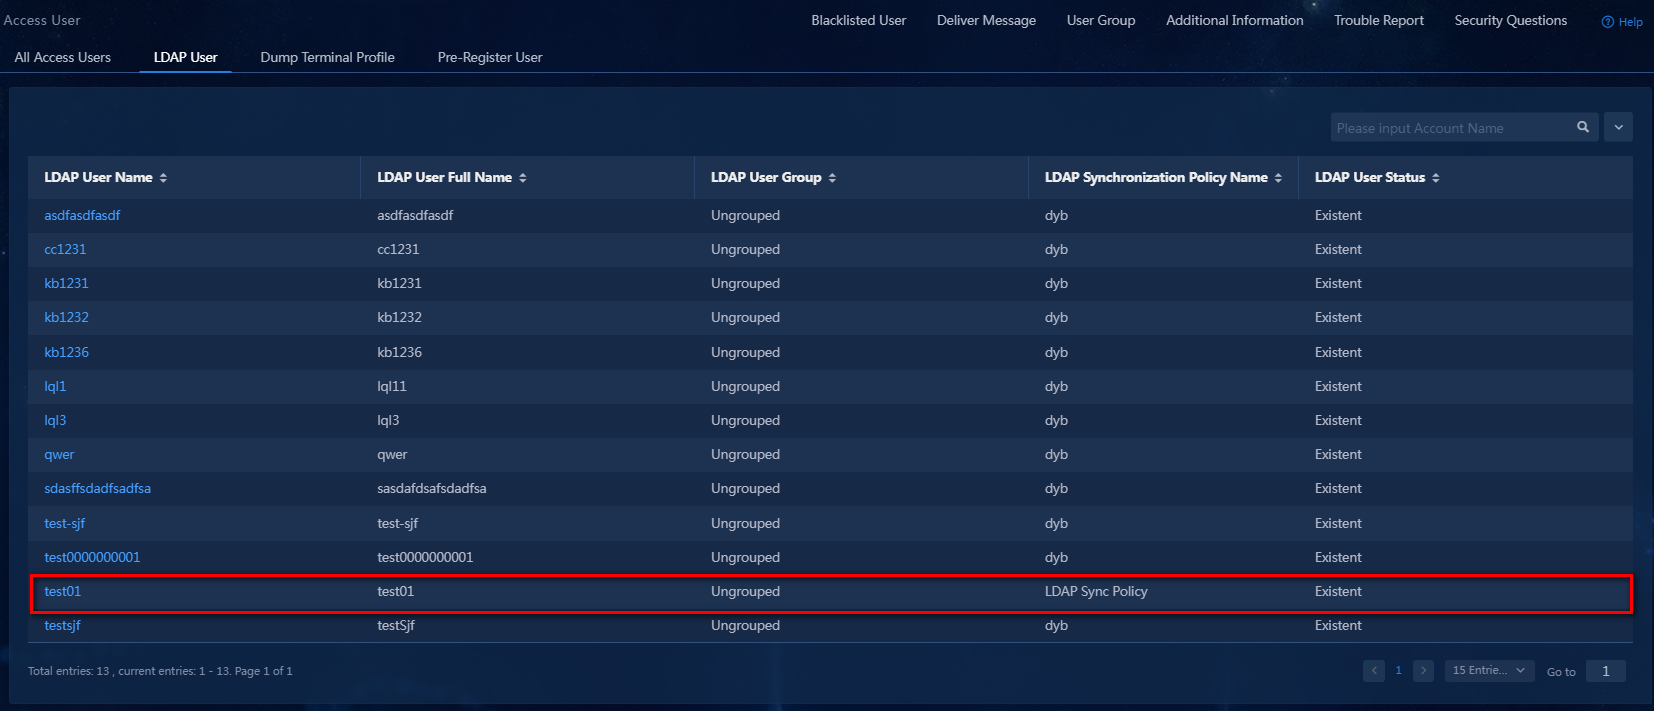
5. From the left navigation pane, select User > Access User, and then click the LDAP User tab. On the page that opens, view the synchronized access users, as shown in Figure 25.
Figure 25 Synchronized LDAP users
Configuring the access device
The access device is used to control user access. Authenticated users can access the network, while unauthenticated users cannot access the network.
In this example, Telnet to the access device from the Windows CLI and configure it.
Creating a RADIUS scheme
<H3C>system-view
System View: return to User View with Ctrl+Z.
[H3C]radius scheme zzpermit
New RADIUS scheme
[H3C-radius-zzpermit]primary authentication 192.168.7.196 1812
[H3C-radius-zzpermit]primary accounting 192.168.7.196 1813
// Specify EIA as both the authentication and accounting servers. Make sure the authentication and accounting ports are the same as those specified for the access device in "Adding an access device."
[H3C-radius-zzpermit]key authentication simple fine
[H3C-radius-zzpermit]key accounting simple fine
// Make sure the authentication and accounting shared keys are the same as the shared key specified for the access device in "Adding an access device."
[H3C-radius-zzpermit]user-name-format with-domain
// Include the domain name in the usernames sent to the server. For information about the configuration matching relationships between the EIA server and the device, see Table 1 in "Adding an access service."
[H3C-radius-zzpermit]quit
Creating an ISP domain
[H3C]domain cert
// Make sure the name of the ISP domain is the same as the service suffix specified on the EIA server.
[H3C-isp-cert]authentication lan-access radius-scheme zzpermit
[H3C-isp-cert]authorization lan-access radius-scheme zzpermit
[H3C-isp-cert]accounting lan-access radius-scheme zzpermit
// Apply RADIUS scheme zzpermit for LAN user authentication, authorization, and accounting in the ISP domain.
[H3C-isp-cert]quit
Enabling 802.1X authentication
[H3C]dot1x
[H3C]interface GigabitEthernet 1/0/39
[H3C-GigabitEthernet 1/0/39]dot1x
[H3C-GigabitEthernet 1/0/39]quit
// For 802.1X authentication to take effect, you must enable it both globally and on the interface that users access.
[H3C]dot1x authentication-method pap
// Supported 802.1X authentication methods include PAP, CHAP, and EAP. To perform LDAP authentication, you can use PAP and EAP. In the current software version, LDAP authentication does not support CHAP.
Using the iNode client to initiate authentication
Installing the iNode client
EIA supports all versions of iNode. You can select an iNode version as needed.
Using the iNode client to initiate 802.1X authentication
In the authentication window, click 802.1X connection, enter the correct username and password, and then click Connect. Verify that the username and password can pass authentication.
Figure 26 Authentication window
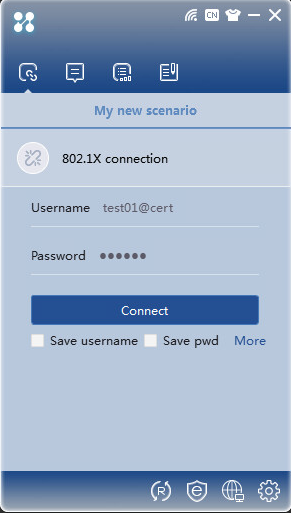
Figure 27 Authentication success

Viewing online users on the EIA server
On the top navigation bar, click Monitor. From the left navigation pane, select Monitor List > Online User. On the page that opens, view local online users.
Appendix
Installing the primary domain controller
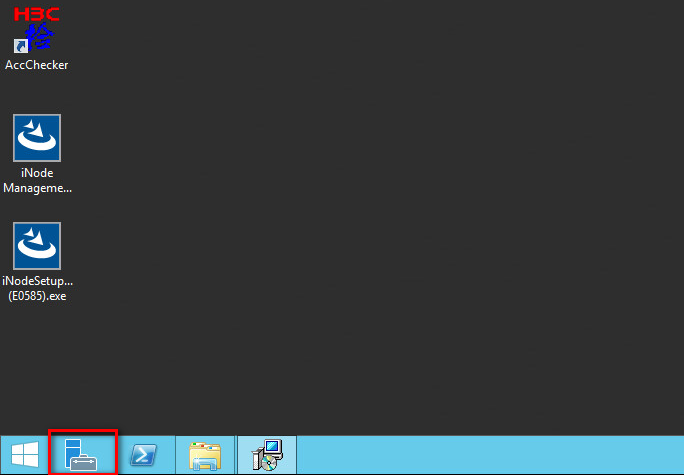
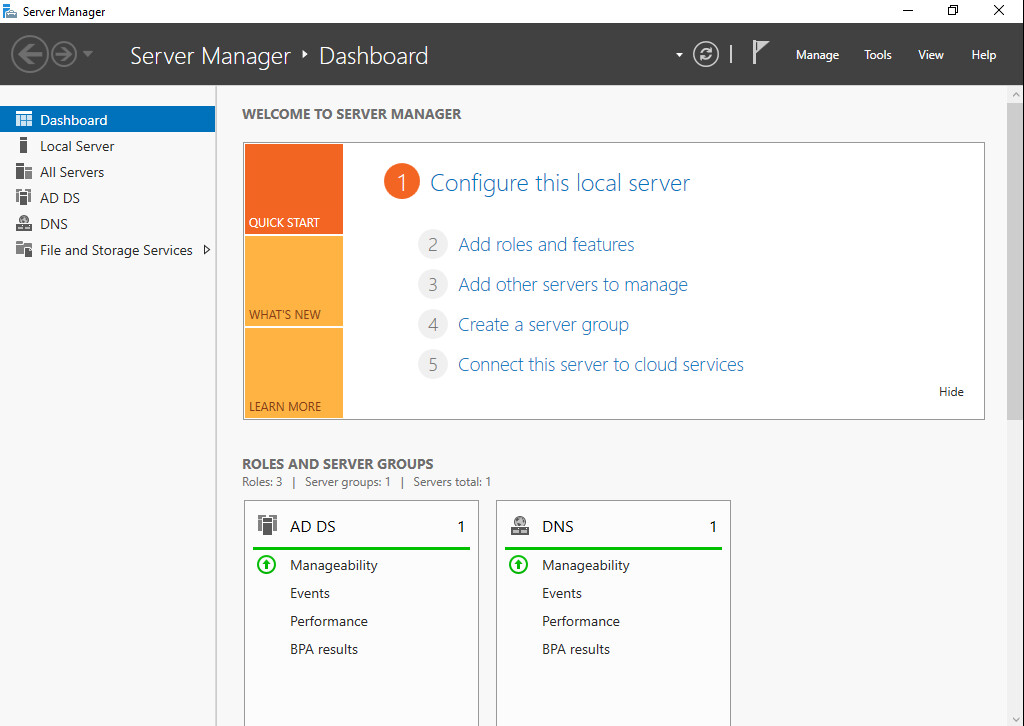
1. Click the Server Manager.
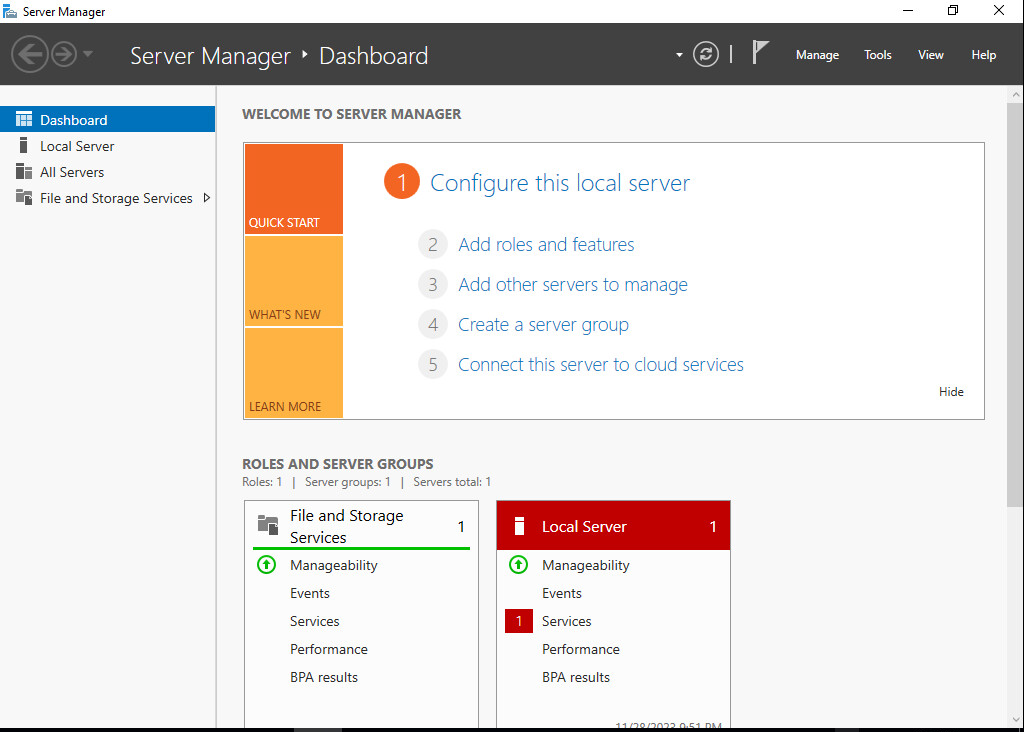
2. Access the dashboard page.
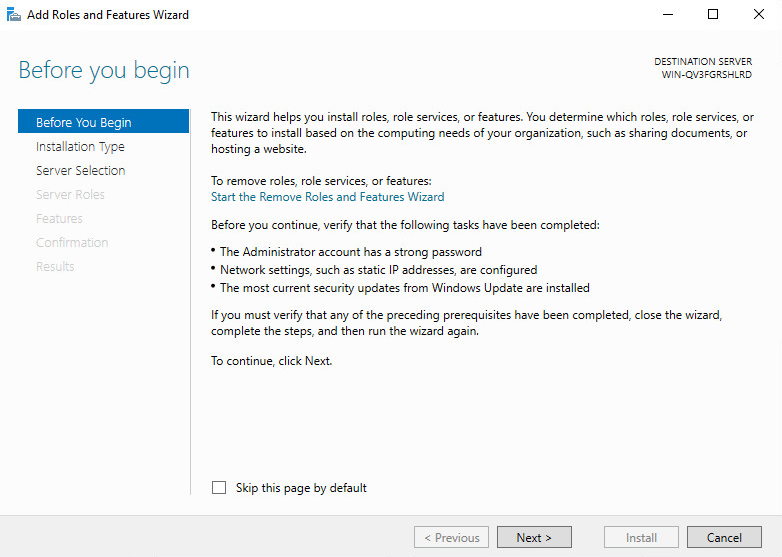
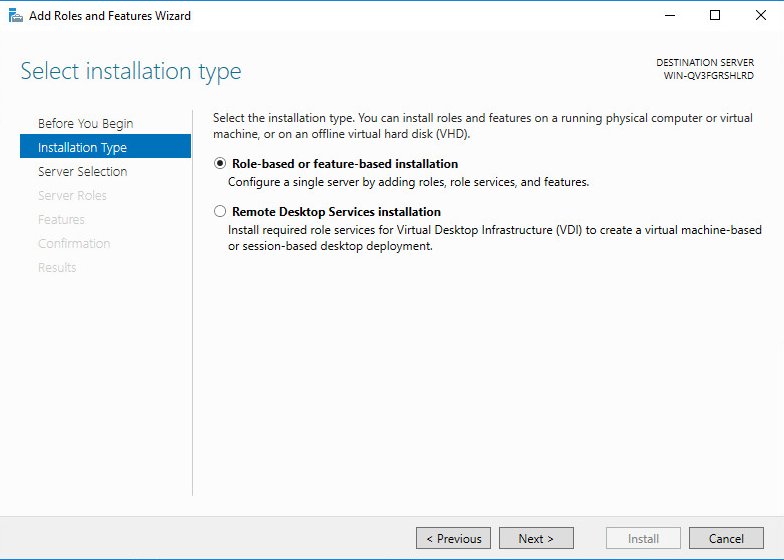
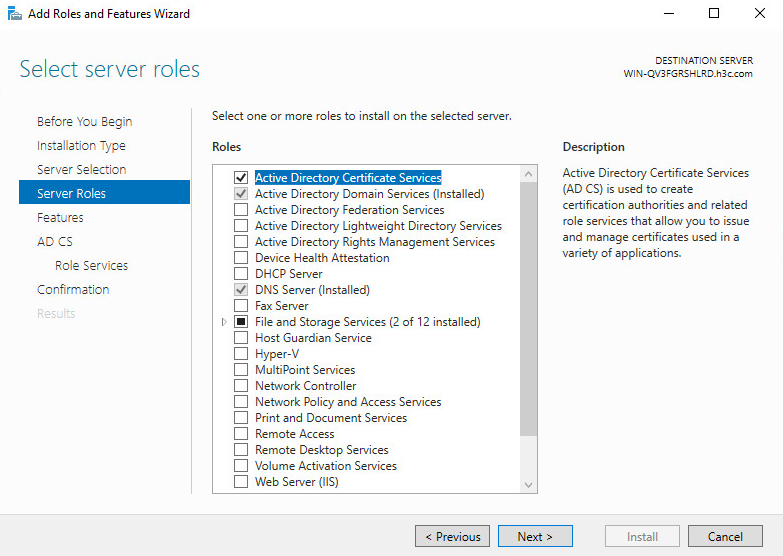
3. Click Add roles and features. In the wizard window that opens, click Next.
Figure 30 Add Roles and Features Wizard
4. On the Installation Type tab, select the Role-based or feature-based installation option, and then click Next.
5. On the Server Selection tab, select the Select a server from the server pool option, and then click Next.

6. On the Server Roles tab, select Active Directory Domain Services.
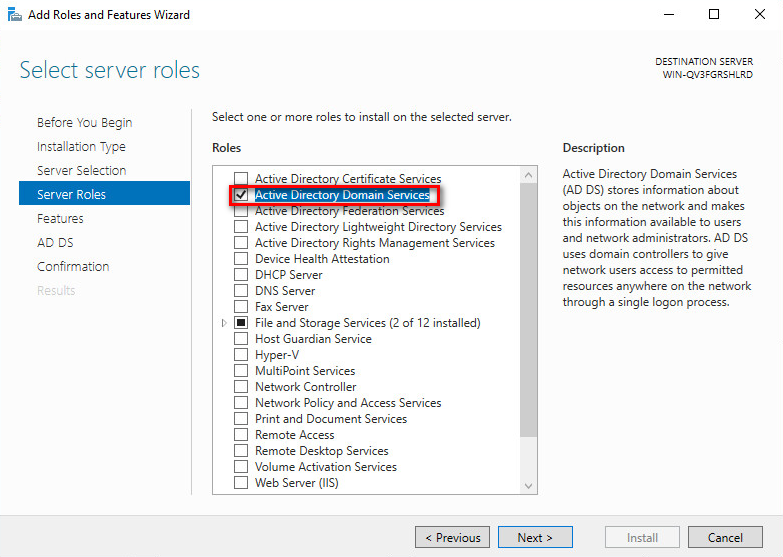
7. In the window that opens, click Add Features, and then click Next.
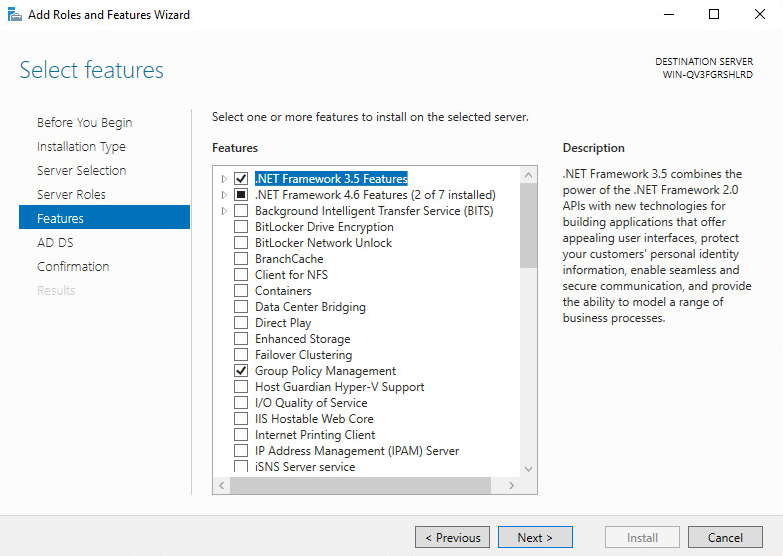
8. On the Features tab, click Next.
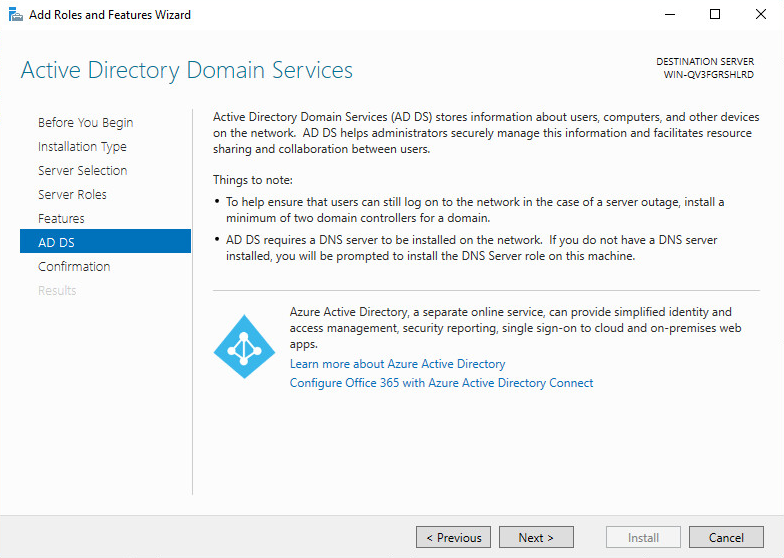
9. On the AD DS tab, click Next.
10. On the Confirmation tab, select the Restart the destination server automatically if required option.
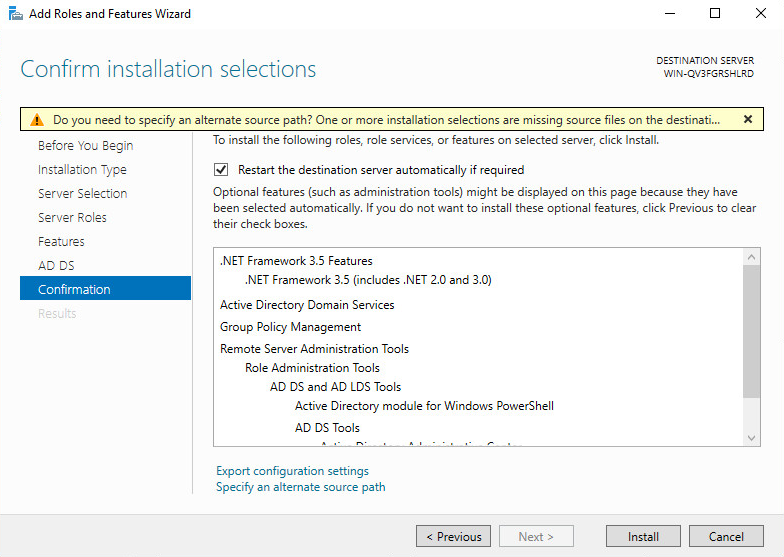
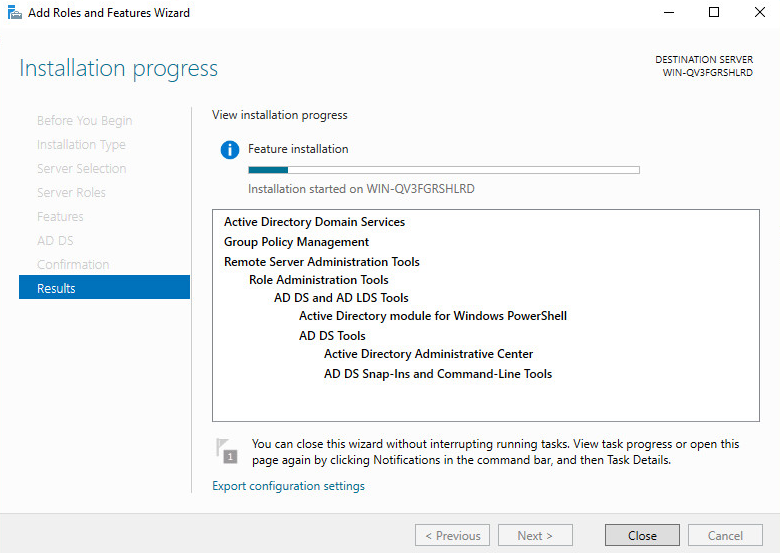
11. Click Install. On the Results tab, view the installation progress.
Figure 37 Feature installation
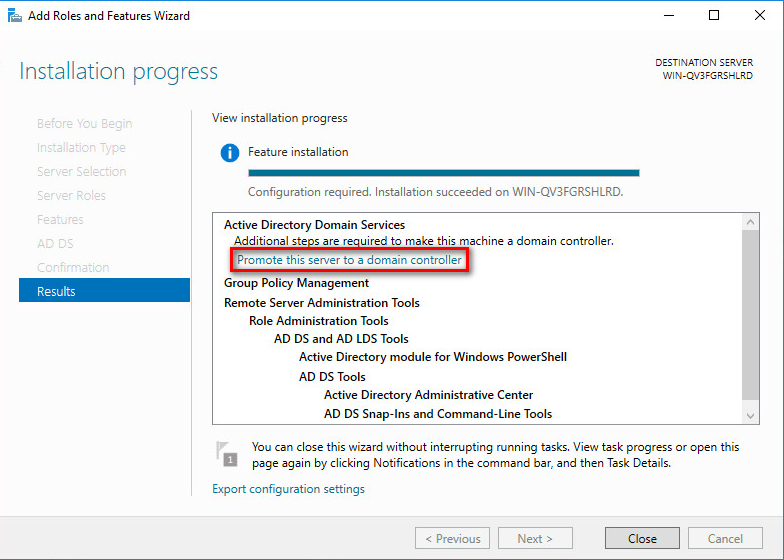
12. The computer will automatically restart after the installation is complete. After the computer restarts up, reopen the Server Manager, select Add roles and features, go back to the Results tab, and then click Promote this server to a domain controller.
Figure 38 Installation completed
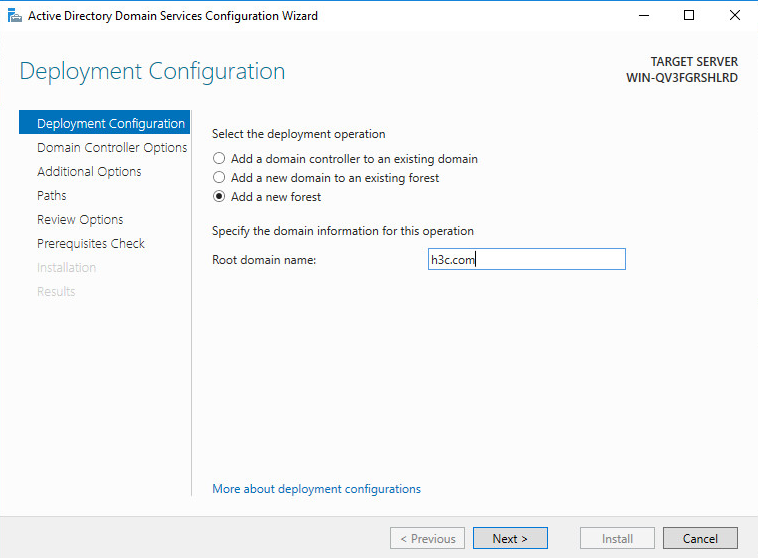
13. On the Deployment Configuration tab, select Add a new forest and enter a root domain name. In this example, enter h3c.com as the root domain name.
Figure 39 Deployment configuration
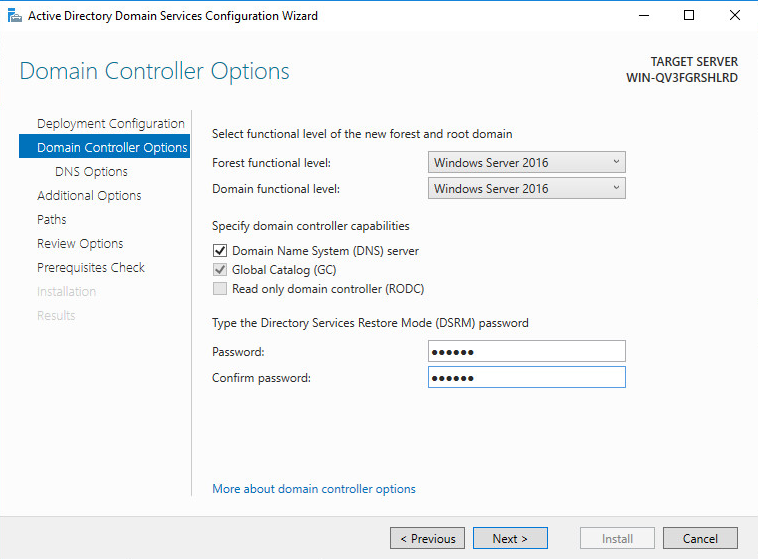
14. Click Next. On the Domain Controller Options tab, select the functional levels of the new forest and root domain, and enter the Directory Services Restore Mode (DSRM) password.
Figure 40 Domain controller options
15. Click Next.
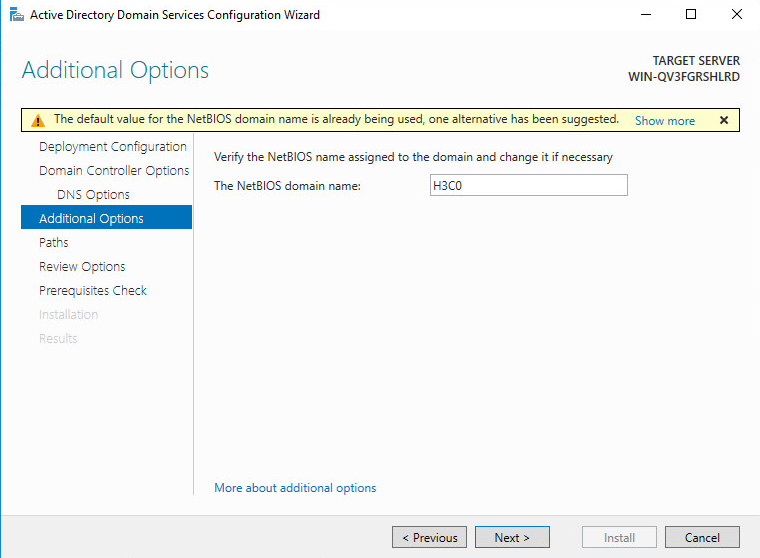
16. Click Next.

17. Click Next.

18. Click Next.
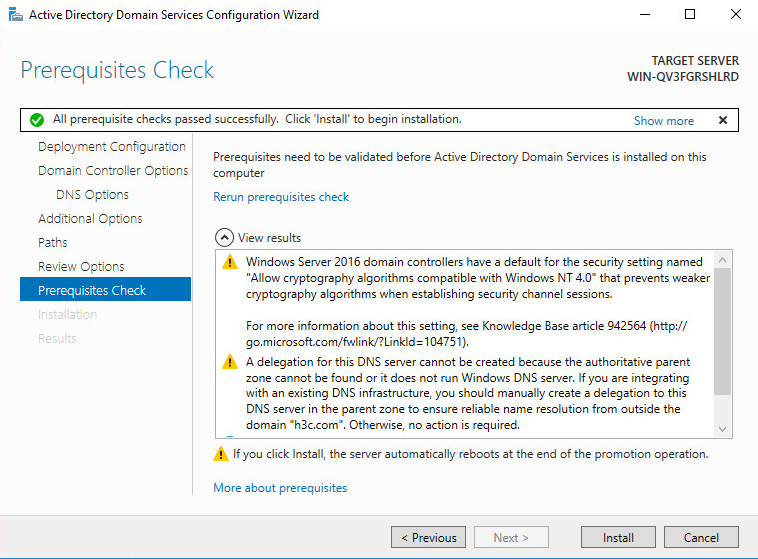
19. After all prerequisites pass the check, click Install. After the installation is complete, you will be prompted to restart the computer.
20. After the restart is complete, log in to the domain server.
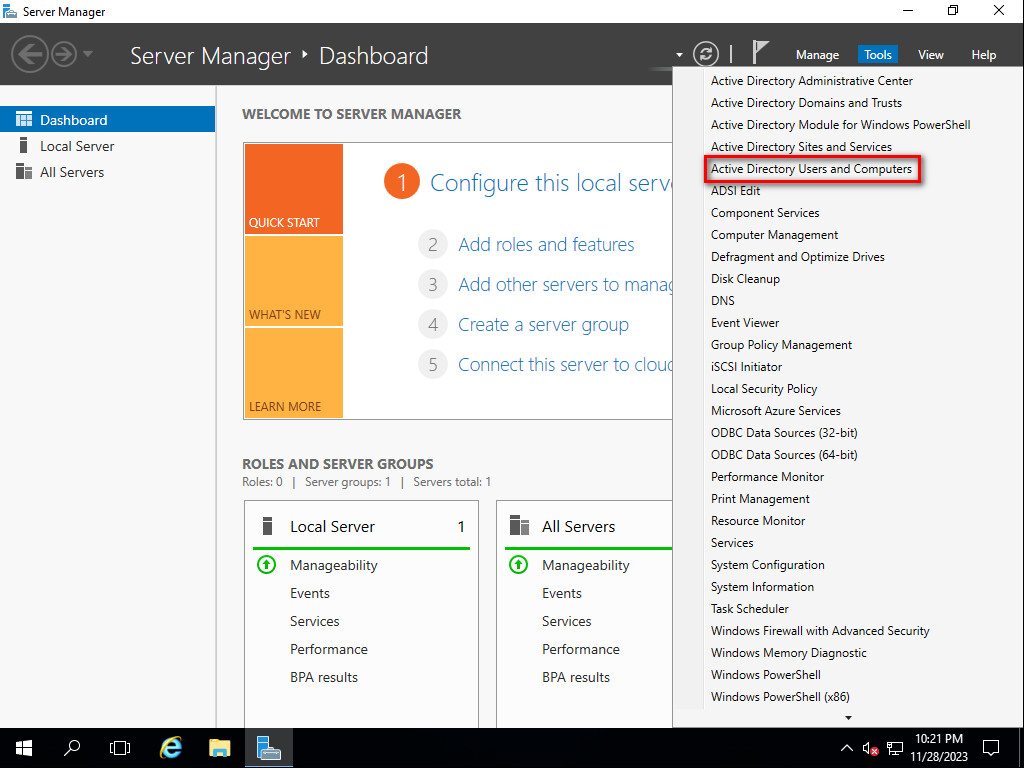
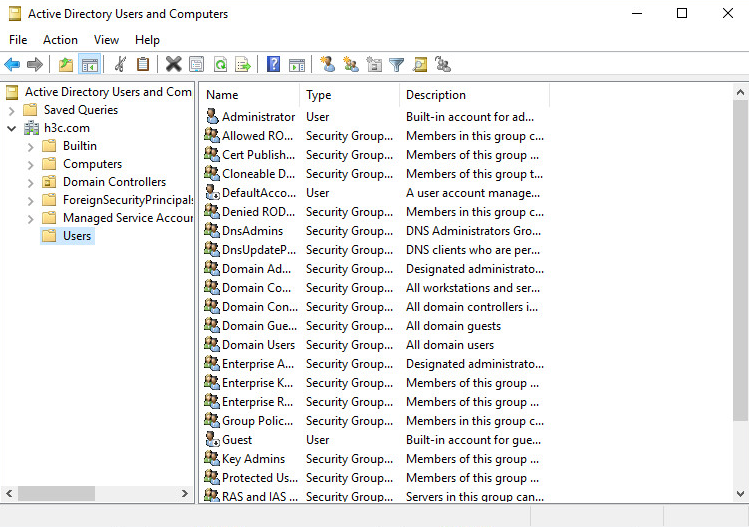
21. Open the Server Manager, and then select Tools > Active Directory Users and Computers.
Figure 45 Opening the Active Directory Users and Computers window
22. In the Active Directory Users and Computers window, view managed users and groups.
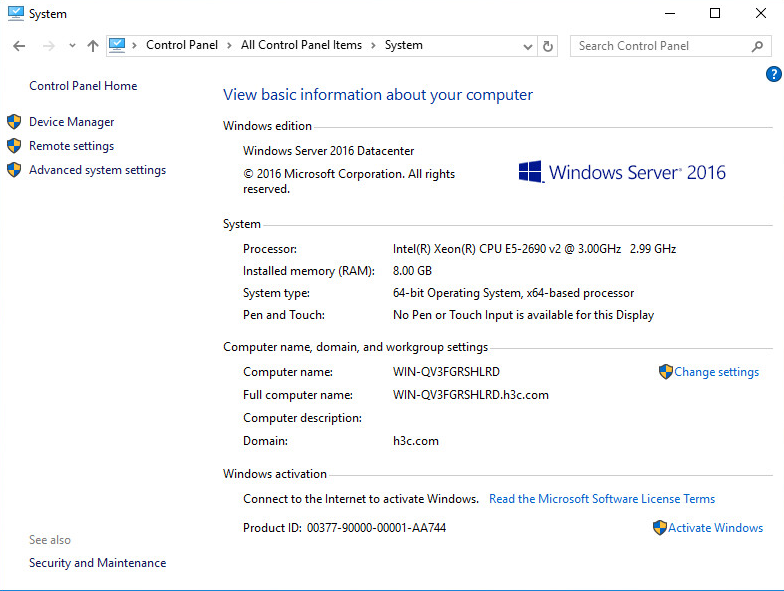
23. Navigate to the Control Panel > System and Security > System window, and verify that the domain controller has been installed successfully.
Figure 47 Viewing domain settings
Configuring certificate services
1. Open the Server Manager, and enter the dashboard page.
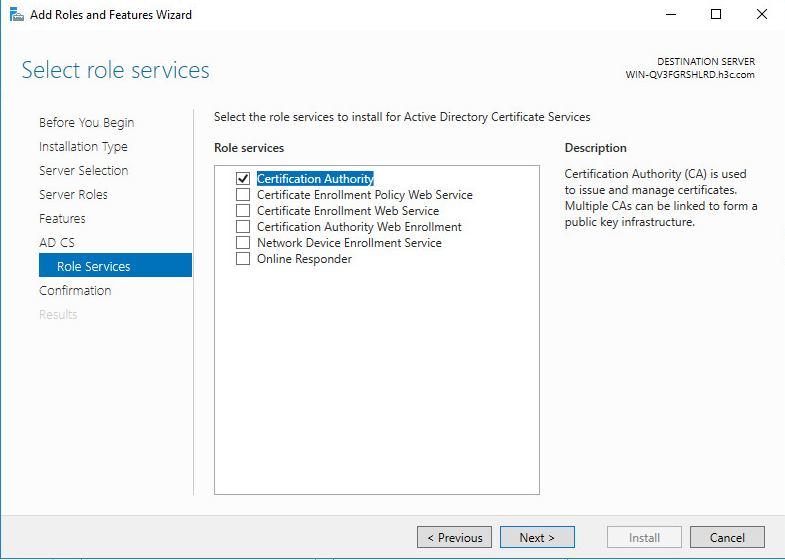
2. Select Add roles and features, access the Server Roles tab, select Active Directory Certificate Services, and then click Next.
3. In the Add Roles and Features Wizard window, click Add Features.
4. On the Role Services tab, select Certification Authority, and then click Next.
5. On the Confirmation tab, select the Restart the destination server automatically if required option, and then click Install.

6. On the Results tab, view the installation progress.
Figure 52 Installation completed

7. The computer will automatically restart after the installation is complete. After the computer restarts up, reopen the Server Manager, go to the Credentials page, and then click Next.

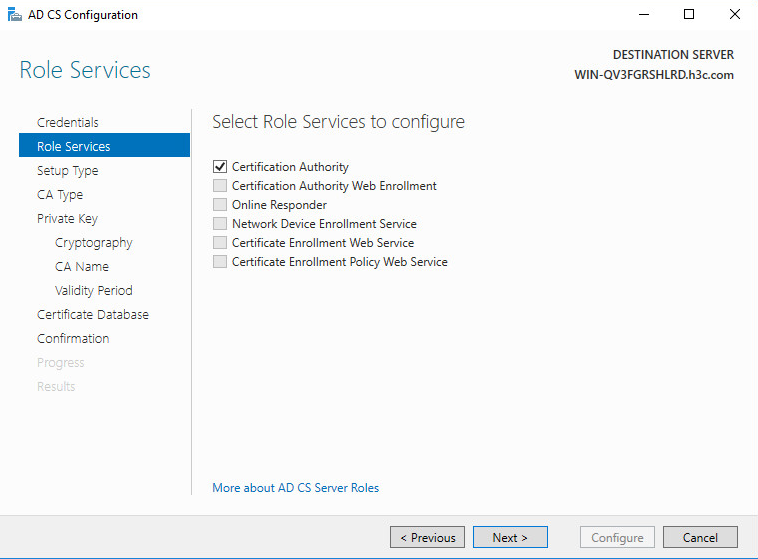
8. On the Role Services tab, click Next.
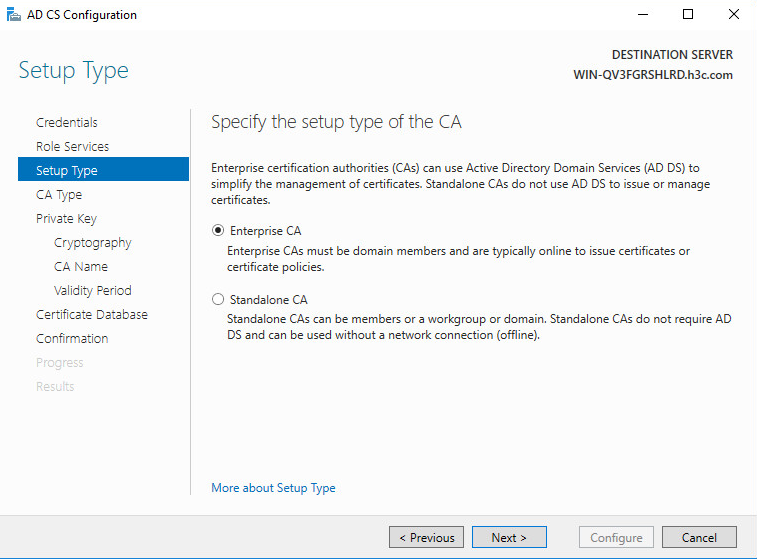
9. On the Setup Type tab, click Next.
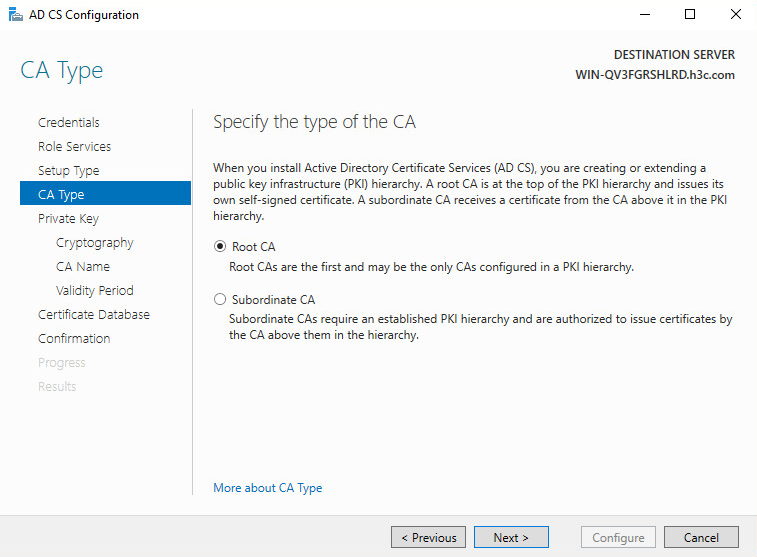
10. On the CA Type tab, click Next.
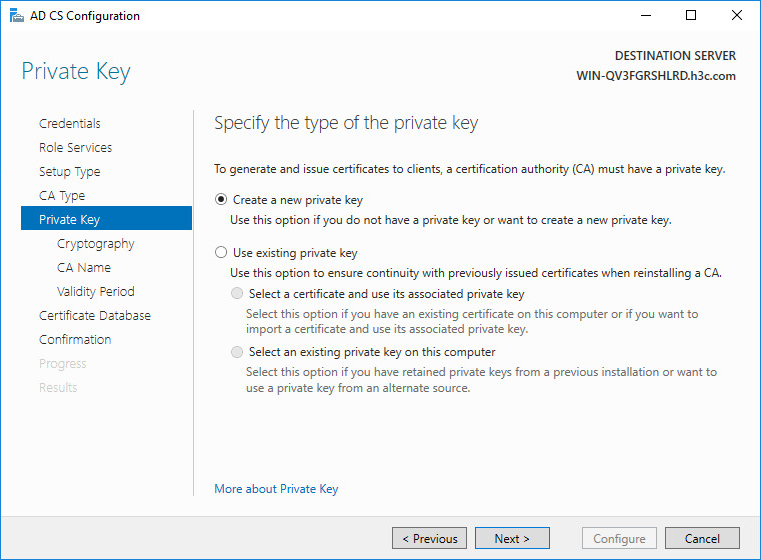
11. On the Private Key tab, select to create a new private key, and then click Next.
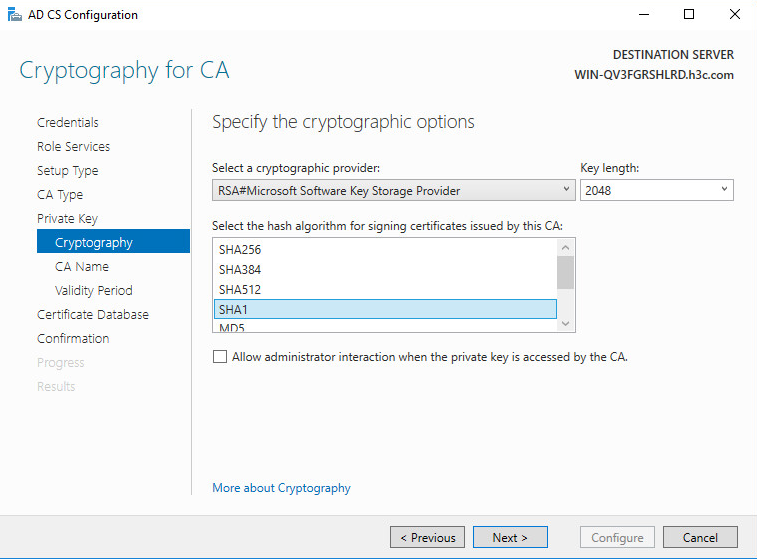
12. Select SHA1, and then click Next.
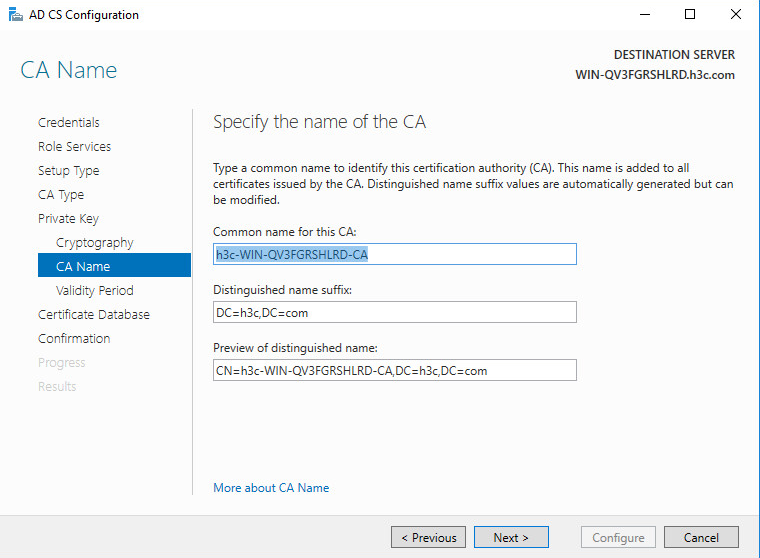
13. On the CA Name tab, use the default value, and then click Next.
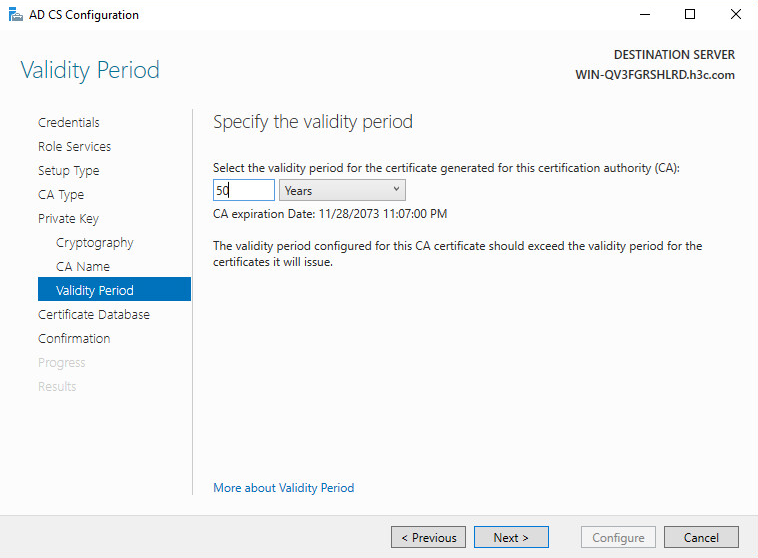
14. On the Validity Period tab, specify a validity period, and then click Next.
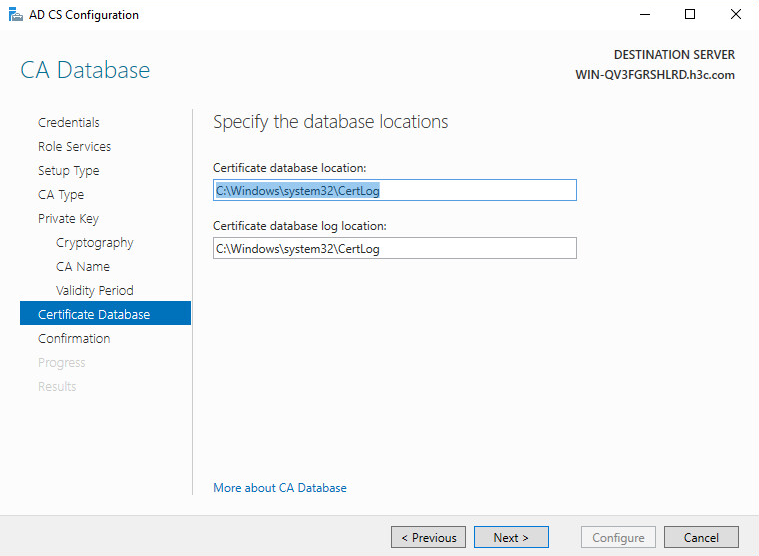
15. On the Certificate Database tab, click Next.
Figure 61 Certificate database
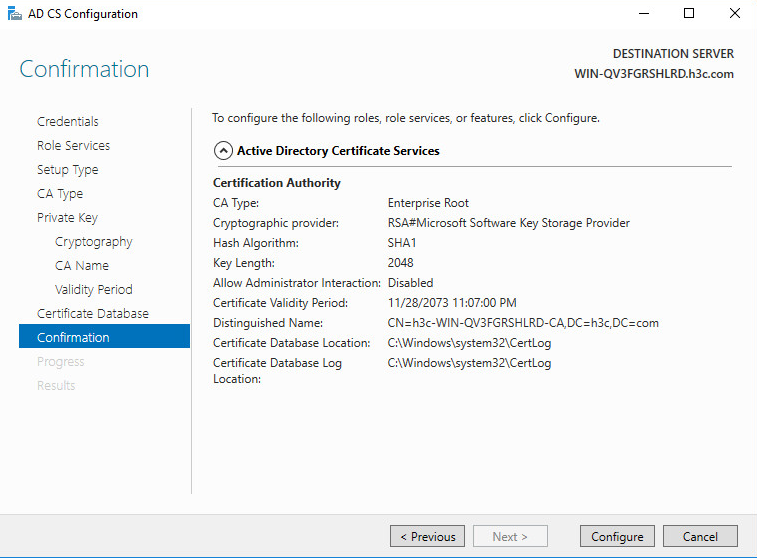
16. On the Confirmation tab, click Configure.
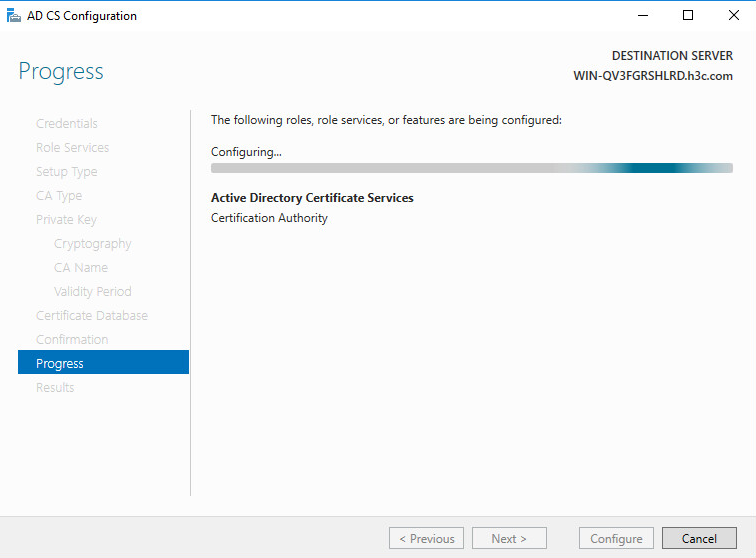
17. View the configuration progress.
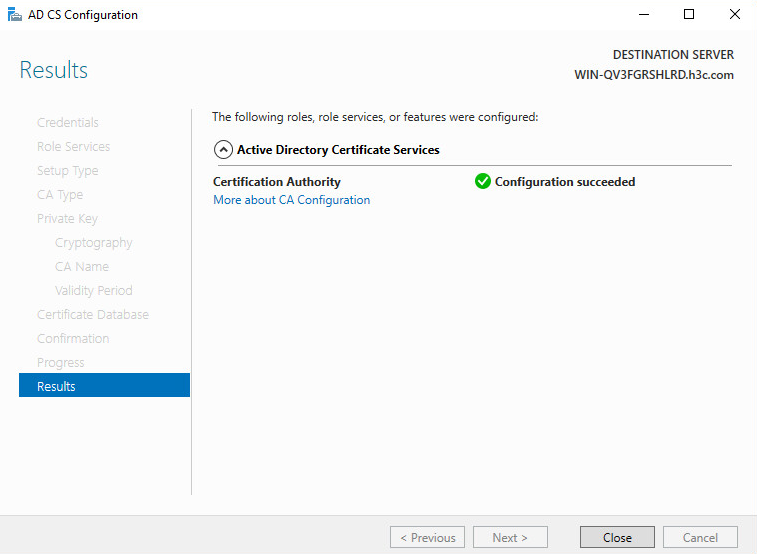
18. After the installation is complete, a prompt will appear to indicate successful configuration.
Figure 64 Successful configuration
19. After the installation, you can navigate to the Server Manager > Tools > Certification Authority > Issued Certificates window to view certificates.
Figure 65 Viewing certificates

