 Login
Login
- Table of Contents
- Related Documents
-
| Title | Size | Download |
|---|---|---|
| 01-Text | 3.77 MB |
NSM-Extend server requirements
Application installation packages for NSM-Extend
Installing the operating system and software dependencies
Uploading the Matrix installation package
Editing the configuration file as a non-root user
Modifying the SSH service port number
Configuring password-based SSH login
Configuring cluster parameters
Deploying Unified Platform applications
Deploying the Unified Platform Base application package (standard mode)
Deploying the Unified Platform Base application package (proxy mode)
Installing NSM applications (standard mode)
Installing NSM applications (proxy mode)
Checking NSM after installation
Installation procedure (standard mode)
Installation procedure (proxy mode)
Installing the license on the license server
Obtaining the license authorization
Rebuilding and recovering a cluster from failure
Upgrading and uninstalling software
Upgrading components (standard mode)
Upgrading components (proxy mode)
Uninstalling components (standard mode)
Uninstalling components (proxy mode)
How can I enable Unified Platform application services on Matrix?
Overview
Network Service Management (NSM) is an integrated management platform designed for basic network devices, virtual private networks (VPNs), wireless networks, and all-optical networks (AON). It consists of basic NSM module and the NSM-Extend expansion module. It enables unified management and monitoring of CT devices such as switches, routers, WLAN devices, firewalls, and PON devices, and also supports unified monitoring of IT device such as servers, storage systems, server operating systems, and virtual resources.
· The basic NSM module provides access management, configuration management, software management, performance monitoring, alarm management, and topology display for network devices. This ensures unified device access, configuration deployment, software upgrades, alarm generation, and visual topology representation. It can assist administrators in simplifying operations, enhancing efficiency, reducing management costs, and ensuring stable network system operation.
· NSM-Extend includes three subcomponents: Virtual Private Network Manager (VPNM), Wireless Service Management (WSM), and Optical Network Management (ONM). You can deploy these components separately. Their deployment and operation rely on the Unified Platform environment.
¡ VPNM is a component that monitors and manages VPN services. It supports flexible network configuration and policy adjustment. It also automatically allocates and adjusts resources based on business requirements.
The VPNM component applies to large enterprises, government agencies, and carriers. It enables flexible VPN service monitoring and management, improves network efficiency, and reduces costs.
¡ WSM is a component for managing wireless network devices. It provides network administrators with comprehensive wireless service management capabilities. The network administrators can use WSM to centrally manage access controllers (ACs), cloud access points (APs), fit APs, and other wireless devices. With WSM, the network administrators can easily configure and manage network devices.
¡ ONM is a key component for managing and controlling the all-optical networks (AONs). An all-optical network (AON) is a network architecture that does not rely on electrical signal processing. It transmits data through optical fiber media and minimizes or completely avoids electrical signal conversion along the entire transmission path.
NSM rely on the Unified Platform environment. This document describes the installation, login, upgrade, registration, and uninstallation functions of NSM and NSM-Extend.
Installation workflow
|
|
NOTE: Only NSM and WSM support deployment in proxy mode. For more information about the differences compared with deployment in standard mode, see the relevant chapter. |
The workflow of deploying NSM and NSM-Extend on the deployment page of Matrix is as shown in Table 1.
Table 1 NSM installation process
|
Step |
Task |
Remarks |
|
Prepare for installation |
Plan the installation, and prepare servers and software packages. |
Required. For more information, see "Preparing for installation." |
|
Install the operating system |
Install the operating system and dependent packages. |
Required. For more information, see H3C Unified Platform Operating System Installation Guide. |
|
Install Matrix |
Required. |
|
|
Deploy Unified Platform |
Required. |
|
|
Deploy NSM |
Required. |
|
|
Required. |
||
|
Required. |
||
|
Configuring resourcesInstalling NSM applications (standard mode) |
Required. |
|
|
Required. |
||
|
Deploy NSM-Extend |
Optional. Deploy VPNM if you need to use its service management function. |
|
|
Optional. Deploy WSM if you need to manage wireless network services. |
||
|
Optional. Deploy ONM if you need to manage AON services. |
Preparing for installation
Planning the installation
Planning disk partitioning
Plan the RAID arrays and partitions for disks based on different service scales and server configuration requirements. Configure and partition disks according to the requirements in the resource calculator.
Planning the network
Network plan
In the Matrix cluster deployment mode, a minimum of three master nodes and n worker nodes (where value n is determined by task load and must be greater than or equal to 0) are required. A typical network plan is as shown in the figure below:
Figure 1 Network plan

IP address plan
|
|
CAUTION: If a service scenario that has NSM deployed requires multiple NICs, follow these restrictions and guidelines: · Before you deploy the cluster, make sure the NIC used by the cluster is the first one detected by the ifconfig command. · If the above condition is not met, make sure the cluster uses the previously configured NIC that meets the following conditions: 1. The NIC is down and the onboot option is set to no. 2. The NIC is in up state, has an IP configured, and has a security policy configured. |

NSM supports IPv4 deployment. Table 2 shows the IP address plan.
|
IP address |
Description |
Remarks |
|
Master node 1 IP |
IP address assigned to the master node installed with an operating system. |
Required. (Only one master node is required in standalone deployment mode.) The IP addresses of all master nodes assigned to the same cluster must be on the same subnet. |
|
Master node 2 IP |
IP address assigned to the master node installed with an operating system. |
|
|
Master node 3 IP |
IP address assigned to the master node installed with an operating system. |
|
|
Northbound service VIP |
Fixed external access address for all applications deployed through Matrix. |
Required. The northbound service VIP must be on the same subnet as the subnet of the master nodes. |
|
Worker node IP |
IP address assigned to a worker node. |
Optional. The IP addresses of worker nodes must be on the same subnet as the IP addresses of master nodes in the same cluster. |
NSM requirements
NSM server requirements
Hardware requirements (deployment on physical server)
The NSM component supports both standalone deployment mode and cluster deployment mode. To understand the hardware requirements for deploying NSM, you can contact Technical Support for hardware configuration evaluation.
Operating system requirements
For the specific operating system requirements, see the release notes for the version of Unified Platform you want to install and use. As a best practice, use a 64-bit operating system. For more information about support for operating systems, see H3C Unified Platform Operating System Installation Guide.
Obtaining software packages
Install the required software packages as described in this chapter. For more information about installing software packages, see H3C Unified Platform Deployment Guide.
Table 3 shows the installation packages related to NSM. The version argument represents the software version number and the platform argument represents the CPU architecture type.
A required application package must be installed for NSM to operate correctly. An optional application package can be installed if you need the corresponding feature.
|
|
NOTE: Support for the x86 and ARM installation packages varies by component and version. For more information, see the release notes. |
Table 3 Application installation packages and their dependencies (standard mode)
|
Installation package name |
Function description |
Remarks |
Dependencies |
|
|
Unified Platform |
UDTP_Base_<version>_platform.zip |
Basic service component, which provides basic functions such as convergence deployment, user management, permission management, resource management, tenant management, menu management, log center, backup & restoration, and health check. |
Required. Unified Platform application package used to provide basic services for components. |
N/A |
|
BMP_Common_<version>_platform.zip |
Common service component, which provides dashboard management, alarms, alarm aggregation, and alarm subscription. |
N/A |
||
|
BMP_UCP_BasePlat_<version>_platform.zip |
UCP base platform component, which provides U-Center public platform component services (ETCD, ops domain menu registration, and visualization component). |
· UDTP_Base · BMP_Common |
||
|
BMP_UCP_CollectPlat_<version>_platform.zip |
Provides templates, maintenance tag tasks, collection platforms, unified resources, resource discovery, and file transfer. |
· BMP_UCP_BasePlat |
||
|
BMP_CMDB_version_platform.zip |
Configuration management database |
Optional |
· BMP_Common |
|
|
H3C_NSM_version_platform.zip |
NSM_RES_version_platform.zip |
Basic resource management component, which provides unified network resource management, including the resource list, resource discovery, network hardware, access location query, and network device definition functions |
Required |
· UDTP_Base · BMP_Common · BMP_UCP_CollectPlat · BMP_UCP_BasePlat |
|
NSM_TOPO_version_platform.zip |
Network topology component, which provides NSM-related resource views. |
Optional |
· UDTP_Base · BMP_Common · BMP_UCP_CollectPlat · BMP_UCP_BasePlat · NSM_RES · BMP_CMDB |
|
|
NSM_PERF_version_platform.zip |
Basic resource monitoring component, which provides resource operation status monitoring views and operation history tracking function from multiple dimensions (device, interface, performance metric, and instance). |
Optional |
· UDTP_Base · BMP_Common · BMP_UCP_CollectPlat · BMP_UCP_BasePlat · NSM_RES |
|
|
NSM_ICC_version_platform.zip |
Device configuration management component, which efficiently manages, flexibly deploys, backs up, and controls changes for network device configuration files and software versions. |
Optional |
· UDTP_Base · BMP_Common · BMP_UCP_CollectPlat · BMP_UCP_BasePlat · NSM_RES |
|
|
NSM_Tools_version_platform.zip |
Network management tool component, which integrates common network management and diagnostic tools. |
Optional |
· UDTP_Base · BMP_Common · BMP_UCP_CollectPlat · BMP_UCP_BasePlat · NSM_RES |
|
Table 4 Application installation packages and their dependencies (proxy mode)
|
Installation package name |
Function description |
Remarks |
Dependencies |
|
|
Unified Platform |
UDTP_Base_<version>_platform.zip |
Basic service component, which provides basic functions such as convergence deployment, user management, permission management, resource management, tenant management, menu management, log center, backup & restoration, and health check. |
Required. Unified Platform application package used to provide basic services for components. |
N/A |
|
BMP_Connect_<version>_platform.zip |
Connection service component, which provides management of higher-level and lower-level sites, NETCONF channels, and WebSocket channels. |
UDTP_Base |
||
|
BMP_UCP_BasePlat_<version>_platform.zip |
UCP base platform component, which provides U-Center public platform component services (ETCD, ops domain menu registration, and visualization component). |
UDTP_Base |
||
|
BMP_UCP_CollectPlat_<version>_platform.zip |
Provides templates, maintenance tag tasks, collection platforms, unified resources, resource discovery, and file transfer. |
BMP_UCP_BasePlat |
||
|
H3C_NSM_version_platform.zip |
NSM_RES_version_platform.zip |
Basic resource management component, which provides unified network resource management, including the resource list, resource discovery, network hardware, access location query, and network device definition functions |
Required |
· UDTP_Base · BMP_Common · BMP_UCP_CollectPlat · BMP_UCP_BasePlat |
|
NSM_PERF_version_platform.zip |
Basic resource monitoring component, which provides resource operation status monitoring views and operation history tracking function from multiple dimensions (device, interface, performance metric, and instance). |
Optional |
· UDTP_Base · BMP_Common · BMP_UCP_CollectPlat · BMP_UCP_BasePlat · NSM_RES |
|
|
NSM_ICC_version_platform.zip |
Device configuration management component, which efficiently manages, flexibly deploys, backs up, and controls changes for network device configuration files and software versions. |
Optional |
· UDTP_Base · BMP_Common · BMP_UCP_CollectPlat · BMP_UCP_BasePlat · NSM_RES |
|
NSM-Extend requirements
The NSM-Extend package contains WSM, ONM, and VPNM subcomponents.
NSM-Extend server requirements
Hardware requirements
WSM, ONM, and VPNM all support standalone and cluster deployment on physical servers or VMs. To understand the hardware requirements for deploying NSM, you can contact Technical Support for hardware configuration evaluation.
Software requirements
· Before you deploy WSM, ONM, and VPNM, install the operating system, Unified Platform, and Matrix. For more information, see H3C Unified Platform Deployment Guide.
¡ Operating system: Choose the operating system as described in the release notes for the associated Unified Platform version. As a best practice, use a 64-bit operating system. For more information about operating system installation, see H3C Unified Platform Operating System Installation Guide.
¡ Unified Platform and NSM: Other components are dependent on Unified Platform. For more information, see "Application installation packages for NSM-Extend."
¡ Matrix: Deploy Matrix before you install components on the Matrix page.
· Before you install WSM, ONM, and VPNM, you can upload their installation packages in bulk for bulk deployment. Prepare the required installation packages in advance.
Application installation packages for NSM-Extend
|
|
NOTE: · The application package names of Unified Platform and basic network management might vary by software version. For more information, see the release notes for the product. In this chapter, the version of NSM-Extend is E7301, and the version of Unified Platform is also E7301. · The following tables show installation package name formats. The version argument represents the software version number and the platform argument represents the CPU architecture type. · A required application package must be installed for the related component to operate correctly. An optional application package can be installed if the related function is required. |
The released NSM-Extend installation package contains the installation packages for WSM, ONM, and VPNM. To obtain the application installation packages, decompress the NSM-Extend installation package. For more information, see Table 5.
Table 5 NSM-Extend installation package
|
Installation package name |
Application package name |
Description |
|
H3C_NSM_Extend_version_platform.zip |
NSM_VPNM_version_platform.zip |
Provides VPN management functions. |
|
NSM_WSM_version_platform.zip |
Provides wireless management functions, including wireless device monitoring, configuration, management, and topology. |
|
|
NSM_ONM_version_platform.zip |
Provides AON management functions, including AON node (iOptic node), EPON/GPON ONU, optical splitter management and topology. |
VPNM component installation packages
Table 6 shows the application installation packages required for deploying VPNM. Prepare these installation packages in advance.
Table 6 Application installation packages
|
Required component |
Application installation package name |
Description |
Remarks |
|
Unified Platform |
UDTP_Base_<version>_platform.zip |
Basic service component, which provides basic functions such as convergence deployment, user management, permission management, resource management, tenant management, menu management, log center, backup & restoration, and health check. |
(Required) Application installation packages of Unified Platform that provide basic services for components. Before you install VPNM, you must install these installation packages. |
|
BMP_Common_<version>_platform.zip |
Common service component, which provides dashboard management, alarm, alarm aggregation, and alarm subscription. |
||
|
BMP_Connect_<version>_platform.zip |
Connection service component, which provides management of higher-level and lower-level sites, NETCONF channels, and WebSocket channels. |
||
|
BMP_UCP_BasePlat_<version>_platform.zip |
Provides U-Center public platform services (ETCD, operations domain menu registration, visualization components) |
||
|
BMP_UCP_CollectPlat_<version>_platform.zip |
Provides template, tag adding, data collection platform, unified resource, resource discovery, and file transfer services. |
||
|
NSM |
NSM_RES_<version>_platform.zip |
Discovers and incorporates network devices, and manages their basic information. |
(Required) Basic network management packages, which are used for device incorporation. |
|
NSM_PERF_<version>_platform.zip |
Performs performance monitoring. |
||
|
VPNM |
NSM_VPNM_version_platform.zip |
Provides VPN management functions. |
Required. |
WSM component installation packages
Table 7 shows the application installation packages required for deploying WSM. Prepare these installation packages in advance.
Table 7 Application installation packages
|
Required component |
Application installation package name |
Description |
Remarks |
|
Unified Platform |
UDTP_Base_version_platform.zip |
Basic service component, which provides basic functions such as convergence deployment, user management, permission management, resource management, tenant management, menu management, log center, backup & restoration, and health check. |
(Required) Application installation packages of Unified Platform that provide basic services for components. Before you install iWSM, you must install these application installation packages. In proxy mode, WSM is not dependent on BMP_Common. |
|
BMP_Common_version_platform.zip |
Common service component, which provides dashboard management, alarm, alarm aggregation, and alarm subscription |
||
|
BMP_Connect_<version>_platform.zip |
Connection service component, which provides upper- and lower-level site management, NETCONF channel management, and WebSocket channel management. |
||
|
BMP_UCP_BasePlat_<version>_platform.zip |
Provides U-Center public platform services (ETCD, operations domain menu registration, visualization components) |
||
|
BMP_UCP_CollectPlat_<version>_platform.zip |
Provides template, tag adding, data collection platform, unified resource, resource discovery, and file transfer services. |
||
|
NSM |
NSM_RES_version_platform.zip |
Discovers and incorporates network devices, and manages their basic information. |
(Required) Application installation packages of NSM, which are used for device incorporation. Before you install iWSM, you must install these application installation packages. |
|
WSM |
NSM_WSM_version_platform.zip |
Provides wireless management functions. |
Required. |
ONM component installation packages
Table 8 shows the application installation packages required for deploying ONM. Prepare these installation packages in advance.
Table 8 Application installation packages
|
Required component |
Application installation package name |
Description |
Remarks |
|
Unified Platform |
UDTP_Base_version_platform.zip |
Basic service component, which provides basic functions such as convergence deployment, user management, permission management, resource management, tenant management, menu management, log center, backup & restoration, and health check. |
(Required) Application installation packages of Unified Platform that provide basic services for components. Before you install iWSM, you must install these application installation packages. |
|
BMP_Common_version_platform.zip |
Common service component, which provides dashboard management, alarm, alarm aggregation, and alarm subscription. |
||
|
NSM |
NSM_RES_version_platform.zip |
Discovers and incorporates network devices, and manages their basic information. |
(Required) Application installation packages of NSM, which are used for device incorporation. Before you install iWSM, you must install these application installation packages. |
|
NSM_PERF_version_platform.zip |
Performs performance management. |
||
|
NSM_ICC_version_platform.zip |
Performs device backup, restoration, and software upgrade. |
||
|
ONM |
NSM_ONM_version_platform.zip |
Provides AON management functions |
Required. |
Client requirements
The controller is clientless. You can access the controller from a browser.
Table 9 Client requirements
|
Operating system |
Hardware requirements |
Browser requirements |
|
Windows |
· 2.1 GHz (or above) CPU · 2 GB (or above) memory · 50 GB (or above) disk · 100 Mbps (or above) NIC · Sound card |
· Turn off the pop-up blocker in the browser. · Enable Cookies in the browser. · Add NSM to the trusted site list. · Set the screen resolution to 1600 × 900. · Firefox 97 or higher · Chrome 96 or higher |
Verifying software packages
After uploading installation packages, first perform MD5 verification on each software package to ensure its integrity and correctness.
1. Identify the uploaded installation packages.
[root@node1~]# cd /opt/matrix/app/install/packages/
[root@node1 packages]# ls
BMP_Common_E7301_x86.zip BMP_Connect_E7301_x86.zip
…
2. Obtain the MD5 value of an installation package, for example, UDTP_Base_E7301_x86.zip.
[root@node1 packages]# md5sum UDTP_Base_E7301_x86.zip
652845e0b92bbdff675c7598430687e2 UDTP_Base_E7301_x86.zip
3. Compare the obtained MD5 value with the MD5 value released with the software. If they are the same, the installation package is correct.
Pre-installation checklist
Table 10 Pre-installation checklist
|
Item |
Requirements |
|
|
Server |
Hardware |
The CPU, memory, disk, and NIC requirements are met. Unified Platform deployment is supported. |
|
Software |
The system time settings are configured correctly. As a best practice, configure NTP on each node and specify the same time source for all the nodes. |
|
|
Client |
The browser version meets the requirements. |
|
|
Server and OS compatibility |
To view the compatibility matrix between H3C servers and operating systems, access http://www.h3c.com/en/home/qr/default.htm?id=65 |
|
Installing the operating system and software dependencies
See H3C Unified Platform Operating System Installation Guide.
Installing Matrix
Uploading the Matrix installation package
|
|
IMPORTANT: · To avoid file damage, use binary mode if you use FTP or TFTP for package upload.. · If the Docker version is 20.10.24, you can directly install Matrix E7105H04 (or later) or E7302 (or later). If the Docker version is earlier than 20.10.24, you must first install any Matrix version earlier than E7105H04 or E7302, then upgrade the Docker version to 20.10.24, and finally upgrade the Matrix version to E7105H04 (or later) or E7302 (or later). |

1. Copy or use a file transfer protocol to upload the installation package to the target directory on the server.
¡ (Recommended.) Enter the /root directory or a directory created in the /root directory if you log in as the root user.
¡ (Recommended.) Enter the /home/admin directory if you log in as a non-root user (for example, admin).
2. After you upload the Matrix installation package, perform MD5 verification on the installation package as described in "Verifying software packages".
Editing the configuration file as a non-root user
If you install the software package as the root user or install the NingOS operating system as the admin user, you can skip this section directly.
1. Execute the su root command to switch to the root user, and view the /etc/passwd file as a root user. Identify whether the configured non-root user name (user in this example, as shown in the following figure) is the same as that in the configuration file. If not, modify the corresponding username in the configuration file. Leave the other parameters unchanged.
[root@node1 ~]# vim /etc/passwd
user:x:1000:1001:user:/home/user:/bin/bash
…
2. As a root user, edit the /etc/sudoers file.
[root@node1 ~]# vim /etc/sudoers
…
## Allow root to run any commands anywhere
root ALL=(ALL) ALL
user ALL=(root) NOPASSWD:/bin/bash
## Allows members of the 'sys' group to run networking, software,
## service management apps and more.
# %sys ALL = NETWORKING, SOFTWARE, SERVICES, STORAGE, DELEGATING, PROCESSES, LOCATE, DRIVERS
## Allows people in group wheel to run all commands
%wheel ALL=(ALL) ALL
user ALL=(root) NOPASSWD:/bin/bash
user ALL=(root) NOPASSWD:/usr/bin/rpm,/bin/sh
…
3. As a root user, edit the /etc/pam.d/login file.
[root@node1 ~]# vim /etc/pam.d/login
#%PAM-1.0
auth substack system-auth
auth [user_unknown=ignore success=ok ignore=ignore auth_err=die default=bad] pam_securetty.so
…
4. As a root user, edit the /etc/ssh/sshd_config file.
[root@node1 ~]# vim /etc/ssh/sshd_config
…
#LoginGraceTime 2m
PermitRootLogin no
…
5. After editing the configuration file, execute the systemctl restart sshd command to restart the sshd service.
Installing Matrix
|
|
NOTE: · Make sure the installation users are the same for all nodes. For a non-root installation user, add the sudo /bin/bash instruction before the script execution command. · Make sure the name of the Matrix installation user is the same as that of the user group to which the user belongs. |
1. Access the storage directory of the Matrix installation package.
2. Execute the unzip UDTP_Matrix_version-platform.zip command. UDTP_Matrix_version_platform.zip represents the installation package name, the version argument represents the version number, and the platform argument represents the CPU architecture type, x86_64 for a root user in this example.
[root@node1 ~]# unzip UDTP_Matrix_E7301_x86_64.zip
[root@node1 ~]# cd UDTP_Matrix_E7301_x86_64
[root@node1 UDTP_Matrix_E7301_x86_64]# ./install.sh
…
Complete!
3. Use the systemctl status matrix command to identify whether the Matrix service is installed correctly. The Active field displays active (running) if the platform is installed correctly.
4. Change the language setting (Chinese by default) for the Web interface to English as follows:
a. Use the vim /opt/matrix/config/navigator_config.json command to open the navigator_config file.
b. Change the value for the defaultLanguage field to en as follows:
If the field is not available in the file, manually add this field and add a comma after the field.
[root@node4 ~]# vim /opt/matrix/config/navigator_config.json
{
"defaultLanguage":"en",
"productName": "uc",
"pageList": ["SYS_CONFIG", "DEPLOY", "APP_DEPLOY"],
"defaultPackages": [],
"allowDeployedPackageIds": ["UNIFIED-PLATFORM-BASE"],
"url": "http:””://${vip}:30000/central/index.html#/ucenter-deploy",
"theme":"darkblue",
"matrixLeaderLeaseDuration": 30,
"matrixLeaderRetryPeriod": 2,
"sshPort": 22,
"sshLoginMode": "secret",
"features":{"stopNtpServerBeyondThreshold":"false"}
}
c. Execute the systemctl restart matrix command to restart the Matrix service and have your configuration take effect.
d. Follow the previous steps to configure other nodes.
(Optional.) Configuring SSH
Modifying the SSH service port number
A Matrix cluster installs, upgrades, and repairs nodes and performs application deployment and monitoring through SSH connections. On each node, the SSH server uses port 22 by default to listen on the client connection requests. After a TCP connection is established between a node and the SSH server, data information can be exchanged between them.
You can modify the SSH service port number to improve the SSH connection security.
|
|
IMPORTANT: · Make sure all nodes are configured with the same SSH service port number. · The port number range is 1 to 65535. As a best practice, do not use well-known port numbers between 1 and 1024. Do not use port numbers already defined in the port usage guide for any solution. · If you change the SSH service port number for a deployed cluster, verify that all service components support the port number. If you cannot do that, the SSH service might fail to start. · To upgrade Matrix through an ISO image, make sure the contents in the navigator_config file on all cluster nodes are the same. To view detailed information in the navigator_config file, use the vim /opt/matrix/config/navigator_config.json command. · To ensure cluster stability, make sure all cluster nodes have consistent configurations in the /opt/matrix/config/navigator_config.json file. · To change the SSH service port number, see the port usage section in the usage guidelines of the associated product. · After a Matrix cluster is deployed, do not edit the SSH port number. |

Modifying the SSH service port number for the server of each node
1. If the cluster has not been deployed, log in to the CLI of the node and execute the netstat -anp | grep after_port-number command to identify whether the specified port number is occupied. If it is not occupied, no information will be returned. If it is occupied, the following information will be returned.
If the cluster has already been deployed, in addition to the preceding checks, execute the following command to identify whether any service containers in the environment are using the specified port (check for other forms of port usage as necessary). More specifically:
¡ Port number 12345 is not used, and you can modify the port number to 12345.
[root@node1 ~]# kubectl get svc -A -oyaml | grep nodePort | grep -w 12345
[root@node1 ~]# kubectl get pod -A -oyaml | grep hostPort | grep -w 12345
¡ Port number 1234 is occupied by nodePort or hostPort, and you cannot modify the port number to 1234.
[root@node1 ~]# kubectl get svc -A -oyaml | grep nodePort | grep -w 1234
nodePort: 1234
[root@worker ~]# kubectl get pod -A -oyaml | grep hostPort | grep -w 1234
hostPort: 1234
2. Use the vim /etc/ssh/sshd_config command to open the configuration file of the sshd service. Modify the port number in the configuration file to the target port number (for example, 12345), and delete the annotation symbols.
Figure 2 The port number before modification is 22

Figure 3 The port number after modification

3. After modifying the port number, restart the sshd service.
[root@node-worker ~]# systemctl restart sshd
4. Identify whether the port number is successfully modified. The port number is successfully modified if the following information is returned.
The following uses the configuration on a master node for example.
[root@node-worker ~]# netstat -anp | grep -w 12345
tcp 0 0 0.0.0.0:12345 0.0.0.0:* LISTEN 26212/sshd
tcp6 0 0 :::12345 :::* LISTEN 26212/sshd
Modifying the SSH service port number for each Matrix node
1. Use the vim /opt/matrix/config/navigator_config.json command to open the navigator_config file. Identify whether the sshPort field exists in the file.
¡ If yes, modify the value for the field to the target value (12345 in this example).
¡ If not, manually add the field and specify a value for it.
{
"productName": "uc",
"pageList": ["SYS_CONFIG", "DEPLOY", "APP_DEPLOY"],
…
"matrixLeaderLeaseDuration": 30,
"matrixLeaderRetryPeriod": 2,
"sshPort": 12345
}
2. After modification, restart the Matrix service.
[root@node-worker ~]# systemctl restart matrix
3. Identify whether the port number is successfully modified. If yes, the last message in the log is as follows:
The following uses the configuration on a master node for example.
[root@node-worker ~]# cat /var/log/matrix-diag/Matrix/Matrix/matrix.log | grep "ssh port"
2022-03-24T03:46:22,695 | INFO | FelixStartLevel | CommonUtil.start:232 | ssh port = 12345.
Configuring password-based SSH login
The primary master node of the cluster manages and monitors all nodes in the cluster over SSH connection. After you change the SSH login password through the command line for a node, you must change that password from the Matrix Web interface and any other scenarios (such as a springboard machine and an application deployed on Matrix) that saves the password. The process is time and labor wasted and mistakes easily occur.
After password-based SSH login is configured on each node, you are not required to change a password for a node at multiple places. You can also configure settings for other nodes from a node without using an SSH login password.
You can configure password-based SSH login for the root user account or a non-root user account.
|
|
CAUTION: · Make sure all nodes in the cluster use the same SSH login method. If you change the SSH login method for a node after the Matrix service is started, you must make that change on all the other nodes and restart the Matrix service for the nodes one by one. · You can configure password-based SSH login before cluster deployment, matrix scale-out, and node rebuild or upgrade. Make sure you complete the password-based SSH login configuration all nodes before cluster deployment, matrix scale-out, and node rebuild or upgrade. · If you reinstall the operating system after Matrix deployment (in cluster or standalone mode), make sure the password-based SSH login configuration is completed on all nodes. In addition, make sure the SSH login method is password-based login on all nodes. |

Configuring password-based SSH login for the root user account
Log in to the CLI of each node to configure password-based SSH login. The following procedure uses node1 as an example.
|
|
NOTE: If the system prompts that a file or directory does not exist when you execute the ssh-keygen -R command, ignore the message, because this is normal. |
1. Use the root user account to log in to the CLI of node1. Execute the following commands to generate the public key and private key files required for SSH symmetric authentication through the ED25519 encryption algorithm to save the public/private key. The default file is /root/. ssh/id_ed25519.
[root@node1 ~]# ssh-keygen -t ed25519
Generating public/private ed25519 key pair.
Enter file in which to save the key (/root/.ssh/id_ed25519):
Enter passphrase (empty for no passphrase):
Enter same passphrase again:
Your identification has been saved in /root/.ssh/id_ed25519
Your public key has been saved in /root/.ssh/id_ed25519.pub
The key fingerprint is:
SHA256:GLeq7ZQlnKHRTWvefTwIAlAHyeB3ZfZt0Ovnfbkcbak root@node1
The key's randomart image is:
…
2. Clear old public key information on each node, and then copy the generated public key to each node (including the current node). In this example, the cluster has three master nodes and the default SSH port number 22 is used. The IP addresses of node 1, node 2, and node 3 are 192.168.227.171, 192.168.227.172, and 192.168.227.173, respectively.
[root@node1 ~]# ssh-keygen -R 192.168.227.171
[root@node1 ~]# ssh-keygen -R 192.168.227.172
[root@node1 ~]# ssh-keygen -R 192.168.227.173
[root@node1 ~]# ssh-copy-id -p 22 -i ~/.ssh/id_ed25519.pub [email protected]
[root@node1 ~]# ssh-copy-id -p 22 -i ~/.ssh/id_ed25519.pub [email protected]
[root@node1 ~]# ssh-copy-id -p 22 -i ~/.ssh/id_ed25519.pub [email protected]
3. Perform the same procedure on all the other nodes.
4. Use the root user account to log in to the CLI of node1 and then SSH to the current and the other nodes to verify that password-based SSH login takes effect.
In this example, the root user log in to node2 over SSH and the SSH port number is 22.
[root@node1 ~]# ssh -p 22 [email protected]
Configuring password-based SSH login for a non-root user account
Log in to the CLI of each node to configure password-based SSH login.
Because some commands must be executed with root permission, you must configure admin-to-admin password-based SSH login and root-to-admin password-based SSH login for an admin user account.
|
|
NOTE: If the system prompts that a file or directory does not exist when you execute the ssh-keygen -R command, ignore the message, because this is normal. |
1. Configuring admin-to-admin password-based SSH login
In this example, admin accounts are used for accessing the three master nodes of the cluster.
a. Use the admin user account to log in to the CLI of node1. Execute the ssh-keygen - t ed25519 command to generate public key and private key files required for SSH symmetric authentication to save the public/private key. The default file is /home/admin/. ssh/id_ ed25519.
b. Clear old public key information on each node, and then copy the generated public key to each node (including the current node).In this example, the cluster has three master nodes and the default SSH port number 22 is used. The IP addresses of node 1, node 2, and node 3 are 192.168.227.171, 192.168.227.172, and 192.168.227.173, respectively.
[root@node1 ~]# ssh-keygen -R 192.168.227.171
[root@node1 ~]# ssh-keygen -R 192.168.227.172
[root@node1 ~]# ssh-keygen -R 192.168.227.173
[root@node1 ~]$ ssh-copy-id -p 22 -i ~/.ssh/id_ed25519.pub [email protected]
[root@node1 ~]$ ssh-copy-id -p 22 -i ~/.ssh/id_ed25519.pub [email protected]
[root@node1 ~]$ ssh-copy-id -p 22 -i ~/.ssh/id_ed25519.pub [email protected]
c. Perform the same procedure on all the other nodes.
d. Log in to the backend as the admin user. Log in to the current node and other nodes through SSH to identify whether the password-based SSH login configuration takes effect.
[root@node1 ~]$ ssh -p 22 [email protected]
2. Configuring root-to-admin password-based SSH login
a. Use the admin user account to log in to the CLI of node1 and switch to the root use account.
b. Generate new public key and private key files, clear old public key information, and then copy the new public key to each node (including the current node).
c. Perform the same procedure on all the other nodes..
d. Log in to the back end of a node as the admin user, and switch the user to the root user. Log in to the current node and other nodes through SSH as the admin user to identify whether the password-based SSH login configuration takes effect.
[root@node1 ~]# ssh -p 22 [email protected]
Configuring password-based SSH login for Matrix
1. Open the navigator_config file in the vim/opt/matrix/config/navigator_config.json directory to check whether the sshLoginMode field exists in the file. If the field exists, set the value to secret. If the field does not exist, manually add the field and assign a value to it. The following configuration takes the x86 version as an example.
{
"productName": "uc",
"pageList": ["SYS_CONFIG", "DEPLOY", "APP_DEPLOY"],
…
"matrixLeaderLeaseDuration": 30,
"matrixLeaderRetryPeriod": 2,
"sshPort": 22,
"sshLoginMode":"secret"
}
2. Restart the Matrix service.
[root@node1 ~]# systemctl restart matrix
3. Verify that the configuration takes effect.
[root@node1 ~]# cat /var/log/matrix-diag/Matrix/Matrix/matrix.log | grep "sshLoginMode"
2022-03-31T20:11:08,119 | INFO | features-3-thread-1 | CommonUtil.start:245 | ssh port = 22, sshLoginMode = secret.
Deploying Unified Platform
|
|
IMPORTANT: · In scenarios where an inner NTP server is used, make sure the system time of all nodes is consistent with the current time before deploying the cluster. In scenarios where an external NTP server is used as the clock source, make sure the time of the external NTP server is consistent with the current time. Network disconnectivity, failure, or time inaccuracy of the NTP server might cause deployment failure of the Matrix cluster. · To view the system time, execute the date command. To modify the system time, use the date -s yyyy-mm-dd or date -s hh:mm:ss command. · During application deployment or upgrade, do not restart the matrix service or a node and do not disconnect the server power supply. If you do so, application deployment data might be corrupted (etcd data error or disk file corruption for example), which might cause operation failure. |

For NSM, before you deploy Unified Platform in a non-root environment (for example, admin), you must execute the following commands to manually create the log directory as the root user and edit the owner:
mkdir -p /var/log/matrix-diag/deploy/ && chown admin:wheel /var/log/matrix-diag/deploy/
ll -d /var/log/matrix-diag/deploy/
If the cluster has multiple nodes, perform this operation on all nodes.
Pre-deployment check
1. Log in to the back end of each node in turn, execute the sudo bash /opt/matrix/tools/env_check.sh command to perform environment check, and take appropriate actions according to the check results.
|
|
NOTE: · You can execute the env_check.sh script in all operating systems supported by Unified Platform. · When the CPU frequency is lower than 2000 MHz, the Matrix self-check script (env_check.sh) and health check module will print a CPU frequency alarm. Please make sure the server hardware meets the requirements, and the CPU power supply mode is set to performance(For example, the NingOS system can execute the cpupower frequency-set -g performance command). · To view the help and obtain more script usage methods, execute the sudo bash /opt/matrix/tools/env_check.sh -h command in the back end of the node. For example, the command used to obtain the IOPS performance of the etcd disk is sudo bash /opt/matrix/tools/env_check.sh -p -d /var/lib/etcd. · After cluster deployment is complete, services such as docker and chrony are automatically started. Ignore the check result for those services. |
Manually confirm the items listed in the following table that are not checked in the env_check.sh script. Make sure the conditions for installing Matrix are met.
Table 11 Verifying the installation environment
|
Item |
Requirements |
|
Network port |
Make sure each Matrix node has a unique network port. Do not configure subinterfaces or secondary IP addresses on the network port. |
|
IP address |
The IP addresses of network ports used by other Matrix nodes and the IP address of the network port used by the current Matrix node cannot be on the same subnet. The source IP address for the current Matrix node to communicate with other nodes in the Matrix cluster must be the IP address of the Matrix cluster. You can execute the ip route get targetIP command to obtain the source IP address. |
|
Time zone |
· To avoid node adding failure on the GUI interface, make sure the system time zone of all Matrix nodes are the same. You can execute the timedatectl command to view the system time zone of each Matrix node. · When selecting a time zone, do not select Beijing. |
|
Host name |
To avoid cluster creation failure, make sure the host name meets the following rules: · The host name of each node must be unique. · Do not use the default host names, including localhost, localhost.localdomain, localhost4, localhost4.localdomain4, localhost6, and localhost6.localdomain6. · The host name contains a maximum of 63 characters and supports only lowercase letters, digits, hyphens, and decimal points. It cannot start with 0, 0x, hyphen, or decimal point, and cannot end with hyphen or decimal point. It cannot be all digits. |
2. Before you deploy the UDTP_Base_version_platform.zip component of Unified Platform, execute the cat /proc/sys/vm/nr_hugepages command on each node to identify whether HugePages is enabled. If the return result is not 0, record that value and execute the echo 0 > /proc/sys/vm/nr_hugepages command to temporarily disable hugepages. After you deploy the UDTP_Base_version_platform.zip component, replace value 0 in the echo 0 > /proc/sys/vm/nr_hugepages command with the recorded value, and then execute the command on each node to restore the HugePages configuration.
Creating a Matrix cluster
Logging in to Matrix
Restrictions and guidelines
On Matrix, you can perform the following operations:
· Upload or delete the Unified Platform installation package.
· Deploy, upgrade, expand, or uninstall Unified Platform.
· Upgrade or rebuild cluster nodes.
· Add or delete worker nodes.
Procedure
1. Enter the Matrix login address in your browser and then press Enter.
¡ If the node that hosts Matrix uses an IPv4 address, the login address is in the https://ip_address:8443/matrix/ui format.
¡ If the node that hosts Matrix uses an IPv6 address, the login address is in the https://[ip_address]:8443/matrix/ui format.
ip_address represents the IP address of the node that hosts Matrix. This configuration uses an IPv4 address. 8443 is the default port number.
|
|
NOTE: · In cluster deployment mode, ip_address can be the IP address of any Master node in the cluster before the cluster is deployed. · When deploying cluster nodes, make sure no duplicate host names exist. After successfully deploying the cluster, you cannot edit the host names of the cluster nodes. · During cluster deployment, you cannot log in to the cluster nodes to perform any operations, or add the nodes deployed in the cluster to another cluster. |
Figure 4 Matrix login page

2. Enter the username and password, and then click Login. The cluster deployment page is displayed.
The default username is admin and the default password is Pwd@12345. If you have set the password when installing the operating system, enter the set password.
To deploy a dual-stack cluster, enable the dual-stack feature.
Figure 5 Single-stack cluster deployment page

Figure 6 Dual-stack cluster deployment page

Configuring cluster parameters
Before deploying cluster nodes, first configure cluster parameters. On the Configure cluster parameters page, configure cluster parameters as described in the following two tables and then click Apply.
Table 12 Configuring single-stack cluster parameters
|
Parameter |
Description |
|
Northbound service Virtual IP |
IP address for northbound interface services. This address must be on the same subnet as the master nodes. |
|
Service IP pool |
Address pool for IP assignment to services in the cluster. It cannot overlap with other subnets in the deployment environment. The default value is 10.96.0.0/16. Typically, the default value is used. |
|
Container IP pool |
Address pool for IP assignment to containers. It cannot overlap with other subnets in the deployment environment. The default value is 177.177.0.0/16. Typically, the default value is used. |
|
VIP Mode |
Options are Internal and External. In Internal mode, the VIP is assigned by Matrix to the cluster and Matrix manages drift of the VIP among cluster nodes. In External mode, the VIP is assigned to the outside of the cluster by a third-party platform or software, and is not managed by Matrix. The default is Internal. This parameter is added as from E0713. |
|
Cluster network mode |
Network mode of the cluster: Single Subnet: In this mode, all nodes and virtual IPs in the cluster must be on the same subnet for mutual communication. Single Subnet-VXLAN: In this mode, all nodes and virtual IPs in the cluster must be on the same subnet for mutual communication. Only an IPv4 network is supported in this mode. |
|
NTP server |
Used for time synchronization between the nodes in the cluster. Options include Internal server and External server. If you select External server, you must specify the IP address of the server, and make sure the IP address does not conflict with the IP address of any node in the cluster. An internal NTP server is used in this configuration. After cluster deployment is started, the system synchronizes the time first. After the cluster is deployed, the three master nodes will synchronize the time regularly to ensure that the system time of all nodes in the cluster is consistent. To deploy an environment with upper- and lower-level nodes, configure the same NTP server for both the upper- and lower-level nodes, and make sure they have consistent system time. |
|
External DNS server |
Used for resolving domain names outside the K8s cluster. Specify it by using the IP: Port format. In this configuration, leave this parameter not configured. The DNS server in the cluster cannot resolve domain names outside the cluster. This platform will forward an external domain name randomly to an external DNS server for resolution. A maximum of 10 external DNS servers can be configured. All the external DNS servers must have the same DNS resolution capability, and each can perform external domain name resolution independently. These DNS servers will be used randomly without precedence and sequence. Make sure all DNS servers can access the root domain. To verify the accessibility, use the nslookup -port = {port} -q = ns. {Ip} command. |
|
Self-Defined VIPs |
This setting is typically used to isolate the cluster network from the management network. Make sure the self-defined VIPs do not belong to other subnets in the deployment environment. |
Table 13 Configuring dual-stack cluster parameters
|
Parameter |
Description |
|
Northbound service VIP1 and VIP2 |
IP address for northbound interface services. This address must be on the same subnet as the master nodes. VIP1 is an IPv4 address, and VIP2 is an IPv6 address. For the northbound service VIPs, you must specify at least one IPv4 address or IPv6 address. Also, you can configure both an IPv4 address and IPv6 address. You cannot configure two IP addresses of the same version. When configuring IPv6 addresses, make sure that they do not end with a colon. |
|
Service IP pool |
This parameter takes effect only in a dual-stack environment. Address pool for assigning IPv4 addresses and IPv6 addresses to services in the cluster. The default IPv4 address is 10.96.0.0/16, and the default IPv6 address is fd00:10:96::/112. Typically, the default values are used. You cannot change the value after deployment. To avoid cluster errors, make sure the subnet does not overlap with other subnets in the deployment. |
|
Container IP pool |
This parameter takes effect only in a dual-stack environment. Address pool for assigning IPv4 addresses and IPv6 addresses to containers in the cluster. The default IPv4 address is 177.177.0.0/16, and the default IPv6 address is fd00:177:177::/112. Typically, the default values are used. You cannot change the value after deployment. To avoid cluster errors, make sure the subnet does not overlap with other subnets in the deployment. |
|
VIP |
Options are Internal and External. In Internal mode, the VIP is assigned by Matrix to the cluster and Matrix manages drift of the VIP among cluster nodes. In External mode, the VIP is assigned to the outside of the cluster by a third-party platform or software, and is not managed by Matrix. The default is Internal. This parameter is added as from E0713. |
|
Cluster network mode |
Network mode of the cluster. Only Single Subnet mode is supported. In this mode, all nodes and virtual IPs in the cluster must be on the same subnet for mutual communication. |
|
NTP server |
Used for time synchronization between the nodes in the cluster. Options include Internal server and External server. If you select External server, you must specify the IP address of the server, and make sure the IP address does not conflict with the IP address of any node in the cluster. An internal NTP server is used in this configuration. After cluster deployment is started, the system synchronizes the time first. After the cluster is deployed, the three master nodes will synchronize the time regularly to ensure that the system time of all nodes in the cluster is consistent. To deploy an environment with upper- and lower-level nodes, configure the same NTP server for both the upper- and lower-level nodes, and make sure they have consistent system time. |
|
External DNS server |
Used for resolving domain names outside the K8s cluster. Specify it by using the IP: Port format. In this configuration, leave this parameter not configured. The DNS server in the cluster cannot resolve domain names outside the cluster. This platform will forward an external domain name randomly to an external DNS server for resolution. A maximum of 10 external DNS servers can be configured. All the external DNS servers must have the same DNS resolution capability, and each can perform external domain name resolution independently. These DNS servers will be used randomly without precedence and sequence. Make sure all DNS servers can access the root domain. To verify the accessibility, use the nslookup -port = {port} -q = ns. {Ip} command. |
|
Self-Defined VIPs |
This setting is typically used to isolate the cluster network from the management network. Make sure the self-defined VIPs do not belong to other subnets in the deployment environment. |
|
|
IMPORTANT: If the existing NTP server cannot reach the northbound addresses, you can change cluster parameters to add NTP servers at NIC network configuration after cluster deployment. |

Creating a cluster
For standalone deployment, add one master node on Matrix. For cluster deployment, add three master nodes on Matrix.
To create a cluster:
1. After configuring the cluster parameters, click Next.
2. In the Master Node
area, click the plus icon  .
.
Figure 7 Adding a single-stack node

Figure 8 Adding a dual-stack node

3. Configure node parameters as shown in the following figure and then click OK.
Table 14 Node parameter description
|
Item |
Description |
|
Type |
Displays the node type. Options include Master and Worker. This field cannot be modified. |
|
IP address |
Enter the planned IP address for the master node. You can add master nodes in bulk. In bulk adding mode, make sure the username and password of the master nodes are the same. |
|
Username |
Specify the user account to access the operating system. Use an account based on your configuration during system installation. All nodes in a cluster must use the same user account. |
|
Password |
Specify the password to access the operating system. |
4. Click Start deployment.
When the deployment progress of each node
reaches 100%, the deployment finishes. After the cluster is deployed, a star
icon  is displayed at the left corner of the primary master node, as
shown in the following figure.
is displayed at the left corner of the primary master node, as
shown in the following figure.
Figure 9 Cluster deployment completed

After the cluster is deployed, you can skip over the procedures for configuring the network and deploying applications and configure them later as needed.
Deploying Unified Platform applications
In a standalone environment, you can select the standard or proxy deployment mode. You cannot change the deployment mode after you install a component.
· Standard deployment mode—Applicable to the systems of standard architecture and the server side of server-proxy architecture. You can deploy all components of Unified Platform in standard mode.
· Proxy deployment mode—Used for the proxy side of the server-proxy architecture, which is applicable to U-Center products. You can deploy only the Base, Connect, UCP_BasePlat, and UCP_CollectPlat components of Unified Platform in proxy mode.
|
|
IMPORTANT: · When you bulk upload application packages simultaneously, make sure the deployment page is not closed, the PC does not enter sleep mode, and the network between the PC and cluster is not disconnected. If any of these situations occur while the system is deploying components, some components might fail to be deployed correctly. (During the deployment process, you can switch between the browser tabs, minimize the browser window, and lock the PC screen.) · If a cluster resource, for example, CPU or memory, reaches the usage threshold during the deployment, some components might fail to be deployed correctly. You can attempt to redeploy these components that failed to be deployed later. · When you bulk deploy a large number of applications, resource contention might occur, causing some applications to fail. For applications that fail to be deployed, you can click Retry on the page to attempt redeployment. · By default, the websocket, region, netconf, and Common application services of the Connect component, as well as the incident application service of the Common component are disabled. They are automatically enabled only when you deploy other components that depend on these application services. To manually enable them on Matrix as required by the scenario, see "How can I enable Unified Platform application services on Matrix?." · To change the deployment mode (such as from standard to proxy), reinstall Matrix. Changing the deployment mode by only reinstalling the Base component might cause deployment issues for other components. |

Deploying the Unified Platform Base application package (standard mode)
|
|
IMPORTANT: When you upload installation packages, make sure the network between the browser and the cluster is operating stably and the bandwidth is not less than 10 Mbps. If the network does not meet the requirements, the installation uploading might fail or take a long time. |

You can deploy the application packages only on the Matrix page, and you can bulk upload application packages. However, you must deploy the Base component first before deploying other applications.
1. In the address bar of the browser, enter https://ip_address:8443/matrix/ui to log in to Matrix, where the ip_address parameter specifies the northbound service VIP.
2. Access the Deploy > Applications page.
3. Select Standard for Deploy Mode.
Figure 10 Selecting a deployment mode

4. Click Deploy Applications.
Figure 11 Installing the Base component

5. Click Upload. In the dialog box that opens, upload the Base installation package.
Figure 12 Uploading the Base installation package

6. After the Base installation package is uploaded, select the Base application package on the current page and then click Next.
|
|
NOTE: Do not select the other application packages. If you do that, you cannot install the Base component. |
Figure 13 Base installation package uploaded

7. On the current page, directly click Next without performing any other operations.
Figure 14 Selecting applications

8. Click Edit to configure the Base configuration item parameters. Then, click OK to save the settings.
Table 15 Base configuration item parameters
|
Configuration item |
Description |
|
Resource Level |
In standalone mode, options include single_large, single_medium, and single_small. In cluster mode, options include cluster_large, cluster_medium, and cluster_small. |
|
Deployment Protocol |
Options include HTTP and HTTPS. |
|
HTTP Protocol Port Number |
The default value is 30000. |
|
HTTPS Protocol Port Number |
The default value is 30443. |
|
CPU manufacturer |
Select CPU manufacturer. |
|
Use Third-Party Database |
Select whether to use a third-party database. |
|
Theme |
Options include white and star. |
|
Language |
Options include zh_CN and en_US. |
Figure 15 Configuring parameters

9. After configuring the parameters, click Deploy to start deploying the Base component.
10. After the Base component is deployed, the original Deploy > Applications page is automatically updated to the Deploy > Convergence Deployment page, where you can deploy other optional packages.
Deploying the Unified Platform Base application package (proxy mode)
|
|
IMPORTANT: When you upload installation packages, make sure the network between the browser and the cluster is operating stably and the bandwidth is not less than 10 Mbps. If the network does not meet the requirements, the installation uploading might fail or take a long time. |

You can deploy the application packages only on the Matrix page, and you must deploy the Base component first. You can bulk upload application packages to deploy both the Base and optional components or separately deploy optional components after the Base component. If the component to be deployed has dependent components, deploy the dependent components together or make sure the dependent components have been deployed in advance.
1. In the address bar of the browser, enter https://ip_address:8443/matrix/ui to log in to Matrix, where the ip_address parameter specifies the northbound service VIP.
2. Access the Deploy > Applications page.
3. Select Proxy for Deploy Mode.
Figure 16 Selecting a deployment mode

4. Click Deploy Applications.
Figure 17 Installing the Base component

5. Click Upload. In the dialog box that opens, upload the Base installation package.
Figure 18 Uploading the Base installation package

6. After the Base installation package is uploaded, select the Base application package on the current page and then click Next.
Figure 19 Base installation package uploaded

7. On the current page, directly click Next without performing any other operations.
Figure 20 Selecting applications

8. Click Edit to configure the Base configuration item parameters. Then, click OK to save the settings.
Table 16 Base configuration item parameters
|
Configuration item |
Description |
|
RESOURCE LEVEL |
Options include single_large, single_medium, and single_small. |
|
CPU MANUFACTURER |
Select CPU manufacturer. |
Figure 21 Configuring parameters

9. After configuring the parameters, click Deploy to start deploying the Base component.
Deploying NSM
Installation guidelines
· Before you install NSM, install the related Unified Platform version.
· The time taken for installation varies by network scale and component. For a small-scale standalone deployment, the installation typically takes 35 to 45 minutes.
Installing NSM applications (standard mode)
Uploading installation packages
1. Log in to Matrix. On the top navigation bar, click DEPLOY. From the navigation pane, select Convergence Deployment.
Figure 22 Convergence management

2. Click Package Management.
Figure 23 Package management

3. Click Install to access the page for uploading installation packages. In the dialog box that opens, click Select Files, select installation packages, and then click Upload to upload the selected installation packages to the system. For installation packages for NSM, see "Obtaining software packages."
Figure 24 Uploading or registering installation packages

4. After the upload is completed, return to the Convergence Management page, and then click Install to access the application selection page.
Selecting applications
Select the U-Center Basic NMS scene and, select applications as needed, and then click Next to access the installation package selection page. By default, some applications of the Unified Platform and NSM components are selected.
Figure 25 Selecting a scene and applications

Selecting installation packages
On this page, select the version of each component, and then click Next. In this example, select E7301.
Figure 26 Selecting installation package versions

Configuring resources
On the resource configuration page, set an appropriate resource level based on the planned network size and service size, and then click Next.
Figure 27 Unified Platform

Figure 28 U-Center

Figure 29 NSM

Configuring parameters
1. On the parameter configuration page, follow the navigation bar to configure the relevant parameters.
Figure 30 BMP_UCP_BasePlat

Figure 31 BMP_CMDB

2. Click Deploy. In the dialog box that opens, confirm node and application information, and then click OK to start deploying all selected components.
Figure 32 Confirming parameters

Figure 33 Deploying applications


|
|
NOTE: If the deployment fails, collect logs for the deployment process for troubleshooting. For more information, see "FAQ." |
Installing NSM applications (proxy mode)
Logging in to Matrix
1. In the address bar of the browser, enter https://ip_address:8443/matrix/ui to log in to Matrix, where the ip_address parameter specifies the northbound service VIP.
2. Navigate to the Deploy > Applications page.
Figure 34 Application list page

3. Click Deploy Applications to start deployment NSM.
Selecting installation packages
On this page, click Upload. In the window that opens, select the target files, and then click Upload. After the upload is complete, the application packages are displayed in the list. Select the application packages to install, and then click Next to wait for the package resolving to complete.
Figure 35 Selecting installation packages

Selecting applications
After the system completes resolving the packages, click Next to access the application selection page.
Figure 36 Selecting applications

Configuring parameters
Click Next to access the parameter configuration page. To edit the resource level, click Edit, select a resource level from the drop-down field, and then click OK.
Figure 37 Configuring parameters

Starting deployment
Verify the settings, and then click Deploy to start deployment.
Figure 38 Starting deployment

Checking NSM after installation
|
|
NOTE: · You can log in to the environment to view function menus on the page only for deployment in standard mode. · To view the related function tabs, you must first obtain the corresponding product license. |
After you deploy NSM, the related menus will be displayed on Unified Platform. You can use NSM features after logging in to Unified Platform.
To log in to NSM:
1. In the address bar of the browser, enter the login address (the default is http://ip_address:30000/) of NSM, and press Enter to access the login page as shown in Figure 39.
¡ The ip_address parameter specifies the northbound service VIP of the NSM cluster.
¡ 30000 is the default port number.

2. Enter the username and password. The default username is admin. After you log in to NSM, the main page opens.
Deploy NSM-Extend
· For information about VPNM component deployment, see "Deploy VPNM"
· For information about WSM component deployment, see "Deploy WSM"
· For information about ONM component deployment, see "Deploy ONM"
|
|
NOTE: · Before you deploy VPNM, WSM, or ONM, install Unified Platform and its dependency applications. For more information, see "Application installation packages for NSM-Extend." · This chapter assumes that Unified Platform and the dependency applications have been installed. For information about installing Unified Platform and the dependency applications, see "Deploying Unified Platform" and "Deploying NSM". · To avoid configuration data incompatibility when multiple versions of an application package exist, click Register Data before deployment or upgrade to register convergence deployment configuration data carried in the application package. |
If configuration data from different versions is incompatible, follow these steps to re-register the configuration data before deployment:
1. On the Deploy > Convergence Deployment page, click Packages Management to access the installation package management page.
2. Select the application package to install or upgrade, and then click Register Data to register convergence deployment configuration data carried in the application package.
Figure 40 Registering data

Deploy VPNM
This chapter describes the procedure for deploying VPNM on the convergence deployment page of Matrix. After deployment, the VPNM component is deployed as a container on the host where Unified Platform is located.
Installation procedure
Log in to Matrix
1. In the address bar of the browser, enter https://ip_address:8443/matrix/ui to log in to Matrix. The ip_address parameter specifies the northbound service VIP.
2. On the top navigation bar, click DEPLOY. From the navigation pane, select Convergence Deployment, as shown in Figure 41.
Figure 41 Convergence Deployment

Uploading installation packages
1. Click Packages Management to access the installation package management page. On this page, you can upload and delete installation packages. The installation package list displays names, versions, sizes, creation time, and other information of the uploaded installation packages, as shown in Figure 42.
2. Click Upload to upload the component installation packages to the system. You can bulk select application installation packages as needed.
3. After the installation package upload is complete, click Return to return to the convergence deployment page.
Figure 42 Package Management (for illustration only)

Select applications
1. On the convergence deployment page, click Install to access the Select Applications page.
2. Select the application to install, as shown in Figure 43.
3. After selection, click Next.

Select installation packages
1. Select installation packages of the desired versions for the associated components as needed.
2. Click Next to access the Configure Resource page.
Figure 44 Select installation packages

Configure resources
1. On the Configure Resources page, select an appropriate resource level based on the designed network scale and service scale.
|
|
TIP: Refer to the specification description on the page, and then select an appropriate resource level based on your actual service scale. |

2. After you select the resource levels, click Next to access the Configure Parameters page.
Figure 45 Resource configuration page

Configure parameters
1. Configure the nodes for running the component.
Figure 46 VPNM controller parameter settings

2. After verifying the configuration, click Deploy to start component deployment after confirming the parameters, and then wait for the deployment to complete in about 10 minutes.
|
|
NOTE: If the deployment fails, collect logs for the deployment process for troubleshooting. For more information, see "FAQ." |
Check after installation
View component details
To view information about an installed
component, navigate to the DEPLOY > Convergence Deployment page, and then click the  icon on the left side of that component,
as shown in Figure 47.
icon on the left side of that component,
as shown in Figure 47.
Figure 47 View component details

View the VPNM component page
|
|
NOTE: To view the related function tabs, you must first obtain the corresponding product license. |
After you deploy VPNM, the related menus will be displayed on Unified Platform. You can use VPNM features after you log in to Unified Platform.
To log in to Unified Platform:
1. Enter http://ip_address:30000 in the address bar of a Web browser to access the page as shown in Figure 48. The ip_address argument represents the northbound service VIP.

2. Enter the operator name and password (admin and Pwd@12345 by default), and click Log In to access the homepage of the component.
3. On the Automation > VPNs page, you can use VPN-associated features, as shown in Figure 49.

Deploy WSM
Installation procedure (standard mode)
This section describes the procedure for deploying WSM in standard mode on the deployment page of Matrix.
Log in to Matrix
1. In the address bar of the browser, enter https://ip_address:8443/matrix/ui to log in to Matrix. The ip_address argument specifies the northbound service VIP.
2. Access the Deploy > Convergence Deployment page.
Figure 50 Convergence Deployment

Upload installation packages
1. Click the Package Management button, and then click Upload to upload the component installation packages to the system. You can upload application packages in bulk as needed.
2. After the installation package upload is complete, click Return to return to the convergence deployment page.
Figure 51 Package Management (for illustration only)

Select applications
Click Install to open the application selection page, and then select the WSM application.
Figure 52 Select applications

Select installation packages
After you select applications, click Next to open the package selection page, and select installation packages as needed.
Figure 53 Select installation packages (for illustration only)

Configure resources
Click Next to open the resource configuration page. On the resource configuration page, select an appropriate resource level based on the designed network scale and service scale.
|
|
TIP: Refer to the specification description on the page, and then select an appropriate resource level based on your actual service scale. |

Figure 54 Configure resources (in standalone mode)

Configure parameters
Click Next to open the parameter configuration page. WSM does not require resource configuration. You can click Next without configuring parameters, and then start component deployment.
Deploy components
Click Deploy to start component deployment, and then wait for the deployment to complete.
|
|
NOTE: · Deployment in either standalone or cluster mode takes about 30 minutes. You can make an appropriate deployment plan accordingly. · If the deployment fails, collect logs for the deployment process for troubleshooting. For more information, see "FAQ." |
Installation procedure (proxy mode)
This section describes the procedure for deploying WSM in proxy mode on the deployment page of Matrix.
|
|
NOTE: The time of the WSM level and proxy must be synchronized. |
Log in to Matrix
1. In the address bar of the browser, enter https://ip_address:8443/matrix/ui to log in to Matrix. The ip_address argument specifies the northbound service VIP.
2. Navigate to the Deploy > Applications page.
Figure 55 Application list page

3. Click Deploy Applications to start deployment NSM.
Selecting installation package
On this page, click Upload. In the window that opens, select the target file, and then click Upload. After the upload is complete, the application package is displayed in the list. Select the application package to install, and then click Next to wait for the package resolving to complete.
Figure 56 Selecting installation package

Selecting application
After the system completes resolving the packages, click Next to access the application selection page.
Figure 57 Selecting application

Configuring parameters
Click Next to access the parameter configuration page. To edit the resource level, click Edit, select a resource level from the drop-down field, and then click OK.
Figure 58 Configuring parameters

Starting deployment
Verify the settings, and then click Deploy to start deployment.
Check after installation
View installation information
After completing installation in standard
mode, to view information about an installed component, navigate to the Deploy > Convergence Deployment
page, and then click the  icon on the left
side of that component.
icon on the left
side of that component.
Figure 59 Installation information (standard mode)

After completing installation in proxy
mode, to view information about a deployed application, navigate to the Deploy > Applications
page, and then click the  icon on the left
side of that application.
icon on the left
side of that application.
Figure 60 Installation information (proxy mode)

View the system menu
|
|
NOTE: · You can log in to the environment to view function menus on the page only for deployment in standard mode. · To view the related function tabs, you must first obtain the corresponding product license. · After installation, The first page access after installation might be slow. Wait approximately 10 minutes before accessing WSM-related menus. |
After you deploy WSM, the related menus will be displayed on Unified Platform. You can use WSM features after you log in to Unified Platform.
To view the system menu:
1. Enter http://ip_address:30000 in the address bar of a Web browser. The ip_address argument represents the northbound service VIP.
Figure 61 Log in to a deployed component

2. Enter the operator name and password (admin and Pwd@12345 by default), and click Log In to access the homepage of the component.
3. On the Management > Wireless Management page, you can use WSM-associated features, as shown in Figure 62.

Deploy ONM
This chapter describes the procedure for deploying ONM on the convergence deployment page of Matrix.
Installation procedure
Log in to Matrix
1. In the address bar of the browser, enter https://ip_address:8443/matrix/ui to log in to Matrix. The ip_address parameter specifies the northbound service VIP.
2. Navigate to the DEPLOY > Convergence Deployment page.
Figure 63 Convergence Deployment

Upload installation packages
1. Click Packages Management to access the installation package management page. Click Upload to upload the component installation packages to the system. You can bulk select application installation packages as needed.
2. After the installation package upload is complete, click Return to return to the convergence deployment page.
Figure 64 Package Management (for illustration only)

Select applications
Click Install. On the Select Applications page that opens, select the ONM component.
|
|
NOTE: If the dependency applications of the selected ONM application are not installed, the system will automatically select them. |
Figure 65 Select applications

Select installation packages
After you select applications, click Next to open the package selection page, and select installation packages as needed.
Figure 66 Select installation packages (for illustration only)

Configure resources
Click Next to open the resource configuration page. Select an appropriate resource level based on the designed network scale and service scale.
|
|
TIP: Refer to the specification description on the page, and then select an appropriate resource level based on your actual service scale. |

Figure 67 Configure resources

Configure parameters
On the Configure Parameters page, configure relevant parameters according to the requirements of each component as needed.
Figure 68 Configure parameters

Deploy the component
Click Deploy to start component deployment after confirming the parameters, and then wait for the deployment to complete.
|
|
NOTE: · Deployment in either standalone or cluster mode takes about 5 to 10 minutes. You can make an appropriate deployment plan accordingly. · If the deployment fails, collect logs for the deployment process for troubleshooting. For more information, see "FAQ." |
Check after installation
View component installation information
To view information about an installed
component, navigate to the Deploy > Convergence Deployment page, and then click the  icon on the left side of that component.
Figure 69 Component installation information
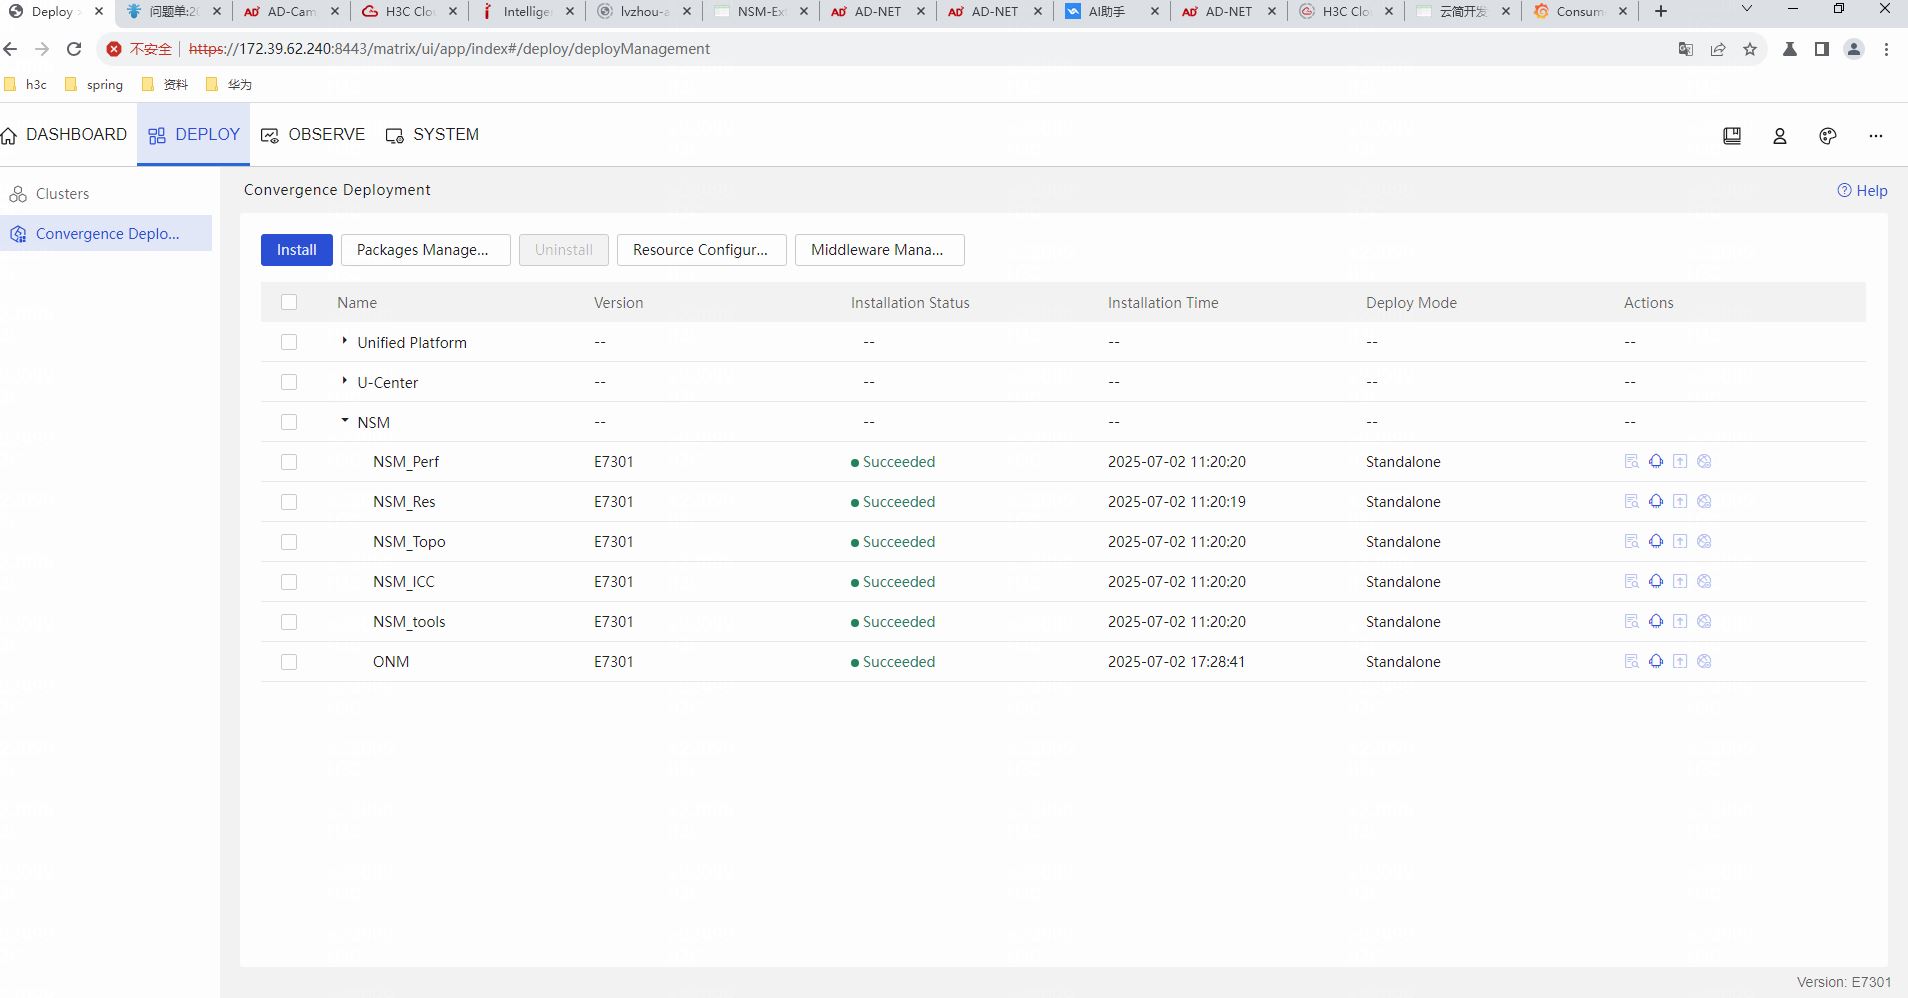
View the system menu
|
|
NOTE: To view the related function tabs, you must first obtain the corresponding product license. |
After you deploy ONM, the related menus will be displayed on Unified Platform. You can use ONM features after you log in to Unified Platform.
To log in to Unified Platform:
1. Enter http://ip_address:30000 in the address bar of a Web browser. The ip_address argument represents the northbound service VIP.
Figure 70 Log in to a deployed component

2. Enter the operator name and password (admin and Pwd@12345 by default), and click Log In to access the homepage of the component.
3. On the Management > All Optical Network page, you can use AON-associated features, as shown in Figure 71.
Figure 71 New menu items on the Management page after ONM deployment
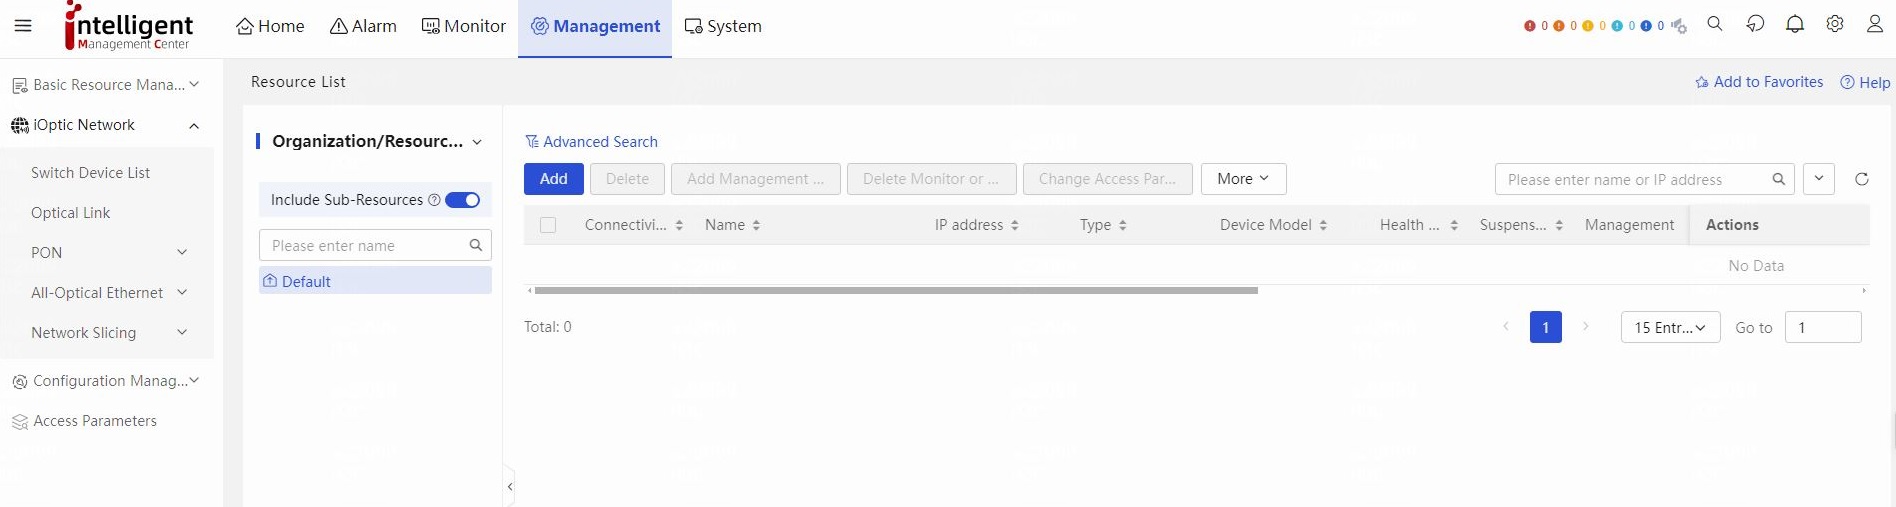
Registering the software
Installing the license on the license server
For more information about requesting and installing the license, see H3C Software Product Remote Licensing Guide.
Obtaining the license authorization
After installing the license for the product on the license server, you only need to connect to the license server from the license management page to obtain the license authorization. To do that, perform the following tasks:
1. Log in to Unified Platform. On the top navigation bar, click System. From the navigation pane, select License Management > License Information.
2. Configure the license server parameters on the page. Table 17 describes each parameter.
|
Parameter |
Description |
|
IP Address |
The IP address is configured on the license server and used for communication among nodes in the cluster. |
|
Port Number |
The default is 5555, which is the same as the port number of the license server authorization service. |
|
Client Name |
Client name set on the license server. |
|
Client Password |
Password for the client set on the license server. |
3. After configuration, click Connect to establish a connection to the license server. After the connection is established successfully, NSM can automatically obtain the license authorization in real time.
Backup and restoration
You can back up and restore NSM components from Unified Platform. For more information, see H3C Unified Platform Deployment Guide.
Rebuilding and recovering a cluster from failure
If a cluster node has a hardware failure and cannot recover, replace that node. If a cluster node's operating system is abnormal, reinstall the operating system and Matrix on that node. You can restore the cluster from Unified Platform. For more information, see H3C Unified Platform Deployment Guide.
|
|
NOTE: In the current software version, WSM does not support rebuilding and recovering a cluster from failure. |
Upgrading and uninstalling software
This chapter describes the upgrade and uninstallation procedures of the NSM and NSM-Extend components. For information about the upgrade and uninstallation procedures of Unified Platform, see H3C Unified Platform Deployment Guide.
Upgrading components
|
|
CAUTION: · When upgrading components, follow the dependency order. For example, upgrade the network resource component before the network topology component, because the latter depends on the former. For more information about the dependencies, see "Obtaining software packages." · This section uses NSM upgrade as an example. The upgrade method for the NSM-Extend component is similar to that of NSM. · Before you upgrade NSM in a non-root environment (for example, admin), you must execute the chown -R admin:wheel /opt/matrix/app/install/metadata/ command to use the root user to edit the owner of the deployment file. If the cluster has multiple nodes, perform this operation on all nodes. |

Upgrading components (standard mode)
1. Log in to Matrix, and access the Deploy > Convergence Deployment page.
2. Click the  icon to the left
of the NSM component to expand the component information.
icon to the left
of the NSM component to expand the component information.
Figure 72 Expanding component information

3. Click the  icon in the Actions column for the component to be upgraded to access
the upgrade page.
icon in the Actions column for the component to be upgraded to access
the upgrade page.
Figure 73 Clicking the Upgrade icon

4. NSM supports upgrading a single component and bulk upgrading multiple components. Take upgrading a single component as an example. Click the Upload button. In the dialog box that opens, click the Select Files button. Select the target installation package, and then click the Upload button.
Figure 74 Uploading installation packages

5. Select the uploaded installation package, and then click Upgrade to upgrade the related component.
Figure 75 Component upgrade

Upgrading components (proxy mode)
1. Log in to Matrix, and access the Deploy > Applications page.
2. Click Deploy Applications. On the installation package selection page that opens, click Upload to upload the installation package for version upgrade.
3. Select the installation package for version upgrade, and then click Next to wait for the package resolving to complete. You can complete upgrade following the application deployment procedure for version upgrade.
Uninstalling components
Uninstalling components (standard mode)
|
|
CAUTION: · When uninstalling applications on Matrix, uninstall applications in the reverse dependency order. For example, because the network topology application depends on the network resource application, first uninstall the former and then the latter. For the dependencies, see "Obtaining software packages." · When you uninstall an application on the convergence deployment page, other applications that depend on it will also be uninstalled. For example, if you select the network resource application, other applications that depend on it will also be selected. When you uninstall applications, the system will automatically uninstall applications one by one based on their dependencies. |

1. Log in to Matrix, and access the Deploy > Convergence Deployment page.
2. Select the checkboxes on the left of the components to be uninstalled, click Uninstall. In the dialog box that opens, click OK to uninstall the selected components.
The system will display the uninstallation progress. Wait for the uninstallation to complete.
Figure 76 Uninstalling components (NSM for example)

Figure 77 Uninstallation progress bar (NSM for example)

Uninstalling components (proxy mode)
|
|
CAUTION: When uninstalling applications on the application list page, uninstall applications in the reverse dependency order. For example, because the network topology application depends on the network resource application, first uninstall the former and then the latter. For the dependencies, see "Obtaining software packages." |

1. Log in to Matrix, and access the Deploy > Applications page.
2. Click  in the Actions column for the application to be uninstalled. In
the dialog box that opens, click OK.
in the Actions column for the application to be uninstalled. In
the dialog box that opens, click OK.
The system will display the uninstallation progress. Wait for the uninstallation to complete.
Figure 78 Application list page (taking WSM uninstallation for example)

Figure 79 Uninstallation progress bar (WSM for example)

FAQ
Component deployment failure
If the NSM or NSM-Extend component deployment fails, collect logs for the deployment process and contact Technical Support for troubleshooting.
Log storage path: /var/log/matrix-diag/Matrix/Matrix
To resolve this issue:
1. Locate logs. Identify the corresponding log files based on the deployment task start time.
2. Collect logs. Execute the following command to package the logs:
bash
tar -czvf /tmp/deploy_failure_logs.tar.gz /var/log/matrix-diag/Matrix/Matrix/matrix.log
3. Submit the logs. Send the generated /tmp/deploy_failure_logs.tar.gz file to Technical Support.
How can I enable Unified Platform application services on Matrix?
1. Log in to Matrix and navigate to the OBSERVE > Monitor > Application Monitoring page.
2. Expand a component to view status of the applications of that component.
3. Click the  or
or  icon
in the Actions column for an application to enable
or disable the application.
icon
in the Actions column for an application to enable
or disable the application.
Figure 80 View application services
