制作Linux专业模式镜像
执行制作Linux标准模式镜像中(1)至(15)步骤。
|
|
配置前,请确保用于制作镜像的虚拟机可以访问镜像源并下载所需的安装包。 |
使用SSH(推荐使用Xshell)工具以root用户身份登录CentOS系统。
使用以下命令安装cloud-init工具,交互过程中输入y表示同意。
[root@localhost ~]# yum install cloud-init
<省略部分交互和输出内容>
Installed:
cloud-init.x86_64 0:0.7.5-10.el7.centos.1
Dependency Installed:
PyYAML.x86_64 0:3.10-11.el7
audit-libs-python.x86_64 0:2.4.1-5.el7
checkpolicy.x86_64 0:2.1.12-6.el7
jbigkit-libs.x86_64 0:2.0-11.el7
libcgroup.x86_64 0:0.41-8.el7
libjpeg-turbo.x86_64 0:1.2.90-5.el7
libsemanage-python.x86_64 0:2.1.10-18.el7
libtiff.x86_64 0:4.0.3-25.el7_2
libwebp.x86_64 0:0.3.0-3.el7
libyaml.x86_64 0:0.1.4-11.el7_0
net-tools.x86_64 0:2.0-0.17.20131004git.el7
policycoreutils-python.x86_64 0:2.2.5-20.el7
python-IPy.noarch 0:0.75-6.el7
python-backports.x86_64 0:1.0-8.el7
python-backports-ssl_match_hostname.noarch 0:3.4.0.2-4.el7
python-boto.noarch 0:2.25.0-2.el7.centos
python-chardet.noarch 0:2.2.1-1.el7_1
python-cheetah.x86_64 0:2.4.4-5.el7.centos
python-jsonpatch.noarch 0:1.2-3.el7.centos
python-jsonpointer.noarch 0:1.9-2.el7
python-markdown.noarch 0:2.4.1-1.el7.centos
python-pillow.x86_64 0:2.0.0-19.gitd1c6db8.el7
python-prettytable.noarch 0:0.7.2-2.el7.centos
python-pygments.noarch 0:1.4-9.el7
python-requests.noarch 0:2.6.0-1.el7_1
python-setuptools.noarch 0:0.9.8-4.el7
python-six.noarch 0:1.9.0-2.el7
python-urllib3.noarch 0:1.10.2-2.el7_1
setools-libs.x86_64 0:3.3.7-46.el7
Complete!
联系技术支援获取cloud-init定制工具包,并通过FTP客户端将工具包上传到/root文件夹。
|
|
|
使用以下命令解压缩工具包。
[root@master ~]# tar zxvf cloudinit_custom_0.2.tgz
cloudinit_custom/
cloudinit_custom/0.7.5/
cloudinit_custom/0.7.5/cc_set_passwords.py
cloudinit_custom/0.7.5/net_util.py
cloudinit_custom/0.7.5/rhel.py
cloudinit_custom/0.7.6/
cloudinit_custom/0.7.6/cc_set_passwords.py
cloudinit_custom/0.7.6/net_util.py
cloudinit_custom/0.7.6/rhel.py
cloudinit_custom/0.7.7/
cloudinit_custom/0.7.7/cc_set_passwords.py
cloudinit_custom/0.7.7/net_util.py
cloudinit_custom/0.7.7/rhel.py
cloudinit_custom/0.7.8/
cloudinit_custom/0.7.8/cc_set_passwords.py
cloudinit_custom/0.7.8/net_util.py
cloudinit_custom/0.7.8/rhel.py
cloudinit_custom/0.7.9/
cloudinit_custom/0.7.9/cc_set_passwords.py
cloudinit_custom/0.7.9/net_util.py
cloudinit_custom/0.7.9/rhel.py
cloudinit_custom/README
cloudinit_custom/ChangLog
cloudinit_custom/custom_script.sh
使用以下命令进入工具包所在目录,并查看脚本。
[root@master ~]# cd cloudinit_custom/
[root@master cloudinit_custom]# ll
total 32
drwxr-xr-x 2 root root 4096 Dec 4 2017 0.7.5
drwxr-xr-x 2 root root 4096 Dec 4 2017 0.7.6
drwxr-xr-x 2 root root 4096 Dec 4 2017 0.7.7
drwxr-xr-x 2 root root 4096 Dec 4 2017 0.7.8
drwxr-xr-x 2 root root 4096 Dec 4 2017 0.7.9
-rw-r--r-- 1 root root 87 Dec 4 2017 ChangLog
-rw-r--r-- 1 root root 3486 Dec 4 2017 custom_script.sh
-rw-r--r-- 1 root root 57 Dec 4 2017 README
使用以下命令执行脚本,提示"Cloud-init package customization finished."即安装成功。
[root@master cloudinit_custom]# sh ./custom_script.sh
|
|
使用cloud-init向CentOS或Rad Hat虚拟机注入数据之前,请确认CentOS为7.4及以上版本或Rat Hat为Enterprise Linux Server release 7.4及以上版本。若为上述版本的以下版本,请确认libselinux库已升级到2.5.7及以上版本。 |
设置Linux操作系统的NetworkManager 服务。
使用以下命令禁用NetworkManager服务。
[root@localhost ~]# service NetworkManager stop
使用以下命令禁止NetworkManager服务开机自启动。
[root@localhost ~]# chkconfig NetworkManager off
编辑Linux操作系统的网卡配置文件。
整行清除HWADDR配置项。
整行清除UUID配置项。
将NM_CONTROLLED配置项的取值由yes改为no。
将BOOTPROTO配置项的取值配置为dhcp。

启用Linux操作系统的SSH服务。
使用以下命令启用Linux操作系统的SSH服务。
[root@localhost ~]# chkconfig sshd on
重启虚拟机。
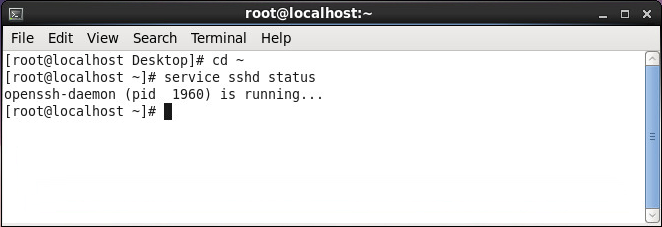
使用以下命令检查SSH服务的状态。
[root@localhost ~]# service sshd status
图-2 SSH服务状态
清除Linux操作系统的Network Persistence Rules。
使用以下命令清除70-persistent-net.rules中的内容。
[root@localhost ~]# echo > /etc/udev/rules.d/70-persistent-net.rules
使用以下命令清除75-persistent-net-generator.rules中的内容。
[root@localhost ~]# echo > /lib/udev/rules.d/75-persistent-net-generator.rules
在虚拟机上安装支持多网卡绑定脚本。
将netorktool-1.0.tar.gz拷到环境中,并解压该文件。
tar -zvxf networktool-1.0.tar.gz
进入解压后的文件夹。
cd networktool-1.0/
执行程序安装。
python setup.py install
安装过程如下所示:
[root@localhost ~]# tar -zvxf networktool-1.0.tar.gz
networktool-1.0/
networktool-1.0/PKG-INFO
networktool-1.0/scripts/
networktool-1.0/scripts/networktool
networktool-1.0/networktool/
networktool-1.0/networktool/__init__.py
networktool-1.0/networktool/utils/
networktool-1.0/networktool/utils/util.py
networktool-1.0/networktool/utils/text.py
networktool-1.0/networktool/utils/__init__.py
networktool-1.0/networktool/utils/log.py
networktool-1.0/networktool/network_tool.py
networktool-1.0/setup.py
[root@localhost ~]# cd networktool-1.0/
[root@localhost networktool-1.0]# python setup.py install
running install
running build
running build_py
creating build
creating build/lib
creating build/lib/networktool
creating build/lib/networktool/utils
…………………
|
|
networktool-1.0.tar.gz文件请联系技术支援获取。 |
正常关闭Linux系统。
|
|
关闭Linux系统前请查看/etc/resolv.conf文件中是否有DNS信息残留,如有,请删除。 |