Web example: Configuring DHCP
Network configuration
As shown in
The internal servers obtain static IP addresses, the DNS server address, and the gateway from the device.
Clients dynamically obtain IP addresses from the device.

Software versions used
This configuration example was created and verified on R9900P25 of the M9000-X06 device.
Restrictions and guidelines
Make sure the network segment for dynamic allocation is on the same subnet as the DHCP server-enabled interface. Otherwise, clients cannot obtain IP addresses from the DHCP server.
To ensure the communication between the local security zone and the security zone of the DHCP server-enabled interface, configure a security policy between the local security zone and the DHCP server-enabled interface.
Procedure
Assign IP addresses to interfaces.
# On the top navigation bar, click
Network .# From the navigation pane, select
Interface Configuration >Interfaces .# Click the
Edit icon for GE 1/0/1.# In the dialog box that opens, configure the interface:
Select the DMZ security zone.
On the
IPv4 Address tab, enter the IP address and mask of the interface. In this example, enter 10.1.1.1/25.Retain the default configuration for the remaining parameters.
Click OK.
# Add GE 1/0/2 to the
T rust security zone and set its IP address to 10.1.1.129/25 in the same way you configure GE 1/0/1.# Add GE 1/0/3 to the
Un t rust security zone and set its IP address to 1.1.1.1/30 in the same way you configure GE 1/0/1.Create security policies.
# On the top navigation bar, click
Policies .# From the navigation pane, select Security Policies > Security Policies.
# Select
Create >Create a policy .# Create security policy
dhcp-a :Enter policy name
dhcp-a .Select type
IPv4 .Select source zone
Trust .Select destination zone
Local .Select action
Permit .
# Click
OK .# Create security policy
dhcp-b :Enter policy name
dhcp-b .Select type
IPv4 .Select source zone
Local .Select destination zone
T rust .Select action
Permit .
# Click
OK .# Create security policy
dhcp-c :Enter policy name
dhcp-c .Select type
IPv4 .Select source zone
DMZ .Select destination zone
Local .Select action
Permit .
# Click
OK .# Create security policy
dhcp-d :Enter policy name
dhcp-d .Select type
IPv4 .Select source zone
Local .Select destination zone
DMZ .Select action
Permit .
# Click
OK .Configure statically assigned IP addresses.
# On the top navigation bar, click
Network .# From the navigation pane, select
DHCP >DHCP service .# Select
Enable forDHCP service .# From the navigation pane, select
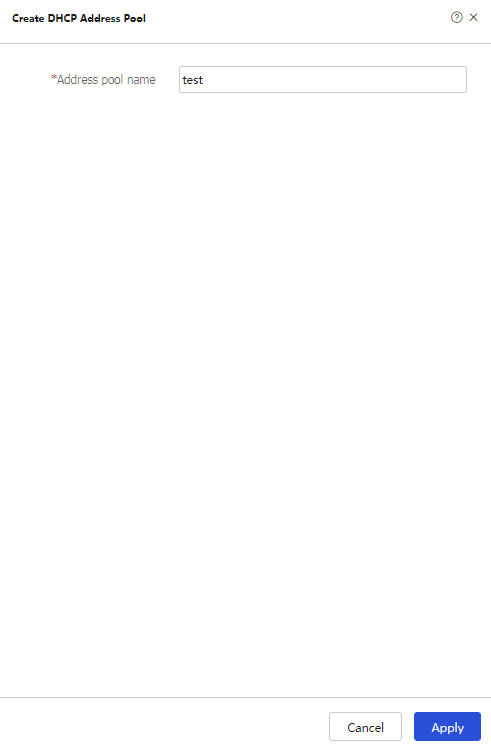
DHCP >DHCP Address Pool s .# Click
Create address pool .# Enter the address pool name, and click
OK , as shown in Figure-2. Figure-2 Creating a DHCP address pool
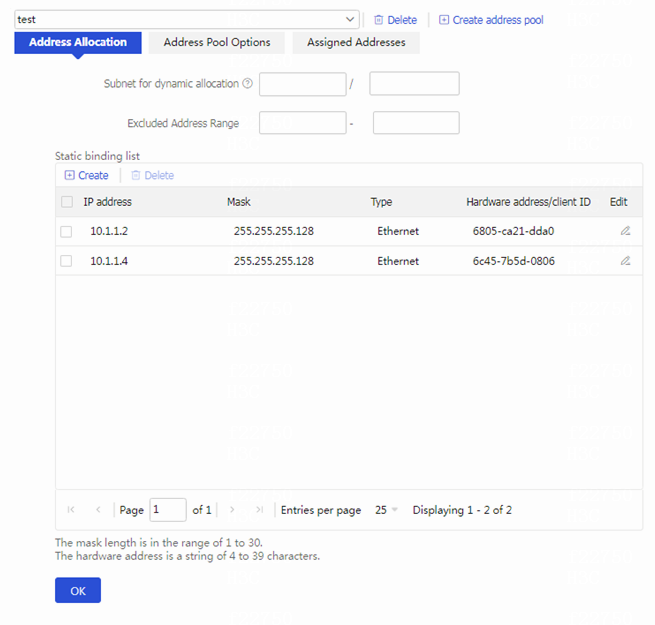
# Click the
Address Allocation tab.# Add statically assigned IP addresses, as shown in Figure-3
. Figure-3 Configuring address allocation
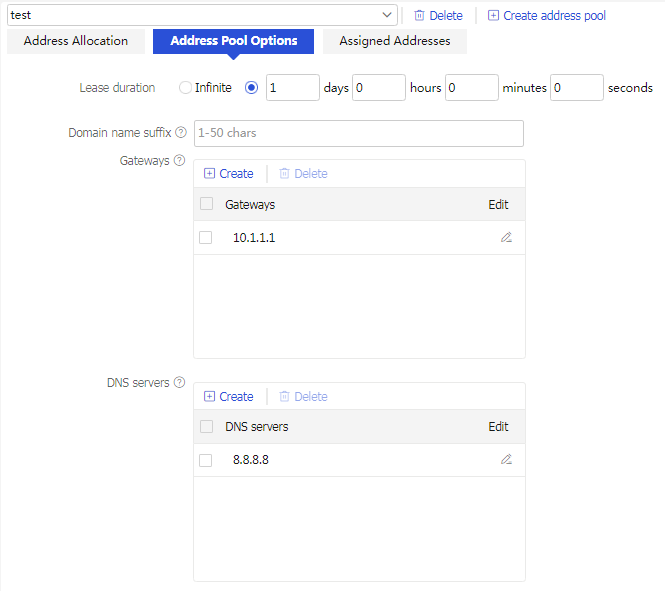
# Click the
Address Pool Op tions tab, and configure address pool options as shown in Figure-4.Figure-4 Configuring address pool options
# Click
OK .Configure dynamic address allocation.
# On the top navigation bar, click
Network .# From the navigation pane, select
DHCP >DHCP service .# Select
Enable forDHCP service .# From the navigation pane, select
DHCP >DHCP Address Pool s .# Click
Create address pool .# Enter the address pool name, and click
OK , as shown in Figure-5. Figure-5 Creating a DHCP address pool

# Click the
Address Allocation tab.# Enter a subnet address for dynamic allocation. The configuration is shown in Figure-6
. Figure-6 Configuring address allocation
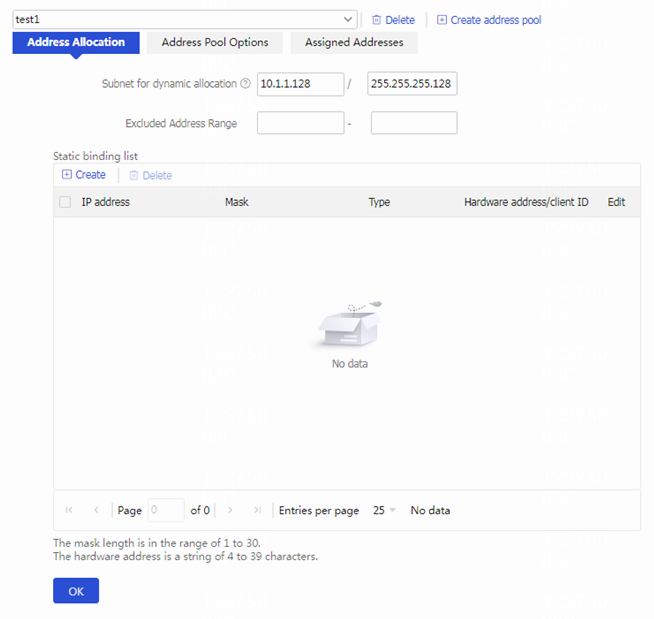
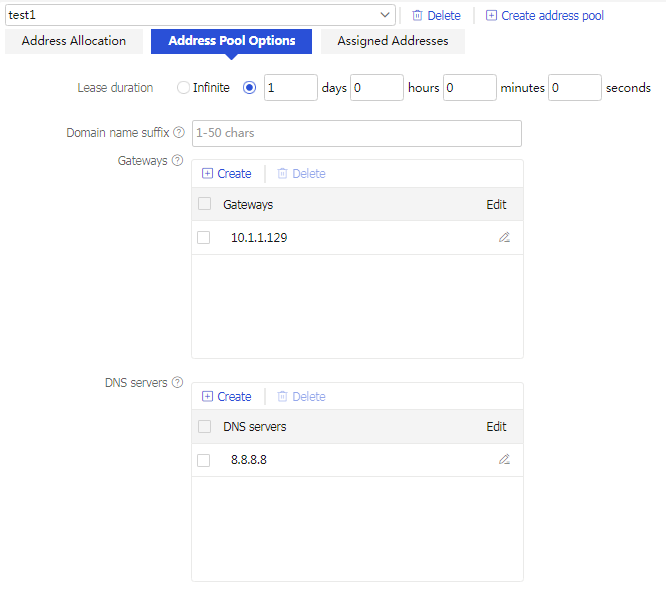
# Click the
Address Pool Op tions tab, add the gateway address and the DNS server address as shown in Figure-7.Figure-7 Configuring address pool options
# Click
OK .
Verifying the configuration
Verifying statically-bound IP address allocation
# On the top navigation bar, click
# From the navigation pane, select
# Select the DHCP address pool for the static allocation, and click the
# Verify that the device has assigned static addresses to internal servers.
Figure-8 Verifying statically assigned IP addresses
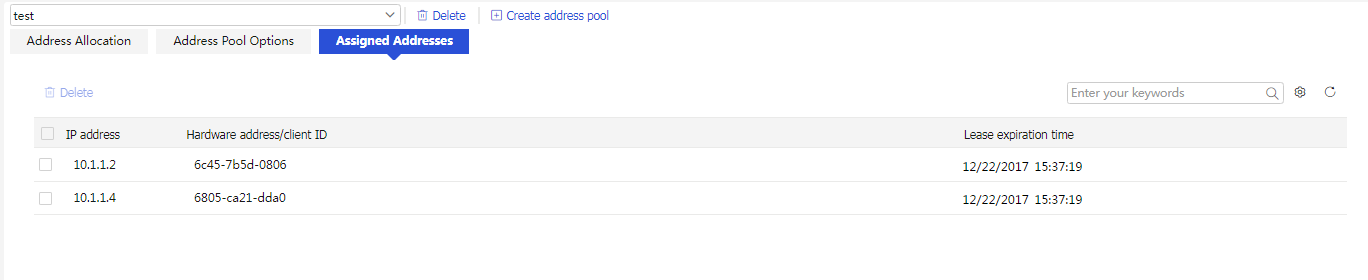
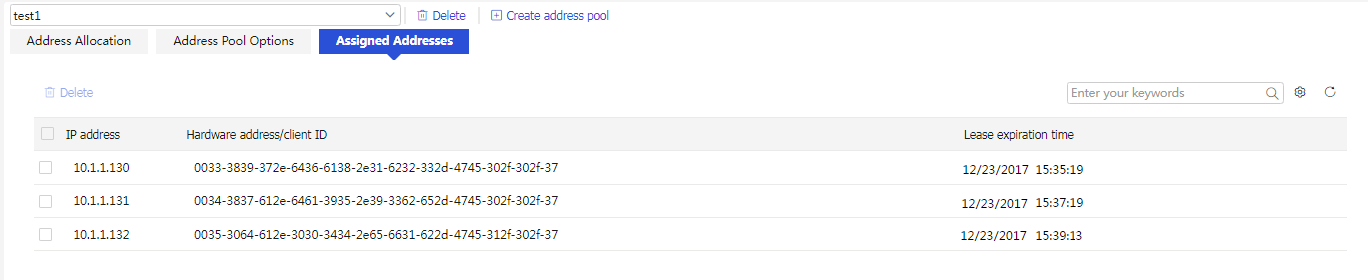
Verifying dynamic IP address allocation
# On the top navigation bar, click
# From the navigation pane, select
# Select the DHCP address pool for dynamic allocation, and click the
# Verify that the device has dynamically assigned addresses to clients.
Figure-9 Verifying dynamically assigned IP addresses